Fiery Furnace (Donkey Kong Country 2: Diddy's Kong Quest): Difference between revisions
(→Names in other languages: Italian translation found) |
No edit summary |
||
| (8 intermediate revisions by 3 users not shown) | |||
| Line 1: | Line 1: | ||
{{italic title|id=yes}} | {{italic title|id=yes}} | ||
{{ | {{level infobox | ||
|image=[[File:Fiery Furnace.png]] | |||
|image=[[File:Fiery Furnace.png | |||
|code=8 - 4 | |code=8 - 4 | ||
|world=[[Lost World (Donkey Kong Country 2: Diddy's Kong Quest)|Lost World]] | |world=[[Lost World (Donkey Kong Country 2: Diddy's Kong Quest)|Lost World]] | ||
|game=''[[Donkey Kong Country 2: Diddy's Kong Quest]]'' | |game=''[[Donkey Kong Country 2: Diddy's Kong Quest]]'' | ||
| | |track=Hot Head Bop | ||
|before=[[ | |before=[[Parrot Chute Panic (Donkey Kong Country 2: Diddy's Kong Quest)|<<]] | ||
|after=[[ | |after=[[Krocodile Kore (Donkey Kong Country 2: Diddy's Kong Quest)|>>]] | ||
}} | }} | ||
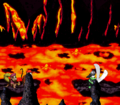
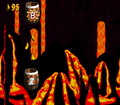
'''Fiery Furnace''' is the fourth level of the [[Lost World (Donkey Kong Country 2: Diddy's Kong Quest)|Lost World]]. It can be accessed from the [[Klubba's Kiosk]] in [[Gloomy Gulch]]. Fiery Furnace is the third and last volcanic level, and the only one not in [[Crocodile Cauldron]]. Fiery Furnace has | '''Fiery Furnace''' is the fourth level of the [[Lost World (Donkey Kong Country 2: Diddy's Kong Quest)|Lost World]]. It can be accessed from the [[Klubba's Kiosk]] in [[Gloomy Gulch]]. Fiery Furnace is the third and last volcanic level, and the only one not in [[Crocodile Cauldron]]. Fiery Furnace is the only level that has [[Steerable Barrel]]s, which Diddy and Dixie can enter and freely move around inside for only a few seconds to move across the long pits of [[lava]]. [[Zinger]]s are the main enemy of the level, and there are numerous of them to avoid. | ||
==Layout== | ==Layout== | ||
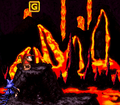
[[File: | [[File:Fiery Furnace GBA pit.png|thumb|left|Fiery Furnace in the Game Boy Advance version]] | ||
At the start of the level, the Kongs must journey east and defeat some Spinies. Soon, they will come up to the first Steerable Barrel, which should be used to float over a dangerous Kutlass. After that, the heroes will have to climb up a few ledges and dodge several Klampons, until they get to the first large abyss of the level. The Steerable Barrels above it must be used to cross, although the monkeys must be careful, as there is a time limit on them. Once on the other side, they will need to watch out for a few enemies and get into another Steerable Barrel. While watching the time limit, they must maneuver around many Zingers and soon get to the other side. Here, they will have to avoid some more foes, including more Spinies. Eventually, they will bounce off of a Flitter and continue to travel through the barrels. As they shoot to each Steerable Barrel, the monkeys will need to be aided by some Flitters, so they can bounce off of them and get to another barrel. The Kongs are then blasted onto a group of three Flitters, which are positioned diagonally, and they must bounce off them to land into the [[Star Barrel]] and fall on the platform below. | At the start of the level, the Kongs must journey east and defeat some Spinies. Soon, they will come up to the first Steerable Barrel, which should be used to float over a dangerous Kutlass. After that, the heroes will have to climb up a few ledges and dodge several Klampons, until they get to the first large abyss of the level. The Steerable Barrels above it must be used to cross, although the monkeys must be careful, as there is a time limit on them. Once on the other side, they will need to watch out for a few enemies and get into another Steerable Barrel. While watching the time limit, they must maneuver around many Zingers and soon get to the other side. Here, they will have to avoid some more foes, including more Spinies. Eventually, they will bounce off of a Flitter and continue to travel through the barrels. As they shoot to each Steerable Barrel, the monkeys will need to be aided by some Flitters, so they can bounce off of them and get to another barrel. The Kongs are then blasted onto a group of three Flitters, which are positioned diagonally, and they must bounce off them to land into the [[Star Barrel]] and fall on the platform below. | ||
Halfway through the level, the heroes will need to dodge or beat a Kutlass and a Krook. Then they must hop aboard another Steerable Barrel and journey across a wide gap. If they can dodge the many Zingers scattered around, they will make it back to land again, and shortly plop right back into another barrel. After they blast their way to the other end of the gap with the many Steerable Barrels, they will have to avoid a few more enemies, including the pesky Cat O' 9 Tails. After passing these foes, the group must get in another barrel and steer their way to the next barrel. Although there is more time than usual on the barrel's limit, the other barrel is a longer distance away, so the monkey must move fast. When they get to land again, they must make a well-timed jump and defeat more Cat O' 9 Tails in their path. From there, they will have to get into more Steerable Barrels and float above a dangerous abyss. This time, many Zingers are moving about to attack the Kongs, but they can be avoided with some good skills. Once on the other side, the Kongs must beat more Cat O' 9 Tails and cross two small abysses, until they finally find the [[End of Level Target]]. If they land on it from the Barrel Cannon above (which can only be entered after exiting the Bonus Level), Diddy and Dixie can win either a Banana Bunch, Banana | Halfway through the level, the heroes will need to dodge or beat a Kutlass and a Krook. Then they must hop aboard another Steerable Barrel and journey across a wide gap. If they can dodge the many Zingers scattered around, they will make it back to land again, and shortly plop right back into another barrel. After they blast their way to the other end of the gap with the many Steerable Barrels, they will have to avoid a few more enemies, including the pesky Cat O' 9 Tails. After passing these foes, the group must get in another barrel and steer their way to the next barrel. Although there is more time than usual on the barrel's limit, the other barrel is a longer distance away, so the monkey must move fast. When they get to land again, they must make a well-timed jump and defeat more Cat O' 9 Tails in their path. From there, they will have to get into more Steerable Barrels and float above a dangerous abyss. This time, many Zingers are moving about to attack the Kongs, but they can be avoided with some good skills. Once on the other side, the Kongs must beat more Cat O' 9 Tails and cross two small abysses, until they finally find the [[End of Level Target]]. If they land on it from the Barrel Cannon above (which can only be entered after exiting the Bonus Level), Diddy and Dixie can win either a [[Banana Bunch]], a [[Banana Coin]], or a [[Green Balloon]]. | ||
==Enemies== | ==Enemies== | ||
The following enemies appear in the following quantities: | |||
<gallery> | |||
Cat O 9 Tails DKC2.png|[[Cat O' 9 Tails]] (5) | |||
Flitter DKC2.png|[[Flitter]] (8) | |||
Klampon DKC2.png|[[Klampon]] (6) | |||
| | Kutlass DKC2 green.png|[[Kutlass]] (green) (4) | ||
Krook DKC2.png|[[Krook]] (2) | |||
Spiny DKC2.png|[[Spiny (Donkey Kong Country 2: Diddy's Kong Quest)|Spiny]] (10) | |||
Zinger DKC2 yellow.png|[[Zinger]] (yellow) (60) | |||
</gallery> | |||
=== | ==Items and objects== | ||
The following items and objects appear in the following quantities: | |||
<gallery> | |||
Banana Coin.png|[[Banana Coin]] (2) | |||
DK Barrel.png|[[DK Barrel]] (4) | |||
</gallery> | |||
===KONG Letters=== | |||
*'''K:''' After the two Klampons which move in opposite directions. | |||
*'''O:''' Found to the right of the second DK Barrel. | |||
*'''N:''' Obtained by properly timing a Steerable barrel's launch in between two Zingers. | |||
*'''G:''' Above a Cat O' 9 Tails | |||
===Key items=== | |||
[[File:FieryFurnace-GBA-Feather.png|thumb|The location of the golden feather in the Game Boy Advance version]] | |||
*'''[[Golden feather]] (Game Boy Advance version only):''' Some time after the letter K, there is a large gap with numerous Zingers. The Kongs must ride inside Steerable Barrels to get across. When they enter the second Steerable Barrel, Diddy and Dixie must move in a southeast direction and collect the golden feather, which is hovering between two Zingers just before the third Steerable Barrel. | |||
*'''[[Photograph]] (Game Boy Advance version only):''' Just beneath the letter G, there is a Cat O' 9 Tails with a photograph icon. The Kongs must defeat the Cat O' 9 Tails to obtain a photograph of it for the sixth page of the [[Scrapbook (Donkey Kong Country series)|scrapbook]]. | |||
{{br}} | |||
==Bonus Level== | ==Bonus Level== | ||
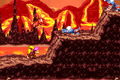
[[File:FieryFurnace-Bonus.png|thumb|The Bonus Level of Fiery Furnace]] | |||
Fiery Furnace has only one [[Bonus Level]], of the following type: | |||
*'''Find the Token!''': Shortly before the end of the level, the Kongs must jump onto a platform with a Cat O' 9 Tails, followed by another. There are a few [[banana]]s floating in a straight line above the platform, below another Steerable Barrel. The Kongs can enter it by either performing a [[team up]] throw or by having Cat O' 9 Tails throw them up into it. The Steerable Barrel is set to three seconds, and the Kongs must continue right and follow the trail of bananas, which then lead up into the [[Bonus Barrel]]. In the Bonus Level, Diddy and Dixie have to steer inside of a Steerable Barrel, which does not have a countdown timer, and go through a narrow path between two long [[bramble]]s. Throughout the path are Zingers which continuously fly back and forth. When they reach the top, the Kongs can move above the final Zinger then around the bramble and land into the [[DK Coin|Video Game Hero Coin]], positioned in the center of the wooden bridge platform. Upon exiting the Bonus Level, the Kongs land into a Barrel Cannon directly above the End of Level Target. | |||
==Gallery== | ==Gallery== | ||
| Line 107: | Line 59: | ||
FireyFurnaceSNES1.png|The Kongs on a platform adjacent to another with a Kutlass | FireyFurnaceSNES1.png|The Kongs on a platform adjacent to another with a Kutlass | ||
FieryFurnaceDKC2-O.png|The letter O | FieryFurnaceDKC2-O.png|The letter O | ||
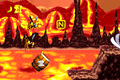
FieryFurnace-1.png|The Kongs are inside a Steerable Barrel, hovering above a green Kutlass | |||
Fiery Furnace Star Barrel.png|The Star Barrel | Fiery Furnace Star Barrel.png|The Star Barrel | ||
Fiery Furnace Bonus Barrel.png|The Kongs move the Steerable Barrel beneath the Bonus Barrel | Fiery Furnace Bonus Barrel.png|The Kongs move the Steerable Barrel beneath the Bonus Barrel | ||
FieryFurnaceDKC2-G.png|The letter G | FieryFurnaceDKC2-G.png|The letter G | ||
Fiery Furnace GBA Klampons.png|The Kongs encounter some Klampons at the start in the Game Boy Advance version | |||
FieryFurnace-GBA-N.png|The letter N in the Game Boy Advance version | |||
Fiery Furnace GBA Klampons.png|The Kongs encounter some Klampons at the start | |||
FieryFurnace-GBA-N.png|The letter N | |||
</gallery> | </gallery> | ||
==Names in other languages== | ==Names in other languages== | ||
{{foreign names | {{foreign names | ||
|Jap= | |Jap=ホットドーム タイザー | ||
|JapR=Hotto Dōmu Taizā | |JapR=Hotto Dōmu Taizā | ||
|JapM=Hot Dome Tizer, possibly a reference to | |JapM=Hot Dome Tizer, possibly a reference to {{wp|Appletiser}}, carbonated apple juice that comes in a red "Grapetizer" variety, and is popular in Japan. | ||
|Spa=Horno Fogoso | |Spa=Horno Fogoso | ||
|SpaM=Spirited Furnace | |SpaM=Spirited Furnace | ||
| | |Fre=Fournaise Furieuse | ||
| | |FreM=Furious Furnace | ||
|Ger=Glutofen | |Ger=Glutofen | ||
|GerM=Ember Furnace | |GerM=Ember Furnace | ||
| Line 132: | Line 81: | ||
|ItaM=Lava Quarry | |ItaM=Lava Quarry | ||
}} | }} | ||
{{DKC2}} | {{DKC2}} | ||
[[Category:Secret levels]] | [[Category:Secret levels]] | ||
Latest revision as of 16:49, January 20, 2024
| Level | |
|---|---|
| Fiery Furnace | |

| |
| Level code | 8 - 4 |
| World | Lost World |
| Game | Donkey Kong Country 2: Diddy's Kong Quest |
| Music track | Hot Head Bop |
| << Directory of levels >> | |
Fiery Furnace is the fourth level of the Lost World. It can be accessed from the Klubba's Kiosk in Gloomy Gulch. Fiery Furnace is the third and last volcanic level, and the only one not in Crocodile Cauldron. Fiery Furnace is the only level that has Steerable Barrels, which Diddy and Dixie can enter and freely move around inside for only a few seconds to move across the long pits of lava. Zingers are the main enemy of the level, and there are numerous of them to avoid.
Layout[edit]

At the start of the level, the Kongs must journey east and defeat some Spinies. Soon, they will come up to the first Steerable Barrel, which should be used to float over a dangerous Kutlass. After that, the heroes will have to climb up a few ledges and dodge several Klampons, until they get to the first large abyss of the level. The Steerable Barrels above it must be used to cross, although the monkeys must be careful, as there is a time limit on them. Once on the other side, they will need to watch out for a few enemies and get into another Steerable Barrel. While watching the time limit, they must maneuver around many Zingers and soon get to the other side. Here, they will have to avoid some more foes, including more Spinies. Eventually, they will bounce off of a Flitter and continue to travel through the barrels. As they shoot to each Steerable Barrel, the monkeys will need to be aided by some Flitters, so they can bounce off of them and get to another barrel. The Kongs are then blasted onto a group of three Flitters, which are positioned diagonally, and they must bounce off them to land into the Star Barrel and fall on the platform below.
Halfway through the level, the heroes will need to dodge or beat a Kutlass and a Krook. Then they must hop aboard another Steerable Barrel and journey across a wide gap. If they can dodge the many Zingers scattered around, they will make it back to land again, and shortly plop right back into another barrel. After they blast their way to the other end of the gap with the many Steerable Barrels, they will have to avoid a few more enemies, including the pesky Cat O' 9 Tails. After passing these foes, the group must get in another barrel and steer their way to the next barrel. Although there is more time than usual on the barrel's limit, the other barrel is a longer distance away, so the monkey must move fast. When they get to land again, they must make a well-timed jump and defeat more Cat O' 9 Tails in their path. From there, they will have to get into more Steerable Barrels and float above a dangerous abyss. This time, many Zingers are moving about to attack the Kongs, but they can be avoided with some good skills. Once on the other side, the Kongs must beat more Cat O' 9 Tails and cross two small abysses, until they finally find the End of Level Target. If they land on it from the Barrel Cannon above (which can only be entered after exiting the Bonus Level), Diddy and Dixie can win either a Banana Bunch, a Banana Coin, or a Green Balloon.
Enemies[edit]
The following enemies appear in the following quantities:

Cat O' 9 Tails (5)

Flitter (8)

Klampon (6)

Kutlass (green) (4)

Krook (2)

Spiny (10)

Zinger (yellow) (60)


Items and objects[edit]
The following items and objects appear in the following quantities:

Banana Coin (2)

DK Barrel (4)


KONG Letters[edit]
- K: After the two Klampons which move in opposite directions.
- O: Found to the right of the second DK Barrel.
- N: Obtained by properly timing a Steerable barrel's launch in between two Zingers.
- G: Above a Cat O' 9 Tails
Key items[edit]

- Golden feather (Game Boy Advance version only): Some time after the letter K, there is a large gap with numerous Zingers. The Kongs must ride inside Steerable Barrels to get across. When they enter the second Steerable Barrel, Diddy and Dixie must move in a southeast direction and collect the golden feather, which is hovering between two Zingers just before the third Steerable Barrel.
- Photograph (Game Boy Advance version only): Just beneath the letter G, there is a Cat O' 9 Tails with a photograph icon. The Kongs must defeat the Cat O' 9 Tails to obtain a photograph of it for the sixth page of the scrapbook.
Bonus Level[edit]

Fiery Furnace has only one Bonus Level, of the following type:
- Find the Token!: Shortly before the end of the level, the Kongs must jump onto a platform with a Cat O' 9 Tails, followed by another. There are a few bananas floating in a straight line above the platform, below another Steerable Barrel. The Kongs can enter it by either performing a team up throw or by having Cat O' 9 Tails throw them up into it. The Steerable Barrel is set to three seconds, and the Kongs must continue right and follow the trail of bananas, which then lead up into the Bonus Barrel. In the Bonus Level, Diddy and Dixie have to steer inside of a Steerable Barrel, which does not have a countdown timer, and go through a narrow path between two long brambles. Throughout the path are Zingers which continuously fly back and forth. When they reach the top, the Kongs can move above the final Zinger then around the bramble and land into the Video Game Hero Coin, positioned in the center of the wooden bridge platform. Upon exiting the Bonus Level, the Kongs land into a Barrel Cannon directly above the End of Level Target.
Gallery[edit]
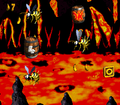
The Kongs on a platform adjacent to another with a Kutlass
The letter O
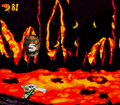
The Kongs are inside a Steerable Barrel, hovering above a green Kutlass
The Star Barrel
The Kongs move the Steerable Barrel beneath the Bonus Barrel
The letter G
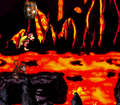
The Kongs encounter some Klampons at the start in the Game Boy Advance version
The letter N in the Game Boy Advance version


Names in other languages[edit]
| Language | Name | Meaning |
|---|---|---|
| Japanese | ホットドーム タイザー Hotto Dōmu Taizā |
Hot Dome Tizer, possibly a reference to Appletiser, carbonated apple juice that comes in a red "Grapetizer" variety, and is popular in Japan. |
| French | Fournaise Furieuse |
Furious Furnace |
| German | Glutofen |
Ember Furnace |
| Italian | Cava di Lava |
Lava Quarry |
| Spanish | Horno Fogoso |
Spirited Furnace |