Gallery:Donkey Kong Land: Difference between revisions
(print advert) |
TheRaoul1992 (talk | contribs) |
||
| (11 intermediate revisions by 8 users not shown) | |||
| Line 1: | Line 1: | ||
{{italic title}} | {{italic title}} | ||
This is a gallery of images for the game ''[[Donkey Kong Land]]''. | This is a gallery of images for the game ''[[Donkey Kong Land]]''. | ||
==Logos== | ==Logos== | ||
<gallery widths=270> | <gallery widths=270> | ||
| Line 10: | Line 8: | ||
==Artwork== | ==Artwork== | ||
<small>Note:A large amount of | <small>Note:A large amount of artwork for this game is borrowed from the original ''[[Donkey Kong Country]]''.</small> | ||
===Characters=== | |||
<gallery> | |||
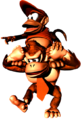
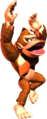
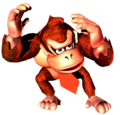
DonkeyKongLand1.png|[[Donkey Kong]], [[Diddy]], [[Rambi]], and [[Expresso]] | |||
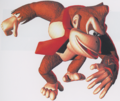
DKC-DKDiddy.png|Donkey Kong and Diddy Kong | |||
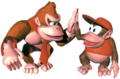
Group Art 2 - Donkey Kong Country.png|Donkey Kong and Diddy Kong | |||
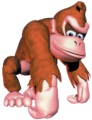
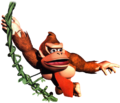
DK bending DKC art.png|Donkey Kong | |||
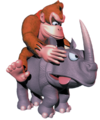
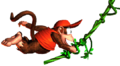
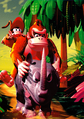
DK riding Rambi.png|Donkey Kong riding Rambi | |||
DonkeyDKC.png|Donkey Kong | |||
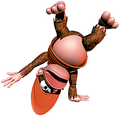
Donkey Kong - Jumping Art - Donkey Kong Country.png|Donkey Kong | |||
DKbarrelroll.png|Donkey Kong | |||
Donkey Kong swinging DKC.png|Donkey Kong | |||
DK swimming.png|Donkey Kong | |||
Donkey Kong - Ducking Art - Donkey Kong Country.png|Donkey Kong | |||
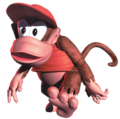
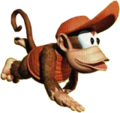
Diddy Kong DKC.png|Diddy Kong | |||
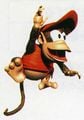
Diddy jumping DKC art.jpg|Diddy Kong | |||
Diddy Kong Cartwheel DKC.png|Diddy Kong | |||
Diddy Kong swinging DKC.png|Diddy Kong | |||
DKCArt2.png|Diddy Kong | |||
Diddy on Rambi DKC.png|Diddy Kong riding Rambi | |||
Expresso.png|Expresso | |||
Rambi DKC frontal artwork.jpg|Rambi | |||
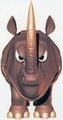
DKC-Cranky Kong.png|[[Cranky Kong]] | |||
</gallery> | |||
===Enemies=== | |||
<gallery> | <gallery> | ||
ArmyRoll.png|[[Army]] | |||
ChompsDKC.png|[[Chomps]] | |||
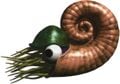
Clambo DKC art.jpg|[[Clambo]] | |||
Clambo DKC Artwork.png|Clambo | |||
Fangfish 01.png|[[Fangfish]] | Fangfish 01.png|[[Fangfish]] | ||
Fangfish DKL front art.jpg|Fangfish | Fangfish DKL front art.jpg|Fangfish | ||
FlapperDKL.jpg|[[Flapper]] | |||
DKC Gnawty.png|[[Gnawty]] | |||
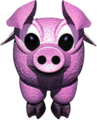
Hogwash the flying pig.png|[[Hogwash the Flying Pig]] | |||
DonkeyKongLand2.png|Hogwash the Flying Pig | |||
DonkeyKongLand10.png|Hogwash the Flying Pig | |||
Klaptrap.png|[[Klaptrap|Klap Trap]] | |||
Kritter DKC.png|[[Kritter]] | |||
Krusha showing muscle.jpeg|[[Krusha]] | |||
Mini-Necky.png|[[Mini-Necky]] | |||
DKC - Necky Artwork.png|[[Necky]] | |||
Nemo 01.png|[[Nemo]] | Nemo 01.png|[[Nemo]] | ||
Nemo DKL side artwork.jpg|Nemo | Nemo DKL side artwork.jpg|Nemo | ||
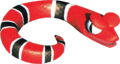
Slippa.png|[[Slippa]] | |||
DKC - Slippa Artwork.png|Slippa | |||
Swirlwind 01.png|[[Swirlwind]] | Swirlwind 01.png|[[Swirlwind]] | ||
Flying Zinger.png|[[Zinger]] | |||
</gallery> | |||
===Bosses=== | |||
<gallery> | |||
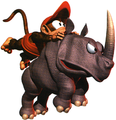
Wild Sting artwork.jpg|[[Wild Sting]] | |||
Clambo DKC Artwork.png|[[Giant Clam]] | |||
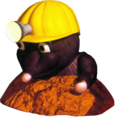
DonkeyKongLand3.png|[[Hard Hat]] | |||
Hard hat 01.png|Hard Hat | |||
Hard hat 02.png|Hard Hat | |||
K Rool artwork DKC1.jpg|[[King K. Rool]] | |||
</gallery> | |||
===Items and objects=== | |||
<gallery> | |||
DKL Banana art.png|[[Banana]] | |||
DKL Banana Bunch art.png|[[Banana Bunch]] | |||
DKL Banana Counter art.png|Banana Counter | |||
Barrel render.jpg|[[Barrel]] | |||
Auto-FireBarrel DKC.png|[[Blast Barrel]] | |||
DKBarrel DKC.png|[[DK Barrel|Buddy Barrel]] | |||
DKL Continue and End art.png|[[Continue Point]]s and [[end of stage]] | |||
KONG Letters DKC art.jpg|[[KONG Letters]] | |||
Kong Token DKL artwork.png|[[Kong Token]] | Kong Token DKL artwork.png|[[Kong Token]] | ||
DKL Kong Token Diddy art.png|Kong Token | |||
</gallery> | |||
===Unused content=== | |||
<gallery> | |||
DKL-Unused Hatted Kong.png|[[List of Donkey Kong Land pre-release and unused content|Kong with a hat]] | |||
UnusedKong.png|Kong with a hat | |||
Pucka.png|[[List of Donkey Kong Land pre-release and unused content|Pucka]] | |||
Ram Bunkshus.png|[[List of Donkey Kong Land pre-release and unused content|Ram Bunkshus]] | |||
DKL Beta-Ram Bunkshus Alt Artwork.png|Ram Bunkshus | |||
</gallery> | |||
===Scenes=== | |||
<gallery> | |||
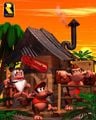
Cranky Cabin DKC art.jpg|Donkey Kong, Diddy Kong, and Cranky Kong | |||
Group 01.png|Donkey Kong riding Rambi, with Diddy Kong | |||
</gallery> | </gallery> | ||
==Sprites and models== | ==Sprites and models== | ||
===Protagonists=== | ===Protagonists=== | ||
====Game Boy==== | |||
<gallery> | <gallery> | ||
DKLDonkeyKongSprite.png|Donkey Kong | DKLDonkeyKongSprite.png|[[Donkey Kong]] | ||
DKLDiddyKongSprite.png|Diddy Kong | DKLDiddyKongSprite.png|[[Diddy Kong]] | ||
DKLRambiSprite.png|[[Rambi]] | DKLRambiSprite.png|[[Rambi]] | ||
Expresso DKL.png|[[Expresso]] | Expresso DKL.png|[[Expresso]] | ||
</gallery> | |||
====Super Game Boy==== | |||
<gallery> | |||
DKL SGB Donkey 1-1, 4-3 B2, & 4-4 B2.png|Donkey Kong ([[Jungle Jaunt]], [[Balloon Barrage]] bonus 2, and [[Fast Barrel Blast]] bonus 2) | |||
DKL SGB Donkey 1-1 B1, 2-4, & 3-2 B2.png|Donkey Kong (Jungle Jaunt bonus 1, [[Snake Charmer's Challenge]], and [[Mountain Mayhem]] bonus 2) | |||
DKL SGB Donkey 1-1 B2.png|Donkey Kong (Jungle Jaunt bonus 2) | |||
DKL SGB Donkey 1-2, 1-2 B1. & 1-7 B1.png|Donkey Kong ([[Freezing Fun]], Freezing Fun bonus 1, and [[Riggin' Rumble]] bonus 1) | |||
DKL SGB Donkey 1-3, 3-2 B1, & 3-7 B1.png|Donkey Kong ([[Simian Swing]], Mountain Mayhem bonus 1, and [[Collapsing Clouds]] bonus 1) | |||
DKL SGB Donkey 1-3 B1, 1-7, & 4-2 B1.png|Donkey Kong (Simian Swing bonus 1, Riggin' Rumble, and [[Kong Krazy]] bonus 1) | |||
DKL SGB Donkey 1-3 B2, 1-6 B1, 1-9 B2, 4-2, & 4-4 B1.png|Donkey Kong (Simian Swing bonus 2, [[Tyre Trail]] bonus 1, [[Arctic Barrel Arsenal]] bonus 2, Kong Krazy, and Fast Barrel Blast bonus 1) | |||
DKL SGB Donkey 1-4.png|Donkey Kong ([[Deck Trek]]) | |||
DKL SGB Donkey 1-4 B1, 1-5 B1, 1-8 B2, & 3-7 B2.png|Donkey Kong (Deck Trek bonus 1, [[Rope Ravine]] bonus 1, [[Congo Carnage]] bonus 2, and Collapsing Clouds bonus 2) | |||
DKL SGB Donkey 1-4 B2, 1-8, & 3-4 B1.png|Donkey Kong (Deck Trek bonus 2, Congo Carnage, and [[Spiky Tyre Trail]] bonus 1) | |||
DKL SGB Donkey 1-5, 1-10, & 4-7 B2.png|Donkey Kong (Rope Ravine, [[Wild Sting Fling]], and Oil Drum Slum bonus 2) | |||
DKL SGB Donkey 1-5 B2.png|Donkey Kong (Rope Ravine bonus 2) | |||
DKL SGB Donkey 1-6, 1-9 B1, 2-7 B1, & 3-6 B1.png|Donkey Kong (Tyre Trail, Arctic Barrel Arsenal bonus 1, [[Swirlwind Storm]] bonus 1, and [[Landslide Leap]] bonus 1) | |||
DKL SGB Donkey 1-6 B2 & 3-1 B2.png|Donkey Kong (Tyre Trail bonus 2, [[Pot Hole Panic (Donkey Kong Land)|Pot Hole Panic]] bonus 2) | |||
DKL SGB Donkey 1-6 B3.png|Donkey Kong (Tyre Trail bonus 3) | |||
DKL SGB Donkey 1-7 B2, 2-1, & 3-3 B1.png|Donkey Kong (Riggin' Rumble bonus 2, [[Tricky Temple]], and [[Track Attack]] bonus 1) | |||
DKL SGB Donkey 1-8 B1, 2-7, & 4-3 B1.png|Donkey Kong (Congo Carnage bonus 1, Swirlwind Storm, and Balloon Barrage bonus 1) | |||
DKL SGB Donkey 1-9.png|Donkey Kong (Arctic Barrel Arsenal) | |||
DKL SGB Donkey 2-1 B1, 3-4 B2, 4-6 B1, & 4-6 B2.png|Donkey Kong (Tricky Temple bonus 1, Spiky Tyre Trail bonus 2, [[Button Barrel Blast]] bonus 1, and Button Barrel Blast bonus 2) | |||
DKL SGB Donkey 2-2.png|Donkey Kong ([[Kremlantis Kaos]]) | |||
DKL SGB Donkey 2-3.png|Donkey Kong ([[Reef Rampage]]) | |||
DKL SGB Donkey 2-4 B1 & 4-5.png|Donkey Kong (Snake Charmer's Challenge bonus 1 and [[Skyscraper Caper]]) | |||
DKL SGB Donkey 2-5.png|Donkey Kong ([[Chomp's Coliseum]]) | |||
DKL SGB Donkey 2-6 & 4-5 B1.png|Donkey Kong ([[Nautilus Chase]] and Skyscraper Caper bonus 1) | |||
DKL SGB Donkey 2-8.png|Donkey Kong ([[Seabed Showdown]]) | |||
DKL SGB Donkey 3-1.png|Donkey Kong (Pot Hole Panic) | |||
DKL SGB Donkey 3-1 B1 & 3-6.png|Donkey Kong (Pot Hole Panic bonus 1 and Landslide Leap) | |||
DKL SGB Donkey 3-2.png|Donkey Kong (Mountain Mayhem) | |||
DKL SGB Donkey 3-3.png|Donkey Kong (Track Attack) | |||
DKL SGB Donkey 3-3 B2.png|Donkey Kong (Track Attack bonus 2) | |||
DKL SGB Donkey 3-4.png|Donkey Kong (Spiky Tyre Trail) | |||
DKL SGB Donkey 3-5.png|Donkey Kong ([[Sky High Caper]]) | |||
DKL SGB Donkey 3-5 B1.png|Donkey Kong (Sky High Caper bonus 1) | |||
DKL SGB Donkey 3-6 B2 & 4-6.png|Donkey Kong (Landslide Leap bonus 2 and Button Barrel Blast) | |||
DKL SGB Donkey 3-7.png|Donkey Kong (Collapsing Clouds) | |||
DKL SGB Donkey 3-8.png|Donkey Kong ([[Mad Mole Holes]]) | |||
DKL SGB Donkey 4-1 & 4-1 B2.png|Donkey Kong ([[Construction Site Fight]] and Construction Site Fight bonus 2) | |||
DKL SGB Donkey 4-1 B1 & 4-3.png|Donkey Kong (Construction Site Fight bonus 1 and Balloon Barrage) | |||
DKL SGB Donkey 4-4.png|Donkey Kong (Fast Barrel Blast) | |||
DKL SGB Donkey 4-7 & 4-8.png|Donkey Kong ([[Oil Drum Slum]] and [[K. Rool's Kingdom]]) | |||
DKL SGB Donkey 4-7 B1.png|Donkey Kong (Oil Drum Slum bonus 1) | |||
DKL SGB Diddy 1-1, 4-3 B2, & 4-4 B2.png|Diddy Kong (Jungle Jaunt, Balloon Barrage bonus 2, and Fast Barrel Blast bonus 2) | |||
DKL SGB Diddy 1-1 B1, 2-4, 3-2 B2.png|Diddy Kong (Jungle Jaunt bonus 1, Snake Charmer's Challenge, and Mountain Mayhem bonus 2) | |||
DKL SGB Diddy 1-1 B2.png|Diddy Kong (Jungle Jaunt bonus 2) | |||
DKL SGB Diddy 1-2, 1-2 B1. & 1-7 B1.png|Diddy Kong (Freezing Fun, Freezing Fun bonus 1, and Riggin' Rumble bonus 1) | |||
DKL SGB Diddy 1-3, 3-2 B1, & 3-7 B1.png|Diddy Kong (Simian Swing, Mountain Mayhem bonus 1, and Collapsing Clouds bonus 1) | |||
DKL SGB Diddy 1-3 B1, 1-7, & 4-2 B1.png|Diddy Kong (Simian Swing bonus 1, Riggin' Rumble, and Kong Krazy bonus 1) | |||
DKL SGB Diddy 1-3 B2, 1-6 B1, 1-9 B2, 4-2, & 4-4 B1.png|Diddy Kong (Simian Swing bonus 2, Tyre Trail bonus 1, Arctic Barrel Arsenal bonus 2, Kong Krazy, and Fast Barrel Blast bonus 1) | |||
DKL SGB Diddy 1-4.png|Diddy Kong (Deck Trek) | |||
DKL SGB Diddy 1-4 B1, 1-5 B1, 1-8 B2, & 3-7 B2.png|Diddy Kong (Deck Trek bonus 1, Rope Ravine bonus 1, Congo Carnage bonus 2, and Collapsing Clouds bonus 2) | |||
DKL SGB Diddy 1-4 B2, 1-8, & 3-4 B1.png|Diddy Kong (Deck Trek bonus 2, Congo Carnage, and Spiky Tyre Trail bonus 1) | |||
DKL SGB Diddy 1-5, 1-10, & 4-7 B2.png|Diddy Kong (Rope Ravine, Wild Sting Fling, and Oil Drum Slum bonus 2) | |||
DKL SGB Diddy 1-5 B2.png|Diddy Kong (Rope Ravine bonus 2) | |||
DKL SGB Diddy 1-6, 1-9 B1, 2-7 B1, & 3-6 B1.png|Diddy Kong (Tyre Trail, Arctic Barrel Arsenal bonus 1, Swirlwind Storm bonus 1, and Landslide Leap bonus 1) | |||
DKL SGB Diddy 1-6 B2 & 3-1 B2.png|Diddy Kong (Tyre Trail bonus 2 and Pot Hole Panic bonus 2) | |||
DKL SGB Diddy 1-6 B3.png|Diddy Kong (Tyre Trail bonus 3) | |||
DKL SGB Diddy 1-7 B2, 2-1, & 3-3 B1.png|Diddy Kong (Riggin' Rumble bonus 2, Tricky Temple, and Track Attack bonus 1) | |||
DKL SGB Diddy 1-8 B1, 2-7, & 4-3 B1.png|Diddy Kong (Congo Carnage bonus 1, Swirlwind Storm, and Balloon Barrage bonus 1) | |||
DKL SGB Diddy 1-9.png|Diddy Kong (Arctic Barrel Arsenal) | |||
DKL SGB Diddy 2-1 B1, 3-4 B2, 4-6 B1, & 4-6 B2.png|Diddy Kong (Tricky Temple bonus 1, Spiky Tyre Trail bonus 2, Button Barrel Blast bonus 1, and Button Barrel Blast bonus 2) | |||
DKL SGB Diddy 2-2.png|Diddy Kong (Kremlantis Kaos) | |||
DKL SGB Diddy 2-3.png|Diddy Kong (Reef Rampage) | |||
DKL SGB Diddy 2-4 B1 & 4-5.png|Diddy Kong (Snake Charmer's Challenge bonus 1 and Skyscraper Caper) | |||
DKL SGB Diddy 2-5.png|Diddy Kong (Chomp's Coliseum) | |||
DKL SGB Diddy 2-6 & 4-5 B1.png|Diddy Kong (Nautilus Chase and Skyscraper Caper bonus 1) | |||
DKL SGB Diddy 2-8.png|Diddy Kong (Seabed Showdown) | |||
DKL SGB Diddy 3-1.png|Diddy Kong (Pot Hole Panic) | |||
DKL SGB Diddy 3-1 B1 & 3-6.png|Diddy Kong (Pot Hole Panic bonus 1 and Landslide Leap) | |||
DKL SGB Diddy 3-2.png|Diddy Kong (Mountain Mayhem) | |||
DKL SGB Diddy 3-3.png|Diddy Kong (Track Attack) | |||
DKL SGB Diddy 3-3 B2.png|Diddy Kong (Track Attack bonus 2) | |||
DKL SGB Diddy 3-4.png|Diddy Kong (Spiky Tyre Trail) | |||
DKL SGB Diddy 3-5.png|Diddy Kong (Sky High Caper) | |||
DKL SGB Diddy 3-5 B1.png|Diddy Kong (Sky High Caper bonus 1) | |||
DKL SGB Diddy 3-6 B2 & 4-6.png|Diddy Kong (Landslide Leap bonus 2 and Button Barrel Blast) | |||
DKL SGB Diddy 3-7.png|Diddy Kong (Collapsing Clouds) | |||
DKL SGB Diddy 3-8.png|Diddy Kong (Mad Mole Holes) | |||
DKL SGB Diddy 4-1 & 4-1 B2.png|Diddy Kong (Construction Site Fight and Construction Site Fight bonus 2) | |||
DKL SGB Diddy 4-1 B1 & 4-3.png|Diddy Kong (Construction Site Fight bonus 1 and Balloon Barrage) | |||
DKL SGB Diddy 4-4.png|Diddy Kong (Fast Barrel Blast) | |||
DKL SGB Diddy 4-7 & 4-8.png|Diddy Kong (Oil Drum Slum and K. Rool's Kingdom) | |||
DKL SGB Diddy 4-7 B1.png|Diddy Kong (Oil Drum Slum bonus 1) | |||
DKL SGB Rambi 1-1.png|Rambi (Jungle Jaunt) | |||
DKL SGB Rambi 2-1 B1.png|Rambi (Tricky Temple bonus 1) | |||
DKL SGB Rambi 3-1 B1.png|Rambi (Pot Hole Panic bonus 1) | |||
DKL SGB Rambi 3-2.png|Rambi (Mountain Mayhem) | |||
DKL SGB Expresso 1-4 B2.png|Expresso (Deck Trek bonus 2) | |||
DKL SGB Expresso 3-2 B1.png|Expresso (Mountain Mayhem bonus 1) | |||
DKL SGB Expresso 3-6 B1.png|Expresso (Landslide Leap bonus 1) | |||
DKL SGB Expresso 3-7.png|Expresso (Collapsing Clouds) | |||
</gallery> | </gallery> | ||
===Enemies=== | ===Enemies=== | ||
====The Bad Guys==== | ====The Bad Guys==== | ||
=====Game Boy===== | |||
<gallery> | <gallery> | ||
Army DKL.png|[[Army]] | Army DKL.png|[[Army]] | ||
| Line 51: | Line 212: | ||
Necky DKL.png|[[Necky]] | Necky DKL.png|[[Necky]] | ||
Slippa DKL.PNG|[[Slippa]] | Slippa DKL.PNG|[[Slippa]] | ||
Rope Slippa DKL.png|Slippa | |||
Swirlwind DKL.png|[[Swirlwind]] | |||
Zinger DKL.PNG|[[Zinger]] | Zinger DKL.PNG|[[Zinger]] | ||
</gallery> | |||
=====Super Game Boy===== | |||
<gallery> | |||
DKL SGB Army 1-6.png|Army (Tyre Trail) | |||
DKL SGB Army 1-7.png|Army (Riggin' Rumble) | |||
DKL SGB Army 2-1.png|Army (Tricky Temple) | |||
DKL SGB Army 2-7.png|Army (Swirlwind Storm) | |||
DKL SGB Army 3-1.png|Army (Pot Hole Panic) | |||
DKL SGB Army 4-1.png|Army (Construction Site Fight) | |||
DKL SGB Army 4-2.png|Army (Kong Krazy) | |||
DKL SGB Army 4-6.png|Army (Button Barrel Blast) | |||
DKL SGB Gnawty 1-2.png|Gnawty (Freezing Fun) | |||
DKL SGB Gnawty 1-3.png|Gnawty (Simian Swing) | |||
DKL SGB Gnawty 1-4.png|Gnawty (Deck Trek) | |||
DKL SGB Gnawty 1-5.png|Gnawty (Rope Ravine) | |||
DKL SGB Gnawty 1-8.png|Gnawty (Congo Carnage) | |||
DKL SGB Gnawty 1-9.png|Gnawty (Arctic Barrel Arsenal) | |||
DKL SGB Gnawty 2-1.png|Gnawty (Tricky Temple) | |||
DKL SGB Gnawty 2-4.png|Gnawty (Snake Charmer's Challenge) | |||
DKL SGB Gnawty 3-2.png|Gnawty (Mountain Mayhem) | |||
DKL SGB Gnawty 3-3.png|Gnawty (Track Attack) | |||
DKL SGB Gnawty 3-5.png|Gnawty (Sky High Caper) | |||
DKL SGB Gnawty 3-6.png|Gnawty (Landslide Leap) | |||
DKL SGB Gnawty 3-7.png|Gnawty (Collapsing Clouds) | |||
DKL SGB Gnawty 4-1.png|Gnawty (Construction Site Fight) | |||
DKL SGB Gnawty 4-2.png|Gnawty (Kong Krazy) | |||
DKL SGB Gnawty 4-3.png|Gnawty (Balloon Barrage) | |||
DKL SGB Gnawty 4-4.png|Gnawty (Fast Barrel Blast) | |||
DKL SGB Gnawty 4-5.png|Gnawty (Skyscraper Caper) | |||
DKL SGB Gnawty 4-6.png|Gnawty (Button Barrel Blast) | |||
DKL SGB Gnawty 4-7.png|Gnawty (Oil Drum Slum) | |||
DKL SGB Hogwash 1-2.png|Hogwash the Flying Pig (Freezing Fun) | |||
DKL SGB Hogwash 1-6.png|Hogwash the Flying Pig (Tyre Trail) | |||
DKL SGB Hogwash 1-7.png|Hogwash the Flying Pig (Riggin' Rumble) | |||
DKL SGB Hogwash 3-3.png|Hogwash the Flying Pig (Track Attack) | |||
DKL SGB Hogwash 3-5.png|Hogwash the Flying Pig (Sky High Caper) | |||
DKL SGB Hogwash 3-6.png|Hogwash the Flying Pig (Landslide Leap) | |||
DKL SGB Hogwash 4-1.png|Hogwash the Flying Pig (Construction Site Fight) | |||
DKL SGB Hogwash 4-2.png|Hogwash the Flying Pig (Kong Krazy) | |||
DKL SGB Hogwash 4-3.png|Hogwash the Flying Pig (Balloon Barrage) | |||
DKL SGB Hogwash 4-4.png|Hogwash the Flying Pig (Fast Barrel Blast) | |||
DKL SGB Hogwash 4-5.png|Hogwash the Flying Pig (Skyscraper Caper) | |||
DKL SGB Mini-Necky 1-4.png|Mini-Necky (Deck Trek) | |||
DKL SGB Mini-Necky 3-6.png|Mini-Necky (Landslide Leap) | |||
DKL SGB Mini-Necky 4-2.png|Mini-Necky (Kong Krazy) | |||
DKL SGB Mini-Necky 4-4.png|Mini-Necky (Fast Barrel Blast) | |||
DKL SGB Necky 1-8.png|Necky (Congo Carnage) | |||
DKL SGB Necky 3-1.png|Necky (Pot Hole Panic) | |||
DKL SGB Slippa 1-1.png|Slippa (Jungle Jaunt) | |||
DKL SGB Slippa 1-2.png|Slippa (Freezing Fun) | |||
DKL SGB Slippa 1-3.png|Slippa (Simian Swing) | |||
DKL SGB Slippa 1-4.png|Slippa (Deck Trek) | |||
DKL SGB Slippa 1-6.png|Slippa (Tyre Trail) | |||
DKL SGB Slippa 1-7.png|Slippa (Riggin' Rumble) | |||
DKL SGB Hister 1-7.png|Slippa (Riggin' Rumble) | |||
DKL SGB Slippa 2-1.png|Slippa (Tricky Temple) | |||
DKL SGB Slippa 2-1 B1.png|Slippa (Tricky Temple bonus 1) | |||
DKL SGB Slippa 2-4.png|Slippa (Snake Charmer's Challenge) | |||
DKL SGB Slippa 2-7.png|Slippa (Swirlwind Storm) | |||
DKL SGB Slippa 3-2.png|Slippa (Mountain Mayhem) | |||
DKL SGB Slippa 3-4.png|Slippa (Spiky Tyre Trail) | |||
DKL SGB Slippa 4-2.png|Slippa (Kong Krazy) | |||
DKL SGB Slippa 4-3.png|Slippa (Balloon Barrage) | |||
DKL SGB Slippa 4-4.png|Slippa (Fast Barrel Blast) | |||
DKL SGB Slippa 4-5.png|Slippa (Skyscraper Caper) | |||
DKL SGB Hister 4-5.png|Slippa (Skyscraper Caper) | |||
DKL SGB Slippa 4-7.png|Slippa (Oil Drum Slum) | |||
DKL SGB Swirlwind 2-4.png|Swirlwind (Snake Charmer's Challenge) | |||
DKL SGB Swirlwind 2-7.png|Swirlwind (Swirlwind Storm) | |||
Swirlwind.gif|Swirlwind (Swirlwind Storm) | |||
DKL SGB Zinger 1-2.png|Zinger (Freezing Fun) | |||
DKL SGB Zinger 1-3 & 3-2 B1.png|Zinger (Simian Swing and Mountain Mayhem bonus 1) | |||
DKL SGB Zinger 1-4.png|Zinger (Deck Trek) | |||
DKL SGB Zinger 1-5.png|Zinger (Rope Ravine) | |||
DKL SGB Zinger 1-6.png|Zinger (Tyre Trail) | |||
DKL SGB Zinger 1-7.png|Zinger (Riggin' Rumble) | |||
DKL SGB Zinger 1-8.png|Zinger (Congo Carnage) | |||
DKL SGB Zinger 1-9.png|Zinger (Arctic Barrel Arsenal) | |||
DKL SGB Zinger 2-4.png|Zinger (Snake Charmer's Challenge) | |||
DKL SGB Zinger 2-4 B1 & 4-5.png|Zinger (Snake Charmer's Challenge bonus 1 and Skyscraper Caper) | |||
DKL SGB Zinger 2-7.png|Zinger (Swirlwind Storm) | |||
DKL SGB Zinger 3-1.png|Zinger (Pot Hole Panic) | |||
DKL SGB Zinger 3-2.png|Zinger (Mountain Mayhem) | |||
DKL SGB Zinger 3-3.png|Zinger (Track Attack) | |||
DKL SGB Zinger 3-5.png|Zinger (Sky High Caper) | |||
DKL SGB Zinger 3-6.png|Zinger (Landslide Leap) | |||
DKL SGB Zinger 3-7.png|Zinger (Collapsing Clouds) | |||
DKL SGB Zinger 4-1.png|Zinger (Construction Site Fight) | |||
DKL SGB Zinger 4-2.png|Zinger (Kong Krazy) | |||
DKL SGB Zinger 4-3.png|Zinger (Balloon Barrage) | |||
DKL SGB Zinger 4-4.png|Zinger (Fast Barrel Blast) | |||
DKL SGB Zinger 4-6 B1.png|Zinger (Button Barrel Blast bonus 1) | |||
DKL SGB Zinger 4-7.png|Zinger (Oil Drum Slum) | |||
</gallery> | </gallery> | ||
====The Aquatic Bad Guys==== | ====The Aquatic Bad Guys==== | ||
=====Game Boy===== | |||
<gallery> | <gallery> | ||
Chomps Jr. DKL.png|[[Chomps | Chomps Jr. DKL.png|[[Chomps]] | ||
Clambo - DKL Sprite.png|[[Clambo]] | Clambo - DKL Sprite.png|[[Clambo]] | ||
Fangfish DKL sprite.png|[[Fangfish]] | Fangfish DKL sprite.png|[[Fangfish]] | ||
| Line 63: | Line 321: | ||
Nemo DKL sprite.png|[[Nemo]] | Nemo DKL sprite.png|[[Nemo]] | ||
Nemo.gif|Nemo | Nemo.gif|Nemo | ||
</gallery> | |||
=====Super Game Boy===== | |||
<gallery> | |||
DKL SGB Chomps 2-5.png|Chomps (Chomp's Coliseum) | |||
DKL SGB Chomps 2-6.png|Chomps (Nautilus Chase) | |||
DKL SGB Chomps 3-5 B1.png|Chomps (Sky High Caper bonus 1) | |||
DKL SGB Chomps 4-7 B1.png|Chomps (Oil Drum Slum bonus 1) | |||
DKL SGB Clambo 2-6.png|Clambo (Nautilus Chase) | |||
DKL SGB Fangfish 2-2.png|Fangfish (Kremlantis Kaos) | |||
DKL SGB Fangfish 2-3.png|Fangfish (Reef Rampage) | |||
DKL SGB Fangfish 2-6.png|Fangfish (Nautilus Chase) | |||
DKL SGB Fangfish 4-7 B1.png|Fangfish (Oil Drum Slum bonus 1) | |||
DKL SGB Flapper 2-2.png|Flapper (Kremlantis Kaos) | |||
DKL SGB Flapper 2-3.png|Flapper (Reef Rampage) | |||
DKL SGB Flapper 2-5.png|Flapper (Chomp's Coliseum) | |||
DKL SGB Gloop 2-2.png|Gloop (Kremlantis Kaos) | |||
DKL SGB Gloop 2-3.png|Gloop (Reef Rampage) | |||
DKL SGB Gloop 2-5.png|Gloop (Chomp's Coliseum) | |||
DKL SGB Gloop 2-6.png|Gloop (Nautilus Chase) | |||
DKL SGB Gloop 3-5 B1.png|Gloop (Sky High Caper bonus 1) | |||
DKL SGB Gloop 4-7 B1.png|Gloop (Oil Drum Slum bonus 1) | |||
DKL SGB Nemo 2-6.png|Nemo (Nautilus Chase) | |||
</gallery> | </gallery> | ||
====The Kremlings==== | ====The Kremlings==== | ||
=====Game Boy===== | |||
<gallery> | <gallery> | ||
Klaptrap DKL.png|[[Klaptrap]] | Klaptrap DKL.png|[[Klaptrap|Klap Trap]] | ||
Kritter DKL.PNG|[[Kritter]] | Kritter DKL.PNG|[[Kritter]] | ||
Krusha DKL.PNG|[[Krusha]] | Krusha DKL.PNG|[[Krusha]] | ||
</gallery> | |||
=====Super Game Boy===== | |||
<gallery> | |||
DKL SGB Klap Trap 1-7.png|Klap Trap (Riggin' Rumble) | |||
DKL SGB Klap Trap 1-9.png|Klap Trap (Arctic Barrel Arsenal) | |||
DKL SGB Klap Trap 2-4.png|Klap Trap (Snake Charmer's Challenge) | |||
DKL SGB Klap Trap 3-1.png|Klap Trap (Pot Hole Panic) | |||
DKL SGB Klap Trap 4-2.png|Klap Trap (Kong Krazy) | |||
DKL SGB Klap Trap 4-5.png|Klap Trap (Skyscraper Caper) | |||
DKL SGB Kritter 1-1.png|Kritter (Jungle Jaunt) | |||
DKL SGB Kritter 1-2.png|Kritter (Freezing Fun) | |||
DKL SGB Kritter 1-3.png|Kritter (Simian Swing) | |||
DKL SGB Kritter 1-4.png|Kritter (Deck Trek) | |||
DKL SGB Kritter 1-6.png|Kritter (Tyre Trail) | |||
DKL SGB Kritter 1-7.png|Kritter (Riggin' Rumble) | |||
DKL SGB Kritter 1-8.png|Kritter (Congo Carnage) | |||
DKL SGB Kritter 1-9.png|Kritter (Arctic Barrel Arsenal) | |||
DKL SGB Kritter 2-1.png|Kritter (Tricky Temple) | |||
DKL SGB Kritter 2-1 B1.png|Kritter (Tricky Temple bonus 1) | |||
DKL SGB Kritter 2-7.png|Kritter (Swirlwind Storm) | |||
DKL SGB Kritter 3-1.png|Kritter (Pot Hole Panic) | |||
DKL SGB Kritter 3-1 B1 & 3-6.png|Kritter (Pot Hole Panic bonus 1 and Landslide Leap) | |||
DKL SGB Kritter 3-2.png|Kritter (Mountain Mayhem) | |||
DKL SGB Kritter 3-3.png|Kritter (Track Attack) | |||
DKL SGB Kritter 3-4.png|Kritter (Spiky Tyre Trail) | |||
DKL SGB Kritter 3-5.png|Kritter (Sky High Caper) | |||
DKL SGB Kritter 3-7.png|Kritter (Collapsing Clouds) | |||
DKL SGB Kritter 4-1.png|Kritter (Construction Site Fight) | |||
DKL SGB Kritter 4-2.png|Kritter (Kong Krazy) | |||
DKL SGB Kritter 4-3.png|Kritter (Balloon Barrage) | |||
DKL SGB Kritter 4-4.png|Kritter (Fast Barrel Blast) | |||
DKL SGB Kritter 4-5.png|Kritter (Skyscraper Caper) | |||
DKL SGB Kritter 4-7.png|Kritter (Oil Drum Slum) | |||
DKL SGB Krusha 2-1.png|Krusha (Tricky Temple) | |||
DKL SGB Krusha 3-1.png|Krusha (Pot Hole Panic) | |||
DKL SGB Krusha 3-2.png|Krusha (Mountain Mayhem) | |||
DKL SGB Krusha 3-6.png|Krusha (Landslide Leap) | |||
DKL SGB Krusha 4-3.png|Krusha (Balloon Barrage) | |||
DKL SGB Krusha 4-4.png|Krusha (Fast Barrel Blast) | |||
DKL SGB Krusha 4-5.png|Krusha (Skyscraper Caper) | |||
DKL SGB Krusha 4-7.png|Krusha (Oil Drum Slum) | |||
</gallery> | </gallery> | ||
====Obstacles==== | ====Obstacles==== | ||
=====Game Boy===== | |||
<gallery> | <gallery> | ||
Slippa Jar DKL.png|[[Basket of snakes]] | Slippa Jar DKL.png|[[Basket of snakes]] | ||
DKL GB Basket roll.png|Basket of snakes | |||
DKL GB Boulder stage.png|[[Boulder]] | |||
DKL GB Coconut.png|[[Coconut]] | |||
DKL GB Crownerang Hard Hat.png|[[Crownerang]] | |||
DKL GB Crownerang K. Rool.png|Crownerang | |||
Mincer DKL.png|[[Mincer]] | Mincer DKL.png|[[Mincer]] | ||
Oil Drum DKL.png|[[Oil drum]] | Oil Drum DKL.png|[[Oil drum]] | ||
DKL GB Pearl.png|Pearl | |||
</gallery> | |||
=====Super Game Boy===== | |||
<gallery> | |||
DKL SGB Basket stand 2-4.png|Basket of snakes (Snake Charmer's Challenge) | |||
DKL SGB Basket roll 2-4.png|Basket of snakes (Snake Charmer's Challenge) | |||
DKL SGB Boulder stage 3-2.png|Boulder (Mountain Mayhem) | |||
DKL SGB Boulder stage 3-6.png|Boulder (Landslide Leap) | |||
DKL SGB Coconut 1-4.png|Coconut (Deck Trek) | |||
DKL SGB Coconut 1-8.png|Coconut (Congo Carnage) | |||
DKL SGB Coconut 3-1.png|Coconut (Pot Hole Panic) | |||
DKL SGB Coconut 3-6.png|Coconut (Landslide Leap) | |||
DKL SGB Coconut 4-2.png|Coconut (Kong Krazy) | |||
DKL SGB Coconut 4-4.png|Coconut (Fast Barrel Blast) | |||
DKL SGB Crownerang 3-8.png|Crownerang (Mad Mole Holes) | |||
DKL SGB Crownerang 4-8.png|Crownerang (K. Rool's Kingdom) | |||
DKL SGB Mincer 1-4 B1.png|Mincer (Deck Trek bonus 1) | |||
DKL SGB Mincer 1-7 B1.png|Mincer (Riggin' Rumble bonus 1) | |||
DKL SGB Mincer 1-8 B1.png|Mincer (Congo Carnage bonus 1) | |||
DKL SGB Mincer 2-3 & 3-1 B2.png|Mincer (Reef Rampage and Pot Hole Panic bonus 2) | |||
DKL SGB Mincer 2-4 B1.png|Mincer (Snake Charmer's Challenge bonus 1) | |||
DKL SGB Mincer 3-2 B2.png|Mincer (Mountain Mayhem bonus 2) | |||
DKL SGB Mincer 3-3 B1.png|Mincer (Track Attack bonus 1) | |||
DKL SGB Mincer 3-4.png|Mincer (Spiky Tyre Trail) | |||
DKL SGB Mincer 3-6 B2.png|Mincer (Landslide Leap bonus 2) | |||
DKL SGB Mincer 4-2 B1.png|Mincer (Kong Krazy bonus 1) | |||
DKL SGB Mincer 4-3 B2.png|Mincer (Balloon Barrage bonus 2) | |||
DKL SGB Mincer 4-4 B2.png|Mincer (Fast Barrel Blast bonus 2) | |||
DKL SGB Mincer 4-5 B1.png|Mincer (Skyscraper Caper bonus 1) | |||
DKL SGB Mincer 4-6 B2.png|Mincer (Button Barrel Blast bonus 2) | |||
DKL SGB Oil Drum 3-6 B2.png|Oil drum (Landslide Leap bonus 2) | |||
DKL SGB Oil Drum 4-7.png|Oil drum (Oil Drum Slum) | |||
DKL SGB Oil Drum broken 4-7.png|Oil drum (Oil Drum Slum) | |||
DKL SGB Pearl 2-8.png|Pearl (Seabed Showdown) | |||
</gallery> | </gallery> | ||
====Bosses==== | ====The Bosses==== | ||
=====Game Boy===== | |||
<gallery> | <gallery> | ||
Wild Sting DKL.PNG|[[Wild Sting]] | Wild Sting DKL.PNG|[[Wild Sting]] | ||
DKLColossalClamboSprite.png|[[Giant Clam]] | DKLColossalClamboSprite.png|[[Giant Clam]] | ||
Hard Hat DKL.PNG|[[Hard Hat]] | Hard Hat DKL.PNG|[[Hard Hat]] | ||
| Line 90: | Line 453: | ||
</gallery> | </gallery> | ||
===Items | =====Super Game Boy===== | ||
<gallery> | |||
DKL SGB Wild Sting 1-10.png|Wild Sting (Wild Sting Fling) | |||
Wild Sting.gif|Wild Sting (Wild Sting Fling) | |||
DKL SGB Giant Clam 2-8.png|Giant Clam (Seabed Showdown) | |||
DKL SGB Hard Hat 3-8.png|Hard Hat (Mad Mole Holes) | |||
DKL SGB K. Rool 4-8.png|King K. Rool (K. Rool's Kingdom) | |||
</gallery> | |||
===Items=== | |||
====Game Boy==== | |||
<gallery> | <gallery> | ||
Banana DKL.PNG|[[Banana]] | Banana DKL.PNG|[[Banana]] | ||
Banana Bunch DKL.PNG|[[Banana Bunch]] | Banana Bunch DKL.PNG|[[Banana Bunch]] | ||
Kong Token DK.png|[[Kong Token]] | |||
Kong Token Diddy.png|Kong Token | Kong Token Diddy.png|Kong Token | ||
Kong Token.gif|Kong Token | |||
Letter K DKL sprite.png|[[K-O-N-G Letters|Letter K]] | Letter K DKL sprite.png|[[K-O-N-G Letters|Letter K]] | ||
Letter O DKL sprite.png|Letter O | Letter O DKL sprite.png|Letter O | ||
| Line 106: | Line 475: | ||
Letter G DKL sprite.png|Letter G | Letter G DKL sprite.png|Letter G | ||
Extra Life Balloon DKL.png|[[Red Balloon|Life Balloon]] | Extra Life Balloon DKL.png|[[Red Balloon|Life Balloon]] | ||
</gallery> | |||
Continue Point DKL unactivated.png|Continue Point | |||
====Super Game Boy==== | |||
<gallery> | |||
DKL SGB Banana 1-1, 4-3 B2, & 4-4 B2.png|Banana (Jungle Jaunt, Balloon Barrage bonus 2, and Fast Barrel Blast bonus 2) | |||
DKL SGB Banana 1-1 B1 & 2-4.png|Banana (Jungle Jaunt bonus 1 and Snake Charmer's Challenge) | |||
DKL SGB Banana 1-1 B2 & 3-3.png|Banana (Jungle Jaunt bonus 2 and Track Attack) | |||
DKL SGB Banana 1-2, 1-2 B1, & 1-7 B1.png|Banana (Freezing Fun, Freezing Fun bonus 1, and Riggin' Rumble bonus 1) | |||
DKL SGB Banana 1-3, 3-2 B1, & 3-7 B1.png|Banana (Simian Swing, Mountain Mayhem bonus 1, and Collapsing Clouds bonus 1) | |||
DKL SGB Banana 1-3 B1 & 1-7.png|Banana (Simian Swing bonus 1 and Riggin' Rumble) | |||
DKL SGB Banana 1-4.png|Banana (Deck Trek) | |||
DKL SGB Banana 1-4 B2, 1-8, & 3-4 B1.png|Banana (Deck Trek bonus 2, Congo Carnage and Spiky Tyre Trail bonus 1) | |||
DKL SGB Banana 1-5.png|Banana (Rope Ravine) | |||
DKL SGB Banana 1-5 B2 & 3-5.png|Banana (Rope Ravine bonus 2 and Sky High Caper) | |||
DKL SGB Banana 1-6, 2-7 B1, & 3-6 B1.png|Banana (Tyre Trail, Swirlwind Storm bonus 1 and Landslide Leap bonus 1) | |||
DKL SGB Banana 1-9 & 4-7 B1.png|Banana (Arctic Barrel Arsenal and Oil Drum Slum bonus 1) | |||
DKL SGB Banana 1-9 B2 & 4-2.png|Banana (Arctic Barrel Arsenal bonus 2 and Kong Krazy) | |||
DKL SGB Banana 2-1.png|Banana (Tricky Temple) | |||
DKL SGB Banana 2-1 B1.png|Banana (Tricky Temple bonus 1) | |||
DKL SGB Banana 2-2.png|Banana (Kremlantis Kaos) | |||
DKL SGB Banana 2-3.png|Banana (Reef Rampage) | |||
DKL SGB Banana 2-5 & 3-3 B2.png|Banana (Chomp's Coliseum and Track Attack bonus 2) | |||
DKL SGB Banana 2-6.png|Banana (Nautilus Chase) | |||
DKL SGB Banana 2-7.png|Banana (Swirlwind Storm) | |||
DKL SGB Banana 3-1.png|Banana (Pot Hole Panic) | |||
DKL SGB Banana 3-1 B1 & 3-6.png|Banana (Pot Hole Panic bonus 1 and Landslide Leap) | |||
DKL SGB Banana 3-2.png|Banana (Mountain Mayhem) | |||
DKL SGB Banana 3-4.png|Banana (Spiky Tyre Trail) | |||
DKL SGB Banana 3-5 B1 & 4-4.png|Banana (Sky High Caper bonus 1 and Fast Barrel Blast) | |||
DKL SGB Banana 3-7.png|Banana (Collapsing Clouds) | |||
DKL SGB Banana 4-1.png|Banana (Construction Site Fight) | |||
DKL SGB Banana 4-3.png|Banana (Balloon Barrage) | |||
DKL SGB Banana 4-5.png|Banana (Skyscraper Caper) | |||
DKL SGB Banana 4-6.png|Banana (Button Barrel Blast) | |||
DKL SGB Banana 4-7.png|Banana (Oil Drum Slum) | |||
DKL SGB Banana Bunch 1-2.png|Banana Bunch (Freezing Fun) | |||
DKL SGB Banana Bunch 1-3 B1 & 1-7.png|Banana Bunch (Simian Swing bonus 1 and Riggin' Rumble) | |||
DKL SGB Banana Bunch 1-4.png|Banana Bunch (Deck Trek) | |||
DKL SGB Banana Bunch 1-10.png|Banana Bunch (Wild Sting Fling) | |||
DKL SGB Banana Bunch 2-2.png|Banana Bunch (Kremlantis Kaos) | |||
DKL SGB Banana Bunch 2-3.png|Banana Bunch (Reef Rampage) | |||
DKL SGB Banana Bunch 2-4.png|Banana Bunch (Snake Charmer's Challenge) | |||
DKL SGB Banana Bunch 2-4 B1 & 4-5.png|Banana Bunch (Snake Charmer's Challenge bonus 1 and Skyscraper Caper) | |||
DKL SGB Banana Bunch 2-5.png|Banana Bunch (Chomp's Coliseum) | |||
DKL SGB Banana Bunch 2-6.png|Banana Bunch (Nautilus Chase) | |||
DKL SGB Banana Bunch 2-7.png|Banana Bunch (Swirlwind Storm) | |||
DKL SGB Banana Bunch 2-8.png|Banana Bunch (Seabed Showdown) | |||
DKL SGB Banana Bunch 3-2.png|Banana Bunch (Mountain Mayhem) | |||
DKL SGB Banana Bunch 3-3.png|Banana Bunch (Track Attack) | |||
DKL SGB Banana Bunch 3-4.png|Banana Bunch (Spiky Tyre Trail) | |||
DKL SGB Banana Bunch 3-5.png|Banana Bunch (Sky High Caper) | |||
DKL SGB Banana Bunch 3-6.png|Banana Bunch (Landslide Leap) | |||
DKL SGB Banana Bunch 3-6 B2 & 4-6.png|Banana Bunch (Landslide Leap bonus 2 and Button Barrel Blast) | |||
DKL SGB Banana Bunch 3-8.png|Banana Bunch (Mad Mole Holes) | |||
DKL SGB Banana Bunch 4-1.png|Banana Bunch (Construction Site Fight) | |||
DKL SGB Banana Bunch 4-3.png|Banana Bunch (Balloon Barrage) | |||
DKL SGB Banana Bunch 4-4.png|Banana Bunch (Fast Barrel Blast) | |||
DKL SGB Banana Bunch 4-7.png|Banana Bunch (Oil Drum Slum) | |||
DKL SGB Kong Token Diddy files.png|Kong Token (file select) | |||
DKL SGB Kong Token Donkey files.png|Kong Token (file select) | |||
DKL SGB Kong Token Diddy 1-1.png|Kong Token (Jungle Jaunt) | |||
DKL SGB Kong Token Donkey 1-1.png|Kong Token (Jungle Jaunt) | |||
DKL SGB Kong Token Diddy 1-1 B1 & 2-4.png|Kong Token (Jungle Jaunt bonus 1 and Snake Charmer's Challenge) | |||
DKL SGB Kong Token Donkey 1-1 B1 & 2-4.png|Kong Token (Jungle Jaunt bonus 1 and Snake Charmer's Challenge) | |||
DKL SGB Kong Token Diddy 1-2 & 1-7 B1.png|Kong Token (Freezing Fun and Riggin' Rumble bonus 1) | |||
DKL SGB Kong Token Donkey 1-2 & 1-7 B1.png|Kong Token (Freezing Fun and Riggin' Rumble bonus 1) | |||
DKL SGB Kong Token Diddy 1-3 & 3-7 B1.png|Kong Token (Simian Swing and Collapsing Clouds bonus 1) | |||
DKL SGB Kong Token Donkey 1-3 & 3-7 B1.png|Kong Token (Simian Swing and Collapsing Clouds bonus 1) | |||
DKL SGB Kong Token Diddy 1-3 B2, 1-6 B1, & 4-4 B1.png|Kong Token (Simian Swing bonus 2, Tyre Trail bonus 1, and Fast Barrel Blast bonus 1) | |||
DKL SGB Kong Token Donkey 1-3 B2, 1-6 B1, & 4-4 B1.png|Kong Token (Simian Swing bonus 2, Tyre Trail bonus 1, and Fast Barrel Blast bonus 1) | |||
DKL SGB Kong Token Diddy 1-4.png|Kong Token (Deck Trek) | |||
DKL SGB Kong Token Donkey 1-4.png|Kong Token (Deck Trek) | |||
DKL SGB Kong Token Diddy 1-5.png|Kong Token (Rope Ravine) | |||
DKL SGB Kong Token Donkey 1-5.png|Kong Token (Rope Ravine) | |||
DKL SGB Kong Token Diddy 1-5 B1, 1-8 B2, 2-2, & 3-7 B2.png|Kong Token (Rope Ravine bonus 1, Congo Carnage bonus 2, Kremlantis Kaos, and Collapsing Clouds bonus 2) | |||
DKL SGB Kong Token Donkey 1-5 B1, 1-8 B2, 2-2, & 3-7 B2.png|Kong Token (Rope Ravine bonus 1, Congo Carnage bonus 2, Kremlantis Kaos, and Collapsing Clouds bonus 2) | |||
DKL SGB Kong Token Diddy 1-5 B2 & 3-5.png|Kong Token (Rope Ravine bonus 2 and Sky High Caper) | |||
DKL SGB Kong Token Donkey 1-5 B2 & 3-5.png|Kong Token (Rope Ravine bonus 2 and Sky High Caper) | |||
DKL SGB Kong Token Diddy 1-6, 1-9 B1, 2-7 B1, & 3-6 B1.png|Kong Token (Tyre Trail, Arctic Barrel Arsenal bonus 1, Swirlwind Storm bonus 1, and Landslide Leap bonus 1) | |||
DKL SGB Kong Token Donkey 1-6, 1-9 B1, 2-7 B1, & 3-6 B1.png|Kong Token (Tyre Trail, Arctic Barrel Arsenal bonus 1, Swirlwind Storm bonus 1, and Landslide Leap bonus 1) | |||
DKL SGB Kong Token Diddy 1-6 B2 & 2-3.png|Kong Token (Tyre Trail bonus 2 and Reef Rampage) | |||
DKL SGB Kong Token Donkey 1-6 B2 & 2-3.png|Kong Token (Tyre Trail bonus 2 and Reef Rampage) | |||
DKL SGB Kong Token Diddy 1-7 & 4-2 B1.png|Kong Token (Riggin' Rumble and Kong Krazy bonus 1) | |||
DKL SGB Kong Token Donkey 1-7 & 4-2 B1.png|Kong Token (Riggin' Rumble and Kong Krazy bonus 1) | |||
DKL SGB Kong Token Diddy 1-7 B2 & 2-1.png|Kong Token (Riggin' Rumble bonus 2 and Tricky Temple) | |||
DKL SGB Kong Token Donkey 1-7 B2 & 2-1.png|Kong Token (Riggin' Rumble bonus 2 and Tricky Temple) | |||
DKL SGB Kong Token Diddy 1-8.png|Kong Token (Congo Carnage) | |||
DKL SGB Kong Token Donkey 1-8.png|Kong Token (Congo Carnage) | |||
DKL SGB Kong Token Diddy 1-8 B1, 2-7, & 4-3 B1.png|Kong Token (Congo Carnage bonus 1, Swirlwind Storm, and Balloon Barrage bonus 1) | |||
DKL SGB Kong Token Donkey 1-8 B1, 2-7, & 4-3 B1.png|Kong Token (Congo Carnage bonus 1, Swirlwind Storm, and Balloon Barrage bonus 1) | |||
DKL SGB Kong Token Diddy 2-6.png|Kong Token (Nautilus Chase) | |||
DKL SGB Kong Token Donkey 2-6.png|Kong Token (Nautilus Chase) | |||
DKL SGB Kong Token Diddy 3-2.png|Kong Token (Mountain Mayhem) | |||
DKL SGB Kong Token Donkey 3-2.png|Kong Token (Mountain Mayhem) | |||
DKL SGB Kong Token Diddy 3-3.png|Kong Token (Track Attack) | |||
DKL SGB Kong Token Donkey 3-3.png|Kong Token (Track Attack) | |||
DKL SGB Kong Token Diddy 3-3 B2.png|Kong Token (Track Attack bonus 2) | |||
DKL SGB Kong Token Donkey 3-3 B2.png|Kong Token (Track Attack bonus 2) | |||
DKL SGB Kong Token Diddy 3-4 B2 & 4-6 B2.png|Kong Token (Spiky Tyre Trail bonus 2 and Button Barrel Blast bonus 2) | |||
DKL SGB Kong Token Donkey 3-4 B2 & 4-6 B2.png|Kong Token (Spiky Tyre Trail bonus 2 and Button Barrel Blast bonus 2) | |||
DKL SGB Kong Token Diddy 3-5 B1 & 4-4.png|Kong Token (Sky High Caper bonus 1 and Fast Barrel Blast) | |||
DKL SGB Kong Token Donkey 3-5 B1 & 4-4.png|Kong Token (Sky High Caper bonus 1 and Fast Barrel Blast) | |||
DKL SGB Kong Token Diddy 3-6.png|Kong Token (Landslide Leap) | |||
DKL SGB Kong Token Donkey 3-6.png|Kong Token (Landslide Leap) | |||
DKL SGB Kong Token Diddy 3-7.png|Kong Token (Collapsing Clouds) | |||
DKL SGB Kong Token Donkey 3-7.png|Kong Token (Collapsing Clouds) | |||
DKL SGB Kong Token Diddy 4-1 B1 & 4-3.png|Kong Token (Construction Site Fight bonus 1 and Balloon Barrage) | |||
DKL SGB Kong Token Donkey 4-1 B1 & 4-3.png|Kong Token (Construction Site Fight bonus 1 and Balloon Barrage) | |||
DKL SGB Kong Token Diddy 4-1 B2.png|Kong Token (Construction Site Fight bonus 2) | |||
DKL SGB Kong Token Donkey 4-1 B2.png|Kong Token (Construction Site Fight bonus 2) | |||
DKL SGB Kong Token Diddy 4-5.png|Kong Token (Skyscraper Caper) | |||
DKL SGB Kong Token Donkey 4-5.png|Kong Token (Skyscraper Caper) | |||
DKL SGB Kong Token Diddy 4-6.png|Kong Token (Button Barrel Blast) | |||
DKL SGB Kong Token Donkey 4-6.png|Kong Token (Button Barrel Blast) | |||
DKL SGB Letter K 1-1.png|Letter K (Jungle Jaunt) | |||
DKL SGB Letter K 1-2.png|Letter K (Freezing Fun) | |||
DKL SGB Letter K 1-3.png|Letter K (Simian Swing) | |||
DKL SGB Letter K 1-4.png|Letter K (Deck Trek) | |||
DKL SGB Letter K 1-5.png|Letter K (Rope Ravine) | |||
DKL SGB Letter K 1-6.png|Letter K (Tyre Trail) | |||
DKL SGB Letter K 1-7 & 4-2 B1.png|Letter K (Riggin' Rumble and Kong Krazy bonus 1) | |||
DKL SGB Letter K 1-8.png|Letter K (Congo Carnage) | |||
DKL SGB Letter K 1-9.png|Letter K (Arctic Barrel Arsenal) | |||
DKL SGB Letter K 2-1.png|Letter K (Tricky Temple) | |||
DKL SGB Letter K 2-3.png|Letter K (Reef Rampage) | |||
DKL SGB Letter K 2-2.png|Letter K (Kremlantis Kaos) | |||
DKL SGB Letter K 2-4.png|Letter K (Snake Charmer's Challenge) | |||
DKL SGB Letter K 2-5.png|Letter K (Chomp's Coliseum) | |||
DKL SGB Letter K 2-6.png|Letter K (Nautilus Chase) | |||
DKL SGB Letter K 2-7.png|Letter K (Swirlwind Storm) | |||
DKL SGB Letter K 3-1.png|Letter K (Pot Hole Panic) | |||
DKL SGB Letter K 3-2.png|Letter K (Mountain Mayhem) | |||
DKL SGB Letter K 3-3.png|Letter K (Track Attack) | |||
DKL SGB Letter K 3-4.png|Letter K (Spiky Tyre Trail) | |||
DKL SGB Letter K 3-5.png|Letter K (Sky High Caper) | |||
DKL SGB Letter K 3-6.png|Letter K (Landslide Leap) | |||
DKL SGB Letter K 3-7.png|Letter K (Collapsing Clouds) | |||
DKL SGB Letter K 4-1.png|Letter K (Construction Site Fight) | |||
DKL SGB Letter K 4-2.png|Letter K (Kong Krazy) | |||
DKL SGB Letter K 4-3.png|Letter K (Balloon Barrage) | |||
DKL SGB Letter K 4-4.png|Letter K (Fast Barrel Blast) | |||
DKL SGB Letter K 4-5.png|Letter K (Skyscraper Caper) | |||
DKL SGB Letter K 4-6.png|Letter K (Button Barrel Blast) | |||
DKL SGB Letter K 4-7.png|Letter K (Oil Drum Slum) | |||
DKL SGB Letter O 1-1.png|Letter O (Jungle Jaunt) | |||
DKL SGB Letter O 1-2.png|Letter O (Freezing Fun) | |||
DKL SGB Letter O 1-3 & 3-2 B1.png|Letter O (Simian Swing and Mountain Mayhem bonus 1) | |||
DKL SGB Letter O 1-4 B1 & 2-2.png|Letter O (Deck Trek bonus 1 and Kremlantis Kaos) | |||
DKL SGB Letter O 1-5.png|Letter O (Rope Ravine) | |||
DKL SGB Letter O 1-6.png|Letter O (Tyre Trail) | |||
DKL SGB Letter O 1-7.png|Letter O (Riggin' Rumble) | |||
DKL SGB Letter O 1-8.png|Letter O (Congo Carnage) | |||
DKL SGB Letter O 1-9.png|Letter O (Arctic Barrel Arsenal) | |||
DKL SGB Letter O 2-1 & 3-3 B1.png|Letter O (Tricky Temple and Track Attack bonus 1) | |||
DKL SGB Letter O 2-3.png|Letter O (Reef Rampage) | |||
DKL SGB Letter O 2-4 B1 & 4-5.png|Letter O (Snake Charmer's Challenge bonus 1 and Skyscraper Caper) | |||
DKL SGB Letter O 2-5.png|Letter O (Chomp's Coliseum) | |||
DKL SGB Letter O 2-6.png|Letter O (Nautilus Chase) | |||
DKL SGB Letter O 2-7.png|Letter O (Swirlwind Storm) | |||
DKL SGB Letter O 3-1.png|Letter O (Pot Hole Panic) | |||
DKL SGB Letter O 3-4.png|Letter O (Spiky Tyre Trail) | |||
DKL SGB Letter O 3-5.png|Letter O (Sky High Caper) | |||
DKL SGB Letter O 3-6.png|Letter O (Landslide Leap) | |||
DKL SGB Letter O 3-7.png|Letter O (Collapsing Clouds) | |||
DKL SGB Letter O 4-1.png|Letter O (Construction Site Fight) | |||
DKL SGB Letter O 4-2.png|Letter O (Kong Krazy) | |||
DKL SGB Letter O 4-3.png|Letter O (Balloon Barrage) | |||
DKL SGB Letter O 4-4.png|Letter O (Fast Barrel Blast) | |||
DKL SGB Letter O 4-6 B1.png|Letter O (Button Barrel Blast bonus 1) | |||
DKL SGB Letter O 4-7.png|Letter O (Oil Drum Slum) | |||
DKL SGB Letter N 1-1.png|Letter N (Jungle Jaunt) | |||
DKL SGB Letter N 1-2.png|Letter N (Freezing Fun) | |||
DKL SGB Letter N 1-3.png|Letter N (Simian Swing) | |||
DKL SGB Letter N 1-4 B2 & 1-8.png|Letter N (Deck Trek bonus 2 and Congo Carnage) | |||
DKL SGB Letter N 1-5.png|Letter N (Rope Ravine) | |||
DKL SGB Letter N 1-6 B3, 2-6, & 4-5 B1.png|Letter N (Tyre Trail bonus 3, Nautilus Chase, and Skyscraper Caper bonus 1) | |||
DKL SGB Letter N 1-7.png|Letter N (Riggin' Rumble) | |||
DKL SGB Letter N 1-9 B2 & 4-2.png|Letter N (Arctic Barrel Arsenal bonus 2 and Kong Krazy) | |||
DKL SGB Letter N 2-1.png|Letter N (Tricky Temple) | |||
DKL SGB Letter N 2-2.png|Letter N (Kremlantis Kaos) | |||
DKL SGB Letter N 2-3.png|Letter N (Reef Rampage) | |||
DKL SGB Letter N 2-4.png|Letter N (Snake Charmer's Challenge) | |||
DKL SGB Letter N 2-5.png|Letter N (Chomp's Coliseum) | |||
DKL SGB Letter N 2-7.png|Letter N (Swirlwind Storm) | |||
DKL SGB Letter N 3-1.png|Letter N (Pot Hole Panic) | |||
DKL SGB Letter N 3-2.png|Letter N (Mountain Mayhem) | |||
DKL SGB Letter N 3-3.png|Letter N (Track Attack) | |||
DKL SGB Letter N 3-4.png|Letter N (Spiky Tyre Trail) | |||
DKL SGB Letter N 3-5.png|Letter N (Sky High Caper) | |||
DKL SGB Letter N 3-6.png|Letter N (Landslide Leap) | |||
DKL SGB Letter N 3-7.png|Letter N (Collapsing Clouds) | |||
DKL SGB Letter N 4-1 B2.png|Letter N (Construction Site Fight bonus 2) | |||
DKL SGB Letter N 4-3.png|Letter N (Balloon Barrage) | |||
DKL SGB Letter N 4-4.png|Letter N (Fast Barrel Blast) | |||
DKL SGB Letter N 4-6 B2.png|Letter N (Button Barrel Blast bonus 2) | |||
DKL SGB Letter N 4-7.png|Letter N (Oil Drum Slum) | |||
DKL SGB Letter G 1-1 & 4-4 B2.png|Letter G (Jungle Jaunt and Fast Barrel Blast bonus 2) | |||
DKL SGB Letter G 1-2.png|Letter G (Freezing Fun) | |||
DKL SGB Letter G 1-3.png|Letter G (Simian Swing) | |||
DKL SGB Letter G 1-4 B2 & 1-8.png|Letter G (Deck Trek bonus 2 and Congo Carnage) | |||
DKL SGB Letter G 1-5.png|Letter G (Rope Ravine) | |||
DKL SGB Letter G 1-6.png|Letter G (Tyre Trail) | |||
DKL SGB Letter G 1-7.png|Letter G (Riggin' Rumble) | |||
DKL SGB Letter G 1-9.png|Letter G (Arctic Barrel Arsenal) | |||
DKL SGB Letter G 2-1.png|Letter G (Tricky Temple) | |||
DKL SGB Letter G 2-2.png|Letter G (Kremlantis Kaos) | |||
DKL SGB Letter G 2-3 & 3-1 B2.png|Letter G (Reef Rampage and Pot Hole Panic bonus 2) | |||
DKL SGB Letter G 2-4 & 3-2 B2.png|Letter G (Snake Charmer's Challenge and Mountain Mayhem bonus 2) | |||
DKL SGB Letter G 2-5.png|Letter G (Chomp's Coliseum) | |||
DKL SGB Letter G 2-6.png|Letter G (Nautilus Chase) | |||
DKL SGB Letter G 2-7.png|Letter G (Swirlwind Storm) | |||
DKL SGB Letter G 3-3.png|Letter G (Track Attack) | |||
DKL SGB Letter G 3-4.png|Letter G (Spiky Tyre Trail) | |||
DKL SGB Letter G 3-5.png|Letter G (Sky High Caper) | |||
DKL SGB Letter G 3-6 B2 & 4-6.png|Letter G (Landslide Leap bonus 2 and Button Barrel Blast) | |||
DKL SGB Letter G 3-7.png|Letter G (Collapsing Clouds) | |||
DKL SGB Letter G 4-1.png|Letter G (Construction Site Fight) | |||
DKL SGB Letter G 4-2.png|Letter G (Kong Krazy) | |||
DKL SGB Letter G 4-3.png|Letter G (Balloon Barrage) | |||
DKL SGB Letter G 4-5.png|Letter G (Skyscraper Caper) | |||
DKL SGB Letter G 4-7.png|Letter G (Oil Drum Slum) | |||
DKL SGB Life Balloon 1-1 B2.png|Life Balloon (Jungle Jaunt bonus 2) | |||
DKL SGB Life Balloon 1-2 & 1-2 B1.png|Life Balloon (Freezing Fun and Freezing Fun bonus 1) | |||
DKL SGB Life Balloon 1-3 & 3-2 B1.png|Life Balloon (Simian Swing and Mountain Mayhem bonus 1) | |||
DKL SGB Life Balloon 1-4.png|Life Balloon (Deck Trek) | |||
DKL SGB Life Balloon 1-6 & 2-7 B1.png|Life Balloon (Tyre Trail and Swirlwind Storm bonus 1) | |||
DKL SGB Life Balloon 1-7.png|Life Balloon (Riggin' Rumble) | |||
DKL SGB Life Balloon 2-1.png|Life Balloon (Tricky Temple) | |||
DKL SGB Life Balloon 3-4.png|Life Balloon (Spiky Tyre Trail) | |||
DKL SGB Life Balloon 4-3 B1.png|Life Balloon (Balloon Barrage bonus 1) | |||
DKL SGB Life Balloon 4-5.png|Life Balloon (Skyscraper Caper) | |||
DKL SGB Life Balloon 4-7 B1.png|Life Balloon (Oil Drum Slum bonus 1) | |||
DKL SGB Life Balloon 4-7 B2.png|Life Balloon (Oil Drum Slum bonus 2) | |||
</gallery> | |||
===Objects=== | |||
====Game Boy==== | |||
<gallery> | |||
DKL GB Crate Rambi.png|[[Animal Crate]] | |||
DKL GB Crate Expresso.png|Animal Crate | |||
DKL GB Balloon.png|[[Balloon (platform)|Balloon]] | |||
Barrel DKL.png|[[Barrel]] | |||
DKL GB Barrel Cannon.png|[[Barrel Cannon]] | |||
DKL GB Blast Barrel.png|[[Blast Barrel]] | |||
DKL GB Boulder map.png|[[Boulder]] | |||
Buddy Barrel DKL.PNG|[[DK Barrel|Buddy Barrel]] | |||
DKL GB Button.png|[[Button (Donkey Kong Land)|Button]] | |||
DKL GB Cloud.png|Cloud | |||
Continue Point DKL unactivated.png|[[Continue Point]] | |||
Continue Point DKL activated.png|Continue Point | Continue Point DKL activated.png|Continue Point | ||
Star-checkpoint-animation.gif|Continue Point | |||
DKL GB Elevator stone.png|[[Lift|Elevator]] | |||
DKL GB Elevator rail.png|Elevator | |||
DKL GB Elevator arrow.png|Elevator | |||
DKL-Endofstage.png|[[End of stage]] | DKL-Endofstage.png|[[End of stage]] | ||
DKL GB Explosive Barrel.png|Explosive Barrel | |||
DKL GB KONG Button.png|[[KONG button]] | |||
DKL GB Rope.png|[[Rope]] | |||
DKL GB Rebound Clambo.png|Sponge | |||
SteelKegDKL.png|[[Iron Barrel|Steel keg]] | |||
DKL GB Tire half.png|[[Tire]] | |||
DKL GB Tire full.png|Tire | |||
TNT Barrel DKL.png|[[TNT Barrel]] | |||
</gallery> | |||
====Super Game Boy==== | |||
<gallery> | |||
DKL SGB Crate Rambi 1-1.png|Animal Crate (Jungle Jaunt) | |||
DKL SGB Crate Expresso 1-4 B2.png|Animal Crate (Deck Trek bonus 2) | |||
DKL SGB Crate Rambi 2-1 B1.png|Animal Crate (Tricky Temple bonus 1) | |||
DKL SGB Crate Rambi 3-1 B1.png|Animal Crate (Pot Hole Panic bonus 1) | |||
DKL SGB Crate Rambi 3-2.png|Animal Crate (Mountain Mayhem) | |||
DKL SGB Crate Expresso 3-2 B1.png|Animal Crate (Mountain Mayhem bonus 1) | |||
DKL SGB Crate Expresso 3-6 B1.png|Animal Crate (Landslide Leap bonus 1) | |||
DKL SGB Crate Expresso 3-7.png|Animal Crate (Collapsing Clouds) | |||
DKL SGB Balloon 4-1.png|Balloon (Construction Site Fight) | |||
DKL SGB Barrel 1-1.png|Barrel (Jungle Jaunt) | |||
DKL SGB Barrel 1-2.png|Barrel (Freezing Fun) | |||
DKL SGB Barrel 2-1.png|Barrel (Tricky Temple) | |||
DKL SGB Barrel Cannon 1-2.png|Barrel Cannon (Freezing Fun) | |||
DKL SGB Barrel Cannon 1-3 B2, 1-6 B1, & 4-4 B1.png|Barrel Cannon (Simian Swing bonus 2, Tyre Trail bonus 1, and Fast Barrel Blast bonus 1) | |||
DKL SGB Barrel Cannon 1-5.png|Barrel Cannon (Rope Ravine) | |||
DKL SGB Barrel Cannon 1-5 B1, 1-8 B2, & 3-7 B2.png|Barrel Cannon (Rope Ravine bonus 1, Congo Carnage bonus 2, and Collapsing Clouds bonus 2) | |||
DKL SGB Barrel Cannon 1-9.png|Barrel Cannon (Arctic Barrel Arsenal) | |||
DKL SGB Barrel Cannon 1-9 B1.png|Barrel Cannon (Arctic Barrel Arsenal bonus 1) | |||
DKL SGB Barrel Cannon 3-4.png|Barrel Cannon (Spiky Tyre Trail) | |||
DKL SGB Barrel Cannon 3-4 B2.png|Barrel Cannon (Spiky Tyre Trail bonus 2) | |||
DKL SGB Barrel Cannon 4-2.png|Barrel Cannon (Kong Krazy) | |||
DKL SGB Barrel Cannon 4-4.png|Barrel Cannon (Fast Barrel Blast) | |||
DKL SGB Blast Barrel 1-2 & 1-7 B1.png|Blast Barrel (Freezing Fun and Riggin' Rumble bonus 1) | |||
DKL SGB Blast Barrel 1-3.png|Blast Barrel (Simian Swing) | |||
DKL SGB Blast Barrel 1-4.png|Blast Barrel (Deck Trek) | |||
DKL SGB Blast Barrel 1-4 B1.png|Blast Barrel (Deck Trek bonus 1) | |||
DKL SGB Blast Barrel 1-5 & 4-7 B2.png|Blast Barrel (Rope Ravine and Oil Drum Slum bonus 2) | |||
DKL SGB Blast Barrel 1-6, 2-7 B1, & 3-6 B1.png|Blast Barrel (Tyre Trail, Swirlwind Storm bonus 1, and Landslide Leap bonus 1) | |||
DKL SGB Blast Barrel 1-6 B3.png|Blast Barrel (Tyre Trail bonus 3) | |||
DKL SGB Blast Barrel 1-7 & 4-2 B1.png|Blast Barrel (Riggin' Rumble and Kong Krazy bonus 1) | |||
DKL SGB Blast Barrel 1-8.png|Blast Barrel (Congo Carnage) | |||
DKL SGB Blast Barrel 1-8 B1 & 4-3 B1.png|Blast Barrel (Congo Carnage bonus 1 and Balloon Barrage bonus 1) | |||
DKL SGB Blast Barrel 1-9.png|Blast Barrel (Arctic Barrel Arsenal) | |||
DKL SGB Blast Barrel 1-9 B2.png|Blast Barrel (Arctic Barrel Arsenal bonus 2) | |||
DKL SGB Blast Barrel 2-1.png|Blast Barrel (Tricky Temple) | |||
DKL SGB Blast Barrel 2-1 B1.png|Blast Barrel (Tricky Temple bonus 1) | |||
DKL SGB Blast Barrel 2-4 B1 & 4-5.png|Blast Barrel (Snake Charmer's Challenge bonus 1 and Skyscraper Caper) | |||
DKL SGB Blast Barrel 3-1.png|Blast Barrel (Pot Hole Panic) | |||
DKL SGB Blast Barrel 3-1 B1 & 3-6.png|Blast Barrel (Pot Hole Panic bonus 1 and Landslide Leap) | |||
DKL SGB Blast Barrel 3-1 B2.png|Blast Barrel (Pot Hole Panic bonus 2) | |||
DKL SGB Blast Barrel 3-2.png|Blast Barrel (Mountain Mayhem) | |||
DKL SGB Blast Barrel 3-2 B2.png|Blast Barrel (Mountain Mayhem bonus 2) | |||
DKL SGB Blast Barrel 3-3.png|Blast Barrel (Track Attack) | |||
DKL SGB Blast Barrel 3-3 B2.png|Blast Barrel (Track Attack bonus 2) | |||
DKL SGB Blast Barrel 3-4.png|Blast Barrel (Spiky Tyre Trail) | |||
DKL SGB Blast Barrel 3-5.png|Blast Barrel (Sky High Caper) | |||
DKL SGB Blast Barrel 3-6 B2 & 4-6.png|Blast Barrel (Landslide Leap bonus 2 and Button Barrel Blast) | |||
DKL SGB Blast Barrel 3-7.png|Blast Barrel (Collapsing Clouds) | |||
DKL SGB Blast Barrel 3-7 B1.png|Blast Barrel (Collapsing Clouds bonus 1) | |||
DKL SGB Blast Barrel 4-1.png|Blast Barrel (Construction Site Fight) | |||
DKL SGB Blast Barrel 4-1 B1 & 4-3.png|Blast Barrel (Construction Site Fight bonus 1 and Balloon Barrage) | |||
DKL SGB Blast Barrel 4-1 B2.png|Blast Barrel (Construction Site Fight bonus 2) | |||
DKL SGB Blast Barrel 4-3 B2.png|Blast Barrel (Balloon Barrage bonus 2) | |||
DKL SGB Blast Barrel 4-4.png|Blast Barrel (Fast Barrel Blast) | |||
DKL SGB Blast Barrel 4-7.png|Blast Barrel (Oil Drum Slum) | |||
DKL SGB Boulder map 1.png|Boulder ([[Gangplank Galleon Ahoy!]]) | |||
DKL SGB Boulder map 2.png|Boulder ([[Kremlantis]]) | |||
DKL SGB Buddy Barrel 1-1.png|Buddy Barrel (Jungle Jaunt) | |||
DKL SGB Buddy Barrel 1-2.png|Buddy Barrel (Freezing Fun) | |||
DKL SGB Buddy Barrel 1-3.png|Buddy Barrel (Simian Swing) | |||
DKL SGB Buddy Barrel 1-4.png|Buddy Barrel (Deck Trek) | |||
DKL SGB Buddy Barrel 1-5.png|Buddy Barrel (Rope Ravine) | |||
DKL SGB Buddy Barrel 1-6.png|Buddy Barrel (Tyre Trail) | |||
DKL SGB Buddy Barrel 1-7.png|Buddy Barrel (Riggin' Rumble) | |||
DKL SGB Buddy Barrel 1-8.png|Buddy Barrel (Congo Carnage) | |||
DKL SGB Buddy Barrel 1-9.png|Buddy Barrel (Arctic Barrel Arsenal) | |||
DKL SGB Buddy Barrel 2-1.png|Buddy Barrel (Tricky Temple) | |||
DKL SGB Buddy Barrel 2-2.png|Buddy Barrel (Kremlantis Kaos) | |||
DKL SGB Buddy Barrel 2-3.png|Buddy Barrel (Reef Rampage) | |||
DKL SGB Buddy Barrel 2-4.png|Buddy Barrel (Snake Charmer's Challenge) | |||
DKL SGB Buddy Barrel 2-5.png|Buddy Barrel (Chomp's Coliseum) | |||
DKL SGB Buddy Barrel 2-6.png|Buddy Barrel (Nautilus Chase) | |||
DKL SGB Buddy Barrel 2-7.png|Buddy Barrel (Swirlwind Storm) | |||
DKL SGB Buddy Barrel 3-1.png|Buddy Barrel (Pot Hole Panic) | |||
DKL SGB Buddy Barrel 3-2.png|Buddy Barrel (Mountain Mayhem) | |||
DKL SGB Buddy Barrel 3-3.png|Buddy Barrel (Track Attack) | |||
DKL SGB Buddy Barrel 3-4.png|Buddy Barrel (Spiky Tyre Trail) | |||
DKL SGB Buddy Barrel 3-5.png|Buddy Barrel (Sky High Caper) | |||
DKL SGB Buddy Barrel 3-6.png|Buddy Barrel (Landslide Leap) | |||
DKL SGB Buddy Barrel 3-7.png|Buddy Barrel (Collapsing Clouds) | |||
DKL SGB Buddy Barrel 4-1.png|Buddy Barrel (Construction Site Fight) | |||
DKL SGB Buddy Barrel 4-2.png|Buddy Barrel (Kong Krazy) | |||
DKL SGB Buddy Barrel 4-3.png|Buddy Barrel (Balloon Barrage) | |||
DKL SGB Buddy Barrel 4-4.png|Buddy Barrel (Fast Barrel Blast) | |||
DKL SGB Buddy Barrel 4-5.png|Buddy Barrel (Skyscraper Caper) | |||
DKL SGB Buddy Barrel 4-6.png|Buddy Barrel (Button Barrel Blast) | |||
DKL SGB Buddy Barrel 4-7.png|Buddy Barrel (Oil Drum Slum) | |||
DKL SGB Button 1-3 B2, 1-6 B1, & 4-4 B1.png|Button (Simian Swing bonus 2, Tyre Trail bonus 1, and Fast Barrel Blast bonus 1) | |||
DKL SGB Button 1-5 B1, 1-8 B2, & 3-7 B2.png|Button (Rope Ravine bonus 1, Congo Carnage bonus 2, and Collapsing Clouds bonus 2) | |||
DKL SGB Button 1-9 B1.png|Button (Arctic Barrel Arsenal bonus 1) | |||
DKL SGB Button 3-4 B2.png|Button (Spiky Tyre Trail bonus 2) | |||
DKL SGB Button 4-6.png|Button (Button Barrel Blast) | |||
DKL SGB Cloud 1-3 B1 & 1-7.png|Cloud (Simian Swing bonus 1 and Riggin' Rumble) | |||
DKL SGB Cloud 3-2 B1.png|Cloud (Mountain Mayhem bonus 1) | |||
DKL SGB Cloud 3-3.png|Cloud (Track Attack) | |||
DKL SGB Cloud 3-7.png|Cloud (Collapsing Clouds) | |||
DKL SGB Cloud 4-6 B1.png|Cloud (Button Barrel Blast bonus 1) | |||
DKL SGB Continue Point default 1-1.png|Continue Point (Jungle Jaunt) | |||
DKL SGB Continue Point hit 1-1.png|Continue Point (Jungle Jaunt) | |||
DKL SGB Continue Point default 1-2.png|Continue Point (Freezing Fun) | |||
DKL SGB Continue Point hit 1-2.png|Continue Point (Freezing Fun) | |||
DKL SGB Continue Point default 1-3.png|Continue Point (Simian Swing) | |||
DKL SGB Continue Point hit 1-3.png|Continue Point (Simian Swing) | |||
DKL SGB Continue Point default 1-4.png|Continue Point (Deck Trek) | |||
DKL SGB Continue Point hit 1-4.png|Continue Point (Deck Trek) | |||
DKL SGB Continue Point default 1-5.png|Continue Point (Rope Ravine) | |||
DKL SGB Continue Point hit 1-5.png|Continue Point (Rope Ravine) | |||
DKL SGB Continue Point default 1-6.png|Continue Point (Tyre Trail) | |||
DKL SGB Continue Point hit 1-6.png|Continue Point (Tyre Trail) | |||
DKL SGB Continue Point default 1-7.png|Continue Point (Riggin' Rumble) | |||
DKL SGB Continue Point hit 1-7.png|Continue Point (Riggin' Rumble) | |||
DKL SGB Continue Point default 1-8.png|Continue Point (Congo Carnage) | |||
DKL SGB Continue Point hit 1-8.png|Continue Point (Congo Carnage) | |||
DKL SGB Continue Point default 1-9.png|Continue Point (Arctic Barrel Arsenal) | |||
DKL SGB Continue Point hit 1-9.png|Continue Point (Arctic Barrel Arsenal) | |||
DKL SGB Continue Point default 2-1.png|Continue Point (Tricky Temple) | |||
DKL SGB Continue Point hit 2-1.png|Continue Point (Tricky Temple) | |||
DKL SGB Continue Point default 2-2.png|Continue Point (Kremlantis Kaos) | |||
DKL SGB Continue Point hit 2-2.png|Continue Point (Kremlantis Kaos) | |||
DKL SGB Continue Point default 2-3.png|Continue Point (Reef Rampage) | |||
DKL SGB Continue Point hit 2-3.png|Continue Point (Reef Rampage) | |||
DKL SGB Continue Point default 2-4.png|Continue Point (Snake Charmer's Challenge) | |||
DKL SGB Continue Point hit 2-4.png|Continue Point (Snake Charmer's Challenge) | |||
DKL SGB Continue Point default 2-5.png|Continue Point (Chomp's Coliseum) | |||
DKL SGB Continue Point hit 2-5.png|Continue Point (Chomp's Coliseum) | |||
DKL SGB Continue Point default 2-6.png|Continue Point (Nautilus Chase) | |||
DKL SGB Continue Point hit 2-6.png|Continue Point (Nautilus Chase) | |||
DKL SGB Continue Point default 2-7.png|Continue Point (Swirlwind Storm) | |||
DKL SGB Continue Point hit 2-7.png|Continue Point (Swirlwind Storm) | |||
DKL SGB Continue Point default 3-1.png|Continue Point (Pot Hole Panic) | |||
DKL SGB Continue Point hit 3-1.png|Continue Point (Pot Hole Panic) | |||
DKL SGB Continue Point default 3-2.png|Continue Point (Mountain Mayhem) | |||
DKL SGB Continue Point hit 3-2.png|Continue Point (Mountain Mayhem) | |||
DKL SGB Continue Point default 3-3.png|Continue Point (Track Attack) | |||
DKL SGB Continue Point hit 3-3.png|Continue Point (Track Attack) | |||
DKL SGB Continue Point default 3-4.png|Continue Point (Spiky Tyre Trail) | |||
DKL SGB Continue Point hit 3-4.png|Continue Point (Spiky Tyre Trail) | |||
DKL SGB Continue Point default 3-5.png|Continue Point (Sky High Caper) | |||
DKL SGB Continue Point hit 3-5.png|Continue Point (Sky High Caper) | |||
DKL SGB Continue Point default 3-6.png|Continue Point (Landslide Leap) | |||
DKL SGB Continue Point hit 3-6.png|Continue Point (Landslide Leap) | |||
DKL SGB Continue Point default 3-7.png|Continue Point (Collapsing Clouds) | |||
DKL SGB Continue Point hit 3-7.png|Continue Point (Collapsing Clouds) | |||
DKL SGB Continue Point default 4-1.png|Continue Point (Construction Site Fight) | |||
DKL SGB Continue Point hit 4-1.png|Continue Point (Construction Site Fight) | |||
DKL SGB Continue Point default 4-2.png|Continue Point (Kong Krazy) | |||
DKL SGB Continue Point hit 4-2.png|Continue Point (Kong Krazy) | |||
DKL SGB Continue Point default 4-3.png|Continue Point (Balloon Barrage) | |||
DKL SGB Continue Point hit 4-3.png|Continue Point (Balloon Barrage) | |||
DKL SGB Continue Point default 4-4.png|Continue Point (Fast Barrel Blast) | |||
DKL SGB Continue Point hit 4-4.png|Continue Point (Fast Barrel Blast) | |||
DKL SGB Continue Point default 4-5.png|Continue Point (Skyscraper Caper) | |||
DKL SGB Continue Point hit 4-5.png|Continue Point (Skyscraper Caper) | |||
DKL SGB Continue Point default 4-6.png|Continue Point (Button Barrel Blast) | |||
DKL SGB Continue Point hit 4-6.png|Continue Point (Button Barrel Blast) | |||
DKL SGB Continue Point default 4-7.png|Continue Point (Oil Drum Slum) | |||
DKL SGB Continue Point hit 4-7.png|Continue Point (Oil Drum Slum) | |||
DKL SGB Elevator stone 1-7 B2.png|Elevator (Riggin' Rumble bonus 2) | |||
DKL SGB Elevator rail 2-4 B1.png|Elevator (Snake Charmer's Challenge bonus 1) | |||
DKL SGB Elevator stone 3-1.png|Elevator (Pot Hole Panic) | |||
DKL SGB Elevator rail 3-3.png|Elevator (Track Attack) | |||
DKL SGB Elevator stone 3-4.png|Elevator (Spiky Tyre Trail) | |||
DKL SGB Elevator arrow 3-5.png|Elevator (Sky High Caper) | |||
DKL SGB Elevator rail 4-1 B1.png|Elevator (Construction Site Fight bonus 1) | |||
DKL SGB Elevator arrow 4-1 B2.png|Elevator (Construction Site Fight bonus 2) | |||
DKL SGB End 1-1.png|End of stage (Jungle Jaunt) | |||
DKL SGB End 1-2.png|End of stage (Freezing Fun) | |||
DKL SGB End 1-3.png|End of stage (Simian Swing) | |||
DKL SGB End 1-4.png|End of stage (Deck Trek) | |||
DKL SGB End 1-5.png|End of stage (Rope Ravine) | |||
DKL SGB End 1-6.png|End of stage (Tyre Trail) | |||
DKL SGB End 1-7.png|End of stage (Riggin' Rumble) | |||
DKL SGB End 1-8.png|End of stage (Congo Carnage) | |||
DKL SGB End 1-9.png|End of stage (Arctic Barrel Arsenal) | |||
DKL SGB End 2-1.png|End of stage (Tricky Temple) | |||
DKL SGB End 2-2.png|End of stage (Kremlantis Kaos) | |||
DKL SGB End 2-3.png|End of stage (Reef Rampage) | |||
DKL SGB End 2-4.png|End of stage (Snake Charmer's Challenge) | |||
DKL SGB End 2-5.png|End of stage (Chomp's Coliseum) | |||
DKL SGB End 2-6.png|End of stage (Nautilus Chase) | |||
DKL SGB End 2-7.png|End of stage (Swirlwind Storm) | |||
DKL SGB End 3-1.png|End of stage (Pot Hole Panic) | |||
DKL SGB End 3-2.png|End of stage (Mountain Mayhem) | |||
DKL SGB End 3-3.png|End of stage (Track Attack) | |||
DKL SGB End 3-4.png|End of stage (Spiky Tyre Trail) | |||
DKL SGB End 3-5.png|End of stage (Sky High Caper) | |||
DKL SGB End 3-6.png|End of stage (Landslide Leap) | |||
DKL SGB End 3-7.png|End of stage (Collapsing Clouds) | |||
DKL SGB End 4-1.png|End of stage (Construction Site Fight) | |||
DKL SGB End 4-2.png|End of stage (Kong Krazy) | |||
DKL SGB End 4-3.png|End of stage (Balloon Barrage) | |||
DKL SGB End 4-4.png|End of stage (Fast Barrel Blast) | |||
DKL SGB End 4-5.png|End of stage (Skyscraper Caper) | |||
DKL SGB End 4-6.png|End of stage (Button Barrel Blast) | |||
DKL SGB End 4-7.png|End of stage (Oil Drum Slum) | |||
DKL SGB Explosive Barrel 1-4.png|Explosive Barrel (Deck Trek) | |||
DKL SGB Explosive Barrel 2-4.png|Explosive Barrel (Snake Charmer's Challenge) | |||
DKL SGB Explosive Barrel 2-5.png|Explosive Barrel (Chomp's Coliseum) | |||
DKL SGB KONG Button 4-2.png|KONG button (Kong Krazy) | |||
DKL SGB Rope 1-1.png|Rope (Jungle Jaunt) | |||
DKL SGB Rope 1-3.png|Rope (Simian Swing) | |||
DKL SGB Rope 1-5.png|Rope (Rope Ravine) | |||
DKL SGB Rope 1-6.png|Rope (Tyre Trail) | |||
DKL SGB Rope 1-7.png|Rope (Riggin' Rumble) | |||
DKL SGB Rope 1-8.png|Rope (Congo Carnage) | |||
DKL SGB Rope 2-4.png|Rope (Snake Charmer's Challenge) | |||
DKL SGB Rope 2-7.png|Rope (Swirlwind Storm) | |||
DKL SGB Rope 3-2.png|Rope (Mountain Mayhem) | |||
DKL SGB Rope 3-6.png|Rope (Landslide Leap) | |||
DKL SGB Rope 4-2.png|Rope (Kong Krazy) | |||
DKL SGB Rope 4-4.png|Rope (Fast Barrel Blast) | |||
DKL SGB Rope 4-7.png|Rope (Oil Drum Slum) | |||
DKL SGB Rebound Clambo 2-8.png|Sponge (Seabed Showdown) | |||
DKL SGB Steel keg 1-8.png|Steel keg (Congo Carnage) | |||
DKL SGB Steel keg 3-4.png|Steel keg (Spiky Tyre Trail) | |||
DKL SGB Steel keg 4-3.png|Steel keg (Balloon Barrage) | |||
DKL SGB Tire half 1-2.png|Tire (Freezing Fun) | |||
DKL SGB Tire half 1-6 & 2-7 B1.png|Tire (Tyre Trail and Swirlwind Storm bonus 1) | |||
DKL SGB Tire half 1-7.png|Tire (Riggin' Rumble) | |||
DKL SGB Tire half 1-9.png|Tire (Arctic Barrel Arsenal) | |||
DKL SGB Tire full 2-1.png|Tire (Tricky Temple) | |||
DKL SGB Tire half 2-4.png|Tire (Snake Charmer's Challenge) | |||
DKL SGB Tire half 2-7.png|Tire (Swirlwind Storm) | |||
DKL SGB Tire full 3-1.png|Tire (Pot Hole Panic) | |||
DKL SGB Tire half 3-2.png|Tire (Mountain Mayhem) | |||
DKL SGB Tire half 3-5.png|Tire (Sky High Caper) | |||
DKL SGB Tire half 3-6.png|Tire (Landslide Leap) | |||
DKL SGB Tire full 3-6.png|Tire (Landslide Leap) | |||
DKL SGB Tire half 4-1.png|Tire (Construction Site Fight) | |||
DKL SGB Tire half 4-2.png|Tire (Kong Krazy) | |||
DKL SGB Tire full 4-2.png|Tire (Kong Krazy) | |||
DKL SGB Tire half 4-3.png|Tire (Balloon Barrage) | |||
DKL SGB Tire half 4-4.png|Tire (Fast Barrel Blast) | |||
DKL SGB Tire full 4-4.png|Tire (Fast Barrel Blast) | |||
DKL SGB Tire half 4-4 B2.png|Tire (Fast Barrel Blast bonus 2) | |||
DKL SGB Tire half 4-7.png|Tire (Oil Drum Slum) | |||
DKL SGB Tire full 4-7.png|Tire (Oil Drum Slum) | |||
DKL SGB TNT Barrel 1-4.png|TNT Barrel (Deck Trek) | |||
DKL SGB TNT Barrel 2-4.png|TNT Barrel (Snake Charmer's Challenge) | |||
DKL SGB TNT Barrel 3-2.png|TNT Barrel (Mountain Mayhem) | |||
DKL SGB TNT Barrel 3-6.png|TNT Barrel (Landslide Leap) | |||
DKL SGB TNT Barrel 4-2.png|TNT Barrel (Kong Krazy) | |||
DKL SGB TNT Barrel 4-7.png|TNT Barrel (Oil Drum Slum) | |||
</gallery> | </gallery> | ||
| Line 118: | Line 993: | ||
DKL Title Screen GB.png|Title screen | DKL Title Screen GB.png|Title screen | ||
Game Over DKL.png|[[Game Over]] screen | Game Over DKL.png|[[Game Over]] screen | ||
DKL Jungle Jaunt Attacked.png|[[Jungle Jaunt]] | |||
</gallery> | </gallery> | ||
| Line 126: | Line 1,002: | ||
Jungle Jaunt DKL start.png|The game's first level. | Jungle Jaunt DKL start.png|The game's first level. | ||
Jungle Jaunt DKL halfway.png | Jungle Jaunt DKL halfway.png | ||
Freezing Fun.png|Diddy Kong in [[Freezing Fun]]. | Freezing Fun.png|Diddy Kong in [[Freezing Fun]]. | ||
Simian Swing.png | Simian Swing.png | ||
| Line 172: | Line 1,047: | ||
==Box art== | ==Box art== | ||
<gallery> | <gallery> | ||
Donkey Kong Land Box Art.jpg|North American | Donkey Kong Land Box Art.jpg|North American box art (front) | ||
DKL cover art back.png|North American | DKL cover art back.png|North American box art (back) | ||
DKL Player's Choice cover art.jpg|North American box art ([[Player's Choice]]) | DKL Player's Choice cover art.jpg|North American box art ([[Player's Choice]]) | ||
DKL Europe cover art.jpg|European | DKL Player's Choice cover art (early).jpg|Early North American box art (Player's Choice) | ||
DKL Japan cover art.jpg|Japanese | DKL Europe cover art.jpg|European box art | ||
DKL Box EU Nintendo Classics.jpg|European box art (Nintendo Classics) | |||
DKL Box DE.jpg|German box art | |||
Nintendo Classics DKL Box DE.jpg|German box art (Nintendo Classics) | |||
DKL Box FRA.jpg|French and Dutch box art | |||
DKL Box AU.jpg|Australian box art | |||
DKL Japan cover art.jpg|Japanese box art (front) | |||
DKL Japan cover art back.jpg|Japanese box art (back) | DKL Japan cover art back.jpg|Japanese box art (back) | ||
DKL GB Pocket Australian bundle.jpg|Australian Game Boy Pocket "Gold Super Pack" bundle | DKL GB Pocket Australian bundle.jpg|Australian Game Boy Pocket "Gold Super Pack" bundle | ||
DKL3DSIcon.jpg|Nintendo 3DS [[Virtual Console]] | DKL3DSIcon.jpg|Nintendo 3DS [[Virtual Console]] icon | ||
</gallery> | </gallery> | ||
Latest revision as of 19:42, April 6, 2024
This is a gallery of images for the game Donkey Kong Land.
Logos[edit]
International logo
Japanese logo


Artwork[edit]
Note:A large amount of artwork for this game is borrowed from the original Donkey Kong Country.
Characters[edit]
Donkey Kong, Diddy, Rambi, and Expresso
Donkey Kong and Diddy Kong
Donkey Kong and Diddy Kong
Donkey Kong
Donkey Kong riding Rambi
Donkey Kong
Donkey Kong
Donkey Kong
Donkey Kong
Donkey Kong
Donkey Kong
Diddy Kong
Diddy Kong
Diddy Kong
Diddy Kong
Diddy Kong
Diddy Kong riding Rambi
Expresso
Rambi


Enemies[edit]
Clambo
Fangfish
Hogwash the Flying Pig
Hogwash the Flying Pig
Nemo
Slippa


Bosses[edit]
Hard Hat
Hard Hat


Items and objects[edit]

Banana Counter
Kong Token


Unused content[edit]
Kong with a hat
Ram Bunkshus


Scenes[edit]
Donkey Kong, Diddy Kong, and Cranky Kong
Donkey Kong riding Rambi, with Diddy Kong


Sprites and models[edit]
Protagonists[edit]
Game Boy[edit]

Super Game Boy[edit]

Donkey Kong (Jungle Jaunt, Balloon Barrage bonus 2, and Fast Barrel Blast bonus 2)

Donkey Kong (Jungle Jaunt bonus 1, Snake Charmer's Challenge, and Mountain Mayhem bonus 2)

Donkey Kong (Jungle Jaunt bonus 2)

Donkey Kong (Freezing Fun, Freezing Fun bonus 1, and Riggin' Rumble bonus 1)

Donkey Kong (Simian Swing, Mountain Mayhem bonus 1, and Collapsing Clouds bonus 1)

Donkey Kong (Simian Swing bonus 1, Riggin' Rumble, and Kong Krazy bonus 1)

Donkey Kong (Simian Swing bonus 2, Tyre Trail bonus 1, Arctic Barrel Arsenal bonus 2, Kong Krazy, and Fast Barrel Blast bonus 1)

Donkey Kong (Deck Trek)

Donkey Kong (Deck Trek bonus 1, Rope Ravine bonus 1, Congo Carnage bonus 2, and Collapsing Clouds bonus 2)

Donkey Kong (Deck Trek bonus 2, Congo Carnage, and Spiky Tyre Trail bonus 1)

Donkey Kong (Rope Ravine, Wild Sting Fling, and Oil Drum Slum bonus 2)

Donkey Kong (Rope Ravine bonus 2)

Donkey Kong (Tyre Trail, Arctic Barrel Arsenal bonus 1, Swirlwind Storm bonus 1, and Landslide Leap bonus 1)

Donkey Kong (Tyre Trail bonus 2, Pot Hole Panic bonus 2)

Donkey Kong (Tyre Trail bonus 3)

Donkey Kong (Riggin' Rumble bonus 2, Tricky Temple, and Track Attack bonus 1)

Donkey Kong (Congo Carnage bonus 1, Swirlwind Storm, and Balloon Barrage bonus 1)

Donkey Kong (Arctic Barrel Arsenal)

Donkey Kong (Tricky Temple bonus 1, Spiky Tyre Trail bonus 2, Button Barrel Blast bonus 1, and Button Barrel Blast bonus 2)

Donkey Kong (Kremlantis Kaos)

Donkey Kong (Reef Rampage)

Donkey Kong (Snake Charmer's Challenge bonus 1 and Skyscraper Caper)

Donkey Kong (Chomp's Coliseum)

Donkey Kong (Nautilus Chase and Skyscraper Caper bonus 1)

Donkey Kong (Seabed Showdown)

Donkey Kong (Pot Hole Panic)

Donkey Kong (Pot Hole Panic bonus 1 and Landslide Leap)

Donkey Kong (Mountain Mayhem)

Donkey Kong (Track Attack)

Donkey Kong (Track Attack bonus 2)

Donkey Kong (Spiky Tyre Trail)

Donkey Kong (Sky High Caper)

Donkey Kong (Sky High Caper bonus 1)

Donkey Kong (Landslide Leap bonus 2 and Button Barrel Blast)

Donkey Kong (Collapsing Clouds)

Donkey Kong (Mad Mole Holes)

Donkey Kong (Construction Site Fight and Construction Site Fight bonus 2)

Donkey Kong (Construction Site Fight bonus 1 and Balloon Barrage)

Donkey Kong (Fast Barrel Blast)

Donkey Kong (Oil Drum Slum and K. Rool's Kingdom)

Donkey Kong (Oil Drum Slum bonus 1)

Diddy Kong (Jungle Jaunt, Balloon Barrage bonus 2, and Fast Barrel Blast bonus 2)

Diddy Kong (Jungle Jaunt bonus 1, Snake Charmer's Challenge, and Mountain Mayhem bonus 2)

Diddy Kong (Jungle Jaunt bonus 2)

Diddy Kong (Freezing Fun, Freezing Fun bonus 1, and Riggin' Rumble bonus 1)

Diddy Kong (Simian Swing, Mountain Mayhem bonus 1, and Collapsing Clouds bonus 1)

Diddy Kong (Simian Swing bonus 1, Riggin' Rumble, and Kong Krazy bonus 1)

Diddy Kong (Simian Swing bonus 2, Tyre Trail bonus 1, Arctic Barrel Arsenal bonus 2, Kong Krazy, and Fast Barrel Blast bonus 1)

Diddy Kong (Deck Trek)

Diddy Kong (Deck Trek bonus 1, Rope Ravine bonus 1, Congo Carnage bonus 2, and Collapsing Clouds bonus 2)

Diddy Kong (Deck Trek bonus 2, Congo Carnage, and Spiky Tyre Trail bonus 1)

Diddy Kong (Rope Ravine, Wild Sting Fling, and Oil Drum Slum bonus 2)

Diddy Kong (Rope Ravine bonus 2)

Diddy Kong (Tyre Trail, Arctic Barrel Arsenal bonus 1, Swirlwind Storm bonus 1, and Landslide Leap bonus 1)

Diddy Kong (Tyre Trail bonus 2 and Pot Hole Panic bonus 2)

Diddy Kong (Tyre Trail bonus 3)

Diddy Kong (Riggin' Rumble bonus 2, Tricky Temple, and Track Attack bonus 1)

Diddy Kong (Congo Carnage bonus 1, Swirlwind Storm, and Balloon Barrage bonus 1)

Diddy Kong (Arctic Barrel Arsenal)

Diddy Kong (Tricky Temple bonus 1, Spiky Tyre Trail bonus 2, Button Barrel Blast bonus 1, and Button Barrel Blast bonus 2)

Diddy Kong (Kremlantis Kaos)

Diddy Kong (Reef Rampage)

Diddy Kong (Snake Charmer's Challenge bonus 1 and Skyscraper Caper)

Diddy Kong (Chomp's Coliseum)

Diddy Kong (Nautilus Chase and Skyscraper Caper bonus 1)

Diddy Kong (Seabed Showdown)

Diddy Kong (Pot Hole Panic)

Diddy Kong (Pot Hole Panic bonus 1 and Landslide Leap)

Diddy Kong (Mountain Mayhem)

Diddy Kong (Track Attack)

Diddy Kong (Track Attack bonus 2)

Diddy Kong (Spiky Tyre Trail)

Diddy Kong (Sky High Caper)

Diddy Kong (Sky High Caper bonus 1)

Diddy Kong (Landslide Leap bonus 2 and Button Barrel Blast)

Diddy Kong (Collapsing Clouds)

Diddy Kong (Mad Mole Holes)

Diddy Kong (Construction Site Fight and Construction Site Fight bonus 2)

Diddy Kong (Construction Site Fight bonus 1 and Balloon Barrage)

Diddy Kong (Fast Barrel Blast)

Diddy Kong (Oil Drum Slum and K. Rool's Kingdom)

Diddy Kong (Oil Drum Slum bonus 1)

Rambi (Jungle Jaunt)

Rambi (Tricky Temple bonus 1)

Rambi (Pot Hole Panic bonus 1)

Rambi (Mountain Mayhem)

Expresso (Deck Trek bonus 2)

Expresso (Mountain Mayhem bonus 1)

Expresso (Landslide Leap bonus 1)

Expresso (Collapsing Clouds)


Enemies[edit]
The Bad Guys[edit]
Game Boy[edit]

Slippa


Super Game Boy[edit]

Army (Tyre Trail)

Army (Riggin' Rumble)

Army (Tricky Temple)

Army (Swirlwind Storm)

Army (Pot Hole Panic)

Army (Construction Site Fight)

Army (Kong Krazy)

Army (Button Barrel Blast)

Gnawty (Freezing Fun)

Gnawty (Simian Swing)

Gnawty (Deck Trek)

Gnawty (Rope Ravine)

Gnawty (Congo Carnage)

Gnawty (Arctic Barrel Arsenal)

Gnawty (Tricky Temple)

Gnawty (Snake Charmer's Challenge)

Gnawty (Mountain Mayhem)

Gnawty (Track Attack)

Gnawty (Sky High Caper)

Gnawty (Landslide Leap)

Gnawty (Collapsing Clouds)

Gnawty (Construction Site Fight)

Gnawty (Kong Krazy)

Gnawty (Balloon Barrage)

Gnawty (Fast Barrel Blast)

Gnawty (Skyscraper Caper)

Gnawty (Button Barrel Blast)

Gnawty (Oil Drum Slum)

Hogwash the Flying Pig (Freezing Fun)

Hogwash the Flying Pig (Tyre Trail)

Hogwash the Flying Pig (Riggin' Rumble)

Hogwash the Flying Pig (Track Attack)

Hogwash the Flying Pig (Sky High Caper)

Hogwash the Flying Pig (Landslide Leap)

Hogwash the Flying Pig (Construction Site Fight)

Hogwash the Flying Pig (Kong Krazy)

Hogwash the Flying Pig (Balloon Barrage)

Hogwash the Flying Pig (Fast Barrel Blast)

Hogwash the Flying Pig (Skyscraper Caper)

Mini-Necky (Deck Trek)

Mini-Necky (Landslide Leap)

Mini-Necky (Kong Krazy)

Mini-Necky (Fast Barrel Blast)

Necky (Congo Carnage)

Necky (Pot Hole Panic)

Slippa (Jungle Jaunt)

Slippa (Freezing Fun)

Slippa (Simian Swing)

Slippa (Deck Trek)

Slippa (Tyre Trail)

Slippa (Riggin' Rumble)

Slippa (Riggin' Rumble)

Slippa (Tricky Temple)

Slippa (Tricky Temple bonus 1)

Slippa (Snake Charmer's Challenge)

Slippa (Swirlwind Storm)

Slippa (Mountain Mayhem)

Slippa (Spiky Tyre Trail)

Slippa (Kong Krazy)

Slippa (Balloon Barrage)

Slippa (Fast Barrel Blast)

Slippa (Skyscraper Caper)

Slippa (Skyscraper Caper)

Slippa (Oil Drum Slum)

Swirlwind (Snake Charmer's Challenge)

Swirlwind (Swirlwind Storm)

Swirlwind (Swirlwind Storm)

Zinger (Freezing Fun)

Zinger (Simian Swing and Mountain Mayhem bonus 1)

Zinger (Deck Trek)

Zinger (Rope Ravine)

Zinger (Tyre Trail)

Zinger (Riggin' Rumble)

Zinger (Congo Carnage)

Zinger (Arctic Barrel Arsenal)

Zinger (Snake Charmer's Challenge)

Zinger (Snake Charmer's Challenge bonus 1 and Skyscraper Caper)

Zinger (Swirlwind Storm)

Zinger (Pot Hole Panic)

Zinger (Mountain Mayhem)

Zinger (Track Attack)

Zinger (Sky High Caper)

Zinger (Landslide Leap)

Zinger (Collapsing Clouds)

Zinger (Construction Site Fight)

Zinger (Kong Krazy)

Zinger (Balloon Barrage)

Zinger (Fast Barrel Blast)

Zinger (Button Barrel Blast bonus 1)

Zinger (Oil Drum Slum)


The Aquatic Bad Guys[edit]
Game Boy[edit]

Nemo


Super Game Boy[edit]

Chomps (Chomp's Coliseum)

Chomps (Nautilus Chase)

Chomps (Sky High Caper bonus 1)

Chomps (Oil Drum Slum bonus 1)

Clambo (Nautilus Chase)

Fangfish (Kremlantis Kaos)

Fangfish (Reef Rampage)

Fangfish (Nautilus Chase)

Fangfish (Oil Drum Slum bonus 1)

Flapper (Kremlantis Kaos)

Flapper (Reef Rampage)

Flapper (Chomp's Coliseum)

Gloop (Kremlantis Kaos)

Gloop (Reef Rampage)

Gloop (Chomp's Coliseum)

Gloop (Nautilus Chase)

Gloop (Sky High Caper bonus 1)

Gloop (Oil Drum Slum bonus 1)

Nemo (Nautilus Chase)


The Kremlings[edit]
Game Boy[edit]


Super Game Boy[edit]

Klap Trap (Riggin' Rumble)

Klap Trap (Arctic Barrel Arsenal)

Klap Trap (Snake Charmer's Challenge)

Klap Trap (Pot Hole Panic)

Klap Trap (Kong Krazy)

Klap Trap (Skyscraper Caper)

Kritter (Jungle Jaunt)

Kritter (Freezing Fun)

Kritter (Simian Swing)

Kritter (Deck Trek)

Kritter (Tyre Trail)

Kritter (Riggin' Rumble)

Kritter (Congo Carnage)

Kritter (Arctic Barrel Arsenal)

Kritter (Tricky Temple)

Kritter (Tricky Temple bonus 1)

Kritter (Swirlwind Storm)

Kritter (Pot Hole Panic)

Kritter (Pot Hole Panic bonus 1 and Landslide Leap)

Kritter (Mountain Mayhem)

Kritter (Track Attack)

Kritter (Spiky Tyre Trail)

Kritter (Sky High Caper)

Kritter (Collapsing Clouds)

Kritter (Construction Site Fight)

Kritter (Kong Krazy)

Kritter (Balloon Barrage)

Kritter (Fast Barrel Blast)

Kritter (Skyscraper Caper)

Kritter (Oil Drum Slum)

Krusha (Tricky Temple)

Krusha (Pot Hole Panic)

Krusha (Mountain Mayhem)

Krusha (Landslide Leap)

Krusha (Balloon Barrage)

Krusha (Fast Barrel Blast)

Krusha (Skyscraper Caper)

Krusha (Oil Drum Slum)


Obstacles[edit]
Game Boy[edit]

Basket of snakes

Crownerang

Pearl


Super Game Boy[edit]

Basket of snakes (Snake Charmer's Challenge)

Basket of snakes (Snake Charmer's Challenge)

Boulder (Mountain Mayhem)

Boulder (Landslide Leap)

Coconut (Deck Trek)

Coconut (Congo Carnage)

Coconut (Pot Hole Panic)

Coconut (Landslide Leap)

Coconut (Kong Krazy)

Coconut (Fast Barrel Blast)

Crownerang (Mad Mole Holes)

Crownerang (K. Rool's Kingdom)

Mincer (Deck Trek bonus 1)

Mincer (Riggin' Rumble bonus 1)

Mincer (Congo Carnage bonus 1)

Mincer (Reef Rampage and Pot Hole Panic bonus 2)

Mincer (Snake Charmer's Challenge bonus 1)

Mincer (Mountain Mayhem bonus 2)

Mincer (Track Attack bonus 1)

Mincer (Spiky Tyre Trail)

Mincer (Landslide Leap bonus 2)

Mincer (Kong Krazy bonus 1)

Mincer (Balloon Barrage bonus 2)

Mincer (Fast Barrel Blast bonus 2)

Mincer (Skyscraper Caper bonus 1)

Mincer (Button Barrel Blast bonus 2)

Oil drum (Landslide Leap bonus 2)

Oil drum (Oil Drum Slum)

Oil drum (Oil Drum Slum)

Pearl (Seabed Showdown)


The Bosses[edit]
Game Boy[edit]

Super Game Boy[edit]

Wild Sting (Wild Sting Fling)

Wild Sting (Wild Sting Fling)

Giant Clam (Seabed Showdown)

Hard Hat (Mad Mole Holes)

King K. Rool (K. Rool's Kingdom)


Items[edit]
Game Boy[edit]

Kong Token

Kong Token

Letter O

Letter N

Letter G


Super Game Boy[edit]

Banana (Jungle Jaunt, Balloon Barrage bonus 2, and Fast Barrel Blast bonus 2)

Banana (Jungle Jaunt bonus 1 and Snake Charmer's Challenge)

Banana (Jungle Jaunt bonus 2 and Track Attack)

Banana (Freezing Fun, Freezing Fun bonus 1, and Riggin' Rumble bonus 1)

Banana (Simian Swing, Mountain Mayhem bonus 1, and Collapsing Clouds bonus 1)

Banana (Simian Swing bonus 1 and Riggin' Rumble)

Banana (Deck Trek)

Banana (Deck Trek bonus 2, Congo Carnage and Spiky Tyre Trail bonus 1)

Banana (Rope Ravine)

Banana (Rope Ravine bonus 2 and Sky High Caper)

Banana (Tyre Trail, Swirlwind Storm bonus 1 and Landslide Leap bonus 1)

Banana (Arctic Barrel Arsenal and Oil Drum Slum bonus 1)

Banana (Arctic Barrel Arsenal bonus 2 and Kong Krazy)

Banana (Tricky Temple)

Banana (Tricky Temple bonus 1)

Banana (Kremlantis Kaos)

Banana (Reef Rampage)

Banana (Chomp's Coliseum and Track Attack bonus 2)

Banana (Nautilus Chase)

Banana (Swirlwind Storm)

Banana (Pot Hole Panic)

Banana (Pot Hole Panic bonus 1 and Landslide Leap)

Banana (Mountain Mayhem)

Banana (Spiky Tyre Trail)

Banana (Sky High Caper bonus 1 and Fast Barrel Blast)

Banana (Collapsing Clouds)

Banana (Construction Site Fight)

Banana (Balloon Barrage)

Banana (Skyscraper Caper)

Banana (Button Barrel Blast)

Banana (Oil Drum Slum)

Banana Bunch (Freezing Fun)

Banana Bunch (Simian Swing bonus 1 and Riggin' Rumble)

Banana Bunch (Deck Trek)

Banana Bunch (Wild Sting Fling)

Banana Bunch (Kremlantis Kaos)

Banana Bunch (Reef Rampage)

Banana Bunch (Snake Charmer's Challenge)

Banana Bunch (Snake Charmer's Challenge bonus 1 and Skyscraper Caper)

Banana Bunch (Chomp's Coliseum)

Banana Bunch (Nautilus Chase)

Banana Bunch (Swirlwind Storm)

Banana Bunch (Seabed Showdown)

Banana Bunch (Mountain Mayhem)

Banana Bunch (Track Attack)

Banana Bunch (Spiky Tyre Trail)

Banana Bunch (Sky High Caper)

Banana Bunch (Landslide Leap)

Banana Bunch (Landslide Leap bonus 2 and Button Barrel Blast)

Banana Bunch (Mad Mole Holes)

Banana Bunch (Construction Site Fight)

Banana Bunch (Balloon Barrage)

Banana Bunch (Fast Barrel Blast)

Banana Bunch (Oil Drum Slum)

Kong Token (file select)

Kong Token (file select)

Kong Token (Jungle Jaunt)

Kong Token (Jungle Jaunt)

Kong Token (Jungle Jaunt bonus 1 and Snake Charmer's Challenge)

Kong Token (Jungle Jaunt bonus 1 and Snake Charmer's Challenge)

Kong Token (Freezing Fun and Riggin' Rumble bonus 1)

Kong Token (Freezing Fun and Riggin' Rumble bonus 1)

Kong Token (Simian Swing and Collapsing Clouds bonus 1)

Kong Token (Simian Swing and Collapsing Clouds bonus 1)

Kong Token (Simian Swing bonus 2, Tyre Trail bonus 1, and Fast Barrel Blast bonus 1)

Kong Token (Simian Swing bonus 2, Tyre Trail bonus 1, and Fast Barrel Blast bonus 1)

Kong Token (Deck Trek)

Kong Token (Deck Trek)

Kong Token (Rope Ravine)

Kong Token (Rope Ravine)

Kong Token (Rope Ravine bonus 1, Congo Carnage bonus 2, Kremlantis Kaos, and Collapsing Clouds bonus 2)

Kong Token (Rope Ravine bonus 1, Congo Carnage bonus 2, Kremlantis Kaos, and Collapsing Clouds bonus 2)

Kong Token (Rope Ravine bonus 2 and Sky High Caper)

Kong Token (Rope Ravine bonus 2 and Sky High Caper)

Kong Token (Tyre Trail, Arctic Barrel Arsenal bonus 1, Swirlwind Storm bonus 1, and Landslide Leap bonus 1)

Kong Token (Tyre Trail, Arctic Barrel Arsenal bonus 1, Swirlwind Storm bonus 1, and Landslide Leap bonus 1)

Kong Token (Tyre Trail bonus 2 and Reef Rampage)

Kong Token (Tyre Trail bonus 2 and Reef Rampage)

Kong Token (Riggin' Rumble and Kong Krazy bonus 1)

Kong Token (Riggin' Rumble and Kong Krazy bonus 1)

Kong Token (Riggin' Rumble bonus 2 and Tricky Temple)

Kong Token (Riggin' Rumble bonus 2 and Tricky Temple)

Kong Token (Congo Carnage)

Kong Token (Congo Carnage)

Kong Token (Congo Carnage bonus 1, Swirlwind Storm, and Balloon Barrage bonus 1)

Kong Token (Congo Carnage bonus 1, Swirlwind Storm, and Balloon Barrage bonus 1)

Kong Token (Nautilus Chase)

Kong Token (Nautilus Chase)

Kong Token (Mountain Mayhem)

Kong Token (Mountain Mayhem)

Kong Token (Track Attack)

Kong Token (Track Attack)

Kong Token (Track Attack bonus 2)

Kong Token (Track Attack bonus 2)

Kong Token (Spiky Tyre Trail bonus 2 and Button Barrel Blast bonus 2)

Kong Token (Spiky Tyre Trail bonus 2 and Button Barrel Blast bonus 2)

Kong Token (Sky High Caper bonus 1 and Fast Barrel Blast)

Kong Token (Sky High Caper bonus 1 and Fast Barrel Blast)

Kong Token (Landslide Leap)

Kong Token (Landslide Leap)

Kong Token (Collapsing Clouds)

Kong Token (Collapsing Clouds)

Kong Token (Construction Site Fight bonus 1 and Balloon Barrage)

Kong Token (Construction Site Fight bonus 1 and Balloon Barrage)

Kong Token (Construction Site Fight bonus 2)

Kong Token (Construction Site Fight bonus 2)

Kong Token (Skyscraper Caper)

Kong Token (Skyscraper Caper)

Kong Token (Button Barrel Blast)

Kong Token (Button Barrel Blast)

Letter K (Jungle Jaunt)

Letter K (Freezing Fun)

Letter K (Simian Swing)

Letter K (Deck Trek)

Letter K (Rope Ravine)

Letter K (Tyre Trail)

Letter K (Riggin' Rumble and Kong Krazy bonus 1)

Letter K (Congo Carnage)

Letter K (Arctic Barrel Arsenal)

Letter K (Tricky Temple)

Letter K (Reef Rampage)

Letter K (Kremlantis Kaos)

Letter K (Snake Charmer's Challenge)

Letter K (Chomp's Coliseum)

Letter K (Nautilus Chase)

Letter K (Swirlwind Storm)

Letter K (Pot Hole Panic)

Letter K (Mountain Mayhem)

Letter K (Track Attack)

Letter K (Spiky Tyre Trail)

Letter K (Sky High Caper)

Letter K (Landslide Leap)

Letter K (Collapsing Clouds)

Letter K (Construction Site Fight)

Letter K (Kong Krazy)

Letter K (Balloon Barrage)

Letter K (Fast Barrel Blast)

Letter K (Skyscraper Caper)

Letter K (Button Barrel Blast)

Letter K (Oil Drum Slum)

Letter O (Jungle Jaunt)

Letter O (Freezing Fun)

Letter O (Simian Swing and Mountain Mayhem bonus 1)

Letter O (Deck Trek bonus 1 and Kremlantis Kaos)

Letter O (Rope Ravine)

Letter O (Tyre Trail)

Letter O (Riggin' Rumble)

Letter O (Congo Carnage)

Letter O (Arctic Barrel Arsenal)

Letter O (Tricky Temple and Track Attack bonus 1)

Letter O (Reef Rampage)

Letter O (Snake Charmer's Challenge bonus 1 and Skyscraper Caper)

Letter O (Chomp's Coliseum)

Letter O (Nautilus Chase)

Letter O (Swirlwind Storm)

Letter O (Pot Hole Panic)

Letter O (Spiky Tyre Trail)

Letter O (Sky High Caper)

Letter O (Landslide Leap)

Letter O (Collapsing Clouds)

Letter O (Construction Site Fight)

Letter O (Kong Krazy)

Letter O (Balloon Barrage)

Letter O (Fast Barrel Blast)

Letter O (Button Barrel Blast bonus 1)

Letter O (Oil Drum Slum)

Letter N (Jungle Jaunt)

Letter N (Freezing Fun)

Letter N (Simian Swing)

Letter N (Deck Trek bonus 2 and Congo Carnage)

Letter N (Rope Ravine)

Letter N (Tyre Trail bonus 3, Nautilus Chase, and Skyscraper Caper bonus 1)

Letter N (Riggin' Rumble)

Letter N (Arctic Barrel Arsenal bonus 2 and Kong Krazy)

Letter N (Tricky Temple)

Letter N (Kremlantis Kaos)

Letter N (Reef Rampage)

Letter N (Snake Charmer's Challenge)

Letter N (Chomp's Coliseum)

Letter N (Swirlwind Storm)

Letter N (Pot Hole Panic)

Letter N (Mountain Mayhem)

Letter N (Track Attack)

Letter N (Spiky Tyre Trail)

Letter N (Sky High Caper)

Letter N (Landslide Leap)

Letter N (Collapsing Clouds)

Letter N (Construction Site Fight bonus 2)

Letter N (Balloon Barrage)

Letter N (Fast Barrel Blast)

Letter N (Button Barrel Blast bonus 2)

Letter N (Oil Drum Slum)

Letter G (Jungle Jaunt and Fast Barrel Blast bonus 2)

Letter G (Freezing Fun)

Letter G (Simian Swing)

Letter G (Deck Trek bonus 2 and Congo Carnage)

Letter G (Rope Ravine)

Letter G (Tyre Trail)

Letter G (Riggin' Rumble)

Letter G (Arctic Barrel Arsenal)

Letter G (Tricky Temple)

Letter G (Kremlantis Kaos)

Letter G (Reef Rampage and Pot Hole Panic bonus 2)

Letter G (Snake Charmer's Challenge and Mountain Mayhem bonus 2)

Letter G (Chomp's Coliseum)

Letter G (Nautilus Chase)

Letter G (Swirlwind Storm)

Letter G (Track Attack)

Letter G (Spiky Tyre Trail)

Letter G (Sky High Caper)

Letter G (Landslide Leap bonus 2 and Button Barrel Blast)

Letter G (Collapsing Clouds)

Letter G (Construction Site Fight)

Letter G (Kong Krazy)

Letter G (Balloon Barrage)

Letter G (Skyscraper Caper)

Letter G (Oil Drum Slum)

Life Balloon (Jungle Jaunt bonus 2)

Life Balloon (Freezing Fun and Freezing Fun bonus 1)

Life Balloon (Simian Swing and Mountain Mayhem bonus 1)

Life Balloon (Deck Trek)

Life Balloon (Tyre Trail and Swirlwind Storm bonus 1)

Life Balloon (Riggin' Rumble)

Life Balloon (Tricky Temple)

Life Balloon (Spiky Tyre Trail)

Life Balloon (Balloon Barrage bonus 1)

Life Balloon (Skyscraper Caper)

Life Balloon (Oil Drum Slum bonus 1)

Life Balloon (Oil Drum Slum bonus 2)


Objects[edit]
Game Boy[edit]

Animal Crate

Cloud

Continue Point

Continue Point

Elevator

Elevator

Explosive Barrel

Sponge

Tire


Super Game Boy[edit]

Animal Crate (Jungle Jaunt)

Animal Crate (Deck Trek bonus 2)

Animal Crate (Tricky Temple bonus 1)

Animal Crate (Pot Hole Panic bonus 1)

Animal Crate (Mountain Mayhem)

Animal Crate (Mountain Mayhem bonus 1)

Animal Crate (Landslide Leap bonus 1)

Animal Crate (Collapsing Clouds)

Balloon (Construction Site Fight)

Barrel (Jungle Jaunt)

Barrel (Freezing Fun)

Barrel (Tricky Temple)

Barrel Cannon (Freezing Fun)

Barrel Cannon (Simian Swing bonus 2, Tyre Trail bonus 1, and Fast Barrel Blast bonus 1)

Barrel Cannon (Rope Ravine)

Barrel Cannon (Rope Ravine bonus 1, Congo Carnage bonus 2, and Collapsing Clouds bonus 2)

Barrel Cannon (Arctic Barrel Arsenal)

Barrel Cannon (Arctic Barrel Arsenal bonus 1)

Barrel Cannon (Spiky Tyre Trail)

Barrel Cannon (Spiky Tyre Trail bonus 2)

Barrel Cannon (Kong Krazy)

Barrel Cannon (Fast Barrel Blast)

Blast Barrel (Freezing Fun and Riggin' Rumble bonus 1)

Blast Barrel (Simian Swing)

Blast Barrel (Deck Trek)

Blast Barrel (Deck Trek bonus 1)

Blast Barrel (Rope Ravine and Oil Drum Slum bonus 2)

Blast Barrel (Tyre Trail, Swirlwind Storm bonus 1, and Landslide Leap bonus 1)

Blast Barrel (Tyre Trail bonus 3)

Blast Barrel (Riggin' Rumble and Kong Krazy bonus 1)

Blast Barrel (Congo Carnage)

Blast Barrel (Congo Carnage bonus 1 and Balloon Barrage bonus 1)

Blast Barrel (Arctic Barrel Arsenal)

Blast Barrel (Arctic Barrel Arsenal bonus 2)

Blast Barrel (Tricky Temple)

Blast Barrel (Tricky Temple bonus 1)

Blast Barrel (Snake Charmer's Challenge bonus 1 and Skyscraper Caper)

Blast Barrel (Pot Hole Panic)

Blast Barrel (Pot Hole Panic bonus 1 and Landslide Leap)

Blast Barrel (Pot Hole Panic bonus 2)

Blast Barrel (Mountain Mayhem)

Blast Barrel (Mountain Mayhem bonus 2)

Blast Barrel (Track Attack)

Blast Barrel (Track Attack bonus 2)

Blast Barrel (Spiky Tyre Trail)

Blast Barrel (Sky High Caper)

Blast Barrel (Landslide Leap bonus 2 and Button Barrel Blast)

Blast Barrel (Collapsing Clouds)

Blast Barrel (Collapsing Clouds bonus 1)

Blast Barrel (Construction Site Fight)

Blast Barrel (Construction Site Fight bonus 1 and Balloon Barrage)

Blast Barrel (Construction Site Fight bonus 2)

Blast Barrel (Balloon Barrage bonus 2)

Blast Barrel (Fast Barrel Blast)

Blast Barrel (Oil Drum Slum)

Boulder (Gangplank Galleon Ahoy!)

Boulder (Kremlantis)

Buddy Barrel (Jungle Jaunt)

Buddy Barrel (Freezing Fun)

Buddy Barrel (Simian Swing)

Buddy Barrel (Deck Trek)

Buddy Barrel (Rope Ravine)

Buddy Barrel (Tyre Trail)

Buddy Barrel (Riggin' Rumble)

Buddy Barrel (Congo Carnage)

Buddy Barrel (Arctic Barrel Arsenal)

Buddy Barrel (Tricky Temple)

Buddy Barrel (Kremlantis Kaos)

Buddy Barrel (Reef Rampage)

Buddy Barrel (Snake Charmer's Challenge)

Buddy Barrel (Chomp's Coliseum)

Buddy Barrel (Nautilus Chase)

Buddy Barrel (Swirlwind Storm)

Buddy Barrel (Pot Hole Panic)

Buddy Barrel (Mountain Mayhem)

Buddy Barrel (Track Attack)

Buddy Barrel (Spiky Tyre Trail)

Buddy Barrel (Sky High Caper)

Buddy Barrel (Landslide Leap)

Buddy Barrel (Collapsing Clouds)

Buddy Barrel (Construction Site Fight)

Buddy Barrel (Kong Krazy)

Buddy Barrel (Balloon Barrage)

Buddy Barrel (Fast Barrel Blast)

Buddy Barrel (Skyscraper Caper)

Buddy Barrel (Button Barrel Blast)

Buddy Barrel (Oil Drum Slum)

Button (Simian Swing bonus 2, Tyre Trail bonus 1, and Fast Barrel Blast bonus 1)

Button (Rope Ravine bonus 1, Congo Carnage bonus 2, and Collapsing Clouds bonus 2)

Button (Arctic Barrel Arsenal bonus 1)

Button (Spiky Tyre Trail bonus 2)

Button (Button Barrel Blast)

Cloud (Simian Swing bonus 1 and Riggin' Rumble)

Cloud (Mountain Mayhem bonus 1)

Cloud (Track Attack)

Cloud (Collapsing Clouds)

Cloud (Button Barrel Blast bonus 1)

Continue Point (Jungle Jaunt)

Continue Point (Jungle Jaunt)

Continue Point (Freezing Fun)

Continue Point (Freezing Fun)

Continue Point (Simian Swing)

Continue Point (Simian Swing)

Continue Point (Deck Trek)

Continue Point (Deck Trek)

Continue Point (Rope Ravine)

Continue Point (Rope Ravine)

Continue Point (Tyre Trail)

Continue Point (Tyre Trail)

Continue Point (Riggin' Rumble)

Continue Point (Riggin' Rumble)

Continue Point (Congo Carnage)

Continue Point (Congo Carnage)

Continue Point (Arctic Barrel Arsenal)

Continue Point (Arctic Barrel Arsenal)

Continue Point (Tricky Temple)

Continue Point (Tricky Temple)

Continue Point (Kremlantis Kaos)

Continue Point (Kremlantis Kaos)

Continue Point (Reef Rampage)

Continue Point (Reef Rampage)

Continue Point (Snake Charmer's Challenge)

Continue Point (Snake Charmer's Challenge)

Continue Point (Chomp's Coliseum)

Continue Point (Chomp's Coliseum)

Continue Point (Nautilus Chase)

Continue Point (Nautilus Chase)

Continue Point (Swirlwind Storm)

Continue Point (Swirlwind Storm)

Continue Point (Pot Hole Panic)

Continue Point (Pot Hole Panic)

Continue Point (Mountain Mayhem)

Continue Point (Mountain Mayhem)

Continue Point (Track Attack)

Continue Point (Track Attack)

Continue Point (Spiky Tyre Trail)

Continue Point (Spiky Tyre Trail)

Continue Point (Sky High Caper)

Continue Point (Sky High Caper)

Continue Point (Landslide Leap)

Continue Point (Landslide Leap)

Continue Point (Collapsing Clouds)

Continue Point (Collapsing Clouds)

Continue Point (Construction Site Fight)

Continue Point (Construction Site Fight)

Continue Point (Kong Krazy)

Continue Point (Kong Krazy)

Continue Point (Balloon Barrage)

Continue Point (Balloon Barrage)

Continue Point (Fast Barrel Blast)

Continue Point (Fast Barrel Blast)

Continue Point (Skyscraper Caper)

Continue Point (Skyscraper Caper)

Continue Point (Button Barrel Blast)

Continue Point (Button Barrel Blast)

Continue Point (Oil Drum Slum)

Continue Point (Oil Drum Slum)

Elevator (Riggin' Rumble bonus 2)

Elevator (Snake Charmer's Challenge bonus 1)

Elevator (Pot Hole Panic)

Elevator (Track Attack)

Elevator (Spiky Tyre Trail)

Elevator (Sky High Caper)

Elevator (Construction Site Fight bonus 1)

Elevator (Construction Site Fight bonus 2)

End of stage (Jungle Jaunt)

End of stage (Freezing Fun)

End of stage (Simian Swing)

End of stage (Deck Trek)

End of stage (Rope Ravine)

End of stage (Tyre Trail)

End of stage (Riggin' Rumble)

End of stage (Congo Carnage)

End of stage (Arctic Barrel Arsenal)

End of stage (Tricky Temple)

End of stage (Kremlantis Kaos)

End of stage (Reef Rampage)

End of stage (Snake Charmer's Challenge)

End of stage (Chomp's Coliseum)

End of stage (Nautilus Chase)

End of stage (Swirlwind Storm)

End of stage (Pot Hole Panic)

End of stage (Mountain Mayhem)

End of stage (Track Attack)

End of stage (Spiky Tyre Trail)

End of stage (Sky High Caper)

End of stage (Landslide Leap)

End of stage (Collapsing Clouds)

End of stage (Construction Site Fight)

End of stage (Kong Krazy)

End of stage (Balloon Barrage)

End of stage (Fast Barrel Blast)

End of stage (Skyscraper Caper)

End of stage (Button Barrel Blast)

End of stage (Oil Drum Slum)

Explosive Barrel (Deck Trek)

Explosive Barrel (Snake Charmer's Challenge)

Explosive Barrel (Chomp's Coliseum)

KONG button (Kong Krazy)

Rope (Jungle Jaunt)

Rope (Simian Swing)

Rope (Rope Ravine)

Rope (Tyre Trail)

Rope (Riggin' Rumble)

Rope (Congo Carnage)

Rope (Snake Charmer's Challenge)

Rope (Swirlwind Storm)

Rope (Mountain Mayhem)

Rope (Landslide Leap)

Rope (Kong Krazy)

Rope (Fast Barrel Blast)

Rope (Oil Drum Slum)

Sponge (Seabed Showdown)

Steel keg (Congo Carnage)

Steel keg (Spiky Tyre Trail)

Steel keg (Balloon Barrage)

Tire (Freezing Fun)

Tire (Tyre Trail and Swirlwind Storm bonus 1)

Tire (Riggin' Rumble)

Tire (Arctic Barrel Arsenal)

Tire (Tricky Temple)

Tire (Snake Charmer's Challenge)

Tire (Swirlwind Storm)

Tire (Pot Hole Panic)

Tire (Mountain Mayhem)

Tire (Sky High Caper)

Tire (Landslide Leap)

Tire (Landslide Leap)

Tire (Construction Site Fight)

Tire (Kong Krazy)

Tire (Kong Krazy)

Tire (Balloon Barrage)

Tire (Fast Barrel Blast)

Tire (Fast Barrel Blast)

Tire (Fast Barrel Blast bonus 2)

Tire (Oil Drum Slum)

Tire (Oil Drum Slum)

TNT Barrel (Deck Trek)

TNT Barrel (Snake Charmer's Challenge)

TNT Barrel (Mountain Mayhem)

TNT Barrel (Landslide Leap)

TNT Barrel (Kong Krazy)

TNT Barrel (Oil Drum Slum)


Screenshots[edit]
NOTE: Most screenshots shown below were taken using Super Game Boy rather than a Game Boy because this game is enhanced. The first few would be what would normally display while most of the remaining screenshots had the border cropped out. Most of the cropped images are likely what a Super Game Boy would produce by default.
Game Boy[edit]
Title screen
Game Over screen


Super Game Boy[edit]
Title screen
Japanese title screen
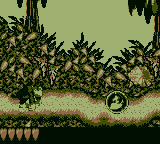
The game's first level.
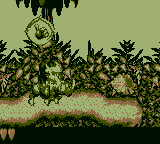
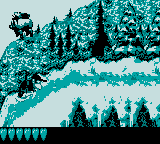
Diddy Kong in Freezing Fun.
The fourth level, Deck Trek
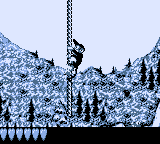
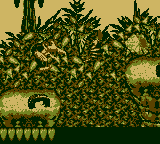
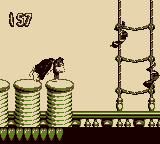
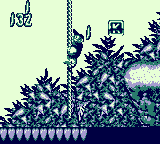
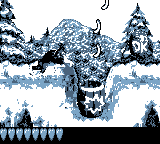
Donkey Kong in Tricky Temple
Another level, Reef Rampage
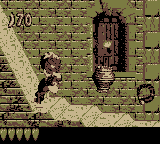
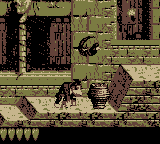
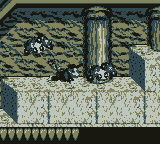
Diddy Kong encounters two Flappers
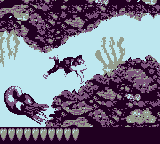
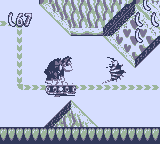
Donkey Kong in Track Attack.
Diddy Kong in the cave level, Spiky Tire Trail.
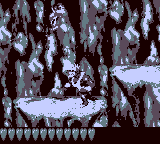
Donkey Kong jumps over a Krusha.
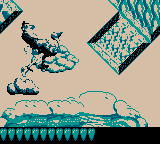
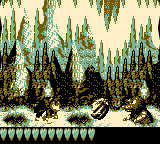

Donkey Kong in the seemingly-misnamed level, Balloon Barrage.
A journey through one of the game's blimp levels.
Diddy Kong in the seemingly-misnamed level, Construction Site Fight.

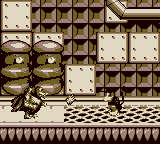


Commercials[edit]
Commercial
Australian Gold Super Pack bundle commercial


Box art[edit]
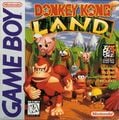
North American box art (front)
North American box art (back)
North American box art (Player's Choice)
Early North American box art (Player's Choice)
European box art
European box art (Nintendo Classics)

German box art
German box art (Nintendo Classics)
French and Dutch box art
Australian box art
Japanese box art (front)
Japanese box art (back)
Australian Game Boy Pocket "Gold Super Pack" bundle

Nintendo 3DS Virtual Console icon


.jpg)


Miscellaneous[edit]
Germany print ad

| Donkey Kong Land | ||
|---|---|---|
| Playable characters | Diddy Kong • Donkey Kong | |
| Items and objects | Banana • Banana Bunch • Barrel • Blast Barrel • Buddy Barrel • Continue Point • End of stage • KONG Letters • Kong Token • Steel keg • Life Balloon • TNT Barrel | |
| Animal Friends | Expresso • Rambi | |
| Bosses | Wild Sting • Giant Clam • Hard Hat • King K. Rool | |
| Enemies | Army • Basket of snakes • Chomps • Clambo • Fangfish • Flapper • Gloop • Gnawty • Hogwash the Flying Pig • Klaptrap • Kritter • Krusha • Mincer • Mini-Necky • Necky • Nemo • Slippa • Swirlwind • Zinger | |
| Levels | Gangplank Galleon Ahoy! | Jungle Jaunt • Freezing Fun • Simian Swing • Deck Trek • Rope Ravine • Tire Trail • Riggin' Rumble • Congo Carnage • Arctic Barrel Arsenal • Wild Sting Fling |
| Kremlantis | Tricky Temple • Kremlantis Kaos • Reef Rampage • Snake Charmer's Challenge • Chomp's Coliseum • Nautilus Chase • Swirlwind Storm • Seabed Showdown | |
| Monkey Mountains & Chimpanzee Clouds | Pot Hole Panic • Mountain Mayhem • Track Attack • Spiky Tire Trail • Sky High Caper • Landslide Leap • Collapsing Clouds • Mad Mole Holes | |
| Big Ape City | Construction Site Fight • Kong Krazy • Balloon Barrage • Fast Barrel Blast • Skyscraper Caper • Button Barrel Blast • Oil Drum Slum • K. Rool's Kingdom | |