Portrait ghost: Difference between revisions
Tag: Mobile edit |
|||
| Line 32: | Line 32: | ||
!Story requirement | !Story requirement | ||
|- | |- | ||
|[[File:Neville Frame.png]] | |[[File:Neville Frame.png|100px]] | ||
[[Neville]], the Bookish Father | [[Neville]], the Bookish Father | ||
|[[Study (Luigi's Mansion)|Study]] | |[[Study (Luigi's Mansion)|Study]] | ||
| Line 39: | Line 39: | ||
|Yes | |Yes | ||
|- | |- | ||
|[[File:Lydia Frame.png]] | |[[File:Lydia Frame.png|100px]] | ||
[[Lydia]], the Mirror Gazing Mother | [[Lydia]], the Mirror Gazing Mother | ||
|[[Master Bedroom (Luigi's Mansion)|Master Bedroom]] | |[[Master Bedroom (Luigi's Mansion)|Master Bedroom]] | ||
| Line 46: | Line 46: | ||
|Yes | |Yes | ||
|- | |- | ||
|[[File:Chauncey Frame.png]] | |[[File:Chauncey Frame.png|100px]] | ||
[[Chauncey]], the Spoiled Baby (boss) | [[Chauncey]], the Spoiled Baby (boss) | ||
|[[Nursery]] | |[[Nursery]] | ||
| Line 63: | Line 63: | ||
!Story requirement | !Story requirement | ||
|- | |- | ||
|[[File:The Floating Whirlindas Frame.png]] | |[[File:The Floating Whirlindas Frame.png|100px]] | ||
[[The Floating Whirlindas]], the Dancing Couple | [[The Floating Whirlindas]], the Dancing Couple | ||
|[[Ball Room]] | |[[Ball Room]] | ||
| Line 71: | Line 71: | ||
|Yes | |Yes | ||
|- | |- | ||
|[[File:Shivers Frame.png]] | |[[File:Shivers Frame.png|100px]] | ||
[[Shivers]], the Wandering Butler | [[Shivers]], the Wandering Butler | ||
|[[Butler's Room]] | |[[Butler's Room]] | ||
| Line 78: | Line 78: | ||
|Yes | |Yes | ||
|- | |- | ||
|[[File:Melody Pianissima Frame.png]] | |[[File:Melody Pianissima Frame.png|100px]] | ||
[[Melody Pianissima]], the Beautiful Pianist | [[Melody Pianissima]], the Beautiful Pianist | ||
|[[Conservatory (Luigi's Mansion)|Conservatory]] | |[[Conservatory (Luigi's Mansion)|Conservatory]] | ||
| Line 85: | Line 85: | ||
|Yes | |Yes | ||
|- | |- | ||
|[[File:Mr. Luggs Frame.png]] | |[[File:Mr. Luggs Frame.png|100px]] | ||
[[Mr. Luggs]], the Glutton | [[Mr. Luggs]], the Glutton | ||
|[[Dining Room (Luigi's Mansion)|Dining Room]] | |[[Dining Room (Luigi's Mansion)|Dining Room]] | ||
| Line 92: | Line 92: | ||
|No | |No | ||
|- | |- | ||
|[[File:Spooky Frame.png]] | |[[File:Spooky Frame.png|100px]] | ||
[[Spooky (character)|Spooky]], the Hungry Guard Dog | [[Spooky (character)|Spooky]], the Hungry Guard Dog | ||
|[[Boneyard]] | |[[Boneyard]] | ||
| Line 99: | Line 99: | ||
|Yes | |Yes | ||
|- | |- | ||
|[[File:Bogmire Frame.png]] | |[[File:Bogmire Frame.png|100px]] | ||
[[Bogmire]], the Cemetery Shadow ([[NGC]])/The black shadow of the graveyard ([[N3DS]]) (boss) | [[Bogmire]], the Cemetery Shadow ([[NGC]])/The black shadow of the graveyard ([[N3DS]]) (boss) | ||
|[[Graveyard]] | |[[Graveyard]] | ||
| Line 117: | Line 117: | ||
!Story requirement | !Story requirement | ||
|- | |- | ||
|[[File:Biff Atlas Frame.png]] | |[[File:Biff Atlas Frame.png|100px]] | ||
[[Biff Atlas]], the Bodybuilder | [[Biff Atlas]], the Bodybuilder | ||
|[[Rec Room]] | |[[Rec Room]] | ||
| Line 124: | Line 124: | ||
|No | |No | ||
|- | |- | ||
|[[File:Miss Petunia Frame.png]] | |[[File:Miss Petunia Frame.png|100px]] | ||
[[Miss Petunia]], the Bathing Beauty | [[Miss Petunia]], the Bathing Beauty | ||
|[[Bathroom (2F)]] | |[[Bathroom (2F)]] | ||
| Line 131: | Line 131: | ||
|Yes | |Yes | ||
|- | |- | ||
|[[File:Nana Frame.png]] | |[[File:Nana Frame.png|100px]] | ||
[[Nana]], the Scarf-Knitting Granny | [[Nana]], the Scarf-Knitting Granny | ||
|[[Nana's Room]] | |[[Nana's Room]] | ||
| Line 138: | Line 138: | ||
|Yes | |Yes | ||
|- | |- | ||
|[[File:Slim Bankshot Frame.png]] | |[[File:Slim Bankshot Frame.png|100px]] | ||
[[Slim Bankshot]], the Lonely Poolshark ([[NGC]])/The lone competitor ([[N3DS]]) | [[Slim Bankshot]], the Lonely Poolshark ([[NGC]])/The lone competitor ([[N3DS]]) | ||
|[[Billiards Room]] | |[[Billiards Room]] | ||
| Line 145: | Line 145: | ||
|No | |No | ||
|- | |- | ||
|[[File:Henry and Orville Frame.png]] | |[[File:Henry and Orville Frame.png|100px]] | ||
[[Henry and Orville]], the Twin Brothers ([[NGC]])/The shy twin brothers ([[N3DS]]) | [[Henry and Orville]], the Twin Brothers ([[NGC]])/The shy twin brothers ([[N3DS]]) | ||
|[[The Twins' Room]] | |[[The Twins' Room]] | ||
| Line 153: | Line 153: | ||
|Yes | |Yes | ||
|- | |- | ||
|[[File:Madame Clairvoya Frame.png]] | |[[File:Madame Clairvoya Frame.png|100px]] | ||
[[Madame Clairvoya]], the Freaky Fortune-Teller | [[Madame Clairvoya]], the Freaky Fortune-Teller | ||
|[[Fortune-teller's Room]] | |[[Fortune-teller's Room]] | ||
| Line 160: | Line 160: | ||
|Yes | |Yes | ||
|- | |- | ||
|[[File:Boolossus Frame.png]] | |[[File:Boolossus Frame.png|100px]] | ||
[[Boolossus]], the Jumbo Ghost (boss) | [[Boolossus]], the Jumbo Ghost (boss) | ||
|[[Balcony (3F)]] | |[[Balcony (3F)]] | ||
| Line 177: | Line 177: | ||
!Story requirement | !Story requirement | ||
|- | |- | ||
|[[File:Uncle Grimmly Frame.png]] | |[[File:Uncle Grimmly Frame.png|100px]] | ||
[[Uncle Grimmly]], Hermit of the Darkness ([[NGC]])/The hermit of the darkness ([[N3DS]]) | [[Uncle Grimmly]], Hermit of the Darkness ([[NGC]])/The hermit of the darkness ([[N3DS]]) | ||
|[[Wardrobe Room]] | |[[Wardrobe Room]] | ||
| Line 184: | Line 184: | ||
|Yes | |Yes | ||
|- | |- | ||
|[[File:Clockwork Soldiers Frame.png]] | |[[File:Clockwork Soldiers Frame.png|100px]] | ||
The [[Clockwork Soldiers]], the Toy Platoon | The [[Clockwork Soldiers]], the Toy Platoon | ||
|[[Clockwork Room]] | |[[Clockwork Room]] | ||
| Line 194: | Line 194: | ||
|Yes | |Yes | ||
|- | |- | ||
|[[File:Sue Pea Frame.png]] | |[[File:Sue Pea Frame.png|100px]] | ||
[[Sue Pea]], the Dozing Girl | [[Sue Pea]], the Dozing Girl | ||
|[[Guest Room]] | |[[Guest Room]] | ||
| Line 201: | Line 201: | ||
|No | |No | ||
|- | |- | ||
|[[File:Jarvis Frame.png]] | |[[File:Jarvis Frame.png|100px]] | ||
[[Jarvis]], the Jar Collector ([[NGC]])/The pot collector ([[N3DS]]) | [[Jarvis]], the Jar Collector ([[NGC]])/The pot collector ([[N3DS]]) | ||
|[[Ceramics Studio]] | |[[Ceramics Studio]] | ||
| Line 208: | Line 208: | ||
|No | |No | ||
|- | |- | ||
|[[File:Sir Weston Frame.png]] | |[[File:Sir Weston Frame.png|100px]] | ||
[[Sir Weston]], the Chilly Climber | [[Sir Weston]], the Chilly Climber | ||
|[[Cold Storage]] | |[[Cold Storage]] | ||
| Line 215: | Line 215: | ||
|Yes | |Yes | ||
|- | |- | ||
|[[File:Vincent Van Gore Frame.png]] | |[[File:Vincent Van Gore Frame.png|100px]] | ||
[[Vincent Van Gore]], the Starving Artist | [[Vincent Van Gore]], the Starving Artist | ||
|[[The Artist's Studio]] | |[[The Artist's Studio]] | ||
| Line 222: | Line 222: | ||
|Yes | |Yes | ||
|- | |- | ||
|[[File:King Boo Frame.png]] | |[[File:King Boo Frame.png|100px]] | ||
[[Bowser]] and [[King Boo]], the Dastardly Duo ([[NGC]])/King of Boos ([[N3DS]]) (final boss) | [[Bowser]] and [[King Boo]], the Dastardly Duo ([[NGC]])/King of Boos ([[N3DS]]) (final boss) | ||
|[[Roof (Luigi's Mansion)|Roof]]/[[Secret Altar]] | |[[Roof (Luigi's Mansion)|Roof]]/[[Secret Altar]] | ||
Revision as of 02:42, May 4, 2022

A portrait ghost (sometimes capitalized[1]) or gallery ghost[2] is a ghost that was once a portrait in the game Luigi's Mansion.
History
According to Professor E. Gadd, the first twenty one portrait ghosts and Boolossus (No. 22)[3] were released from their paintings by Boos under the command of King Boo. Luigi has to vacuum up all of the portrait ghosts (except for a few "optional ghosts" like Mr. Luggs) using the Poltergust 3000. Captured portrait ghosts are returned to their paintings via the Ghost Portrificationizer. The frame and the style of the portraits change depending on how many pearls Luigi acquires during the battle with the ghosts.
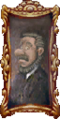
Sepia tone pictures can be found in many rooms of the mansion. These pictures look similar to each ghost that inhabits the room they are in, suggesting these pictures may be depicting these ghosts when they were alive. Pictures resembling Neville, Lydia, Nana, Vincent Van Gore, Spooky, Chauncey, Mr. Whirlinda, Slim Bankshot, Henry and Orville, and Sue Pea can be seen in the Parlor, Study, Nursery, Ball Room, Billiards Room, Twins' Room, and Guest Room.
All of the portraits were given new designs in the Nintendo 3DS remake.
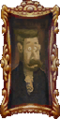
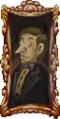
The figure resembling Neville
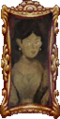
The figure resembling Lydia
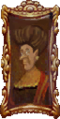
The figure resembling Nana
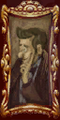
The figure resembling Vincent Van Gore

The figure resembling Spooky

The figure resembling Chauncey
The figure resembling Mr. Whirlinda
The figure resembling Slim Bankshot

The figure resembling Henry or Orville

The figure resembling Sue Pea


List of portrait ghosts
Area One
| Name | Location | Life | Heart quote | Story requirement |
|---|---|---|---|---|
|
Neville, the Bookish Father |
Study | 100 | Ho ho ho ho... Go ahead, try to find me. I can see you, but you cannot see me, ho ho ho ho... | Yes |

Lydia, the Mirror Gazing Mother |
Master Bedroom | 100 | Isn't my hair just gorgeous? Of course, I do spend a lot of time on it. I was so bored cooped up in that painting... Now I spend all my time in front of the mirror. It seems to scare people, though, so everything is coming up roses! | Yes |

Chauncey, the Spoiled Baby (boss) |
Nursery | 100 | Horsey... rocky... horsey... (while sleeping)/Stay away! (while attacking) | Yes |
Area Two
| Name | Location | Life | Heart quote | Story requirement |
|---|---|---|---|---|

The Floating Whirlindas, the Dancing Couple |
Ball Room | 100 | Male: So, you can see me? Well, that may be, but you will never find my weakness!
Female:I don't think this gent can even see us! (NGC)/Let us show him how we dance... (N3DS) |
Yes |

Shivers, the Wandering Butler |
Butler's Room | 100 | Ah, the beautiful Melody will not even give me the time of day... What must I do to win her? Passion! Yes! That's it! I will show her I burn for her! My unbridled passion will scorch her soul! (before lighting his candelabra)/The burning flames of unbridled passion! Or... wait, how about the passionate flames of unbridled burning? (after lighting his candelabra) | Yes |

Melody Pianissima, the Beautiful Pianist |
Conservatory | 100 | Hmph! This ragamuffin looks as if he couldn't play a note! (default)/Show him the power of genius, my music sheets! (while attacking) | Yes |

Mr. Luggs, the Glutton |
Dining Room | 100 | No one can see me in this darkness! No one no one no one noooooooooo-one!/It's so bright here. Everyone can see me eat! ...I don't care, I'll just keep eating! (N3DS only, after lighting the candles) | No |

Spooky, the Hungry Guard Dog |
Boneyard | 100 | Woof woof woof! | Yes |

Bogmire, the Cemetery Shadow (NGC)/The black shadow of the graveyard (N3DS) (boss) |
Graveyard | 100 | N/A | Yes |
Note: Although Luigi first meets Madame Clairvoya in Area Two, he captures her after he begins Area Three.
Area Three
| Name | Location | Life | Heart quote | Story requirement |
|---|---|---|---|---|

Biff Atlas, the Bodybuilder |
Rec Room | 100 | Look at this buffness! I'm huge! How'd you like to be my punching bag, weakling? | No |

Miss Petunia, the Bathing Beauty |
Bathroom (2F) | 100 | Ahh...a piping hot shower! | Yes |

Nana, the Scarf-Knitting Granny |
Nana's Room | 100 | Hey, it's a funny man. Should I play with him? | Yes |

Slim Bankshot, the Lonely Poolshark (NGC)/The lone competitor (N3DS) |
Billiards Room | 100 | You want some of this? | No |

Henry and Orville, the Twin Brothers (NGC)/The shy twin brothers (N3DS) |
The Twins' Room | 200 (100 each) | Henry: SMASH!
Orville: Guh-waaaa! |
Yes |

Madame Clairvoya, the Freaky Fortune-Teller |
Fortune-teller's Room | 100 | Destiny chooses our paths... | Yes |

Boolossus, the Jumbo Ghost (boss) |
Balcony (3F) | 15 Boos | N/A | Yes |
Area Four
| Name | Location | Life | Heart quote | Story requirement |
|---|---|---|---|---|

Uncle Grimmly, Hermit of the Darkness (NGC)/The hermit of the darkness (N3DS) |
Wardrobe Room | 100 | Nobody will find me because I'm old, cranky and, by gum, people are afraid of me! | Yes |

The Clockwork Soldiers, the Toy Platoon |
Clockwork Room | 300 (100 each) | Green: The valve... The valve...
Blue: Squeak squeak Pink: Heyyyyy, stooooppp lookkkinnnggg at meeee! |
Yes |

Sue Pea, the Dozing Girl |
Guest Room | 100 | I won't wet the bed... I promise. | No |

|
Ceramics Studio | 100 | Go back to the woods, boyo! (N3DS only) | No |

Sir Weston, the Chilly Climber |
Cold Storage | 100 | Darn, I love the cold, I mean, I just plain love it! | Yes |

Vincent Van Gore, the Starving Artist |
The Artist's Studio | 100 | Now does he grasp zee power of my creations? | Yes |

Bowser and King Boo, the Dastardly Duo (NGC)/King of Boos (N3DS) (final boss) |
Roof/Secret Altar | 500 | N/A | Yes |
Profiles
Luigi's Mansion
- Instruction booklet description: "I collected famous ghosts from all over the world and turned them into paintings, but those darn Boos went and turned them all back into ghosts again! You've got to catch those ghosts so I can turn them back into paintings."
Names in other languages
| Language | Name | Meaning |
|---|---|---|
| Japanese | 絵画オバケ Kaiga obake |
Painting ghost |
| German | Gemäldegeister |
Painting ghost |
| Italian | Fantasma ritratto |
Portrait ghost |
| Spanish (NOA) | Espíritu de lo cuadro |
Spirit of the painting |
| Spanish (NOE) | Espíritu de cuadro |
Painting spirit |
Trivia
- In the Mario Kart series, some of the portrait ghosts reappear in GCN Luigi's Mansion and DS Luigi's Mansion.
References
- ^ Luigi's Mansion instruction manual, page 25.
- ^ Luigi's Mansion Nintendo Power Player's Guide, various pages
- ^ https://youtu.be/SUAwsMK17Vg?t=540
Template:Luigi's Mansion Ghosts