Gallery:WarioWare: Smooth Moves: Difference between revisions
(→Blog posts: Altered some captions to be more accurate) |
Green Star (talk | contribs) (→Mysterious Form Baton Found!: (Fixed disambiguation link.)) |
||
| (36 intermediate revisions by 16 users not shown) | |||
| Line 1: | Line 1: | ||
{{italic title}} | {{italic title}} | ||
This is a gallery of images for the game ''[[WarioWare: Smooth Moves]]''. | This is a gallery of images for the game ''[[WarioWare: Smooth Moves]]''. | ||
==Logos== | ==Logos== | ||
<gallery widths="240"> | <gallery widths="240"> | ||
| Line 11: | Line 10: | ||
==Artwork== | ==Artwork== | ||
===Characters=== | |||
<gallery> | <gallery> | ||
Wario WarioWareWii.png|[[Wario]] | Wario WarioWareWii.png|[[Wario]] | ||
Wariowii.jpg|Wario with the Form Baton | Wariowii.jpg|Wario with the Form Baton | ||
Smooth Moves Website.gif|Wario and other characters | |||
Mona WWSM art.png|[[Mona]] | Mona WWSM art.png|[[Mona]] | ||
WarioWare - Smooth Moves - Kat and Ana.svg|[[Kat | WarioWare - Smooth Moves - Kat and Ana.svg|[[Kat & Ana]] | ||
WarioWare - Smooth Moves - Young Cricket.svg|[[ | WarioWare - Smooth Moves - Young Cricket.svg|[[Young Cricket]] | ||
WarioWare - Smooth Moves - Master Mantis.svg|[[ | WarioWare - Smooth Moves - Master Mantis.svg|[[Master Mantis]] | ||
Jimmy T WarioWare Smooth Moves.png|[[Jimmy T|Jimmy T.]] | Jimmy T WarioWare Smooth Moves.png|[[Jimmy T|Jimmy T.]] | ||
AshleySmooth.png|[[ | AshleySmooth.png|[[Ashley]] | ||
Red WarioWare Smooth Moves.png|[[ | Red WarioWare Smooth Moves.png|[[Red (WarioWare series)|Red]] | ||
WarioWare - Smooth Moves - Dribble.svg|[[Dribble]] | WarioWare - Smooth Moves - Dribble.svg|[[Dribble & Spitz|Dribble]] | ||
WarioWare - Smooth Moves - Spitz.svg|[[Spitz]] | WarioWare - Smooth Moves - Spitz.svg|[[Dribble & Spitz|Spitz]] | ||
Penny Crygor.png|[[Penny]] | Penny Crygor.png|[[Penny]] | ||
WarioWare - Smooth Moves - 9-Volt.svg|[[9-Volt]] | WarioWare - Smooth Moves - 9-Volt.svg|[[9-Volt]] | ||
| Line 29: | Line 30: | ||
Orbulon WarioWare Smooth Moves.png|[[Orbulon]] | Orbulon WarioWare Smooth Moves.png|[[Orbulon]] | ||
Dr. Crygor WarioWare Smooth Moves.png|[[Dr. Crygor]] | Dr. Crygor WarioWare Smooth Moves.png|[[Dr. Crygor]] | ||
CrygorSmooth.jpg|Dr. Crygor<br | CrygorSmooth.jpg|Dr. Crygor<br>(Penny's stage) | ||
Mike WarioWare Smooth Moves.png|[[Mike]] | Mike WarioWare Smooth Moves.png|[[Mike]] | ||
Wariowarebomb.jpg|[[Bomb (WarioWare series)|Bomb]] | Wariowarebomb.jpg|[[Bomb (WarioWare series)|Bomb]] | ||
| Line 35: | Line 36: | ||
WWSM Diamond City Map.png|Map of [[Diamond City]] | WWSM Diamond City Map.png|Map of [[Diamond City]] | ||
</gallery> | </gallery> | ||
===Japanese website blog=== | ===Japanese website blog=== | ||
====Characters==== | ====Characters==== | ||
| Line 41: | Line 41: | ||
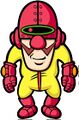
WWSM Blog Wario.png|[[Wario]] | WWSM Blog Wario.png|[[Wario]] | ||
WWSM Blog Mona.png|[[Mona]] | WWSM Blog Mona.png|[[Mona]] | ||
WWSM Blog Kat.png|[[Kat | WWSM Blog Kat.png|[[Kat & Ana|Kat]] | ||
WWSM Blog Ana.png|[[Kat | WWSM Blog Ana.png|[[Kat & Ana|Ana]] | ||
WWSM Blog Young Cricket.png|[[ | WWSM Blog Young Cricket.png|[[Young Cricket]] | ||
WWSM Blog Master Mantis.png|[[ | WWSM Blog Master Mantis.png|[[Master Mantis]] | ||
WWSM Blog Jimmy T.png|[[Jimmy T|Jimmy T.]] | WWSM Blog Jimmy T.png|[[Jimmy T|Jimmy T.]] | ||
WWSM Blog Ashley.png|[[ | WWSM Blog Ashley.png|[[Ashley]] | ||
WWSM Blog Red.png|[[ | WWSM Blog Red.png|[[Red (WarioWare series)|Red]] | ||
WWSM Blog Dribble.png|[[Dribble | WWSM Blog Dribble.png|[[Dribble & Spitz|Dribble]] | ||
WWSM Blog Spitz.png|[[Dribble | WWSM Blog Spitz.png|[[Dribble & Spitz|Spitz]] | ||
WWSM Blog Penny.png|[[Penny]] | WWSM Blog Penny.png|[[Penny]] | ||
WWSM Blog 9-Volt.png|[[9-Volt]] | WWSM Blog 9-Volt.png|[[9-Volt]] | ||
| Line 59: | Line 59: | ||
</gallery> | </gallery> | ||
====Blog | ====Blog post images==== | ||
<gallery> | <gallery widths=160 heights=120> | ||
WWSM Blog Wario 1.jpg|[[Wario]] and [[Mona]] in a board room | WWSM Blog Wario 1.jpg|[[Wario]] and [[Mona]] in a board room | ||
WWSM Blog Wario 2.jpg|Wario performing the Mohawk next to a [[Splunk]] | WWSM Blog Wario 2.jpg|Wario performing the Mohawk next to a [[Splunk]] | ||
| Line 66: | Line 66: | ||
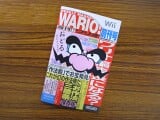
WWSM Blog Wario 4.jpg|Wario holding a copy of ''[[WarioWare: Smooth Moves]]'' | WWSM Blog Wario 4.jpg|Wario holding a copy of ''[[WarioWare: Smooth Moves]]'' | ||
WWSM Blog Jimmy T 1.jpg|[[Jimmy T|Jimmy T.]] and [[Jimmy P.]] at [[Tomorrow Hill]] | WWSM Blog Jimmy T 1.jpg|[[Jimmy T|Jimmy T.]] and [[Jimmy P.]] at [[Tomorrow Hill]] | ||
WWSM Blog Mona 1.jpg|Mona and [[ | WWSM Blog Mona 1.jpg|Mona and [[Young Cricket]] at [[Pearl Square]] | ||
WWSM Blog Mona 2.jpg|[[Joe]] in front of some flowers | WWSM Blog Mona 2.jpg|[[Joe]] in front of some flowers | ||
WWSM Blog Young Cricket 1.jpg|[[Young Cricket | WWSM Blog Young Cricket 1.jpg|[[Young Cricket]] & [[Master Mantis]] training atop two pillars | ||
WWSM Blog Kat 1.jpg|[[Kat | WWSM Blog Kat 1.jpg|[[Kat & Ana]] on a rooftop | ||
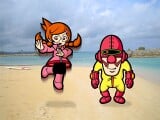
WWSM Blog Ashley 1.jpg|[[Ashley | WWSM Blog Ashley 1.jpg|[[Ashley]] & [[Red (WarioWare series)|Red]] next to baboons | ||
WWSM Blog Dribble 1.jpg|A Splunk jumping in a forest | WWSM Blog Dribble 1.jpg|A Splunk jumping in a forest | ||
WWSM Blog Penny 1.jpg|[[Penny]] and [[Dr. Crygor]] at a beach | WWSM Blog Penny 1.jpg|[[Penny]] and [[Dr. Crygor]] at a beach | ||
| Line 76: | Line 76: | ||
WWSM Blog Jimmy T 2.jpg|Jimmy P. walking down a sidewalk | WWSM Blog Jimmy T 2.jpg|Jimmy P. walking down a sidewalk | ||
WWSM Blog Jimmy T 3.jpg|Jimmy T. being followed by three Splunks | WWSM Blog Jimmy T 3.jpg|Jimmy T. being followed by three Splunks | ||
WWSM Blog Dribble 2.jpg|[[Dribble | WWSM Blog Dribble 2.jpg|[[Dribble & Spitz]] at Tomorrow Hill | ||
WWSM Blog Mona 3.jpg|[[Orbulon]] holding the Form Baton and [[Balance Stone]] | WWSM Blog Mona 3.jpg|[[Orbulon]] holding the Form Baton and [[Balance Stone]] | ||
WWSM Blog Penny 2.jpg|Dr. Crygor and [[Mike]] in front of a [[Nintendo]] building | WWSM Blog Penny 2.jpg|Dr. Crygor and [[Mike]] in front of a [[Nintendo]] building | ||
| Line 88: | Line 88: | ||
Wario Overworld Sprite WWSM.png|[[Wario]] | Wario Overworld Sprite WWSM.png|[[Wario]] | ||
Mona Overworld Sprite WWSM.png|[[Mona]] | Mona Overworld Sprite WWSM.png|[[Mona]] | ||
Kat Overworld Sprite WWSM.png|[[Kat | Kat Overworld Sprite WWSM.png|[[Kat & Ana|Kat]] | ||
Young Cricket Overworld Sprite WWSM.png|[[ | Young Cricket Overworld Sprite WWSM.png|[[Young Cricket]] | ||
Jimmy T Overworld Sprite WWSM.png|[[Jimmy T|Jimmy T.]] | Jimmy T Overworld Sprite WWSM.png|[[Jimmy T|Jimmy T.]] | ||
Ashley Overworld Sprite WWSM.png|[[ | Ashley Overworld Sprite WWSM.png|[[Ashley]] | ||
Dribble Overworld Sprite WWSM.png|[[Dribble | Dribble Overworld Sprite WWSM.png|[[Dribble & Spitz|Dribble]] | ||
Penny Overworld Sprite WWSM.png|[[Penny]] | Penny Overworld Sprite WWSM.png|[[Penny]] | ||
9-Volt Overworld Sprite WWSM.png|[[9-Volt]] | 9-Volt Overworld Sprite WWSM.png|[[9-Volt]] | ||
| Line 106: | Line 106: | ||
</gallery> | </gallery> | ||
===Theater | ===Theater posters=== | ||
<gallery> | <gallery heights=180> | ||
Wario Theater Poster WW-SM.png|[[Wario]] | Wario Theater Poster WW-SM.png|[[Wario]] | ||
Mona Theater Poster WW-SM.png|[[Mona]] | Mona Theater Poster WW-SM.png|[[Mona]] | ||
Kat and Ana Theater Poster WW-SM.png|[[Kat | Kat and Ana Theater Poster WW-SM.png|[[Kat & Ana]] | ||
Young Cricket and Master Mantis Theater Poster WW-SM.png|[[Young Cricket | Young Cricket and Master Mantis Theater Poster WW-SM.png|[[Young Cricket]] & [[Master Mantis]] | ||
Jimmy T Theater Poster WW-SM.png|[[Jimmy T|Jimmy T.]] | Jimmy T Theater Poster WW-SM.png|[[Jimmy T|Jimmy T.]] | ||
Ashley and Red Theater Poster WW-SM.png|[[Ashley | Ashley and Red Theater Poster WW-SM.png|[[Ashley]] & [[Red (WarioWare series)|Red]] | ||
Dribble and Spitz Theater Poster WW-SM.png|[[Dribble | Dribble and Spitz Theater Poster WW-SM.png|[[Dribble & Spitz]] | ||
Penny Theater Poster WW-SM.png|[[Penny]] | Penny Theater Poster WW-SM.png|[[Penny]] | ||
9-Volt and 18-Volt Theater Poster WW-SM.png|[[9-Volt]] | 9-Volt and 18-Volt Theater Poster WW-SM.png|[[9-Volt]] & [[18-Volt]] | ||
Jimmy P Theater Poster WW-SM.png|[[Jimmy P.]] | Jimmy P Theater Poster WW-SM.png|[[Jimmy P.]] | ||
</gallery> | </gallery> | ||
===Temple of Form | ===[[Temple of Form]] icons=== | ||
<gallery> | <gallery> | ||
Wario Temple of Form WWSM.png|[[Wario]] | Wario Temple of Form WWSM.png|[[Wario]] | ||
Mona Temple of Form WWSM.png|[[Mona]] | Mona Temple of Form WWSM.png|[[Mona]] | ||
Kat and Ana Temple of Form WWSM.png|[[Kat | Kat and Ana Temple of Form WWSM.png|[[Kat & Ana]] | ||
Young Cricket Temple of Form WWSM.png|[[ | Young Cricket Temple of Form WWSM.png|[[Young Cricket]] | ||
Ashley and Red Temple of Form WWSM.png|[[Ashley | Ashley and Red Temple of Form WWSM.png|[[Ashley]] & [[Red (WarioWare series)|Red]] | ||
Dribble and Spitz Temple of Form WWSM.png|[[Dribble | Dribble and Spitz Temple of Form WWSM.png|[[Dribble & Spitz]] | ||
Penny Temple of Form WWSM.png|[[Penny]] | Penny Temple of Form WWSM.png|[[Penny]] | ||
9-Volt and 18-Volt Temple of Form WWSM.png|[[9-Volt]] | 9-Volt and 18-Volt Temple of Form WWSM.png|[[9-Volt]] & [[18-Volt]] | ||
Tiny Wario Temple of Form WWSM.png|[[Tiny Wario]] | Tiny Wario Temple of Form WWSM.png|[[Tiny Wario]] | ||
Orbulon Temple of Form WWSM.png|[[Orbulon]] | Orbulon Temple of Form WWSM.png|[[Orbulon]] | ||
| Line 135: | Line 135: | ||
==Screenshots== | ==Screenshots== | ||
===Cutscenes=== | |||
<gallery widths=160 heights=127> | |||
Warioshousecu3.png|[[Wario's House]] | |||
WWSM Wario in House.png|Wario eating sweets in his house | |||
Monette.png|Mona talking with a [[Monettes|Monette]] | |||
Diamond City Rough.png|[[Boy (WarioWare: Smooth Moves)|Boy]] in his American football uniform | |||
Mona epilogue WarioWare Smooth Moves.png|Mona with the Monettes | |||
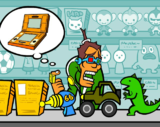
Dinosaurssmoothmoves.png|[[The Dinosaurs]] | |||
Elephant Ogre screenshot WarioWare Smooth Moves.png|[[Elephant Ogre]] | |||
Kat and Ana prologue WarioWare Smooth Moves.png|Kat & Ana in the prologue | |||
Li'l Ogre.png|[[Li'l Ogre]] pestering [[Sensei]] | |||
Kat and Ana epilogue WarioWare Smooth Moves.png|The epilogue to Kat & Ana's story | |||
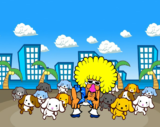
WWSM Group Shot.png|Mona with many other characters associated with her | |||
Young Cricket Master Mantis epilogue WarioWare Smooth Moves.png|Young Cricket asking for dumplings | |||
WWSM Park Street Judgement.png|Young Cricket looking at the line of people | |||
WWSM Club Sugar.png|[[Club Sugar]] | |||
JimmyandCatDancers.png|Jimmy T. dancing with the [[Legendary Cat Dancers]] | |||
Jimmy T epilogue WarioWare Smooth Moves.png|Jimmy dancing with Legendary Cat Dancers in the epilogue | |||
Mr.SpellBook.png|[[Chatty Mr. Spell Book]] talking with Ashley | |||
Monster Flower 2.png|The [[Monster Flower]] growing through [[Ashley's Mansion]] | |||
WWSM Ashley Smiling.png|Ashley smiling | |||
Alien Mitzi Human.png|[[Alien Mitzi]] in her human form | |||
Alien Mitzi.png|Alien Mitzi getting beamed up | |||
WWSM Tomorrow Hill Day.png|[[Tomorrow Hill]] after [[Alien Mitzi's Spaceship]] leaves | |||
Diamond academy.png|[[Diamond Academy]] | |||
WWSM Penny Prologue.png|Penny competing against Dr. Crygor | |||
9-voltgamewatch.png|9-Volt showing his [[Game & Watch]] | |||
9-Volt 18-Volt prologue WarioWare Smooth Moves.png|9-Volt showing off his Game & Watch to 18-Volt | |||
Interstate 310.png|[[Interstate 310]] | |||
ToyExpress.png|[[Toy Express]] | |||
WWSM 18-Volt in Toy Express.png|18-Volt looking for a Game & Watch | |||
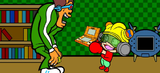
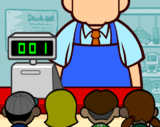
Videogamestore.png|[[Satoru Iwata]] making a cameo | |||
WWSM Club Spice.png|[[Club Spice]] | |||
JimmyPandDogDancers.png|Jimmy P. dancing with the [[Legendary Dog Dancers]] | |||
Splunk.png|[[Splunk]] | |||
WWSM Temple of Form.png|Wario being chased into the [[Temple of Form]] | |||
WWSM Orbulon Temple of Form.png|Orbulon in the Temple of Form | |||
WWSM Balance Stone.png|The [[Form Baton]] and [[Balance Stone]] connected together | |||
</gallery> | |||
===Character intros=== | |||
<gallery widths=160 heights=120> | |||
Mona Name SM.jpg|[[Mona]]'s name | |||
Mona SM Intro.jpg|Mona | |||
Kat SM Intro.jpg|[[Kat]] | |||
Ana SM Intro.jpg|[[Ana]] | |||
Young Cricket SM Intro.jpg|[[Young Cricket]] | |||
Master Mantis SM Intro.jpg|[[Master Mantis]] | |||
Jimmy T SM Intro.jpg|[[Jimmy T.]] | |||
Ashley & Red SM Intro.jpg|[[Ashley]] & [[Red (WarioWare series)|Red]] | |||
Dribble & Spitz SM Intro.jpg|[[Dribble & Spitz]] | |||
Penny SM Intro.jpg|[[Penny]] | |||
9-Volt & 18-Volt Names SM.jpg|[[9-Volt]] & [[18-Volt]]'s names | |||
9-Volt & 18-Volt SM Intro.jpg|9-Volt & 18-Volt | |||
Jimmy P SM Intro.jpg|[[Jimmy P.]] | |||
</gallery> | |||
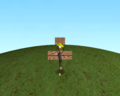
===Title cards=== | ===Title cards=== | ||
<gallery> | <gallery widths=160 heights=120> | ||
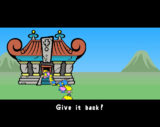
WWSM Wario - Mysterious Form Baton Found.png | WWSM Wario - Mysterious Form Baton Found.png|"Mysterious [[Form Baton]] Found!" ([[Wario]]) | ||
WWSM Mona - Cheerleading to Victory.png | WWSM Mona - Cheerleading to Victory.png|"[[Monettes|Cheerleading]] to Victory" ([[Mona]]) | ||
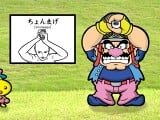
WWSM Kat and Ana - Evil Attacks Diamond Dojo.png | WWSM Kat and Ana - Evil Attacks Diamond Dojo.png|"[[Elephant Ogre|Ev]][[Li'l Ogre|il]] Attacks [[Diamond Dojo]]!" ([[Kat & Ana]]) | ||
WWSM Young Cricket and Master Mantis - Enter Young Cricket.png | WWSM Young Cricket and Master Mantis - Enter Young Cricket.png|"Enter Young Cricket" ([[Young Cricket]] & [[Master Mantis]]) | ||
WWSM Jimmy T. - Feline Fever.png | WWSM Jimmy T. - Feline Fever.png|"[[Legendary Cat Dancers|Feline]] Fever" by ([[Jimmy T|Jimmy T.]]) | ||
WWSM Ashley and Red - The Loquacious Spell Book.png | WWSM Ashley and Red - The Loquacious Spell Book.png|"[[Chatty Mr. Spell Book|The Loquacious Spell Book]]" ([[Ashley]] & [[Red (WarioWare series)|Red]]) | ||
WWSM Dribble and Spitz - Tomorrow Hill.png | WWSM Dribble and Spitz - Tomorrow Hill.png|"[[Tomorrow Hill]]" ([[Dribble & Spitz]]) | ||
WWSM Penny - The Invent-Off.png | WWSM Penny - The Invent-Off.png|"The Invent-Off" ([[Penny]]) | ||
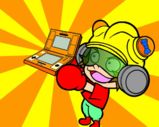
WWSM 9-Volt and 18-Volt - The Multiplayer Test.png | WWSM 9-Volt and 18-Volt - The Multiplayer Test.png|"[[Game & Watch|The Multiplayer Test]]" ([[9-Volt]] & [[18-Volt]]) | ||
WWSM Jimmy P. - Canine Crazed.png | WWSM Jimmy P. - Canine Crazed.png|"[[Legendary Dog Dancers|Canine]] Crazed" ([[Jimmy P.]]) | ||
WWSM Tiny Wario - Forever Form Baton.png | WWSM Tiny Wario - Forever Form Baton.png|"Forever Form Baton" ([[Tiny Wario]]) | ||
WWSM Orbulon - The Secret of the Balance Stone.png | WWSM Orbulon - The Secret of the Balance Stone.png|"The Secret of the [[Balance Stone]]" ([[Orbulon]]) | ||
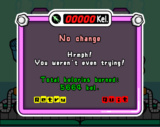
WWSM Dr. Crygor and Mike - The Kelorometer.png | WWSM Dr. Crygor and Mike - The Kelorometer.png|"The [[Kelorometer]]" ([[Dr. Crygor]] & [[Mike]]) | ||
</gallery> | </gallery> | ||
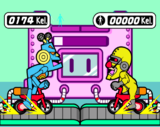
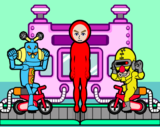
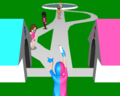
===Character stages=== | ===Character stages=== | ||
<gallery> | <gallery widths=160 heights=127> | ||
WWSM Wario Stage.png|Wario's stage | WWSM Wario Stage.png|Wario's stage | ||
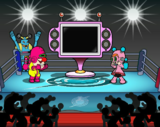
WWSM Mona Stage.png|Mona's stage | WWSM Mona Stage.png|Mona's stage | ||
WWSM Kat & Ana Stage.png|Kat | WWSM Kat & Ana Stage.png|Kat & Ana's stage | ||
WWSM Young Cricket & Master Mantis Stage.png|Young Cricket | WWSM Young Cricket & Master Mantis Stage.png|Young Cricket & Master Mantis's stage | ||
WWSM Jimmy T.'s Stage.png|Jimmy T.'s stage | WWSM Jimmy T.'s Stage.png|Jimmy T.'s stage | ||
WWSM Ashley Stage.png|Ashley's stage | WWSM Ashley Stage.png|Ashley & Red's stage | ||
WWSM Dribble & Spitz stage.png|Dribble | WWSM Dribble & Spitz stage.png|Dribble & Spitz's stage | ||
WWSM Dribble and Spitz stage.png|Dribble | WWSM Dribble and Spitz stage.png|Dribble & Spitz's stage (alternate) | ||
WWSM Penny Stage.png|Penny's stage | WWSM Penny Stage.png|Penny's stage | ||
WWSM 9-Volt Stage.png|9-Volt | WWSM 9-Volt Stage.png|9-Volt & 18-Volt's stage | ||
WWSM Jimmy P. Stage.png|Jimmy P.'s stage | WWSM Jimmy P. Stage.png|Jimmy P.'s stage | ||
TinyWarioSmooth.png|Tiny Wario's stage | TinyWarioSmooth.png|Tiny Wario's stage | ||
WWSM Orbulon Stage.png|Orbulon's stage | WWSM Orbulon Stage.png|Orbulon's stage | ||
Kelorometer WarioWare Smooth Moves.png|Dr. Crygor's stage | Kelorometer WarioWare Smooth Moves.png|Dr. Crygor's stage | ||
WWSM Kelorometer Lounging.png|Dr. Crygor's stage (no activity) | |||
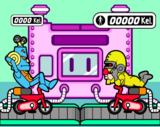
WWSM Kelorometer Maximum.png|Dr. Crygor's stage (maximum activity) | |||
WWSM Kelorometer Before.png|Dr. Crygor's stage | |||
WWSM Kelorometer Twig-Like.png|Dr. Crygor's stage | |||
WWSM All Mixed Up.png|All Mixed Up | WWSM All Mixed Up.png|All Mixed Up | ||
WWSM Super Hard.png|Super Hard | WWSM Super Hard.png|Super Hard | ||
| Line 174: | Line 235: | ||
</gallery> | </gallery> | ||
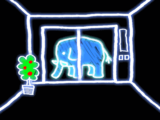
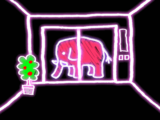
===[[Game Over]]=== | ===[[Game Over]] screens=== | ||
<gallery> | <gallery widths=160 heights=127> | ||
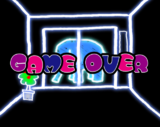
WWSM Game Over Wario.png|Wario's stage | WWSM Game Over Wario.png|Wario's stage | ||
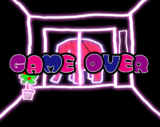
WWSM Game Over Mona.png|Mona's stage | WWSM Game Over Mona.png|Mona's stage | ||
WWSM Game Over Kat and Ana.png|Kat | WWSM Game Over Kat and Ana.png|Kat & Ana's stage | ||
WWSM Game Over Young Cricket and Master Mantis.png|Young Cricket | WWSM Game Over Young Cricket and Master Mantis.png|Young Cricket & Master Mantis's stage | ||
WWSM Game Over Jimmy T.png|Jimmy T./Jimmy P.'s stage | WWSM Game Over Jimmy T.png|Jimmy T./Jimmy P.'s stage | ||
WWSM Game Over Ashley and Red.png|Ashley's stage | WWSM Game Over Ashley and Red.png|Ashley & Red's stage | ||
WWSM Game Over Dribble and Spitz.png|Dribble | WWSM Game Over Dribble and Spitz.png|Dribble & Spitz's stage | ||
WWSM Game Over Penny.png|Penny's stage | WWSM Game Over Penny.png|Penny's stage | ||
WWSM Game Over 9-Volt and 18-Volt.png|9-Volt | WWSM Game Over 9-Volt and 18-Volt.png|9-Volt & 18-Volt's stage | ||
WWSM Game Over Tiny Wario.png|Tiny Wario's stage | WWSM Game Over Tiny Wario.png|Tiny Wario's stage | ||
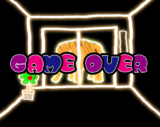
WWSM Game Over Orbulon.png|Orbulon's stage | WWSM Game Over Orbulon.png|Orbulon's stage | ||
| Line 211: | Line 272: | ||
WWSM Shaving Scream.png|[[Shaving Scream]] | WWSM Shaving Scream.png|[[Shaving Scream]] | ||
WWSM One In Hole.png|[[One In Hole]] | WWSM One In Hole.png|[[One In Hole]] | ||
WWSM Biggest Fan.png|[[Biggest Fan]] (BOSS) | WWSM Biggest Fan.png|[[Biggest Fan (WarioWare: Smooth Moves)|Biggest Fan]] (BOSS) | ||
</gallery> | </gallery> | ||
| Line 233: | Line 294: | ||
WWSM Universal Marionette.png|[[Universal Marionette]] | WWSM Universal Marionette.png|[[Universal Marionette]] | ||
WWSM Cupsy Daisy.png|[[Cupsy Daisy]] | WWSM Cupsy Daisy.png|[[Cupsy Daisy]] | ||
WWSM Escape Artist.png|[[Escape Artist]] | WWSM Escape Artist.png|[[Escape Artist (WarioWare: Smooth Moves)|Escape Artist]] | ||
WWSM Five More Minutes.png|[[Five More Minutes]] | WWSM Five More Minutes.png|[[Five More Minutes]] | ||
WWSM Tearful Reunion.png|[[Tearful Reunion]] | WWSM Tearful Reunion.png|[[Tearful Reunion]] | ||
| Line 445: | Line 506: | ||
<gallery> | <gallery> | ||
WWSM Bungii!.png|[[Bungii!]] | WWSM Bungii!.png|[[Bungii!]] | ||
</gallery> | </gallery> | ||
===Minigames=== | ===Minigames=== | ||
====Single player==== | ====Single player==== | ||
<gallery> | <gallery widths=160 heights=127> | ||
BalloonTrip SM title screen.png|[[Balloon Trip (minigame)|Balloon Trip]]'s title screen | BalloonTrip SM title screen.png|[[Balloon Trip (minigame)|Balloon Trip]]'s title screen | ||
Balloon Trip.png|Balloon Trip | Balloon Trip.png|Balloon Trip | ||
| Line 513: | Line 528: | ||
====Multiplayer==== | ====Multiplayer==== | ||
<gallery> | <gallery widths=160 heights=127> | ||
WWSM Pearl Square.png|[[Pearl Square]] | WWSM Pearl Square.png|[[Pearl Square]] | ||
SmoothMovesBomb.png|[[Bomb (minigame)|Bomb]] | SmoothMovesBomb.png|[[Bomb (minigame)|Bomb]] | ||
| Line 531: | Line 546: | ||
Odoru Made in Wario JP cover.jpg|Japanese box art | Odoru Made in Wario JP cover.jpg|Japanese box art | ||
Smooth moves EU cover.jpg|European box art | Smooth moves EU cover.jpg|European box art | ||
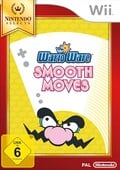
WWSM Box DE.jpg|German box art | |||
Smooth moves cover.jpg|North American box art | Smooth moves cover.jpg|North American box art | ||
WarioWare Smooth Moves AUS cover.jpg|Australian box art | WarioWare Smooth Moves AUS cover.jpg|Australian box art | ||
Chumchwora Made in Wario KOR cover.jpg|Korean box art | Chumchwora Made in Wario KOR cover.jpg|Korean box art | ||
Smooth Moves Select boxart.jpg|[[Nintendo Selects]] | Smooth Moves Select boxart.jpg|European box art ([[Nintendo Selects]]) | ||
WarioWareSmoothMoves-NintendoSelect.jpg| | Nintendo Selects WWSM Box DE.jpg|German box art (Nintendo Selects) | ||
WarioWareSmoothMoves-NintendoSelect.jpg|Portuguese box art (Nintendo Selects) | |||
</gallery> | </gallery> | ||
==Miscellaneous== | |||
<gallery> | |||
Wii WWSM channel.png|Wii Menu screen | |||
</gallery> | |||
{{Galleries}} | {{Galleries}} | ||
{{WWSM}} | {{WWSM}} | ||
[[Category:Galleries]] | [[Category:Galleries]] | ||
[[Category:WarioWare: Smooth Moves|*]] | [[Category:WarioWare: Smooth Moves|*]] | ||
[[de:WarioWare: Smooth Moves/Galerie]] | |||
Revision as of 17:15, April 25, 2024
This is a gallery of images for the game WarioWare: Smooth Moves.
Logos

Western logo

Another rendering of the logo

Box art logo

Face logo


Artwork
Characters

Wario with the Form Baton
Wario and other characters
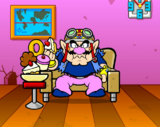
Dr. Crygor
(Penny's stage)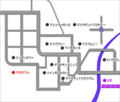
Map of Diamond City


Japanese website blog
Characters


Blog post images
Wario performing the Mohawk next to a Splunk

Wario holding the Form Baton
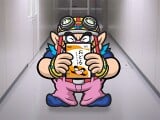
Wario holding a copy of WarioWare: Smooth Moves
Jimmy T. and Jimmy P. at Tomorrow Hill
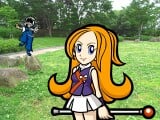
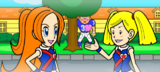
Mona and Young Cricket at Pearl Square

Joe in front of some flowers
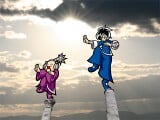
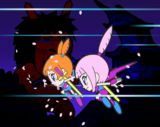
Young Cricket & Master Mantis training atop two pillars
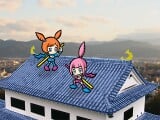
Kat & Ana on a rooftop
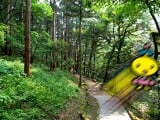
A Splunk jumping in a forest
Penny and Dr. Crygor at a beach
The Japanese manual for WarioWare: Smooth Moves
Jimmy P. walking down a sidewalk
Jimmy T. being followed by three Splunks
Dribble & Spitz at Tomorrow Hill
Orbulon holding the Form Baton and Balance Stone

The Broadway Pose at a beach

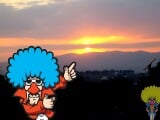
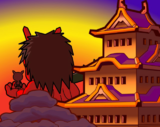
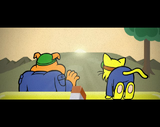
Jimmy T. in front of the Temple of Form


Sprites
Overworld

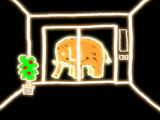
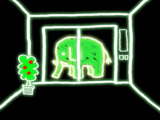
All Mixed Up Elephant

Super Hard Elephant

Sudden Death Elephant

Thrilling Elephant
Theater posters


Temple of Form icons


Screenshots
Cutscenes
Wario eating sweets in his house
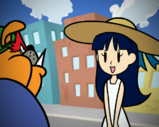
Mona talking with a Monette
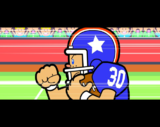
Boy in his American football uniform
Mona with the Monettes
Kat & Ana in the prologue
The epilogue to Kat & Ana's story

Mona with many other characters associated with her
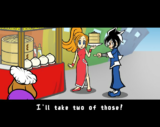
Young Cricket asking for dumplings
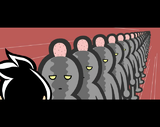
Young Cricket looking at the line of people
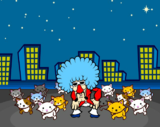
Jimmy T. dancing with the Legendary Cat Dancers
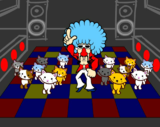
Jimmy dancing with Legendary Cat Dancers in the epilogue

Chatty Mr. Spell Book talking with Ashley

The Monster Flower growing through Ashley's Mansion

Ashley smiling
Alien Mitzi in her human form
Alien Mitzi getting beamed up
Tomorrow Hill after Alien Mitzi's Spaceship leaves
Penny competing against Dr. Crygor
9-Volt showing his Game & Watch
9-Volt showing off his Game & Watch to 18-Volt
18-Volt looking for a Game & Watch
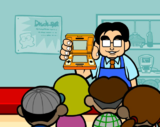
Satoru Iwata making a cameo
Jimmy P. dancing with the Legendary Dog Dancers
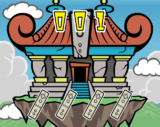
Wario being chased into the Temple of Form
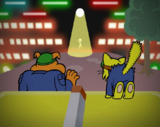
Orbulon in the Temple of Form

The Form Baton and Balance Stone connected together


Character intros
Mona's name
Mona
9-Volt & 18-Volt


Title cards
"Mysterious Form Baton Found!" (Wario)

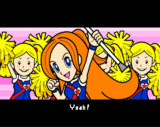
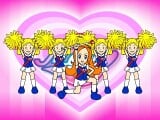
"Cheerleading to Victory" (Mona)
"Evil Attacks Diamond Dojo!" (Kat & Ana)
"Enter Young Cricket" (Young Cricket & Master Mantis)
"The Invent-Off" (Penny)
"Forever Form Baton" (Tiny Wario)
"The Secret of the Balance Stone" (Orbulon)
"The Kelorometer" (Dr. Crygor & Mike)


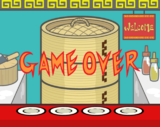
Character stages
Wario's stage

Mona's stage
Kat & Ana's stage
Young Cricket & Master Mantis's stage

Jimmy T.'s stage
Ashley & Red's stage
Dribble & Spitz's stage
Dribble & Spitz's stage (alternate)
Penny's stage
9-Volt & 18-Volt's stage
Jimmy P.'s stage
Tiny Wario's stage
Orbulon's stage
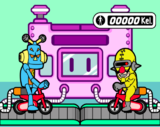
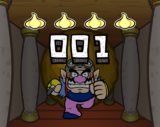
Dr. Crygor's stage
Dr. Crygor's stage (no activity)
Dr. Crygor's stage (maximum activity)

Dr. Crygor's stage
Dr. Crygor's stage
All Mixed Up
Super Hard
Sudden Death
Thrilling


Game Over screens

Wario's stage

Mona's stage
Kat & Ana's stage
Young Cricket & Master Mantis's stage
Jimmy T./Jimmy P.'s stage

Ashley & Red's stage

Dribble & Spitz's stage
Penny's stage
9-Volt & 18-Volt's stage

Tiny Wario's stage
Orbulon's stage
Dr. Crygor's stage
All Mixed Up
Super Hard
Sudden Death
Thrilling


Microgames
Mysterious Form Baton Found!

Biggest Fan (BOSS)


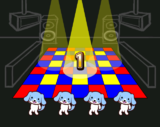
Cheerleading to Victory
Toilet Training (BOSS)


Evil Attacks Diamond Dojo!
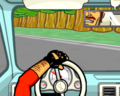
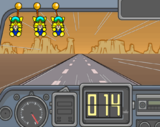
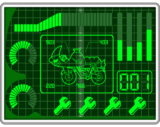
Driver's Ed (BOSS)


Enter Young Cricket

Block Party (BOSS)


The Loquacious Spell Book

Fresh off the Grill (BOSS)


Tomorrow Hill
Boot Camp (BOSS)


The Invent-Off

Produce Stand-Off (BOSS)


The Multiplayer Test
Star Fox (BOSS)


Forever Form Baton
Three's a Crowd (Korean version)
Wario Dance Company (BOSS)


The Secret of the Balance Stone

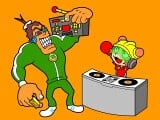
Boom Box (BOSS)


Other

Minigames
Single player
Balloon Trip's title screen
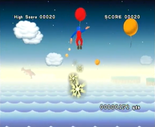
Balloon Trip

Block Star's title screen
Block Star
Block Star
Block Star
Can Shooter's title screen
Can Shooter
Pyoro S' title screen
Tortoise & Hare's title screen
Tortoise & Hare
Tower Tennis' title screen
Tower Tennis


Multiplayer
Bungee Buddies' title screen
Darts' title screen
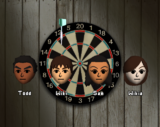
Darts
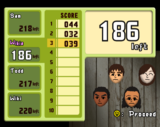
Darts
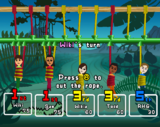
Lifeline

Star Nose's title screen


Box art
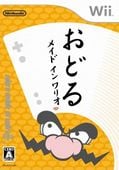
Japanese box art
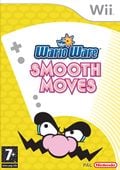
European box art
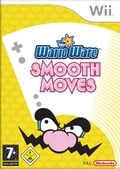
German box art
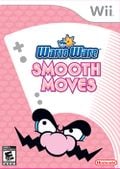
North American box art
Australian box art
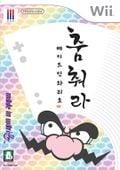
Korean box art
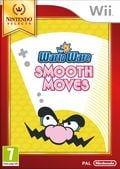
European box art (Nintendo Selects)
German box art (Nintendo Selects)
Portuguese box art (Nintendo Selects)


Miscellaneous
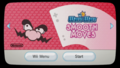
Wii Menu screen

| WarioWare: Smooth Moves | |
|---|---|
| Main characters | Wario • Mona • Kat & Ana • Young Cricket • Master Mantis • Jimmy T. • Ashley • Red • Dribble & Spitz • Penny • 9-Volt • 18-Volt • Jimmy P. • Tiny Wario • Orbulon • Dr. Crygor • Mike |
| Minor characters | Splunk • Joe • Ken the Reporter • Boy • Team Dinosaur • Monettes • Diamond City Roughs • Elephant Ogre • Li'l Ogre • Sensei • Mona's Elephant • Mona's Pig • Mona's Monkey • Mona's Bear • Art and Deco • Dancing Monkeys • Park Street Residents • Legendary Cat Dancers • Chatty Mr. Spell Book • Monster Flower • Alien Mitzi • Diamond Academy Audience • Shop Manager Iwata • Fan Kids in the Shop • Legendary Dog Dancers |
| Forms | The Remote Control • The Umbrella • The Handlebar • The Sketch Artist • The Chauffeur • The Samurai • The Tug-of-War • The Waiter • The Elephant • The Thumb Wrestler • The Discard • The Big Cheese • The Janitor • The Dumbbell • The Mohawk • The Finger Food • The Boxer • The Mortar and Pestle • The Diner |
| Single-player minigames | Tortoise & Hare • Balloon Trip • Can Shooter • Block Star • Tower Tennis • Pyoro S |
| Multi-player minigames | Lifeline • Survival • Balloon • Bomb • Bungee Buddies • Star Nose • Darts |
| Locations | Diamond City • Wario's House • Temple of Form • Diamond Stadium • Diamond Dojo • Park Street • Club Sugar • Ashley's Mansion • Diamond Taxi • Tomorrow Hill • Alien Mitzi's Spaceship • Diamond Academy • 9-Volt's House • Interstate 310 • Toy Express • Club Spice • Pearl Square • Sound Studio • Movie Theater • Variety Towers |
| Objects | Form Baton • Balance Stone • Bomb • Dribble's taxi • Oinker • Kelorometer • Pose |
| Miscellaneous | Gallery • Microgames • Pre-release and unused content • Quotes • Staff |