The Final-Final Test Badge Marathon: Difference between revisions
No edit summary Tags: Mobile edit Advanced mobile edit |
m (Undo revision 4194680 by 90.218.10.94 (talk) That's not related.) Tag: Undo |
||
| (33 intermediate revisions by 19 users not shown) | |||
| Line 1: | Line 1: | ||
{{DEFAULTSORT:Final Test Wonder Gauntlet}} | {{DEFAULTSORT:Final Test Wonder Gauntlet}} | ||
{{level infobox | {{level infobox | ||
|title=The Final-Final Test<br>Badge Marathon | |title=The Final-Final Test<br>Badge Marathon | ||
|image= | |image=[[File:The Final-Final Test Badge Marathon Course.jpg|250px]]<br>[[Mario]] in the [[Badge (Super Mario Bros. Wonder)#Expert Badges|Spring Feet]] section | ||
|world=[[Special World]] | |world=[[Special World]] | ||
|game=''[[Super Mario Bros. Wonder]]'' | |game=''[[Super Mario Bros. Wonder]]'' | ||
| Line 12: | Line 11: | ||
|secret= | |secret= | ||
}} | }} | ||
{{quote2|This is the final challenge. Clear it, and you'll be a truly amazing player!|Opening message tip|[[Super Mario Bros. Wonder]]}} | {{quote2|This is the final challenge. Clear it, and you'll be a truly amazing player!|Opening message tip|[[Super Mario Bros. Wonder]]}} | ||
'''The Final-Final Test Badge Marathon''' is the final course in the [[Special World]] and, subsequently, the final course of ''[[Super Mario Bros. Wonder]]''. It features many challenges that require the use of [[Badge (Super Mario Bros. Wonder)| | '''The Final-Final Test Badge Marathon''' is the final course in the [[Special World]] and, subsequently, the final course of ''[[Super Mario Bros. Wonder]]''. It features many challenges that require the use of [[Badge (Super Mario Bros. Wonder)|badge]]s. Beating [[The Final Test Wonder Gauntlet]] unlocks a path from there to this level, but only if the player has collected all [[Wonder Seed]]s, [[10-flower coin]]s, and [[Goal Pole#Super Mario Bros. Wonder|golden flags]] available so far, and has cleared [[The Final Battle! Bowser's Rage Stage]]. This course features a single Wonder Seed, and completing the course along with collecting all 10-flower coins and reaching the top of the Goal Pole unlocks the final Poplin house [[WONDER?]]. This level's Wonder Seed, 10-flower coins, and top of the Goal Pole do not count towards their respective medal requirements on the player's save file. This is the only Special World level without a [[Wonder Effect]]. | ||
Unlike Badge Challenges, this is a regular level, meaning the player loses a life normally when defeated, but keeps 10-flower coins collected up to that point unless the level is exited before being cleared. | |||
==Layout== | ==Layout== | ||
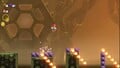
The level takes place in a factory resembling the courses found in [[Castle Bowser]]. It is split into a series of rooms separated by [[Warp Pipe|pipe]]s; each room automatically changes the player's current badge to a certain Action Badge or Expert Badge, and the player must use said badge to navigate the obstacles in the room. There are a total of 10 rooms, and the level features two [[Checkpoint Flag]]s. | The level takes place in a factory resembling the courses found in [[Castle Bowser]]. It is split into a series of rooms separated by [[Warp Pipe|pipe]]s; each room automatically changes the player's current badge to a certain Action Badge or Expert Badge, and the player must use said badge to navigate the obstacles in the room. There are a total of 10 rooms, and the level features two [[Checkpoint Flag]]s. | ||
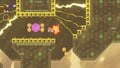
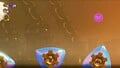
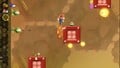
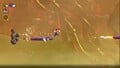
The first room uses the Parachute Cap badge, and the player must use it to dodge [[Sugarstar]]s while activating | The first room uses the Parachute Cap badge, and the player must use it to dodge [[Sugarstar]]s while activating [[Wow Bud]]s to lower the [[Poison (obstacle)|poison]] until reaching safe ground. The second room uses Floating High Jump, and the player must [[jump]] and [[Ground Pound]] to propel an accordion-like [[lift]] while avoiding large poison geysers. The third room uses Dolphin Kick, which allows the player to dash away from underwater {{conjectural|electricity block}}s that activate quickly. Clearing this room leads to the first Checkpoint Flag. | ||
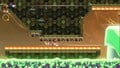
The fourth room uses Crouching High Jump, where the player must quickly charge and activate its ability quickly along [[Zip Track]]s to avoid poison geysers and [[Muncher]]s. The fifth room uses Wall-Climb Jump, where the player must outrun rising poison by using the ability and jumping on the seeds from [[Melon Piranha Plant]]s, while [[Lil Sparky|Lil Sparkies]] and [[Hothead]]s move across platforms. The sixth room uses Spring Feet, and requires navigating increasingly thin platforms with large and rapidly moving [[Fire Bar]]s while subject to jumping perpetually. Clearing this room leads to the second Checkpoint Flag. | The fourth room uses Crouching High Jump, where the player must quickly charge and activate its ability quickly along [[Zip Track]]s to avoid poison geysers and [[Muncher]]s. The fifth room uses Wall-Climb Jump, where the player must outrun rising poison by using the ability and jumping on the seeds from [[Melon Piranha Plant]]s, while [[Lil Sparky|Lil Sparkies]] and [[Hothead]]s move across platforms. The sixth room uses Spring Feet, and requires navigating increasingly thin platforms with large and rapidly moving [[Fire Bar]]s while subject to jumping perpetually. Clearing this room leads to the second Checkpoint Flag. | ||
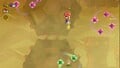
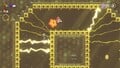
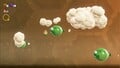
The seventh room uses Jet Run, requiring the player to repeatedly jump in mid-air after running off platforms, followed by [[Missile Meg]]s, causing the player to move at an extremely high speed, and finally platforms that slope upward, which changes the trajectory of running off their edges. The eighth room uses Boosting Spin Jump, necessitating that the player use it to prevent themselves from falling into a [[Pit|bottomless pit]], navigate tight corridors of [[Spike Trap]]s, and latch back onto a Zip Track. The ninth room uses Grappling Vine, so that the player can latch onto small walls surrounded by Spike Traps and climb along [[Hot-Hot Rock]]s while they are not emitting magma. The tenth and final room uses Invisibility; while being invisible, the player must jump across triangular [[Bumper (Super Mario series)|bumper]]s, a magenta [[Bloomp]] launched to the right from a pump, and several green Bloomps approaching from the | The seventh room uses Jet Run, requiring the player to repeatedly jump in mid-air after running off platforms, followed by [[Missile Meg]]s, causing the player to move at an extremely high speed, and finally platforms that slope upward, which changes the trajectory of running off their edges. The eighth room uses Boosting Spin Jump, necessitating that the player use it to prevent themselves from falling into a [[Pit|bottomless pit]], navigate tight corridors of [[Spike Trap]]s, and latch back onto a Zip Track. The ninth room uses Grappling Vine, so that the player can latch onto small walls surrounded by Spike Traps and climb along [[Hot-Hot Rock]]s while they are not emitting magma. The tenth and final room uses Invisibility; while being invisible, the player must jump across triangular [[Bumper (Super Mario series)|bumper]]s, a magenta [[Bloomp]] launched to the right from a pump, and several green Bloomps approaching from the right. To aid the player in discerning their location, many clouds are present in this room, which disappear when the player comes into contact with them. The end of this room has a staircase of [[Hard Block]]s and a final bumper leading to the [[Goal Pole]], where the Wonder Seed is obtained. | ||
==10-flower coins== | ==10-flower coins== | ||
| Line 32: | Line 29: | ||
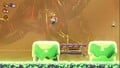
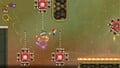
*'''10-flower coin 3''': In the Invisibility room, above a large, rotating triangular bumper surrounded by bottomless pits. | *'''10-flower coin 3''': In the Invisibility room, above a large, rotating triangular bumper surrounded by bottomless pits. | ||
==Enemies== | <gallery> | ||
SMBW The Final-Final Test Badge Marathon first 10-flower coin.jpg|First 10-flower coin | |||
SMBW The Final-Final Test Badge Marathon second 10-flower coin.jpg|Second 10-flower coin | |||
SMBW The Final-Final Test Badge Marathon third 10-flower coin.jpg|Third 10-flower coin | |||
</gallery> | |||
==Enemies and obstacles== | |||
*[[Sugarstar]] | *[[Sugarstar]] | ||
*[[Piranha Plant]] | *[[Piranha Plant]] | ||
| Line 41: | Line 44: | ||
*[[Missile Meg]] | *[[Missile Meg]] | ||
*[[Bloomp]] | *[[Bloomp]] | ||
*[[Electricity Block]] | |||
* | |||
*[[Fire Bar]] | *[[Fire Bar]] | ||
*[[Spike Trap]] | *[[Spike Trap]] | ||
| Line 51: | Line 52: | ||
*[[Poison tide]] (green) | *[[Poison tide]] (green) | ||
*Clouds | *Clouds | ||
* | *[[Būsuke Hōdai]] | ||
==Talking Flower quotes== | ==Talking Flower quotes== | ||
| Line 82: | Line 83: | ||
<gallery> | <gallery> | ||
The Final-Final Test Badge Marathon Thumbnail.png|The course's thumbnail | The Final-Final Test Badge Marathon Thumbnail.png|The course's thumbnail | ||
Badge Marathon Parachute Cap.jpg|The Parachute Cap badge section | |||
Badge Marathon Floating High Jump.jpg|The Floating High Jump badge section | |||
Badge Marathon Dolphin Kick.jpg|The Dolphin Kick badge section | |||
Badge Marathon Crouching High Jump.jpg|The Crouching High Jump badge section | |||
Badge Marathon Wall-Climb Jump.jpg|The Wall-Climb Jump badge section | |||
The Final-Final Test Badge Marathon Course.jpg|The Spring Feet Expert Badge section | |||
Expert Badge Marathon Jet Run.jpg|The Jet Run Expert Badge section | |||
Badge Marathon Boosting Spin Jump.jpg|The Boosting Spin Jump badge section | |||
Badge Marathon Grappling Vine.jpg|The Grappling Vine badge section | |||
Expert Badge Marathon Invisibility.jpg|The Invisibility Expert Badge section | |||
</gallery> | </gallery> | ||
| Line 89: | Line 100: | ||
|JapR=Urutora chanpionshippu bajji on parēdo | |JapR=Urutora chanpionshippu bajji on parēdo | ||
|JapM=Ultra Championship: A succession of badges (lit. Badge {{plain link|[https://en.m.wiktionary.org/wiki/%E3%82%AA%E3%83%B3%E3%83%91%E3%83%AC%E3%83%BC%E3%83%89 on parade]}}) | |JapM=Ultra Championship: A succession of badges (lit. Badge {{plain link|[https://en.m.wiktionary.org/wiki/%E3%82%AA%E3%83%B3%E3%83%91%E3%83%AC%E3%83%BC%E3%83%89 on parade]}}) | ||
| | |ChiS=终极锦标赛 徽章总动员 | ||
| | |ChiSR=Zhōngjí Jǐnbiāosài Huīzhāng Zǒngdòngyuán | ||
| | |ChiSM=Ultimate Championship: Badges All-In | ||
| | |ChiT=終極錦標賽 徽章總動員 | ||
|ChiTR=Zhōngjí Jǐnbiāosài Huīzhāng Zǒngdòngyuán | |||
|ChiTM=Ultimate Championship: Badges All-In | |||
|Dut=De allerlaatste test: Badge-examen | |||
|DutM=The very final test: Badge exams | |||
|Fre=Tout dernier test : Parade des badges | |||
|FreM=Very last test: Badge parade | |||
|Ita=Prova suprema: Spille a gogo | |||
|ItaM=Supreme trial: Badges galore | |||
|Ger=Superfinal-Test: Abzeichenparade | |||
|GerM=Superfinal test: Badge parade | |||
|Kor=울트라 챔피언십 배지 온 퍼레이드 | |||
|KorR=Ulteula Chaempieonsib Baeji on Peoleideu | |||
|KorM=Ultra Championship: Badges on Parade | |||
|PorA=Desafio final à vera: Prova das insígnas! | |PorA=Desafio final à vera: Prova das insígnas! | ||
|PorAM=Final challenge for real: Badge test! | |PorAM=Final challenge for real: Badge test! | ||
|PorE=Teste final (a sério): Exame das insígnias | |PorE=Teste final (a sério): Exame das insígnias | ||
|PorEM=Final test (seriously): Badges exam | |PorEM=Final test (seriously): Badges exam | ||
| | |Rus=Мегаиспытание 3: экзамен по значкам | ||
| | |RusR=Megaispytaniye 3: ekzamen po znachkam | ||
|RusM=Mega Challenge 3: Badge Exam | |||
|Spa=Maratón ultrafinal: Insignias a examen | |||
|SpaM=Ultra Final Marathon: Badges to the Test | |||
}} | }} | ||
Revision as of 02:38, May 1, 2024
| Level | |
|---|---|
| The Final-Final Test Badge Marathon | |
Mario in the Spring Feet section | |
| World | Special World |
| Game | Super Mario Bros. Wonder |
| Difficulty | ★★★★★ |
| << Directory of levels >> | |
Template:Quote2 The Final-Final Test Badge Marathon is the final course in the Special World and, subsequently, the final course of Super Mario Bros. Wonder. It features many challenges that require the use of badges. Beating The Final Test Wonder Gauntlet unlocks a path from there to this level, but only if the player has collected all Wonder Seeds, 10-flower coins, and golden flags available so far, and has cleared The Final Battle! Bowser's Rage Stage. This course features a single Wonder Seed, and completing the course along with collecting all 10-flower coins and reaching the top of the Goal Pole unlocks the final Poplin house WONDER?. This level's Wonder Seed, 10-flower coins, and top of the Goal Pole do not count towards their respective medal requirements on the player's save file. This is the only Special World level without a Wonder Effect.
Unlike Badge Challenges, this is a regular level, meaning the player loses a life normally when defeated, but keeps 10-flower coins collected up to that point unless the level is exited before being cleared.
Layout
The level takes place in a factory resembling the courses found in Castle Bowser. It is split into a series of rooms separated by pipes; each room automatically changes the player's current badge to a certain Action Badge or Expert Badge, and the player must use said badge to navigate the obstacles in the room. There are a total of 10 rooms, and the level features two Checkpoint Flags.
The first room uses the Parachute Cap badge, and the player must use it to dodge Sugarstars while activating Wow Buds to lower the poison until reaching safe ground. The second room uses Floating High Jump, and the player must jump and Ground Pound to propel an accordion-like lift while avoiding large poison geysers. The third room uses Dolphin Kick, which allows the player to dash away from underwater electricity blocks that activate quickly. Clearing this room leads to the first Checkpoint Flag.
The fourth room uses Crouching High Jump, where the player must quickly charge and activate its ability quickly along Zip Tracks to avoid poison geysers and Munchers. The fifth room uses Wall-Climb Jump, where the player must outrun rising poison by using the ability and jumping on the seeds from Melon Piranha Plants, while Lil Sparkies and Hotheads move across platforms. The sixth room uses Spring Feet, and requires navigating increasingly thin platforms with large and rapidly moving Fire Bars while subject to jumping perpetually. Clearing this room leads to the second Checkpoint Flag.
The seventh room uses Jet Run, requiring the player to repeatedly jump in mid-air after running off platforms, followed by Missile Megs, causing the player to move at an extremely high speed, and finally platforms that slope upward, which changes the trajectory of running off their edges. The eighth room uses Boosting Spin Jump, necessitating that the player use it to prevent themselves from falling into a bottomless pit, navigate tight corridors of Spike Traps, and latch back onto a Zip Track. The ninth room uses Grappling Vine, so that the player can latch onto small walls surrounded by Spike Traps and climb along Hot-Hot Rocks while they are not emitting magma. The tenth and final room uses Invisibility; while being invisible, the player must jump across triangular bumpers, a magenta Bloomp launched to the right from a pump, and several green Bloomps approaching from the right. To aid the player in discerning their location, many clouds are present in this room, which disappear when the player comes into contact with them. The end of this room has a staircase of Hard Blocks and a final bumper leading to the Goal Pole, where the Wonder Seed is obtained.
10-flower coins
- 10-flower coin 1: In the Dolphin Kick room, at the bottom of a circle of electricity blocks. Collecting it necessitates traversing the circle a second time or taking damage in order to progress.
- 10-flower coin 2: In the Wall-Climb Jump room, on the right of the platform after the first Hothead. It can be collected by falling from a higher platform or by jumping on a Melon Piranha Plant's seeds.
- 10-flower coin 3: In the Invisibility room, above a large, rotating triangular bumper surrounded by bottomless pits.
First 10-flower coin
Second 10-flower coin
Third 10-flower coin
Enemies and obstacles
- Sugarstar
- Piranha Plant
- Muncher
- Melon Piranha Plant
- Lil Sparky
- Hothead
- Missile Meg
- Bloomp
- Electricity Block
- Fire Bar
- Spike Trap
- Hot-Hot Rock
- Bumper
- Poison (green)
- Poison tide (green)
- Clouds
- Būsuke Hōdai
Talking Flower quotes
- "Go for it!" (in the Parachute Cap room)
- "Float while in midair!"
- "Ready to ride?" (in the Floating High Jump room)
- "Thank you for riding with us."
- "Show me what you can do!" (in the Dolphin Kick room)
- "Focus... Take a breath."
- "Wait! We're underwater! Just focus."
- "Crouch, then jump!" (in the Crouching High Jump room)
- "Great!"
- "Jump against the wall, then jump again!" (in the Wall-Climb Jump room)
- "You've got it!"
- "Practice makes better." (in the Spring Feet room)
- "If all else fails, you just gotta..."
- "Jump! Jump! Jump!"
- "I always believed in you!"
- "If all else fails, you just gotta..."
- "Keep going..." (in the Jet Run room)
- "Yeahhhh!"
- "Mid! Air! Spin!" (in the Boosting Spin Jump room)
- "Focus... Take a breath."
- "Impressive!"
- "Jump, then unleash the vine!" (in the Grappling Vine room)
- "Deep breaths..."
- "Don't give up!"
- "See ya!"
Gallery

The course's thumbnail
The Parachute Cap badge section
The Floating High Jump badge section
The Dolphin Kick badge section
The Crouching High Jump badge section
The Wall-Climb Jump badge section
The Spring Feet Expert Badge section
The Jet Run Expert Badge section
The Boosting Spin Jump badge section

The Grappling Vine badge section
The Invisibility Expert Badge section


Names in other languages
| Language | Name | Meaning |
|---|---|---|
| Japanese | ウルトラチャンピオンシップバッジ・オン・パレード Urutora chanpionshippu bajji on parēdo |
Ultra Championship: A succession of badges (lit. Badge on parade) |
| Chinese (simplified) | 终极锦标赛 徽章总动员 Zhōngjí Jǐnbiāosài Huīzhāng Zǒngdòngyuán |
Ultimate Championship: Badges All-In |
| Chinese (traditional) | 終極錦標賽 徽章總動員 Zhōngjí Jǐnbiāosài Huīzhāng Zǒngdòngyuán |
Ultimate Championship: Badges All-In |
| Dutch | De allerlaatste test: Badge-examen |
The very final test: Badge exams |
| French | Tout dernier test : Parade des badges |
Very last test: Badge parade |
| German | Superfinal-Test: Abzeichenparade |
Superfinal test: Badge parade |
| Italian | Prova suprema: Spille a gogo |
Supreme trial: Badges galore |
| Korean | 울트라 챔피언십 배지 온 퍼레이드 Ulteula Chaempieonsib Baeji on Peoleideu |
Ultra Championship: Badges on Parade |
| Portuguese (NOA) | Desafio final à vera: Prova das insígnas! |
Final challenge for real: Badge test! |
| Portuguese (NOE) | Teste final (a sério): Exame das insígnias |
Final test (seriously): Badges exam |
| Russian | Мегаиспытание 3: экзамен по значкам Megaispytaniye 3: ekzamen po znachkam |
Mega Challenge 3: Badge Exam |
| Spanish | Maratón ultrafinal: Insignias a examen |
Ultra Final Marathon: Badges to the Test |