The Colossal Hole: Difference between revisions
m (Text replacement - "Category:Subterranean areas" to "Category:Underground areas") |
m (→Musical Coins) |
||
| (6 intermediate revisions by 3 users not shown) | |||
| Line 1: | Line 1: | ||
[[File:TCHM.PNG|thumb | [[File:TCHM.PNG|thumb|E4 The Colossal Hole]] | ||
'''The Colossal Hole''' is | '''The Colossal Hole''' is the fourth level on the eastern side of the [[music box (world)|music box world]] in ''[[Wario Land 3]]''. This level is accessible after acquiring the red Tusk from [[The Steep Canyon]]'s Red Chest, the blue Tusk from [[The Stagnant Swamp]]'s Blue Chest, and the Green Flower from [[The Stagnant Swamp]]'s Red Chest, causing the volcano to erupt. It is unlocked alongside [[The West Crater]]. | ||
The Colossal Hole takes place in a large underground level that consists of a deep pit in the middle under a sky. There are many openings to the left and right within the pit, and some of them contains [[Omodonmeka]]. [[Owl (species)|Owl]]s are also present in the level, where they will fly high at night and rest during the day. | |||
==Treasures== | ==Treasures== | ||
===Gray Chest: Left Glass Eye=== | ===Gray Chest: Left Glass Eye=== | ||
[[File:Snakyb!.PNG|thumb|left|The Left and Right Glass Eyes, opening the door]] | [[File:Snakyb!.PNG|thumb|left|The Left and Right Glass Eyes, opening the door]] | ||
The Left Glass Eye<ref>Brady, Matthew K., Nathan Beittenmiller, Debra McBride, and David Cassady. ''Game Boy Game Secrets, 2001 Edition'' Prima's Official Strategy Guide. Page 94.</ref> in the [[treasure chest|Gray Chest]] is | The Left Glass Eye<ref>Brady, Matthew K., Nathan Beittenmiller, Debra McBride, and David Cassady. ''Game Boy Game Secrets, 2001 Edition'' Prima's Official Strategy Guide. Page 94.</ref> in the [[treasure chest|Gray Chest]]. It is available as soon as the level is unlocked. | ||
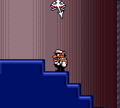
To get the Gray Key in the upper area, Wario must first go to the lower area to use one of the [[Jellybob (Wario Land 3)|Pneumo]]s to trigger [[Puffy Wario]], and then ascend to the top while avoiding the [[Spike (Wario Land series)|spike]]s to reach the upper area. In the upper area, Wario must float so that he crosses the thin platform, where the Gray Key is in between damaged blocks. | |||
After acquiring the Gray Key, Wario must go back to the lower are. In the lower area, the left Pneumo must be used to trigger Puffy Wario, and then float up and to the left to the platform where the [[Omodonmeka]] is. After deflating, Wario must make his way to the left where the Gray Chest is. | |||
The | The Left Glass Eye, along with the Right Glass Eye from The West Crater's Gray Chest, are used to fit into the snake's eye sockets on the blue door at [[Tower of Revival]], opening up the door found there. | ||
{{br}} | {{br}} | ||
===Red Chest: Air-Pump=== | ===Red Chest: Air-Pump=== | ||
[[File:Pump!.PNG|thumb|The Air-Pump raising the ice blocks]] | [[File:Pump!.PNG|thumb|The Air-Pump raising the ice blocks]] | ||
The {{conjectural|Air-Pump}} in the Red Chest requires the Garlic | The {{conjectural|Air-Pump}} in the Red Chest requires the Garlic from Tower of Revival's Red Chest. This allows Wario to break solid blocks obstructing both the Red Key's room and the Golf minigame room. | ||
To get the Red Key, Wario must go all the way down to the bottom of the lower area and to the right, where there are solid blocks next to the [[Omodonmeka]]. There is a room past the blocks, which contains a [[Spearhead (enemy)|Spearhead]]. The one-tile-wide floor is treated as a series of [[Enemy Block]]s, so the Spearhead must be thrown on it to break through it, allowing Wario to reach the Red Key. | |||
The Air-Pump makes the | In order to reach the Red Chest, the Golf minigame must be played in the upper area to lift the mini-game block in the lower area. To reach the door containing the Golf minigame, the Omodonmeka with the [[Omodon]] on the left side in the upper area must be used to trigger Flat Wario. To get there, Wario can go left and climb up the ladder all the way up, or use Puffy Wario triggered by the Pneumo to go to the upper area and to the left. After being flattened, Wario must descend to the platform where there is a Gray Key underneath. From there, he must go left to the narrow gap to get the Omodonmeka to unflatten him, break the blocks to the left, go up the ladder, and then jump up the platforms to the Golf minigame room. After completing the minigame, Wario must go to where the mini-game block is. To get there, there are two ways: The first way is to go back to the beginning and be squashed by the Omodon again, this time descending to the lower area to slowly descend to the right where the mini-game block is (Flat Wario is immune to spikes), after which Wario must unflatten himself with the Omodonmeka past the block; the other way is to go to the lower area, and then use a [[Dash Attack]] to the right, after that dropping to the left while crouching and then hugging the right to reach past the narrow gap. In the room past the mini-game block, there is a wall of solid blocks to the right, and another wall of damaged blocks up and to the left. Breaking past the blocks is needed to reach the Red Chest. | ||
The Air-Pump makes the glass containers rise in [[The Pool of Rain]] and [[Bank of the Wild River]], allowing Wario to enter the room underneath it in the former and reach a higher area with it in the latter. | |||
===Green Chest: High Jump Boots=== | ===Green Chest: High Jump Boots=== | ||
The High Jump Boots<ref name=High>Brady, Matthew K., Nathan Beittenmiller, Debra McBride, and David Cassady. ''Game Boy Game Secrets, 2001 Edition'' Prima's Official Strategy Guide. Page 95.</ref> power-up in the Green Chest requires | The High Jump Boots<ref name=High>Brady, Matthew K., Nathan Beittenmiller, Debra McBride, and David Cassady. ''Game Boy Game Secrets, 2001 Edition'' Prima's Official Strategy Guide. Page 95.</ref> is a power-up in the Green Chest. It requires both the Top Half of Sun Medallion from [[Sea Turtle Rocks]]' Green Chest and the Bottom Half of Sun Medallion from [[Desert Ruin]]'s Blue Chest, so that daytime can happen on the eastern part of the world. Unlike the other two chests in the east where daytime is required, this Chest cannot be obtained in the nighttime at first, as the power-up in this treasure must be used to get it at night. | ||
From the start, the [[Owl (species)|owl]] at the beginning perches and sleeps, allowing Wario to more easily reach it. After riding the Owl, Wario must make his way down and to the right, still in the upper area, so that he reaches the right side where there is a maze of [[Spike (Wario Land series)|spike]] to navigate through. At the end of the maze, there is a door. The room within the door is open, where the upper area consists of the [[Sun (Wario Land 3)|Sun]] and the lower area consists of a [[Spear-bot]] and [[Brrr Bear]]s. To get to the Green Key, Wario must first make his way up to the sky and then go right to the rightmost platform above the sky, and then wait for the Sun to breathe fire to trigger [[Flaming Wario|Hot Wario]], waiting for Wario to be enveloped in flames to be able to break the [[Bonfire Block]]s to collect the Green Key. (If this level is visited in the nighttime, the Brrr Bears are replaced with [[Fire Robota]]s to trigger Hot Wario so that the Bonfire Blocks can be broken.) | |||
After | After acquiring the Green Key, Wario must make his way to the left, and then go up again to wait for the Sun to breathe fire on him to trigger Hot Wario again, this time ensuring that he is on the floor where the Bonfire Blocks are, in order to break them after Wario is enveloped in flames. After breaking through the blocks, the Green Chest can be reached. (If this level is visited in the nighttime, the nearby Fire Robota can be used for the same purpose of triggering Hot Wario to break the Bonfire Blocks.) | ||
The High Jump Boots power-up allow Wario High Jump<ref>''Nintendo Power'' Volume 133, page 59.</ref><ref name=High/> power-up. It allows Wario to jump higher after up is held on the D-pad while jumping. Wario can also bounce off enemies for a height boost after {{button|gbc|A}} is held when bouncing on them. This opens up the way to new treasures in [[The Grasslands]], [[The Stagnant Swamp]], and [[Cave of Flames]]. | |||
===Blue Chest: Locomotive=== | ===Blue Chest: Locomotive=== | ||
[[File:Locomotive.PNG|thumb|left|Wario finds the Locomotive]] | [[File:Locomotive.PNG|thumb|left|Wario finds the Locomotive]] | ||
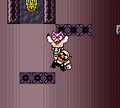
The {{conjectural|Locomotive}} in the Blue Chest requires blowing up the bomb found in this level using the Explosive Plunger Box from [[Beneath the Waves]]. | The {{conjectural|Locomotive}} in the Blue Chest requires blowing up the bomb found in this level using the Explosive Plunger Box from [[Beneath the Waves]]' Gray Chest. This causes the ceiling with an attached bomb to drop down, allowing the door originally below it to be entered. | ||
From the beginning Wario must go outside the hole and then go right. He can do this by riding an owl or float up with Puffy Wario using a Pneumo found in the lower area. The room outside the hole has many snake pots inside, though not all pots contain [[Snake (Wario Land 3)|snake]]s. To reach the Blue Key, Wario must go all the way to the right, and then jump from the snake's heads and platforms to reach the ceiling, where the key is to the left within a recess. | |||
From the Blue Key, Wario must descend from there to the bottom, and then go left to a snake to jump up from the snake's heads and platforms upwards, until reaching near the top to the left, where the Blue Chest is. | |||
The Locomotive does not affect the world in any way. | |||
{{br}} | {{br}} | ||
==[[Musical Coin]]s== | |||
{|width=60% cellspacing=0 border=2 cellpadding=3 style="border-collapse:collapse;" | |||
|- | |||
!Location | |||
!Description | |||
|- | |||
|[[File:WL3 S TheColossalHole MC1.png]] | |||
|align="center"|In the upper area, Wario must ride the owl there, and then go out and up into the sky. The Musical Coin is high up to the left. | |||
|- | |||
|[[File:WL3 S TheColossalHole MC2.png]] | |||
|align="center"|In the room outside the hole, which requires riding the owl to get there, the Musical Coin is to the left under the pit next to where the Blue Chest is. | |||
|- | |||
|[[File:WL3 S TheColossalHole MC3.png]] | |||
|align="center"|In the lower area, the Musical Coin requires Puffy Wario to be triggered by one of the Pneumo so that he floats towards the Musical Coin in the middle from underneath. | |||
|- | |||
|[[File:WL3 S TheColossalHole MC4.png]] | |||
|align="center"|In the upper area, Wario must ride the owl on the right side through a maze of spikes to get the Musical Coin in a dead end. | |||
|- | |||
|[[File:WL3 S TheColossalHole MC5.png]] | |||
|align="center"|In the upper area, and in room within the maze of spikes, Wario must go right all the way after going up the ladder, and then drop to the area where the Green Key is. After that, the Brrr Bear (day) or Fire Robota (night) must be used to break the Enemy Blocks on the floor, and then the wall to the left in order to be able to reach the Musical Coin. | |||
|- | |||
|[[File:WL3 S TheColossalHole MC6 Loc.png]] | |||
[[File:WL3 S TheColossalHole MC6.png]] | |||
|align="center"|In the lower area, Puffy Wario must be triggered by the left Pneumo, and then float up a thin platform to the left. After returning to normal, Wario must go down the ladder and then roll down the slope found there. While rolling, Wario must jump to the center of the level, and then jump again to reach the Musical Coin on the other side. | |||
|- | |||
|[[File:WL3 S TheColossalHole MC7 Loc.png]] | |||
[[File:WL3 S TheColossalHole MC7.png]] | |||
|align="center"|In the upper area, Flat Wario must be triggered through the Omodonmeka at the upper area. From there, Wario must descend to the lower area so that he lands on the midair platform in the middle. From there, Wario must go left to reach the Omodonmeka to the left to return to normal, and then climb the ladder to roll down the slope. After breaking the blocks, Wario must jump over the gap, and then continue rolling down without jumping towards the Musical Coin. | |||
|- | |||
|[[File:WL3 S TheColossalHole MC8 Loc.png]] | |||
[[File:WL3 S TheColossalHole MC8.png]] | |||
|align="center"|In order to acquire this Musical Coin, Wario must complete the Golf minigame first. This requires Flat Wario to be triggered by the Omodonmeka in the upper area, and then descend to the left to the other Omodonmeka in the area to unflatten Wario to reach the Golf minigame room above. After completing the minigame, Wario must go to the lower area and under the mini-game block, and then into the door found past there. Within the room, Wario must break the blocks in a way that allows him to reach the Musical Coin in the upper level. | |||
|} | |||
==Enemies== | |||
*[[Omodonmeka]] (6, 1 carrying Omodon) | |||
*[[Omodon]] (1) | |||
*[[Snake (Wario Land 3)|Snake]] (8) | |||
*[[Jellybob (Wario Land 3)|Pneumo]] (2) | |||
*[[Spearhead (enemy)|Spearhead]] (1) | |||
*[[Spear-bot]] (1) | |||
*[[Sun (Wario Land 3)|Sun]] (1, day only) | |||
*[[Brrr Bear]] (2, day only) | |||
*[[Mr. Moon]] (1, night only) | |||
*[[Fire Robota]] (2, night only) | |||
==Reaction abilities in this level== | ==Reaction abilities in this level== | ||
*[[Electric Wario]] | *[[Electric Wario]] (via Mr. Mooon) | ||
*[[Flat Wario]] | *[[Flat Wario]] (via Omodon) | ||
*[[Flaming Wario|Hot Wario]] | *[[Flaming Wario|Hot Wario]] (via Sun or Fire Robota) | ||
*[[Frozen Wario|Ice Skatin' Wario]] | *[[Frozen Wario|Ice Skatin' Wario]] (via Brrr Bear) | ||
*[[Puffy Wario]] | *[[Puffy Wario]] (via Pneumo) | ||
==Gallery== | ==Gallery== | ||
| Line 57: | Line 112: | ||
|JapM=The Colossal Hole | |JapM=The Colossal Hole | ||
}} | }} | ||
==References== | ==References== | ||
<references/> | <references/> | ||
Latest revision as of 14:00, April 25, 2023

The Colossal Hole is the fourth level on the eastern side of the music box world in Wario Land 3. This level is accessible after acquiring the red Tusk from The Steep Canyon's Red Chest, the blue Tusk from The Stagnant Swamp's Blue Chest, and the Green Flower from The Stagnant Swamp's Red Chest, causing the volcano to erupt. It is unlocked alongside The West Crater.
The Colossal Hole takes place in a large underground level that consists of a deep pit in the middle under a sky. There are many openings to the left and right within the pit, and some of them contains Omodonmeka. Owls are also present in the level, where they will fly high at night and rest during the day.
Treasures[edit]
Gray Chest: Left Glass Eye[edit]

The Left Glass Eye[1] in the Gray Chest. It is available as soon as the level is unlocked.
To get the Gray Key in the upper area, Wario must first go to the lower area to use one of the Pneumos to trigger Puffy Wario, and then ascend to the top while avoiding the spikes to reach the upper area. In the upper area, Wario must float so that he crosses the thin platform, where the Gray Key is in between damaged blocks.
After acquiring the Gray Key, Wario must go back to the lower are. In the lower area, the left Pneumo must be used to trigger Puffy Wario, and then float up and to the left to the platform where the Omodonmeka is. After deflating, Wario must make his way to the left where the Gray Chest is.
The Left Glass Eye, along with the Right Glass Eye from The West Crater's Gray Chest, are used to fit into the snake's eye sockets on the blue door at Tower of Revival, opening up the door found there.
Red Chest: Air-Pump[edit]

The Air-Pump in the Red Chest requires the Garlic from Tower of Revival's Red Chest. This allows Wario to break solid blocks obstructing both the Red Key's room and the Golf minigame room.
To get the Red Key, Wario must go all the way down to the bottom of the lower area and to the right, where there are solid blocks next to the Omodonmeka. There is a room past the blocks, which contains a Spearhead. The one-tile-wide floor is treated as a series of Enemy Blocks, so the Spearhead must be thrown on it to break through it, allowing Wario to reach the Red Key.
In order to reach the Red Chest, the Golf minigame must be played in the upper area to lift the mini-game block in the lower area. To reach the door containing the Golf minigame, the Omodonmeka with the Omodon on the left side in the upper area must be used to trigger Flat Wario. To get there, Wario can go left and climb up the ladder all the way up, or use Puffy Wario triggered by the Pneumo to go to the upper area and to the left. After being flattened, Wario must descend to the platform where there is a Gray Key underneath. From there, he must go left to the narrow gap to get the Omodonmeka to unflatten him, break the blocks to the left, go up the ladder, and then jump up the platforms to the Golf minigame room. After completing the minigame, Wario must go to where the mini-game block is. To get there, there are two ways: The first way is to go back to the beginning and be squashed by the Omodon again, this time descending to the lower area to slowly descend to the right where the mini-game block is (Flat Wario is immune to spikes), after which Wario must unflatten himself with the Omodonmeka past the block; the other way is to go to the lower area, and then use a Dash Attack to the right, after that dropping to the left while crouching and then hugging the right to reach past the narrow gap. In the room past the mini-game block, there is a wall of solid blocks to the right, and another wall of damaged blocks up and to the left. Breaking past the blocks is needed to reach the Red Chest.
The Air-Pump makes the glass containers rise in The Pool of Rain and Bank of the Wild River, allowing Wario to enter the room underneath it in the former and reach a higher area with it in the latter.
Green Chest: High Jump Boots[edit]
The High Jump Boots[2] is a power-up in the Green Chest. It requires both the Top Half of Sun Medallion from Sea Turtle Rocks' Green Chest and the Bottom Half of Sun Medallion from Desert Ruin's Blue Chest, so that daytime can happen on the eastern part of the world. Unlike the other two chests in the east where daytime is required, this Chest cannot be obtained in the nighttime at first, as the power-up in this treasure must be used to get it at night.
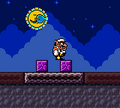
From the start, the owl at the beginning perches and sleeps, allowing Wario to more easily reach it. After riding the Owl, Wario must make his way down and to the right, still in the upper area, so that he reaches the right side where there is a maze of spike to navigate through. At the end of the maze, there is a door. The room within the door is open, where the upper area consists of the Sun and the lower area consists of a Spear-bot and Brrr Bears. To get to the Green Key, Wario must first make his way up to the sky and then go right to the rightmost platform above the sky, and then wait for the Sun to breathe fire to trigger Hot Wario, waiting for Wario to be enveloped in flames to be able to break the Bonfire Blocks to collect the Green Key. (If this level is visited in the nighttime, the Brrr Bears are replaced with Fire Robotas to trigger Hot Wario so that the Bonfire Blocks can be broken.)
After acquiring the Green Key, Wario must make his way to the left, and then go up again to wait for the Sun to breathe fire on him to trigger Hot Wario again, this time ensuring that he is on the floor where the Bonfire Blocks are, in order to break them after Wario is enveloped in flames. After breaking through the blocks, the Green Chest can be reached. (If this level is visited in the nighttime, the nearby Fire Robota can be used for the same purpose of triggering Hot Wario to break the Bonfire Blocks.)
The High Jump Boots power-up allow Wario High Jump[3][2] power-up. It allows Wario to jump higher after up is held on the D-pad while jumping. Wario can also bounce off enemies for a height boost after ![]() is held when bouncing on them. This opens up the way to new treasures in The Grasslands, The Stagnant Swamp, and Cave of Flames.
is held when bouncing on them. This opens up the way to new treasures in The Grasslands, The Stagnant Swamp, and Cave of Flames.
Blue Chest: Locomotive[edit]

The Locomotive in the Blue Chest requires blowing up the bomb found in this level using the Explosive Plunger Box from Beneath the Waves' Gray Chest. This causes the ceiling with an attached bomb to drop down, allowing the door originally below it to be entered.
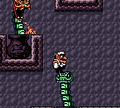
From the beginning Wario must go outside the hole and then go right. He can do this by riding an owl or float up with Puffy Wario using a Pneumo found in the lower area. The room outside the hole has many snake pots inside, though not all pots contain snakes. To reach the Blue Key, Wario must go all the way to the right, and then jump from the snake's heads and platforms to reach the ceiling, where the key is to the left within a recess.
From the Blue Key, Wario must descend from there to the bottom, and then go left to a snake to jump up from the snake's heads and platforms upwards, until reaching near the top to the left, where the Blue Chest is.
The Locomotive does not affect the world in any way.
Musical Coins[edit]
| Location | Description |
|---|---|

|
In the upper area, Wario must ride the owl there, and then go out and up into the sky. The Musical Coin is high up to the left. |

|
In the room outside the hole, which requires riding the owl to get there, the Musical Coin is to the left under the pit next to where the Blue Chest is. |

|
In the lower area, the Musical Coin requires Puffy Wario to be triggered by one of the Pneumo so that he floats towards the Musical Coin in the middle from underneath. |

|
In the upper area, Wario must ride the owl on the right side through a maze of spikes to get the Musical Coin in a dead end. |

|
In the upper area, and in room within the maze of spikes, Wario must go right all the way after going up the ladder, and then drop to the area where the Green Key is. After that, the Brrr Bear (day) or Fire Robota (night) must be used to break the Enemy Blocks on the floor, and then the wall to the left in order to be able to reach the Musical Coin. |

|
In the lower area, Puffy Wario must be triggered by the left Pneumo, and then float up a thin platform to the left. After returning to normal, Wario must go down the ladder and then roll down the slope found there. While rolling, Wario must jump to the center of the level, and then jump again to reach the Musical Coin on the other side. |

|
In the upper area, Flat Wario must be triggered through the Omodonmeka at the upper area. From there, Wario must descend to the lower area so that he lands on the midair platform in the middle. From there, Wario must go left to reach the Omodonmeka to the left to return to normal, and then climb the ladder to roll down the slope. After breaking the blocks, Wario must jump over the gap, and then continue rolling down without jumping towards the Musical Coin. |

|
In order to acquire this Musical Coin, Wario must complete the Golf minigame first. This requires Flat Wario to be triggered by the Omodonmeka in the upper area, and then descend to the left to the other Omodonmeka in the area to unflatten Wario to reach the Golf minigame room above. After completing the minigame, Wario must go to the lower area and under the mini-game block, and then into the door found past there. Within the room, Wario must break the blocks in a way that allows him to reach the Musical Coin in the upper level. |


Enemies[edit]
- Omodonmeka (6, 1 carrying Omodon)
- Omodon (1)
- Snake (8)
- Pneumo (2)
- Spearhead (1)
- Spear-bot (1)
- Sun (1, day only)
- Brrr Bear (2, day only)
- Mr. Moon (1, night only)
- Fire Robota (2, night only)
Reaction abilities in this level[edit]
- Electric Wario (via Mr. Mooon)
- Flat Wario (via Omodon)
- Hot Wario (via Sun or Fire Robota)
- Ice Skatin' Wario (via Brrr Bear)
- Puffy Wario (via Pneumo)
Gallery[edit]
Wario and an owl
Outside the hole
The snakes area
The bottom of the hole


Names in other languages[edit]
| Language | Name | Meaning |
|---|---|---|
| Japanese | 巨大な穴 Kyodai na Ana |
The Colossal Hole |
References[edit]
- ^ Brady, Matthew K., Nathan Beittenmiller, Debra McBride, and David Cassady. Game Boy Game Secrets, 2001 Edition Prima's Official Strategy Guide. Page 94.
- ^ a b Brady, Matthew K., Nathan Beittenmiller, Debra McBride, and David Cassady. Game Boy Game Secrets, 2001 Edition Prima's Official Strategy Guide. Page 95.
- ^ Nintendo Power Volume 133, page 59.