Gallery:Mario Party 3: Difference between revisions
| (20 intermediate revisions by the same user not shown) | |||
| Line 250: | Line 250: | ||
====Chance Time blocks==== | ====Chance Time blocks==== | ||
<gallery> | <gallery widths=48 heights=32> | ||
Mario Chance Time MP3.png|Mario | Mario Chance Time MP3.png|Mario | ||
Luigi Chance Time MP3.png|Luigi | Luigi Chance Time MP3.png|Luigi | ||
| Line 271: | Line 271: | ||
===Board selection markers=== | ===Board selection markers=== | ||
<gallery> | <gallery widths=48 heights=20> | ||
MP3 Character Selection 1P Text.png|First player | MP3 Character Selection 1P Text.png|First player | ||
MP3 Character Selection 2P Text.png|Second player | MP3 Character Selection 2P Text.png|Second player | ||
| Line 280: | Line 280: | ||
===Place markers=== | ===Place markers=== | ||
<gallery> | <gallery widths=40 heights=20> | ||
MP2-3 Board Play 1st Place Marker Test.png|1st place | MP2-3 Board Play 1st Place Marker Test.png|1st place | ||
MP3 Board Play 2nd Place Marker Test.png|2nd place | MP3 Board Play 2nd Place Marker Test.png|2nd place | ||
| Line 288: | Line 288: | ||
===Duel Mode partners=== | ===Duel Mode partners=== | ||
<gallery> | <gallery widths=40 heights=40> | ||
KoopaTroopaIcon MP3.png|[[Koopa Troopa]] | KoopaTroopaIcon MP3.png|[[Koopa Troopa]] | ||
GoombaIcon MP3.png|[[Goomba]] | GoombaIcon MP3.png|[[Goomba]] | ||
| Line 305: | Line 305: | ||
===Items=== | ===Items=== | ||
====Sprites==== | ====Sprites==== | ||
<gallery> | <gallery widths=48 heights=32> | ||
Mushroom MP2-3.png | Mushroom MP2-3.png | ||
Skeleton Key MP3.png | Skeleton Key MP3.png | ||
| Line 324: | Line 324: | ||
====Player panels==== | ====Player panels==== | ||
<gallery> | <gallery widths=48 heights=28 style="display:inline-block"> | ||
No item text MP3.png | No item text MP3.png | ||
</gallery> | |||
<gallery widths=50 heights=20 style="display:inline-block"> | |||
No item text MP2-3.png | No item text MP2-3.png | ||
</gallery> | |||
<gallery widths=48 heights=16 style="display:inline-block"> | |||
Mushroom Item player panel sprite.png | Mushroom Item player panel sprite.png | ||
Warp Box Item player panel sprite.png | Warp Box Item player panel sprite.png | ||
| Line 349: | Line 353: | ||
====Using sprites==== | ====Using sprites==== | ||
<gallery> | <gallery widths=48 heights=24> | ||
Mushroom Item gameplay sprite.png | Mushroom Item gameplay sprite.png | ||
Warp Block Item gameplay sprite.png | Warp Block Item gameplay sprite.png | ||
| Line 374: | Line 378: | ||
====Mini-game sprites==== | ====Mini-game sprites==== | ||
<gallery> | <gallery widths=48 heights=32> | ||
Mushroom mini-game sprite MP3.png | Mushroom mini-game sprite MP3.png | ||
Warp Block mini-game sprite MP3.png | Warp Block mini-game sprite MP3.png | ||
| Line 394: | Line 398: | ||
====Item description icons==== | ====Item description icons==== | ||
<gallery> | <gallery widths=40 heights=40> | ||
MP2-3 Mushroom.png|[[Mushroom]] | MP2-3 Mushroom.png|[[Mushroom]] | ||
MP2-3 Warp Block.png|[[Warp Block]] | MP2-3 Warp Block.png|[[Warp Block]] | ||
| Line 419: | Line 423: | ||
===Spaces=== | ===Spaces=== | ||
====Battle Royale==== | ====Battle Royale==== | ||
<gallery> | <gallery widths=48 heights=32> | ||
BlueSpace MP3.png | BlueSpace MP3.png | ||
RedSpace MP3.png | RedSpace MP3.png | ||
| Line 433: | Line 437: | ||
====Duel==== | ====Duel==== | ||
<gallery> | <gallery widths=48 heights=32> | ||
MP3 BasicSpace.png | MP3 BasicSpace.png | ||
MP3 Power Up Space.png | MP3 Power Up Space.png | ||
| Line 444: | Line 448: | ||
===Tutorial icons=== | ===Tutorial icons=== | ||
<gallery> | <gallery widths=85 heights=69 style="display:inline-block"> | ||
Blue Space Tutorial MP3.png | Blue Space Tutorial MP3.png | ||
Red Space Tutorial MP3.png | Red Space Tutorial MP3.png | ||
| Line 453: | Line 457: | ||
Battle Space Tutorial MP3.png | Battle Space Tutorial MP3.png | ||
Game Guy Space Tutorial MP3.png | Game Guy Space Tutorial MP3.png | ||
</gallery> | |||
<gallery widths=80 heights=60 style="display:inline-block"> | |||
VS Mini-game MP3.png | VS Mini-game MP3.png | ||
</gallery> | |||
<gallery widths=64 heights=64 style="display:inline-block"> | |||
Coin Star Tutorial MP3.png | Coin Star Tutorial MP3.png | ||
Happening Star Tutorial MP3.png | Happening Star Tutorial MP3.png | ||
| Line 460: | Line 468: | ||
===Selection icons=== | ===Selection icons=== | ||
====Battle Royale boards==== | ====Battle Royale boards==== | ||
<gallery perrow=3> | <gallery widths=64 heights=64 perrow=3> | ||
Chilly Waters Selection Icon.png|Chilly Waters | Chilly Waters Selection Icon.png|Chilly Waters | ||
Deep Bloober Sea Selection Icon.png|Deep Bloober Sea | Deep Bloober Sea Selection Icon.png|Deep Bloober Sea | ||
| Line 470: | Line 478: | ||
====Duel boards==== | ====Duel boards==== | ||
<gallery perrow=3> | <gallery widths=64 heights=64 perrow=3> | ||
Gate Guy Selection Icon.png|Gate Guy | Gate Guy Selection Icon.png|Gate Guy | ||
Arrowhead Selection Icon.png|Arrowhead | Arrowhead Selection Icon.png|Arrowhead | ||
| Line 481: | Line 489: | ||
===Board logos=== | ===Board logos=== | ||
====Battle Royale board logos==== | ====Battle Royale board logos==== | ||
<gallery widths= | <gallery widths=226 heights=120> | ||
MP3 Chilly Waters Logo.png|[[Chilly Waters]] | MP3 Chilly Waters Logo.png|[[Chilly Waters]] | ||
MP3 Deep Bloober Sea Logo.png|[[Deep Bloober Sea]] | MP3 Deep Bloober Sea Logo.png|[[Deep Bloober Sea]] | ||
| Line 491: | Line 499: | ||
====Duel board logos==== | ====Duel board logos==== | ||
<gallery widths= | <gallery widths=228 heights=122> | ||
MP3 Gate Guy logo.png|[[Gate Guy]] | MP3 Gate Guy logo.png|[[Gate Guy]] | ||
MP3 Arrowhead logo.png|[[Arrowhead]] | MP3 Arrowhead logo.png|[[Arrowhead]] | ||
| Line 501: | Line 509: | ||
====Results icons==== | ====Results icons==== | ||
<gallery perrow=3> | <gallery widths=100 heights=46 perrow=3> | ||
Chilly Waters Results Icon.png|Chilly Waters | Chilly Waters Results Icon.png|Chilly Waters | ||
Deep Bloober Sea Results Icon.png|Deep Bloober Sea | Deep Bloober Sea Results Icon.png|Deep Bloober Sea | ||
| Line 512: | Line 520: | ||
====Pause menu icons==== | ====Pause menu icons==== | ||
<gallery perrow=3> | <gallery widths=152 heights=52 perrow=3> | ||
Chilly Waters Pause Menu.png | Chilly Waters Pause Menu.png | ||
Deep Bloober Sea Pause Menu.png | Deep Bloober Sea Pause Menu.png | ||
| Line 519: | Line 527: | ||
Creepy Cavern Pause Menu.png | Creepy Cavern Pause Menu.png | ||
Waluigi's Island Pause Menu.png | Waluigi's Island Pause Menu.png | ||
</gallery> | |||
<gallery widths=152 heights=60 perrow=3> | |||
Gate Guy Pause Menu.png | Gate Guy Pause Menu.png | ||
Arrowhead Pause Menu.png | Arrowhead Pause Menu.png | ||
| Line 534: | Line 544: | ||
====Pause menu settings==== | ====Pause menu settings==== | ||
<gallery> | <gallery widths=50 heights=50> | ||
Current COM and Player settings.gif | Current COM and Player settings.gif | ||
Mini-Game Explanations settings.gif | Mini-Game Explanations settings.gif | ||
| Line 546: | Line 556: | ||
===Starting areas=== | ===Starting areas=== | ||
<gallery> | <gallery widths=160 heights=120> | ||
MP3 Chilly Waters Start BG.png|Chilly Waters | MP3 Chilly Waters Start BG.png|Chilly Waters | ||
MP3 Deep Bloober Sea Start BG.png|Deep Bloober Sea | MP3 Deep Bloober Sea Start BG.png|Deep Bloober Sea | ||
| Line 558: | Line 568: | ||
===Game modes=== | ===Game modes=== | ||
<gallery> | <gallery widths=73 heights=18> | ||
Party Mode Logo MP3.png | Party Mode Logo MP3.png | ||
Story Mode Logo MP3.png | Story Mode Logo MP3.png | ||
| Line 564: | Line 574: | ||
===Game levels=== | ===Game levels=== | ||
<gallery> | <gallery widths=52 heights=18> | ||
Easy Mode Main Menu MP3.png | Easy Mode Main Menu MP3.png | ||
Normal Mode Main Menu MP3.png | Normal Mode Main Menu MP3.png | ||
| Line 613: | Line 623: | ||
===Dice Block numbers=== | ===Dice Block numbers=== | ||
<gallery> | <gallery widths=40 heights=40> | ||
MP3 Number 0.png | MP3 Number 0.png | ||
MP3 Number 1.png | MP3 Number 1.png | ||
| Line 628: | Line 638: | ||
===Dialogue portraits=== | ===Dialogue portraits=== | ||
<gallery> | <gallery widths=40 heights=40> | ||
Millennium Star Dialogue Portrait MP3.png | Millennium Star Dialogue Portrait MP3.png | ||
Toad Dialogue Portrait MP3.png | Toad Dialogue Portrait MP3.png | ||
| Line 653: | Line 663: | ||
===Transition screens=== | ===Transition screens=== | ||
<gallery class="blackbg"> | <gallery widths=145 heights=145 class="blackbg"> | ||
Tumble Transition MP3.png|[[Tumble]] | Tumble Transition MP3.png|[[Tumble]] | ||
Goomba Transition MP3.png|[[Goomba]] | Goomba Transition MP3.png|[[Goomba]] | ||
| Line 664: | Line 674: | ||
===Mini-game preview icons=== | ===Mini-game preview icons=== | ||
<gallery> | <gallery widths=128 heights=96> | ||
MP3 Treadmill Grill Icon.png|[[Treadmill Grill]] | MP3 Treadmill Grill Icon.png|[[Treadmill Grill]] | ||
MP3 Ice Rink Risk Icon.png|[[Ice-Rink Risk|Ice Rink Risk]] | MP3 Ice Rink Risk Icon.png|[[Ice-Rink Risk|Ice Rink Risk]] | ||
Latest revision as of 18:37, January 20, 2024
This is a gallery of images for the game Mario Party 3.
Logos[edit]
International logo
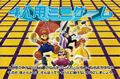
Japanese logo
In-game[edit]

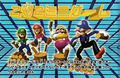
In-game logo (International)
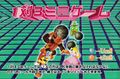
In-game logo (Japanese)
Artwork[edit]
Group pictures[edit]

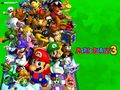
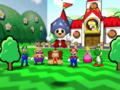
The main cast of Mario Party 3
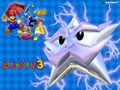
Promotional group picture
Group picture (also seen for the box art)
Group art from Japanese cover
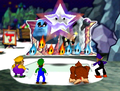
Mario, Wario, Waluigi, and Princess Daisy playing Parasol Plummet as the Millennium Star looks on
The group playing Parasol Plummet again
Yoshi tossing boulders in Boulder Ball
The group competing in Log Jam
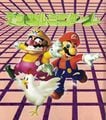
Mario and Wario participating in Fowl Play


Solo pictures (main cast)[edit]
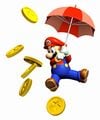
Mario playing Parasol Plummet
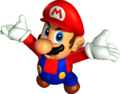
Mario raising his arms
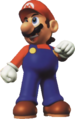
Mario ready to party
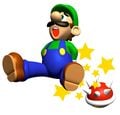
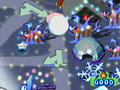
Luigi playing Ice Rink Risk

Luigi posing
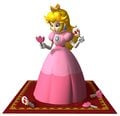
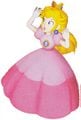
Princess Peach playing Locked Out
Princess Peach
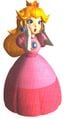
Princess Peach
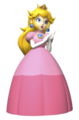
Princess Peach
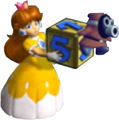
Princess Daisy playing Hey, Batter, Batter!
Princess Daisy and a Snifit

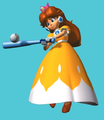
Princess Daisy playing Parasol Plummet
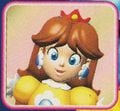
A portrait of Daisy
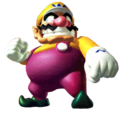
Wario striking a pose
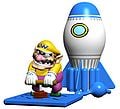
Wario playing Pump, Pump and Away
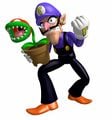
Waluigi with a Piranha Plant from Storm Chasers
A portrait of Waluigi
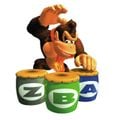
Donkey Kong playing The Beat Goes On
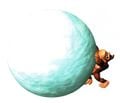
Donkey Kong playing Snowball Summit
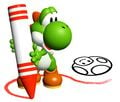
Yoshi playing Etch 'n' Catch


Solo pictures (supporting cast)[edit]
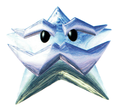
The Millennium Star

The Millennium Star

The Millennium Star
Tumble sleeping
Tumble
Tumble
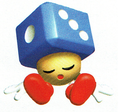
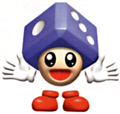
Belltop, the Duel Board turn counter


Items[edit]


Other[edit]

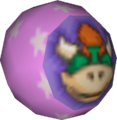
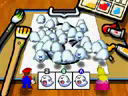
A Chance Block


Sprites and models[edit]
Characters[edit]
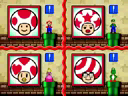
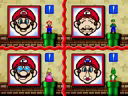
Character icons[edit]

Mario (Selected/Win)

Mario (Lose)

Luigi (Selected/Win)

Luigi (Lose)

Princess Peach (Selected/Win)

Princess Peach (Lose)

Yoshi (Selected/Win)

Yoshi (Lose)

Wario (Selected/Win)

Wario (Lose)

Donkey Kong (Selected/Win)

Donkey Kong (Lose)

Princess Daisy (Selected/Win)

Princess Daisy (Lose)

Waluigi (Selected/Win)

Waluigi (Lose)
Character's turn start[edit]

Mario

Luigi

Peach

Daisy

Yoshi

Wario

Donkey Kong

Waluigi


Player panels[edit]
Mini-map sprites[edit]


Mini-game instruction sprites[edit]
Mini-game sprites[edit]
Mini-game cursors[edit]
Messy Memory[edit]
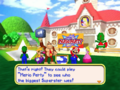
Game Guy's Sweet Surprise[edit]
Basic spaces[edit]
Character sculptures[edit]

Mario

Luigi

Peach

Yoshi

Wario

Donkey Kong


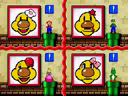
Chance Time blocks[edit]

Mario

Luigi

Peach

Yoshi

Wario

Donkey Kong

Daisy

Waluigi

1 coin →

10 coins →

20 coins →

30 coins →

1 Star →

2 Stars →

3 Stars →

all coins

all Stars
Board selection markers[edit]

First player

Second player

Third player

Fourth player

Computer player
Place markers[edit]

1st place

2nd place

3rd place

4th place
Duel Mode partners[edit]
Items[edit]
Sprites[edit]
Player panels[edit]
Using sprites[edit]
Mini-game sprites[edit]
Item description icons[edit]
Spaces[edit]
Battle Royale[edit]
Duel[edit]
Tutorial icons[edit]


Selection icons[edit]
Battle Royale boards[edit]

Chilly Waters

Deep Bloober Sea

Spiny Desert

Woody Woods

Creepy Cavern

Waluigi's Island
Duel boards[edit]

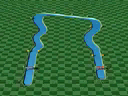
Gate Guy

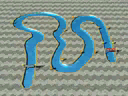
Arrowhead

Pipesqueak

Blowhard

Mr. Mover

Backtrack
Board logos[edit]
Battle Royale board logos[edit]
Duel board logos[edit]
Results icons[edit]
Chilly Waters

Deep Bloober Sea

Spiny Desert

Woody Woods
Creepy Cavern

Waluigi's Island
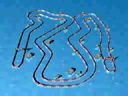
Duel maps
[edit]


[edit]


[edit]


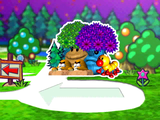
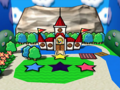
Starting areas[edit]
Chilly Waters
Deep Bloober Sea
Spiny Desert
Woody Woods
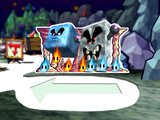
Creepy Cavern
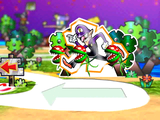
Waluigi's Island
Battle Royale rule map
Duel maps


Game modes[edit]
Game levels[edit]
In-game models[edit]
Mario

Luigi

Princess Peach

Princess Daisy
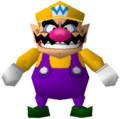
Wario
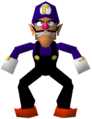
Waluigi
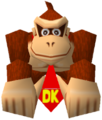
Donkey Kong


A Boulder


Data-rendered models[edit]
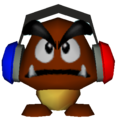
Goomba (headphones)


Dice Block numbers[edit]
Dialogue portraits[edit]
Transition screens[edit]

Question mark

Exclamation mark


Mini-game preview icons[edit]
Picture Imperfect (Toad)
Picture Imperfect (Wiggler)
Picture Imperfect (Mario)
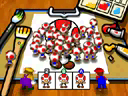
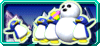
Crowd Cover (Toad)
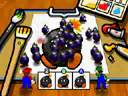
Crowd Cover (Bob-omb)
Crowd Cover (Boo)
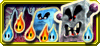
Dizzy Dinghies (Course 1)
Dizzy Dinghies (Course 2)
Dizzy Dinghies (Course 3)
Screenshots[edit]
It has been requested that more images be uploaded for this section. Remove this notice only after the additional image(s) have been added. Reason: Gameplay

Title screen

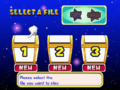
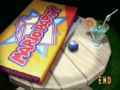
File screen


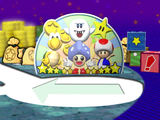
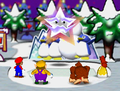
Opening[edit]
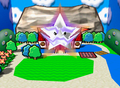
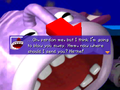
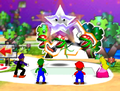
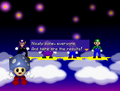
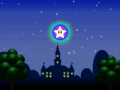
The Millennium Star in space
Tumble
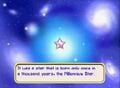
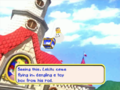
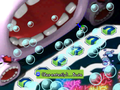
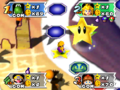
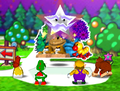
Three stars pop out of the ground


[edit]

Boards[edit]
Chilly Waters[edit]
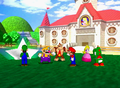
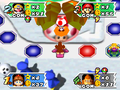
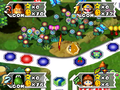
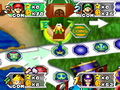
The beginning of a game on Chilly Waters
Daisy crossing the ice
Donkey Kong at the Koopa Bank
Daisy wearing a Bowser Suit
Donkey Kong at Toad's Trading Post
Mario winning a Star
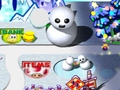
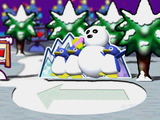
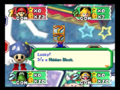
Mr. Blizzard about to throw a snowball
Donkey Kong jumping over a snowball
Wario jumping over a snowball
Donkey Kong and Wario both successfully dodging a snowball
Donkey Kong being chased by a snowball
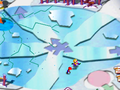
The ice cracking


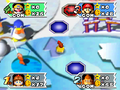
Deep Bloober Sea[edit]
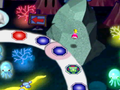
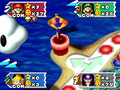
The beginning of a game on Deep Bloober Sea
Luigi at the Koopa Bank
The torpedo junction, where players must press a button before proceeding
Luigi being blasted off course after pressing the wrong button
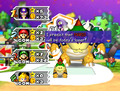
Peach buying a Reverse Mushroom from Baby Bowser's Joint
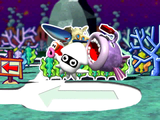
The Bloober calling its mother
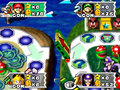
The mother Bloober about to move Yoshi with her tentacle
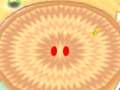
The anglerfish preparing to attempt to blow someone away
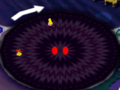
Luigi swimming against the anglerfish's suction
Peach is blown to the northeast end of the board.


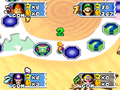
Spiny Desert[edit]
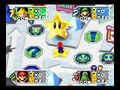
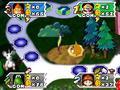
Starting in Spiny Desert
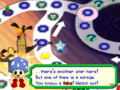
Tumble warning the players that one of the Stars is a mirage
Luigi near the night area
Wario near the sand pit
Yoshi opening a Skeleton Key door
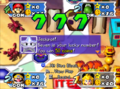
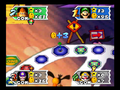
Getting triple sevens after using a Golden Mushroom
Wario obtaining a Star

The last five turns
Peach being pulled into the sand pit
Peach and Daisy being pulled into the sand pit
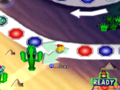
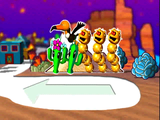
Daisy preparing to jump over the cacti
Daisy being flung to the right after failing to jump over the cacti


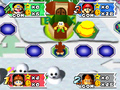
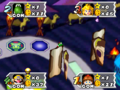
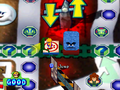
Woody Woods[edit]
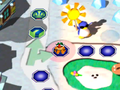
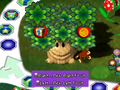
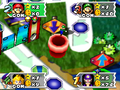
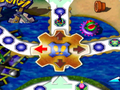
The beginning of a game on Woody Woods
Monty Mole offering to turn the arrows for 5 coins
Monty Mole turning the arrows at the start of a turn
Monty Mole turning the arrows after someone lands on a Happening Space
Woody's Action Time event
Evil Woody's Action Time event


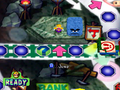
Creepy Cavern[edit]
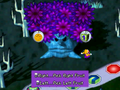
The beginning of a game in Creepy Cavern
Waluigi at the Koopa Bank
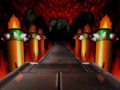
Wario about to jump on the mine cart
Wario riding the mine cart
Donkey Kong riding the mine cart
Waluigi being chased by the mine cart

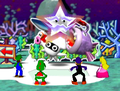
The Whomp King turning over


Waluigi's Island[edit]
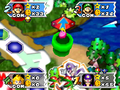
The beginning of a game on Waluigi's Island
Waluigi picking the wrong path and falling into a trap
Luigi at the Koopa Bank
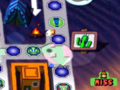
Waluigi entering a red pipe
Luigi entering a red pipe
Peach exiting the green pipe
Bowser predicting the loser during the Last Five Turns Event
The Action Time event
The north bridge to the space-changing island moving
The dynamite exploding
Mario, Luigi, and Peach losing all their coins


Minigame instructions[edit]


Other[edit]
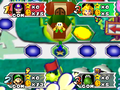
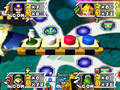
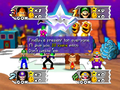
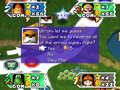
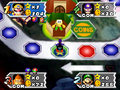
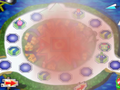
The Battle Royale results screen


Box art[edit]
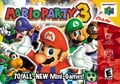
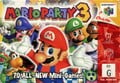
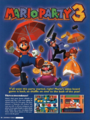
North American box art
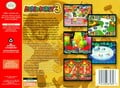
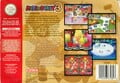
North American box art (back)
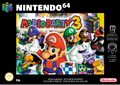
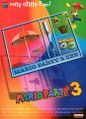
European box art
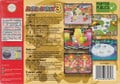
European box art (back)
Australian box art
Australian box art (back)
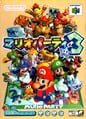
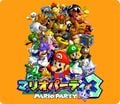
Japanese box art
Japanese box art (back)


Cartridge art[edit]
It has been requested that more images be uploaded for this article. Remove this notice only after the additional image(s) have been added. Reason: Add Australian cartridge
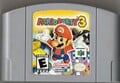
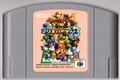
North American Cartridge
European Cartridge
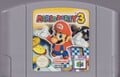
Japanese Cartridge


Miscellaneous[edit]
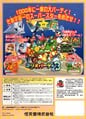
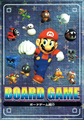
North American print ad
North American print ad
German print ad
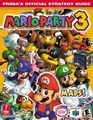
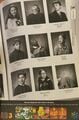
Prima Games official guide
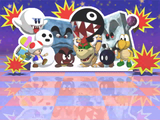
Party Central: Mario & the cast of supporting characters.
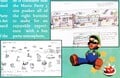
Concept art for the game's website
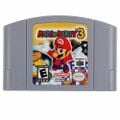
North American cartridge


| Mario Party 3 | |
|---|---|
| Main characters | Mario • Luigi • Princess Peach • Yoshi • Wario • Donkey Kong • Princess Daisy • Waluigi |
| Other characters | Bowser • Millennium Star • Tumble • Belltop • Game Guy • Battle T. • Koopa Kid • Arijigokun • Bob-omb • Boo • Chain Chomp • Evil Woody • Goomba • Koopa Troopa • Mr. Blizzard • Mushroom Genie • Mushroom Jeanie • Piranha Plant • Snifit • Sushi • Thwomp • Toad • Whomp • Whomp King • Woody • Yajirushi Ankou |
| Items | Mushroom • Warp Block • Cellular Shopper • Dueling Glove • Golden Mushroom • Boo Repellant • Magic Lamp • Reverse Mushroom • Poison Mushroom • Bowser Phone • Plunder Chest • Lucky Lamp • Boo Bell • Bowser Suit • Skeleton Key • Item Bag • Wacky Watch • Barter Box • Koopa Kard • Lucky Charm • Star Stamp |
| Battle Royale spaces | Blue Space • Red Space • Item Space • Happening Space • Battle Space • Bowser Space • Star Space • Chance Time Space • Bank Space • Game Guy Space |
| Duel spaces | Back Space • Basic Space • Power Up Space • Minigame Space • Happening Space • Game Guy Space |
| Battle Royale maps | Chilly Waters • Deep Bloober Sea • Spiny Desert • Woody Woods • Creepy Cavern • Waluigi's Island |
| Duel maps | Gate Guy • Arrowhead • Pipesqueak • Blowhard • Mr. Mover • Backtrack |
| Other | Gallery • Media • Minigames • In-game music • Pre-release and unused content • Quotes • Staff |