Cave of Flames: Difference between revisions
mNo edit summary |
LinkTheLefty (talk | contribs) mNo edit summary |
||
| (10 intermediate revisions by 3 users not shown) | |||
| Line 1: | Line 1: | ||
[[File:S5COF.PNG|thumb|S5 Cave of Flames]] | [[File:S5COF.PNG|thumb|S5 Cave of Flames]] | ||
'''Cave of Flames''' is | '''Cave of Flames''' is the fifth level on the southern side of the [[music box (world)|music box world]] in ''[[Wario Land 3]]''. The level is unlocked after the third [[Music Box|music box]] in [[Sea Turtle Rocks]]' Gray Chest is acquired and played. | ||
As its name implies, this level is a dark cave situated in a mountain which is not volcanic and has flame patterns on walls and the background. There are flame pits that will burn [[Wario]] on contact, where most of them are found in the area past a [[Warp Pipe|pipe]] past a bomb. | |||
==Treasures== | ==Treasures== | ||
===Gray Chest: Scepter=== | ===Gray Chest: Scepter=== | ||
[[File:Staff!.PNG|thumb|left|Scepter]] | [[File:Staff!.PNG|thumb|left|Scepter]] | ||
The Scepter<ref>Brady, Matthew K., Nathan Beittenmiller, Debra McBride, and David Cassady. ''Game Boy Game Secrets, 2001 Edition'' Prima's Official Strategy Guide. Page 94.</ref> is in the [[treasure chest|Gray Chest]] | The Scepter<ref>Brady, Matthew K., Nathan Beittenmiller, Debra McBride, and David Cassady. ''Game Boy Game Secrets, 2001 Edition'' Prima's Official Strategy Guide. Page 94.</ref> is in the [[treasure chest|Gray Chest]]. It is available as soon as the level is unlocked. | ||
To reach the [[key|Gray Key]], Wario must first go to the flame pit down the ladder and to the right, which is below the third [[bird (Wario Land series)|bird]]. From there, the flame pit is used to trigger [[Flaming Wario|Hot Wario]] in order to break the [[Bonfire Block]]s below to the left. Past the Bonfire Blocks, there is a [[Spearhead (enemy)|Spearhead]] above damaged blocks, as well as a beam of purple energy past the damaged blocks. Going past the beam will transport Wario to the other side, but if he's holding the Spearhead, it will disappear. In order to break the [[Enemy Block]]s on the other side, Wario must throw the Spearhead through the beam. Past the Enemy Blocks, there is a slope, where Wario must roll from it to break the damaged blocks below the Gray Key to be able to collect it. | |||
From where the Gray Key is, the associated Gray Chest is above it. To get there, Wario must go up, and then to the left to where the thin platforms to jump on them. After that, he must go to the right and up past the birds to the end where the Gray Chest is. | |||
The Scepter purifies the murky water in [[The Frigid Sea]], [[Sea Turtle Rocks]], and [[The Big Bridge]], so that the underwater entrances in those levels can be entered. | |||
{{br|left}} | {{br|left}} | ||
===Red Chest: Minicar=== | ===Red Chest: Minicar=== | ||
[[File:Luxury Car WL3 found.png|thumb|Wario finds the Minicar]] | [[File:Luxury Car WL3 found.png|thumb|Wario finds the Minicar]] | ||
The Minicar<ref name=MinicarPouch>Brady, Matthew K., Nathan Beittenmiller, Debra McBride, and David Cassady. ''Game Boy Game Secrets, 2001 Edition'' Prima's Official Strategy Guide. Page 95.</ref> is in the Red Chest | The Minicar<ref name=MinicarPouch>Brady, Matthew K., Nathan Beittenmiller, Debra McBride, and David Cassady. ''Game Boy Game Secrets, 2001 Edition'' Prima's Official Strategy Guide. Page 95.</ref> is in the Red Chest. It requires the High Jump Boots from [[The Colossal Hole]]'s Green Chest, where the ability to bounce off enemies is needed to be able to collect the treasure. | ||
From the beginning, Wario must go up and to the left, where there is a bird. It is required to jump off from to get a boost to reach the platform above, where a door is nearby. Within this room, the Red Key is underneath the seventh gap to the right of the ladder, while other gaps will lead to underwater with a [[current]]. | |||
In order to get the Red Chest, the [[doughnut block]] above the chest must be broken. To do this, Wario must first become [[Flat Wario]] triggered by one of the [[Count Richtertoffen]]s in this area to get past the gap to the right, and then submerge into the water to the right to restore Wario. The area to the right contains a [[Para-Goom]] and a [[Spearhead (enemy)|Spearhead]]. To reach the platform where a [[Togēba]], both the two lowest platforms must have an enemy each, where one of them thrown to the second lowest thin platform, so that the enemies can be bounced from to reach it. A [[Ground Pound|Smash Attack]] is required to spring the Togēba into the air to reach one of the platforms above to reach the [[Doughnuteer]], who can be brought above the thin platforms through a powered-up Smash Attack. It is used to trigger [[Fat Wario]], after which Wario must fall from above back to the left to the doughnut blocks to break them and the drop below them. From there, the Red Chest is to the right below. | |||
The Minicar does not affect the world in any way. | |||
{{br|right}} | {{br|right}} | ||
===Green Chest: Pouch=== | ===Green Chest: Pouch=== | ||
[[File:Windnsack.PNG|thumb|left|The Pouch with the Eye of the Storm]] | [[File:Windnsack.PNG|thumb|left|The Pouch with the Eye of the Storm]] | ||
The Pouch<ref name=MinicarPouch/> is in the Green Chest | The Pouch<ref name=MinicarPouch/> is in the Green Chest. It requires the Explosive Plunger Box found in [[Beneath the Waves]]'s Gray Chest, causing the bomb in this level to blow up and destroy the wall near it. | ||
To get to the pipe originally blocked by the bomb, Wario must first travel down the level, and then go right and up past the birds, and then up the platforms, then to the right where the pipe is. Within the pipe, there is a [[Mad Scienstein]] to the right. After [[Invisible Wario]] is triggered by his potion, Wario must go down between the pillars of fire and then to the right over the flame pit while avoiding the fire, in order to go past the [[seeing-eye door]] to get the Green Key. | |||
This treasure, along with the Eye of the Storm, makes leaves fall in [[Out of the Woods]]. | The Green Chest is to the right of this room, past the Bonfire Blocks and down the ladder. Hot Wario can be triggered by the flame pit near Wario, which overrides Invisible Wario, and then go up so that Wario is positioned near the blocks to break them when he is engulfed in flames. Past this area, there is another seeing-eye door, which requires Wario to be Invisible Wario again. Before the seeing-eye door, there are two [[Akamajakushi]] and a [[Brrr Bear]], though only Brrr Bear can remove Wario's invisibility by triggering [[Frozen Wario|Ice Skatin' Wario]]. Past the seeing-eye door, there is a ladder that goes down. Wario must use the slope near the ladder to break the blocks within the narrow gap before the Green Chest. Wario must remove his invisibility to collect the treasure, which can be done by triggering Hot Wario or Ice Skatin' Wario and then waiting for him to return to normal. | ||
This treasure, along with the Eye of the Storm from [[The Stagnant Swamp]]'s Blue Chest, causes a strong wind to blow from the pouch after the former is inserted into the latter, causing a suppression in the pouch that releases wind from it. It makes leaves fall in [[Out of the Woods]], therefore enabling them to be used as platforms. | |||
{{br|left}} | {{br|left}} | ||
===Blue Chest: Scissors=== | ===Blue Chest: Scissors=== | ||
[[File:Scissorswl3.PNG|thumb|The Scissors cutting a balloon in Above the Clouds]] | [[File:Scissorswl3.PNG|thumb|The Scissors cutting a balloon in Above the Clouds]] | ||
The {{conjectural|Scissors}} is in the Blue Chest, which requires the Rust Spray from the [[Castle of Illusions]] | The {{conjectural|Scissors}} is in the Blue Chest, which requires the Rust Spray from the [[Castle of Illusions]]' Blue Chest to make the iron wall rusty and consequently breakable. | ||
The Scissors | The iron floor is located at the top of the area, which is reachable after going down the ladder, going right, and then making all the way up. A Smash Attack is required to break it. Within this room, the [[Spear-bot]]s must be used to go to the floor above by putting the Spear-bots on one thin platform each to bounce off them to reach it. | ||
From the Blue Key, Wario must go to the right to throw one of the Spear-bots to throw past the gap, which would be used to boost off from to reach the area to the right. In this area, Wario must go down, and then to the right. He must make his way up and avoid the [[Omodon]] from crushing him on the way up. After he reaches the top, the topmost Omodon must be used to trigger [[Flat Wario]], which would be needed to go past a narrow gap in the left area. After Wario moves back to the previous area, a high jump is needed to give Flat Wario enough height to jump on the platforms above and to the left. After he goes past the narrow gap, the blue [[Omodonmeka]] is needed to restore Wario, after which he makes his way to the left to the Blue Chest. | |||
The Scissors is used to cut the balloon in [[Above the Clouds (Wario Land 3)|Above the Clouds]], causing it to float upwards until it stops below a door in the clouds, allowing that door to be entered. | |||
==[[Musical Coin]]s== | |||
{|width=60% cellspacing=0 border=2 cellpadding=3 style="border-collapse:collapse;" | |||
|- | |||
!Location | |||
!Description | |||
|- | |||
|[[File:WL3 S CaveOfFlames MC1 Loc.png]] | |||
[[File:WL3 S CaveOfFlames MC1.png]] | |||
|align="center"|In the room to the top-left from the beginning where the Red Key and Red Chest are, there is a Musical Coin at the drop off before the narrow gap and above the current. | |||
|- | |||
|[[File:WL3 S CaveOfFlames MC2.png]] | |||
|align="center"|In the area to the right of the area with the Red Key and Red Chest, there is a Musical Coin at the top-left, on the left of where the Doughnuteer is. | |||
|- | |||
|[[File:WL3 S CaveOfFlames MC3 Loc.png]] | |||
[[File:WL3 S CaveOfFlames MC3.png]] | |||
|align="center"|Right below from where the player begins, there is a Musical Coin out of reach on the left side. To reach it, the blue bird on the right must be lured to the left so that Wario can bounce off it to reach the ledge near the coin. | |||
|- | |||
|[[File:WL3 S CaveOfFlames MC4 Loc.png]] | |||
[[File:WL3 S CaveOfFlames MC4.png]] | |||
|align="center"|On the right of the stage, there is a flame pit. The wall to the right is breakable, leading to an isolated room. There is a damaged block to the right in the top level. To break it, Wario must go down the ladder where two [[Hammer-Bot|Hammer-bot]]s are, break the damaged blocks to the right, and then use one of the Hammer-bots to trigger [[Bouncy Wario]] to break it from the bottom. After that, Wario must go up and then crawl his way to the right to squeeze through the gap to reach the Musical Coin. | |||
|- | |||
|[[File:WL3 S CaveOfFlames MC5.png]] | |||
|align="center"|In the room where the Green Key is, accessible through the pipe on the top-right, there is a Musical Coin in between two pillars of flames. | |||
|- | |||
|[[File:WL3 S CaveOfFlames MC6 Loc.png]] | |||
[[File:WL3 S CaveOfFlames MC6.png]] | |||
|align="center"|In the room past the rusted iron, there is a wall of Enemy Blocks that leads to a door. A Spear-bot can be used to break them and the wall to the right of the door (they are treated as Enemy Blocks). After breaking them, the Musical Coin is accessible by smashing the wall to the right with a Dash Attack and then climbing the ladder towards the coin. | |||
|- | |||
|[[File:WL3 S CaveOfFlames MC7 Loc.png]] | |||
[[File:WL3 S CaveOfFlames MC7.png]] | |||
|align="center"|In the room past the rusted iron, there is a wall of Enemy Blocks that leads to a door. Within this room, there are four Spear-bots and platforms above them. Each Spear-bot can be thrown to one platform each, in order to reach the Musical Coin all the way up from it. Alternatively, one Spear-bot can be thrown on the next platform above to be thrown to the wall on the right (they are treated as Enemy Blocks), where an off-screen ladder leads to the top of the room, from which Wario can drop towards the Musical Coin. | |||
|- | |||
|[[File:WL3 S CaveOfFlames MC8.png]] | |||
|align="center"|In the room past the rusted iron, the area to the right has Omodon in it. Within that area, Wario must go around to the bottom, move right, and then work his way to the top to reach this Musical Coin at the drop-off to the left. | |||
|} | |||
==Enemies== | |||
*[[Spearhead (enemy)|Spearhead]] (8) | |||
*[[Bird (Wario Land series)|Bird]] (4) | |||
*[[Count Richtertoffen]] (2) | |||
*[[Para-Goom]] (4) | |||
*[[Togēba]] (1) | |||
*[[Doughnuteer]] (1) | |||
*[[Mad Scienstein]] (1) | |||
*[[Brrr Bear]] (2) | |||
*[[Akamajakushi]] (2) | |||
*[[Seeing-eye door]] (2) | |||
*[[Hammer-Bot|Hammer-bot]] (2) | |||
*[[Spear-bot]] (10) | |||
*[[Omodonmeka]] (6, 3 carrying Omodon) | |||
*[[Omodon]] (3) | |||
==Reaction abilities in this level== | ==Reaction abilities in this level== | ||
*[[Flaming Wario|Hot Wario]] | *[[Flaming Wario|Hot Wario]] (via the fire pillars or the flaming pits) | ||
*[[Invisible Wario]] | *[[Invisible Wario]] (via Mad Scienstein) | ||
*[[Fat Wario]] | *[[Fat Wario]] (via Doughnuteer) | ||
*[[Flat Wario]] | *[[Flat Wario]] (via Count Richtertoffen or Omodon) | ||
*[[Frozen Wario|Ice Skatin' Wario]] | *[[Frozen Wario|Ice Skatin' Wario]] (via Brrr Bear) | ||
*[[Bouncy Wario]] (via Hammer-bot) | |||
{{br|right}} | {{br|right}} | ||
| Line 62: | Line 121: | ||
|JapM=Cave of Flames; same as the [[Honō no Dōkutsu|fifth stage]] of ''[[Mario & Wario]]''. | |JapM=Cave of Flames; same as the [[Honō no Dōkutsu|fifth stage]] of ''[[Mario & Wario]]''. | ||
}} | }} | ||
==References== | ==References== | ||
<references/> | <references/> | ||
Latest revision as of 21:53, November 9, 2023

Cave of Flames is the fifth level on the southern side of the music box world in Wario Land 3. The level is unlocked after the third music box in Sea Turtle Rocks' Gray Chest is acquired and played.
As its name implies, this level is a dark cave situated in a mountain which is not volcanic and has flame patterns on walls and the background. There are flame pits that will burn Wario on contact, where most of them are found in the area past a pipe past a bomb.
Treasures[edit]
Gray Chest: Scepter[edit]

The Scepter[1] is in the Gray Chest. It is available as soon as the level is unlocked.
To reach the Gray Key, Wario must first go to the flame pit down the ladder and to the right, which is below the third bird. From there, the flame pit is used to trigger Hot Wario in order to break the Bonfire Blocks below to the left. Past the Bonfire Blocks, there is a Spearhead above damaged blocks, as well as a beam of purple energy past the damaged blocks. Going past the beam will transport Wario to the other side, but if he's holding the Spearhead, it will disappear. In order to break the Enemy Blocks on the other side, Wario must throw the Spearhead through the beam. Past the Enemy Blocks, there is a slope, where Wario must roll from it to break the damaged blocks below the Gray Key to be able to collect it.
From where the Gray Key is, the associated Gray Chest is above it. To get there, Wario must go up, and then to the left to where the thin platforms to jump on them. After that, he must go to the right and up past the birds to the end where the Gray Chest is.
The Scepter purifies the murky water in The Frigid Sea, Sea Turtle Rocks, and The Big Bridge, so that the underwater entrances in those levels can be entered.
Red Chest: Minicar[edit]

The Minicar[2] is in the Red Chest. It requires the High Jump Boots from The Colossal Hole's Green Chest, where the ability to bounce off enemies is needed to be able to collect the treasure.
From the beginning, Wario must go up and to the left, where there is a bird. It is required to jump off from to get a boost to reach the platform above, where a door is nearby. Within this room, the Red Key is underneath the seventh gap to the right of the ladder, while other gaps will lead to underwater with a current.
In order to get the Red Chest, the doughnut block above the chest must be broken. To do this, Wario must first become Flat Wario triggered by one of the Count Richtertoffens in this area to get past the gap to the right, and then submerge into the water to the right to restore Wario. The area to the right contains a Para-Goom and a Spearhead. To reach the platform where a Togēba, both the two lowest platforms must have an enemy each, where one of them thrown to the second lowest thin platform, so that the enemies can be bounced from to reach it. A Smash Attack is required to spring the Togēba into the air to reach one of the platforms above to reach the Doughnuteer, who can be brought above the thin platforms through a powered-up Smash Attack. It is used to trigger Fat Wario, after which Wario must fall from above back to the left to the doughnut blocks to break them and the drop below them. From there, the Red Chest is to the right below.
The Minicar does not affect the world in any way.
Green Chest: Pouch[edit]

The Pouch[2] is in the Green Chest. It requires the Explosive Plunger Box found in Beneath the Waves's Gray Chest, causing the bomb in this level to blow up and destroy the wall near it.
To get to the pipe originally blocked by the bomb, Wario must first travel down the level, and then go right and up past the birds, and then up the platforms, then to the right where the pipe is. Within the pipe, there is a Mad Scienstein to the right. After Invisible Wario is triggered by his potion, Wario must go down between the pillars of fire and then to the right over the flame pit while avoiding the fire, in order to go past the seeing-eye door to get the Green Key.
The Green Chest is to the right of this room, past the Bonfire Blocks and down the ladder. Hot Wario can be triggered by the flame pit near Wario, which overrides Invisible Wario, and then go up so that Wario is positioned near the blocks to break them when he is engulfed in flames. Past this area, there is another seeing-eye door, which requires Wario to be Invisible Wario again. Before the seeing-eye door, there are two Akamajakushi and a Brrr Bear, though only Brrr Bear can remove Wario's invisibility by triggering Ice Skatin' Wario. Past the seeing-eye door, there is a ladder that goes down. Wario must use the slope near the ladder to break the blocks within the narrow gap before the Green Chest. Wario must remove his invisibility to collect the treasure, which can be done by triggering Hot Wario or Ice Skatin' Wario and then waiting for him to return to normal.
This treasure, along with the Eye of the Storm from The Stagnant Swamp's Blue Chest, causes a strong wind to blow from the pouch after the former is inserted into the latter, causing a suppression in the pouch that releases wind from it. It makes leaves fall in Out of the Woods, therefore enabling them to be used as platforms.
Blue Chest: Scissors[edit]

The Scissors is in the Blue Chest, which requires the Rust Spray from the Castle of Illusions' Blue Chest to make the iron wall rusty and consequently breakable.
The iron floor is located at the top of the area, which is reachable after going down the ladder, going right, and then making all the way up. A Smash Attack is required to break it. Within this room, the Spear-bots must be used to go to the floor above by putting the Spear-bots on one thin platform each to bounce off them to reach it.
From the Blue Key, Wario must go to the right to throw one of the Spear-bots to throw past the gap, which would be used to boost off from to reach the area to the right. In this area, Wario must go down, and then to the right. He must make his way up and avoid the Omodon from crushing him on the way up. After he reaches the top, the topmost Omodon must be used to trigger Flat Wario, which would be needed to go past a narrow gap in the left area. After Wario moves back to the previous area, a high jump is needed to give Flat Wario enough height to jump on the platforms above and to the left. After he goes past the narrow gap, the blue Omodonmeka is needed to restore Wario, after which he makes his way to the left to the Blue Chest.
The Scissors is used to cut the balloon in Above the Clouds, causing it to float upwards until it stops below a door in the clouds, allowing that door to be entered.
Musical Coins[edit]
| Location | Description |
|---|---|

|
In the room to the top-left from the beginning where the Red Key and Red Chest are, there is a Musical Coin at the drop off before the narrow gap and above the current. |

|
In the area to the right of the area with the Red Key and Red Chest, there is a Musical Coin at the top-left, on the left of where the Doughnuteer is. |

|
Right below from where the player begins, there is a Musical Coin out of reach on the left side. To reach it, the blue bird on the right must be lured to the left so that Wario can bounce off it to reach the ledge near the coin. |

|
On the right of the stage, there is a flame pit. The wall to the right is breakable, leading to an isolated room. There is a damaged block to the right in the top level. To break it, Wario must go down the ladder where two Hammer-bots are, break the damaged blocks to the right, and then use one of the Hammer-bots to trigger Bouncy Wario to break it from the bottom. After that, Wario must go up and then crawl his way to the right to squeeze through the gap to reach the Musical Coin. |

|
In the room where the Green Key is, accessible through the pipe on the top-right, there is a Musical Coin in between two pillars of flames. |

|
In the room past the rusted iron, there is a wall of Enemy Blocks that leads to a door. A Spear-bot can be used to break them and the wall to the right of the door (they are treated as Enemy Blocks). After breaking them, the Musical Coin is accessible by smashing the wall to the right with a Dash Attack and then climbing the ladder towards the coin. |

|
In the room past the rusted iron, there is a wall of Enemy Blocks that leads to a door. Within this room, there are four Spear-bots and platforms above them. Each Spear-bot can be thrown to one platform each, in order to reach the Musical Coin all the way up from it. Alternatively, one Spear-bot can be thrown on the next platform above to be thrown to the wall on the right (they are treated as Enemy Blocks), where an off-screen ladder leads to the top of the room, from which Wario can drop towards the Musical Coin. |

|
In the room past the rusted iron, the area to the right has Omodon in it. Within that area, Wario must go around to the bottom, move right, and then work his way to the top to reach this Musical Coin at the drop-off to the left. |


Enemies[edit]
- Spearhead (8)
- Bird (4)
- Count Richtertoffen (2)
- Para-Goom (4)
- Togēba (1)
- Doughnuteer (1)
- Mad Scienstein (1)
- Brrr Bear (2)
- Akamajakushi (2)
- Seeing-eye door (2)
- Hammer-bot (2)
- Spear-bot (10)
- Omodonmeka (6, 3 carrying Omodon)
- Omodon (3)
Reaction abilities in this level[edit]
- Hot Wario (via the fire pillars or the flaming pits)
- Invisible Wario (via Mad Scienstein)
- Fat Wario (via Doughnuteer)
- Flat Wario (via Count Richtertoffen or Omodon)
- Ice Skatin' Wario (via Brrr Bear)
- Bouncy Wario (via Hammer-bot)
Gallery[edit]
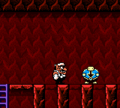
The Count Richtertoffens' room
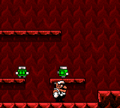
The Spear-bots' room
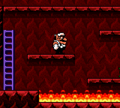
A flame cave


Names in other languages[edit]
| Language | Name | Meaning |
|---|---|---|
| Japanese | 炎の洞窟 Honō no Dōkutsu |
Cave of Flames; same as the fifth stage of Mario & Wario. |
References[edit]
- ^ Brady, Matthew K., Nathan Beittenmiller, Debra McBride, and David Cassady. Game Boy Game Secrets, 2001 Edition Prima's Official Strategy Guide. Page 94.
- ^ a b Brady, Matthew K., Nathan Beittenmiller, Debra McBride, and David Cassady. Game Boy Game Secrets, 2001 Edition Prima's Official Strategy Guide. Page 95.