The Pool of Rain: Difference between revisions
(Revamped Treasures section) |
No edit summary |
||
| Line 1: | Line 1: | ||
[[File:WL3_S_ThePoolOfRain6.png|thumb|W3 The Pool of Rain]] | [[File:WL3_S_ThePoolOfRain6.png|thumb|W3 The Pool of Rain]] | ||
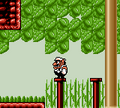
'''The Pool of Rain''' is the third level on the west side of the [[music box (world)|music box world]] in ''[[Wario Land 3]]''. [[Wario]] unlocks both this level and [[A Town in Chaos]] after finding the Jar in [[Out of the Woods]]'s Red Chest, which causes a rain cloud to pop out and fill the empty pool. | '''The Pool of Rain''' is the third level on the west side of the [[music box (world)|music box world]] in ''[[Wario Land 3]]''. [[Wario]] unlocks both this level and [[A Town in Chaos]] after finding the Jar in [[Out of the Woods]]'s Red Chest, which causes a rain cloud to pop out and fill the empty pool. | ||
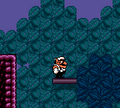
This level takes place in a rainforest, where trees are found over a pond. In the main area of this level, there are posts above a pond with trees in the background. The upper portion of this level contains treetops, while the bottom portion of this level contains a lot of [[current]]s behind a door. This level contains a boss battle with [[Wolfenboss]], located in the latter. Moreover, there is a cave behind another underwater door behind the glass container. | |||
==Treasures== | ==Treasures== | ||
| Line 6: | Line 8: | ||
The First Gear for Machine<ref>Brady, Matthew K., Nathan Beittenmiller, Debra McBride, and David Cassady. ''Game Boy Game Secrets, 2001 Edition'' Prima's Official Strategy Guide. Page 90.</ref> can be found in the [[treasure chest|Gray Chest]]. | The First Gear for Machine<ref>Brady, Matthew K., Nathan Beittenmiller, Debra McBride, and David Cassady. ''Game Boy Game Secrets, 2001 Edition'' Prima's Official Strategy Guide. Page 90.</ref> can be found in the [[treasure chest|Gray Chest]]. | ||
The way to the right contains posts, where [[Ground Pound|Smash Attack]]ing one will cause another to rise. The Gray Key is located above the second set of posts | The way to the right contains posts, where [[Ground Pound|Smash Attack]]ing one will cause another to rise. The Gray Key is located above the second set of posts and can be reached by causing the second-from-right one to rise up high enough to reach on the platform to its left. | ||
The chest is located to the right of the third and last set of posts, where the last of the posts must rise high enough to reach the platform, | The chest is located to the right of the third and last set of posts, where the last of the posts must rise high enough to reach the platform. On this platform, a ladder will lead to the room with the Gray Chest. | ||
After both the First Gear from this chest and the Second Gear in A Town in Chaos's Gray Chest are collected, the elevator machine in the east side becomes operational, opening the path to [[The Grasslands]]. | After both the First Gear from this chest and the Second Gear in A Town in Chaos's Gray Chest are collected, the elevator machine in the east side becomes operational, opening the path to [[The Grasslands]]. | ||
| Line 15: | Line 17: | ||
===Red Chest: Skull Ring (blue)=== | ===Red Chest: Skull Ring (blue)=== | ||
[[File:WL3 S VastPlain6.PNG|thumb|left|The Skull Rings.]] | [[File:WL3 S VastPlain6.PNG|thumb|left|The Skull Rings.]] | ||
The Skull Ring<ref>Brady, Matthew K., Nathan Beittenmiller, Debra McBride, and David Cassady. ''Game Boy Game Secrets, 2001 Edition'' Prima's Official Strategy Guide. Page 91.</ref> in the Red Chest requires the Magic Seeds from [[The Big Bridge]]'s Gray Chest. This causes the vine | The Skull Ring<ref>Brady, Matthew K., Nathan Beittenmiller, Debra McBride, and David Cassady. ''Game Boy Game Secrets, 2001 Edition'' Prima's Official Strategy Guide. Page 91.</ref> in the Red Chest requires the Magic Seeds from [[The Big Bridge]]'s Gray Chest. This causes the vine underneath the rock to grow, pushing that rock to the top of the area and revealing a door behind it. | ||
To the left of Wario from the beginning, a vine grew to the top of the area, | To the left of Wario from the beginning, a vine grew to the top of the area, allowing him to climb up on it. To get to the Red Key, Wario must climb the vine to the top of the area, and then travel all the way to the right through the treetops with [[Spearhead (enemy)|Spearhead]]s on the branches. Some leaves obscure the view of the branch platforms and the Spearheads behind them. | ||
The Red Chest is behind the door to the left of Wario from the beginning. To reach it from where the Red Key is, Wario can either drop from the treetops to the bottom and then make his way to the left | The Red Chest is behind the door to the left of Wario from the beginning. To reach it from where the Red Key is, Wario can either drop from the treetops to the bottom and then make his way to the left or traverse through the branches to the left and drop down from where the vine grew from. | ||
After collecting | After collecting the blue Skull Ring and the red one in [[The Vast Plain]]'s Green Chest, the [[Tower of Revival]] is erected from the ground in the southern side after both rings come in contact with each other. | ||
{{br|left}} | {{br|left}} | ||
===Green Chest: Ornamental Fan=== | ===Green Chest: Ornamental Fan=== | ||
| Line 30: | Line 32: | ||
From where the Green Key is, Wario must goto the left to another loop. To return to the first loop, Wario must go west from this one and then north-east in the loop after that. To reach the boss room, Wario must go east in the first loop and then east in the second loop. The door leads to a room, where going up the platforms from it will commence a boss battle with [[Wolfenboss]]. | From where the Green Key is, Wario must goto the left to another loop. To return to the first loop, Wario must go west from this one and then north-east in the loop after that. To reach the boss room, Wario must go east in the first loop and then east in the second loop. The door leads to a room, where going up the platforms from it will commence a boss battle with [[Wolfenboss]]. | ||
Wolfenboss attacks by shooting | Wolfenboss attacks by shooting gray wisps at Wario, which causes him to rise up to the ceiling if hit by them, similar in behavior as [[Bubble Wario]]. The boss can also throw spiked balls that triggers [[Puffy Wario]] if Wario touches it. After a while, the spiked balls on the ground will produce a [[Kuri]], which requires a Dash Attack to knock it upwards diagonally where they can bounce on walls, to cause it to hit the boss. If Wario is hit by the boss's gray wisps or spiked balls, the boss will disappear as Wario floats out of the arena. To get back to the door to redo the boss battle, Wario must exit the door above, and then go south from the current loop to the left, then go right in the loop below it to reach the door. The boss is defeated after being hit three times by Kuri, causing the manhole to flip open, thus leading to the Green Chest. | ||
The Ornamental Fan blows away the mist at the | The Ornamental Fan blows away the mist at the southern side, thus making [[The Stagnant Swamp]] accessible. | ||
{{br|right}} | {{br|right}} | ||
===Blue Chest: Crayon (yellow)=== | ===Blue Chest: Crayon (yellow)=== | ||
| Line 42: | Line 44: | ||
The Blue Chest is instead to the left from the entrance. Rather than avoiding the leftmost Pneumo, Wario must instead lure it to the left so that it is below the Blue Chest, where Puffy Wario must be triggered to reach it. | The Blue Chest is instead to the left from the entrance. Rather than avoiding the leftmost Pneumo, Wario must instead lure it to the left so that it is below the Blue Chest, where Puffy Wario must be triggered to reach it. | ||
Once collected, the crayon flies to a hill on the north side of the world, where a tower with a sign reading "GAME" | Once collected, the crayon flies to a hill on the north side of the world, where a tower with a sign reading "GAME" resides; the yellow crayon colors in the sign. Once Wario finds all seven crayons hidden throughout the game and gains access the tower, the player can then play the Golf minigame found there. | ||
{{br}} | {{br}} | ||
Revision as of 12:47, March 26, 2023

The Pool of Rain is the third level on the west side of the music box world in Wario Land 3. Wario unlocks both this level and A Town in Chaos after finding the Jar in Out of the Woods's Red Chest, which causes a rain cloud to pop out and fill the empty pool.
This level takes place in a rainforest, where trees are found over a pond. In the main area of this level, there are posts above a pond with trees in the background. The upper portion of this level contains treetops, while the bottom portion of this level contains a lot of currents behind a door. This level contains a boss battle with Wolfenboss, located in the latter. Moreover, there is a cave behind another underwater door behind the glass container.
Treasures
Gray Chest: First Gear for Machine
The First Gear for Machine[1] can be found in the Gray Chest.
The way to the right contains posts, where Smash Attacking one will cause another to rise. The Gray Key is located above the second set of posts and can be reached by causing the second-from-right one to rise up high enough to reach on the platform to its left.
The chest is located to the right of the third and last set of posts, where the last of the posts must rise high enough to reach the platform. On this platform, a ladder will lead to the room with the Gray Chest.
After both the First Gear from this chest and the Second Gear in A Town in Chaos's Gray Chest are collected, the elevator machine in the east side becomes operational, opening the path to The Grasslands.
Red Chest: Skull Ring (blue)

The Skull Ring[2] in the Red Chest requires the Magic Seeds from The Big Bridge's Gray Chest. This causes the vine underneath the rock to grow, pushing that rock to the top of the area and revealing a door behind it.
To the left of Wario from the beginning, a vine grew to the top of the area, allowing him to climb up on it. To get to the Red Key, Wario must climb the vine to the top of the area, and then travel all the way to the right through the treetops with Spearheads on the branches. Some leaves obscure the view of the branch platforms and the Spearheads behind them.
The Red Chest is behind the door to the left of Wario from the beginning. To reach it from where the Red Key is, Wario can either drop from the treetops to the bottom and then make his way to the left or traverse through the branches to the left and drop down from where the vine grew from.
After collecting the blue Skull Ring and the red one in The Vast Plain's Green Chest, the Tower of Revival is erected from the ground in the southern side after both rings come in contact with each other.
Green Chest: Ornamental Fan
The Ornamental Fan[3] in the Green Chest requires the Swimming Flippers from the Tower of Revival's Gray Chest.
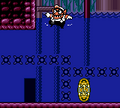
To get to the entrance, Wario must go underwater from the beginning downwards and then to the right, where a Haridama is swimming to the left and right, and spike are up and right of the path leading to the door. The door leads to a large room with many currents. To get to the Green Key, Wario must go east at the first loop to reach a second loop, and then southeast at the second loop, leading to a path that leads to the Green Key.
From where the Green Key is, Wario must goto the left to another loop. To return to the first loop, Wario must go west from this one and then north-east in the loop after that. To reach the boss room, Wario must go east in the first loop and then east in the second loop. The door leads to a room, where going up the platforms from it will commence a boss battle with Wolfenboss.
Wolfenboss attacks by shooting gray wisps at Wario, which causes him to rise up to the ceiling if hit by them, similar in behavior as Bubble Wario. The boss can also throw spiked balls that triggers Puffy Wario if Wario touches it. After a while, the spiked balls on the ground will produce a Kuri, which requires a Dash Attack to knock it upwards diagonally where they can bounce on walls, to cause it to hit the boss. If Wario is hit by the boss's gray wisps or spiked balls, the boss will disappear as Wario floats out of the arena. To get back to the door to redo the boss battle, Wario must exit the door above, and then go south from the current loop to the left, then go right in the loop below it to reach the door. The boss is defeated after being hit three times by Kuri, causing the manhole to flip open, thus leading to the Green Chest.
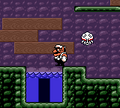
The Ornamental Fan blows away the mist at the southern side, thus making The Stagnant Swamp accessible.
Blue Chest: Crayon (yellow)

The Crayon[4] in the Blue Chest requires the Air-Pump from The Colossal Hole's Gray Chest, causing the glass container to float, thus making the door within it accessible.
The door, which is underwater in between the second and third set of posts, leads to a cave with Pneumos and Spearheads. The Blue Key is all the way to the right, underneath the thin platform. Thus, it has to be reached while avoiding the Pneumo that would trigger Puffy Wario.
The Blue Chest is instead to the left from the entrance. Rather than avoiding the leftmost Pneumo, Wario must instead lure it to the left so that it is below the Blue Chest, where Puffy Wario must be triggered to reach it.
Once collected, the crayon flies to a hill on the north side of the world, where a tower with a sign reading "GAME" resides; the yellow crayon colors in the sign. Once Wario finds all seven crayons hidden throughout the game and gains access the tower, the player can then play the Golf minigame found there.
Musical Coins
| Location | Description |
|---|---|

|
To the left, there is a Musical Coin on the vine. |

|
In the area after climbing up the vine to the left, there are numerous clumps of leaves on the way to the Red Key. The Musical Coin is hidden among one of the leaf bunches above a platform in between two other platforms. |

|
In the room underwater below the Spikes, there is a room with multiple currents. This Musical Coin is surrounded by the first current, and the rocks that can be broken are the sixth and seventh rocks beneath the closed area. |

|
In the same room as above, the Musical Coin is directly below the entrance. To reach this Musical Coin, the rocks beneath the coin must be broken from below. |

|
In the same room as above, the Musical Coin is towards the top-left, above the first loop of currents. |

|
In the water at the beginning of the starting area, the Musical Coin is underwater below the second set of posts. He has to swim around the Spikes to reach it. |

|
In the water at the beginning of the starting area, the Musical Coin is at the bottom-right, where a current is moving against it. It requires the use of Prince Frog's Glove to reach it. |

|
In the room underneath the glass that originally sealed the door, Wario has to trigger the Puffy Wario reaction from the third Pneumo to the right, which is around where the Musical Coin is. |

Enemies
Reaction abilities in this level
- Puffy Wario (via Pneumo or Wolfenboss's spike)
- Bubble Wario (unique variant via Wolfenboss' energy balls)
Gallery
The main area with the platforms.
Above the main area where the Red Key is found.

The underwater cave with the currents.
The main underwater area with the spikes.
The Pneumo cave.


Names in other languages
| Language | Name | Meaning |
|---|---|---|
| Japanese | 雨水の池 Amamizu no Ike |
The Pond of Rainwater |
References
- ^ Brady, Matthew K., Nathan Beittenmiller, Debra McBride, and David Cassady. Game Boy Game Secrets, 2001 Edition Prima's Official Strategy Guide. Page 90.
- ^ Brady, Matthew K., Nathan Beittenmiller, Debra McBride, and David Cassady. Game Boy Game Secrets, 2001 Edition Prima's Official Strategy Guide. Page 91.
- ^ Brady, Matthew K., Nathan Beittenmiller, Debra McBride, and David Cassady. Game Boy Game Secrets, 2001 Edition Prima's Official Strategy Guide. Page 92.
- ^ Brady, Matthew K., Nathan Beittenmiller, Debra McBride, and David Cassady. Game Boy Game Secrets, 2001 Edition Prima's Official Strategy Guide. Page 95.