Above the Clouds (Wario Land 3): Difference between revisions
LinkTheLefty (talk | contribs) (Undo revision 3741165 by VideoGamePhenomHD (talk)) Tag: Undo |
(Revamped Treasures section; Added Musical Coins and Enemies section) |
||
| Line 1: | Line 1: | ||
{{italic title|id=yes}} | {{italic title|id=yes}} | ||
[[File:Cloud.PNG|thumb|S6 Above the Clouds]] | [[File:Cloud.PNG|thumb|S6 Above the Clouds]] | ||
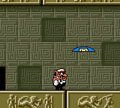
'''Above the Clouds''' is a level appearing in the game ''[[Wario Land 3]]''. It is located in the south part of the [[music box (world)|music box world]]. | '''Above the Clouds''' is a level appearing in the game ''[[Wario Land 3]]''. It is located in the south part of the [[music box (world)|music box world]]. The area is accessible after procuring the Sky Key from [[Tower of Revival]]'s Blue Chest. | ||
As its name implies, the level takes place in a sky. The platforms Wario can use are appearing and disappearing clouds | As its name implies, the level takes place in a sky and is above the clouds. The platforms Wario can use are appearing and disappearing clouds. The [[moon]] also makes an appearance in this level at night after [[Wario]] gets the Full Moon Gong from [[Sea Turtle Rocks]]. | ||
==Treasures== | ==Treasures== | ||
===Gray Chest: Crayon (green)=== | ===Gray Chest: Crayon (green)=== | ||
The green {{conjectural|Crayon}} is in the [[treasure chest|Gray Chest]] found | The green {{conjectural|Crayon}} is in the [[treasure chest|Gray Chest]] found on the ground near the entrance. | ||
Once the crayon has been collected, it flies to the tower on the north side of the world. The scene is initially monochrome, but gains another color for each crayon Wario manages to find. There are seven crayons in total hidden throughout the game, and once Wario finds all of them, he will be able to play the | To get the [[key|Gray Key]], Wario must make his way to door on the platform on one of the thin clouds in the same area. To get there, he must jump through the platforms to go to the lower right thick cloud, then go to the thick cloud to the left while watching out for the [[Bird (Wario Land series)|bird]], and then up to the right to the middle thick cloud, and then going down the thin clouds to the right until he encounters the door. After entering the door, the Gray Key is in sight, at the drop-off. | ||
To exit the area after obtaining the Gray Key, Wario must navigate a series of clouds to the right, then make his way up in a zigzag path. There are [[Hebarii]] peeking out from the ceiling, whose projectiles should be avoided while going up. After exiting the area, Wario has to drop from the door to the Gray Chest at the bottom of the area. | |||
Once the crayon has been collected, it flies to the tower on the north side of the world. The scene is initially monochrome, but gains another color for each crayon Wario manages to find. There are seven crayons in total hidden throughout the game, and once Wario finds all of them, he will be able to play the Golf Minigame found there. The green crayon colors the greenery that surrounds the building. | |||
===Red Chest: Fire Drencher=== | ===Red Chest: Fire Drencher=== | ||
[[File:fire!.PNG|thumb|right|The Fire Drencher putting off the flames]] | [[File:fire!.PNG|thumb|right|The Fire Drencher putting off the flames]] | ||
The {{conjectural|Fire Drencher}} is located in the Red Chest | The {{conjectural|Fire Drencher}} is located in the Red Chest. | ||
To get to the Red Key, Wario must first go to the upper area, which can be reached by first going to the lower right thick cloud, then going left and up to the leftmost thick cloud, then going right and up to the middle thick cloud, then going left, up, and right to the upper right thick cloud to go up, where there is one [[Spark (Wario Land 3)|spark]] on the way there. In the upper area, Wario must first go up and left to the middle left thick cloud, then go right and up to the middle thick cloud, and then go up and left to the door on a thin cloud. Within this room, there are [[Beam Robota]]s, where they must be brought down so that Wario can bounce from one of them to break a breakable block on the left, and then use one to throw upwards to the [[Enemy Block]]s above the Red Key to break them. To get to the Red Key, Wario must exit the room and then go to another thin cloud with a door. To reach it, he must go down to the middle thick cloud, and then go left and then up to it. In the room, he must make his way up and then right to the narrow gap to the ladder, watching out for the Beam Robota on the way. The Red Key is to the right above the ladder, which requires dropping down. | |||
After acquiring the Red Key, Wario must make his way back to the other door, then after going up the ladder. Instead of going right, he must go left to reach the Red Chest. | |||
The Fire Drencher extinguishes the flames in [[The West Crater]] and [[The East Crater]], opening up the paths that were originally blocked by them. | |||
===Green Chest: Jackhammer=== | ===Green Chest: Jackhammer=== | ||
[[File:jackhammerwl3.PNG|thumb|left|The | [[File:jackhammerwl3.PNG|thumb|left|The Jackhammer drilling holes in the ground]] | ||
The {{conjectural|Jackhammer}} in the Green Chest requires the Scissors from the [[Cave of Flames]]. | The {{conjectural|Jackhammer}} in the Green Chest requires the Scissors from the [[Cave of Flames]]' Blue Chest. Originally, there is a balloon tied to a building at the entrance; after the Scissors is acquired, the string attached to the balloon is cut off, causing it to float and stop under the cloud containing a door in the upper area. | ||
Before going to the newly-accessible door, the Golf Minigame near the start should be completed, since the associated mini-game block is in this room. To get to where the balloon is. Wario must go to the upper area. In this area, the balloon is reached by first going up and left to the middle left thick cloud, then up and right to the middle thick cloud, then near the upper-left thick cloud by going right, up, left, then up on the thin clouds. In this room, there are [[zombie]]s near the beginning, as well as many birds. To get to the Green Key, [[Zombie Wario]] must be triggered by one of the zombies, and then he must slowly make his way to the right past the birds and then down the thin platforms, to the left past the birds and a [[Lumpy (enemy)|Prince Froggy]] and then down the thin platforms. From there he can either go to the right past the birds or go left to be restored to normal from the beam of light and then move to the right while avoiding the birds to the Green Key. | |||
After getting the Green Key, Wario must jump on the series of thin platforms on the right upwards, and then jump on the series of thin platforms a bit to the left upwards. From there, he must move to the left to where the mini-game block is (if the Golf Minigame is not cleared after entering the level, then Wario must exit the area and go to the bottom of the lower area to clear it). From the mini-game block, the Green Chest is down the ladder and to the right. | |||
The Jackhammer drills holes in the ground in one of [[The East Crater]]'s rooms to cause an updraft. | |||
{{br|left}} | {{br|left}} | ||
===Blue Chest: Pick-Axe=== | ===Blue Chest: Pick-Axe=== | ||
The {{conjectural|Pick-Axe}} in the Blue Chest requires the Full Moon Gong from [[Sea Turtle Rocks]]. | The {{conjectural|Pick-Axe}} in the Blue Chest requires the Full Moon Gong from [[Sea Turtle Rocks]]' Blue Chest. This causes a moon to appear in this level only during nighttime, which also appears on the overworld map. | ||
During the nighttime, Wario must make his way to the upper are of this level, and then going up through the cloud platforms until he reaches the top-right where the moon is. The Blue Key is at the drop-off from the entrance. | |||
The Blue Chest is within the moon. Within the moon, there are two rooms. The first room contains three [[Togēba]], where the middle one is needed to reach a rock. The rock is needed to break the Enemy Blocks on the right side by riding atop the right Togēba to reach. Below the Enemy Blocks is a door, leading to the second room. In the second room, there are two birds. The one on the right is needed for Wario to bounce off from to pass a narrow gap in the pillar, while the one of the left should be avoided while Wario navigates the red platforms to the left, down, then right. Should Wario fall off at any point here, he returns to the first area. There are breakable blocks before the Blue Chest that must be broken with a Dash Attack to reach it. | |||
The Pick-Axe is used to chisel a hole containing a portal in [[The East Crater]], making a new area accessible there. | |||
==[[Musical Coin]]s== | |||
{|width=60% cellspacing=0 border=2 cellpadding=3 style="border-collapse:collapse;" | |||
|- | |||
!Location | |||
!Description | |||
|- | |||
|[[File:WL3 S AboveTheClouds MC1.png]] | |||
|align="center"|The Musical Coin is to the left of Wario from the beginning. | |||
|- | |||
|[[File:WL3 S AboveTheClouds MC2.png]] | |||
|align="center"|In the room at the lower area of this level, the Musical Coin is to the left of the drop-off where the Gray Key is. | |||
|- | |||
|[[File:WL3 S AboveTheClouds MC3.png]] | |||
|align="center"|In the room at the lower area of this level, the Musical Coin is to the right from the door, in between the first two thick clouds. | |||
|- | |||
|[[File:WL3 S AboveTheClouds MC4 Loc.png]] | |||
[[File:WL3 S AboveTheClouds MC4.png]] | |||
|align="center"|In the left room at the upper area of this level, the Musical Coin is past a gap at the middle left, requiring the thin clouds to reach. | |||
|- | |||
|[[File:WL3 S AboveTheClouds MC5.png]] | |||
|align="center"|In the room at the upper area accessible after cutting the balloon, Wario must make all the way to the bottom of the area as Zombie Wario, and then return to normal and go to the middle of the floor, where a Musical Coin is above breakable blocks. | |||
|- | |||
|[[File:WL3 S AboveTheClouds MC6.png]] | |||
|align="center"|From the previous Musical Coin, Wario must go to the middle floor and to the left to break the breakable blocks to reach this Musical Coin. | |||
|- | |||
|[[File:WL3 S AboveTheClouds MC7.png]] | |||
|align="center"|From the previous Musical Coin, Wario must go to the top floor and to the right to break the breakable blocks to reach this Musical Coin. | |||
|- | |||
|[[File:WL3 S AboveTheClouds MC8.png]] | |||
|align="center"|In the upper area of this level, Wario must go to one of the clouds near the balloon, and then use a Dash Attack to reach the Musical Coin to its left. | |||
|} | |||
==Enemies== | |||
*[[Bird (Wario Land series)|Bird]] (16; 2 at night only) | |||
*[[Hebarii]] (8) | |||
*[[Spark (Wario Land 3)|Spark]] (1) | |||
*[[Beam Robota]] (6) | |||
*[[Zombie]] (2) | |||
*[[Lumpy (enemy)|Prince Froggy]] (1) | |||
*[[Togēba]] (3 at night only) | |||
==Reaction abilities in this level== | ==Reaction abilities in this level== | ||
*[[Zombie Wario]] | *[[Zombie Wario]] (via zombie) | ||
==Gallery== | ==Gallery== | ||
Revision as of 11:43, March 18, 2023

Above the Clouds is a level appearing in the game Wario Land 3. It is located in the south part of the music box world. The area is accessible after procuring the Sky Key from Tower of Revival's Blue Chest.
As its name implies, the level takes place in a sky and is above the clouds. The platforms Wario can use are appearing and disappearing clouds. The moon also makes an appearance in this level at night after Wario gets the Full Moon Gong from Sea Turtle Rocks.
Treasures
Gray Chest: Crayon (green)
The green Crayon is in the Gray Chest found on the ground near the entrance.
To get the Gray Key, Wario must make his way to door on the platform on one of the thin clouds in the same area. To get there, he must jump through the platforms to go to the lower right thick cloud, then go to the thick cloud to the left while watching out for the bird, and then up to the right to the middle thick cloud, and then going down the thin clouds to the right until he encounters the door. After entering the door, the Gray Key is in sight, at the drop-off.
To exit the area after obtaining the Gray Key, Wario must navigate a series of clouds to the right, then make his way up in a zigzag path. There are Hebarii peeking out from the ceiling, whose projectiles should be avoided while going up. After exiting the area, Wario has to drop from the door to the Gray Chest at the bottom of the area.
Once the crayon has been collected, it flies to the tower on the north side of the world. The scene is initially monochrome, but gains another color for each crayon Wario manages to find. There are seven crayons in total hidden throughout the game, and once Wario finds all of them, he will be able to play the Golf Minigame found there. The green crayon colors the greenery that surrounds the building.
Red Chest: Fire Drencher

The Fire Drencher is located in the Red Chest.
To get to the Red Key, Wario must first go to the upper area, which can be reached by first going to the lower right thick cloud, then going left and up to the leftmost thick cloud, then going right and up to the middle thick cloud, then going left, up, and right to the upper right thick cloud to go up, where there is one spark on the way there. In the upper area, Wario must first go up and left to the middle left thick cloud, then go right and up to the middle thick cloud, and then go up and left to the door on a thin cloud. Within this room, there are Beam Robotas, where they must be brought down so that Wario can bounce from one of them to break a breakable block on the left, and then use one to throw upwards to the Enemy Blocks above the Red Key to break them. To get to the Red Key, Wario must exit the room and then go to another thin cloud with a door. To reach it, he must go down to the middle thick cloud, and then go left and then up to it. In the room, he must make his way up and then right to the narrow gap to the ladder, watching out for the Beam Robota on the way. The Red Key is to the right above the ladder, which requires dropping down.
After acquiring the Red Key, Wario must make his way back to the other door, then after going up the ladder. Instead of going right, he must go left to reach the Red Chest.
The Fire Drencher extinguishes the flames in The West Crater and The East Crater, opening up the paths that were originally blocked by them.
Green Chest: Jackhammer

The Jackhammer in the Green Chest requires the Scissors from the Cave of Flames' Blue Chest. Originally, there is a balloon tied to a building at the entrance; after the Scissors is acquired, the string attached to the balloon is cut off, causing it to float and stop under the cloud containing a door in the upper area.
Before going to the newly-accessible door, the Golf Minigame near the start should be completed, since the associated mini-game block is in this room. To get to where the balloon is. Wario must go to the upper area. In this area, the balloon is reached by first going up and left to the middle left thick cloud, then up and right to the middle thick cloud, then near the upper-left thick cloud by going right, up, left, then up on the thin clouds. In this room, there are zombies near the beginning, as well as many birds. To get to the Green Key, Zombie Wario must be triggered by one of the zombies, and then he must slowly make his way to the right past the birds and then down the thin platforms, to the left past the birds and a Prince Froggy and then down the thin platforms. From there he can either go to the right past the birds or go left to be restored to normal from the beam of light and then move to the right while avoiding the birds to the Green Key.
After getting the Green Key, Wario must jump on the series of thin platforms on the right upwards, and then jump on the series of thin platforms a bit to the left upwards. From there, he must move to the left to where the mini-game block is (if the Golf Minigame is not cleared after entering the level, then Wario must exit the area and go to the bottom of the lower area to clear it). From the mini-game block, the Green Chest is down the ladder and to the right.
The Jackhammer drills holes in the ground in one of The East Crater's rooms to cause an updraft.
Blue Chest: Pick-Axe
The Pick-Axe in the Blue Chest requires the Full Moon Gong from Sea Turtle Rocks' Blue Chest. This causes a moon to appear in this level only during nighttime, which also appears on the overworld map.
During the nighttime, Wario must make his way to the upper are of this level, and then going up through the cloud platforms until he reaches the top-right where the moon is. The Blue Key is at the drop-off from the entrance.
The Blue Chest is within the moon. Within the moon, there are two rooms. The first room contains three Togēba, where the middle one is needed to reach a rock. The rock is needed to break the Enemy Blocks on the right side by riding atop the right Togēba to reach. Below the Enemy Blocks is a door, leading to the second room. In the second room, there are two birds. The one on the right is needed for Wario to bounce off from to pass a narrow gap in the pillar, while the one of the left should be avoided while Wario navigates the red platforms to the left, down, then right. Should Wario fall off at any point here, he returns to the first area. There are breakable blocks before the Blue Chest that must be broken with a Dash Attack to reach it.
The Pick-Axe is used to chisel a hole containing a portal in The East Crater, making a new area accessible there.
Musical Coins
| Location | Description |
|---|---|

|
The Musical Coin is to the left of Wario from the beginning. |

|
In the room at the lower area of this level, the Musical Coin is to the left of the drop-off where the Gray Key is. |

|
In the room at the lower area of this level, the Musical Coin is to the right from the door, in between the first two thick clouds. |

|
In the left room at the upper area of this level, the Musical Coin is past a gap at the middle left, requiring the thin clouds to reach. |

|
In the room at the upper area accessible after cutting the balloon, Wario must make all the way to the bottom of the area as Zombie Wario, and then return to normal and go to the middle of the floor, where a Musical Coin is above breakable blocks. |

|
From the previous Musical Coin, Wario must go to the middle floor and to the left to break the breakable blocks to reach this Musical Coin. |

|
From the previous Musical Coin, Wario must go to the top floor and to the right to break the breakable blocks to reach this Musical Coin. |

|
In the upper area of this level, Wario must go to one of the clouds near the balloon, and then use a Dash Attack to reach the Musical Coin to its left. |

Enemies
- Bird (16; 2 at night only)
- Hebarii (8)
- Spark (1)
- Beam Robota (6)
- Zombie (2)
- Prince Froggy (1)
- Togēba (3 at night only)
Reaction abilities in this level
- Zombie Wario (via zombie)
Gallery
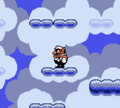
The main area
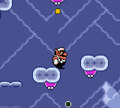
A room full of Hebarii
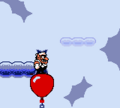
Wario on the balloon
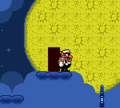
The moon
An area inside the moon


Names in other languages
| Language | Name | Meaning |
|---|---|---|
| Japanese | 雲の上 Kumo no Ue |
Above the Clouds |