A Town in Chaos: Difference between revisions
m (Text replacement - "<references/> {{" to "<references/> {{") |
LinkTheLefty (talk | contribs) mNo edit summary |
||
| (11 intermediate revisions by 3 users not shown) | |||
| Line 1: | Line 1: | ||
[[File:WL3 S ATownInChaos9.PNG|thumb|W4 A Town in Chaos]] | [[File:WL3 S ATownInChaos9.PNG|thumb|W4 A Town in Chaos]] | ||
'''A Town in Chaos''' is | '''A Town in Chaos''' is the fourth level on the western side of the [[music box (world)|music box world]] in ''[[Wario Land 3]]''. In order to access this level, the Jar from [[Out of the Woods]]' Red Chest is required, causing a rain cloud to be released after opening the jar, thus filling the water in the pool and allowing access to this level, in addition to [[The Pool of Rain]]. | ||
The level itself is set in an urban environment, where there are two buildings that can be entered. Both buildings contain switches that are used for toggling shifting blocks to open or close access to certain areas, as well as the fans to operate if the propeller for the fans are acquired. The building to the right is also used to access the boss of this level, [[Shoot]]. | |||
==Treasures== | ==Treasures== | ||
===Gray Chest: Second Gear for Machine=== | ===Gray Chest: Second Gear for Machine=== | ||
[[File:WL3 S PoolOfRain5.PNG|thumb|left|The two Gears fix the machine that connects west and south.]] | [[File:WL3 S PoolOfRain5.PNG|thumb|left|The two Gears fix the machine that connects west and south.]] | ||
The Second Gear for Machine<ref>Brady, Matthew K., Nathan Beittenmiller, Debra McBride, and David Cassady. ''Game Boy Game Secrets, 2001 Edition'' Prima's Official Strategy Guide. Page 90.</ref> can be found in the [[treasure chest|Gray Chest]] | The Second Gear for Machine<ref>Brady, Matthew K., Nathan Beittenmiller, Debra McBride, and David Cassady. ''Game Boy Game Secrets, 2001 Edition'' Prima's Official Strategy Guide. Page 90.</ref> can be found in the [[treasure chest|Gray Chest]]. It is available as soon as the level is unlocked. | ||
The | The [[key|Gray Key]] is located on the third floor of the building to the right, and on the way to the door, there are [[Para-Goom]]s and [[Brrr Bear]]s. Once [[Wario]] entered the building, he emerges from a window and thus it cannot be exited normally. From there, the Gray Key is to the bottom-right of the room, where it is above a door. | ||
To exit the room and access the Gray Chest, Wario must go out of the building. One way to do this is to go into the room near the Gray Key, and then activate the [[Switch (Wario Land II)|switch]] to cause the blocks in the previous room to move up, thus allowing the [[stove]] atop the room to be tackled with a Dash Attack to the left so that it is below the window, in order to exit the room. Alternatively, within the room, Wario can use the [[zombie]] there to trigger [[Zombie Wario]] and fall through the floor, and then tackle the stove with a Dash Attack to the right so that it is below the window, after which Wario can exit through it. Once out of the building, he needs to go to the top of the right building by climbing the ladders to reach the top, where there is a zipline handle on the left. After grabbing it, Wario will quickly zip down and to the left, rolling on the ground and breaking the damaged blocks before the Gray Chest, making it accessible. | |||
The Second Gear for Machine, along with the First Gear for Machine from The Pool of Rain's Gray Chest, causes the elevator to function, allowing access to the southern side and opening the way to [[The Grasslands]]. | |||
{{br|left}} | {{br|left}} | ||
===Red Chest: Blue Music Box=== | ===Red Chest: Blue Music Box=== | ||
[[File:WL3 S ATownInChaos6.PNG|thumb|A close-up of the Blue Music Box]] | [[File:WL3 S ATownInChaos6.PNG|thumb|A close-up of the Blue Music Box]] | ||
The Blue Music Box<ref>Brady, Matthew K., Nathan Beittenmiller, Debra McBride, and David Cassady. ''Game Boy Game Secrets, 2001 Edition'' Prima's Official Strategy Guide. Page 93.</ref> | The Blue Music Box<ref>Brady, Matthew K., Nathan Beittenmiller, Debra McBride, and David Cassady. ''Game Boy Game Secrets, 2001 Edition'' Prima's Official Strategy Guide. Page 93.</ref> is the second of five [[Music Box|music box]]es, and it is in the Red Chest. In order to access it, the Head Smash Helmet from [[The Frigid Sea]]'s Gray Chest is needed to break an overhead damaged block that leads toward the chest. | ||
To get the Red Key, Wario must first activate a switch, since it is locked behind shifting blocks. One such switch is in the third floor of the building. Within the room, there is another room below it to the bottom-right, where there is a switch. After activating it, Wario must exit the building, and then enter the room on the first floor of this building. Within this room, the Red Key is down the first ladder, though there are [[Hebarii]] and [[Fire Robota]] on the way there. | |||
In order to go to the Red Chest, Wario must first exit the room and go back to the room on the third floor, and then into the room at the bottom-right. From there, there is a damaged block to the right that must be broken by jumping on it from below. After that, Wario must make his way to the right, where Zombie Wario must be triggered near the rightmost thin platform, in order to collapse through it to exit the room through the window below, after returning to normal due to exposure of sunlight. Outside the door, there is a boss battle against [[Shoot]], where a game of soccer is played. | |||
[[File:WL3 S ATownInChaos5.PNG|thumb|left|Shoot and his goalkeeper]] | [[File:WL3 S ATownInChaos5.PNG|thumb|left|Shoot and his goalkeeper]] | ||
Wario | In order to defeat Shoot, Wario must be the first to score three goals against Shoot. To score a goal, Wario must step on Shoot in order to turn him into a [[Ball (form)|ball]] and knock him through the goal with a Dash Attack, past the tortoise goalkeeper into the goal. If Wario bumps into the tortoise, it will withdraw and won't catch Shoot as a ball, as otherwise, the tortoise might catch Shoot and he won't score. On the other hand, Shoot can jump on Wario to turn him into a ball, and if he manages to grab Wario, he will always score as the tortoise will leave the goal open, so a point will go to Shoot. In this form, Wario can only revert to normal if he moves towards the tortoise before Shoot can grab him. After being the first to score three points, Shoot will be defeated and the tortoise will retract and float upwards, leading the way to the chest. If Shoot is the winner, Wario will float upwards as a ball until he hits the ceiling, requiring the battle to be restarted. If Wario is the winner, the tortoise's shell will turn into an elevator that moves up and down, allowing Wario to stand on it to carry him to where the Red Chest is. | ||
After playing it, the Blue Music Box causes both [[Bank of the Wild River]] and [[The Tidal Coast]] to become accessible. | |||
{{br}} | {{br}} | ||
===Green Chest: Golden Left Eye=== | ===Green Chest: Golden Left Eye=== | ||
[[File:WL3 S SeaTurtleRocks6.PNG|thumb|left|The Golden Left and Right Eyes, opening the door]] | [[File:WL3 S SeaTurtleRocks6.PNG|thumb|left|The Golden Left and Right Eyes, opening the door]] | ||
The {{conjectural|Golden Left Eye}} is | The {{conjectural|Golden Left Eye}} is in the Green Chest. To access it, the Super Grab Gloves from [[The East Crater]]'s Gray Chest is required, which is required to bring a Brrr Bear to a position that makes use of [[Frozen Wario|Ice Skatin' Wario]]. | ||
The | The room with the Green Key and Green Chest is on the left building, where it is blocked by [[Lump|Prince Froggy]]. To do this, Wario must carry one of the Brrr Bears on the second or third floor to the left, so that it is before the grate in the same floor as Prince Froggy. After this, Wario must go to the other side of the grate, and then trigger Ice Skatin' Wario from that Brrr Bear to bypass Prince Froggy, after which he can reach the room. Within the room, which has [[Spearhead (enemy)|Spearhead]], Wario must activate the switches in the rooms in order to advance to the top-right where an [[Appleby]] is. In the first room to the left from the beginning, there is a Para-Goom that needs to be thrown through [[Enemy Block]]s to reach the switch. After exiting the room, there is another room to the right up a ladder, which contains [[Togēba]] that must be knocked into the air to reach the switch at the top-left of the room. From this room, Wario must go into the room to the left to activate the switch in there, which contains a Fire Robota and multiple [[Silky|Silkies]] where he must make it to the top to break the blocks, and then trigger [[Hot Wario]] via the Fire Robota to break the [[Bonfire Block]]s below the switch. After Wario reaches the top-right where the Appleby is, [[Fat Wario]] must be triggered so that the [[doughnut block]]s can be broken in the middle of the room. After breaking the doughnut blocks, Wario must activate one of the switches in order to access the Green Key. | ||
In order to reach the Green Chest, Wario must go to the top where [[Kobatto]] is. After triggering [[Vampire Wario]], Wario must fly to the top-left, using one of the droplets that will revert Wario back to normal after he's on the topmost platform. From there, the Green Chest is downwards from the ladder. | |||
The Golden Left Eye, along with the Golden Right Eye from [[Sea Turtle Rocks]]' Red Chest, are used to fit into the snake's eye sockets on golden door at [[Tower of Revival]], opening up the door found there. | |||
{{br|left}} | {{br|left}} | ||
===Blue Chest: Sapling of Growth=== | ===Blue Chest: Sapling of Growth=== | ||
[[File:WL3 S ATownInChaos8.PNG|thumb|A close-up of the Sapling of Growth]] | [[File:WL3 S ATownInChaos8.PNG|thumb|A close-up of the Sapling of Growth]] | ||
The {{conjectural|Sapling of Growth}} | The {{conjectural|Sapling of Growth}} is in the Blue Chest. To access it, the Electric Fan Propeller from The Tidal Coast's Green Chest is required, which allows the electric fans to operate after it is switched on. | ||
In order to get to the room containing the Blue Chest, Wario must go to the room on the first floor of the right building, and then go down two levels where a door is. Behind this door, there are two fans on the floor where they must be activated to operate. To the right of this door, there is a room containing a switch and the Blue Chest, which is past the damaged blocks. After activating the switch, the fans will operate and causes an updraft. In order to reach the Blue Key, the Spearhead around the middle of the room is needed to be thrown upwards and then to the left on the platforms so that it is brought to the upper left of the propeller. After that, the Spearhead must be brought down to be thrown on the Enemy Blocks to break them, allowing the Blue Key to be accessed. | |||
From the Blue Key, Wario must go down from the platform to the ground, and then go into the door to the right where the Blue Chest is to open it. | |||
The Sapling of Growth causes the [[Octohōn]] to grow in size and strength, not only allowing them to break any grates that were originally blocking them in both The Tidal Coast and [[Beneath the Waves]], but also making them able to harm Wario after they tackle him. | |||
{{br}} | {{br}} | ||
==[[Musical Coin]]s== | |||
{|width=60% cellspacing=0 border=2 cellpadding=3 style="border-collapse:collapse;" | |||
|- | |||
!Location | |||
!Description | |||
|- | |||
|[[File:WL3 S ATownInChaos MC1.png]] | |||
|align="center"|In the room on the first floor of the right building, there is a Musical Coin at the bottom. To get there, Wario has to go to the bottom where a door is, and Super Smash the floor next to the togglable blocks to get there. To get out of the pit, Wario has to break the blocks to the right, then up, and then right again. | |||
|- | |||
|[[File:WL3 S ATownInChaos MC2.png]] | |||
|align="center"|In the room on the first floor of the right building, there is another room where the ventilation devices are. The Musical Coin is to the right of the Spearhead, surrounded by Enemy Blocks that require throwing the Spearhead at them to reach. | |||
|- | |||
|[[File:WL3 S ATownInChaos MC3.png]] | |||
|align="center"|In the room on the third floor of the right building, the Musical Coin is in the area below the floor from where the player appears from. To get there, a Doughnuteer must be thrown at the wall from the right of the area at the lower floor (the wall is treated as a series of Enemy Blocks), and then go to the left to reach it. | |||
|- | |||
|[[File:WL3 S ATownInChaos MC4.png]] | |||
|align="center"|In the room on the third floor of the right building, there is a door that leads to a dark room. Under the third thin floor of the upper level, there is a Musical Coin that requires Zombie Wario to reach by collapsing through it. | |||
|- | |||
|[[File:WL3 S ATownInChaos MC5.png]] | |||
|align="center"|On the roof of the left building, the Musical Coin is to the left. | |||
|- | |||
|[[File:WL3 S ATownInChaos MC6.png]] | |||
|align="center"|In the room past Prince Froggy of the left building, and behind the left door of the lowest floor, there is a Musical Coin at the top-right in this room. After breaking the first set of Enemy Blocks by throwing the Para-Goom, the coin is above the ladder. | |||
|- | |||
|[[File:WL3 S ATownInChaos MC7.png]] | |||
|align="center"|In the room past Prince Froggy of the left building, and behind the middle-right door up a ladder, there is a Musical Coin at the top-right. To reach it, the top right Togēba must be knocked into the air with a Super Smash next to it, in order to have enough height to collect the coin. | |||
|- | |||
|[[File:WL3 S ATownInChaos MC8.png]] | |||
|align="center"|In the room past Prince Froggy of the left building, the Musical Coin is to the top-right next to the Appleby, requiring Vampire Wario to reach. | |||
|} | |||
==Enemies== | |||
*[[Brrr Bear]] (5) | |||
*[[Para-Goom]] (8) | |||
*[[Lump|Prince Froggy]] (1) | |||
*[[Hebarii]] (4) | |||
*[[Fire Robota]] (7) | |||
*[[Doughnuteer]] (3) | |||
*[[Zombie]] (4) | |||
*[[Spearhead (enemy)|Spearhead]] (8) | |||
*[[Kobatto]] (1) | |||
*[[Appleby]] (1) | |||
*[[Togēba]] (3) | |||
*[[Silky]] (3) | |||
==Reaction abilities in this level== | ==Reaction abilities in this level== | ||
| Line 74: | Line 120: | ||
|JapM=A Town in Chaos | |JapM=A Town in Chaos | ||
}} | }} | ||
==References== | ==References== | ||
<references/> | <references/> | ||
{{WL3}} | {{WL3}} | ||
[[Category: | [[Category:Towns]] | ||
[[Category:Wario Land 3 | [[Category:Wario Land 3 levels]] | ||
Latest revision as of 21:41, November 9, 2023

A Town in Chaos is the fourth level on the western side of the music box world in Wario Land 3. In order to access this level, the Jar from Out of the Woods' Red Chest is required, causing a rain cloud to be released after opening the jar, thus filling the water in the pool and allowing access to this level, in addition to The Pool of Rain.
The level itself is set in an urban environment, where there are two buildings that can be entered. Both buildings contain switches that are used for toggling shifting blocks to open or close access to certain areas, as well as the fans to operate if the propeller for the fans are acquired. The building to the right is also used to access the boss of this level, Shoot.
Treasures[edit]
Gray Chest: Second Gear for Machine[edit]

The Second Gear for Machine[1] can be found in the Gray Chest. It is available as soon as the level is unlocked.
The Gray Key is located on the third floor of the building to the right, and on the way to the door, there are Para-Gooms and Brrr Bears. Once Wario entered the building, he emerges from a window and thus it cannot be exited normally. From there, the Gray Key is to the bottom-right of the room, where it is above a door.
To exit the room and access the Gray Chest, Wario must go out of the building. One way to do this is to go into the room near the Gray Key, and then activate the switch to cause the blocks in the previous room to move up, thus allowing the stove atop the room to be tackled with a Dash Attack to the left so that it is below the window, in order to exit the room. Alternatively, within the room, Wario can use the zombie there to trigger Zombie Wario and fall through the floor, and then tackle the stove with a Dash Attack to the right so that it is below the window, after which Wario can exit through it. Once out of the building, he needs to go to the top of the right building by climbing the ladders to reach the top, where there is a zipline handle on the left. After grabbing it, Wario will quickly zip down and to the left, rolling on the ground and breaking the damaged blocks before the Gray Chest, making it accessible.
The Second Gear for Machine, along with the First Gear for Machine from The Pool of Rain's Gray Chest, causes the elevator to function, allowing access to the southern side and opening the way to The Grasslands.
Red Chest: Blue Music Box[edit]

The Blue Music Box[2] is the second of five music boxes, and it is in the Red Chest. In order to access it, the Head Smash Helmet from The Frigid Sea's Gray Chest is needed to break an overhead damaged block that leads toward the chest.
To get the Red Key, Wario must first activate a switch, since it is locked behind shifting blocks. One such switch is in the third floor of the building. Within the room, there is another room below it to the bottom-right, where there is a switch. After activating it, Wario must exit the building, and then enter the room on the first floor of this building. Within this room, the Red Key is down the first ladder, though there are Hebarii and Fire Robota on the way there.
In order to go to the Red Chest, Wario must first exit the room and go back to the room on the third floor, and then into the room at the bottom-right. From there, there is a damaged block to the right that must be broken by jumping on it from below. After that, Wario must make his way to the right, where Zombie Wario must be triggered near the rightmost thin platform, in order to collapse through it to exit the room through the window below, after returning to normal due to exposure of sunlight. Outside the door, there is a boss battle against Shoot, where a game of soccer is played.

In order to defeat Shoot, Wario must be the first to score three goals against Shoot. To score a goal, Wario must step on Shoot in order to turn him into a ball and knock him through the goal with a Dash Attack, past the tortoise goalkeeper into the goal. If Wario bumps into the tortoise, it will withdraw and won't catch Shoot as a ball, as otherwise, the tortoise might catch Shoot and he won't score. On the other hand, Shoot can jump on Wario to turn him into a ball, and if he manages to grab Wario, he will always score as the tortoise will leave the goal open, so a point will go to Shoot. In this form, Wario can only revert to normal if he moves towards the tortoise before Shoot can grab him. After being the first to score three points, Shoot will be defeated and the tortoise will retract and float upwards, leading the way to the chest. If Shoot is the winner, Wario will float upwards as a ball until he hits the ceiling, requiring the battle to be restarted. If Wario is the winner, the tortoise's shell will turn into an elevator that moves up and down, allowing Wario to stand on it to carry him to where the Red Chest is.
After playing it, the Blue Music Box causes both Bank of the Wild River and The Tidal Coast to become accessible.
Green Chest: Golden Left Eye[edit]

The Golden Left Eye is in the Green Chest. To access it, the Super Grab Gloves from The East Crater's Gray Chest is required, which is required to bring a Brrr Bear to a position that makes use of Ice Skatin' Wario.
The room with the Green Key and Green Chest is on the left building, where it is blocked by Prince Froggy. To do this, Wario must carry one of the Brrr Bears on the second or third floor to the left, so that it is before the grate in the same floor as Prince Froggy. After this, Wario must go to the other side of the grate, and then trigger Ice Skatin' Wario from that Brrr Bear to bypass Prince Froggy, after which he can reach the room. Within the room, which has Spearhead, Wario must activate the switches in the rooms in order to advance to the top-right where an Appleby is. In the first room to the left from the beginning, there is a Para-Goom that needs to be thrown through Enemy Blocks to reach the switch. After exiting the room, there is another room to the right up a ladder, which contains Togēba that must be knocked into the air to reach the switch at the top-left of the room. From this room, Wario must go into the room to the left to activate the switch in there, which contains a Fire Robota and multiple Silkies where he must make it to the top to break the blocks, and then trigger Hot Wario via the Fire Robota to break the Bonfire Blocks below the switch. After Wario reaches the top-right where the Appleby is, Fat Wario must be triggered so that the doughnut blocks can be broken in the middle of the room. After breaking the doughnut blocks, Wario must activate one of the switches in order to access the Green Key.
In order to reach the Green Chest, Wario must go to the top where Kobatto is. After triggering Vampire Wario, Wario must fly to the top-left, using one of the droplets that will revert Wario back to normal after he's on the topmost platform. From there, the Green Chest is downwards from the ladder.
The Golden Left Eye, along with the Golden Right Eye from Sea Turtle Rocks' Red Chest, are used to fit into the snake's eye sockets on golden door at Tower of Revival, opening up the door found there.
Blue Chest: Sapling of Growth[edit]

The Sapling of Growth is in the Blue Chest. To access it, the Electric Fan Propeller from The Tidal Coast's Green Chest is required, which allows the electric fans to operate after it is switched on.
In order to get to the room containing the Blue Chest, Wario must go to the room on the first floor of the right building, and then go down two levels where a door is. Behind this door, there are two fans on the floor where they must be activated to operate. To the right of this door, there is a room containing a switch and the Blue Chest, which is past the damaged blocks. After activating the switch, the fans will operate and causes an updraft. In order to reach the Blue Key, the Spearhead around the middle of the room is needed to be thrown upwards and then to the left on the platforms so that it is brought to the upper left of the propeller. After that, the Spearhead must be brought down to be thrown on the Enemy Blocks to break them, allowing the Blue Key to be accessed.
From the Blue Key, Wario must go down from the platform to the ground, and then go into the door to the right where the Blue Chest is to open it.
The Sapling of Growth causes the Octohōn to grow in size and strength, not only allowing them to break any grates that were originally blocking them in both The Tidal Coast and Beneath the Waves, but also making them able to harm Wario after they tackle him.
Musical Coins[edit]
| Location | Description |
|---|---|

|
In the room on the first floor of the right building, there is a Musical Coin at the bottom. To get there, Wario has to go to the bottom where a door is, and Super Smash the floor next to the togglable blocks to get there. To get out of the pit, Wario has to break the blocks to the right, then up, and then right again. |

|
In the room on the first floor of the right building, there is another room where the ventilation devices are. The Musical Coin is to the right of the Spearhead, surrounded by Enemy Blocks that require throwing the Spearhead at them to reach. |

|
In the room on the third floor of the right building, the Musical Coin is in the area below the floor from where the player appears from. To get there, a Doughnuteer must be thrown at the wall from the right of the area at the lower floor (the wall is treated as a series of Enemy Blocks), and then go to the left to reach it. |

|
In the room on the third floor of the right building, there is a door that leads to a dark room. Under the third thin floor of the upper level, there is a Musical Coin that requires Zombie Wario to reach by collapsing through it. |

|
On the roof of the left building, the Musical Coin is to the left. |

|
In the room past Prince Froggy of the left building, and behind the left door of the lowest floor, there is a Musical Coin at the top-right in this room. After breaking the first set of Enemy Blocks by throwing the Para-Goom, the coin is above the ladder. |

|
In the room past Prince Froggy of the left building, and behind the middle-right door up a ladder, there is a Musical Coin at the top-right. To reach it, the top right Togēba must be knocked into the air with a Super Smash next to it, in order to have enough height to collect the coin. |

|
In the room past Prince Froggy of the left building, the Musical Coin is to the top-right next to the Appleby, requiring Vampire Wario to reach. |
Enemies[edit]
- Brrr Bear (5)
- Para-Goom (8)
- Prince Froggy (1)
- Hebarii (4)
- Fire Robota (7)
- Doughnuteer (3)
- Zombie (4)
- Spearhead (8)
- Kobatto (1)
- Appleby (1)
- Togēba (3)
- Silky (3)
Reaction abilities in this level[edit]
- Ball o' String Wario (via Silky)
- Ball (via Shoot)
- Fat Wario (via Doughnuteer)
- Hot Wario (Fire Robota)
- Ice Skatin' Wario (via Brrr Bear)
- Vampire Wario (via Kobatto)
- Zombie Wario (via Zombie)
Gallery[edit]
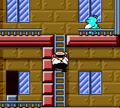
The city area
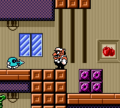
Inside the buildings

The path to Shoot's backyard
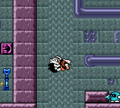
The basement


Names in other languages[edit]
| Language | Name | Meaning |
|---|---|---|
| Japanese | 混沌とした街 Konton to Shita Machi |
A Town in Chaos |
References[edit]
- ^ Brady, Matthew K., Nathan Beittenmiller, Debra McBride, and David Cassady. Game Boy Game Secrets, 2001 Edition Prima's Official Strategy Guide. Page 90.
- ^ Brady, Matthew K., Nathan Beittenmiller, Debra McBride, and David Cassady. Game Boy Game Secrets, 2001 Edition Prima's Official Strategy Guide. Page 93.