Sea Turtle Rocks: Difference between revisions
LinkTheLefty (talk | contribs) mNo edit summary |
|||
| (39 intermediate revisions by 9 users not shown) | |||
| Line 1: | Line 1: | ||
[[File:WL3 S SeaTurtleRocks9.PNG|thumb|N6 Sea Turtle Rocks]] | [[File:WL3 S SeaTurtleRocks9.PNG|thumb|N6 Sea Turtle Rocks]] | ||
'''Sea Turtle Rocks''' is | '''Sea Turtle Rocks''' is the sixth level on the northern side of the [[music box (world)|music box world]] in ''[[Wario Land 3]]''. After acquiring the Super Smash from the [[Tower of Revival]]'s Red Chest, this level is unlocked. Initially, the path to reach this level is blocked by a big boulder, but after [[Wario]] moves from [[The Tidal Coast]] to this level, he breaks the boulder on the way. | ||
This level is set on a gigantic pink rock, vaguely shaped like a turtle shell. The rock sports a pattern reminiscent of the pattern on turtle shells as well. The rock itself has many breakable parts, where they can be dug through with [[Dash Attack]]s and [[Ground Pound|Smash Attack]]s. Underneath the rock, there are bodies of water, where most of them start out murky. There are various caves within the rock, including one where there is a series of looping [[Warp Pipe|pipe]]s. The boss featured in this level is [[Octo|Scowler]]. | |||
==Treasures== | |||
===Gray Chest: Green Music Box=== | |||
[[File:WL3 S SeaTurtleRocks5.PNG|thumb|left|Wario, holding the Green Music Box]] | |||
[[File:WL3 S SeaTurtleRocks4.PNG|thumb|Wario, fighting Scowler]] | |||
The Green Music Box<ref>Brady, Matthew K., Nathan Beittenmiller, Debra McBride, and David Cassady. ''Game Boy Game Secrets, 2001 Edition'' Prima's Official Strategy Guide. Page 94.</ref>, the third of five [[Music Box|music box]]es, is in the [[treasure chest|Gray Chest]]. It is available as soon as the level is unlocked. | |||
To get to the [[key|Gray Key]], Wario must first start from the left to the inside of the rock. After that, he must break the rocks to the right, two rocks down (not all the way), right, down, right, up, right, down, left, and then down to the only clear body of water. After that, Wario must jump up to the second platform and then break the following rocks in the order: all the way left, down, right, then down to the murky water. The Gray Key is to the right. | |||
From the Gray Key, Wario must go right and up to the surface, then break the rocks above, then to the left to reach the part where Wario previously broken the rocks. From there, he must go into the water and enter the room within there. From the water, he must jump out and then leap to the bottom into a bigger body of water where [[Octo|Scowler]] is waiting. | |||
The battle against Scowler takes place underwater. Scowler will move horizontally or vertically to pursue Wario, and if it catches Wario this way, Wario will be thrown out of the cave and above the rocks outside, where he will be in the leftmost body of water, where he must return to the area to re-battle the boss. Additionally, Scowler can spew out ink, which will darken the screen if Wario touches it, leaving only the boss's face and Wario visible. In order to create an opening to hit the boss, Wario must bump into the glowing bump on the boss's head, which causes the boss to assume a different stance where it use its tentacles like a rotor blade and dash across the room diagonally before returning to the previous stance. While in this stance, Wario must go underneath the boss to hit it. The process is to be repeated an additional two times for a total of three times to defeat the boss. After the boss's defeat, a float will emerge to the water surface, which Wario can stand on to reach a platform that leads towards the Gray Chest. | |||
The battle against Scowler | |||
After playing it, the Green Music Box causes the [[Cave of Flames]] in the southern side is opened after an explosion occurs, resulting in the reveal of the cave entrance. | |||
{{br}} | {{br}} | ||
===Red Chest: | ===Red Chest: Golden Right Eye=== | ||
[[File:WL3 S SeaTurtleRocks6.PNG|thumb|left|The Golden | [[File:WL3 S SeaTurtleRocks6.PNG|thumb|left|The Golden Left and Right Eyes, opening the door]] | ||
The | The Golden Right Eye<ref name=EyeSun>Brady, Matthew K., Nathan Beittenmiller, Debra McBride, and David Cassady. ''Game Boy Game Secrets, 2001 Edition'' Prima's Official Strategy Guide. Page 95.</ref> is in the Red Chest. It requires the Scepter from Cave of Flames' Gray Chest, which purifies the murky water to allow it to become clear, thus revealing an entrance that is originally obscured. | ||
In order to get to the cave containing the Red Key and Red Chest, Wario must start from the left to the inside of the rock. After that, he must break the rocks to the right, down all the way, left, down, partially to the left, down, right, down, and then left until the middle above the water, and then down to get in the water where the door is. The Red Key is blocked by a mini-game block, and the corresponding Golf minigame room is below [[doughnut block]]s. After going out of the water and climbing up the ladder, the [[Appleby]] is required to trigger [[Fat Wario]] from its apple, where Wario must move to the right to jump on the blocks while avoiding the [[denki]] from the [[Electric Lamp]], which if exposed, triggers [[Electric Wario]] and then return to his previous state. After breaking the doughnut blocks and returning to normal, the Golf minigame room is accessible. After completing the minigame, Wario must break the blocks to the left, and then go up the ladder to go all the way to the right for the Red Key. | |||
After collecting the Red Key, Wario must go back down to the where the Golf minigame room is, and then go to the right to the Red Chest. | |||
The Golden | The Golden Right Eye, along with the Golden Left Eye from [[A Town in Chaos]]' Green Chest, are used to fit into the snake's eye sockets on golden door at [[Tower of Revival]], opening up the door found there. | ||
{{br}} | {{br}} | ||
===Green Chest: | ===Green Chest: Top Half of Sun Medallion=== | ||
[[File:WL3 S SeaTurtleRocks7.PNG|thumb|The two pieces of the Sun | [[File:WL3 S SeaTurtleRocks7.PNG|thumb|The two pieces of the Sun Medallion]] | ||
The Green | The Top Half of Sun Medallion<ref name=EyeSun/> is in the Green Chest located in a cave near the top of the level. To access it, the Super Jump Slam Overalls from [[Castle of Illusions]]' Gray Chest is required to break open the blocks obscuring the entrance to it. | ||
From the beginning, there are two blocks above a cave entrance. Wario must first break the blocks with a Smash Attack to get in the cave. Within the cave, which contains [[Para-Goom]]s, Wario must take the slope to the left and roll from it, then continuously roll through the pipes to reach higher platforms until he breaks the blocks leading to the Green Key. | |||
The Sun | After that, Wario must go back down to the ground level and take the slope to the right and roll from it, then continuously roll through the pipes to reach higher platforms until he breaks the blocks leading to the Green Chest. | ||
The Sun Medallion, which is formed from this treasure and Top Half of Sun Medallion from [[Sea Turtle Rocks]]'s Green Chest, affects the eastern part of the world. Initially, it is trapped in an eternal night that cannot be toggled by the Day or Night Spell. After completing the Sun Medallion, daytime can occur and thus new paths are accessible in [[The Colossal Hole]], [[The Frigid Sea]], and the [[Castle of Illusions]] during the daytime. Respectively, the [[Owl (species)|owl]]s rest on the ground (this event is plays in the cutscene) so that Wario can grab them more easily, the frozen waterfall flows so that Wario can pass through it, and light breaks through the windows so that one of the thin platforms leading to a new area can be stepped on through reverting Zombie Wario back to normal. | |||
{{br}} | {{br}} | ||
===Blue Chest: | |||
===Blue Chest: Full Moon Gong=== | |||
[[File:WL3 S SeaTurtleRocks8.PNG|thumb|left|A close-up of the Full Moon Gong]] | [[File:WL3 S SeaTurtleRocks8.PNG|thumb|left|A close-up of the Full Moon Gong]] | ||
The | The {{conjectural|Full Moon Gong}} is in the Blue Chest, which requires the Night Vision Scope from [[The East Crater]]'s Green Chest. It increases the visibility of a dark room in a cave found in this level, which also reveals a door. | ||
To get to this cave, Wario must go in the cave underneath him from the beginning. After that, he must enter the upper pipe to a more visible dark cave, where a door is located. Within the door, Wario must go right past the [[Spearhead (enemy)|Spearhead]]s, and then go up the ladder. To the left up the ladder, there are laser [[sensor]]s, which Wario must go around them while travelling on the carts on the rails. After travelling the first cart to the end and climbing up the ladder, the Blue Key is just above the second cart to the right. | |||
From the second cart, Wario must ride it all the way to the right while avoiding the sensors, and then at the end of the line, Wario must jump down to the right to reach the Blue Chest. | |||
The Full Moon Gong | The Full Moon Gong causes the moon to appear in [[Above the Clouds (Wario Land 3)|Above the Clouds]] after the gong is struck. It only appears at night, which can also be seen in the overworld. | ||
{{br}} | {{br}} | ||
==[[Musical Coin]]s== | |||
{|width=60% cellspacing=0 border=2 cellpadding=3 style="border-collapse:collapse;" | |||
|- | |||
!Location | |||
!Description | |||
|- | |||
|[[File:WL3 S SeaTurtleRocks MC1.png]] | |||
|align="center"|To reach this Musical Coin, Wario needs to break the rocks starting from the opening on top to the right, then down, then left, then down, and then far left, and then down towards the body of water where the coin is. | |||
|- | |||
|[[File:WL3 S SeaTurtleRocks MC2.png]] | |||
|align="center"|To reach this Musical Coin, Wario needs to go to the boss room, which is reachable by breaking the rocks starting from the opening on top to the right, then down, then right, then down, then right, then up, then right, then far downwards, then left, and then downwards towards the water where the room is. The coin can be reached after beating Scowler and then going upwards the ladder past the Gray Chest. Alternatively, there are breakable rocks off-screen that are reachable with the High Jump Boots. From the off-screen step, Wario can reach the platform above and skip the boss entirely to reach the coin. | |||
|- | |||
|[[File:WL3 S SeaTurtleRocks MC3.png]] | |||
|align="center"|From the body of water that has a room leading to Scowler, Wario can jump to the second platform from the water to break the blocks to the right to reach the Musical Coin. | |||
|- | |||
|[[File:WL3 S SeaTurtleRocks MC4.png]] | |||
|align="center"|From the previous Musical Coin, Wario needs to break the rocks to the left, then down, then right, then downwards to reach the water, and then swim to the left and follow the path, then jump out of the water to break rocks to the right, then, up, then right, and then downwards to the body of water that contains the Musical Coin. | |||
|- | |||
|[[File:WL3 S SeaTurtleRocks MC5.png]] | |||
|align="center"|From the previous Musical Coin, Wario can swim to the body of water above the platform to reach this Musical Coin. Alternatively, Wario can break the blocks starting from the opening on top to the right, then down, then right, then down, then right, then up, then right, and then midway down so that it is aligned with the visible platform on the right, then right, and then down to the body of water with this Musical Coin. | |||
|- | |||
|[[File:WL3 S SeaTurtleRocks MC6.png]] | |||
|align="center"|In the cave below Wario in the beginning, there is a Musical Coin in the top row of pipes. Wario must take the left incline so that he rolls to the right, and upon reaching the dark cave, the High Jump Boots must be used so that Wario can reach the platform above to break the blocks towards the Musical Coin. | |||
|- | |||
|[[File:WL3 S SeaTurtleRocks MC7.png]] | |||
|align="center"|From the previous Musical Coin, there is an inner cave that contains the Blue Key and the Blue Chest. The Musical Coin is below the rail on the upper carriage past the sensor that requires jumping off of the carriage to reach. | |||
|- | |||
|[[File:WL3 S SeaTurtleRocks MC8.png]] | |||
|align="center"|From the previous Musical Coin, after reaching the top at the end of the line of the upper rail, Wario needs to drop from high up towards the right to reach the Musical Coin found in the middle of the fall. | |||
|} | |||
==Enemies== | |||
*[[Hebarii]] (1) | |||
*[[Appleby]] (1) | |||
*[[Electric Lamp]] (3) | |||
*[[Denki]] (3) | |||
*[[Para-Goom]] (5) | |||
*[[Sensor]] (3) | |||
*[[Spearhead (enemy)|Spearhead]] (3) | |||
==Reaction abilities in this level== | ==Reaction abilities in this level== | ||
*[[Electric Wario]] | *[[Electric Wario]] (via denki) | ||
*[[Fat Wario]] | *[[Fat Wario]] (via Appleby) | ||
==Gallery== | ==Gallery== | ||
| Line 45: | Line 99: | ||
WL3 S SeaTurtleRocks1.PNG|The surface of Sea Turtle Rocks | WL3 S SeaTurtleRocks1.PNG|The surface of Sea Turtle Rocks | ||
WL3 S SeaTurtleRocks2.PNG|A flooded cave | WL3 S SeaTurtleRocks2.PNG|A flooded cave | ||
WL3 S SeaTurtleRocks3.PNG|The cave with the | WL3 S SeaTurtleRocks3.PNG|The cave with the sensors | ||
</gallery> | </gallery> | ||
| Line 52: | Line 106: | ||
|Jap=ウミガメ岩場 | |Jap=ウミガメ岩場 | ||
|JapR=Umigame Iwaba | |JapR=Umigame Iwaba | ||
|JapM=Sea Turtle Rockface}} | |JapM=Sea Turtle Rockface | ||
}} | |||
==References== | |||
<references/> | |||
{{WL3}} | {{WL3}} | ||
[[Category:Mazes]] | [[Category:Mazes]] | ||
[[Category: | [[Category:Underground areas]] | ||
[[Category: | [[Category:Aquatic areas]] | ||
[[Category:Wario Land 3 | [[Category:Wario Land 3 levels]] | ||
Latest revision as of 21:16, November 9, 2023

Sea Turtle Rocks is the sixth level on the northern side of the music box world in Wario Land 3. After acquiring the Super Smash from the Tower of Revival's Red Chest, this level is unlocked. Initially, the path to reach this level is blocked by a big boulder, but after Wario moves from The Tidal Coast to this level, he breaks the boulder on the way.
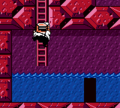
This level is set on a gigantic pink rock, vaguely shaped like a turtle shell. The rock sports a pattern reminiscent of the pattern on turtle shells as well. The rock itself has many breakable parts, where they can be dug through with Dash Attacks and Smash Attacks. Underneath the rock, there are bodies of water, where most of them start out murky. There are various caves within the rock, including one where there is a series of looping pipes. The boss featured in this level is Scowler.
Treasures[edit]
Gray Chest: Green Music Box[edit]


The Green Music Box[1], the third of five music boxes, is in the Gray Chest. It is available as soon as the level is unlocked.
To get to the Gray Key, Wario must first start from the left to the inside of the rock. After that, he must break the rocks to the right, two rocks down (not all the way), right, down, right, up, right, down, left, and then down to the only clear body of water. After that, Wario must jump up to the second platform and then break the following rocks in the order: all the way left, down, right, then down to the murky water. The Gray Key is to the right.
From the Gray Key, Wario must go right and up to the surface, then break the rocks above, then to the left to reach the part where Wario previously broken the rocks. From there, he must go into the water and enter the room within there. From the water, he must jump out and then leap to the bottom into a bigger body of water where Scowler is waiting.
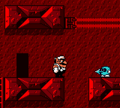
The battle against Scowler takes place underwater. Scowler will move horizontally or vertically to pursue Wario, and if it catches Wario this way, Wario will be thrown out of the cave and above the rocks outside, where he will be in the leftmost body of water, where he must return to the area to re-battle the boss. Additionally, Scowler can spew out ink, which will darken the screen if Wario touches it, leaving only the boss's face and Wario visible. In order to create an opening to hit the boss, Wario must bump into the glowing bump on the boss's head, which causes the boss to assume a different stance where it use its tentacles like a rotor blade and dash across the room diagonally before returning to the previous stance. While in this stance, Wario must go underneath the boss to hit it. The process is to be repeated an additional two times for a total of three times to defeat the boss. After the boss's defeat, a float will emerge to the water surface, which Wario can stand on to reach a platform that leads towards the Gray Chest.
After playing it, the Green Music Box causes the Cave of Flames in the southern side is opened after an explosion occurs, resulting in the reveal of the cave entrance.
Red Chest: Golden Right Eye[edit]

The Golden Right Eye[2] is in the Red Chest. It requires the Scepter from Cave of Flames' Gray Chest, which purifies the murky water to allow it to become clear, thus revealing an entrance that is originally obscured.
In order to get to the cave containing the Red Key and Red Chest, Wario must start from the left to the inside of the rock. After that, he must break the rocks to the right, down all the way, left, down, partially to the left, down, right, down, and then left until the middle above the water, and then down to get in the water where the door is. The Red Key is blocked by a mini-game block, and the corresponding Golf minigame room is below doughnut blocks. After going out of the water and climbing up the ladder, the Appleby is required to trigger Fat Wario from its apple, where Wario must move to the right to jump on the blocks while avoiding the denki from the Electric Lamp, which if exposed, triggers Electric Wario and then return to his previous state. After breaking the doughnut blocks and returning to normal, the Golf minigame room is accessible. After completing the minigame, Wario must break the blocks to the left, and then go up the ladder to go all the way to the right for the Red Key.
After collecting the Red Key, Wario must go back down to the where the Golf minigame room is, and then go to the right to the Red Chest.
The Golden Right Eye, along with the Golden Left Eye from A Town in Chaos' Green Chest, are used to fit into the snake's eye sockets on golden door at Tower of Revival, opening up the door found there.
Green Chest: Top Half of Sun Medallion[edit]

The Top Half of Sun Medallion[2] is in the Green Chest located in a cave near the top of the level. To access it, the Super Jump Slam Overalls from Castle of Illusions' Gray Chest is required to break open the blocks obscuring the entrance to it.
From the beginning, there are two blocks above a cave entrance. Wario must first break the blocks with a Smash Attack to get in the cave. Within the cave, which contains Para-Gooms, Wario must take the slope to the left and roll from it, then continuously roll through the pipes to reach higher platforms until he breaks the blocks leading to the Green Key.
After that, Wario must go back down to the ground level and take the slope to the right and roll from it, then continuously roll through the pipes to reach higher platforms until he breaks the blocks leading to the Green Chest.
The Sun Medallion, which is formed from this treasure and Top Half of Sun Medallion from Sea Turtle Rocks's Green Chest, affects the eastern part of the world. Initially, it is trapped in an eternal night that cannot be toggled by the Day or Night Spell. After completing the Sun Medallion, daytime can occur and thus new paths are accessible in The Colossal Hole, The Frigid Sea, and the Castle of Illusions during the daytime. Respectively, the owls rest on the ground (this event is plays in the cutscene) so that Wario can grab them more easily, the frozen waterfall flows so that Wario can pass through it, and light breaks through the windows so that one of the thin platforms leading to a new area can be stepped on through reverting Zombie Wario back to normal.
Blue Chest: Full Moon Gong[edit]

The Full Moon Gong is in the Blue Chest, which requires the Night Vision Scope from The East Crater's Green Chest. It increases the visibility of a dark room in a cave found in this level, which also reveals a door.
To get to this cave, Wario must go in the cave underneath him from the beginning. After that, he must enter the upper pipe to a more visible dark cave, where a door is located. Within the door, Wario must go right past the Spearheads, and then go up the ladder. To the left up the ladder, there are laser sensors, which Wario must go around them while travelling on the carts on the rails. After travelling the first cart to the end and climbing up the ladder, the Blue Key is just above the second cart to the right.
From the second cart, Wario must ride it all the way to the right while avoiding the sensors, and then at the end of the line, Wario must jump down to the right to reach the Blue Chest.
The Full Moon Gong causes the moon to appear in Above the Clouds after the gong is struck. It only appears at night, which can also be seen in the overworld.
Musical Coins[edit]
| Location | Description |
|---|---|

|
To reach this Musical Coin, Wario needs to break the rocks starting from the opening on top to the right, then down, then left, then down, and then far left, and then down towards the body of water where the coin is. |

|
To reach this Musical Coin, Wario needs to go to the boss room, which is reachable by breaking the rocks starting from the opening on top to the right, then down, then right, then down, then right, then up, then right, then far downwards, then left, and then downwards towards the water where the room is. The coin can be reached after beating Scowler and then going upwards the ladder past the Gray Chest. Alternatively, there are breakable rocks off-screen that are reachable with the High Jump Boots. From the off-screen step, Wario can reach the platform above and skip the boss entirely to reach the coin. |

|
From the body of water that has a room leading to Scowler, Wario can jump to the second platform from the water to break the blocks to the right to reach the Musical Coin. |

|
From the previous Musical Coin, Wario needs to break the rocks to the left, then down, then right, then downwards to reach the water, and then swim to the left and follow the path, then jump out of the water to break rocks to the right, then, up, then right, and then downwards to the body of water that contains the Musical Coin. |

|
From the previous Musical Coin, Wario can swim to the body of water above the platform to reach this Musical Coin. Alternatively, Wario can break the blocks starting from the opening on top to the right, then down, then right, then down, then right, then up, then right, and then midway down so that it is aligned with the visible platform on the right, then right, and then down to the body of water with this Musical Coin. |

|
In the cave below Wario in the beginning, there is a Musical Coin in the top row of pipes. Wario must take the left incline so that he rolls to the right, and upon reaching the dark cave, the High Jump Boots must be used so that Wario can reach the platform above to break the blocks towards the Musical Coin. |

|
From the previous Musical Coin, there is an inner cave that contains the Blue Key and the Blue Chest. The Musical Coin is below the rail on the upper carriage past the sensor that requires jumping off of the carriage to reach. |

|
From the previous Musical Coin, after reaching the top at the end of the line of the upper rail, Wario needs to drop from high up towards the right to reach the Musical Coin found in the middle of the fall. |
Enemies[edit]
Reaction abilities in this level[edit]
- Electric Wario (via denki)
- Fat Wario (via Appleby)
Gallery[edit]

The surface of Sea Turtle Rocks
A flooded cave
The cave with the sensors


Names in other languages[edit]
| Language | Name | Meaning |
|---|---|---|
| Japanese | ウミガメ岩場 Umigame Iwaba |
Sea Turtle Rockface |
References[edit]
- ^ Brady, Matthew K., Nathan Beittenmiller, Debra McBride, and David Cassady. Game Boy Game Secrets, 2001 Edition Prima's Official Strategy Guide. Page 94.
- ^ a b Brady, Matthew K., Nathan Beittenmiller, Debra McBride, and David Cassady. Game Boy Game Secrets, 2001 Edition Prima's Official Strategy Guide. Page 95.