Gangplank Galley (Donkey Kong Land 2): Difference between revisions
LinkTheLefty (talk | contribs) mNo edit summary |
m (→Warp Barrel) |
||
| (33 intermediate revisions by 14 users not shown) | |||
| Line 1: | Line 1: | ||
{{italic title| | {{italic title|id=yes}} | ||
{{ | {{level infobox | ||
|image=[[File:Gangplank Galley DKL2.png]] | |||
|code=1 - 3 | |code=1 - 3 | ||
|world=[[Gangplank Galleon (world)|Gangplank Galleon]] | |||
|game=''[[Donkey Kong Land 2]]'' | |game=''[[Donkey Kong Land 2]]'' | ||
|track=Lockjaw's Saga | |||
|before=[[Mainbrace Mayhem (Donkey Kong Land 2)|<<]] | |before=[[Mainbrace Mayhem (Donkey Kong Land 2)|<<]] | ||
|after=[[Lockjaw's Locker (Donkey Kong Land 2)|>>]] | |after=[[Lockjaw's Locker (Donkey Kong Land 2)|>>]] | ||
}} | }} | ||
'''Gangplank Galley''' is the third [[level]] in ''[[Donkey Kong Land 2]]'' and of the first world, [[Gangplank Galleon (world)|Gangplank Galleon]]. Similarly to the first level, [[Pirate Panic (Donkey Kong Land 2)|Pirate Panic]], Gangplank Galley takes place on a ship deck with [[hook]]s that [[Diddy Kong|Diddy]] and [[Dixie Kong|Dixie]] must jump from to reach higher areas or to safely get across [[pit]]s. Gangplank Galley bears many similarities with [[Gangplank Galley (Donkey Kong Country 2: Diddy's Kong Quest)|its ''Donkey Kong Country 2: Diddy's Kong Quest'' counterpart]], although it does not have an [[Invincibility Barrel|Exclamation Point Barrel]]. | |||
==Layout== | |||
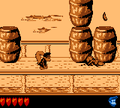
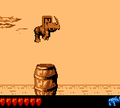
[[File:Gangplank Galley 1.png|thumb|left|180px|Dixie Kong jumps towards a DK Barrel.]] | |||
At the beginning of the level, the primates find themselves in front of some large [[barrel]]s that support [[banana]]s and around a single Neek. The stack of barrels to the left of the Kongs sits under some hooks that they can climb along to reach a [[Banana Coin]] and some bananas. After passing the Neek, the heroes come up a stairway with another Neek at the top of it. Two ledges are ahead of here, and a [[DK Barrel]] with some bananas under it is between the ledges. Once they make their way down the second ledge, they come up to some large barrels that they can jump on to reach a few bananas and the letter K. A smaller barrel that the Kongs can carry and a Neek are in front of these large barrels, which are followed by another Neek and a Klomp. | |||
Two additional Neeks are at the top of a stairway ahead of here, and they are followed by a small pit with an Extra Life Balloon in it. The heroes can find a ledge ahead of here, along with a Neek and a thin stack of barrels with a Banana Bunch above it. If they travel farther ahead, they find a large ledge with a hook to the top-right of it. Instead of dropping down the ledge to access the next area, they can climb on the hook and jump to a banana trail near it that is located under the letter O. At the bottom of the trail, the heroes can find more barrels piled up and another trail of bananas that lead off of the large barrels, where a Kruncha and a wide abyss are located. Three hooks are in the pit that can be used to cross. Once they pass over the abyss, the Kongs discover an Extra Life Balloon and a stairway leading to a Neek and a tall stack of barrels. An [[Animal Barrel]] appears just before the [[Star Barrel]], and it transforms the Kongs into [[Rambi]]. A Neek is also found after the Star Barrel. | |||
Two ledges are ahead of here, and when the Kongs climb it, they approach a few Neeks and a DK Barrel that floats next to a group of four large barrels with bananas on it. Another large barrel with a single banana on it is next to them. There are two more ledges after here that lead them down to a lower area with a treasure chest that contains a Banana Bunch, a thin stack of barrels with the letter N above it, and a Kaboing. Once they head up a stairway near here, they reach a Neek and a group of two large barrels placed next to each other. A Barrel Cannon is next to these barrels that can shoot the primates to a higher section of the ship, where there is a Banana Coin and a long, flat pathway with some Neeks and bananas on it. At the end of this flat area, the Kongs can find a ledge that drops them into a slightly lower area with a [[TNT Barrel]] and a Kruncha in it. | |||
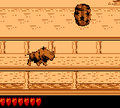
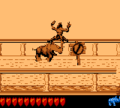
[[File:Gangplank Galley DKL2 shot 2.png|thumb|Dixie Kong hovers over a Kruncha]] | |||
If they drop down the ledge ahead of here, the discover a DK Barrel and an additional ledge that leads them to a Kaboing and a [[No Animal Sign]], which makes Rambi transform back into the primates if he has been freed from his Animal Barrel. A wide gap with four hooks above it is ahead of here. They must use the hooks to cross and reach a long platform with two Neeks and a Kruncha on it. They can also use the hooks to access a hidden Barrel Cannon that is able to blast them to the letter G and onto a hook high above a pit just ahead of here. If they drop down from here, they grab a Banana Coin and then grab onto a hook above the pit. With the use of a few more hooks, the primates can cross the remaining part of the pit, which contains the level's Video Game Hero Coin that is hidden above a Barrel Cannon. Once the primates cross the pit, they approach two stairways with Neeks walking along them. At the top of the stairs, they can find a crate, a few bananas, and a pair of Krunchas. After they cross a small pit ahead of here, they reach a Banana Bunch and a spring that can bounce them out of the level successfully. | |||
==Enemies== | |||
The following enemies appear in the following quantities, and enemies marked in '''bold''' debut in the level. | |||
*[[Kaboing]]: 2 | |||
[[ | *[[Klomp]]: 1 (2 more in a Bonus Level) | ||
*[[Kruncha]]: 4 | |||
*[[Neek]]: 15 (4 more in a Bonus Level) | |||
==Items and objects== | |||
The following items and objects appear in the following quantities: | |||
*[[Banana Coin]]: 4 | |||
*[[Barrel]]: 1 | |||
*[[Crate]]: 1 | |||
*[[DK Barrel]]s: 3 | |||
*[[Red Balloon|Extra Life Balloon]]s: 2 | |||
*[[TNT Barrel]]s: 1 | |||
*[[Treasure chest]]: 1 | |||
===KONG Letters=== | |||
*K: After the first DK Barrel, the Kongs must jump on a stack of barrels and jump right to collect the letter K. | |||
*O: When the Kongs reach a hook in the air, they must jump to the upper-right to get the letter O, which is above a short trail of bananas. | |||
*N: After the Star Barrel, when the Kongs find a Treasure Chest, they must jump on a stack of barrels with a banana and the letter N above it. | |||
*G: After crossing the [[No Animal Sign]], the Kongs must jump from a diagonal set of hooks to enter a [[Barrel Cannon]] at the top, which blasts them to the letter G and then a hook with a Banana Coin and a few bananas underneath it. | |||
[[File: | ===Cranky's Video Game Hero Coin=== | ||
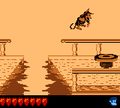
[[File:Gangplank Galley DKL2 DK Coin.png|thumb|The location of the Video Game Hero Coin]] | |||
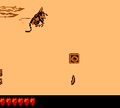
The [[DK Coin|Video Game Hero Coin]] is to the right of the [[Bonus Barrel]]. It is underneath the third hook over the same abyss that the Bonus Barrel is under. A Barrel Cannon is beneath the Video Game Hero Coin, to catch the Kongs when they fall, and it blasts them upper-right to the fourth hook over the abyss. | |||
{{br}} | |||
==Bonus Level== | |||
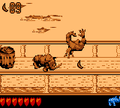
[[File:Gangplank Galley DKL2 Bonus Area 2.png|thumb|The Bonus Level of Gangplank Galley]] | |||
Gangplank Galley has only one [[Bonus room|Bonus Level]], of the following type: | |||
*'''Destroy them All!''': After collecting the letter G from a Barrel Cannon, the Kongs are blasted down to a hook which is over an abyss. By dropping below it, they can enter a [[Bonus Barrel]]. In the [[Bonus Level]], the Kongs have to defeat four Neeks and two Klomps. After defeating the enemies, the [[Kremkoin]] appears. | |||
{{br}} | |||
* | ==Warp Barrel== | ||
Dixie is required to reach the [[Warp Barrel]]. From the start of the level, she must go backwards, jump on a pile of barrels, and then up to a hook. Dixie must jump to another hook and use her [[Helicopter Spin]] to collect a Banana Coin and two bananas. To the right of the collectibles is a hidden Warp Barrel. In the warp room, the Kongs can collect some bananas and walk out from the other side. This leads them directly to the [[End of Level Target]]. | |||
[[ | |||
==Gallery== | ==Gallery== | ||
<gallery> | |||
Gangplank Galley DKL2 start.png|Dixie at the start of the level | |||
</gallery | GGGB-K.png|The letter K | ||
GGGB-O.png|The letter O | |||
Gangplank Galley DKL2 Star Barrel.png|Rambi goes to the Star Barrel | |||
Gangplank Galley DKL2 Kruncha defeated.png|Rambi defeats a Kruncha | |||
GGGB-N.png|The letter N | |||
Gangplank Galley DKL2 No Animal Sign.png|Rambi approaches the No Animal Sign | |||
Gangplank Galley DKL2 end.png|Diddy jumps to the End of Level Target | |||
</gallery> | |||
==Names in other languages== | ==Names in other languages== | ||
{{ | {{foreign names | ||
|Jap=アスレチックデッキ | |Jap=アスレチックデッキ | ||
|JapR=Asurechikku | |JapR=Asurechikku Dekki | ||
|JapM=Athletic Deck | |||
}} | |||
{{DKL2}} | {{DKL2}} | ||
[[Category: | [[Category:Pirate areas]] | ||
[[Category:Donkey Kong | [[Category:Donkey Kong Land 2 levels]] | ||
[[Category:Crocodile Isle]] | [[Category:Crocodile Isle]] | ||
Latest revision as of 19:38, December 15, 2023
| Level | |
|---|---|
| Gangplank Galley | |

| |
| Level code | 1 - 3 |
| World | Gangplank Galleon |
| Game | Donkey Kong Land 2 |
| Music track | Lockjaw's Saga |
| << Directory of levels >> | |
Gangplank Galley is the third level in Donkey Kong Land 2 and of the first world, Gangplank Galleon. Similarly to the first level, Pirate Panic, Gangplank Galley takes place on a ship deck with hooks that Diddy and Dixie must jump from to reach higher areas or to safely get across pits. Gangplank Galley bears many similarities with its Donkey Kong Country 2: Diddy's Kong Quest counterpart, although it does not have an Exclamation Point Barrel.
Layout[edit]

At the beginning of the level, the primates find themselves in front of some large barrels that support bananas and around a single Neek. The stack of barrels to the left of the Kongs sits under some hooks that they can climb along to reach a Banana Coin and some bananas. After passing the Neek, the heroes come up a stairway with another Neek at the top of it. Two ledges are ahead of here, and a DK Barrel with some bananas under it is between the ledges. Once they make their way down the second ledge, they come up to some large barrels that they can jump on to reach a few bananas and the letter K. A smaller barrel that the Kongs can carry and a Neek are in front of these large barrels, which are followed by another Neek and a Klomp.
Two additional Neeks are at the top of a stairway ahead of here, and they are followed by a small pit with an Extra Life Balloon in it. The heroes can find a ledge ahead of here, along with a Neek and a thin stack of barrels with a Banana Bunch above it. If they travel farther ahead, they find a large ledge with a hook to the top-right of it. Instead of dropping down the ledge to access the next area, they can climb on the hook and jump to a banana trail near it that is located under the letter O. At the bottom of the trail, the heroes can find more barrels piled up and another trail of bananas that lead off of the large barrels, where a Kruncha and a wide abyss are located. Three hooks are in the pit that can be used to cross. Once they pass over the abyss, the Kongs discover an Extra Life Balloon and a stairway leading to a Neek and a tall stack of barrels. An Animal Barrel appears just before the Star Barrel, and it transforms the Kongs into Rambi. A Neek is also found after the Star Barrel.
Two ledges are ahead of here, and when the Kongs climb it, they approach a few Neeks and a DK Barrel that floats next to a group of four large barrels with bananas on it. Another large barrel with a single banana on it is next to them. There are two more ledges after here that lead them down to a lower area with a treasure chest that contains a Banana Bunch, a thin stack of barrels with the letter N above it, and a Kaboing. Once they head up a stairway near here, they reach a Neek and a group of two large barrels placed next to each other. A Barrel Cannon is next to these barrels that can shoot the primates to a higher section of the ship, where there is a Banana Coin and a long, flat pathway with some Neeks and bananas on it. At the end of this flat area, the Kongs can find a ledge that drops them into a slightly lower area with a TNT Barrel and a Kruncha in it.

If they drop down the ledge ahead of here, the discover a DK Barrel and an additional ledge that leads them to a Kaboing and a No Animal Sign, which makes Rambi transform back into the primates if he has been freed from his Animal Barrel. A wide gap with four hooks above it is ahead of here. They must use the hooks to cross and reach a long platform with two Neeks and a Kruncha on it. They can also use the hooks to access a hidden Barrel Cannon that is able to blast them to the letter G and onto a hook high above a pit just ahead of here. If they drop down from here, they grab a Banana Coin and then grab onto a hook above the pit. With the use of a few more hooks, the primates can cross the remaining part of the pit, which contains the level's Video Game Hero Coin that is hidden above a Barrel Cannon. Once the primates cross the pit, they approach two stairways with Neeks walking along them. At the top of the stairs, they can find a crate, a few bananas, and a pair of Krunchas. After they cross a small pit ahead of here, they reach a Banana Bunch and a spring that can bounce them out of the level successfully.
Enemies[edit]
The following enemies appear in the following quantities, and enemies marked in bold debut in the level.
Items and objects[edit]
The following items and objects appear in the following quantities:
- Banana Coin: 4
- Barrel: 1
- Crate: 1
- DK Barrels: 3
- Extra Life Balloons: 2
- TNT Barrels: 1
- Treasure chest: 1
KONG Letters[edit]
- K: After the first DK Barrel, the Kongs must jump on a stack of barrels and jump right to collect the letter K.
- O: When the Kongs reach a hook in the air, they must jump to the upper-right to get the letter O, which is above a short trail of bananas.
- N: After the Star Barrel, when the Kongs find a Treasure Chest, they must jump on a stack of barrels with a banana and the letter N above it.
- G: After crossing the No Animal Sign, the Kongs must jump from a diagonal set of hooks to enter a Barrel Cannon at the top, which blasts them to the letter G and then a hook with a Banana Coin and a few bananas underneath it.
Cranky's Video Game Hero Coin[edit]

The Video Game Hero Coin is to the right of the Bonus Barrel. It is underneath the third hook over the same abyss that the Bonus Barrel is under. A Barrel Cannon is beneath the Video Game Hero Coin, to catch the Kongs when they fall, and it blasts them upper-right to the fourth hook over the abyss.
Bonus Level[edit]

Gangplank Galley has only one Bonus Level, of the following type:
- Destroy them All!: After collecting the letter G from a Barrel Cannon, the Kongs are blasted down to a hook which is over an abyss. By dropping below it, they can enter a Bonus Barrel. In the Bonus Level, the Kongs have to defeat four Neeks and two Klomps. After defeating the enemies, the Kremkoin appears.
Warp Barrel[edit]
Dixie is required to reach the Warp Barrel. From the start of the level, she must go backwards, jump on a pile of barrels, and then up to a hook. Dixie must jump to another hook and use her Helicopter Spin to collect a Banana Coin and two bananas. To the right of the collectibles is a hidden Warp Barrel. In the warp room, the Kongs can collect some bananas and walk out from the other side. This leads them directly to the End of Level Target.
Gallery[edit]
Dixie at the start of the level

The letter K
The letter O
Rambi goes to the Star Barrel
Rambi defeats a Kruncha
The letter N
Rambi approaches the No Animal Sign
Diddy jumps to the End of Level Target


Names in other languages[edit]
| Language | Name | Meaning |
|---|---|---|
| Japanese | アスレチックデッキ Asurechikku Dekki |
Athletic Deck |