Bramble Blast (Donkey Kong Land 2)
| Bramble Blast | |||||||
|---|---|---|---|---|---|---|---|

| |||||||
| Level code | 3 - 3 | ||||||
| World | Krazy Kremland | ||||||
| Game | Donkey Kong Land 2 | ||||||
| Music track | Stickerbush Symphony | ||||||
| |||||||
Bramble Blast is the eighteenth level in Donkey Kong Land 2 and the third level of Krazy Kremland. It takes place within a series of large brambles that Diddy and Dixie can navigate through by blasting from a series of Barrel Cannons, several of which move only in a few directions. There are a few sections where the Kongs move around on foot.
Layout[edit]

At the beginning of the level, the heroes find themselves on some wooden planks that hold them above the brambles. A DK Barrel and a Blast Barrel are near here, and if the Kongs jump into the Blast Barrel, they are shot into a Barrel Cannon that they must use to shoot to another barrel. Some more Barrel Cannons are ahead of here, and the primates must use them in order to safely access the bottom-right section of the area. Bananas placed in front of the barrels help them determine which direction to shoot in. As they approach the bottom-right portion of the area, a Zinger flies in their way, and they also come up to some Barrel Cannons hidden to the left of them that can fire them to a Banana Bunch. If they continue to the bottom-right part of this area, they make their way to a Banana Coin, and then into a Blast Barrel that can shoot them through a thin passage around the brambles. The primates then land in another Barrel Cannon, which is positioned near several more Barrel Cannons that they must use to progress over the brambles. One of these Barrel Cannons can either fire them into a barrel to the left, or another to the right. If they shoot to the barrel on the left, they can find a few more Barrel Cannons that they must operate in order to shoot them to the letter K in a narrow passage.
If they fire themselves into the Barrel Cannon to the right, they can find more barrels ahead of them that they must use advance. With the help of the bananas next to the barrels, which indicate the correct direction to shoot in, the heroes can make their way to a Zinger that they must shoot past to reach another Barrel Cannon. As before, they must fire themselves over the brambles with these many barrels. Eventually, they reach a Barrel Cannon that rotates when accessed. They must shoot out of this barrel with perfect timing in order to reach another Barrel Cannon above it. This barrel moves in the same way as the previous barrels, as it only makes 90 degree turns. After they shoot to the left with this barrel, they land in a Blast Barrel that automatically fires them to an additional Blast Barrel. This barrel then sends them to another Barrel Cannon that rotates when accessed. This time, they not only have to shoot at the correct time to avoid shooting into the brambles, but they must also watch for a Zinger that moves in their way. Once they fire past this foe, they land in a Blast Barrel that shoots them onto some wooden planks with a DK Barrel above them. Bananas are placed along a vine near here, and the heroes must climb down the vine to reach some more wooden planks. They must walk along them to reach a Flitter, another vine, and a Barrel Cannon shortly afterward. By bouncing on the Flitter, the heroes can reach the vine, which they can climb up to find a Zinger that flies in their path and a horizontal vine. An additional Zinger flies around the horizontal vine, which is also positioned above a Bonus Barrel and some wooden planks.
If the primates do not climb along these vines, they can instead jump into the previously-mentioned Barrel Cannon, which can fire them into a stationary barrel with a Zinger in front of it. When the enemy moves out of their path, they must shoot out of the barrel in order to reach another stationary Barrel Cannon, which they must also use to shoot past a Zinger and into an additional stationary Barrel Cannon. They must activate this barrel in order to blast themselves into a Blast Barrel that can blast them towards a few more Blast Barrels. These barrels can send the duo into a Barrel Cannon that is surrounded by several other Barrel Cannons. They must fire through the area with these barrels in order to progress. As they travel through the area, they can find a Blast Barrel that is able to blast them to the letter O, and then to another Blast Barrel that can shoot them back into one of the Barrel Cannons. Once the primates shoot towards the bottom-left corner of this section of barrels, they reach a tilted Blast Barrel, which they must use to shoot them to some more Blast Barrels. The barrels send the heroes into a Barrel Cannon, which they must operate to lead them into another Barrel Cannon to the right. The barrel is able to fire them towards two stationary Barrel Cannons that are both placed next to Zingers. They must shoot out of the barrels when the enemies pass them in order to safely progress to some wooden planks with a Blast Barrel and a Star Barrel above them.

The nearby Blast Barrel is able to shoot them towards a chain of Barrel Cannons above it. Each of these barrels rotate when accessed, so the Kongs must aim carefully in order to reach the top of the area, where they can discover another Barrel Cannon that simply makes 90 degree turns when entered. As the two friends approach this Barrel Cannon, a few Zingers stand in their way. Once they reach the Barrel Cannon, they must fire themselves to a Blast Barrel that can then shoot them onto some wooden planks positioned on top of some brambles. Another section of planks is ahead of here, and the heroes must travel over the brambles with it to reach a DK Barrel and a Blast Barrel that can shoot them onto some more planks that hold the letter N. A hidden area is to the left of the Blast Barrel, and it contains some more Barrel Cannons and a Video Game Hero Coin. The primates can discover an additional Barrel Cannon above the letter N, and they must use it in order to reach a Blast Barrel that can shoot them into another Barrel Cannon. This cannon can fire them north into a Blast Barrel, which then blasts them towards a Flitter that is placed next to another Blast Barrel. After they bounce off of this insect foe, they must shift themselves towards the barrel to land in it and be shot into another Barrel Cannon, which they must use to shoot to an additional Barrel Cannon.
A Zinger flies above this barrel, but once it moves out of their path, they must fire themselves upwards into yet another Barrel Cannon, which is followed by a few more Barrel Cannons. Once the duo shoots across some of the area with these barrels, they reach a Blast Barrel that, again, shoots them into a Barrel Cannon. With this cannon, along with the many other cannons ahead of it that are placed diagonally from each other, the Kongs can reach some Blast Barrels that can send them up into some different Barrel Cannons that rotate when accessed. The second of these spinning barrels can shoot them to a hidden Blast Barrel, which is then able to send them onto some wooden planks in a secret area. Here, they can find the letter G, a Flitter, and some vines that they can climb along to reach a Bonus Barrel. If the primates do not shoot to this secret area, they must instead shoot to the left with the previous rotating Barrel Cannon in order to reach a Blast Barrel that can blast them upwards into a Barrel Cannon that is located next to a Zinger. While trying not to shoot into the foe, the primates must fire to the left to reach a few more Barrel Cannons that they must use to traverse the area. Soon, they reach some Blast Barrels that can shoot them onto some wooden planks that support a spring, which they must bounce on to complete the level. A Banana Bunch is above this spring.
Enemies[edit]
Items and objects[edit]
The following items and objects appear in the following quantities:
- Banana Coins: 2
- DK Barrels: 3
- No Animal Sign: 2
KONG Letters[edit]
- K: Near the start, the Kongs must shoot through a thin gap just after the first Banana Coin. After doing so, they must continue left into an area with many Barrel Cannons; they must blast from them until entering a Barrel Cannon directly above the letter K. From this Barrel Cannon, they can blast down to the letter K.
- O: After completing the first Bonus Level, the Kongs must continue blasting between Barrel Cannons. From the first Barrel Cannon with a banana to the left and below each, Diddy or Dixie must blast to the lower banana to land into another Barrel Cannon, and then blast down again to the letter O. A Barrel Cannon beneath the letter O shoots the Kongs back up after they have collected it.
- N: Shortly after the Kongs pass the Star Barrel, they must continue north while blasting from rotating Barrel Cannons and then along a few wooden platforms. A Barrel Cannon to the left of a DK Barrel launches them on another wooden platform with the letter N.
- G: Near the end of the level, a Barrel Cannon shoots the Kongs northeast onto a platform with a No Animal Sign; the letter G is next to it.
Cranky's Video Game Hero Coin[edit]
After the Kongs pass the Star Barrel and shoot upwards through all of the rotating Barrel Cannons, they must jump across a few wooden platforms. Instead of taking the next Barrel Cannon, Diddy or Dixie must jump over the brambles to the left. Eventually they can blast from some Barrel Cannons which take them to the Video Game Hero Coin.
Bonus Levels[edit]

Bramble Blast has two Bonus Levels, listed by type:
- Find the Token!: When the Kongs find the first Flitter, they should bounce on it to reach a vine above. They must climb up the vine and avoid a Zinger and then climb left across a horizontal vine, where Diddy or Dixie must avoid another Zinger. The Bonus Barrel is underneath the vine to the end, and the Kongs must drop below to enter the Bonus Barrel. In the Bonus Level, the Kongs have 20 seconds to collect the Kremkoin at the end. Diddy or Dixie must jump from wooden plank platforms and blast from Barrel Cannons along their way. A Zinger appears just before a long platform with a Kremkoin.
- Destroy them All!: The second Bonus Barrel is found similarly to the first one. When the Kongs collect the letter G, they must climb up a vine and then continue right across a horizontal vine. When they reach the end, the Kongs must drop into a Bonus Barrel below. In the Bonus Level, the Kongs must jump into a Squawks Barrel above them. Squawks must fly around a wide area between the brambles and defeat six Zingers within 30 seconds. When Squawks defeats every Zinger, the Kremkoin appears on a platform of wooden planks to the bottom-left. Squawks has to first cross a No Animal Sign before the Kongs can get the Kremkoin. There is also a No Animal Sign in the main level in case Squawks loses the Bonus Level, causing him to return into the main level.
Gallery[edit]
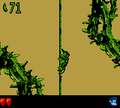
Diddy climbing up a vine
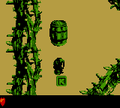
The letter K
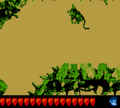
Diddy jumping from a platform of wooden planks
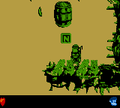
The letter N


Names in other languages[edit]
| Language | Name | Meaning | Note(s) | Ref. |
|---|---|---|---|---|
| Japanese | とげとげタルめいろ Togetoge Taru Meiro |
Prickly Barrel Maze | [?] |