Topsail Trouble (Donkey Kong Land 2)
| Topsail Trouble | |||||||
|---|---|---|---|---|---|---|---|

| |||||||
| Level code | 1 - 5 | ||||||
| World | Gangplank Galleon | ||||||
| Game | Donkey Kong Land 2 | ||||||
| Music track | Lockjaw's Saga | ||||||
| |||||||
Topsail Trouble is the fifth level in Donkey Kong Land 2 and of the first world, Gangplank Galleon. It takes place on a ship mast. At the start, there is an Animal Barrel of Rattly, whom Diddy Kong and Dixie Kong can transform into until they cross the No Animal Sign. After crossing it, the level becomes similar to Mainbrace Mayhem, as the Kongs must climb up ropes, jump from masts, and avoid enemies.
Layout[edit]
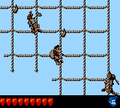
The Kongs begin the level on a yard with an Animal Barrel above it, which can turn them into Rattly if they enter it. If they head east from here, they make their way up a slanted yard with some Neeks on it. Another Neek walks on the yard ahead of here, which is partly tilted under the previous yard. A mast is behind the final yard in this area, and some wooden structures are on it that can be used to climb to the second set of yards. Some hooks are next to the structures to help the Kongs climb to them. They soon climb to a small yard with a Click-Clack and a DK Barrel on it. A pit is ahead of it that contains a Zinger, and once the heroes cross this pit, they come onto another yard with the letter K above it. A larger yard follows here, and it holds a Click-Clack and a set of ropes that hang below it. A Klinger slides along the rope, which can lead the heroes to a Banana Bunch. If they head north from here using some hooks and platforms connected to masts, they reach a slanted yard with a Neek and a DK Barrel on it. An additional platform attached to a mast is next to the yard, and they can climb on it to reach a hidden Bonus Barrel. To the east of here, they can find another mast with a platform on it.

A Zinger flies next to the mast, and it is followed by a yard with a No Animal Sign on it. Rattly disappears when this sign is passed, and the primates are also given a Banana Coin if they lead him to this sign. If they continue east from here, they reach a set of ropes that lead to up a higher yard. To the right of these ropes, they can find another rope set that a Klinger climbs along. Bananas are also located around the ropes. The primates must travel upwards along the previous ropes to progress from here. Once they reach the next yard, they encounter a Click-Clack and a large mast that holds a wooden platform. They must use the platform to reach a horizontal tightrope, which they must climb along. As they climb, they come past a lone Zinger and then reach another mast with a platform on it. A set of ropes are to the left of this mast, and if they climb them, they can find the letter O in the air. Another set of ropes is farther to the left from here, and a Klinger climbs along them. When they reach the top of the ropes, they can find a Banana Bunch to their right and a mast with a platform on it to their left. They can use the platform to make their way onto an additional set of ropes that lead up to a yard with a Klomp and a Star Barrel on it.
At this point in the level, the Kongs can find a DK Barrel and a barrel to their right on the same yard. Another yard is ahead of here with a trio of Neeks on it. The slanted yard leads them up to a horizontal tightrope with an Exclamation Point Barrel to the far left of it. To the right of the rope, the primates can find a large group of ropes that are covered in Klingers and bananas. A Banana Coin is also near the bottom of the ropes. Once the duo climbs these ropes, they reach a long, horizontal tightrope with four Zingers along it. The tightrope leads to a larger group of ropes with some more Klingers on them. When they reach the rope of the ropes, they can find another horizontal tightrope to their right with a few Zingers in front of it. As the primates climb across it, they come under the letter N and then make their way to another large set of ropes with a Klinger on it. A mast with a platform on it is to the right of these ropes, and they can use the platform to reach a yard with a Kaboing and a DK Barrel in it. A yard with a treasure chest containing an Extra Life Balloon is on a yard above here.
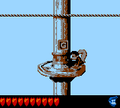
This yard also supports a Kaboing, as does the following yard, which additionally carries a Click-Clack. If the primates journey to the left edge of this yard, they can find a Video Game Hero Coin and a Banana Bunch floating high in the air above a pit. A slanted yard is located near here with some Flitters flying around it. The two friends can find a large set of ropes on the end of this yard, and as they climb these ropes, they encounter a few Klingers and a Banana Coin that is located in the top-right part of the area. A straight, horizontal tightrope is to the left of the coin, and a Flitter and some Zingers fly around it. The letter G is also put in view under them as they climb along the rope, and if they drop down to it they are caught by a sturdy platform connected to a mast. After passing the final Zinger in this area, the Kongs approach a hidden yard with an Extra Life Balloon next to it and a Barrel Cannon that they can drop into in order to be blasted to some more Barrel Cannons that can lead them onto a yard with a spring on it. If they bounce on the spring, they complete the level. A Banana Bunch is located in the air to the right of the spring.
Enemies[edit]
The following enemies appear in the following quantities:
- Click-Clack: 6
- Flitter: 3
- Neek: 8
- Kaboing: 4
- Klinger: 14 (4 more in a Bonus Level)
- Klomp: 1
- Zinger: 12
Items and objects[edit]
The following items and objects appear in the following quantities:
- Banana Coins: 3
- DK Barrels: 5
- Exclamation Point Barrel: 1 (Near the Star Barrel, at the ropes where the Kongs must go left and climb until reaching the barrel)
- Extra Life Balloons: 2 (one is in a Treasure Chest, the other is to the left of a Barrel Cannon at the end)
KONG Letters[edit]
- K: Above a yard after the first Zinger.
- O: Above a square of ropes after a Zinger and shortly before the Star Barrel.
- N: The letter N is after the Star Barrel, hovering above a horizontal rope found after two Zingers.
- G: To the left of a Flitter and beneath the last horizontal rope in the level.
Cranky's Video Game Hero Coin[edit]

Above the fourth DK Barrel, the Kongs must go to the very left of a yard. From there, they must jump off a distance to reach a Banana Bunch and the Video Game Hero Coin to the top-left.
Bonus Level[edit]

Topsail Trouble has only one Bonus Level, of the following type:
- Destroy them All!: Shortly before the DK Barrel is a wooden structure attached to a mast. The Kongs must jump on the platform and then into a Bonus Barrel on the left. In the Bonus Level, Diddy or Dixie has to defeat four Klingers that are climbing up and down a large set of ropes, by picking up and throwing kannonballs from the circular platforms. After the Kongs defeat every Klinger, the Kremkoin appears at the bottom center of the area to be obtained.
Warp Barrel[edit]
To find the Warp Barrel, the Kongs must jump into the Rattly Barrel and jump on a circular platform to the left. Rattly must perform a superjump to land into the Warp Barrel far above. The warp room takes place on a long yard, starting with a No Animal Sign, and a group of bananas shaping a right arrow is floating above the yard, pointing the direction that the Kongs must leave. Back in the main level, the Kongs start beneath a Barrel Cannon on a yard with the End of Level Target.
Gallery[edit]
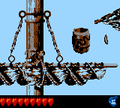
Dixie at the start of the level where there is a Rattly Barrel

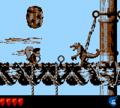
Rattly bounces to the Bonus Barrel
Dixie falls to the letter O
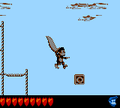
Diddy encounters a Zinger around a rope
Dixie standing beneath the Star Barrel

Dixie finds the Exclamation Point Barrel
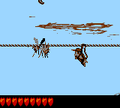
Dixie climbing a series of ropes between two Klingers
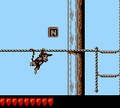
Diddy climbs to the letter N
Dixie standing next to the letter G

Dixie at the End of Level Target


Names in other languages[edit]
| Language | Name | Meaning | Note(s) | Ref. |
|---|---|---|---|---|
| Japanese | ラトリーとうじょう Ratorī Tōjō |
Enter Rattly | [?] |