Toxic Tower (Donkey Kong Land 2)
| Toxic Tower | |||||||
|---|---|---|---|---|---|---|---|

| |||||||
| Level code | 5 - 6 | ||||||
| World | K. Rool's Keep | ||||||
| Game | Donkey Kong Land 2 | ||||||
| Music track | Krook's March | ||||||
| |||||||
Toxic Tower is the thirty-third level of Donkey Kong Land 2 and the sixth and last regular level of K. Rool's Keep. It takes place inside of a castle where the main hazard is rising toxic waste. Diddy and Dixie must go up the level by climbing up the chains and jumping from platforms. There are three Animal Friends they have to transform into in order to progress: The first is Squitter who must use his web platforms to ascend; followed by Rattly, who must perform high bounces to progress; and lastly Squawks, who can fly up the level.
Layout[edit]

The Kongs begin the level on a solid ground positioned to the right of a pit with toxic waste. Several chains with bananas on them hang over the pit for the primates to use in order to avoid falling into the toxic waste. After they cross the pit, they reach another solid piece of ground with a DK Barrel wobbling over it. A set of chains that hang near here can be used to climb to a higher area, where an Animal Barrel containing Squitter and a Spiny are placed. The toxic waste starts rising as they climb the chains. They must jump into the Animal Barrel to transform into Squitter. To escape the toxic waste, Squitter must create and jump from his web platforms, as directed by a formation of bananas creating an arrow. Soon, Squitter reaches a ledge with a Spiny on it and then the letter K. Once he climbs a little bit higher, he approaches a No Animal Sign on a solid piece of ground. Squitter must pass it to transform back into the Kongs. The Kongs must continue through the rest of the level and travel up a few small ledges to reach an Animal Barrel containing Rattly. When they enter this barrel, they are transformed into the animal, who must then use his jumping powers to get onto a higher ledge to the left. He can also head east to find a hidden Barrel Cannon high in the air that can blast him to a Banana Coin and then farther into the level. If Rattly heads right from the ledge, he comes up to several platforms separated by small gaps. After he climbs onto the highest of the platforms, located at the rightmost side of the area, he can find a higher platform to his left that stands under a Zinger and another platform. A Bonus Barrel is located to the left of the Zinger, who can be bounced on to reach a Zinger floating higher in the air. Rattly must bounce on it to reach a higher platform, which supports a formation of bananas that create an arrow pointing north. Rattly must use his super-jump to land on a ledge positioned left of a slightly larger platform. An additional platform with a Kaboing on it comes afterward. With the use of a ledge to the right of this, Rattly is able to reach a higher area that is full of multiple platforms, which the Video Game Hero Coin is left of. At the highest part in the room with the platforms us a Zinger blocking a small opening in the ceiling. He can use his super-jump move or bounce on the Zinger to reach a higher piece of ground that is placed under a few platforms that a Zinger flies over. Some more platforms and a Zinger are above here that can be jumped to in order to discover the letter O under a ceiling. An arrow created by a formation of bananas is located to the right of these platforms, and it leads the rattlesnake to a Zinger and then to another set of bananas that form an arrow pointing upwards. Rattly must follow the arrows and jump up to reach a small ledge and then another that supports a No Animal Sign that makes him turn back into the Kongs when passed. From here, the primates must climb a single chain found ahead of them to reach a Star Barrel.
A set of chains hang to the left, and a pair of Spinies walk under them, while several Klingers slide along them. The Kongs must climb the chains to reach a higher area with a DK Barrel and three small alcoves containing Kaboings. An Animal Barrel containing Squawks is on a ledge next to the final alcove, and when the primates enter it, they are turned into the parrot friend, who must then use his flying abilities to travel upwards along a formation of bananas that create an arrow. Soon, he comes up to the pathway leading west, which contains a few Zingers and a banana. After flying through more the pathway, which is full of several sharp turns and Zingers, he reaches a group of bananas that form an upward arrow. Two Banana Bunches and a Banana Coin are hidden under the arrow, which Squawks must then follow to progress towards a few moving Zingers. Shortly after passing the third Zinger, he finds another set of bananas that form an arrow pointing upwards. As he follows the arrow, he passes two Krooks standing to the left and right sides of him in front of separate alcoves. The Krook to the left guards an alcove with the letter N in it, while the other guards a lone banana. If he continues up from here, he approaches a DK Barrel and a fork-in-the-road. He can either take the path to the left or the one to the right. Both paths contain several Zingers and a few Spinies and are nearly identical. The pathways soon meet up by another passage that leads upwards and then to the left towards a Zinger and some bananas. Squawks comes up to several more sharp turns in the passage as he continues, and some parts of it are blocked by Zingers he is able to defeat with his nut projectiles. After reaching an arrow pointing upwards, which is created by bananas, he can find the letter G in the area directed by the arrow. A solid piece of land with a Spiny walking on it is ahead, and a few Zingers block the passage after it. Once the Zingers are passed, the parrot reaches another Spiny and a curved passage leading to a No Animal Sign. When the sign is passed, the Kongs turn back to normal. A Spiny and few sets of chains with Klingers climbing all over them are ahead of here. If the heroes climb the chains in the far right side of the area, they can find a solid piece of ground with a Banana Bunch, a Banana Coin, and two Extra Life Balloons on it. A spring is ahead of these items, and once the heroes bounce on it, they complete the level.
Enemies[edit]
Items and objects[edit]
The following items and objects appear in the following quantities:
- Banana Coins: 4
- DK Barrels: 3
- Extra Life Balloons: 2
KONG Letters[edit]

- K: After Squitter passes the second Spiny in the level, he comes up to the letter K near a wall, to the top-right of a group of bananas forming an up arrow.
- O: Just before the No Rattly Sign is a Zinger centered between many platforms. The letter O is above a group of bananas forming a right arrow, which is above the Zinger.
- N: After the level's halfway point, Squawks encounters two Krooks. The letter N in a small alcove behind the Krook to the left.
- G: Shortly before the No Squawks Sign, Squawks reaches a group of bananas that direct him to the north, where he can find the letter G.
Cranky's Video Game Hero Coin[edit]

Shortly after the first Bonus Barrel, Rattly accesses a large area filled with many platforms. He must bounce left on the first level of platforms to find the Video Game Hero Coin in a small alcove.
Bonus Level[edit]

Toxic Tower has only one Bonus Level, of the following type:
- Find the Token!: Near the start, Rattly encounters the first Zinger. Instead of jumping on it to reach the next ledge, Rattly must jump into a Bonus Barrel to the left. In the Bonus Level, Rattly has 10 seconds to reach the other side and collect the Kremkoin. He must bounce from Zingers and Flitters to get across a wide gap.
Gallery[edit]
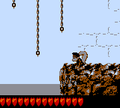
Dixie at the start of the level
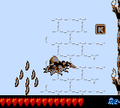
Squitter reaches the letter K
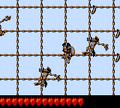
Dixie climbs from some chains
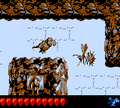
Squawks encounters a Zinger


Names in other languages[edit]
| Language | Name | Meaning | Note(s) | Ref. |
|---|---|---|---|---|
| Japanese | どくどくタワー Dokudoku Tawā |
Poisonous Tower | [?] |