Parrot Chute Panic (Donkey Kong Land 2)
| Parrot Chute Panic | |||||||
|---|---|---|---|---|---|---|---|

| |||||||
| Level code | 4 - 4 | ||||||
| World | Gloomy Gulch | ||||||
| Game | Donkey Kong Land 2 | ||||||
| Music track | Flight of the Zinger | ||||||
| |||||||
Parrot Chute Panic is the twenty-sixth level of Donkey Kong Land 2 and the fourth level of Gloomy Gulch. It takes place in a Zinger hive with three Animal Barrels of Quawks, whom Diddy Kong and Dixie Kong have to transform into to slowly descend their way down the level. Quawks has to avoid several Zingers along the way.
Layout[edit]

At the beginning of the level, an Animal Barrel can be seen at the edge of a ledge. To the left of here, there is a small gap that the heroes must drop through to reach a hidden area with the letter K, two Banana Bunches, and another Animal Barrel. If one of them is enter, they transform into Quawks. The parrot slowly descends through the hive, due to his inability to fly. As a passes down a rather wide passage, he approaches several bananas. A DK Barrel can be found here at a small turn. After the bird travels farther down, he enters a large room with a few Zingers around the center of it. The letter O is between two of the Zingers, who are found vertical to each other. A narrow passage stretches from the bottom of the room. As the hero descends through this part of the dangerous hive, he passes a few Zingers scattered along the walls.
A small number of Zingers can be found in the center of the area farther down. Collectibles such as Banana Bunches float between some of the wasps. Soon, Quawks reaches a solid piece of land with some honey splattered on it. A Spiny marches along the sticky substance. A No Animal Sign stands next to the honey, and once it is passed, Quawks transforms back into the Kongs. The two friends can find a gap ahead of them. If they jump in, they can find a flat piece of land with the Star Barrel on it. Honey is also placed along the ground. Additional honey is laid across the ground farther ahead. A Spiny walks along it as a Zinger floats in a vertical path, moving up and down. There is a Flitter nearby at the edge of a gap. It can be bounced on to reach a Barrel Cannon that can blast the heroes into the Video Game Hero Coin. If they drop into the gap, they can find a spot of honey on the floor of the hive. A Zinger also flies nearby.
After passing a lone Kruncha located at the edge of a gap, the heroes can find another Animal Barrel that turns them back into Quawks. Once they resume this form, Quawks descends down a curved passage with many Zingers all around it. A straight, wider section of the level is ahead with a few more Zingers present throughout it. Some of these Zingers fly back and forth from wall-to-wall, while others stay stationary in the parrot's way. The bird soon enters a narrower passage, which is immediately followed by a large room. Platforms stand in the center parts of the room, creating two different paths for the hero. The first set of paths leads Quawks along a banana trail between several Zingers, some of which who are in motion and others stationary. The second set of paths both feature two stationary Zingers who hover across from each other with a small space between then.
After this large room, Quawks enters a narrower passage with the letter N above it. Zingers fly around the middle of this passage, which is followed by a second large room with platforms in the center of it. The short platforms create two separate paths for the parrot to travel through. As he approaches the first platform, he can find one side with a Zinger around it, and the other with no enemies in sight. The next platform that splits the area is farther down. Zingers are on both sides of it, but a Banana Coin hovers in the left side. A third platform separates the pathway as well. The right side of it holds a Banana Bunch, while the other features no special items. Once the parrot passes the third wall, he arrives in a narrow passage with Zingers all around in it. A flat, solid piece of land is below here with a No Animal Sign on it. If the hero crosses the sign, he turns back into the Kongs. A small gap can be found next to the sign for the primates to jump into. If they fall into it, they land on a ledge with a Klampon marching on it. Two Spinies are also ahead, found on piece of land at slightly different elevations. Another gap is nearby, but it has an Animal Barrel in it. The letter G is in the air above this barrel. The barrel transforms the primates into Quawks, who approaches many Zingers as he travels through the narrow passage beneath the gap. Some turns are also along the passage. Soon, the parrot reaches a flat area of ground with another No Animal Sign on it. Once passed, the buddy turns back into the Kongs. A spring is ahead of here. If it is bounced on, the level is completed.
Enemies[edit]
Items and objects[edit]
The following items and object appear in the following quantities:
- Banana Coins: 3
- Barrels: 5
- DK Barrels: 3
- No Animal Sign: 3
KONG Letters[edit]
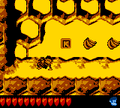
- K: At the very start, the Kongs must go left and drop into a gap hidden behind the start. There they can find the letter K and two Banana Bunches.
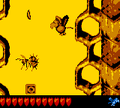
- O: Quawks can find the letter O between two Zingers, shortly after the first DK Barrel.
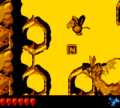
- N: After the Star Barrel, Quawks enters a large room with platforms in the center. After the area, Quawks descends into a narrow passage with the letter N above it.
- G: The Kongs can find the letter G by jumping on an invisible hook near the third Animal Barrel. These hooks also lead to the second Bonus Level.
Cranky's Video Game Hero Coin[edit]

After the Star Barrel, the Kongs can find a Flitter over a wide abyss. They must bounce on it to land in a nearby Barrel Cannon that blasts them up to the Video Game Hero Coin.
Bonus Levels[edit]
Parrot Chute Panic has two Bonus Levels, of the following type:
- Find the Token!: After the first No Animal Sign, the Kongs must look for a hook hidden around the nearby abyss. They must use it to climb up to a hidden Bonus Barrel. In the Bonus Level, Diddy and Dixie have 20 seconds to get the Kremkoin at the other side. As they travel through the curvy area, they encounter several Klampons and Spinies. When the Kongs reach the end, they can grab the Kremkoin, which is floating in midair.
- Destroy Them All!: Right before the third Animal Barrel, the Kongs must roll jump off a nearby ledge to reach an invisible hook. The Kongs must continue jumping from more hooks until they enter a Bonus Barrel. In the Bonus Level, the Kongs have 20 seconds to defeat five Zingers. The Kongs can use a barrel to defeat each of the Zingers. The last Zinger is in a corner near the exit, while the others are in the Kongs' path. After the Kongs defeat the Zingers, the Kremkoin appears.
Gallery[edit]
The letter K
The letter O
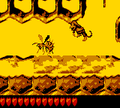
Diddy jumps over a Zinger
The letter N
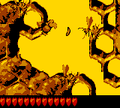
Quawks descends between three Zingers


Names in other languages[edit]
| Language | Name | Meaning | Note(s) | Ref. |
|---|---|---|---|---|
| Japanese | パラシュートパニック Parashūto Panikku |
Parachute Panic | [?] |
Notes[edit]
- In the Japanese version, around the first DK Barrel that appears after the Star Barrel, two Zingers were removed. This was done to fix a sprite overflow bug that occurred in the English version that prevented the DK Barrel from spawning if too many Zingers appeared on the screen.