Crowded Cavern: Difference between revisions
Goolgenerade (talk | contribs) |
m (Text replacement - "dktable-brown" to "wikitable dk") |
||
| (40 intermediate revisions by 17 users not shown) | |||
| Line 1: | Line 1: | ||
{{level | {{level infobox | ||
|image=[[File:Crowded Cavern DKCR.png|250px]] | |||
|image=[[File: | |code=4-5 | ||
|code=4 - 5 | |||
|world=[[Cave]] | |world=[[Cave]] | ||
|game=''[[Donkey Kong Country Returns]]'' (''[[Donkey Kong Country Returns 3D|3D]]'') | |game=''[[Donkey Kong Country Returns]]'' (''[[Donkey Kong Country Returns 3D|3D]]'') | ||
|before=[[Bombs Away (level)|<<]] | |before=[[Bombs Away (level)|<<]] | ||
|after=[[The Mole Train|>>]] | |after=[[The Mole Train|>>]] | ||
|track=Mine Menace | |||
}} | }} | ||
'''Crowded Cavern''' is the twenty-seventh level in ''[[Donkey Kong Country Returns]]'' and ''[[Donkey Kong Country Returns 3D]]'' | '''Crowded Cavern''' is the twenty-seventh level in ''[[Donkey Kong Country Returns]]'' and ''[[Donkey Kong Country Returns 3D]]'' and the fifth and final level of the [[Cave]] world. | ||
==Summary== | |||
Similar to [[Mole Patrol]], Crowded Cavern takes place in a cavern where [[Donkey Kong]] and [[Diddy Kong]] ride a [[Rocket Barrel]] throughout the level, having to move between large rocks and boulders. The main and only enemies in the level are a large group of [[Squeekly]]s, who attempt to fly into the [[Kong]]s. The group includes small Squeeklys that fly at the Kongs, medium-sized Squeeklys that move up or down when approached, and a [[Big Squeekly]] that blasts large sound waves from its mouth. The Kongs cannot defeat the Squeeklys while riding the Rocket Barrel and must avoid every one instead. There are seven [[Banana Coin]]s in the level. | |||
In the [[Donkey Kong Country Returns#Time Attack|Time Attack]] mode, a time below 1:56:00 is needed to get a gold medal, a time below 2:05:00 for silver, and a time below 2:16:00 for bronze. | |||
==Layout== | |||
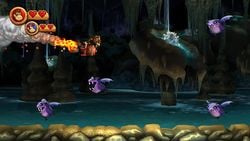
[[File:Crowded Cavern Squeeklies.jpg|thumb|left|250px|The Kongs dodging several Squeeklys]] | |||
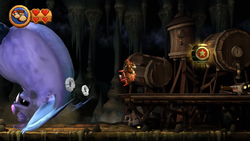
The level begins on a flat pathway leading to some wooden platforms that the Kongs must use to climb up to a higher area. Donkey Kong and Diddy Kong must walk on a rickety, wooden bridge which breaks shortly after they go on it. When it crumbles, the Kongs (as well as an unused minecart and numerous bananas) fall down to a lower area. They must continue right and jump from a few platforms, where Squeeklys are sleeping in the background. The Kongs then come across a Rocket Barrel, and when the Kongs start it, they wake the Squeeklys, who start to chase the Kongs through a wide passage in the cave. Some small Squeeklies attempt to attack Donkey Kong and Diddy Kong by flying horizontally in front of the Rocket Barrel and then attempting to chomp into the Kongs. This continues until the Kongs reach a narrow area with a trail of [[banana]]s and Banana Bunches. The trail curves in a V shape above a tall rock structure and ends with the letter K of the [[KONG Letters|K-O-N-G Letters]]. At that point, the primates ride over some more boulders as a [[Big Squeekly]] begins to chase them. The creature heads into the background as they head past a large waterfall and peeks through a hole in the wall as the Kongs approach the letter O. Many bananas and Banana Bunches are in front of the waterfall. At the end of the group of bananas on the bottom row is the letter O, and a [[Banana Coin]] is also located just before that above a rock. Soon after this is the [[Professor Chops|Tutorial Pig]], who waits on a large platform at the checkpoint. | |||
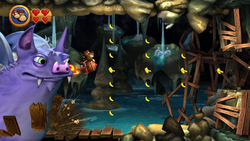
In the area farther ahead, medium-sized, chubby Squeeklys attack the Kongs by trying to fly in front of them while moving up or down vertically. At the same time, smaller Squeeklys return to try and swoop into the Kongs. Eventually, Donkey Kong and Diddy Kong fly over some wooden boards. Underneath the boards is the Big Squeekly who tries smashing through them while sticking its head out of the ground, snapping its jaws. As soon as the Kongs avoid the Big Squeekly, it pops from the wooden boards in the ceiling. There are some rock obstacles farther ahead. The Big Squeekly starts to chase the Kongs, and just before it can reach them, the Kongs fly through a narrow passage, and the Big Squeekly is knocked back. In the passage, the Kongs can find many Banana Bunches and a few obstacles in their path. The Kongs can a large group of collectibles on the other side of the passage. The Tutorial Pig and the next checkpoint are just ahead. | |||
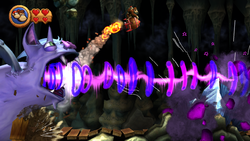
[[File:DKCR Crowded Cavern Sonic Wave.png|thumb|left|250px|The [[Big Squeekly]] shoots a powerful sonic wave]] | |||
[[File:Big Squeekly defeated DKCR.png|thumb|250px|Big Squeekly gets defeated just before the Slot Machine Barrel]] | |||
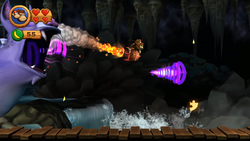
After the checkpoint, the primates enter a slightly narrower area, where there is a crane sticking out of the background, acting as an obstacle. Shortly after the Kongs dodge the crane and some rocks, the Big Squeekly returns to chase after them. The Big Squeekly starts shooting powerful sonic waves from its mouth. In their pursuit, Donkey Kong and Diddy Kong come up to some collectibles and the letter G. Eventually, the Big Squeekly shoots a more powerful sonic wave across the screen, destroying a large boulder and revealing a large group of crystals in its place. The Kongs must avoid the crystals, which the Big Squeekly accidentally crash into, causing it to fall unconsciously in defeat. The Rocket Barrel eventually drops off the Kongs at the end with the [[Slot Machine Barrel]]. | |||
{{br}} | |||
==Enemies== | |||
{|class="wikitable dk" | |||
!Image | |||
!Name | |||
!Count | |||
|- | |||
|align="center"|[[File:Big_Squeekly.png|x50px]] | |||
|align="center"|[[Big Squeekly]] | |||
|1 | |||
|- | |||
|align="center"|[[File:Squeeklies.png|x50px]] | |||
|align="center"|[[Squeekly]] | |||
|19 | |||
|- | |||
|align="center"|[[File:Chū Komorin.png|60px]] | |||
|align="center"|[[Chū Komorin]] | |||
|4 | |||
|} | |||
[[File: | ==Items== | ||
{|class="wikitable dk"width=15% | |||
|- | |||
!Image | |||
!Name | |||
!Count | |||
|- | |||
|align="center"|[[File:BananacoinDKCR.png|x50px]] | |||
|align="center"|[[Banana Coin]] | |||
|7 | |||
|} | |||
===K-O-N-G Letters=== | ===K-O-N-G Letters=== | ||
{|class="wikitable dk"width=70% | |||
|- | |||
!Image | |||
!Letter | |||
!Location | |||
|- | |||
|align="center"|[[File:DKCR Crowded Cavern Letter K.png|250px]] | |||
|align="center"|K | |||
|When the [[Big Squeekly]] starts to chase the Kongs, they must fly in the middle low area and follow a trail of bananas. The letter K is at the end of the trail. | |||
|- | |||
|align="center"|[[File:DKCR Crowded Cavern Letter O.png|250px]] | |||
|align="center"|O | |||
|Immediately after the third Puzzle Piece, the Kongs can head to the bottom row of bananas in a large group to find the letter O. | |||
|- | |||
|align="center"|[[File:DKCR Crowded Cavern Letter N.png|250px]] | |||
|align="center"|N | |||
|Right after the fourth Puzzle Piece, the Big Squeekly smashes through the ceiling. During this point, the letter N next to its head. | |||
|- | |||
|align="center"|[[File:DKCR Crowded Cavern Letter G.png|250px]] | |||
|align="center"|G | |||
|Shortly after the final Puzzle Piece, the Kongs pass two parallel sets of collectibles. After passing them, the Kongs must go to the bottom of the area and collect the letter G while avoiding the Big Squeekly's shockwaves. | |||
|} | |||
===Puzzle Pieces=== | ===Puzzle Pieces=== | ||
[[File: | {|class="wikitable dk"width=70% | ||
|- | |||
!Image | |||
!Number | |||
!Location | |||
|- | |||
|align="center"|[[File:DKCR Crowded Cavern Puzzle Piece 1.png|250px]] | |||
|align="center"|1 | |||
|The first [[Puzzle Piece (Donkey Kong Country Returns)|Puzzle Piece]] is at the start of the level. After the Kongs walk on the bridge of wooden boards, they should jump off just as it begins to fall. The Puzzle Piece falls from the top of the screen if they avoid falling to the next area. | |||
|- | |||
|align="center"|[[File:DKCR Crowded Cavern Bonus Room.png|250px]] | |||
|align="center"|2 | |||
|After the Kongs fall through the wooden boards at the start, they arrive in a lower area. Instead of going to the Rocket Barrel, Donkey Kong and Diddy Kong must travel in the opposite direction to find a hidden opening to a [[Bonus Level]]. In it, the Kongs have 30 seconds to collect 99 bananas and three Banana Coins hovering in circular motion. The Kongs can reach the collectibles by high bouncing from a wooden platform which moves horizontally under the collectibles. When the Kongs collect all the items, the Puzzle Piece appears. | |||
|- | |||
|align="center"|[[File:DKCR Crowded Cavern Puzzle Piece 3.png|250px]] | |||
|align="center"|3 | |||
|Shortly before the first checkpoint, the Kongs come up to a large group of bananas and Banana Bunches. The third Puzzle Piece is on the top row of the bananas. | |||
|- | |||
|align="center"|[[File:DKCR Crowded Cavern Puzzle Piece 4.png|250px]] | |||
|align="center"|4 | |||
|When the Big Squeekly breaks through the floor, the Kongs can use the Rocket Barrel to dive down near its head to collect the fourth Puzzle Piece. | |||
|- | |||
|align="center"|[[File:DKCR Crowded Cavern Puzzle Piece 5.png|250px]] | |||
|align="center"|5 | |||
|Similar to the letter G, the fifth and final Puzzle Piece is collected during the Big Squeekly chase at the end, towards the floor. | |||
|} | |||
==Names in other languages== | ==Names in other languages== | ||
{{ | {{foreign names | ||
|Jap=コモリンのどうくつ | |Jap=コモリンのどうくつ | ||
|JapR=Komorin no | |JapR=Komorin no Dōkutsu | ||
|JapM=Cave | |JapM=Squeeklys' Cave | ||
|Spa=Cueva Concurrida | |Spa=Cueva Concurrida | ||
|SpaM= | |SpaM=Crowded Cavern | ||
| | |Ita=Cava affollata | ||
| | |ItaM=Crowded Cavern | ||
|FreA=Chauve Qui Peut | |||
|FreAM=Pun on ''chauve-souris'' (bat) and the expression ''Sauve qui peut'' (Every man for himself) | |||
|Ger=Höhlenhatz | |Ger=Höhlenhatz | ||
|GerM=Cave Hunt}} | |GerM=Cave Hunt | ||
|Chi=蝠蝠的洞窟 | |||
|ChiR=Fúfú de Dòngkū | |||
|ChiM=Squeeklies' Cave | |||
}} | |||
==Trivia== | ==Trivia== | ||
*If the Kongs stomp the ground before getting into the rocket barrel, the Squeeklys will open their eyes lazily and fall asleep again. | *If the Kongs stomp the ground before getting into the rocket barrel, the Squeeklys will open their eyes lazily and fall asleep again. | ||
*When the | *When the Big Squeekly appears for the last time, Donkey Kong will do various gestures. Donkey Kong will either wave off the Big Squeekly, point downward, or facepalm. | ||
{{DKCR}} | {{DKCR}} | ||
[[Category:Donkey Kong Country Returns levels]] | |||
[[Category:Underground areas]] | |||
[[Category:Donkey Kong Country Returns]] | |||
[[Category: | |||
Latest revision as of 14:17, February 3, 2024
| Level | |
|---|---|
| Crowded Cavern | |
| |
| Level code | 4-5 |
| World | Cave |
| Game | Donkey Kong Country Returns (3D) |
| Music track | Mine Menace |
| << Directory of levels >> | |
Crowded Cavern is the twenty-seventh level in Donkey Kong Country Returns and Donkey Kong Country Returns 3D and the fifth and final level of the Cave world.
Summary[edit]
Similar to Mole Patrol, Crowded Cavern takes place in a cavern where Donkey Kong and Diddy Kong ride a Rocket Barrel throughout the level, having to move between large rocks and boulders. The main and only enemies in the level are a large group of Squeeklys, who attempt to fly into the Kongs. The group includes small Squeeklys that fly at the Kongs, medium-sized Squeeklys that move up or down when approached, and a Big Squeekly that blasts large sound waves from its mouth. The Kongs cannot defeat the Squeeklys while riding the Rocket Barrel and must avoid every one instead. There are seven Banana Coins in the level.
In the Time Attack mode, a time below 1:56:00 is needed to get a gold medal, a time below 2:05:00 for silver, and a time below 2:16:00 for bronze.
Layout[edit]
The level begins on a flat pathway leading to some wooden platforms that the Kongs must use to climb up to a higher area. Donkey Kong and Diddy Kong must walk on a rickety, wooden bridge which breaks shortly after they go on it. When it crumbles, the Kongs (as well as an unused minecart and numerous bananas) fall down to a lower area. They must continue right and jump from a few platforms, where Squeeklys are sleeping in the background. The Kongs then come across a Rocket Barrel, and when the Kongs start it, they wake the Squeeklys, who start to chase the Kongs through a wide passage in the cave. Some small Squeeklies attempt to attack Donkey Kong and Diddy Kong by flying horizontally in front of the Rocket Barrel and then attempting to chomp into the Kongs. This continues until the Kongs reach a narrow area with a trail of bananas and Banana Bunches. The trail curves in a V shape above a tall rock structure and ends with the letter K of the K-O-N-G Letters. At that point, the primates ride over some more boulders as a Big Squeekly begins to chase them. The creature heads into the background as they head past a large waterfall and peeks through a hole in the wall as the Kongs approach the letter O. Many bananas and Banana Bunches are in front of the waterfall. At the end of the group of bananas on the bottom row is the letter O, and a Banana Coin is also located just before that above a rock. Soon after this is the Tutorial Pig, who waits on a large platform at the checkpoint.
In the area farther ahead, medium-sized, chubby Squeeklys attack the Kongs by trying to fly in front of them while moving up or down vertically. At the same time, smaller Squeeklys return to try and swoop into the Kongs. Eventually, Donkey Kong and Diddy Kong fly over some wooden boards. Underneath the boards is the Big Squeekly who tries smashing through them while sticking its head out of the ground, snapping its jaws. As soon as the Kongs avoid the Big Squeekly, it pops from the wooden boards in the ceiling. There are some rock obstacles farther ahead. The Big Squeekly starts to chase the Kongs, and just before it can reach them, the Kongs fly through a narrow passage, and the Big Squeekly is knocked back. In the passage, the Kongs can find many Banana Bunches and a few obstacles in their path. The Kongs can a large group of collectibles on the other side of the passage. The Tutorial Pig and the next checkpoint are just ahead.
After the checkpoint, the primates enter a slightly narrower area, where there is a crane sticking out of the background, acting as an obstacle. Shortly after the Kongs dodge the crane and some rocks, the Big Squeekly returns to chase after them. The Big Squeekly starts shooting powerful sonic waves from its mouth. In their pursuit, Donkey Kong and Diddy Kong come up to some collectibles and the letter G. Eventually, the Big Squeekly shoots a more powerful sonic wave across the screen, destroying a large boulder and revealing a large group of crystals in its place. The Kongs must avoid the crystals, which the Big Squeekly accidentally crash into, causing it to fall unconsciously in defeat. The Rocket Barrel eventually drops off the Kongs at the end with the Slot Machine Barrel.
Enemies[edit]
| Image | Name | Count |
|---|---|---|
| Big Squeekly | 1 | |

|
Squeekly | 19 |
| Chū Komorin | 4 |
Items[edit]
| Image | Name | Count |
|---|---|---|
| Banana Coin | 7 |
K-O-N-G Letters[edit]
| Image | Letter | Location |
|---|---|---|
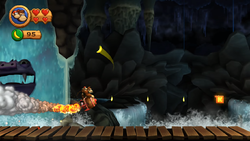
|
K | When the Big Squeekly starts to chase the Kongs, they must fly in the middle low area and follow a trail of bananas. The letter K is at the end of the trail. |
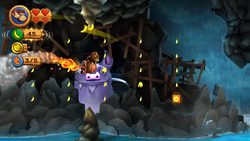
|
O | Immediately after the third Puzzle Piece, the Kongs can head to the bottom row of bananas in a large group to find the letter O. |
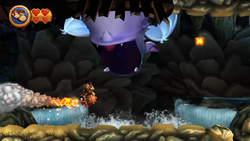
|
N | Right after the fourth Puzzle Piece, the Big Squeekly smashes through the ceiling. During this point, the letter N next to its head. |
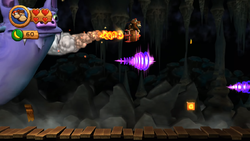
|
G | Shortly after the final Puzzle Piece, the Kongs pass two parallel sets of collectibles. After passing them, the Kongs must go to the bottom of the area and collect the letter G while avoiding the Big Squeekly's shockwaves. |
Puzzle Pieces[edit]
| Image | Number | Location |
|---|---|---|
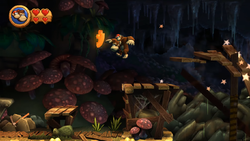
|
1 | The first Puzzle Piece is at the start of the level. After the Kongs walk on the bridge of wooden boards, they should jump off just as it begins to fall. The Puzzle Piece falls from the top of the screen if they avoid falling to the next area. |
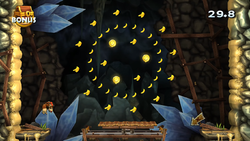
|
2 | After the Kongs fall through the wooden boards at the start, they arrive in a lower area. Instead of going to the Rocket Barrel, Donkey Kong and Diddy Kong must travel in the opposite direction to find a hidden opening to a Bonus Level. In it, the Kongs have 30 seconds to collect 99 bananas and three Banana Coins hovering in circular motion. The Kongs can reach the collectibles by high bouncing from a wooden platform which moves horizontally under the collectibles. When the Kongs collect all the items, the Puzzle Piece appears. |
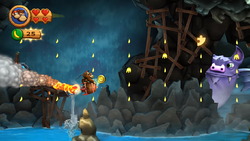
|
3 | Shortly before the first checkpoint, the Kongs come up to a large group of bananas and Banana Bunches. The third Puzzle Piece is on the top row of the bananas. |
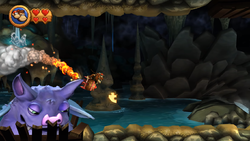
|
4 | When the Big Squeekly breaks through the floor, the Kongs can use the Rocket Barrel to dive down near its head to collect the fourth Puzzle Piece. |
|
5 | Similar to the letter G, the fifth and final Puzzle Piece is collected during the Big Squeekly chase at the end, towards the floor. |
Names in other languages[edit]
| Language | Name | Meaning |
|---|---|---|
| Japanese | コモリンのどうくつ Komorin no Dōkutsu |
Squeeklys' Cave |
| Chinese | 蝠蝠的洞窟 Fúfú de Dòngkū |
Squeeklies' Cave |
| French (NOA) | Chauve Qui Peut |
Pun on chauve-souris (bat) and the expression Sauve qui peut (Every man for himself) |
| German | Höhlenhatz |
Cave Hunt |
| Italian | Cava affollata |
Crowded Cavern |
| Spanish | Cueva Concurrida |
Crowded Cavern |
Trivia[edit]
- If the Kongs stomp the ground before getting into the rocket barrel, the Squeeklys will open their eyes lazily and fall asleep again.
- When the Big Squeekly appears for the last time, Donkey Kong will do various gestures. Donkey Kong will either wave off the Big Squeekly, point downward, or facepalm.
