Super Smash Bros. Brawl
Template:Infobox Super Smash Bros. Brawl is a fighting game for the Wii, designed by Masahiro Sakurai, who also made the preceeding Super Smash Bros. games, and developed by a team especially created for it. The game uses a game engine called Havok that mainly focuses on the game physics. This engine was provided by an Irish company of the same name.[1]
After a planned release date of December 3, 2007 in North America, all regions had their release dates pushed back. It was then slated for release on February 10, 2008 in North America, and January 24, 2008 for Japan. However on January 15, 2008, it was then delayed to January 31, 2008 for Japan[2] and March 9, 2008 for North America.[3] It was released in Australia on June 26, 2008 and in Europe on June 27, 2008[4].
Following the release of the game in Japan, a bug was discovered in the game which displays an error message every time it starts,[5] though players are able to close it and play the game as normal. There has been a replacement program.[6] The game requires 128 blocks of Wii internal memory to save game data[7] and it cannot be copied. However even though players are not able to transfer their data onto another Wii, players can still send replays, snapshots, and custom stages onto other Wii systems.
Gameplay
A new battle mechanic is the Final Smash that was originally supposed to be featured in the first game of the series, but scrapped for technical reasons, which can be used only by collecting a Smash Ball. Players are now able to walk and jump while using projectile-shooting items, like the Super Scope, where in Melee wasn't possible.
As a new feature in the game, certain characters can crawl. Such characters are Bowser, Diddy Kong, Ivysaur, Lucario, Luigi, Pikachu, Sheik, Solid Snake, Squirtle, Wario, Yoshi, and Zero Suit Samus.
A new technique called the Footstool Jump is introduced. It allows players to jump on an another player's head up to five times and spring up by pressing the jump button at the right time. Players are be able to perform Meteor Smashes by doing this as well. The Tether Recovery is a returning tactic in the game. It allows players to grab onto ledges using chain-like items, such as a Plasma Whip or a Link's Hookshot. Gliding is also a technique in this game, available only to winged characters. When gliding is used, players are able to glide across the stage and be able to control the way they fly. They can direct themselves upwards or downwards, depending on the direction the ![]() or the
or the ![]() is pointed in.
is pointed in.
Another feature not present in the past two games is slipping. Any character can slip. The feature has no upside for the players that slip other than the invincibility frames that are granted to the players when they get up. Players can slip when trying to run suddenly, go down slopes, turn around or walking on a Banana Peel.
The game also features three different Taunts for each character, while the past games only feature one taunt. Snake is the only character that has all identical taunts.
The game can be controlled with one of the four controlling methods:
There are a few differences between the controller methods. The Wii Remote and the Nunchuk Attachment has a special feature, the Shake Smash, allowing the players to execute Smash Attacks in the direction they shake the controller to. The Classic Controller, Wii Remote + Nunchuk Attachment, and the GameCube controller also have a function which disables the jump by tapping the control stick upwards.
The execution of standard combos has been made simpler; for many characters, the attack button no longer has to be hit repeatedly, but it is enough to hold it down for the character to start a combo attack. The effects, however, usually differ.
Players are able to set their own button configuration rather than have to play with the default configuration. The configuration can be saved on the Wii Remote's internal memory, allowing to take it to a friend's and play with one's own button configuration there. The Players are able to insert names with up to five letters, as in Super Smash Bros. Melee. In the previous game, names are only a gimmick. In this game, they now also save the players' controlling options to avoid having to select the control method each time.
Playable Characters

With thirty-five playable characters (thirty-nine, if Sheik, Zero Suit Samus, and the Pokémon Trainer's three Pokémon without including Pokémon Trainer are counted), Super Smash Bros. Brawl has ten more characters than the previous installment. Twenty-one characters are available directly from the start, while the other fourteen need to be unlocked to become playable. Only five of the characters from the previous game aren't playable in this game, which are Pichu, Dr. Mario, Mewtwo, Young Link, and Roy. Additionally, Super Smash Bros. Brawl is the first game in the series to feature third-party characters as playable characters; Sonic and Solid Snake. The Special Moves and Final Smash for each character are listed on the right-side column.
Default Characters
| Name | Description | Special Moves | ||
|---|---|---|---|---|

|
Mario |
Mario has always been a balanced character. His strength is mid-tier, and he has medium weight and speed. He is one of the most popular characters in the video game franchise. Unlike Luigi, he can wall jump. | Standard | Fireball |
| Side | Cape | |||
| Up | Super Jump Punch | |||
| Down | F.L.U.D.D. | |||
| Final Smash | Mario Finale | |||

|
Link |
For Link's stature, his power is a little low for the middle-heavy weight that he is. He is also slightly sluggish, but his shield is able to reflect projectiles. He is a master of many different weapons. | Standard | Hero's Bow |
| Side | Gale Boomerang | |||
| Up | Spin Attack | |||
| Down | Bomb | |||
| Final Smash | Triforce Slash | |||

|
Kirby |
Kirby is one of the odd characters. He may be one of the lightest characters in the game, but he is one of the stronger characters. His running speed is good, but his attacks will slow him down. | Standard | Inhale |
| Side | Hammer | |||
| Up | Final Cutter | |||
| Down | Stone | |||
| Final Smash | Cook Kirby | |||

|
Pikachu |
Pikachu may be one of the light characters, but it does have good attacks, and he's one of the faster characters in the game. He also has great recovery. | Standard | Thunder Jolt |
| Side | Skull Bash | |||
| Up | Quick Attack | |||
| Down | Thunder | |||
| Final Smash | Volt Tackle | |||

|
Fox |
Fox is a very fast character in attack speed and running speed, and he has average strength. On the downside, he is very light. | Standard | Blaster |
| Side | Fox Illusion | |||
| Up | Fire Fox | |||
| Down | Reflector | |||
| Final Smash | Landmaster | |||

|
Samus |
Samus has a relatively slow pace, and she is also very floaty. She has great projectiles and heavy weight, but she is also unusually weak. After using her Zero Laser, she loses her suit and becomes Zero Suit Samus. | Standard | Charge Shot |
| Side | Missile | |||
| Up | Screw Attack | |||
| Down | Bomb | |||
| Final Smash | Zero Laser | |||
| File:SSBBZeroSuitSamus.png | Zero Suit Samus |
Zero Suit Samus enters the battle after Samus uses her Zero Laser. She is lighter and faster than with her Power Suit, but has weaker attacks. Her Final Smash transforms her back into Samus. | Standard | Paralyzer |
| Side | Plasma Whip | |||
| Up | Plasma Wire | |||
| Down | Flip Jump | |||
| Final Smash | Power Suit Samus | |||

|
Zelda |
Zelda is a light-weight, and is fairly slow. Zelda uses magical attacks that are hard to control, but can pack a punch when used successfully. If these attacks are not controlled, she will be weak in battle. | Standard | Nayru's Love |
| Side | Din's Fire | |||
| Up | Farore's Wind | |||
| Down | Transform | |||
| Final Smash | Light Arrow | |||
| File:BrawlSheik.jpg | Sheik |
Sheik returns as Zelda's transformation after she uses Transform. Contrary to her counterpart Zelda, Sheik specializes in swift movement, not power. | Standard | Needle Storm |
| Side | Chain | |||
| Up | Vanish | |||
| Down | Transform | |||
| Final Smash | Light Arrow | |||

|
Bowser |
Bowser is the heaviest and largest character. He also has very powerful though slow attacks. Strangely, even though he still moves slowly, Bowser moves at a faster speed in this game, compared to in Melee. | Standard | Fire Breath |
| Side | Flying Slam | |||
| Up | Whirling Fortress | |||
| Down | Bowser Bomb | |||
| Final Smash | Giga Bowser | |||

|
Donkey Kong |
Much like Bowser, Donkey Kong is heavy and strong. He has a unique ability which allows him to capture characters with him for a short distance. He has powerful attacks and surprisingly good speed for a heavyweight. | Standard | Giant Punch |
| Side | Headbutt | |||
| Up | Spinning Kong | |||
| Down | Hand Slap | |||
| Final Smash | Konga Beat | |||

|
Yoshi |
Yoshi is a fast and unusually heavy character. On the downside, his strength is rather weak with only average attack speed. His Egg Throw can act like a third jump in this game. | Standard | Egg Lay |
| Side | Egg Roll | |||
| Up | Egg Throw | |||
| Down | Yoshi Bomb | |||
| Final Smash | Super Dragon | |||

|
Peach |
Peach returns with a new outfit design based on her more recent appearances. She's got excellent aerial techniques, a good horizontal recovery, and high priority attacks. However, she is light and one of the weaker characters. | Standard | Toad |
| Side | Peach Bomber | |||
| Up | Peach Parasol | |||
| Down | Vegetable | |||
| Final Smash | Peach Blossom | |||

|
Ice Climbers |
The Ice Climbers, Popo and Nana, return from Super Smash Bros. Melee, with an updated appearance. Like always, the player controls Popo, while a CPU controls Nana. They may have a good attack range, but their normal attacks are weak, and they are rather light. | Standard | Ice Shot |
| Side | Squall Hammer | |||
| Up | Belay | |||
| Down | Blizzard | |||
| Final Smash | Iceberg | |||

|
Pit |
Pit can multi-jump in the air. He uses a bow in battle, which he can break into two blades for brawl battles. He attacks with very fast slash moves in the air and on the ground. He may have a good projectile and good weight, but he is somewhat weak. | Standard | Palutena Arrow |
| Side | Angel Ring | |||
| Up | Wings of Icarus | |||
| Down | Mirror Shield | |||
| Final Smash | Palutena's Army | |||

|
Wario |
Wario is a very strange character. He is a small heavyweight with great aerial game and recovery, but he has poor range and somewhat slow attacks. He also has his overalls as an alternate attire. For a heavyweight, he only has average strength (similar to Yoshi). | Standard | Chomp |
| Side | Wario Bike | |||
| Up | Corkscrew | |||
| Down | Wario Waft | |||
| Final Smash | Wario-Man | |||

|
Ike |
Ike uses his two-handed blade, Ragnell, in battle. He can wield this sword with only one hand, despite the sword's weight. His attacks are some of the strongest and longest ranged in the game, but they are also very slow. He is also slow himself. | Standard | Eruption |
| Side | Quick Draw | |||
| Up | Aether | |||
| Down | Counter | |||
| Final Smash | Great Aether | |||

|
Pokémon Trainer |
The Pokémon Trainer uses Squirtle, Ivysaur, and Charizard to fight for him, rather than actually fight by himself. He mainly stands on the stage, but he occasionally stands on a floating platform in the background on stages with little solid ground. While the Down move is shared, the other special moves are unique to each of the Pokémon, giving 11 different moves, including the Final Smash. | Down | Pokémon Trainer#Pokémon Change |
| Final Smash | Triple Finish | |||
| Squirtle | ||||
| Standard | Water Gun | |||
| Side | Withdraw | |||
| Up | Waterfall | |||
| Ivysaur | ||||
| Standard | Bullet Seed | |||
| Side | Razor Leaf | |||
| Up | Vine Whip | |||
| Charizard | ||||
| Standard | Flamethrower | |||
| Side | Rock Smash | |||
| Up | Fly | |||

|
Diddy Kong |
Diddy Kong is fast, light, and abundant in unique attacks. However, he is one of the weaker characters. | Standard | Peanut Popgun |
| Side | Monkey Flip | |||
| Up | Rocketbarrel Boost | |||
| Down | Banana Peel | |||
| Final Smash | Rocketbarrel Barrage | |||

|
Meta Knight |
Meta Knight can multi-jump in the air and glide for a short time. He has a very fast combo attack. His standard attack ( |
Standard | Mach Tornado |
| Side | Drill Rush | |||
| Up | Shuttle Loop | |||
| Down | Dimensional Cape | |||
| Final Smash | Galaxia Darkness | |||

|
Lucas |
A PK user, Lucas has a Special Moveset similar to that of Ness, and a unique Normal Moveset. He is on the stronger side, despite being small. | Standard | PK Freeze |
| Side | PK Fire | |||
| Up | PK Thunder | |||
| Down | PSI Magnet | |||
| Final Smash | PK Starstorm | |||

|
King Dedede |
King Dedede is a heavy character, similar to powerhouses Bowser and Donkey Kong. He often uses his hammer in attacks, and relies on Waddle Dees, Waddle Doos or Gordos to damage his opponents from afar. Although he can inhale his foes like Kirby, he does not get their abilities. Like most heavyweights, Dedede is very strong and very big. Additionally, he has a long reach, which makes his grab game quite lethal. | Standard | Inhale |
| Side | Waddle Dee Toss | |||
| Up | Super Dedede Jump | |||
| Down | Jet Hammer | |||
| Final Smash | Waddle Dee Army | |||

|
Olimar |
Captain Olimar from the Pikmin series enters with the handicap of being nearly helpless without the Pikmin. Pikmin must be plucked from the ground, using his standard special move, in order to attack with Olimar. Olimar can still attack without any Pikmin, though only with certain attacks. When he attacks with the Pikmin, they each have different effects:
|
Standard | Pikmin Pluck |
| Side | Pikmin Throw | |||
| Up | Pikmin Chain | |||
| Down | Pikmin Order | |||
| Final Smash | End of Day | |||
Unlockable Characters
In addition to the characters listed above, the following characters can be unlocked when certain requirements are met.
| Name | Description | Special Moves | ||
|---|---|---|---|---|
| File:BrawlNess.jpg | Ness |
Ness appears in Super Smash Bros. Brawl as an unlockable character. His moveset is similar to Lucas, but differs slightly. Despite being slightly light, he has adequate strength. He can be unlocked by:
|
Standard | PK Flash |
| Side | PK Fire | |||
| Up | PK Thunder | |||
| Down | PSI Magnet | |||
| Final Smash | PK Starstorm | |||
| File:BrawlMarth.jpg | Marth |
Marth chooses speed over raw power, specializing in strategic offensive and defensive play. Like in Melee, his sword does more damage at the tip of the blade, but his grab range is much shorter. Marth can be unlocked by:
|
Standard | Shield Breaker |
| Side | Dancing Blade | |||
| Up | Dolphin Slash | |||
| Down | Counter | |||
| Final Smash | Critical Hit | |||

|
Luigi |
Luigi returns with a somewhat similar moveset to Mario. Luigi can jump higher than Mario, and is slightly slower, but his attack strength is unusually high. Luigi can be unlocked by:
|
Standard | Fireball |
| Side | Green Missile | |||
| Up | Super Jump Punch | |||
| Down | Luigi Cyclone | |||
| Final Smash | Negative Zone | |||

|
Falco |
Falco Lombardi returns in Super Smash Bros. Brawl with a similar move set of Fox such as the Final Smash, but several differences. He has the highest initial jump of any character, and is very good at aerial combat. However, he is very light. Falco is unlocked by:
|
Standard | Blaster |
| Side | Falco Phantasm | |||
| Up | Fire Bird | |||
| Down | Reflector | |||
| Final Smash | Landmaster | |||

|
Captain Falcon |
Captain Falcon returns as the second fastest runner in the game (the first being Sonic). His attacks are strong in terms of knockback and damage, but they are also slow and short-ranged. Captain Falcon can be unlocked by:
|
Standard | Falcon Punch |
| Side | Raptor Boost | |||
| Up | Falcon Dive | |||
| Down | Falcon Kick | |||
| Final Smash | Blue Falcon | |||

|
Lucario |
Unlike most Pokémon in the Smash Bros. series, Lucario is one of the few Pokémon characters to have an actual gender. Lucario has average speed, and has good range, but normally doesn't have much power. However, his power increases as he takes damage, maxing out at 182%. He uses his aura for most attacks. Lucario can be unlocked by:
|
Standard | Aura Sphere |
| Side | Force Palm | |||
| Up | ExtremeSpeed | |||
| Down | Double Team | |||
| Final Smash | Aura Storm | |||

|
R.O.B. |
R.O.B. is a heavyweight, and despite being heavy, it is also rather weak and a bit fast. R.O.B. can be unlocked by:
|
Standard | Robo Beam |
| Side | Arm Rotor | |||
| Up | Robo Burner | |||
| Down | Gyro | |||
| Final Smash | Diffusion Beam | |||
| File:BrawlGanondorf.jpg | Ganondorf |
Ganondorf returns with extremely powerful, yet extremely slow attacks (comparable to Ike). He is also very heavy and large. Unfortunately, his movement is very sluggish, making him slower than even Bowser. Ganondorf can be unlocked by:
|
Standard | Warlock Punch |
| Side | Flame Choke | |||
| Up | Dark Dive | |||
| Down | Wizard's Foot | |||
| Final Smash | Beast Ganon | |||
| File:GameandWatch.jpg | Mr. Game & Watch |
Mr. Game & Watch appears in a completely 2-D physical appearance, with his moves being references to the Game & Watch titles. He has good offense due his fast, powerful attacks, but poor defense due his light weight. Mr. Game & Watch can be unlocked by:
|
Standard | Chef |
| Side | Judge | |||
| Up | Fire | |||
| Down | Oil Panic | |||
| Final Smash | Octopus | |||
| File:BrawlJigglypuff.jpg | Jigglypuff |
Jigglypuff is a character of extremes. It has the slowest falling speed, the second-fastest air speed, the slowest dash speed, and the lightest weight. It also, despite being light, has quite good strength. It has a moveset that is quite similar to Kirby's, with the exception of the special moves. Jigglypuff can be unlocked by:
|
Standard | Rollout |
| Side | Pound | |||
| Up | Sing | |||
| Down | Rest | |||
| Final Smash | Puff Up | |||
| File:BrawlToonLink.jpg | Toon Link |
Toon Link is almost exactly like Link, but quicker, floatier, and more cel-shaded. Toon Link can be unlocked by:
|
Standard | Toon Link#Hero's Bow |
| Side | Boomerang | |||
| Up | Spin Attack | |||
| Down | Bomb | |||
| Final Smash | Triforce Slash | |||
| File:BrawlWolf.jpg | Wolf |
Wolf O'Donnell is on the heavier side, and his speed is at an average level. His attack power is also a bit decent. However, Wolf's recovery moves are unsafe, due to their poor accuracy. Wolf can be unlocked by:
|
Standard | Blaster |
| Side | Wolf Flash | |||
| Up | Fire Wolf | |||
| Down | Reflector | |||
| Final Smash | Landmaster | |||

|
Snake |
Snake uses a variety of explosives and weapons in battle, as well as a rifle. He is surprisingly very heavy, and his attacks are quite strong. Snake can be unlocked by:
|
Standard | Hand Grenade |
| Side | Remote Controlled Missile | |||
| Up | Cypher | |||
| Down | C4 | |||
| Final Smash | Grenade Launcher | |||

|
Sonic |
Sonic is the fastest character in the game; even faster than Captain Falcon. He also has a decent strength, and is a middle-weight. Sonic can be unlocked by:
|
Standard | Homing Attack |
| Side | Spin Dash | |||
| Up | Spring Jump | |||
| Down | Spin Charge | |||
| Final Smash | Super Sonic | |||
Additionally, as new characters are unlocked, they are added to the group of fighters at the beginning intro of the game.
Stages
There are forty-one total stages in Super Smash Bros. Brawl. Ten of those stages are returning stages from Super Smash Bros. Melee.
Default Stages
| Stage | Description | Songs | |
|---|---|---|---|
| File:Battlefield SSBB.jpg | Super Smash Bros. Brawl: Battlefield |
Returning from Super Smash Bros. Melee, the stage is now set in a green landscape and features different times of day. A valley can be seen in the background of the stage. |
|
| File:BrawlFinalDestination.jpg | Super Smash Bros. Brawl: Final Destination |
A wide, flat stage, with no gimmicks. Master Hand and Crazy Hand are also fought at Final Destiantion. |
|
| File:Delfino Plaza Stage.jpg | Super Mario Sunshine: Delfino Plaza |
A moving stage, comparable to Mute City from Super Smash Bros. Melee. It features a flying moving platform that takes the characters to various locations in Delfino Plaza. |
|
| File:Mushroomy Kingdom.jpg File:Mushroomy Kingdom 2.jpg |
Super Mario Bros.: Mushroomy Kingdom |
Based from the original Super Mario Bros.. The stage has blocks arranged in the same formation as level 1-1 from the said game. Occasionally, World 1-2 will load instead of World 1-1. It is also identically arranged.
Players do have the option to choose which level to battle on by holding certain buttons on the controller. |
Ground:
Underground:
|
| File:Mariocircuit.jpg | Mario Kart: Mario Circuit |
The stage takes place on a figure-8 circuit's intersection, with Shy Guys driving in from behind (hits the lower level) or the sides (hits the upper level). |
|
| File:Rumble Falls Stage.jpg | Donkey Kong Jungle Beat: Rumble Falls |
A Donkey Kong stage similar to Icicle Mountain. It has numerous obstacles, switches and ladders on the way up. |
|
| File:Bridge of Eldin.jpg | The Legend of Zelda: Twilight Princess: Bridge of Eldin |
A flat stage. King Bulblin and Lord Bullbo occasionally destroy the bridge, forcing the battle to not be fought in the middle of the stage. |
|
| File:Norfair.jpg | Metroid: Norfair |
A stage that takes place inside Planet Zebes, similar to Brinstar Depths from Super Smash Bros. Melee. Lava occasionally rises from the bottom of the stage, as well as from the sides, and even from the back of the stage. Players must enter a capsule when the latter occurs. |
|
| File:Frigate Orpheon.jpg | Metroid Prime: Frigate Orpheon |
From the game Metroid Prime, Frigate Orpheon occasionally flips around, switching between two groups of platforms to fight on. |
|
| File:Yoshi'sIslandStage1.jpg | Yoshi's Island: Yoshi's Island |
Yoshi's Island is based on its appearance in Yoshi's Island DS. It changes seasons as the Brawl progresses. |
|
| File:BattleshipHalberd.jpg | Kirby: Halberd |
Meta Knight's ship. Takes place on a Battlefield-like platform, then lands on the Halberd itself, which has a double-barreled battery in the background, which attacks the players. |
|

|
Star Fox: Lylat Cruise |
A stage that moves through the Lylat System. Very similar to Corneria and Venom. |
|
| File:Pokemon Stadium 2.jpg | Pokémon: Pokémon Stadium 2 |
An exact copy of the Pokémon Stadium from Super Smash Bros. Melee (which has fall through platforms). This stage is now upgraded to look like Pokémon Stadium 2, the game. It changes into one of four terrains as time passes. They are Ice, Electric, Ground, and Flying. |
|
| File:Port Town.jpg | F-Zero: Port Town Aero Dive |
Similar to Mute City from Super Smash Bros. Melee, the stage takes place on a group of platforms that hover along a race track, stopping on occasion. |
|
| File:CastleSiege.jpg | Fire Emblem: Castle Siege |
Taking place on a castle, this stage incorporates elements of various Fire Emblem games. |
|
| File:WarioWare.jpg | WarioWare: WarioWare, Inc. |
The players are sent through random Microgames. Players start on a simplistic stage, with a few platforms. |
|
| File:Distant Planet.jpg | Pikmin: Distant Planet |
A stage set on branches and vines, it is filled with many gimmicks that can either assist or hinder the player. |
|
| File:Brawl Stages - Smashville.jpg | Animal Crossing: Wild World: Smashville |
The stage's date time is based on the Wii's internal clock. K.K. Slider makes live performances Saturdays on 8 P.M. |
|
| File:New Pork City.jpg | EarthBound: New Pork City |
A stage comparable to Temple from Super Smash Bros. Melee; it is a very large and spacy stage. The Ultimate Chimera may appear, and will damage any player it hits, and will instantly KO any player it chomps on. |
|

|
Ice Climber: Summit |
A stage that takes place on a moving glacier. The ice stage moves around constantly. |
|
| File:Stage08 070725a-l.jpg | Kid Icarus: Skyworld |
Pit's homeland. It consists of several breakable platforms. |
|
| File:PictoChat.jpg | Nintendo DS: PictoChat |
Comparable to Flat Zone from Super Smash Bros. Melee; as it is done in a typical black and white setting. Random sketches appear on the stage, acting as added gimmicks on the stage. |
|
| File:Shadow Moses Island.jpg | Metal Gear Solid: Shadow Moses Island |
A stage that takes place just outside a helipad. The walls on the sides can be broken, and sometimes, a Metal Gear will appear in the background. |
|
| File:BrawlTemple.jpg | The Legend of Zelda: Hyrule Temple |
Coming back from Super Smash Bros. Melee, the Temple is exactly the same as it was in the previous game, with a remix of the old background music. |
|
| File:Yoshi's Island Brawl.jpg | Super Mario World: Yoshi's Island |
An exact replica of the stage from Super Smash Bros. Melee. |
|
| File:Onett Brawl.jpg | EarthBound: Onett |
An exact replica of the stage from Super Smash Bros. Melee. |
|
| File:Corneria Brawl.jpg | Star Fox: Corneria |
An exact replica of the stage from Super Smash Bros. Melee. |
|

|
Super Mario 64: Rainbow Cruise |
An exact replica of the stage from Super Smash Bros. Melee. |
|
| File:Brinstar Brawl.jpg | Metroid: Brinstar |
An exact replica of the stage from Super Smash Bros. Melee. |
|
Unlockable Stages
In addition to the above stages, there are several stages that must be unlocked to play on.
| Stage | Description | Songs | |
|---|---|---|---|
| File:LMansionBrawl.jpg | Luigi's Mansion: Luigi's Mansion |
A stage based on the game Luigi's Mansion. If players attack the four poles suspending the roof, the mansion will collapse. After a certain time, it will rebuild itself, however. This stage can be unlocked by playing 3 matches as Luigi. |
|
| File:Pirate ship.jpg | The Legend of Zelda: The Wind Waker: Pirate Ship |
A ship on the ocean of The Legend of Zelda: The Wind Waker, Toon Link's Stage. The stage is unlocked once Toon Link has been unlocked. |
|
| File:Spear Pillar.jpg | Pokémon: Spear Pillar |
The stage takes place at the top of Spear Pillar, located on Mt. Coronet in Pokémon Diamond and Pearl. Palkia appears and does Spacial Rend, doing damage. Dialga appears as well, to use Roar of Time, along with Cresselia, using Psycho Cutter. It is unlocked by beating event #25. |
|
| File:75m.jpg | Donkey Kong: 75m |
A stage based on the third stage of Donkey Kong. This stage is unlocked by playing 20 VS. Matches as Donkey Kong. |
|
| File:MBBrawl.jpg | Mario Bros.: Mario Bros. |
A stage resembling the one from the original Mario Bros. game. This stage is unlocked by beating Event Match #19. |
|
| File:Flatzone2.jpg | Game & Watch: Flat Zone 2 |
An enhanced version of Flat Zone, with references to Game & Watch games, which are Fire, Chef, Oil Panic and Lion. It is unlocked by unlocking Mr. Game and Watch, and is located in Superflat World. |
|
| File:Electroplankton.jpg | Electroplankton: Hanenbow |
A leafy stage, with water at the bottom. There are Hanenbows (species of Electroplankton) that fly around the stage and can knock players. The stage is unlocked after completing the event match #28, "Flowers Bloom in The Echoes". |
None |
| File:Greenhilldojo1.jpg | Sonic the Hedgehog: Green Hill Zone |
Inspired by Sonic the Hedgehog's first level, this course features a gentle, sloping dip. As the dip takes damage from fighter attacks, parts of it fall away, creating holes in the course until the stage regenerates. The stage is automatically unlocked once Sonic is unlocked. |
|
| File:Jungle Japes.jpg | Donkey Kong Country: Jungle Japes |
An exact replica of the stage from Super Smash Bros. Melee. The stage is unlocked by playing in Melee stages ten times. |
|
| File:Green Greens.jpg | Kirby's Dream Land: Green Greens |
An exact replica from Super Smash Bros. Melee. It is unlocked by playing 20 matches as Kirby. |
|
| File:Big Blue.jpg | F-Zero: Big Blue |
An exact replica of the stage from Super Smash Bros. Melee. It is unlocked by playing 10 matches as Captain Falcon. |
|
| File:Pokemon Stadium.jpg | Pokémon: Pokémon Stadium |
An exact replica of the stage from Super Smash Bros. Melee. It is unlocked by playing ten matches on Pokémon Stadium 2. |
|
Items
Items randomly appear on any stage in the game, and in standard Brawl mode, the player can choose to ban certain items from appearing or increase/decrease the frequency of items appearing. In Classic and All Star mode, these options cannot be modified. Certain items from particular game series appear more frequently than they would on other stages, such as Banana Peels on Donkey Kong stages, Poké Balls on Pokémon stages, etc.
| Item Name | Description | |
|---|---|---|

|
Assist Trophy |
Comparable to a Poké Ball, this summons a random character to help the character who used it. |
| Banana Peel |
Can be dropped on the stage. If other characters touch it, the character will trip over it and fall. | |
| File:BrawlBarrels.jpg | Barrel |
These bear a resemblance to crates but can tip over and roll. If hit by a rolling one, the player will receive damage. |
| File:BrawlBeamSword.jpg | Beam Sword |
An item to be held, allowing the user to perform long-distance sideways attacks with the Sword. The more a Smash Attack is charged, the longer the beam of the sword extends. |
| File:Brawl Attacks - Wario - Wario Chopper.jpg | Bike Pieces |
If Wario's bike is dismantled, the pieces can be thrown at others. |
| File:BrawlBob-Omb.jpg | Bob-omb |
A simple and powerful bomb. If it is left untouched for a little while, it will get up and walk around on its own. If one is thrown directly at an opponent, it explodes and causes a huge amount of knockback. Once enough time has passed in Sudden Death, Bob-ombs start to fall from the sky in droves. |
| Bumper |
When thrown, it lies on the ground or floats in the air and hits back all characters touching it. Relatively powerful, and players can be K.O.'d. | |
| File:BrawlBunnyHoodArtwork.jpg | Bunny Hood |
The Bunny Hood provides a substantial boost to the user's running speed and jumping height. |
| File:BrawlCapsule.jpg | Capsule |
Break open these little capsules to find items. They are also effective as a throwing item. Capsules will explode on occasion. |

|
CD |
CDs add a single, random song to the player's collection when picked up. CDs will stop appearing once the player has unlocked every song in the game. |
| Cracker Launcher |
Shoots out fireworks. Players can adjust the aim. | |
| File:BrawlCrates.jpg | Crate and Rolling Crate |
Attack or throw a crate to break it open and gain access to the items inside. There are three designs for crates. Additionally, some crates have dollies underneath them. Attacking these crates sends them rolling away. |
| File:BrawlDekuNut.jpg | Deku Nut |
Throwing one of these near an enemy with creates a flash that stuns foes temporarily. When the Deku Nut makes contact with an opponent in midair, it can send them quite a distance. |
| Dragoon |
When a player manages to collect all three parts of it, he or she can ram into the stage, knocking out all players within the crosshair. | |
| File:Item15 080305 08-l.jpg | Blast Box |
If hit with a strong attack or fire-based attack, the Blast Box will explode, causing anything in the area to be blown away. |
| File:BrawlFan.jpg | Fan |
This item doesn’t pack much of a punch but is easy to score rapid multiple combos; it can also be used to break shields. The Fan has deceptive strength when thrown straight up in the air in modes like Multi-Man Brawl. |
| File:BrawlFireFlowerArtwork.jpg | Fire Flower |
The Fire Flower is a shooting item that spouts a torrent of fire over a short distance, eventually running out of flames. |
| File:BrawlFood.jpg | Food |
Food items restore the consumer's damage. There are essentially 28 different types of food. Each item restores a different amount of health. |
| Franklin Badge |
Deflects any energy-based projectile back at the opponent with double power. | |
| File:BrawlFreezieArtwork.jpg | Freezie |
This icy item slides slowly along the ground. Throwing it at the enemy makes them freeze them in a block of ice, trapping them. |

|
Golden Hammer |
Acts like the Hammer, only is much stronger, and allows the player to float in mid-air, if the button is tapped rapidly. Sometimes, the Golden Hammer will be nothing but a Golden Squeaky Hammer, which cannot damage opponents. The Golden Squeaky Hammer is similar to the Hammer losing its head. |
| Gooey Bomb |
Can be attached to the ground or a character and explodes after a few seconds. | |
| File:BrawlGreenShell.jpg | Green Shell |
Throw, hit, or jump on this shell to send it sliding along the ground. Green Shells can suddenly reverse the direction they are traveling if they bump into a wall or are hit by an attack, so keep an eye out for returning shells. |
| File:BrawlHammer.jpg | Hammer |
Seizing this item makes the user unleash a barrage of hammer swings on a opponent. The attack itself is quite powerful but the user will lose the ability to perform midair jumps and special moves while attacking with it. Sometimes the head of the hammer will fall right off. |
| File:BrawlHeartContainer.jpg | Heart Container |
Picking up one of these reduce the damage by 100 percentage points. Heart Containers float slowly to the ground once they appear. |
| File:BrawlHome-RunBat.jpg | Home-Run Bat |
Performing a Side Smash while holding this item to make a home-run-sized swing at the opponent that sends them soaring. It’s strong when thrown too. |
| File:BrawlHothead.jpg | Hothead |
Hotheads slide across the ground releasing bursts of sparks and damaging the user opponents. When they are hit with fire or electricity-based attacks, they grow even bigger. |

|
Key |
This item will open locked doors the players encounter within The Subspace Emissary. If the player loses a key he or she is were holding on the way to the door, the player must return to where it was originally found. |
| File:BrawlLip'sStick.jpg | Lip's Stick |
Hitting an enemy with this or throwing it caused a flower to bloom on the opponent’s head. While the flower is on his or her head, the opponent will slowly accumulate damage. The more the user beats the foe with Lip’s Stick, the bigger the flower on his or her head will grow. The flower can be removed from the player's head by shaking the control stick back and forth. |
| File:BrawlLightning.jpg | Lightning |
Touching one of these makes all of the user's opponents shrink. The effect is more dramatic and dangerous than the one brought on by a Poison Mushroom. Sometimes the Lightning will backfire and only the user will shrink. |
| File:BrawlMaximTomato.jpg | Maxim Tomato |
These tomatoes are emblazoned with a striking letter "M." Eating one of these reduces the consumer's damage by 50 percentage points. |
| File:BrawlMetalBoxArtwork.jpg | Metal Box |
Turns the user into metal form, giving complete resistance to flinching from lighter attacks. The user falls faster after jumping. |
| Motion-Sensor Bomb |
Set one of these on a floor or wall, and it will react to the next moving object in its proximity by detonating. They are small and inconspicuous, so they can catch opponents by surprise. | |
| File:BrawlMr.Saturn.jpg | Mr. Saturn |
A relatively weak item that can be thrown at opponents multiple times. Also a good shield breaker. |
| Orange Cube |
This item gives valuable items and will not reappear once the player gets them. It also helps by increasing the clear percentage. They only appear in The Subspace Emissary. | |
| File:BrawlPartyBallArtwork.jpg | Party Ball |
When hit, Party Balls float up into the air and split open, raining down a torrent of items. These items are known to drop nothing but Bob-ombs on occasion. |
| File:BrawlPellet.jpg | Pellet |
A throwing item found only on the Distant Planet stage. Throwing one at an Onion will release some items. |

|
Pitfall |
Can be set on the ground. Other characters fall straight into a pit when walking over it, or if hit directly with it. |
| File:BrawlPoisonMushroom.jpg | Poison Mushroom |
Touching one makes the consumer shrink in size; the user's blows will do less damage, and the user flies further when hit. |

|
Poké Ball |
Throw a Poké Ball to summon a randomly selected Pokémon that will assist the user. |
| File:Zero Suit Samus.jpg | Power Suit Pieces |
After Samus sheds her armour during her Final Smash, Zero Laser, the pieces can picked up and thrown at opponents. |
| File:BrawlRayGun.jpg | Ray Gun |
The Ray Gun is a beam gun that lets the user fire fast-moving blasts. It comes loaded with 16 shots. When the user has exhausted the ammo, it can still be useful since the user can throw the gun at the opponent to score a Smash attack. |
| File:BrawlSandbagArtwork.jpg | Sandbag |
Beating Sandbag up make it drop items and food. As Sandbag accumulates damage, it gradually becomes easier to hit far distances. Of course, beat Sandbag too much and its pool of items will run dry. |
| File:BrawlScrewAttack.jpg | Screw Attack |
While wearing it, the Screw Attack ability is added to the user's standard and midair jumps. The user is still able to attack as normal when capable of using the Screw Attack. |
| Smash Ball |
Attacking one of these until it breaks gives the ability to use a Final Smash. | |
| Smoke Ball |
Emits a large cloud of colorful smoke. Doesn't do any damage, but sticks to anyone it hits. | |

|
Smart Bomb |
A bomb that explodes with a large blast radius when thrown, destroying anything in its reach. May occasionally fail. |
| File:BrawlSoccerBall.jpg | Soccer Ball |
No one can pick up this item, but when a player hits the ball with a strong attack, it bursts into flames and flies off into the air, depending on how strong the attack is. The angle of the attack determines the direction the Soccer Ball will fly off in. |
| File:BrawlSpring.jpg | Spring |
Hoping on a Spring makes the user perform an extra high jump. Every so often a Spring will topple over sideways. When it does so, anyone who makes contact with the fallen Spring will be knocked sideways. |
| File:BrawlStockBall.jpg | Stock Ball |
In The Subspace Emissary, Stock Balls increase the number of lives the player have left. |
| File:BrawlSuperMushroomArtwork.jpg | Super Mushroom |
Touch one of these to grow huge. In this enhanced form, the user won’t fly as far when hit and is capable of dealing harder-hitting blows than usual. However, they become easier to strike. |
| File:BrawlSuperScope.jpg | Super Scope |
This beam gun lets the user choose between attacking with rapid-fire or charged shots. The Super Scope holds enough energy for 48 rapid-fire shots, or about three fully charged blasts. |
| Superspicy Curry |
Eat one of these and the player starts spewing flames from his or her mouth. The user can, however, continue to attack as normal. This item also has the side effect of making the user run, even if they try to walk. | |
| File:BrawlStarman.jpg | Starman |
Just touching one of these gives the user temporary invincibility. The effect lasts 10 seconds. |
| File:BrawlStarRod.jpg | Star Rod |
Perform a strong side attack or side Smash attack while holding the Star Rod to swing the rod and simultaneously fire off a star-shaped projectile. When the user throw a Star Rod at the opponent, it sends them rocketing off sideways. |
| Team Healer |
Only usable in Team battles, can recover a teammate's health if tossed at them. If thrown at opponents, it may hurt or heal them. | |
| File:BrawlTimer.jpg | Timer |
Picking up this item slows down the flow of time for all other players. Occasionally the Timer will have a different effect and only slow the user down, or it may slow down time for the entire stage and everyone. |
| Trophy Stand |
This item turns enemies into trophies in The Subspace Emissary. Stronger enemies must be sufficiently weakened to be successfully turned into a trophy. | |
| File:BrawlUnira.jpg | Unira |
Throwing a Unira into the ground or attacking it causes its spikes to extend, damaging opponents who bump into it. Attacking the Unira again make its spikes retract. |
| Vegetables |
Heals the player. Appears only on the Summit stage. | |
| File:BrawlWarpStar.jpg | Warp Star |
The user takes a ride on a Warp Star to launch a vicious attack from above on the opponent. It can be controlled where the Warp Star falls by using the Control Stick. |
Assist Trophy characters
|
|
Poké Ball Pokémon
Game Modes
Solo
Subspace Emissary
The Subspace Emissary is a game mode available in Super Smash Bros. Brawl. It serves as the equivalent to Adventure Mode of Super Smash Bros. Melee, but with a much more complex plot and more gameplay time. Subspace Emissary is set in the World of Trophies. There are five difficulties to choose from; Easy, Medium, Hard, Very Hard, and Intense. The player has a choice to save game process after completing each level.
The Subspace Emissary makes use of a team system. Two players can play in the Subspace Emissary at one time, with the first player being the protagonist, and the second player being an optional supporting character. Due to the camera following the main character, if the second character cannot follow the scroll and becomes off-screen, he or she is automatically warped back to the main hero. Also, by pressing the Start or Plus Button, Player 2 can always warp to wherever Player 1 is. This, however, does not work during boss battles in the Emissary. The main screen shows where to go next, and the character selection screen allows the player to choose his or her team. If Player 1 is defeated, and Player 2 is not, the game will still be over. In single player, teams are still available. However, the second character is akin to an extra life, and if the main character is defeated, the player takes control of the second character, until it, too, is defeated.
The player is able to use Sticker power-ups for the mode. The stickers are arranging on the character's Trophy Stand and give bonuses on Launch Power, Launch Resistance, and powers and resistances to several attacks like Arm, Weapon, Slash, Electric and Flame. The effects vary from sticker to sticker. When the player loses all of their lives, they can be asked to continue but stickers and enemy turned trophies will be cut in half, if they decide to quit, they will get a Game Over and lose half of their stickers but they may keep the trophies.
All unlockable characters can be unlocked by playing Subspace Emissary mode, but three of them can only be unlocked by beating them in a challenger match.
Levels
| Level | Characters |
|---|---|
| 1. Midair Stadium | Mario, Kirby, Peach, Zelda (Characters Who Join: Kirby, Peach/Zelda) |
| 2. Skyworld | Pit, Mario (Characters Who Join: Pit, Mario) |
| 3. Sea of Clouds | Kirby and Peach/Zelda (Characters Who Join: none) |
| 4. The Jungle | Diddy Kong, Donkey Kong (Characters Who Join: Diddy Kong) |
| 5. The Plain | Pit, Mario (Characters Who Join: none) |
| 6. The Lake | Diddy Kong, Fox (Characters Who Join: Fox) |
| 7. The Ruined Zoo | Lucas, Ness, Pokémon Trainer (Characters Who Join: Lucas, Pokémon Trainer) |
| 8. The Battlefield Fortress | Marth, Meta Knight, Ike (Characters Who Join: Marth, Meta Knight, Ike) |
| 9. The Forest | Link, Yoshi (Characters Who Join: Link, Yoshi, Toon Link [after clearing Subspace Emissary]) |
| 10. The Research Facility Part 1 | Zero Suit Samus, Pikachu (Characters Who Join: Zero Suit Samus, Pikachu) |
| 11. The Lake Shore | Pit, Mario, Link, Yoshi, Kirby (Characters Who Join: none) |
| 12. The Path to the Ruins | Lucas, Pokémon Trainer (Characters Who Join: none) |
| 13. The Cave | Pit, Mario, Link, Yoshi, Kirby (Characters Who Join: none) |
| 14. The Ruins | Lucas, Pokémon Trainer (Characters Who Join: Wolf O'Donnell [after clearing Subspace Emissary]) |
| 15. The Wilds Part 1 | Marth, Meta Knight, Ike (Characters Who Join: none) |
| 16. The Ruined Hall | Lucas, Pokémon Trainer (Characters Who Join: none) |
| 17. The Wilds Part 2 | Pit, Mario, Link, Yoshi, Kirby (Characters Who Join: none) |
| 18. The Swamp | Diddy Kong, Fox, Falco (Characters Who Join: Falco, Jigglypuff [after clearing Subspace Emissary]) |
| 19. The Research Facility Part 2 | Zero Suit Samus, Samus, Pikachu (Charcters Who Join: Samus) (Zero Suit Samus Leaves) |
| 20. Outside the Ancient Ruins | Olimar, Captain Falcon, Diddy Kong, Donkey Kong (Characters Who Join: Olimar, Captain Falcon, Donkey Kong) |
| 21. The Glacial Peak | Meta Knight, Ice Climbers, Lucario (Characters Who Join: Ice Climbers, Lucario) |
| 22. The Canyon | Pit, Mario, Link, Yoshi, Kirby (Characters Who Join: none) |
| 23. Battleship Halberd Interior | Snake, Meta Knight, Lucario (Characters Who Join: Snake) |
| 24. Battleship Halberd Exterior | Peach, Zelda/Sheik (Characters Who Join: Zelda/Shiek or Peach) (*Note: Shiek is playable in any level that Zelda is) |
| 25. Battleship Halberd Bridge | Fox, Falco, Lucario, Peach, Zelda/Sheik, Snake (Characters Who Join: Mr. Game & Watch) |
| 26. The Subspace Bomb Factory Part 1 | Samus, Pikachu (Characters Who Join: none) |
| 27. The Subspace Bomb Factory Part 2 | Donkey Kong, Diddy Kong, Captain Falcon, Olimar, R.O.B., Samus, Pikachu (Characters Who Join: R.O.B.) |
| 28. Entrance to Subspace | All previously used (Not Ness and Zero Suit Samus), Mr. Game & Watch (Characters Who Join: none) |
| 29. Subspace Part 1 | King Dedede, Ness, Luigi (Characters Who Join: King Dedede, Ness, Luigi, Bowser, whoever the player saved in the Subspace) |
| 30. Subspace Part 2 | Kirby (Characters Who Join: Whoever the player saved in the Subspace, Ganondorf) |
| 31. The Great Maze | Any Trophies the player has saved, King Dedede, Ness, Luigi, Bowser, Kirby, Sonic (Characters Who Join: Sonic) |
Plot
The "Subspace Emissary" is the adventure and story mode of Super Smash Bros. Brawl. The main antagonists are the Subspace Army, which is led by the Ancient Minister.

At the beginning of the story, Zelda and Peach watch trophies of Mario and Kirby fall into the Midair Stadium and transform into their living counterparts. They proceed to do battle, while Pit watches from Skyworld, cheering them both on. After his defeat, Mario or Kirby is transformed into a Trophy, which the other revives into his living counterpart. However, Meta Knight's ship, the Battleship Halberd, flies over the main stadium. It releases purple spores into the arena, called Shadow Bugs, which then form a group of strange robotic-looking creatures, called the Primid. Zelda and Peach run to assist Mario and Kirby, and all four of them battle against the Primids. The Ancient Minister then arrives on his floating platform, and drops down a Subspace Bomb, which is soon activated by two R.O.B.s. The bomb then shows a detonation timer, indicating that it will explode in three minutes.
Mario hurries to deactivate it, but is blasted out of the stadium by a giant cannonball. Kirby ponders about who shot Mario out of the stadium, then realizes that Peach and Zelda have been entrapped by cages held by Petey Piranha. Petey Piranha proceeds to attack Kirby by swinging the cages at him. Kirby dodges and attacks the cages, thus weakening and eventually destroying one of them. Defeated, Petey Piranha explodes and burns to the ground, flinging the princess Kirby did not free to the other side of the arena. Suddenly, coming out of nowhere, Wario drops in wielding a dark cannon. He notices Kirby and the rescued princess, but then turns his attention to the unrescued princess.
He points his cannon at her, and fires it. A black arrow is fired from the cannon's nozzle and strikes the unrescued princess, who is then transformed into a trophy and carried away by Wario. Kirby and the rescued princess begin to pursue him, but Kirby notices that the Subspace Bomb's timer is almost out. The bomb explodes, taking the stadium into Subspace, fortunately Kirby and the rescued princess escape on a Warp Star.

Meanwhile, in Skyworld, Pit gazes at the disappearing stadium and the devastating effects of the Subspace Bomb. He is then called forth by the goddess Palutena, who gives him the Bow of Palutena and the Angel Ring. She sends Pit on a mission to save the world from the Subspace Army, and assist the others who are trying to save it. Pit then hurries off to the edge of Skyworld, and flies down to the world below to assist in saving it from the Subspace Army. The Halberd appears over the area where Pit landed, releasing Primids. Pit then splits his bow into dual swords and defeats various Subspace enemies, eventually reaches a platform. Looking across the sea of clouds, he sees Mario's trophy. Hopping over to a platform concealed by the clouds, he revives Mario. Once Mario recalls the events in the arena the two come to an understanding that they are working towards the same goal, and head off.
Elsewhere, in an island jungle, a Hammer Bro. and a Goomba pile Donkey Kong's Banana Hoard onto a Cargo, which they proceed to carrier off. Upon battling several of the Koopa Troop's minions (even smashing a Koopa Troopa into the ground, similar to Donkey Kong Jungle Beat), Donkey Kong readies to follow the Hammer Bro. and the Goomba and get his treasured Banana Hoard back. The Goomba jumps down from the pile onto two cannons, which fire three Bullet Bills towards DK. Out from the foliage behind, Diddy Kong appears and with his Peanut Popguns in hand, intercepts them all. Both Donkey Kong and Diddy Kong set off after the Banana Hoard thieves. Upon finding it, they are attacked by Bowser, who wields the same device held by Wario. Bowser aims the dark cannon at Diddy, but Donkey Kong punches Diddy into the sky and out of the way of the oncoming black arrow, which turns the big ape himself into a trophy.
Meanwhile, Kirby and the rescued princess are being chased by the Halberd which then knocks them off their warp star, forcing them to land on the ship. They spot an Arwing coming from the distance. It swiftly dodges the beams fired by the Halberd, but is hit by a claw-like device that is projected from the ship. The Arwing is knocked out of the sky, blowing Kirby and the rescued princess off the Halberd before proceeding to crash on Donkey Kong Island.

Meanwhile, Diddy Kong is swinging through the jungle looking for Donkey Kong. When he reaches a large pond, he notices the damaged Arwing near the lake. As he heads towards it, Rayquaza emerges from the lake and sets the Arwing aflame with a Dragon Pulse attack. As Diddy stares in fear and awe, Rayquaza quickly snatches him up and flies back into the lake. Fox McCloud ejects himself from the destroyed Arwing, and uses his Fox Illusion to swift pass the dragon's hand, forcing it to release Diddy. As Rayquaza uses another Dragon Pulse, Fox uses his Reflector, which deflects the attack back at Rayquaza, causing it to retreat back into the lake, though it recuperates and a battle ensues. Following Rayquaza's defeat, Diddy begins explaining his dilemma to Fox. Fox simply ignores Diddy and walks away. Diddy tries explaining again, and Fox, again, walks away. Diddy becomes angry and physically drags Fox along with him to help find Donkey Kong. Deeper in the jungle, they battle against Bowser; but his defeated trophy disolves into shadow bugs. It turns out that the Bowser they fought was a fake, set up as a trap by the real Bowser, who attempts to turn Diddy and Fox into trophies with his dark cannon. Diddy, desiring to avenge Donkey, steps up to fight Bowser, but Fox quickly grabs him and carries him away into the jungle, as Bowser laughs. Meanwhile on the Plain, Mario and Pit chase the Ancient Minister and attempt to attack him but misses twice. Pit wonders where the Ancient Minister is going.

Meanwhile, Lucas is walking through The Ruined Zoo. On the verge of tears, while all alone, he is attacked by Primids, and the Pig King Statue, a living statue of Porky, appears. Lucas is pursued throughout the zoo by the giant statue, whose intent is to kill Lucas. Lucas soon gets his foot snagged on an unearthed root, and desperately tries to free himself as the statue approaches. Realizing he cannot escape, he covers his eyes, being certain of impending doom. Suddenly Ness appears and blasts the statue with his PK Thunder and destroys it with his PK Flash. Unfortunately, Porky himself appears out of the statue in his spider mech and attacks the boys. Both Ness and Lucas work together and defeat him. Afterwards, Wario appears on a large hill and repeatedly tries to attack Ness with his dark cannon. He fails to hit Ness, who dodges every shot, then he turns and aim for the unaware Lucas. Ness pushes Lucas out of the way of the beam, thus getting himself transformed into a statue which Wario then seizes. Lucas flees aghast as Wario cackles in the rain. Fortunately, the rain stops a bit after, and he bumps into the Pokémon Trainer, and the duo are attacked by more Primids. The Pokémon Trainer lets out his Pokémon, Squirtle, to join Lucas and they destroy the squad of Primids. The Trainer begins to leaves afterwards, and after a moment of reflection over his recent misfortunes, Lucas shadows close behind.
The carnage of a recent battle are shown. Under the Ancient Minister's supervision, two R.O.B.s open a subspace bomb, depleting the area. Marth looks at the explosion a distance away, before setting his sights to a mob of Primids approaching the castle he is standing upon. Marth proceeds to battle the Primids, eliminating them all. After he gets close to the Subspace Explosion he glances to the sky and sees Meta Knight zooming at him. Meta Knight attacks, and they start battling, thinking they are enemies. Their skirmish is interrupted by more Primids. After Marth and Meta Knight both begin killing the Primids, they realize they're fighting a common enemy. They decide to team up to fight the subspace army. After defeating the Primids, they catch up to the Ancient Minister, who is carrying a Subspace Bomb, and attempt to intervene. The Ancient Minister dodges Marth's Dolphin Slash, and shoots Meta Knight's wings, setting them on fire, forcing him to transform them back into his cape. Out of nowhere, Ike comes and destroys the bomb with his Great Aether. The Ancient Minister retreats and the trio of swordsmen move on to catch him, only halting when they reach the side of a cliff and can move no further.

In another area, two Waddle Dees approach Luigi, who is frightened by them. To Luigi's surprise, King Dedede suddenly appears and attacks him with his Jet Hammer. He launches Luigi into the sky, turning him into a trophy. King Dedede retreats, leaving Luigi's trophy as bait for Wario, who is approaching in his trophy carrier containing Ness and the unrescued princess. Wario notices the Luigi trophy and goes to get it, although gets swarmed by Waddle Dees in the process as King Dedede steals the carrier, taking all three trophies with him. Wario looks up, dazed and confused, and angrily yells at the disappearing carrier.
Deep in a forest, Link is seen traveling, intent on finding something with his fairy, Navi, by his side. He walks up to a stone containing the Master Sword. With the Triforce symbol appearing on his left hand, Link pulls the sword out. As he leaves, he passes by a sleeping Yoshi on a stump and the Halberd flying overhead. Link stops and looks up at the Shadow Bugs before getting his sword ready for battle while a confused and newly awaken Yoshi joins him. After passing through the forest, they proceed to follow the departing Halberd. Meanwhile on the Halberd, a man is making plans inside a box.
Meanwhile, on a floating island base, Zero Suit Samus is breaking in. As she emerges from the vent she was in, a glimpse of Solid Snake's hiding box is shown, which later on starts another story. Samus loads her gun and travels through the base, ending up in a room where Pikachu is trapped inside a tube. The machine sucks out Pikachu's electricity, painfully shocking the Pokémon in the process. Zero Suit Samus, seeing Pikachu in pain, destroys the tube with her Plasma Whip. Unfortunately, this sets off an alarm, and they have to fight their way through a hoard of attacking R.O.B.s. Zero Suit Samus and Pikachu then enter a surveillance room with lots of monitors showing various places in the research facility. On one of the many monitors Zero Suit Samus sees what she was looking for: her Power Suit.


At the same time, Kirby and the rescued princess are seen on a long field. Suddenly King Dedede drives by and Kirby runs after him, leaving the princess alone. Bowser then sneaks up from behind the princess and turns her into a trophy, which is subsequently cloned by a mass of Shadow Bugs, turning her into False Peach/Zelda. Mario/Link and Pit/Yoshi run by her without noticing. The Peach/Zelda clone attempts to turn them into trophies, but the gun is cut in half by Pit/Link. Mario/Link and Pit/Yoshi proceed to battle against the clone. They defeat the cloned princess, with the clone transforming into a trophy, then desolving into Shadow Bugs. Mario/Link are running, when he stop to see the clone princess trophy desolving. Thinking this was the real princess, Mario/Link rushes to Link/Mario and attempts to attack. Mario/Link manages to dodge the attack, and Pit and Yoshi join in to battle each other. The losing team are turned into trophies. Afterwards, Mario/Link spots the unrescued princess in the carrier. King Dedede proceeds to capture the losing team trophies by grabbing them with an arm from the carrier as he's speeding away. Fortunately, Kirby cuts the arm with his Final Cutter, and turns Mario/Link and Pit/Yoshi back to normal. King Dedede makes a U-turn and heads for the heroes. After being revived, Link/Pit hit King Dedede's carrier, slowing it down as Mario, Link, Kirby, Yoshi, and Pit pursue him.

In a control room, Ganondorf gives orders to Bowser to track down King Dedede, and gives him his location. Lucas and Pokémon Trainer are by a tall anticline, and see Charizard flying into a cave. They follow Charizard through the ruins of a temple, where Wario appears. Lucas remembers what he did to Ness, and he and Pokémon Trainer battle and defeat Wario, turning him into a trophy. Lucas looks around and wonders where Ness' trophy is. He and Pokémon Trainer hear a growl within the mountain and continue the search for Charizard.
Meanwhile, King Dedede is in his castle, looking at his trophies of the princess, Luigi, and Ness. He puts a timed badge, bearing an image of his face on it, on all of them, until Bowser attacks the castle with his minions and takes the princess's trophy. Link, Mario, Yoshi, Pit, and Kirby enter King Dedede's castle and notice a hole in the wall, which they enter. They chase Bowser all the way out of the castle and to a cliff. Mario attempts to attack Bowser, but he uses Peach/Zelda as a shield and Mario is forced to stand down. Pit shoots an arrow at Bowser which he dodges, falling off of the cliff while Peach/Zelda loses her badge. Bowser ends up in his Koopa Clown Car, and flies away with her to the Halberd. Kirby looks at the fallen badge, confused. Meanwhile, the Ancient Minister plants a bomb at King Dedede's castle, which explodes and sends it to Subspace. Ganondorf is watching on a monitor, and Master Hand appears on it, seeming to order Ganondorf to do something. Ganondorf complies, and bows down.
Meanwhile, Pokémon Trainer, Lucas, and Squirtle fight through a cave. They find a trophy of Ivysaur, which Pokémon Trainer retrieves into a Pokéball. They continue to fight through the cave, until they find Charizard. They fight Charizard, and Pokémon Trainer captures Charizard with his Pokéball. The two eventually end up in a tower.

Meanwhile, the trio of swordsmen find a seemingly inactive tank, which then activates and reveals a huge mech called Galleom. They fight and, after the robot is defeated, it jumps off a cliff and falls through the stone ground below, as Ike, Marth and Meta Knight are only able to look on. As it turns out, Lucas and the Pokémon Trainer had wound up in the chamber in which Galleom lands, damaged. They prepare to fight, but Galleom snatches them with only its right hand (rendering the Trainer unconscious in the process), and reveals itself to be a huge, walking Subspace Bomb, much to Lucas' horror. Galleom then flies up and when it is ready to detonate, Lucas uses his PK Thunder to sever its hand, making them fall as Galleom detonates up above. When Lucas thinks he will get his last breath, holding the Pokémon Trainer closely, Meta Knight swoops in and saves them in the nick of time, as Subspace sucks in everything, including Wario's trophy.

The Ancient Minister watches the explosion, and starts thinking about the Bombs, and the R.O.B's that have sacrificed themselves to detonate it. He turns to go, but is stopped by Mario and company. They proceed to chase him as he fires lasers at them. While they are fighting, two R.O.B.s activate a Subspace bomb. Pit and Mario start attacking the R.O.B.s but are grabbed by two other R.O.B.s and taken away. The Ancient Minister watches sadly as the R.O.B.s wave at him as he leaves. The bomb explodes, however Mario hops on Yoshi and everyone else hops on Kirby's Warp Star and they all leave the area. It is revealed at this point that the impact of the explosion overwhelms the bystanding R.O.B.s and destroys them.

Fox fights through the jungle island with Diddy Kong, eventually seeing Bowser who shoots Diddy and attempts to do the same to Fox. Fortunately, Falco arrives and shoots Bowser with his Arwing. He successfully destroys Bowser's trophy gun, but the Shadow Bugs transform Diddy Kong's trophy into a giant evil false Diddy while Bowser flies away in his Koopa Clown Car. After defeating giant Diddy, Falco leaves. However, Diddy Kong stops him and tries to tell them that Donkey Kong is kidnapped. Falco turns around before Diddy Kong can explain and starts to leave. Diddy Kong gets mad, grabs Falco and drags him along with Fox following behind. The three continue through the jungle and see a ship with Donkey Kong's trophy chained up. It flys over a waterfall and appraches the floating island, but Falco calls the Great Fox and the three hop in to pursue the ship.

Meanwhile, Pikachu and Zero Suit Samus go through a warehouse-like place to find her Power Suit. Two Samus clones are there to battle them. After they defeat them, an alarm goes off and R.O.B.s come from everywhere. Samus puts on her Power Suit and shoots them all. They soon enter a large spacious chamber where Ridley appears, grabs Samus and begins scraping her against a wall. Pikachu electrocutes Ridley, forcing him to let go of Samus who falls on the ground weakened, but able to fight and help Pikachu defeat the monster. They end up outside and see two R.O.B.s carrying a Subspace Bomb.
Elsewhere, a group of Pikmin start to attack a giant R.O.B. which simply rises its arms and spins around knocking them all off and kills most of them. Captain Olimar is shocked and scared, however his Red Pikmin informs him of a new visitor. The Blue Falcon speeds through the forest. Captain Falcon jumps out of the car, and Falcon Punches the robot, sending it flying away. Landing after his attack, captain Falcon accidentally kills many of the Pikmin, but teams up with Olimar, regardless; and the pair run along some old ruins fighting the Subspace Army. They notice an Arwing attacking the ship carrying Donkey Kong: Falco drops Diddy out of his Arwing, and with his Peanut Popguns, the monkey shoots the ship holding Donkey Kong. Captain Falcon and Captain Olimar run to assist. Diddy brings Donkey Kong back to life and they are attacked by Primids. The ship enters a cave area as Falco flies away.

Meanwhile, the Halberd is engaged in a laser duel with the Great Fox, while Marth, Meta Knight, Lucas, Pokémon Trainer, and Ike are watching. Meta Knight flies up the mountain and sees the Ice Climbers on their way to the ships already. Meta Knight flies ahead of them and the Ice Climbers follow. The two become a team and the Ice Climbers and Meta Knight climb the mountain together. After their team reaches the top of the mountain, they see Lucario. He jumps down and challenges Meta Knight to a fight. After the fight, the loser is turned into a trophy. The winner then turns the loser back to his normal state. Lucario and Meta Knight look at each other, but shake hands instead of fighting. Suddenly the Halberd pushes the Great Fox (which it had captured) into the peak of the mountain, causing an avalanche. The Ice Climbers fall down the mountain while Lucario and Meta Knight avoid the avalanche and climb aboard the Halberd. Shadow Bugs swarm around the Ice Climbers, Marth, Ike, Lucas, and Pokémon Trainer and summon more Primids. Mario, Pit, Link, Yoshi, and Kirby arrive at the scene and assist the others.
Meanwhile aboard the Halberd, Solid Snake comes out from underneath his cardboard box and ventures the ship. Then he hears someone coming and he hides under his box. Meta Knight and Lucario pass by, but Lucario senses the aura of Snake. After Lucario uncovers Snake and stops Meta Knight and Snake from fighting each other, he senses Primids behind them with aura, but they are soon defeated, and the three venture further through the Halberd. They eventually reach a room with Peach and Zelda's trophies in cages. Shadow Bugs surround the trophies and generate False Peach and False Zelda. The three battle the evil princesses, break the cages, and turn the real princesses back to life. Snake makes a gesture before he, Lucario, and Meta Knight leave the room, telling the princess to stay in the room. Zelda transforms into Sheik, and Peach giggles as the two leave the room and venture to the deck of the Halberd once Snake and the others were gone.

In the sky, Fox's Arwing is hit, damaging its wing as he attempts to take down the Halberd. One of his shots almost hits Peach, causing Sheik to jump onto the Arwing and force Fox to eject. Sheik and Fox begin to battle on deck, but then Peach offers Fox some tea. As Sheik sips her cup of tea, Fox accepts the offer. Meanwhile, Lucario, Meta Knight, and Solid Snake reach the control room and discover that the Halberd is controlled by a squad of Mr. Game & Watches. Snake knocks the Mr. Game and Watches out the window and onto the deck nearby Fox, Peach, and Sheik. The Mr. Game and Watches turn into Shadow Bugs and transform into a twin robot named Duon. Lucario and Snake assist Fox, Peach, and Sheik, while Falco ejects from his Arwing to also help take down Duon. When Duon is defeated, it reveals Mr. Game & Watch's trophy. Fox points his Blaster at the trophy while Peach brings Mr. Game & Watch to life. Mr. Game & Watch bows in thanks and Peach gives him her Parasol. Mr. Game and Watch plays with it and Peach giggles at this. As he is harmless, the party lets him join their ranks. In the control room, Meta Knight takes the steering wheel and flies his ship out of the dark clouds.

The alarm goes off in the island base as Samus and Pikachu run through the corridors. The two break through a wall and enter a huge room full of Subspace Bombs, R.O.B.s, and the Ancient Minister himself. Samus and Pikachu are ready to attack, but the Ancient Minister puts his head down and the two feel pity for him. Just then, Donkey Kong, Diddy Kong, Captain Olimar, and Captain Falcon burst through another door and stand alongside Samus and Pikachu. Then Ganondorf appears as a hologram and sees the intruders. He orders the R.O.B.s to activate all the Subspace Bombs. The Ancient Minister refuses to let them do that, so Ganondorf takes control the R.O.B.s himself and orders them to obey him. The Ancient Minister tackles two R.O.B.s away from the Subspace Bombs and Ganondorf angrily forces the R.O.B.s to shoot the Ancient Minister before activating all of the Subspace Bombs. The Ancient Minister sadly stands there in his burning clothes while the gang tries to detach the R.O.B.s from the Subspace Bombs. Ganondorf laughs and his hologram disappears, after ordering a flock of Auroros to stop the gang from exiting the island. The Ancient Minister looks up and shoots some of the Auroros down with his laser.
After the Ancient Minister fired beams at the Auroros, his clothes burn off and it is revealed that he is also a R.O.B. himself. This may explain why the Ancient Minister felt sadness at having to sacrifice R.O.B.s, as they are his own kind. Donkey Kong, Diddy Kong, Samus, Pikachu, Olimar, and Captain Falcon help the R.O.B. defeat the Subspace soldiers. Since they cannot detach the R.O.B.s from the Subspace Bombs, they begin to leave. Diddy tries to get the R.O.B. to help, but he's too saddened after mind linking with two R.O.B.s. Captain Falcon calls his ship by pressing some buttons on his gloves and calls his party. Donkey Kong carries R.O.B. (the Ancient Minister) with them after he refuses to leave. They all jump into a tube and Captain Falcon summons his Falcon Flyer to carry them out of the base. However, Meta Ridley chases after them in a tunnel and the gang has to stop him from delaying their getaway. Meta Ridley is eventually defeated and they escape before the massive explosion occurs. Meanwhile, Mario, Link, Pit, Yoshi, Kirby, Lucas, Pokémon Trainer, the Ice Climbers, Marth, and Ike watch the gigantic explosion. Then they see the Halberd and the Falcon Flyer fly toward them and land in front of them. So they all climb aboard the ships and head for Subspace.

Suddenly a gigantic battleship comes out of Subspace and shoots towards the horizon, bringing another area into Subspace. Ganondorf and Bowser are aboard and control the cannon. Suddenly, Ganondorf stares into the distance and sees the Halberd approaching. The two aim the cannon at the Halberd and after a shot that went through the middle of the Halberd, it is brought down. Although it seems like this is over, The Falcon Flyer, the Arwing, Olimar's Hocotate Ship, and Samus' Spacecraft fly out of the explosion. Now frustrated, the two aim all their cannons at the ships. Out of nowhere, Kirby, riding his Dragoon, flies right through the battleship, thus destroying it. Ganondorf and Bowser retreat into Subspace, followed by the entire gang.
Ganondorf and Bowser are walking through a Subspace region when Ganondorf stops behind Bowser and fires the gun at him, turning Bowser into a trophy. He walks to the edge of a cliff and bows to Master Hand, before looking up and realizing that his leader has puppet strings leading back to Tabuu. Ganondorf jumps at Tabuu who easily repels him back into Master Hand, severing the strings. Ganondorf is turned into a trophy, but Master Hand uses his freedom to attack Tabuu, who blasts him back to the cliff where he lies, defeated. The heroes show up to see Master Hand fallen. They look up at Tabuu. His wings emerge and in one blast, he turns everyone into trophies. A cluster of balls of light form around him and he rests at the end of a pathway leading out from the cliff.

Elsewhere, in King Dedede's Castle in Subspace, the timed Dedede badges awaken Ness and Luigi. They revive King Dedede and the three of them start a Subspace level where they must collect the trophies of all their fallen comrades. At the end, they find the Bowser trophy which King Dedede brings back to life. Bowser then challenges Dedede to a fight which he loses, turning back into a trophy which King Dedede then revives. It looks like Bowser is going to try to fight again, but Dedede flicks Bowser in the nose, forcing him to see reason and join the party. After finding Ganondorf's trophy, Bowser attacks it several times in anger. Link and Zelda then arrive and revive Ganondorf.

Kirby is revived by the Dedede badge that he had swallowed much earlier back when King Dedede's Castle was sent to Subspace. Kirby goes to revive the rest of the trophies. Kirby and King Dedede unites after Bowser attempts to attack Kirby after seeing Ganondorf's Trophy. King Dedede is on his way up to Tabuu when he is attacked by Wario. Wario starts laughing at him but Luigi and Ness come and help King Dedede back up. Wario is shocked to see the three as a team. The three point to Tabuu and Wario picks his nose while thinking. He gets on his Wario Bike and goes up to Tabuu, while King Dedede, Luigi and Ness follow. Soon, the whole party arrives at The Great Maze where they must go through all the parts of the Super Smash Bros. World and defeat all the bosses and "dark" characters. After defeating all bosses and "dark" characters, they finally reach Tabuu. Tabuu is about to attack the whole gang again and turn them all into trophies, but Sonic comes in and attacks Tabuu twice, breaking his wings. Sonic then spins around and smiles, waving his finger in the air.
Tabuu then attacks the whole party but is defeated, yelling in pain as all the worlds that were brought into Subspace are brought back. The last area to be brought back is the Final Destination. All the characters are returned back to the regular Smash World and the player then sees the Final Destination at sunset. The credits pass while it shows a few pictures of the various cut-scenes in the game.
Bosses
| Image | Boss | Description |
|---|---|---|

|
Petey Piranha | Petey Piranha captures Peach and Zelda within cages as the Subspace Army assaults the Arena, and the player has to fight him as Kirby, being able to rescue only one of the princesses. Petey actually uses the cages to attack the player. When one of the cages is attacked, its life decreases. When Petey is attacked, the HP for both of the cages' decrease. The princess within the cage to lose all of its health and break first is the one the player ends up saving. After this is accomplished, Petey is defeated and burns to the ground. In his second battle, Petey's cages are empty and the player must break at least one cage to defeat him. |

|
Rayquaza | After Fox's Arwing crashes into the Jungle, Rayquaza emerges from a nearby lake and destroys what is left of the ship. Having watched this take place, Diddy Kong is captured by Rayquaza. Fox is ejected from the Arwing at the last second and rescues Diddy. A battle with Rayquaza commences. Rayquaza uses attacks such as Hyper Beam during the battle, often flying on and off the screen during its mad rushes, and falls to the ground in defeat after it has lost all of its health. |

|
Porky Statue | The Pig King Statue is a gigantic statue from MOTHER 3. It has been described as virtually impossible to hit. Lucas must run from him, dodging his blows, as they can result in one-hit KO's. After running for a certain amount of time, Ness appears, and saves Lucas, only to end up encountering Porky in the Spider Mech. |

|
Porky | Ness and Lucas fight Porky in his Spider Mech from Mother 3 after Ness defeats a large statue of Porky. During the battle, Porky Minch uses the machine's robotic legs to attack either Lucas or Ness. Other, more powerful attacks he uses include a very accurate laser beam and a wave of his mechanical robots (based on himself). The machine flips upside-down and squirms after Porky's life bar has been completely depleted. |

|
Galleom | A large Subspace Army mech, Galleom is fought in two phases. During the first phase, he is fought by Marth, Ike, and Meta Knight. After he is defeated, he falls down into the ruins, crashing through the floor to confront Lucas and the Pokémon Trainer. After being defeated, Galleom activates the Subspace Bomb within its head and attempts to take them with it; however, the two are rescued just in time by Meta Knight after Lucas uses PK Thunder to free themselves and fall. |

|
Ridley | Samus's nemesis from the Metroid series appears as a boss. Like Rayquaza, Ridley often flies on and off the screen during the battle. He has several attacks, including one in which he scrapes his tail against the ground. Many of his other attacks are similar to Master Hand's. After the player depletes his life bar as either Samus or Pikachu, Ridley falls off the platform. |

|
Duon | The second of the two Subspace Army mechs. After the Mr. Game & Watches are tossed out of the control room of the Battleship Halberd, they are converted into Shadow Bugs. These Shadow Bugs combine to form Duon, fought as Fox, Peach, Zelda, Lucario, Solid Snake, and Falco. When it is defeated, it reforms into Mr. Game & Watch, who joins the effort to defeat the Subspace Army. |

|
Meta Ridley | Ridley makes a return appearance in his cybernetically enhanced form from Metroid Prime, this time challenging Samus, Pikachu, Captain Falcon, Captain Olimar, R.O.B., Diddy Kong, and Donkey Kong. He chases after the group as they escape the floating island in Captain Falcon's ship. His attacks include fireballs, rushing at the player, and influencing the ship in various ways, such as forcing it downward and making it rock back and forth. |

|
Tabuu | Tabuu is the true villain of The Subspace Emissary. He was controlling Master Hand and turns all fighters into trophies, but thanks to a time artifact made by King Dedede, some survive and he is then weakened by Sonic and destroyed by everyone. |
Enemies
- Main article: Subspace Army
Classic Mode
Classic Mode returns from Super Smash Bros. Melee, acting the exact same way. Players pick a character, and then go through a barrage of fights. Each stage appears in a certain order, with a Legend of Zelda stage appearing first, and a Pokémon stage appearing third. Like the last game, certain conditions are set in a few matches. A few examples are the player and two teammates fighting a giant version of an opponent, or the player fighting a metal version of another player. A small heart appears next to a teammate's logo in the matches with allies. When a level is finished, the score is added up, and coins are earned. These can be used in the Coin Launcher. Clearing this Mode will give the player a trophy of the character used to complete it. [8]
| Classic Mode | |
|---|---|
| Stage 1 | Legend of Zelda Series. (Link, Toon Link, Zelda, Sheik or Ganondorf) |
| Stage 2 | Yoshi or Donkey Kong Series. (Yoshi, Donkey Kong or Diddy Kong) |
| Stage 3 | Pokémon Series. (Pokémon Trainer, Pikachu, Jigglypuff or Lucario) |
| Stage 4 | Fire Emblem or Earthbound Series. (Marth, Ike, Ness or Lucas) |
| Bonus Stage 1 | Break the Targets! (The Target Smash!! level of current difficulty) |
| Stage 5 | Kirby Series. (Kirby, Meta Knight or King Dedede) |
| Stage 6 | Metroid or Pikmin Series. (Olimar, Samus or Zero Suit Samus) |
| Stage 7 | Star Fox or F-Zero Series. (Fox, Falco, Wolf or Captain Falcon) |
| Stage 8 | Mario Series. (Mario, Peach, Luigi or Bowser) |
| Stage 9 | Robot, Kid Icarus, Ice Climber or Game & Watch Series. (R.O.B, Pit, Ice Climbers, or Mr. Game & Watch) |
| Stage 10 | WarioWare, Metal Gear Solid or Sonic the Hedgehog Series. (Wario, Snake or Sonic) |
| Bonus Stage 2 | Break the Targets! (Target Smash!! level one difficulty higher than current difficulty) |
| Stage 11 | The player has to fight three random characters. |
| Final Stage | The player has to fight Master Hand. Crazy Hand will also appear if it is completed on Hard or higher, within nine minutes, and with no continues. |
Bosses
| Boss | Description | |
|---|---|---|
| File:MasterHandBrawl.jpg | Master Hand | The final boss of Classic mode, the right hand, Master Hand is sometimes referred to as the "manifestation of creative spirit" in the Smash Bros. universe. Master Hand's existence is still a shadowed one, therefore little is known of it. |
| File:CrazyHandBrawl.jpg | Crazy Hand | While Master Hand is the "manifestation of creative spirit", the left hand, Crazy Hand is the "manifestation of destructive spirit". In Classic Mode, Crazy Hand appears only if the player has arrived at the final stage with the difficulty at Hard or above with no continues, and the player must have arrived at the final stage in nine minutes or less. However, if the player loses against the two hands when fighting them, Crazy Hand will not appear to assist Master Hand. |
All-Star Mode
All-Star mode returns from Melee, while basically the same it has had some slight modifications. It can now be played with two players and opponents are now sorted by Series rather than in a random order. No more than two foes appear at the time. The Pokémon Level has the most enemies as Pokémon Trainer uses each Pokémon separately. It is unlocked by unlocking all the characters. Beating rewards the player with a a trophy of the current charcter preforming their Final Smash. Also, if All-Star is beaten with Co-op mode, Final Smash Trophies of both characters are rewarded.[9] The order of the fights are also the order the games came out. Also, in Co-Op mode, the players must fight two Olimars in the last level.
All-Star Matches
| # | Series | Characters | Stages |
|---|---|---|---|

|
Game & Watch | Mr. Game & Watch | Flat Zone 2 |

|
Super Mario | Mario, Luigi, Peach, Bowser | Mushroomy Kingdom/Delfino Plaza/Mario Circuit/Luigi's Mansion |

|
Donkey Kong | Donkey Kong, Diddy Kong | 75m/Rumble Falls |

|
Ice Climbers | Ice Climbers | Summit |

|
R.O.B. | R.O.B. | Mario Bros. |

|
Legend of Zelda | Link, Toon Link, Zelda/Sheik, Ganondorf | Bridge of Eldin/Pirate Ship |

|
Metroid | Samus Aran/Zero Suit Samus | Frigate Orpheon/Norfair |

|
Kid Icarus | Pit | Skyworld |

|
Metal Gear Solid | Solid Snake | Shadow Moses Island |

|
EarthBound | Ness, Lucas | New Pork City |

|
Fire Emblem | Marth, Ike | Castle Siege |

|
Yoshi's Island | Yoshi | Yoshi's Island |

|
F-Zero | Captain Falcon | Port Town Aero Dive |

|
Sonic the Hedgehog | Sonic the Hedgehog | Green Hill Zone |

|
Kirby | Kirby, Meta Knight, King Dedede | Halberd |

|
Star Fox | Fox, Falco, Wolf | Lylat Cruise |

|
WarioWare | Wario | WarioWare, Inc. |

|
Pokémon | Pikachu, Pokémon Trainer, Lucario, Jigglypuff | Pokémon Stadium 2/Spear Pillar |

|
Pikmin | Olimar | Distant Planet |
Events
Events are an updated version of Super Smash Bros. Melee's Event Matches. They are pre-defined missions to be completed by the player; most of them have the objective of defeating certain opponents. Each event is represented by a small preview screenshot on the event list, and a difficulty (Easy - Normal - Hard) can be selected. Several events are also available in the co-op mode, which allows two players at a time to play. In this mode, they cooperate, thus cannot fight each other. The events are:
Single Player Mode
| # | Preview | Event | Player's Character | In-game Description (Objective) | Stage |
|---|---|---|---|---|---|
| 1 | 
|
Two Trouble Kings | Mario | Now there are TWO greedy kings? Having a buddy doesn't change their natures. (Mario must defeat Bowser and King Dedede.) | Delfino Plaza |
| 2 | 
|
Landmaster Ignition | Fox | Slippy! Send me a Landmaster! Show them Star Fox's Final Smash! (Fox must KO Zelda/Sheik and Meta Knight with the Landmaster as many times as possible within a time limit.) | Corneria |
| 3 | 
|
Pink Ball Repulsion | Meta Knight | Kirby must not board the Halberd! Repel him so the plans can succeed! (Meta Knight has to defeat Kirby before he reaches the Battleship Halberd (1:24).) | Halberd |
| 4 | 
|
Cleaning House in Skyworld | Pit | Destroy all the breakable terrain to remodel Skyworld! (Pit has to destroy all platforms in Skyworld, with Wario trying to fight him.) | Skyworld |
| 5 | 
|
Become the Champion! | Pokémon Trainer | The final Pokémon-tournament challenge. Do your Pokémon match up?! (Player must defeat all 3 of the rival Trainer's Pokémon.) | Pokémon Stadium 2 |
| 6 | 
|
Super Bowser Bros. | Bowser | Want to see what it's like to be Mario? Survive as you race to the flag! (Race 3 Marios to the end of Mushroomy Kingdom 1-1, without being KO'd.) | Mushroomy Kingdom 1-1 |
| 7 | 
|
Diddy Kong Panic | Donkey Kong | So many angry little Diddy Kongs. Did they lose a race or something? (KO the 15 Diddy Kongs.) | Mario Circuit |
| 8 | 
|
Go! Triple Finish! | Pikachu | SQUIRTLE, IVYSAUR and CHARIZARD appear all at once in a Pokémon battle royale! (KO Squirtle, Ivysaur, and Charizard.) | Pokémon Stadium 2 |
| 9 | 
|
The Monster Beneath the Earth | Ike | A fearsome beast awaits in the dungeon. Pray you settle things before you see it. (KO two Diddy Kongs; if the player reaches the dungeon below, they will end up having to fight a Giant Donkey Kong.) | Castle Siege |
| 10 | 
|
All-Star Battle Regulars | Choose | The Smash Bros. perfect-attendance crew! Fight the eight regulars in order! (KO the 8 series regulars: Mario, DK, Link, Samus, Yoshi, Kirby, Fox, Pikachu.) | Final Destination |
| 11 | 
|
Yoshi's Rainbow | Ice Climbers | Yoshis everywhere! Beat 'em in order: red, pink, yellow, green, pale blue, blue. (KO the Yoshis in that particular order.) | Rainbow Cruise |
| 12 | 
|
Sleeping in the Eggs | Yoshi | These two can't seem to settle down. Maybe they will if you put them in eggs. (Simultaneously capture Kirby and Pikachu in Yoshi's eggs.) | Yoshi's Island |
| 13 | 
|
Dragoon Strike | Kirby | Reunite the three parts of the Dragoon! Aim well to launch your enemies! (KO three Warios with the Dragoon.) | Halberd |
| 14 | 
|
Sproutage of the Flower Pikmin | Pikmin & Olimar | In time, Pikmin blossom. Guard the six Pikmin until they all bloom into flowers! (Self-explanatory) | Distant Planet |
| 15 | 
|
Hammer of the King | King Dedede | We are the three Dededes! It's King Dedede times three! (With the help of two ally Dededes, KO a Giant Metal Dedede.) | Smashville |
| 16 | 
|
Power Suit ON! | Zero Suit Samus | Quickly! Regain the Power Suit you lost. You'll need a Smash Ball to do it. (Get the Smash Ball and use the Final Smash.) | Frigate Orpheon |
| 17 | 
|
Super Waterfall Climb | Zelda | I want to climb a waterfall at high speed. Why? Because it's there. (Make it to the top of the stage.) | Rumble Falls |
| 18 | 
|
Dark Link Duel | Link | A predestined battle with Dark Link. Nowhere to run, but no one in the way. (KO Dark Link in a match with hitpoints instead of damage percentages.) | Bridge of Eldin |
| 19 | 
|
Wario Bros. | Wario | I came to find the Mario Bros.' roots. What's this giant stage? (KO Mario and Luigi.) | Mario Bros. |
| 20 | 
|
All-Star Battle x 1 | Choose | Challengers approaching! Fight eight Brawl newcomers in all! (KO Wario, Meta Knight, Pit, Zero Suit Samus, Olimar, Lucas, Diddy Kong, and Pokémon Trainer.) | Battlefield |
| 21 | 
|
Visit to Onett | Lucas | In the legendary boy's town, even one as timid as I could become a warrior. (KO Ness.) | Onett |
| 22 | 
|
Monkeys Unite | Diddy Kong | Donkey Kong is under attack! Defeat his opponent! (KO Sheik and Lucario, with Giant Donkey Kong as an ally.) | Rumble Falls |
| 23 | 
|
Molten Norfair | Samus | Get inside the safety capsule before your foes to survive the lava of Norfair. (Enter the capsule when the huge wave of lava approaches.) | Norfair |
| 24 | 
|
Come On! Blue Falcon! | Captain Falcon | Dawdle too much and the race will end! Ride the Blue Falcon to victory! (KO the two R.O.B.s with the Final Smash within one lap.) | Port Town Aero Dive |
| 25 | 
|
The Aura is with Me | Lucario | When pushed to the limit, his power grows! Fight as LUCARIO at lethal damage! (KO Ness and Sheik; Lucario starts with 182% damage.) | Spear Pillar |
| 26 | 
|
The Slow and Easy Life | Ness | You want to enjoy K.K. Slider's show. But those guys keep gettin' in the way... (KO three Tiny Olimars.) | Smashville |
| 27 | 
|
Three-Beast Carnage | R.O.B. | Three beasts are in the tyrant's town! Facing them is a lone figure...R.O.B. (KO Giant Bowser, Giant Donkey Kong, and Giant Charizard.) | New Pork City |
| 28 | 
|
Flower Blooms in the Echoes | Peach | Wrapped in sound waves, flowers of joy bloom. Make all the leaves on the right tree red! (Hit all the leaves on the tree on the right, until they are all red at the same time.) | Hanenbow |
| 29 | 
|
All-Star Semifinal Regulars | Choose | Four hidden characters from the first game! They've appeared in every Smash game to date! (KO Luigi, Captain Falcon, Ness, and Jigglypuff.) | Yoshi's Island |
| 30 | 
|
Sonic Boom | Sonic | Hey, guys! Is this some kind of joke? Isn't one Sonic enough? (KO 15 enemy Sonics.) | Green Hill Zone |
| 31 | 
|
The Ultimate Bodyguard | Marth | Ganondorfs attack Zelda as she focuses! Protect her at all costs! (Protect Zelda from 2 Ganondorfs until she transforms, then finish the battle.) | Castle Siege |
| 32 | 
|
Bird in Darkest Night | Falco | What's happening? It's getting darker! Today's just isn't my lucky day. (KO Mr. Game & Watch in a darker version of Brinstar.) | Brinstar |
| 33 | 
|
Advent of the Evil King | Ganondorf | The king of evil wants the Triforce, but the fated pair have help from above. (KO Link, Zelda, and Pit.) | Temple |
| 34 | 
|
All-Star Battle Melee | Choose | It's the eight challengers from Melee! What's different between then and now? (KO Bowser, Peach, Zelda, Ice Climbers, Marth, Mr. Game & Watch, Falco, and Ganondorf.) | Pokémon Stadium |
| 35 | 
|
The Visitor to Flat Zone | Mr. Game & Watch | Can anyone move well in this flat world? Maybe an ally?! Maybe not... (KO Peach, Jigglypuff, and Toon Link.) | Flat Zone 2 |
| 36 | 
|
High-Tech Special Forces | Solid Snake | Colonel: Snake. Intel shows FOXHOUND has hired three bounty hunters to kill you. (KO Samus, Captain Falcon, and Wolf.) | Shadow Moses Island |
| 37 | 
|
The Pirate Airship | Toon Link | Your chance comes when the whirlwind lifts the pirate ship. Finish it in the sky! (KO the two Yoshis when the ship is in the sky.) | Pirate Ship |
| 38 | 
|
The Wolf Hunts the Fox | Wolf | Wolf will be the one to finish you! It's Star Fox's final battle. (KO Fox and Falco.) | Lylat Cruise |
| 39 | 
|
All-Star Battle x 2 | Choose | It's even more new Brawl challengers! There's a total of eight. Defeat them all. (KO King Dedede, Ike, Lucario, R.O.B, Toon Link, Snake, Sonic, and Wolf.) | Skyworld |
| 40 | 
|
The Final Battle | Choose | Bowser, King Dedede, and Ganondorf... A battle with the bossiest of bosses! (KO Bowser, King Dedede, and Ganondorf.) | Final Destination |
| 41 | 
|
The FINAL, Final Battle | Choose | It's the REAL final battle! (KO Snake, Sonic, and Giant Mario.) | Final Destination |
Co-Op Mode
This mode requires two human players, and has different events from the single-player mode (excluding one which was also an event in Single-Player Mode).
| # | Preview | Event | Player's Characters | In-game Description (Objective) | Stage |
|---|---|---|---|---|---|
| 1 |
|
Two Trouble Kings | Mario and Kirby | Now there are TWO greedy kings? Having a buddy doesn't change their natures. (KO Bowser and King Dedede.) | Delfino Plaza |
| 2 | 
|
Master the Pokémon Tag Battle | Pokémon Trainer and Pikachu | The Pokémon tournament's final challenge. Your rivals have the same Pokémon! (KO rival Pokémon Trainer, and Pikachu.) | Pokémon Stadium 2 |
| 3 | 
|
Fastest, Shortest, Sudden Death | Yoshi and King Dedede | Only ten seconds left?! Beat as many foes as you can in Super Sudden Death and live! (Survive 10 seconds at 300% damage.) | WarioWare, Inc. |
| 4 | 
|
The DK Tag Calamity | Donkey Kong and Diddy Kong | DK and Diddy got tiny! Use lightning to help deal the final blow! (Defeat all enemies while many Lightning Bolt items appear.) | Mario Circuit |
| 5 | 
|
The Yoshi Team of 50 | Meta Knight and Pit | It's a mountain of Yoshis! Take care of them all before completing one lap. (KO all 50 Yoshis in under one lap.) | Rainbow Cruise |
| 6 | 
|
Unwanted Suitors | Zelda and Zero Suit Samus | What do these guys want, anyway? Chase 'em off, will ya? (KO the invisible enemies.) | Port Town Aero Dive |
| 7 | 
|
Battle of the Dark Sides | Link and Samus | A predestined battle with their dark sides. Nowhere to run, but no one in the way. (KO Dark Link and Dark Samus; all players have 200 HP.) | Bridge of Eldin |
| 8 | 
|
All MINE! | Wario and Bowser | Money! Money makes the world go 'round! Gather 2,000 coins and eat something good. (Gather 2,000 coins.) | Skyworld |
| 9 | 
|
Those Who Wait in Onett | Lucas and Ness | A green combo has descended on Onett. And they don't seem to be leaving. (KO Luigi and Yoshi.) | Onett |
| 10 | 
|
The R.O.B.'s of Tomorrow | Lucario and Ice Climbers | It's normally a pretty small robot... Is this even possible? (Take turns KOing the R.O.B.s, which are of varying sizes.) | Summit |
| 11 | 
|
The Great Remodeling Battle | Luigi and Peach | Finally time for that remodel! Nab 300 coins without damaging the house. (Get 300 coins without damaging the mansion.) | Luigi's Mansion |
| 12 | File:Event12.PNG | Come Back, Falcon Flyer! | Captain Falcon and Pikmin & Olimar | Land the final blow before the Falcon Flyer leaves... in about thirty seconds! (KO two Samus' in 30 seconds.) | Big Blue |
| 13 | 
|
Blades of the Quick and Mighty | Marth and Ike | Two blades of vastly different styles. Combine them to grasp their true worth. (KO Link, Meta Knight, and Ganondorf.) | Temple |
| 14 | 
|
The Dark Guardians | Ganondorf and Wolf | Two beasts appeared in the tyrant's town! How clever. See if you can't crush them. (KO Giant Charizard and Donkey Kong.) | New Pork City |
| 15 | 
|
Four Swords Brawl | Both play as Toon Link | Four chase coins instead of Rupees! The first team to 500 coins wins! (Collect 500 coins before the foes do.) | Pirate Ship |
| 16 | 
|
JIGGLYPUFF's Great Comeback | Jigglypuff and Mr. Game & Watch | JIGGLYPUFF may be feeble at first, but if you can just hand on, then surely... (KO Lucas and Ness. Jigglypuff starts small - the equivalent of being lightning-struck, then grows to normal size when the stage changes once, then becomes big when it changes again.) | Castle Siege |
| 17 | 
|
Sonic and Mario | Sonic and Mario | No problem! It's nothing at all! Only a race can decide the true victors! (KO enemies Sonic and Mario.) | Green Hill Zone |
| 18 | 
|
The New Weapon of Shadow Moses | Solid Snake and R.O.B. | The robotic weapons have been rolled out. Only one of them is an ally... (KO two R.O.B.s.) | Shadow Moses Island |
| 19 | 
|
Shadow of Andross | Fox and Falco | It's a fierce attack by Andross and Wolf. Take them, Team Star Fox! (Avoid the attacks of Andross, while attempting to KO Wolf.) | Lylat Cruise |
| 20 | 
|
The Final Battle for Two | Choose any Character | A fierce battle with nasty rivals! You can't lose now! (KO Wario, King Dedede, Wolf, Meta Knight, Ganondorf and Bowser.) | Final Destination |
| 21 | 
|
The True All-Star Battle | Choose any Character | Fight everyone without any breaks! It's endless, but a suitable final battle. (KO every single character.) | Battlefield |
Stadium
The Stadium offers several mini-games, as previously in Super Smash Bros. Melee and one new mode.
Home-Run Contest
The Home-Run Contest returns with quite a few differences. A shield surrounds the platform, preventing players from accidentally pushing Sandbag off the platform. However, the shield shatters if it is knocked around by the Sandbag too much. The shield disappears when the ten seconds are up. Two players can work together in cooperative play, with the two having to work together in order to set a good record. Two players can also challenge each other in two player alternating play, which features two characters taking turns to see who can knock Sandbag the farthest. Both of these modes can be played in Wi-Fi Connection mode, under the With Friends mode.
Target Smash!!
Also available in the Stadium mode is Target Smash!!, a slightly altered mode of the Target Test from the previous games. There are five different levels that all characters can play on, and the replays can be sent to other players via the Wi-Fi Connection. It is also possible to play Target Smash!! with two players simultaneously.
Multi-Man Brawl
Another returning feature is the Multi-Man Brawl, known as Multi-Man Melee in the previous game. In this mode, players fight the enormous Fighting Alloy Team. Objectives include defeating a certain number of Alloys, fighting them off for a set period of time, or fighting endlessly for a high score. 10 Man, 100 Man, 3 Minute, 15 minute, Endless and Cruel Settings all return. Various rewards from the challenges section are obtained in this mode.
New additions to the mode include its inclusion in two-player mode, whereas in Melee the mode was strictly single player. The Fighting Wire Frames have been replaced by the Alloys. While there were only two types of Wire Frames, there are four types of Alloys. All alloys resemble and act like a certain character. Red Alloys act like Captain Falcon, Blue Alloys act like Zelda, Yellow Alloys act like Mario, and Green Alloys act like Kirby.
There are a variety of modes in Multi-Man Melee/Brawl:
- 10-Man Brawl - KO 10 enemies.
- 100-Man Brawl - KO 100 enemies.
- 3-Minute Brawl - Fight for 3 minutes.
- 15-Minute Brawl - Fight for 15 minutes.
- Endless Brawl - Fight until the player gets KO'd.
- Cruel Brawl - Fight until the player gets KO'd.
Additionally in Cruel Melee/Brawl the Fighting Alloy/Wire Frames are stronger, and are capable of making one hit KOs. Also, there are no items that appear, making it very tough. Managing to defeat 10 Fighting Wire Frames in Melee earns the player a bonus message congratulating them for defeating 10 (or more) Fighting Wire Frames in Cruel Melee.
Boss Battle Mode
This mode is similar to All-star mode, except the player must fight all of the bosses that appear in the game. The player is provided only with three Heart Containers that heal all damage, and they only have one life. Unlike All-star, however, enemies are in random order (except for the final boss, Tabuu), and there is no option to continue after being defeated; players are instead taken directly back to the Character Select Screen. If the mode is cleared, the time taken is recorded for the high score. If not, the number of bosses defeated will be. Players can set the difficultly level to the same ones as other modes: Easy, Normal, Hard, Very Hard, or Intense. The difficulty levels will affect how fast the bosses will move, along with how much damage their attacks will inflict.
It is unlocked by clearing Subspace Emissary for the first time, and by defeating Classic Mode at least once. Crazy Hand does not have to be fought to unlock the game mode. Also, like All-Star mode, Boss Battle Mode can be played with two players simultaneously. If done so, there will be five Heart Containers total at the healing area.
Training
The Training mode returns from Super Smash Bros. Melee. It allows the player to learn to play the game properly, or to experiment with certain functions and items. The player fights one to three characters, which can be controlled by the CPU, the player, or not move at all. The player can create any item to test it, as well as the Smash Ball to practice Final Smashes. The hit damage of the CPU can be predefined, and the game can be put in slow or quick motion.
Group
Brawl

Very similar to previous games, in which 2-4 players or computers may battle. The players can select their characters, who also have alternate costumes, and choose the stage to play on. As the battle begins, while the announcer is counting down, each character appears with their specific entrance. For example, Samus comes out of a teleporter and Mario out of a Warp Pipe. These entrances were present in the original Super Smash Bros., but not in Super Smash Bros. Melee, for unknown reasons.
As in the last two games, Super Smash Bros. Brawl has Handicaps to help beginners in battles. However, this time, handicaps do not affect the player's attack strength and knockback resistance, but instead, changes a player's starting damage percentage. The handicap can be from 0% to 300%. For example, one player can start at 0% damage, but the other starts at 50%, even after that player has been knocked out. This allows players to test their skills, or just to give them a challenge, as well as helping beginners learn the basics.
For characters with multiple forms, the character selection screen allows the player to choose which character they will start with, by clicking the alternate form (i.e. Sheik). This means characters like Zelda can be used to select Sheik. Depending on the choice, that will be the character the player starts as in the beginning of the match.
Rules
This feature allows the player to control a wide variety of settings for Group mode. These settings don't affect any other mode.
Rules
Choose the type of match.
- Time: In these matches, fighters will score a point for each KO and lose a point for each fall or self-destruct. The fighter with the most points when time runs out wins the match. If there is a tie, the game will go into sudden death mode. In this situation, there is no time limit but each fighter has only a single life and starts with 300% damage. The last one standing wins.
- Stock: Each fighter has a set number of lives. They lose one each time they fall off the stage. When a fighter loses their last life, they obviously do not reappear. The last fighter standing wins.
- Coin: Fighters collect coins to increase their score, which is displayed above their damage gauge. Bronze coins are worth 1 point, silver coins are worth 3 points, and gold coins are worth 6. There are also bills. Coins are created when a fighter receives damage. The value of the coins corresponds to the strength of the attack. However, these coins are not subtracted from the victim's score. Fighters have unlimited lives, but their score is cut in half when they fall off the stage. Whoever has the highest score when time runs out wins the match.
Time
If the player chooses Time or Coin in the above rules, they can set how long the match will be.
- The player can choose from 1 to 99 minutes at one minute intervals.
- The player can also choose infinity, meaning the match will last forever and no one can win. The player will have to eventually quit the match. However, this setting is useful for certain challenges such as 2,000 KOs or 5,000 coins.
Stock
If the player chooses Stock above, they can set how many lives each fighter will have: from 1 to 99.
Handicap
Fighters can start matches with automatic damage. When they fall off the stage, they will also start with this set amount of damage.
- Off: By default, everyone starts with 0 damage.
- On: On the Fighter select screen, the player can set how much damage each fighter individually will start with; from 0 to 300 at intervals of ten.
- Auto: 10 damage is added for each consecutive win but the handicap is reduced to 0 when a player loses. Here is an example: For the first match everyone will start with 0. But for the second match, the winner of the first will start with 10 damage. If they win again, they will start the third match with 20 damage, and so on. But if they lose, they will start the third match with 0 damage and the winner of the second will start with 10.
Damage Ratio
This number multiplies the knockback of any attack. It can be set from 0.5 to 2.0 at intervals of 0.1 By default, of course, it is set at 1.0.
Stage Choice
Sets how players will choose stages.
- Choose: Any player can pick any stage in between matches.
- Random: Stages are picked randomly without the player even going to the stage selection menu.
- Turns: First Player 1 picks the stage, then Player 2, and so on.
- Ordered: The first match is on a random stage, but the second is on the stage after the first on the stage menu. Once again, the player bypasses this menu.
- Loser's Pick: The loser of the last match picks the stage.
Item Switch
This brings the player to a menu where they can set the rate of items appearing: None, Low, Medium, or High. They can also toggle whether or not each item individually will appear (excluding stickers and CDs).
More Rules
This option is unlocked by scoring a total of 200 KOs in Group mode. It brings the player to another menu like the first where they can set more rules. These are listed below.
Stock Time Limit
Sets time limit for a stock match.
- Infinity: By default there is no timer in stock matches. The only way to win is by taking away all of the oppenents lives.
- The player can also put a limit on stock matches from 1 to 99 minutes at one minute intervals. When time runs out, the fighter with the most lives wins. If there is a tie, they will go into sudden death mode.
Team Attack
- Off: By default, members of the same team in a Team Battle cannot cause each other to take damage or flinch from direct attacks or projectiles. However, if one member places a Motion-Sensor Bomb, anyone can detonate it (including the fighter who placed it).
- On: Members of the same team can deal damage and knockback to each other as if they were opponents.
Pause
- On: By default, any player can pause and enter picture mode during gameplay.
- Off: The battle is continuous; no pausing at all. Best for tourneys.
Score Display
For Time brawls. Scores are always displayed in Coin battles.
- Off: By default, players cannot see their scores. However, a "+1" or "-1" is displayed on the characters' icons whenever a KO is scored or someone falls off the stage, respectively.
- On: Players can see their total score on their icons above their damage gauge. The scoring animations described above still appear.
Damage Gauge
- On: By default, each player can see their damage total next to their fighter's icon.
- Off: For a tenser battle, players do not know how much damage anyone has.
Random Stage Switch
This option brings the player to another menu and is unlocked when all the stages are unlocked. Players can toggle whether or not individual stages appear when the Stage Choice is set to Random or when they choose Random from the Stage menu. Custom Stages cannot be toggled individually; either any of them can appear randomly or none.
Special Brawl
A new feature is the Special Brawl. Using this, players are able to customize the battle themselves. This means they can attach items, set stats, and add appearance differences to all the players, right from the start of the battle, without having to collect the items themselves. The Special Brawl, thus, allows players to try a variety of settings such as Invisible Bunny Brawl, instead of the settings given on a certain type of battle, as seen in previous with the Special Melee modes in Super Smash Bros. Melee.
Records involving Special Brawl are not saved. Also, in Stamina Mode, unlike in Super Smash Bros. Melee, players can choose how much HP they'll start with; from 1 HP, all the way up to 300 HP.
Rotation
The Rotation mode is an enhanced version of the Winner Out/Loser Out Tournament modes of Super Smash Bros. Melee. It allows more than four players to play at the same system, by passing the controllers on after each battle. Up to sixteen players can be put into the queue, with each given the possibility to use their name and their personal controller configuration. However, this is not required. There is still the option between Winner Out and Loser Out, where the winner or the loser of the match pass the controller on to the next player after the match, respectively. Additionally, players have the option to pause, i. e. moving themselves at the end of the queue. The mode is available when two or more controllers are connected to the Wii. Players can change their character in the middle of the Rotation Mode, like in Super Smash Bros. Melee.
Tourney
The Tourney Mode from Super Smash Bros. Melee (then "Tournament Mode") is in Brawl, acting the exact same way as it did in Super Smash Bros. Melee. Players are able to brawl in a tourney, that can have up to thirty-two players, and must fight their way to the championship, eventually earning a cup if they win. It is possible to play with friends, or battle CPU characters. Apart from decreasing the total number of players from sixty-four to thirty-two and letting players put in more characters on stage than controllers (such as four characters when there are only 2 controllers connected), nothing has changed compared to Melee.
Nintendo Wi-Fi Connection

Nintendo Wi-Fi Connection is a new feature in Super Smash Bros. Brawl. However, similar to what happened with Mario Strikers Charged, the game tends to slow down and fail when the players are playing far away. The further away the players are from each other, the more the problem worsens. So, playing a game from Japan to America will slow the game down, and cause some problems in the battle. Regardless, the game is still capable of connecting overseas. The two modes are With Friends and With Anyone.
When playing with friends, players use friend codes in order to brawl with each other. They choose an emblem to represent themselves. Emblems can be the games' series emblems, the characters' icons, or Miis. In this mode, players are able to send messages to each other in-game, using the Taunt command. Players can send four different kinds of messages, one for each direction: up, down, left, and right. Results are recorded only in this mode. The Home-run Contest and Multi-Man Brawl are also playable in this mode.

When brawling in the With Anyone setting, players are unable to send messages to each other in-game, and neither can they see the name or details of their opponent. Also, the results of the battle are not recorded in the With Anyone mode. There are several modes in the With Anyone setting. In the Basic Brawl, players play against each other without teams. However, the rules are set to 2-Minute Brawl and cannot be changed. However, players can individually change their item settings. The game will randomly use the item setting of one of the combatants. If there are less than four players, there will be CPU enemies present to make there be four characters. When a player disconnects from the Wi-Fi connection while battling, a CPU takes over their character.
Unlockable characters are also available in this setting for a player who has unlocked them. Because of this, Nintendo recommends players not to use the Basic Brawl setting if one is not wanting to get the unlockable characters spoiled. A different mode in the With Anyone setting is the Team Brawl. While the game is loading, or while the players are waiting for other opponents, they can practice the game by attacking the Sandbag from Super Smash Bros. Melee. Players can choose to be spectators of the battle, and even bet coins on who will win.
Vault
Here, various content can be found, such as things the player unlocked and content that is just fun to look at.
Trophies & Stickers
Trophies
Trophies return in Super Smash Bros. Brawl. They act the same way, some being collected the same way, but there are now new trophies, and they are more easily stored, as an image of the trophy will be seen when selecting a trophy. They can also be displayed the same way they were in Melee. When a trophy is selected, a description of the character or object portrayed will be displayed. There are a total of 544 different trophies to collect.
Trophy Hoard
Another new feature is that many trophies can be placed together on the same spot, making dioramas. There are also more backgrounds that can add to this new feature.
Stickers
Throughout the game, players can find Stickers, which show up at random points during Brawls. Unlike trophies, however, the items will be much easier to find and are simply pieces of 2D game artwork rather than 3D models. Stickers are stored in an album. They can be used to power up characters in the Subspace Emissary. Stickers however have one use and once used, the player cannot acquire them back unless they happen to collect the same kind of sticker again.
Sticker Center
Similar to the Trophy Hoard, stickers can be used to decorate a screen. Different backgrounds can be selected, and pictures can be taken.
Coin Launcher

The Coin Launcher is a mini-game available in the Vault, replacing the Lottery mode from Super Smash Bros. Melee. In this game, the player uses the coins which they have won in the Classic Mode, the Subspace Emissary, the Group mode or by betting on the winner in the Wi-Fi connection's Spectator Mode, to get trophies and stickers. The player controls the Coin Launcher, a cannon that shoots the coins the player has collected. Several moving objects appear at regular intervals, of which there are a few different types. Each different type moves in a different formation and direction across the screen. If the player shoots all the enemies in a particular group formation, the player will often gain a sticker as a reward. However, the main aim of this game is to hit the Trophies to win them. These appear quite regularly, and move across the screen in a random path, although these are predetermined. A trophy must be hit with two to four coins to be collected. There are some hazards in this game; mainly the missiles which appear and aim for the Coin Launcher. Each one takes two hits to destroy, but some move much faster than others, and occasionally a large group will appear all at once. If a missile hits the Coin Launcher, the player loses ten coins, and a special green gauge decreases. This gauge, located on the bottom left corner of the screen, if filled up completely, allows the player to rapid-fire coins for a short time when it is filled. It is filled slightly whenever a missile is destroyed, or a certain number of moving objects.
Stage Builder

Players create custom stages using this mode. When making the stage, players first pick the size of the stage, and then creating a background pattern, as well as the music from the game that will play on the stage. Once done, the player can start adding pieces to the stage, whether it be simple platforms to ladders to spikes. However, each of the four control types have different ways to move the pieces, however, they are all able to flip, resize, zoom, swap palettes and erase pieces of the stage.
After building a fraction of the stage, it can be tested out before being saved. This can be done several times, if it is necessary. After the stage is finished, the name and comment can be chosen, as well as an option to change the music of the stage. It can be sent to other players via Wi-Fi Connection, but cannot ever be played on using the Wi-Fi connection. At one point, it could have been sent directly to Nintendo using the "Submit" option on the Stage Builder screen. Every day, Nintendo would send a selected stage to every player with Wi-Fi and Super Smash Bros. Brawl, so they could try out the stages that other people have made. The stage got removed after a day had passed, and a new one was brought in the next day. This allowed players to make and try out new stages for themselves every day. However, this ability to send vault data to Nintendo was discontinued.
Challenges
- Main article: Challenges (Super Smash Bros. Brawl)

All three kinds of collectibles in Super Smash Bros. Brawl - trophies, stickers and CDs - can be alternatively won in the Challenges mode. Stages, Masterpieces, and Stage Builder parts can also be unlocked. The Challenge mode has many closed windows which contain the prizes. When the player unlocks an item by winning a challenge, for example playing the Target Smash level 1 with 10 different characters for the Stafy trophy, the collectibles left and right to Stafy's trophy, which are currently not won and invisible, appear in a red silhouette, and their method of unlocking is displayed. The player can also win Golden Hammers, which they can use to automatically get any window of his or her choice open, getting the item inside. However, not all windows can be destroyed with a hammer; objectives related to the Boss Battles mode cannot be opened. There's a total of 128 objectives in the Challenges Mode.
Album
Throughout the game, the player is able to take screenshots while pausing the game. In contrast to Super Smash Bros. Melee, there is no special camera mode needed. The screenshots can be either saved on the Wii's internal memory or an SD card.
Replays
A new feature in Super Smash Bros. Brawl is Replays. This can be used on a single Brawl in Group Mode, Target Smash!!, Home-run Contest, and Multi-man Brawl. They can be recorded by pressing Z after the brawl or the challenge has ended. The maximum time for a replay to be recorded is three minutes. They can later be accessed and replayed from the Vault, or be sent to an SD Card. Players could also submit Target Smash!! and Home-run Contest records to Nintendo, via WiiConnect24. However, the service was discontinued after June 30th, 2009.[10]
Masterpieces
In this mode, the player can play restricted demo versions of classical Nintendo games via the Virtual Console. The player does not have to connect to the Wi-Fi connection for that. The available demos are:
- Super Mario Bros. (1:00)
- Ice Climber (0:40)
- The Legend of Zelda (NES) (2:00)
- Kid Icarus (1:00)
- Kirby's Adventure (2:00)
- Fire Emblem[11] (Japanese version only) (3:00)
- Super Metroid (3:00)
- EarthBound[11] (Japanese version only) (5:00)
- Star Fox 64 (3:00)
Some must be unlocked. These games include:
- Donkey Kong (0:30) (Play for 10 hours or more total.)
- Super Mario World (2:00) (Play on Yoshi's Island (Melee) three times.)
- Super Mario Bros. 2 (1:30) (Play as Peach and win five matches in VS Mode.)
- The Legend of Zelda: Ocarina of Time (5:00) (Play as Toon Link ten times in VS Mode.)
- F-Zero (0:45) (Get Captain Falcon to join the party in The Subspace Emissary.)
All titles have a restricted time they can be played in. However, some, like Super Metroid, come with save data.
Chronicle
Here, the player can view a list of many video game titles that have been released by Nintendo and when they were released. The titles are sorted and separated by which system they were for (e.g. Game & Watch, Game Boy Advance, Wii). More titles are added as trophies and Stickers from those games are collected.
Options
Players can toggle with various settings and features.
Screen
Players can adjust the display of the screen by choosing either the standard 4:3, or the widescreen 16:9 option.
Deflicker
This tool merely changes the appearance of the in-game graphics. The options are...
- ON: Make graphics a little smoother, but a bit blurrier.
- OFF: Make graphics a little sharper, but a bit more jagged.
Rumble
Players can set their controllers so that their rumble feature is active or inactive. They can also change the rumble settings for their names, which have higher priority than the in-game settings. The Wii Classic Controller does not have a rumble feature, so the rumble feature is always inactive with that controller.
Controls
Players can set up their personal control schemes for their names; in other words, they can toggle which button does what. They can also test out their control changes at any time.
Sound
Players can adjust the Music/Sound effect balance with this option. They can also have quick access to the Sound Test from here.
My Music

Rather than restricting each stage to one music track, stages have a selection of music tracks usually from the game series the stage is from, and players can choose which music track they want to play on the stage using the My Music mode. For example, on the Delfino Plaza stage (image shown on the right), players can choose between the Delfino Plaza theme from Super Mario Sunshine, the title/ending theme of Super Mario World, the main theme to New Super Mario Bros., and many more. Players can set how commonly the track may appear on the stage. To add more music to the collection, the player must collect CDs, which randomly appear across the entire game, in many of the numerous modes of play. They can also be earned by completing challenges and certain game modes. After all music tracks have been collected, the CD will appear no more.
Erase Data
This option enables players to erase any data that's been saved. The choices include...
- P1 High Score: This deletes all high score data from Solo Mode. This has the side effect of making almost all Solo game modes be incomplete.
- Brawl Records: This deletes all Group mode data, along with all the names that have been created.
- Adventure: This deletes all the save files that have been made in the Subspace Emissary.
- Vault Data: This deletes contents that are stored in the Vault.
- Erase All: This option deletes everything.
Erased data can not be recovered, so players need to be extremely careful when handling this option.
Data
A variety of content is stored here.
Records
Various records of gameplay are recorded here.
Group Records
This section of Gameplay records has 4 different pages. The first page is a chart showing the total number of KO's each fighter has performed on each fighter. The second page shows the top 5 fighters for each of sevaral stats, such as KO's, falls, self-destructs, victories, losses, peak damage, walking distance, swim time, drownings, etc. The third page lists all the same stats for each individual character. The fourth and final page similarly lists all the same stats for each name; as well as the fighter used most, second-most, and least.
Brawl Records
This is a list of various records of gameplay; including total time playing this game, matches played, total damage, trophy count, fighter most used, etc.
Notices
This is where Notices are recorded. Notices are special messages that congratulate the player and appear when certain accomplishments are done, such as unlocking important things and clearing game modes for the first time. They are saved in the order that they appeared, and the game records exactly when Notices were received, to the very second.
Movies
When cutscenes are viewed in Adventure Mode: The Subspace Emissary, they can viewed again here. There are also five pre-installed videos: a How to Play video, the E3 trailer, another introductory video, and videos that each focus on a new third-party characrer.
Sound Test
Songs and sound effects in the game can be listened to here. Some songs need to be unlocked by completing challenges or picking up CD's. The game that each song originated from is displayed when the song is selected.
Staff

- Main article: List of Super Smash Bros. Brawl staff
Director
- Masahiro Sakurai
Planning & Level Design
- Kazuhiro Irie
- Kenichi Niwano
- Masaya Kuninaga
- Yoshiyasu Okawara
- Takeshi Suzuki
- Shintaro Kataoka
- Miki Yakabe
- Masayuki Tada
- Takeshi Suganuma
- Kunihiko Nakata
- Norihiko Yonesaka
- Kou Arai
- Daisuke Shimizu
Beta Elements
- Main article: List of Super Smash Bros. Brawl beta elements
Early in development, a damage system would have been implemented that would cause characters to shown signs of visible damage and strain during prolonged battles. Among those found included Meta Knight's mask that would develop large cracks, or Captain Falcon's helmet whose visor would crack to reveal a part of his face.
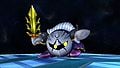
Meta Knight's damaged mask after prolonged damage.
Captain Falcon's broken visor after prolonged damage.


Glitches
- Main article: List of glitches in Super Smash Bros. Brawl
Play as Giant Jigglypuff
First, the player must select the Bridge of Eldin stage. The player should also have a Final Smash prepared. King Bulbin will eventually come and destroy part of the bridge with a bomb. Soon after, a portal will restore that part of the bridge. When the matter begins to rebuild the bridge, the player has to use the final smash in midair in the gap. Jigglypuff will begin to inflate while the bridge is getting mended. When the bridge is completely fixed, Jigglypuff should bounce up onto the bridge and remain giant. Its attacks are completely the same, only that they have a much longer reach. Its movement seems to have slowed somewhat as well. It also becomes a very easy target and is simple to KO, as the slightest touch of the KO range will take it out. With this glitch activated, having Yoshi perform his Egg Lay attack will make Jigglypuff grow even bigger.
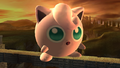
Giant Jigglypuff in action.
- Gigaluff.jpg
Jigglypuff at about its biggest.

Music
- Main article: List of Songs in Super Smash Bros. Brawl
Mario Series
- A01 - Ground Theme - Super Mario Bros. (CS: Koji Kondo, AS: Koji Kondo)
- A02 - Underground Theme - Super Mario Bros. (CS: Koji Kondo, AS: Kentaro Ishizaka)
- A03 - Underwater Theme - Super Mario Bros. (AS: Shogo Sakai)
- A04 - Underground Theme - Super Mario Land (A: Koji Hayama)
- A05 - Airship Theme - Super Mario Bros. 3 (A: Motoi Sakuraba)
- A06 - Castle / Boss Fortress - Super Mario World / Super Mario Bros. 3 (AS: Yusuke Takahama)
- A07 - Title / Ending - Super Mario World (AS: Shota Kageyama)
- A08 - Main Theme - New Super Mario Bros. (AS: Shogo Sakai)
- A09 - Luigi's Mansion Theme - Luigi's Mansion (AS: Shogo Sakai)
- A10 - Gritzy Desert - Mario & Luigi: Partners in Time (AS: Yoko Shimomura)
- A13 - Delfino Plaza [Original] - Super Mario Sunshine
- A14 - Ricco Harbor [Original] - Super Mario Sunshine
- A15 - Main Theme [Original] - Super Mario 64
- A16 - Ground Theme 2 - Super Mario Bros. (A: Masaaki Iwasaki)
- A17 - Mario Bros. - Mario Bros. (AS: Shogo Sakai)
- A20 - Mario Circuit - Super Mario Kart (AS: Yusuke Takahama)
- A21 - Luigi Circuit - Mario Kart 64 (AS: Yasufumi Fukuda)
- A22 - Waluigi Pinball - Mario Kart DS (AS: Kentaro Ishizaka)
- A23 - Rainbow Road [Original] - Mario Kart: Double Dash!!
Gallery
North American title screen
- Samurai Goro 3.jpg
Samurai Goroh
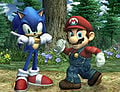
Mario and Sonic
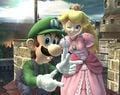
Peach and Luigi taunting
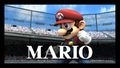
Mario
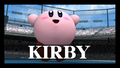
Kirby


Names in Other Languages
References
- ^ Super Smash Bros. Brawl: Havok engine confirmed - GoNintendo, published 1/28/2008.
- ^ Press Release on the Release Date on the Japanese Official Nintendo Website (Japanese), published 1/15/2008.
- ^ Smash Bros. DOJO!! - American English Edition, published 1/15/2008.
- ^ Super Smash Bros. Brawl - IGN UK
- ^ Document on the Japanese Smash Bros. DOJO!! explaining the Error (PDF format), accessed 1/4/2008.
- ^ Cite error: Invalid
<ref>tag; no text was provided for refs nameddisk - ^ "Also, for those of you who haven't seen this already, as previously confirmed, Brawl will be using the Havok engine and it seems that it will take up 128 blocks of memory to save. Don't forget to add replays, snapshots, stages, etc. to that amount since it seems this is only the base amount of memory for records, SSE, and other pre-made features!" - Brawl Central News Archive, accessed 2/4/2008.
- ^ When finishing it as Zelda or Sheik the player can only get the trophy of her current form, unlike in Melee where they received both. The same applies to Samus and Zero Suit Samus. Classic must be cleared three times with the Pokémon Trainer to obtain all the trophies, clearing it only rewards the player with the trophies of the Trainer and the Pokémon in use when it was cleared.
- ^ Finishing it as Zelda or Sheik does not give the player the other's trophy, it must be cleared twice. The same applies to Samus and Zero Suit Samus. All-Star only needs to be cleared once for Pokémon Trainer, unlike Classic.
- ^ Smash Bros. DOJO!! notice
- ^ a b "Masterpieces" on the Smash Bros. DOJO!! - Japanese Edition, accessed 2008-1-25.