Adventure Mode: The Subspace Emissary
- "The Subspace Emissary" redirects here. For the titular character, see R.O.B.
The Subspace Emissary, sometimes called Super Smash Bros. Brawl: The Subspace Emissary,[1] or Adventure Mode: The Subspace Emissary,[2] is the adventure mode campaign of Super Smash Bros. Brawl. It takes place in the World of Trophies, and the player's goal is to stop the Subspace Army from using Subspace Bombs to pull the entire world into Subspace. Rather than being based around one-on-one or group fights, players move through side scrolling platformer-like arrangements of obstacles while fighting enemies using Super Smash Bros. Brawl's control scheme. This combination results in a game resembling a beat 'em up, though it is usually described as an "action game".[3][4] Portions of stages are divided by using doors, with each portion being called a "step".[5] Some steps instead have combat against fighters using normal Super Smash Bros. Brawl gameplay, and others have boss fights where the boss uses a health bar instead of being launched like fighters are. Between stages, there is a map screen where the player selects the next stage or returns to prior stages. Playing stages rewards the player with coins, trophies, stickers and CDs, with the latter three being items collected within the stages. There are five difficulty settings: Easy, Medium, Hard, Very Hard, and Intense, with the player selecting a default difficulty for a save file when creating it but being able to select a difficulty before each starting each stage. Higher difficulties grant more coins and make rarer stickers more common. The player can create a maximum of 50 save files.[6] Overall, The Subspace Emissary is more advanced than its equivalent mode from Super Smash Bros. Melee.

When the player selects a stage, they also have to choose the fighters to use for each of their stocks and the order those stocks come in, with the options for fighters increasing and decreasing based on the storyline's progress. Stocks are the Super Smash Bros. series equivalent of lives, and this system works such that being defeated means switching to that stock's character when they respawn. It is possible for a stock to not be assoicated with a character, and in such instances the player does not switch characters when respawning. Fighters are unlocked in The Subspace Emissary separately from the rest of the game. When playing most stages for the first time, the player's options consist of certain characters featured in cutscenes preceding each step, with the final shot of the cutscene also serving as the menu for fighter selection. This further means the player may have to change the fighters they are using during a stage, should a cutscene playing between steps prompt it. For certain stages, and when replaying any stage, the player can choose any characters unlocked in the mode who are on the same team. The characters form several teams over the course of the mode, but toward the end of the story all of the different teams combine into one team. Each stage has a specified stock count. Cutscenes between steps restore all of the player's stocks. When the player loses every stock, such that they do not have a stock to respawn using, they are sent to a Game Over screen where they can choose to "Get Up" and return to the start of the most recently entered step, or return to the map screen. Choosing to get up makes the player lose half of the stickers and trophies they collected in the stage, and completing the stage will be worth slightly fewer coins. Returning to the map screen has similar drawbacks, but while the player does not lose the trophies they collected, the number of coins the stage rewards is harshly reduced.[7]
The Subspace Emissary is a means of obtaining all of the unlockable fighters in the game, as every fighter in the game is unlockable in this mode and unlocking fighters in this mode also unlocks them in the main game. The majority of the game's playable characters are unlocked as they join one of the teams through story progression, but three fighters are not unlocked this way. These fighters are only available in The Subspace Emissary by first competing the mode, finding a door leading to a battle against that fighter, and winning the battle.
On the map screen, the player can enter a menu where they can apply stickers to each character's trophy base in order to grant that character effects such as stat boosts or increasing their resistance to certain kinds of attacks. The player can use any sticker they have obtained, even those from other The Subspace Emissary save files and those collected from outside the mode. However, trophy bases are circular and stickers are not allowed to overlap, which when combined with the trend that larger stickers provide larger boosts can force the player to make tough decisions about what stickers to use. If two stickers provide the same kind of boost, the game only uses the boost from the sticker which is the most powerful. Some stickers can only be applied to the bases of certain characters. While the player can move stickers that have been placed previously, removing stickers from trophy bases permanently deletes the sticker from the player's collection. To help the player find stickers, they can search or sort their collection or have the game select and apply random stickers. Applied stickers do not affect modes outside of The Subspace Emissary.[8]
The Subspace Emissary's mechanics are very story centric. The aforementioned team formations and how cutscene based character selection are examples. The map screen changes not just for unlocking new stages but also for the detonation of Subspace Bombs. Like in the cutscenes, each explosion leaves a purple sphere on the map screen. Stages that get pulled into Subspace are inaccessible until the game is completed, at which point the purple spheres related to this mechanic are removed from the map screen. There are a three story branches based on which fighters the player selects or for certain in game actions, accompanied by differing cutscenes. One of them, a choice to rescue Peach or Zelda from Petey Piranha at the start of the game, affects the story for a long time past that decision. Two cutscenes only occur if the player collects certain items in the game.
The Subspace Emissary can be played in single-player or with two players, with a second player being able to enter the game even during a stage by pressing the ![]() button as long as there is at least one stock left. If a second player is present for character selection, that player only picks their own character, with the first player making all other decisions. The character the second player picked is essentially the second stock for the stage, The first player is the primary player: the camera always follows them and the game ends if they are KO'd and there are no stocks left for that player to respawn with. The state of the second player does not matter; if they cannot respawn the game continues. If the second player is left off screen due to scrolling, and not through being launched off the screen, they teleport to the first player's position with a move called the space jump.[9] The second player can space jump manually by using the
button as long as there is at least one stock left. If a second player is present for character selection, that player only picks their own character, with the first player making all other decisions. The character the second player picked is essentially the second stock for the stage, The first player is the primary player: the camera always follows them and the game ends if they are KO'd and there are no stocks left for that player to respawn with. The state of the second player does not matter; if they cannot respawn the game continues. If the second player is left off screen due to scrolling, and not through being launched off the screen, they teleport to the first player's position with a move called the space jump.[9] The second player can space jump manually by using the ![]() or
or ![]() buttons but is unable to do so during boss battles.
buttons but is unable to do so during boss battles.
Plot[edit]
- SmashWiki article: Plot summary of The Subspace Emissary

The story begins with the Subspace Army arriving on the Halberd and interrupting a fight between Mario and Kirby. The Ancient Minister deploys a Subspace Bomb controlled by two R.O.B.s, and while Mario tries to intercept it, he is knocked away by Petey Piranha, who has both Peach and Zelda each trapped in a cage. Kirby does manage to defeat Petey Piranha, rescuing only one of the princesses, while Wario arrives to steal the other. The Subspace Bomb eventually detonates, consuming the arena into Subspace.

Meanwhile, in the jungle, Diddy is separated from Donkey Kong by Bowser, though Diddy would soon team up with Fox, who had been struck down into the jungle with his Arwing. The characters are joined by Falco, as well as Captain Falcon and Olimar, all of whom manage to rescue Donkey Kong from the Subspace Army. Fox and Falco leave the group to continue battling the Halberd, now with assistance from the Great Fox.
Elsewhere, King Dedede turns Luigi into a trophy then uses him to distract Wario as King Dedede steals his cargo and its contained trophies. Lucas and the Pokémon Trainer later defeat Wario in retaliation for capturing Ness earlier. After the Pokémon Trainer catches Charizard, he and Lucas meet up with Marth, Meta Knight, and Ike. The fighters watch as the Halberd battles the Great Fox, prompting Meta Knight to scale the cliffs to try and reclaim the Halberd. On the way up, Meta Knight is joined by the Ice Climbers, then later Lucario after battling him on the summit. After the Ice Climbers fall as a result of the Halberd smashing the tethered Great Fox against the mountain, Meta Knight and Lucario take the opportunity to board the ship.

Mario is later revived by Pit, while Link and Yoshi team up in the forest. When Kirby leaves, Bowser makes an evil clone of the captured princess: If the clone is of Peach, it attacks and is defeated by Link, who is met with retaliation from Mario; if the clone is of Zelda, it is defeated by Mario, who is met with resistance from Link instead. Either way, the conflict between Mario and Link ends when King Dedede arrives with the other princess statue, and both Mario and Link team up against him. The characters follow King Dedede back to his castle, though they are not able to prevent Bowser from crashing in and taking the princess, leaving behind a badge that King Dedede had put on his three stolen statues. The heroes soon team up with the Ice Climbers, Lucas, Pokémon Trainer, Marth, and Ike.

Meanwhile, Zero Suit Samus infiltrates the Subspace Army's base on the Isle of the Ancients, rescues Pikachu, recovers her Power Suit, and battles Ridley. She and Pikachu head over to the Subspace Bomb depot. Diddy, Donkey Kong, Captain Falcon, and Olimar all arrive too, having ridden an enemy barge to the island. The Ancient Minister confronts the fighters at first, but loses morale after so many R.O.B.s had been sacrificed to detonate Subspace Bombs. The Ancient Minister's robes are burned away by the R.O.B.s, whom Ganondorf has taken control of, revealing the Ancient Minister to be the main R.O.B. As more Subspace Bombs are being activated, the protagonists leave on the Falcon Flyer, being unable to stop them.
Back on the Halberd, Meta Knight and Lucario team up with Snake, free the captured princesses and kick a crew of Mr. Game & Watch clones out of the cockpit. Peach and Sheik (Zelda's disguised form) make their way onto the deck as Fox and Falco attack in their Arwings. Snake, Lucario, and Falco defeat Duon, who had formed from the Mr. Game & Watch clones, freeing the real Mr. Game & Watch. Meta Knight takes the helm of the Halberd and flies it to shore right as the Falcon Flyer lands, uniting all three groups of fighters.

From the massive sphere of Subspace that had engulfed the Island of the Ancients, Bowser and Ganondorf emerge with the Subspace Gunship and use it to fire larger Subspace blasts. Though the Halberd is destroyed from the attack, this was a diversion allowing the fighters to enter Subspace using smaller aircraft. The gunship is destroyed when Kirby uses the Dragoon to drive into its cannon. During the two villains' retreat, Bowser is betrayed by Ganondorf, who transforms him into a trophy as he visits Master Hand before realizing Tabuu had been controlling Master Hand all along. Master Hand is defeated by Tabuu, who then transforms every protagonist into a trophy, Ganondorf included. The only exceptions are Ness, Luigi, and Kirby, since each of them had been revived by King Dedede's badges. Throughout Subspace, the three characters rescue every ally and former enemy alike. All of the fighters finally enter The Great Maze and defeat every boss and their shadowy counterparts. When the fighters make it over to Tabuu, Sonic arrives unexpectedly and destroys Tabuu's wings, saving the fighters from transforming back into trophies. The story concludes with the fighters defeating Tabuu and finally restoring the World of Trophies.
Major characters[edit]
| Major characters | |||
|---|---|---|---|
| Character | Series | Role | Level debut |
| Fighters: Heroes | |||
 Zelda and Peach |
  The Legend of Zelda and Super Mario |
Zelda and Peach are the two princesses who spectate the match between Mario and Kirby, they are later taken hostage by Petey Piranha. Kirby is only able to save one, and the other is trophified by Wario and taken away, later being taken by King Dedede and then Bowser. Kirby and the saved princess travel together, but the latter gets trophified by Bowser. Later, both are found together and restored by Snake. Peach later manages to befriend both Fox and Mr. Game & Watch. | Midair Stadium |
 Mario |
Super Mario |
Mario is one of the main fighters in the mode, first appearing battling Kirby. After being launched away by Petey Piranha, he is joined by Pit and later joins up with Link and Yoshi on their mission to rescue the princesses, later joining up with the other fighters. | Midair Stadium |
 Kirby |
 Kirby |
Kirby is the other of the main fighters in the mode, first appearing battling Mario. Later he saves one of the princesses from Petey Piranha and goes off to rescue the other with her. He ends separated from the first in the process, but joins up with Mario and Link's teams. He is one of the ones to be revived by King Dedede's badges due to inhaling one. | Midair Stadium |
 Pit |
 Kid Icarus |
Pit is a youthful angel who spectates Mario and Kirby's match from his home in Skyworld. Later, at the blessing of Palutena, he assists Mario in his quest to rescue the princesses and stays as his companion throughout the story. | Midair Stadium (cutscene) Skyworld (playable) |
 Donkey Kong |
 Donkey Kong |
Donkey Kong is a large gorilla who first appears when his banana hoard is stolen by Bowser's Minions. After getting them back, he is promptly trophified by Bowser. He is only rescued at the ancient ruins much later in the game. | The Jungle |
 Diddy Kong |
Donkey Kong |
Diddy Kong is Donkey Kong's little buddy who helps him get his bananas back. After Donkey Kong is turned into a trophy, Diddy Kong seeks help from Fox and later Falco to save him. | The Jungle |
 Fox |
 Star Fox |
Fox is a vulpine starfighter who gets shot down by the Halberd, then is made to join Diddy Kong after saving him from Rayquaza. He later returns to fight the Halberd and gets into a duel with Sheik, only for the battle to be called off by Peach. | The Lake |
 Lucas |
 EarthBound |
Lucas is a timid psychic boy who goes on a quest to rescue Ness from Wario, joining up with the Pokémon Trainer. | The Ruined Zoo |
 Ness |
EarthBound |
Ness is a more seasoned psychic boy who saves Lucas from the Porky Statue, but then gets trophified by Wario and taken by King Dedede. He is revived by one of King Dedede's badges near the end of the game. | The Ruined Zoo |
 Pokémon Trainer |
 Pokémon |
The Pokémon Trainer is a collector of Pokémon who joins up with Lucas while on his own quest to catch more Pokémon. He starts out with Squirtle, then later obtains Ivysaur and Charizard. | The Ruined Zoo (Pokémon Trainer and Squirtle) Path to the Ruins (Ivysaur and Charizard (both cutscenes)) The Ruins (Ivysaur (playable)) The Ruined Hall (Charizard (playable)) |
 Marth |
 Fire Emblem |
Marth is a swordsman who battles against the invading Subspace Army, joining up with Meta Knight and Ike. | The Battlefield Fortress |
 Meta Knight |
Kirby |
Meta Knight is a swordfighter of the same species as Kirby, he joins with Marth and Ike to take back his battleship, Halberd, which has been commandeered by the Subspace Army. | The Battlefield Fortress |
 Ike |
Fire Emblem |
Ike is another swordsman who joins Marth and Meta Knight to battle the Subspace Army. | The Battlefield Fortress |
 Luigi |
Super Mario |
Luigi is Mario's more timid brother, first seen being frightened of King Dedede's Waddle Dee minions before King Dedede trophifies him. He is later revived by one of King Dedede's badges. | The Battlefield Fortress (cutscene) Subspace (Part 1) (playable) |
 King Dedede |
Kirby |
King Dedede is Kirby's primary rival who appears to be a villain at first, taking the trophies of Luigi, Ness, and the princess Kirby did not save. However, near the end, it is revealed he has created badges that can undo the effects of trophification in order to prevent it from happening to everyone. | The Battlefield Fortress (cutscene) Subspace (Part 1) (playable) |
 Link |
The Legend of Zelda |
Link is a swordsman who is joined by Yoshi before running afoul of the Subspace Army. Later he joins Mario and Pit on their journey to save the princesses. | The Forest |
 Yoshi |
 Yoshi |
Yoshi is a dinosaur who accompanies Link after meeting him in the forest. | The Forest |
 Zero Suit Samus |
 Metroid |
Zero Suit Samus is a bounty hunter who is missing her usual armor. She infiltrates the Subspace Army's lab and joins up with Pikachu before she finds her Power Suit. After she does, this version remains selectable by choosing her and pressing the switch form button. | The Research Facility (Part I) |
 Pikachu |
Pokémon |
Pikachu is a mouse-like Pokémon with electrical abilities, it is saved by Samus from being used as a battery for the Subspace Army, and then joins her. | The Research Facility (Part I) |
 Falco |
Star Fox |
Falco is a hotshot pheasant teammate of Fox. He destroys Bowser's Dark Cannon and helps defeat the giant evil Diddy Kong copy Bowser created with it. He then is made to join Diddy Kong in the same manner Fox was, later leaving to fight the Halberd with Fox. | The Swamp |
 Samus |
Metroid |
Samus after recovering her Power Suit from the Subspace Army. She battles her nemesis Ridley and infiltrates the Subspace Bomb factory. | The Research Facility (Part II) |
 Olimar |
 Pikmin |
Olimar is a space freighter and biologist who is accompanied by Pikmin, he attempts to take down the R.O.B.s at the ruins only to be interrupted and joined by Captain Falcon. | Outside the Ancient Ruins |
 Captain Falcon |
 F-Zero |
Captain Falcon is a racing superhero who fights the Subspace Army, joining up with Olimar at the ancient ruins after accidentally killing a platoon of his Pikmin. | Outside the Ancient Ruins |
 Ice Climbers |
 Ice Climber |
The Ice Climbers are twin mountaineers who take Meta Knight's swift ascent up the mountain to reach the Halberd as a challenge, then join with Marth on the ground. | The Glacial Peak |
 Lucario |
Pokémon |
Lucario is a mysterious warrior Pokémon who challenges Meta Knight at the top of the mountain, then joins them in retaking the Halberd. | The Glacial Peak |
 Snake |
 Metal Gear |
Snake is a special forces agent who stowed away on the Halberd, eventually emerging to battle the Subspace Army. He saves the princesses and joins up with Meta Knight to retake the ship. | The Forest (cutscene, in box) Battleship Halberd Interior (playable) |
 Sheik |
The Legend of Zelda |
Sheik is a ninja alter-ego of Zelda, she takes Peach to battle the Subspace Army on the Halberd after they are rescued by Snake, then ends up in a short fight with Fox. | Midair Stadium (playable via transform ability) Battleship Halberd Exterior (cutscene/playable via selection) |
 Sonic |
 Sonic the Hedgehog |
Sonic is a speedy blue hedgehog who appears just in time for the final battle, crippling Tabuu's Off Waves attack to give the heroes a fighting chance. | The Great Maze |
| Fighters: The Subspace Army | |||
 Wario |
 Wario |
Wario is a recurring antagonist throughout the game. With his Dark Cannon, he trophifies the princess Kirby fails to rescue as well as Ness. After his cargo is stolen by King Dedede, he is quickly defeated by Lucas, only reviving near the end of the game to join with the heroes in Subspace. | Midair Stadium (cutscene) The Great Maze (playable) |
 Bowser |
Super Mario |
Bowser is a monstrous king who appears as a high-ranking member of the Subspace Army, commanding his own minions. He trophifies Donkey Kong and whichever princess Kirby previously rescued, as well as takes the non-rescued one's trophy from King Dedede after storming his fortress. He is later betrayed and trophified by Ganondorf, but restored with the others at the end. | The Jungle (cutscene) The Great Maze (playable) |
 Ganondorf |
The Legend of Zelda |
Ganondorf is a treacherous king of evil who holds a high rank in the Subspace Army. He briefs Bowser and the Ancient Minister at different points in the game, later betraying both and seemingly planning on betraying Master Hand as well. However, he is defeated and trophified by Tabuu. He is revived by Link and Zelda. | The Lake Shore (cutscene) The Great Maze (playable) |
 Mr. Game & Watch |
 Game & Watch |
Mr. Game & Watch is a primitive being resembling an LCD graphic. He is used by the Subspace Army to produce Shadow Bugs to create their minions. However, he is not malevolent whatsoever. | Battleship Halberd Bridge |
 R.O.B. |
 Robotic Operating Buddy |
This R.O.B. is the leader of the R.O.B. series who is forced to work for the Subspace Army as the Ancient Minister. When he finally refuses, Ganondorf takes control of them to make them turn on him. | The Subspace Bomb Factory (Part II) |
| Miscellaneous: The Subspace Army | |||
 Ancient Minister |
 Super Smash Bros. |
The Ancient Minister is a major antagonist throughout the game and the titular Subspace Emissary, responsible for the deployment of the various Subspace Bombs that consume the World of Trophies, as well as the R.O.B. series robots that activate them. It is eventually revealed that he is being forced to work for the Subspace Army against his will, and Ganondorf takes control of the R.O.B. units from him. After he is attacked, it is revealed he is the main R.O.B. himself. | Midair Stadium (cutscene) |
 Master Hand |
Super Smash Bros. |
Master Hand is the seeming leader of the Subspace Army who briefs Ganondorf. He is actually under the control of Tabuu. The strings binding him are broken by the defeated Ganondorf crashing into him, but his own attempt at defeating Tabuu fails. | The Cave (cutscene) |
 Tabuu |
Super Smash Bros. |
Tabuu is the true mastermind of the Subspace Army. Tabuu plans on making the entire world be consumed by the Subspace dimension. He uses his Off Waves attack to turn anyone who opposes him into a trophy instantly. Once he is defeated, all the Subspace that consumed the world collapses on itself, restoring the world to normal. | Entrance to Subspace (cutscene) |
| Fighters: Post-game | |||
 Jigglypuff |
Pokémon |
Jigglypuff is a playful balloon Pokémon who is found rolling around on Pokémon Stadium 2. | The Swamp |
 Toon Link |
The Legend of Zelda |
Toon Link is a stylized, pint-sized version of Link who is found sailing on the Pirate Ship. | The Forest |
 Wolf |
Star Fox |
Wolf is the ruthless rival of Fox who is found piloting his Wolfen on the Lylat Cruise. | The Ruins |
Setting[edit]
| Location | Information | ||||||||||
|---|---|---|---|---|---|---|---|---|---|---|---|
World of Trophies |
The World of Trophies (referred to as "this world" on the Smash Bros. DOJO!! website and in trophy descriptions) is the general setting of The Subspace Emissary. The characters that appear in the world are described as being fighters that do very little other than battle. After a fighter is defeated, they revert back to an inanimate trophy, though this can be undone if another fighter touches the trophy's base (or if the trophy has one of King Dedede's badges attached to it). The stages in the world consist of a large stadium, a forest, a large grassy land, a jungle, mountains, a large lake, a deserted zoo, a swamp, a desert (which also includes a large castle), a glacial mountain, some ruins, and a large floating island with a secret base.
| ||||||||||
 Island of the Ancients |
The Island of the Ancients,[10] also referred to as the Isle of Ancients and Isle of the Ancients,[11] is home to several R.O.B.s, led by a single R.O.B. known as the Master Robot.[11]
When Tabuu first found the Island of the Ancients, he decided to use the robots to help him make Subspace Bombs. Taking the island over, he uses their advanced technology to build weapons for the Subspace Army, such as the Subspace Bombs, the Dark Cannons, and the Subspace Gunship. The Master Robot, not wanting to lose so many R.O.B.s to Tabuu, agrees to join the Subspace Army and reluctantly begins production of the Subspace Bombs, becoming the Ancient Minister out of shame.[11] After Ganondorf takes control of the robots on the island, he forces them to detonate several Subspace Bombs at once. He does this so as to transport a Subspace Gunship through to the World of Trophies. Later, after the defeat of Tabuu, a shining "X" appears in the sky where the Island of the Ancients was; it did not return to the world as a side effect of the detonation of the many Subspace Bombs at once.[11] | ||||||||||
 Subspace |
Subspace is a dark dimension that is highly important to the game's plot. In The Subspace Emissary, the Subspace Army uses Subspace Bombs to draw anyone and anywhere into Subspace. Each time a bomb detonates, a certain part of the World of Trophies is consumed and sucked into a place known as Subspace. The first area ever consumed was the Midair Stadium. Throughout the game, the Subspace Army kept consuming many other parts of the world. Subspace explosions do not kill characters sucked into it (unless they are at ground zero, as happens with the various R.O.B. units) and instead just warp them to a world of darkness.
All the characters in the game eventually enter Subspace, where they follow Bowser and Ganondorf after the destruction of the Subspace Gunship. However, once there, they are attacked and incapacitated by Tabuu. Luigi, King Dedede, and Ness (and later Kirby) are revived by badges created by Dedede and come to the rescue, journeying through Subspace and reviving all the trophies. When the heroes have regrouped, even recruiting the former villains into the team, Tabuu forces all the characters to go through The Great Maze, a fusion of the areas of the Smash Bros. world previously pulled into Subspace. After a long journey, the group reaches Tabuu's chamber. Sonic joins them in the fight. They then defeat Tabuu, causing the consumed locations to be restored to the world. |
Stages[edit]
| Stage | Information | |
|---|---|---|
 1: Midair Stadium |
A giant floating arena where Mario and Kirby spar at the start of the game. The plot gets kicked off when the Subspace Army, led by the Ancient Minister and based from the Halberd, invades it. Mario is launched away by Petey Piranha, one of the princesses is turned into a trophy and kidnapped by Wario, and the entire stadium is engulfed by a Subspace Bomb. | |
| Playable characters | Mario • Kirby • Zelda/Sheik • Peach | |
| Characters who join | Kirby • Zelda or Peach | |
| Enemies | Primid • Boom Primid • Spaak • Sword Primid | |
| Bosses | Kirby or Mario • Petey Piranha | |
| Music | Menu (Super Smash Bros. Melee) • Menu 1 • Airship Theme (Super Mario Bros. 3) | |
 2: Skyworld |
The home of Pit, who descends through the clouds to assist Mario and pursue the Halberd. Along the way, the Subspace Army makes trouble for him. At the end of the stage, an Arwing chases the Halberd. | |
| Playable characters | Mario • Pit | |
| Characters who join | Mario • Pit | |
| Enemies | Primid • Boom Primid • Spaak • Cymul • Greap • Glunder • Jyk (electric) • Roturret | |
| Music | Underworld • Skyworld | |
 3: Sea of Clouds |
A section of sky where Kirby and the rescued princess travel along the outside of the Halberd, which shoots down the Arwing. They then fall onto the clouds below. | |
| Playable characters | Kirby • Zelda/Sheik or Peach | |
| Enemies | Primid • Boom Primid • Glunder • Spaak • Greap • Poppant • Feyesh • Towtow • Mite | |
| Music | Skyworld | |
 4: The Jungle |
A jungle resembling Kongo Jungle where Donkey Kong and Diddy Kong pursue Bowser's Minions, who have taken the banana hoard. After they get it back, Bowser appears and turns Donkey Kong into a trophy. | |
| Playable characters | Diddy Kong • Donkey Kong | |
| Characters who join | Diddy Kong | |
| Enemies | Goomba • Koopa Troopa (green) • Koopa Paratroopa (red and green) • Hammer Bro • Bullet Bill • Jyk (watery) • Giant Goomba | |
| Music | Jungle Level • Airship Theme (Super Mario Bros. 3) | |
 5: The Plain |
A relatively flat area where Mario and Pit pursue the Ancient Minister. | |
| Playable characters | Mario • Pit | |
| Enemies | Primid • Boom Primid • Feyesh • Spaak • Glunder • Poppant • Borboras • Ticken • Jyk (fiery) • Fire Primid | |
| Music | Step: The Plain • Battlefield | |
 6: The Lake |
A wetland where the Arwing crashes. Diddy Kong recruits Fox after being menaced by Rayquaza. They then pursue Bowser, only to be tricked into fighting a duplicate. | |
| Playable characters | Diddy Kong • Fox | |
| Characters who join | Fox | |
| Enemies | Goomba • Koopa Troopa (green) • Koopa Paratroopa (red and green) • Hammer Bro • Borboras • Giant Goomba • Towtow • Jyk (watery) • Bullet Bill • Mite • Auroros • Bucculus | |
| Bosses | Rayquaza • False Bowser | |
| Music | Space Armada • Victory Road • Bramble Blast • Battle for Storm Hill • King K. Rool / Ship Deck 2 • Airship Theme (Super Mario Bros. 3) | |
 7: The Ruined Zoo |
A former attraction resembling the Choucream Zoo where Lucas is attacked by Porky and saved by Ness. After Ness is turned into a trophy by Wario, Lucas teams up with the Pokémon Trainer. | |
| Playable characters | Lucas • Ness • Pokémon Trainer (Squirtle) | |
| Characters who join | Lucas • Pokémon Trainer (Squirtle) | |
| Enemies | Primid • Boom Primid • Towtow (harder difficulties) • Auroros • Glunder • Jyk (watery) • Ticken • Fire Primid • Borboras • Buckot • Floow • Bytan (small) | |
| Bosses | Porky Statue • Porky | |
| Music | Mother 3 Love Theme • Porky's Theme • Wild Pokémon Battle! (Diamond/Pearl) • Team Galactic Battle! | |
 8: The Battlefield Fortress |
A ruined stronghold near where two morose R.O.B.s activate another Subspace Bomb. Marth battles the invading Subspace Army, joining up with two other sword-wielders, Meta Knight and Ike, the former being the deposed owner of the Halberd. After it is completed, King Dedede turns Luigi into a trophy, then steals the two trophies Wario has obtained. | |
| Playable characters | Marth • Meta Knight • Ike | |
| Characters who join | Marth • Meta Knight • Ike | |
| Enemies | Primid • Sword Primid • Borboras • Jyk (fiery) • Spaak • Buckot • Greap • Poppant • Feyesh • Fire Primid • Towtow • Armight • Roader • Scope Primid • Autolance • Nagagog | |
| Music | Fire Emblem Theme • Preparing to Advance • Meta Knight's Revenge • Attack • Crimean Army Sortie • Ike's Theme • Luigi's Mansion Theme • King Dedede's Theme | |
 9: The Forest |
A woodland resembling the Lost Woods where Link draws the Master Sword and gets joined by Yoshi. Meanwhile, a mysterious box shuffles around in the Halberd's hold. | |
| Playable characters | Link • Yoshi | |
| Characters who join | Link • Yoshi | |
| Postgame characters | Toon Link | |
| Enemies | Primid • Boom Primid • Sword Primid • Bucculus • Jyk (fiery) • Auroros • Ticken • Feyesh • Fire Primid • Mite • Puppit • Trowlon • Shellpod | |
| Music | Title (The Legend of Zelda) • Hidden Mountain & Forest • The Great Sea • Dragon Roost Island | |
 10: The Research Facility (Part I) |
The Subspace Army's lab, Zero Suit Samus infiltrates it looking for her missing Power Suit, rescuing a tormented Pikachu from a generator in the process. | |
| Playable characters | Zero Suit Samus • Pikachu | |
| Characters who join | Zero Suit Samus • Pikachu | |
| Enemies | Buckot • Roturret • Jyk (electric) • Glunder • Bytan (small and large) • R.O.B. Sentry • R.O.B. Blaster • R.O.B. Launcher • Metal Primid | |
| Music | Opening/Menu (Metroid Prime) • Multiplayer (Metroid Prime 2) | |
 11: The Lake Shore |
A wetland where the princess Kirby saved is trophified and cloned by the False Bowser. After the false princess is destroyed, a misunderstanding erupts between Mario and Link's groups, which is settled when King Dedede passes and is harassed by Kirby. The two groups and Kirby join up to track King Dedede down. At the end of the stage, Ganondorf, acting from a control room, instructs Bowser to go to Castle Dedede himself. | |
| Playable characters | Mario • Pit • Link • Yoshi • Kirby | |
| Characters who leave | Zelda/Sheik or Peach | |
| Enemies | Mite • Ticken • Greap • Spaak • Bullet Bill • Bucculus • Jyk (watery) • Feyesh • Bombed • Shaydas | |
| Bosses | False Zelda or Peach • Mario and Pit or Link and Yoshi | |
| Music | Castle/Boss Fortress (Super Mario World/SMB 3) • Battlefield • Step: The Plain • Step: The Cave | |
 12: The Path to the Ruins |
A dilapidated ancient path where the Pokémon Trainer tries to track down Charizard, while Lucas finds Wario and settles his grudge before realizing Ness's trophy is nowhere in sight. Meanwhile, King Dedede puts badges of himself on the three trophies he has, only for his roof to be caved in by Bowser's Minions. Bowser sees the princess trophy under the rubble and takes it with him, with the badge falling off in the process. | |
| Playable characters | Lucas • Pokémon Trainer (Squirtle) | |
| Enemies | Shellpod • Primid • Boom Primid • Jyk (electric) • Puppit • Borboras • Fire Primid • Armight • Nagagog • Scope Primid • Gamyga • Glire | |
| Bosses | Wario | |
| Music | Gritzy Desert • Underground Theme (Super Mario Land) • Airship Theme (Super Mario Bros. 3) | |
 13: The Cave |
An underground tunnel where Mario and co. travel after finding Castle Dedede deserted save for the newly created entrance to the face in its wall. They find Bowser with the princess trophy, and he takes off in his Koopa Clown Car. Kirby investigates the badge that was dropped. A Subspace Bomb is deployed on the castle, pulling in the trophies of King Dedede and the other two. Meanwhile, Ganondorf receives an order from Master Hand, but gives a distrusting glare as he bows, signifying his own treachery. | |
| Playable characters | Mario • Pit • Link • Yoshi • Kirby | |
| Enemies | Goomba • Koopa Troopa (green) • Koopa Paratroopa (red and green) • Hammer Bro • Shellpod • Glire • Bullet Bill • Bucculus • Giant Goomba | |
| Music | Step: The Cave | |
 14: The Ruins |
An ancient temple full of traps where the Pokémon Trainer catches Ivysaur and Charizard, only to reach a dead end deep within. | |
| Playable characters | Lucas • Pokémon Trainer (Squirtle, Ivysaur) | |
| Characters who join | Pokémon Trainer (Ivysaur, Charizard) | |
| Postgame characters | Wolf | |
| Enemies | Borboras • Mite • Jyk (fiery) • Glire • Floow • Roturret • Fire Primid • Metal Primid • Bytan (small and large) • Armight • Autolance • Shaydas • Towtow | |
| Bosses | Charizard | |
| Music | Underground Theme (Super Mario Land) • Victory Road • Star Wolf | |
 15: The Wilds (Part I) |
A badland where Marth and co. chase the Ancient Minister and a massive tank that turns out to be a robot, Galleom. Galleom ends up falling into a pit when defeated. | |
| Playable characters | Marth • Meta Knight • Ike | |
| Enemies | Primid • Scope Primid • Buckot • Gamyga • Trowlon • Bytan (small) • Roader • Auroros • Mite • Towtow • Boom Primid • Bombed • Jyk (electrical) • Armank • Big Primid | |
| Bosses | Galleom | |
| Music | With Mila's Divine Protection (Celica Map 1) • Boss Battle Song 1 | |
 16: The Ruined Hall |
A chamber where Lucas and Pokémon Trainer arrive before being accosted by the fallen Galleom. After it is defeated a second time, it reveals a Subspace Bomb within its head, which covers the ruins. The heroes all manage to escape, while Wario's trophy is pulled in. | |
| Playable characters | Lucas • Pokémon Trainer (Squirtle, Ivysaur, Charizard) | |
| Bosses | Galleom | |
| Music | Boss Battle Song 1 • Menu 1 | |
 17: The Wilds (Part II) |
Another section of the badland where Mario and co. pursue the Ancient Minister, who has become sullen at the amount of R.O.B. units sacrificed by the Subspace Bomb deployment. At the end of the stage, yet another goes off. | |
| Playable characters | Mario • Pit • Link • Yoshi • Kirby | |
| Enemies | Shellpod • Feyesh • Bucculus • Borboras • Mite • Armight • Puppit • Ticken • Primid • Nagagog • Trowlon • Scope Primid • Sword Primid • Greap • Spaak • Bytan (small) • Roader | |
| Music | Step: The Plain | |
 18: The Swamp |
A wetland where Diddy Kong and Fox continue to pursue Bowser. Diddy Kong is turned into a trophy long enough for Bowser to create a massive evil copy of him, but Falco ends up coming to the rescue. At the end of the stage, they see Donkey Kong's trophy aboard the Smash Skiff heading towards the Island of the Ancients and the Great Fox preparing to battle the Halberd. | |
| Playable characters | Diddy Kong • Fox • Falco | |
| Characters who join | Falco | |
| Postgame characters | Jigglypuff | |
| Enemies | Goomba • Koopa Troopa (green) • Koopa Paratroopa (red and green) • Hammer Bro • Puppit • Bullet Bill • Poppant • Floow • Jyk (watery) • Borboras • Feyesh • Boom Primid • Giant Goomba | |
| Bosses | False Giant Diddy Kong | |
| Music | Bramble Blast • Area 6 • Airship Theme (Super Mario Bros. 3) • Yoshi's Island • Pokémon Center | |
 19: The Research Facility (Part II) |
A deeper portion of the lab Samus is exploring. She eventually recovers her Power Suit, but is attacked by her old enemy Ridley. After he is defeated, they end up outside and see the entrance to the Subspace Bomb production facility. | |
| Playable characters | Zero Suit Samus • Samus • Pikachu | |
| Characters who join | Samus | |
| Enemies | R.O.B. Sentry • R.O.B. Blaster • Primid • Big Primid • Sword Primid • Roader • Buckot • R.O.B. Launcher • Cymul • Autolance • Roturret • Scope Primid • Glice | |
| Bosses | Cloned Power Suits • Ridley | |
| Music | Vs. Parasite Queen • Sector 1 • Theme of Samus Aran, Space Warrior • Main Theme (Metroid) • Vs. Ridley | |
 20: Outside the Ancient Ruins |
An area on the Island of the Ancients where Olimar is joined by Captain Falcon. Then, Falco deposits Diddy Kong onto the Smash Skiff where he rescues Donkey Kong, being joined by Olimar and Captain Falcon. Meanwhile, Falco flies off with Fox to challenge the Halberd again. | |
| Playable characters | Donkey Kong • Diddy Kong • Olimar • Captain Falcon | |
| Characters who join | Donkey Kong • Olimar • Captain Falcon | |
| Characters who leave | Fox • Falco | |
| Enemies | R.O.B. Sentry • R.O.B. Launcher • Shellpod • R.O.B. Blaster • Roader • Gamyga • Auroros • Primid • Scope Primid • Sword Primid • Trowlon • Bombed • Shaydas • Spaak • Metal Primid | |
| Music | Main Theme (Pikmin) • Mute City • Fire Field | |
 21: The Glacial Peak |
An icy mountain where Meta Knight ascends to board and take back the Halberd, with the local Ice Climbers taking this as a race. At the top, he is challenged by Lucario. Afterward, the Great Fox is knocked into the mountainside, making the Ice Climbers fall back to the bottom (where Marth and co. are) while Meta Knight and Lucario board it to reach the Halberd. | |
| Playable characters | Meta Knight • Ice Climbers • Lucario | |
| Characters who join | Ice Climbers • Lucario | |
| Enemies | Primid • Shellpod • Boom Primid • Bucculus • Poppant • Ticken • Floow • Sword Primid • Metal Primid • Glice • Jyk (watery) • Shaydas • Towtow • Spaak | |
| Bosses | Meta Knight or Lucario | |
| Music | Ice Climber • Frozen Hillside • Team Galactic Battle! | |
 22: The Canyon |
A ravine where Mario and co. face a huge gauntlet of enemies to assist Marth and co., who were being menaced by them. | |
| Playable characters | Mario • Pit • Link • Yoshi • Kirby | |
| Enemies | Primid • Boom Primid • Armight • Feyesh • Big Primid • Fire Primid • Puppit • Glire • Roturret | |
| Music | Battlefield | |
 23: Battleship Halberd Interior |
Part of the Halberd, where Snake emerges from his box and joins up with Meta Knight and Lucario, and then together they save the princesses. Snake warns them they should remain safely hidden. | |
| Playable characters | Snake • Meta Knight • Lucario | |
| Characters who join | Snake | |
| Enemies | Primid • Scope Primid • Jyk (fiery) • Sword Primid • Bytan (small) • Armight • Mite • Cymul • Floow • Glire • Fire Primid • Shaydas • Autolance • Buckot • Roader • Bombed • Nagagog • Metal Primid • Towtow | |
| Bosses | False Zelda and Peach | |
| Music | Theme of Tara • Cavern • Encounter • Castle / Boss Fortress (Super Mario World / SMB 3) | |
 24: Battleship Halberd Exterior |
Another section of the Halberd, where Zelda and Peach (the former taking her Sheik guise) travel across, eventually ending up on the deck. Meanwhile, the Great Fox is fleeing from its damages, but Fox remains locked in combat with the Halberd. After he accidentally almost hurts Peach with explosions, Sheik gets into a fight with him on the deck, but Peach calls them off with an offer of tea. | |
| Playable characters | Peach • Sheik/Zelda | |
| Characters who join | Peach • Sheik/Zelda • Fox | |
| Enemies | Mite • Primid • Scope Primid • Poppant • Greap • Puppit • Feyesh • Buckot • Nagagog (encapsulated) • Roader (encapsulated) • Autolance (encapsulated) • Cymul (encapsulated) • Mizzo (encapsulated) • Fire Primid (encapsulated) | |
| Music | Meta Knight's Revenge • Space Battleground | |
 25: Battleship Halberd Bridge |
In the bridge of the Halberd, Meta Knight and co. discover a group of Mr. Game & Watches milling around. After throwing them out the window onto the deck, they merge into a monster called Duon, whom the princesses, Fox, and Meta Knight's partners battle. Upon being defeated, it reverts into a single Mr. Game & Watch, quickly befriending Peach with his innocent nature. Meta Knight, meanwhile, has successfully retaken his ship from the villains. | |
| Playable characters | Fox • Falco • Lucario • Peach • Sheik/Zelda • Snake | |
| Characters who join | Falco • Mr. Game & Watch | |
| Bosses | Duon | |
| Music | Boss Battle Song 1 | |
 26: The Subspace Bomb Factory (Part I) |
The production plant for the Subspace Bombs. Samus and Pikachu fight through it, but when they reach the Ancient Minister's chamber, he acts sad and apologetic rather than aggressive. | |
| Playable characters | Samus • Pikachu | |
| Enemies | R.O.B. Sentry • R.O.B. Blaster • Glunder • Shaydas • Jyk (electric) • R.O.B. Launcher • Sword Primid • Borboras • Roturret • Bombed • Big Primid • Armank • Nagagog | |
| Music | Norfair • Multiplayer (Metroid Prime 2) | |
 27: The Subspace Bomb Factory (Part II) |
A different section of the plant, Captain Falcon and co. fight through it after entering it from the Smash Skiff. Finding the Ancient Minister as well, they prepare for a fight, but he continues to act morose. Ganondorf uses a remote command to take control of the R.O.B. units and make them attack the Ancient Minister, revealing that under his robes, he is a R.O.B. himself. Ganondorf then makes the R.O.B.s activate all the Subspace Bombs stored in the factory. Realizing stopping the bombs from being deployed is futile, Captain Falcon has all the heroes, as well as the main R.O.B., escape in his Falcon Flyer, but it is ambushed by Meta Ridley. After they escape, the entire island is consumed in an enormous Subspace explosion. After this level, the three remaining groups of heroes (Mario's group on the ground, Captain Falcon's group on the Falcon Flyer, and Meta Knight's group in the Halberd) all unite into a single front against the Subspace Army. | |
| Playable characters | Donkey Kong • Diddy Kong • Captain Falcon • Olimar • R.O.B. • Samus/Zero Suit Samus • Pikachu | |
| Characters who join | R.O.B. | |
| Enemies | R.O.B. Sentry • Cymul • Autolance • R.O.B. Launcher • Jyk (electric) • Primid • Metal Primid • Buckot • Mite • Floow • Armight • R.O.B. Blaster • Bytan (small and large) • Fire Primid • Auroros • Ticken • Scope Primid • Sword Primid • Nagagog • Armank • Towtow • Poppant | |
| Bosses | Meta Ridley | |
| Music | Climb Up! And Get The Last Chance! • Battlefield • Vs. Meta Ridley • Vs. Ridley | |
 28: Entrance to Subspace |
The interior of the Subspace void itself, entered after the villains attempt to pull the Subspace Gunship into the world. While the Subspace Gunship manages to make several more Subspace explosions and destroy the Halberd, it too ends up destroyed. Ganondorf then betrays Bowser and turns him into a trophy, then realizes Master Hand is being controlled by another being, Tabuu. Ganondorf ends up being turned into a trophy as well, Master Hand is rendered incapable of moving, and the heroes are all trophified with a single devastating attack from Tabuu. Tabuu then pulls the bubbles of reality created by the Subspace explosions together into a cluster around himself. | |
| Playable characters | All previously used (Except Ness) • Mr. Game & Watch | |
| Characters who leave | All | |
| Enemies | Primid • Boom Primid • Floow • Metal Primid • Borboras • Spaak • Fire Primid • Armank • Greap • Big Primid | |
| Music | Super Smash Bros. Brawl Main Theme • Step: Subspace | |
 29: Subspace (Part I) |
With all hope seemingly lost, the badges King Dedede placed on Luigi and Ness magically revive them. Together with King Dedede, they set off to rescue the others, whose trophies have been scattered across subspace. King Dedede also ends up saving Bowser (twice, due to Bowser getting into a fight the first time, and nearly doing so again the second time). | |
| Playable characters | Luigi • Ness • King Dedede | |
| Characters who join | Anyone saved from Subspace • Luigi • Ness • Bowser • King Dedede | |
| Enemies | Glice • Bombed • Feyesh • Towtow • Poppant • Trowlon • Big Primid • Bytan (small and large) • Mite • Roader • Puppit • Jyk (electric) | |
| Bosses | Bowser | |
| Music | Step: Subspace • Step: Subspace Ver.2 • Giga Bowser (Melee) | |
 30: Subspace (Part II) |
Kirby, having previously swallowed the badge he found back at Castle Dedede, is revived as well. He then goes across Subspace to rescue the remainder. At the end, Kirby sees Bowser attacking Ganondorf's trophy for his betrayal, while King Dedede is happy to see Kirby and hugs him. Depending on what trophies were saved, Link and Zelda may save Ganondorf as well, to his own chagrin at having to work with his enemies. Additionally Wario may attempt to attack King Dedede before the latter points out the cluster Tabuu disappeared into - followed by the former racing up the staircase on the Wario Bike. | |
| Playable characters | Kirby | |
| Characters who join | Anyone saved from Subspace • Kirby • Ganondorf (if Link and Zelda are saved) • Wario (if trophy is saved) | |
| Enemies | Bombed • Primid • Scope Primid • Feyesh • Sword Primid • Bucculus • Fire Primid • Spaak • Armight • Autolance • Shellpod • Ticken • Glire • Auroros • Bytan (small) • Roturret • Gamyga | |
| Music | Step: Subspace Ver.3 | |
 31: The Great Maze |
An enormous labyrinth of sections of previous levels haphazardly connected to each other by doors, brought together by the Subspace Bomb explosions and Tabuu's power. To face Tabuu, rematches must be taken against the game's large bosses, as well as fake versions of the various characters, all scattered in odd places across the maze, marked by shadowy energy emanating from the doors leading to them. The maze is so large and time-consuming that it has Save Points (which also restore life and allow characters and stickers to be reselected) and Warp Points scattered throughout, while a map appears when the level is paused, adding indicators to remaining battles once a full loop around the maze has been made; it is the only stage with these features. Once Tabuu is faced, he attempts his devastating attack again, only to be interrupted and crippled by Sonic, who joins the heroes for the final battle. Once Tabuu is defeated, all the Subspace explosions cave in on themselves and restore the land to its origin. The Island of the Ancients, however, remains destroyed due to the amount of bombs deployed at once on it; a glowing X remains in the sky where it once floated. | |
| Playable characters | Any characters rescued from Subspace • Luigi • Ness • Bowser • King Dedede • Kirby • Sonic | |
| Characters who join | Sonic | |
| Enemies | Goomba • Primid • Koopa (green) • Jyk (electric, fiery, and watery) • Glunder • Scope Primid • Trowlon • Poppant • Giant Goomba • Greap • Puppit • Shellpod • Auroros • Boom Primid • Armight • Buckot • Roader • Borboras • Gamyga • Mite • Ticken • Towtow • Sword Primid • Bytan (small and large) • Fire Primid • Roturret • Feyesh • Metal Primid • Cymul • Hammer Bro • Paratroopa (green) • Bucculus • Big Primid • Glire • Bullet Bill • Autolance • Bombed • Nagagog • Floow • Armank • Shaydas • Glice • Spaak | |
| Bosses | Petey Piranha • Shadow Pit • Shadow Kirby • Shadow Link • Shadow Yoshi • Shadow Diddy Kong • Shadow Captain Falcon • Shadow Olimar • Duon • Shadow Snake • Shadow Mr. Game & Watch • Shadow Meta Knight • Shadow Ness • Porky • Shadow Donkey Kong • Shadow Samus • Shadow Pikachu • Shadow R.O.B. • Ridley • Shadow Bowser • Shadow King Dedede • Shadow Falco • Shadow Fox • Meta Ridley • Shadow Mario • Galleom • Shadow Zelda • Shadow Peach • Shadow Pokémon Trainer • Shadow Lucas • Shadow Lucario • Shadow Wario • Shadow Luigi • Rayquaza • Shadow Ice Climbers • Shadow Ike • Shadow Marth • Shadow Ganondorf • Tabuu | |
| Music | Save Point • Airship Theme (Super Mario Bros. 3) • Step: Subspace • Step: The Plain • Castle/Boss Fortress (Super Mario World/SMB 3) • Gourmet Race • Gerudo Valley • The Dark World • Battle For Storm Hill • Jungle Level • Sector 1 • Gritzy Desert • Boss Battle Song 1 • Meta Knight's Revenge • Flat Zone • Snowman • Unfounded Revenge/Smashing Song of Praise • Porky's Theme • Opening/Menu (Metroid Prime) • Victory Road • Vs. Ridley • Step: The Cave • Bramble Blast • Underground Theme (Super Mario Land) • Frozen Hillside • Luigi's Mansion Theme • Ice Climber • Crimean Army Sortie • Against the Dark Knight • Boss Battle Song 2 | |
Subspace Army[edit]

The Subspace Army is a group of formless beings led by Tabuu, though with a lower hierarchy of other rulers such as Master Hand and the Ancient Minister. Their goal is to pull the entire World of Trophies into Subspace and destroy it, something that they had hoped to accomplish by using the powerful and deadly Subspace Bombs. Some Super Mario enemies are part of the organization, and both Bowser and Wario are commanders, along with fellow The Legend of Zelda villain Ganondorf. The army has several weapons and doomsday devices such as the Subspace Gunship, a flying fortress that can trap entire areas in subspace without the use of the Subspace Bomb, and the Dark Cannon, which both Bowser and Wario have used to turn characters into trophies. The creatures in the Subspace Army were created from Shadow Bugs, which originated from Mr. Game & Watch.
Enemies[edit]
| Enemy | Description | First appearance | ||||||||||||||||||||||||||||||
|---|---|---|---|---|---|---|---|---|---|---|---|---|---|---|---|---|---|---|---|---|---|---|---|---|---|---|---|---|---|---|---|---|
| Primids | ||||||||||||||||||||||||||||||||
 Primid |
Soldier creatures formed from Shadow Bugs. They attack by punching. Their facial features are given a different design in gameplay at random each time the mode is entered, though cutscenes always depict them with two small red eyes.
|
Midair Stadium | ||||||||||||||||||||||||||||||
 Boom Primid |
Boom Primids are equipped with a yellow boomerang, which they attack the player with.
|
Midair Stadium | ||||||||||||||||||||||||||||||
 Sword Primid |
A Primid that wields a green Beam Sword-like sword, which they can deflect projectiles with.
|
Midair Stadium | ||||||||||||||||||||||||||||||
 Fire Primid |
Fire Primids are red Primids that attack by spitting fire.
|
The Plain | ||||||||||||||||||||||||||||||
 Scope Primid |
A Primid with a Super Scope-like rifle that can shoot weak, three-shot attacks and powerful single-shot surge blasts.
|
The Battlefield Fortress | ||||||||||||||||||||||||||||||
 Metal Primid |
Primids covered in metal as if they are under the effects of a Metal Box. They are heavier and more durable, and flinch only from grabs and throws.
|
The Research Facility (Part I) | ||||||||||||||||||||||||||||||
 Big Primid |
Large Primids with stronger attacks and more health points.
|
The Wilds (Part I) | ||||||||||||||||||||||||||||||
| Bowser's Minions | ||||||||||||||||||||||||||||||||
 Goomba |
Goombas are short, mushroom-shaped creatures that walk slowly but dash when the player is near. They can be attacked normally or defeated immediately by squishing them with a stomp. | The Jungle | ||||||||||||||||||||||||||||||
  Koopa |
Koopas walk forward, either falling or turning at ledges. When attacked, they retreat into their shells. Red ones are only found after a red Paratroopa loses its wings. | The Jungle | ||||||||||||||||||||||||||||||
  Paratroopa |
Paratroopas are winged enemies featured in green and red colors. The green type either hops or flies in patterns, while the red type follows players. Hopping on one makes it lose its wings and become a normal Koopa. | The Jungle | ||||||||||||||||||||||||||||||
 Hammer Bro |
A Hammer Bro throws several hammers to attack, occasionally jumping. | The Jungle | ||||||||||||||||||||||||||||||
 Bullet Bill |
Black bullets that travel slowly in a single direction or home in on the fighter when fired. Along with being attacked like other enemies, they can be repelled with moves or items that reflect projectile attacks. | The Jungle | ||||||||||||||||||||||||||||||
 Giant Goomba |
Giant Goombas require more stomps or hits to defeat because they are larger than regular Goombas. | The Jungle | ||||||||||||||||||||||||||||||
| The R.O.B. Squad | ||||||||||||||||||||||||||||||||
 R.O.B. Sentry |
These robots attack with a two-armed punch, and are seen activating Subspace Bombs during game cutscenes.
|
The Research Facility (Part I) | ||||||||||||||||||||||||||||||
 R.O.B. Blaster |
A R.O.B. Sentry with beam-emitting eye lenses that either remains still or moves around a lot.
|
The Research Facility (Part I) | ||||||||||||||||||||||||||||||
 R.O.B. Launcher |
A R.O.B. Sentry with a green and brown militaristic-like body color. It has the ability to shoot missiles from its head.
|
The Research Facility (Part I) | ||||||||||||||||||||||||||||||
| Miscellaneous enemies | ||||||||||||||||||||||||||||||||
  Spaak |
A living cloud with a battery atop it, from which it shoots lightning. A Spaak turns black when hit and attacks faster with more lethal lightning strikes. Attacking the battery does it more damage.
|
Midair Stadium | ||||||||||||||||||||||||||||||
 Cymul |
Floating metallic creatures that can reflect projectiles. They have four blades that spin rapidly when the player is close, attacking them until they are launched away.
|
Skyworld | ||||||||||||||||||||||||||||||
 Greap |
A powerful, large enemy with two sickles for arms and a red area on its head, which is its weak point. It attacks either with a single swing or by jumping into the air and swinging its arms in a large circle.
|
Skyworld | ||||||||||||||||||||||||||||||
 Glunder |
A wheel-like enemy that rolls along any surface and emits electricity. A relative of Glice and Glire. Their speed increases with difficulty.
|
Skyworld | ||||||||||||||||||||||||||||||
   Jyk |
Invincible spiked balls that move in predefined trajectories while emitting either fire, electricity, or water. Jyks are the only enemy that cannot be defeated at all.
|
Skyworld (electric) The Jungle (watery) The Plain (fiery) | ||||||||||||||||||||||||||||||
 Roturret |
A mechanized skull with a giant arrow and two guns. It fires at nearby players. When hit, a Roturret spins around, but it quickly returns to face the player.
|
Skyworld | ||||||||||||||||||||||||||||||
 Poppant |
A cowardly creature that wears large pants. It runs from the player when approached, leaving a trail of Food and other items, though they also throw damaging rocks. Even more health-restoring items can be rewarded by defeating a Poppant.
|
Sea of Clouds | ||||||||||||||||||||||||||||||
 Feyesh |
A floating enemy resembling a large goldfish, except with one large eye and five tentacles. Feyesh swims around in the air lazily and uses its tentacles to attack the player.
|
Sea of Clouds | ||||||||||||||||||||||||||||||
 Towtow |
Ram-like creatures always found asleep at first, but when attacked, a Towtow becomes enraged and charges at the player.
|
Sea of Clouds | ||||||||||||||||||||||||||||||
 Mite |
Stick figure-like creatures that appear mostly from Generators. They appear in red, green, and yellow colors, none of which differ from one another at all beyond small amounts of elemental damage resistance. Mites are generally weak, but they are powerful when in groups.
|
Sea of Clouds | ||||||||||||||||||||||||||||||
 Borboras |
An enemy that blows wind towards the player with its wind instrument-like head.
|
The Plain | ||||||||||||||||||||||||||||||
 Ticken |
A large, armored chicken-like creature that attacks either by flying up into the air and then landing down with force, or ramming the player with its spikes. Defeating a Ticken breaks it open, revealing a chick.
|
The Plain | ||||||||||||||||||||||||||||||
 Auroros |
A bird with long, pointed beak that dives downward at players. Auroros becomes stuck if it misses, in which case it can be plucked out of the ground and thrown at other enemies.
|
The Lake | ||||||||||||||||||||||||||||||
 Bucculus |
Hiding in the ground at first, a Bucculus' lips is their only part visible at first. Their spiked lips attach to the player, damaging them and taking away their health. A Bucculus may drop food or a Maxim Tomato when defeated.
|
The Lake | ||||||||||||||||||||||||||||||
 Buckot |
An enemy consisting of a head, a propeller, two robotic arms, and gloves on its hands. They dump hot pieces of red metal onto the player, but may sometimes drop Food instead.
|
The Ruined Zoo | ||||||||||||||||||||||||||||||
 Floow |
A paranormal creature with small red eyes that is formed out of strips of darkness. They float around, conjuring a highly damaging form of dark energy. Floows can regenerate health lost over time, but they can neither move nor attack while healing.
|
The Ruined Zoo | ||||||||||||||||||||||||||||||
 Bytan |
Ball-shaped creatures with a large eye and sharp teeth. They have the ability to produce more of their kind from their eyes. Larger Bytans are sometimes encountered.
|
The Ruined Zoo (normal) The Research Facility (Part I) (giant) | ||||||||||||||||||||||||||||||
 Armight |
Armored floating cephalapod-like enemies that appear from the background and attack with the swords held in their long appendages.
|
The Battlefield Fortress | ||||||||||||||||||||||||||||||
 Roader |
A powerful motorized enemy with a single wheel that zooms at very high speeds. They can inflict a lot of knockback damage. If a Roader speeds for a while, it may collapse on the ground. When defeated, they explode with only their wheel recoiling to hit other enemies.
|
The Battlefield Fortress | ||||||||||||||||||||||||||||||
 Autolance |
A tank with a giant lance in front and caterpillar treads to move around on. Their vulnerable spot is the emergency light hidden within them.
|
The Battlefield Fortress | ||||||||||||||||||||||||||||||
 Nagagog |
A sumo wrestler-like enemy that jumps at the player and performs a body slam. A Nagagog starts off small and blue at first, but when damaged, Nagagog makes a laughing noise and grows larger, also turning yellow in the process. After some more damage, Nagagog becomes larger and red. Nagagog ironically becomes weaker as it becomes larger. The larger a Nagagog is, the more damage its body slam does.
|
The Battlefield Fortress | ||||||||||||||||||||||||||||||
 Puppit |
A living marionette that moves around in midair while suspended from above. It attacks with its long, sharp claws or by shooting a beam.
|
The Forest | ||||||||||||||||||||||||||||||
 Trowlon |
A flying platform-like enemy that tries to put a player on it before flying upward with them, attempting to take them beyond the blast line.
|
The Forest | ||||||||||||||||||||||||||||||
  Shellpod |
An enemy that wears a horned beetle-like shell and attacks with its front legs and horns. The shell breaks after enough damage, revealing Shellpod's true form and making it significantly more vulnerable to damage.
|
The Forest | ||||||||||||||||||||||||||||||
 Bombed |
A small red-and-black humanoid creature that throws its explosive bomb head to attack.
|
The Lake Shore | ||||||||||||||||||||||||||||||
 Shaydas |
A two-headed enemy comprised of Shadow Bugs and a vulnerable red spot on its chest. Shaydas has long, sharp blades on its arms and shoulders and uses them to attack.
|
The Lake Shore | ||||||||||||||||||||||||||||||
 Gamyga |
It is a colorful-art clown head atop four yellow bases, each having a pair of eyes and arms. Gamyga is tall enough to block the path, and it shoots lasers from its eyes to attack. Its bases can be attacked individually to lower the enemy, but destroying the head is the only means to defeat it.
|
The Path to the Ruins | ||||||||||||||||||||||||||||||
 Glire |
A wheel-like enemy that rolls along any surface and emits fire, and a relative of Glice and Glunder. Their speed increases with difficulty.
|
The Path to the Ruins | ||||||||||||||||||||||||||||||
 Armank |
Consists of a big green blob inside of a tank-like structure that moves on treads. It attacks with a very powerful arm and can only be damaged in very small amounts at a time. Attacking the claw destroys it temporarily and causes the tank to open, allowing it to be attacked for much greater damage while it is helpless.
|
The Wilds (Part I) | ||||||||||||||||||||||||||||||
 Glice |
A wheel-like creature that moves around on any surface and, when approached, emits an aura from which icicles protrude, capable of freezing nearby characters. Their speed increases with difficulty. It is related to Glire and Glunder.
|
The Research Facility (Part II) | ||||||||||||||||||||||||||||||
 Mizzo |
A mysterious swimming creature with a round body sprouting arms and legs that is only ever seen in a capsule near other similarly displayed enemies within the Halberd.
|
Battleship Halberd Exterior | ||||||||||||||||||||||||||||||
Bosses[edit]
| Image | Series | Description | Stages |
|---|---|---|---|
| Main bosses | |||
 Petey Piranha |
Super Mario |
Petey Piranha is an enormous mutant Piranha Plant. He traps Peach and Zelda in a cage each during the Subspace Army's attack on the Midair Stadium. He is fought by Kirby and uses the cages to attack, swinging them like weights. Petey loses health from attacking the cages, which have health bars instead of Petey himself. The first cage to lose all of its health is the princess whom the player manages to rescue. Regardless of which cage is destroyed, Petey burns to the ground in defeat. In the second battle as well as in the Boss Battles mode, the cages are both empty. | Midair Stadium The Great Maze |
 Rayquaza |
Pokémon |
Rayquaza is a legendary Sky High Pokémon who emerges from a lake nearby after Fox's Arwing crashes outside of the jungle. Diddy is captured by Rayquaza, but he is rescued by Fox. In its battle, Rayquaza uses attacks such as Hyper Beam, commonly soars on and off the screen, and charges in and out of the ground. Unlike in its home series, it is treated as more of a feral, territorial beast, and seems to have no direct connection to the Subspace Army aside from appearing in The Great Maze. | The Lake The Great Maze |
 Porky Statue |
EarthBound |
The Porky Statue is a walking parody of the Statue of Liberty. It cannot be defeated from attacks, forcing Lucas to run from him. The Porky Statue's blows can KO Lucas immediately. A while later, Lucas is saved by Ness, only to end up encountering Porky in his mech. | The Ruined Zoo |
 Porky |
EarthBound |
Porky is Ness's former obnoxious neighbor-turned-decrepit dictator strapped to a mechanical spider-like bed, and is fought once the Porky Statue is destroyed. The robotic legs can damage Lucas or Ness. Porky also uses a highly accurate laser beam and several robots based on himself. The machine flips upside-down and squirms after Porky's life bar has been completely depleted. | The Ruined Zoo The Great Maze |
 Galleom |
Super Smash Bros. |
Galleom is a large mech of the Subspace Army who is first fought by Marth, Ike, and Meta Knight. After being defeated, Galleom collapses into the ruins, crashing through the floor to confront Lucas and the Pokémon Trainer for a second battle. After being defeated, Galleom activates the Subspace Bomb within its head, attempting to take both Lucas and the Pokémon Trainer with it, but both of them are rescued by Meta Knight on time. | The Wilds (Part I) The Ruined Hall The Great Maze |
 Ridley |
Metroid |
Ridley is a vicious Space Pirate leader who orphaned Samus. He is an aerial boss fought by Samus and Pikachu. He often flies on and off screen during the battle, similarly to Rayquaza. One of Ridley's attacks is scraping his tail on the ground, while several of his other attacks are similar to Master Hand's. After losing all health, Ridley falls off of the platform. | The Research Facility (Part II) The Great Maze |
 Duon |
Super Smash Bros. |
Duon is a two-headed machine formed by Shadow Bugs, which a group of Mr. Game & Watches become after being thrown out of the control room of the Battleship Halberd. These Shadow Bugs combine to form Duon, whom Fox, Peach, Zelda/Sheik, Lucario, Snake, and Falco battle. Its purple head and arms are topped with cannons with shoulders that shoot missiles, while its blue head and arms are topped with blades with shoulders that shoot bombs. After being defeated, Duon forms back into a single Mr. Game & Watch, who joins the team. | Battleship Halberd Bridge The Great Maze |
 Meta Ridley |
Metroid |
Meta Ridley is the cybernetic form of Ridley, fought by Samus, Pikachu, Captain Falcon, Olimar, R.O.B., Diddy Kong, and Donkey Kong atop the Falcon Flyer during its escape from the Island of the Ancients. Meta Ridley's attacks include fireballs, rushing at the player, and affecting the ship in ways such as forcing it downward and making it rock back and forth. | The Subspace Bomb Factory (Part II) The Great Maze |
 Tabuu |
Super Smash Bros. |
Tabuu is the final boss, who had been controlling Master Hand and transforming all fighters into trophies. As Tabuu is confronted in Subspace, Sonic arrives to weaken him, and the fighters unite to ultimately defeat Tabuu. | The Great Maze |
| Evil doppelgangers | |||
 False Bowser |
Super Mario |
A fake version of Bowser created by Shadow Bugs. It acts the same as the original. It attacks Diddy Kong and Fox so Bowser can ambush them, then later disincorporates itself into Shadow Bugs to create one of the false princesses. | The Lake |
  False Zelda and Peach |
The Legend of Zelda and Super Mario |
Fake versions of the princesses created by Shadow Bugs. Only one appears in the first battle, being based on whichever princess Kirby previously saved, now trophified by Bowser. This in turn leads to a misunderstanding between the duo of Mario and Pit and the duo of Link and Yoshi. For the second battle, both appear at once due to their trophies being re-caged together, and are fought by Snake. | The Lake Shore Battleship Halberd Interior |
 False Giant Diddy Kong |
Donkey Kong |
A fake version of Diddy Kong created and increased to huge size by Shadow Bugs. It is fought by Fox, Falco, and the actual Diddy Kong. | The Swamp |
 Cloned Power Suits |
Metroid |
Two purple-colored copies of Samus's Power Suit. They must be defeated by her and Pikachu before Zero Suit Samus regains her own Power Suit. | The Research Facility (Part II) |
 Shadow Characters |
Varies | Slightly larger dark-colored copies of each of the characters seen thus far (discounting alternate forms). Each must be defeated to challenge Tabuu. | The Great Maze |
Items[edit]
Note: most items from the main game appear in this mode, with a few special exceptions such as Smash Balls, Poké Balls, and Assist Trophies. The following items are exclusive to this mode.
| Obstacle | Description |
|---|---|
 Key |
Keys must be carried to locked shutters to open them. If a key is dropped, it returns to where it started. |
 Stock Ball |
Stock balls function as extra lives, giving each character on the team an extra chance; if the last character loses a life, it starts back over with the first character, and everyone else appears back in line behind them on the HUD. |
 Trophy Stand |
Special items that allow the fighter to turn a weakened enemy or even boss into a trophy. They are very rare on easy difficulties, becoming much more common as the difficulty increases. "Fighter"-type bosses and enemies that are generally invincible, suck as Jyks and the Porky Statue, are also immune to them, so their trophies are obtained in other ways. |
Level objects[edit]
| Blocks | ||||||||||
|---|---|---|---|---|---|---|---|---|---|---|
  Item box | ||||||||||
| Cubes that give an item if broken with an attack. The special orange ones always contain a rare collectible, like a trophy, sticker, or cd. | ||||||||||
               Brick, crate, and box | ||||||||||
| Simple cube-shaped objects that can be attacked to break through. Sometimes they contain items. Their appearance varies depending on the environment, and they come in three sizes. | ||||||||||
 Stone box | ||||||||||
| A super-sturdy brick that can only be destroyed by blasting through with a Barrel Cannon. | ||||||||||
          Punch brick | ||||||||||
| Varyingly sized and shaped blocks that appear along a punch slider's rail. The punch slider is the only way to destroy them. | ||||||||||
           Explosion brick | ||||||||||
| Special blocks that always appear in large clusters or chains. They are impenetrable to attacks and must instead be destroyed by hitting a trigger brick. | ||||||||||
           Trigger brick | ||||||||||
| Bomb-marked blocks that, when attacked, destroy nearby explosion bricks and in rare cases, a wall. | ||||||||||
      Fall brick | ||||||||||
| Down-arrow marked blocks that descend after being stood upon long enough. | ||||||||||
Collapse block | ||||||||||
| Wooden blocks that are destroyed by rapidly moving brambles. | ||||||||||
  Tree block | ||||||||||
| Steel blocks that only appear in a front-and-back area of The Great Maze based on The Forest, where destroying explosive bricks on one side will destroy these on the other. The larger ones appear as platforms over gaps, while the smaller ones fill in holes in tree trunks. | ||||||||||
| Doors | ||||||||||
    Door | ||||||||||
| Doors can be entered to go between different areas in a stage. Some doors only appear after an enemy ambush has been defeated. | ||||||||||
   Goal door | ||||||||||
| Shiny golden doors that mark the end of most levels. | ||||||||||
                 Shutter | ||||||||||
| Gates that block different parts of a single room. They can be opened by a switch, a key, or defeating enemies. | ||||||||||
  Front and back doors | ||||||||||
| Doors that take the player between two similar looking areas with slight differences, often affecting one another. | ||||||||||
![Model of a pin door in a factory stage from The Subspace Emissary in Super Smash Bros. Brawl. The internal name for it is "AdvGdtFactryPinDoor01"[sic]](/File:SSBB_SSE_Door_factory_pin.png) Pin door | ||||||||||
| Special doors that require three colored pins to be found and activated before they can be entered. | ||||||||||
 Save point door | ||||||||||
| Special doors that lead to the save points in The Great Maze. | ||||||||||
 Last boss door | ||||||||||
| An enormous door leading to Tabuu's fight in The Great Maze, requiring all the opponents to be defeated in the maze before it can be entered. | ||||||||||
| Platforms | ||||||||||
Vanishing lift | ||||||||||
| Flatbed platforms that come in a variety of designs and sizes which can appear or disappear after a certain event, including but not limited to a switch being pressed, an ambush beginning or ending, or blocks being broken. | ||||||||||
Moving lift | ||||||||||
| Flatbed platforms that come in a variety of designs and sizes which can move either by themselves or when landed on. | ||||||||||
     Paddle Platform | ||||||||||
| Various types of flatbed platform rotating around a large central axis, like a ferris wheel. Some move faster on higher difficulties. | ||||||||||
                Moving slab | ||||||||||
| Large sections of terrain that slide in and out from floors, walls, and ceilings. | ||||||||||
   Moving battlefield | ||||||||||
| Extra-large moving lifts that the player encounters enemies on. | ||||||||||
   Swing | ||||||||||
| Platforms that sway back and forth from the end of a support. | ||||||||||
Logs | ||||||||||
| Tall blockers that can only be destroyed by the Porky Statue. | ||||||||||
 Sinking lift | ||||||||||
| Floating platforms that slowly sink when stood upon. | ||||||||||
    Collapsing lift | ||||||||||
| Floating platforms that fall and break when stood upon. | ||||||||||
      Elevator | ||||||||||
| Platforms that take the players between floors in narrow shafts. If the player goes between floors without the elevator, it follows on its own. | ||||||||||
 Ring lift | ||||||||||
| Platforms attached to large wheels that travel along rails, often crossing over at least one other ring lift's rail. | ||||||||||
Conveyor belt | ||||||||||
| Floor that moves the player in the direction it rotates. | ||||||||||
Trigger lift | ||||||||||
| Floating platforms that make vanishing lifts temporarily appear when stood upon. | ||||||||||
 Seesaw | ||||||||||
| Large platforms that tilt back and forth in time with each other. | ||||||||||
| Miscellaneous objects | ||||||||||
Arrow | ||||||||||
| Point in the direction that will need to the next objective. Large purple ones appear in The Great Maze and point to Tabuu's lobby once it has been discovered. | ||||||||||
Catapult | ||||||||||
| Sled-like objects that launch the fighter forward if touched. | ||||||||||
 Ladder | ||||||||||
| Objects of varying length that can be climbed. Some move back-and-forth through the air. | ||||||||||
  Barrel Cannon | ||||||||||
| Metallic barrels that shoot the player out when entered. The ones with round areas around the arrows are instead fired on command, and may move or rotate. | ||||||||||
 Switch | ||||||||||
| Pink buttons that cause events to happen when pressed with an attack. They can appear on any surface. | ||||||||||
  Punch slider | ||||||||||
| Round objects that quickly travel along rails when attacked, which can damage enemies, activate other punch sliders, and destroy blocks; they are the only way to destroy punch bricks. | ||||||||||
  Punch move rail | ||||||||||
| The paths that mark where a punch slider will travel. They come in many shapes. | ||||||||||
  Spring | ||||||||||
| Bouncing devices that let the fighter jump extra high. | ||||||||||
 Moving wall | ||||||||||
| Thin blocking walls that emerge from ceilings, sometimes sliding along their length before retracting. | ||||||||||
 Mine Cart | ||||||||||
| Vehicles that rapidly move along tracks, bulldozing through enemies. | ||||||||||
 Exclamation mark | ||||||||||
| Blinking warnings that mark when the player should leave a Mine Cart before they fall from the tracks with it. | ||||||||||
Explodable wall | ||||||||||
| Cracked walls that can be destroyed via an explosion caused by a trigger brick or mine. | ||||||||||
  Teleporter | ||||||||||
| Energy fields that warp the fighter between two locations. | ||||||||||
   Pin | ||||||||||
| Multicolored switches that appear in groups of three, all of which must be activated to unlock the pin door. | ||||||||||
  Save point | ||||||||||
| Objects unique to The Great Maze. There are two types, both of which allow the player to save their game and swap out fighters are stickers. The purple ones also allow the player to leave the maze and return to the map, while the yellow ones do not. | ||||||||||
![Model of the dark group of trophies blocking Tabuu's door from The Subspace Emissary in Super Smash Bros. Brawl. The internal names for them are "bossChara0for the bosses and "shadowChara[#[#]" for the fighters.](/File:SSBB_SSE_Trophy_collection.png) Character trophy | ||||||||||
| These are the trophies of the various fighters seen in the game. They are collected in Subspace Parts I and II. In The Great Maze, shadowy copies of them, including the bosses' trophies, mark which opponents still need defeated before Tabuu can be challenged. | ||||||||||
| Hazardous objects | ||||||||||
    Boulder | ||||||||||
| Giant rocks that fall and roll down hills. | ||||||||||
Bramble | ||||||||||
| Twisting spiked vines that rapidly twirl upwards from the water to hit the player. | ||||||||||
 Burner | ||||||||||
| Flames being shot from walls. Some can be toggled with switches. | ||||||||||
 Fireball | ||||||||||
| Flames that leap out of lava similar to Lava Bubbles. | ||||||||||
 Generator | ||||||||||
Generators spawn several enemies to attack the player. It takes a number of hits to defeat a Generator, but it has no corresponding health bar, making it unclear how damaged a Generator is before being eventually destroyed.
| ||||||||||
Lava | ||||||||||
| Pits of molten rock that deals fire-type damage when touched. Some is attached to the end of large slabs of superheated, but solid rock. | ||||||||||
 Air mine | ||||||||||
| Floating high-tech explosives that create a field of electricity upon blowing up. | ||||||||||
 Poison cloud | ||||||||||
| Toxic purple gas that slowly damages anyone who stands in it. | ||||||||||
          Spikes | ||||||||||
| Pointed surfaces that cause damage when touched. They appear attached to floors, walls, ceilings, moving platforms, crushing obstacles, and other surfaces. | ||||||||||
 Wind | ||||||||||
| High winds can push characters around at different points. |
Cutscene objects[edit]
These objects hold plot importance, but do not directly affect gameplay aside from some of the larger ones being used as stage settings or platforms in certain sequences.
| Object | Description | |||||||||||||||||||||||||||||||||||||||||||||||||||||||
|---|---|---|---|---|---|---|---|---|---|---|---|---|---|---|---|---|---|---|---|---|---|---|---|---|---|---|---|---|---|---|---|---|---|---|---|---|---|---|---|---|---|---|---|---|---|---|---|---|---|---|---|---|---|---|---|---|
 Halberd |
Battleship Halberd is Meta Knight's flying ship and arsenal originally created for an ill-fated attempt to conquer Dream Land. It has been stolen by the Subspace Army to use both as a mobile base and a way to disperse Shadow Bugs, while its Combo Cannon prevents most direct attacks on it. Many stages are set aboard in, both on the inside and the outside. It being taken back leads to the plot's turning point where the heroes begin to take the upper hand, as well as when they are all gathered together into a single large team. It ends up destroyed by the Subspace Gunship.
| |||||||||||||||||||||||||||||||||||||||||||||||||||||||
Shadow Bugs |
Tiny, purple, snow-like particles that are used to create the various Subspace Army grunts such as Primids as well as the evil doppelgangerss. They are usually dumped from the Halberd's hold onto a location that the Subspace Army is invading. They are extracted from the dark, primitive form of Mr. Game & Watch.
| |||||||||||||||||||||||||||||||||||||||||||||||||||||||
 Subspace Bombs |
Explosives that create a huge sphere of subspace around wherever they blow up, with more Subspace Bombs blowing up in one place creating a larger sphere. This pulls the surrounding area into the Subspace dimension while also damaging or destroying anything in the immediate vicinity like an actual bomb. Two R.O.B. units must be used to activate each using their arms as plugs, and they are destroyed by the explosion. These explosions affect gameplay; stages covered in Subspace cannot be revisited until the game is completed.
| |||||||||||||||||||||||||||||||||||||||||||||||||||||||
 Dark Cannons |
Large guns that are used by the Subspace Army to immediately trophify characters that are shot at, using energy projectiles that resemble a dark version of Pit's arrows. Several are used by the villains throughout the game, and a few are destroyed by the heroes.
| |||||||||||||||||||||||||||||||||||||||||||||||||||||||
  Cargos |
Levitating flatbed vehicles used by the Subspace Army. Both Bowser and Wario have one, with each themed after their owner. Bowser's is armed with Bill Blasters and is used to steal Donkey Kong's banana hoard in order to bait him, while Wario's has a crane-like claw and is used to gather the trophies he creates, but gets stolen by King Dedede.
| |||||||||||||||||||||||||||||||||||||||||||||||||||||||
King Dedede's Timed Badges |
Three medallions showing King Dedede's face that he places on the trophies he collects and steals from Wario: Luigi, Ness, and whichever princess Kirby previously rescued. The last one ends up being removed when Bowser takes that trophy, and Kirby inhales it. After all the characters have been turned into trophies, it is revealed that they were a timed mechanism to restore them, with King Dedede planning this in case everyone ended up trophified.
| |||||||||||||||||||||||||||||||||||||||||||||||||||||||
 Smash Skiff |
A flat transport vehicle similar to the cargos, but much larger. It is used to transport the Donkey Kong trophy and later acts as a platform in a battle sequence.
| |||||||||||||||||||||||||||||||||||||||||||||||||||||||
 Subspace Gunship |
An enormous flying weapon that dwarfs even the Halberd, though due to its immense size it can only enter this world after a large enough Subspace explosion has occurred; specifically, the one from the Subspace Bomb factory exploding. Its massive frontal cannon fires a beam that covers the rest of the world with Subspace explosions. Its smaller cannons destroy the Halberd, but it is then cleaved in half by Kirby in his Dragoon.
|
Additionally, many character-based vehicles are seen for brief scenes at different points throughout the game. These include the Koopa Clown Car from Super Mario, the Wario Bike from WarioWare, Arwings and the Great Fox from Star Fox, a Warp Star and Dragoon from Kirby, the Blue Falcon and Falcon Flyer from F-Zero, the Gunship from Metroid, and the Hocotate Ship from Pikmin.
Gallery[edit]
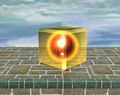
An orange item box
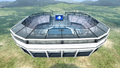
The Midair Stadium in the mode's opening moments
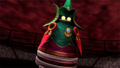
The Ancient Minister

Peach after Wario turned her into a trophy
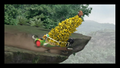
Bowser's Minions stealing Donkey Kong's banana hoard
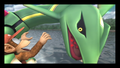
Diddy Kong and Rayquaza
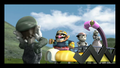
Wario stealing Luigi's trophy
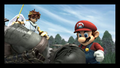
Mario and Pit
Halberd over King Dedede's castle
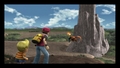
Lucas and Pokémon Trainer find Charizard
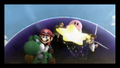
Mario, Yoshi, Kirby, Pit, and Link escape a Subspace Bomb
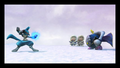
Meta Knight and Lucario face off
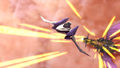
The Halberd fires at an Arwing
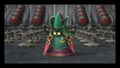
The Ancient Minister and his R.O.B. army
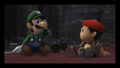
Luigi and Ness
Tabuu creates The Great Maze
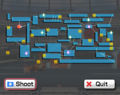
The map of The Great Maze

Tabuu
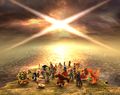
The light marking the previous location of the Island of the Ancients


Names in other languages[edit]
| Language | Name | Meaning | Note(s) | Ref. |
|---|---|---|---|---|
| Japanese | アドベンチャーモード ~亜空の使者~ Adobenchā Mōdo ~Akū no Shisha~ |
Adventure Mode ~The Messenger from the Subspace~ | [12] | |
| French (Canadian) | Mode Aventure : Le Sous-Espace Émissaire | Adventure Mode: The Subspace Emissary | [13] | |
| French (European) | Mode Aventure: L'Émissaire Subspatial | Adventure Mode: The Subspace Emissary | [14] | |
| German | Abenteuer-Modus: Der Subraum-Emissär | Adventure Mode: The Subspace Emissary | [15] | |
| Italian | Modalità Avventura: L'Emissario del Subspazio | Adventure Mode: The Subspace Emissary | [16] | |
| Korean | 어드벤처 모드:아공의 사자 Eodeubencheo Modeu: Agong-ui Saja |
Adventure Mode: The Subspace's Messenger | [17] | |
| Spanish (Latin American) | Modo de Aventura: El Misionero del Espacio | Adventure's Mode: The Space's Missionary | This name appeared in the Spanish section of the game's instruction booklet for its American version during its initial printings, but it was not used in-game because it does not have Spanish translation even if the console is set to that language. Later, the name of the Iberian Spanish version was adopted. | [18][19] |
| Spanish (European) | Modo Aventura: El Emisario Subespacial | Adventure Mode: The Subspace Emissary | [20] |
References[edit]
- ^ "Super Smash Bros. Brawl: The Subspace Emissary is a robust side-scrolling action game!" – Masahiro Sakurai (3 Aug. 2007). What is the Subspace Emissary?. Nintendo. Retrieved 27 Aug. 2025.
- ^ 2008. Super Smash Bros. Brawl Instruction Booklet (PDF). Redmond: Nintendo of America (English, French). Page 18.
- ^ "This time, though, we’ve managed to create a complete side-scrolling action game." – Masahiro Sakurai (3 Aug. 2007). What is the Subspace Emissary?. Nintendo. Retrieved 27 Aug. 2025.
- ^ "Jump into a story-driven action game that can be played with up to two players." – 2008. Super Smash Bros. Brawl Instruction Booklet (PDF). Redmond: Nintendo of America (English, French). Page 18.
- ^ "You resume play from the beginning of the step (the unit of area from one door to another) at which you died." – Masahiro Sakurai (3 Mar. 2008). Secrets for Continuing. Nintendo. Retrieved 27 Aug. 2025.
- ^ "You can have a maximum of 50 save files for Adventure Mode." – 2008. Super Smash Bros. Brawl Instruction Booklet (PDF). Redmond: Nintendo of America (English, French). Page 19.
- ^ Masahiro Sakurai (3 Mar. 2008). Secrets for Continuing. Nintendo. Retrieved 27 Aug. 2025.
- ^ Masahiro Sakurai (18 Jan. 2008). Sticker Power-ups. Nintendo. Retrieved 27 Aug. 2025.
- ^ Masahiro Sakurai (5 Oct. 2007). Team. Nintendo. Retrieved 27 Aug. 2025.
- ^ "He was once the lord of this world, living on the floating Island of the Ancients with many robots—but the robots were taken hostage on Tabuu's orders." - The Ancient Minister's trophy description
- ^ a b c d Mysteries of the Subspace Emissary - Smash Bros. DOJO!!
- ^ 『亜空の使者』とは | スマブラ拳!!
- ^ 2008. Super Smash Bros. Brawl instruction booklet. Nintendo of America (Canadian French). Page 47.
- ^ Qu’est-ce que l’émissaire subspatial ? | Smash Bros. DOJO!! - Français
- ^ Was ist der Subraum-Emissär? | Smash Bros. DOJO!! - Deutsch
- ^ Chi è l’Emissario del Subspazio? | Smash Bros. DOJO!! - Italiano
- ^ https://youtu.be/0QC9lhb76Qc?t=153
- ^ 2008. Super Smash Bros. Brawl instruction booklet. Nintendo of America (Latin American Spanish). Page 55.
- ^ Wii Manual Super Smash Bros Brawl (M3) | PDF es.slideshare.net, slide 37 of 45. Retrieved Nov 23, 2025.
- ^ ¿Qué es el emisario subespacial? | Smash Bros. DOJO!! - Español