Rattle Battle (Donkey Kong Land 2): Difference between revisions
m (Text replacement - "\|notes=[^\n]*\n" to "") |
(update with dkwiki info) |
||
| Line 10: | Line 10: | ||
|after=[[Slime Climb (Donkey Kong Land 2)|>>]] | |after=[[Slime Climb (Donkey Kong Land 2)|>>]] | ||
}} | }} | ||
'''Rattle Battle''' is the fourteenth level of ''[[Donkey Kong Land 2]]'' | '''Rattle Battle''' is the fourteenth level of ''[[Donkey Kong Land 2]]'' and the ninth level of [[Krem Cauldron]]. | ||
== Summary == | |||
The level takes place on the deck of the wrecked ship that [[Glimmer's Galleon (Donkey Kong Land 2)|Glimmer's Galleon]] was in. The level is not much different from the eponymous [[Rattle Battle (Donkey Kong Country 2: Diddy's Kong Quest)|''Donkey Kong Country 2: Diddy's Kong Quest'' level]]. [[Diddy Kong|Diddy]] and [[Dixie Kong|Dixie]] must enter a [[Animal Barrel|Rattly Barrel]] to transform into [[Rattly the Rattlesnake]] during most of the level. Rattly must move across ship deck, jumping over holes and gaps between segments of the ship. Rattly can only get across some gaps by jump from [[Zinger]]s and [[Flitter]]s, or by using his [[super move|superjump]] ability. Banana trails often indicate the direction of the main path or hint at items high above, such as a [[Banana Coin]] or even the [[DK Coin]]. | |||
== | ==Layout== | ||
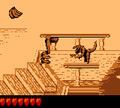
[[File:Rattle Battle DKL2 shot 2.png|thumb|160px|left|Rattly crosses a pit near the beginning of the level.]] | [[File:Rattle Battle DKL2 shot 2.png|thumb|160px|left|Rattly crosses a pit near the beginning of the level.]] | ||
The Kongs begin the level under an Animal Barrel, which, if entered, turns them into Rattly the Rattlesnake. A large barrel with a few bananas above it is located to the left of the Animal Barrel. Ahead of here, Rattly can find a small stairway leading up to a Kaboing and a large pile of barrels with the letter K above it. A Neek crawls past these barrels, which are followed by another stairway with a DK Barrel at the top of it. There is a pit immediately after this barrel, and a Zinger flies over it. Once the pit is crossed, a Kaboing and another pit with a Flitter and a Banana Bunch above it are reached. As with most pits in this level, Rattly can cross with either his normal jump, or by bouncing on the Flitter. On the other side of the abyss, there is another Kaboing and a large barrel with a ledge after it. After the rattlesnake drops down this ledge, he comes up to a Kaboing and another pit with a Zinger above it. The snake can cross this pit with the assistance of the Zinger, or simply by jumping over the gap. If he manages to cross safely, he encounters another Kaboing and a stack of two barrels with a Banana Coin high above them. A ledge is near here, and a small trial of bananas with a Banana Bunch at the end of it is high above it. | The Kongs begin the level under an Animal Barrel, which, if entered, turns them into Rattly the Rattlesnake. A large barrel with a few bananas above it is located to the left of the Animal Barrel. Ahead of here, Rattly can find a small stairway leading up to a Kaboing and a large pile of barrels with the letter K above it. A Neek crawls past these barrels, which are followed by another stairway with a DK Barrel at the top of it. There is a pit immediately after this barrel, and a Zinger flies over it. Once the pit is crossed, a Kaboing and another pit with a Flitter and a Banana Bunch above it are reached. As with most pits in this level, Rattly can cross with either his normal jump, or by bouncing on the Flitter. On the other side of the abyss, there is another Kaboing and a large barrel with a ledge after it. After the rattlesnake drops down this ledge, he comes up to a Kaboing and another pit with a Zinger above it. The snake can cross this pit with the assistance of the Zinger, or simply by jumping over the gap. If he manages to cross safely, he encounters another Kaboing and a stack of two barrels with a Banana Coin high above them. A ledge is near here, and a small trial of bananas with a Banana Bunch at the end of it is high above it. | ||
| Line 25: | Line 26: | ||
A smaller abyss with two Zingers above it can be found ahead of here after the rattlesnake climbs a small stairway. It is followed by an additional gap with a Flitter above it. Once on the other side of this pit, Rattly approaches a DK Barrel and a ledge with a Kaboing at the bottom of it. In order to progress farther, the rattlesnake must cross another pit with a Zinger above it. The letter G and a small stairway with a Kaboing at the top of it are ahead of this abyss. One final abyss is after here, and two more Zingers fly in it. After the Animal Buddy reaches the other side of it, he comes up to a spring, which he must bounce on to complete the level. A Kaboing and a ledge with a Banana Coin and a Banana Bunch above it follow this spring. | A smaller abyss with two Zingers above it can be found ahead of here after the rattlesnake climbs a small stairway. It is followed by an additional gap with a Flitter above it. Once on the other side of this pit, Rattly approaches a DK Barrel and a ledge with a Kaboing at the bottom of it. In order to progress farther, the rattlesnake must cross another pit with a Zinger above it. The letter G and a small stairway with a Kaboing at the top of it are ahead of this abyss. One final abyss is after here, and two more Zingers fly in it. After the Animal Buddy reaches the other side of it, he comes up to a spring, which he must bounce on to complete the level. A Kaboing and a ledge with a Banana Coin and a Banana Bunch above it follow this spring. | ||
== | ==Enemies== | ||
*[[Flitter]] | |||
* | *[[Kaboing]] | ||
* | *[[Kannon]] | ||
* | *[[Zinger]] | ||
* | |||
== | ==Items and objects== | ||
[[ | *[[Banana Coin]]s: 2 | ||
* | *[[DK Barrel]]s: 3 | ||
====DK Coin | ===K-O-N-G letters=== | ||
*K: Above the first stack of barrels | |||
*O: Right after the second DK Barrel, Rattly reaches a pit which the letter O is above. | |||
*N: Above the first Kannon, who appears right after the Star Barrel. | |||
*G: Floating in midair as Rattly approaches the last pit in the level. | |||
===DK Coin=== | |||
Shortly after the letter O, Rattly must go on a barrel platform, and above is a group of bananas shaping an up arrow. As indicated, Rattly must perform a superjump to go up to the [[DK Coin]]. | |||
==Bonus Level== | |||
{|class="wikitable" | |||
!Image | |||
!Type and description | |||
|- | |||
|[[File:Rattle Battle DKL2 Bonus Area.png]] | |||
|'''Find the Token!'''<br>Right before the second DK Barrel is an arrangement of barrels; three are on the bottom, and two on the top. Rattly must jump left from the top row barrels and bounce on a nearby Zinger to enter a [[Bonus Barrel]] high above. In the Bonus Level, Rattly has 20 seconds to obtain the [[Kremkoin]]. He starts from a lower part of the ship, and must bounce from some Zingers to cross a large gap. The [[Kremkoin]] is on a higher ship deck area, to the upper right. Rattly can collect the bananas above the Zingers along the way. | |||
|} | |||
==Gallery== | |||
<gallery> | |||
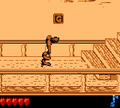
Rattle Battle DKL2 Kaboing.png|Rattly encounters a Kaboing | |||
Rattle Battle DKL2 letter G.png|Rattly finds the letter G | |||
</gallery> | |||
{{DKL2}} | {{DKL2}} | ||
[[Category:Donkey Kong Land 2 Levels]] | [[Category:Donkey Kong Land 2 Levels]] | ||
[[Category:Crocodile Isle]] | [[Category:Crocodile Isle]] | ||
Revision as of 16:28, October 21, 2019
Template:Levelbox Rattle Battle is the fourteenth level of Donkey Kong Land 2 and the ninth level of Krem Cauldron.
Summary
The level takes place on the deck of the wrecked ship that Glimmer's Galleon was in. The level is not much different from the eponymous Donkey Kong Country 2: Diddy's Kong Quest level. Diddy and Dixie must enter a Rattly Barrel to transform into Rattly the Rattlesnake during most of the level. Rattly must move across ship deck, jumping over holes and gaps between segments of the ship. Rattly can only get across some gaps by jump from Zingers and Flitters, or by using his superjump ability. Banana trails often indicate the direction of the main path or hint at items high above, such as a Banana Coin or even the DK Coin.
Layout

The Kongs begin the level under an Animal Barrel, which, if entered, turns them into Rattly the Rattlesnake. A large barrel with a few bananas above it is located to the left of the Animal Barrel. Ahead of here, Rattly can find a small stairway leading up to a Kaboing and a large pile of barrels with the letter K above it. A Neek crawls past these barrels, which are followed by another stairway with a DK Barrel at the top of it. There is a pit immediately after this barrel, and a Zinger flies over it. Once the pit is crossed, a Kaboing and another pit with a Flitter and a Banana Bunch above it are reached. As with most pits in this level, Rattly can cross with either his normal jump, or by bouncing on the Flitter. On the other side of the abyss, there is another Kaboing and a large barrel with a ledge after it. After the rattlesnake drops down this ledge, he comes up to a Kaboing and another pit with a Zinger above it. The snake can cross this pit with the assistance of the Zinger, or simply by jumping over the gap. If he manages to cross safely, he encounters another Kaboing and a stack of two barrels with a Banana Coin high above them. A ledge is near here, and a small trial of bananas with a Banana Bunch at the end of it is high above it.
After dropping to the bottom of the ledge, Rattly meets an additional Kaboing and a large stack of barrels with a pair of Zingers above them. The Zinger to the top-left of the pile can be bounced on to reach a Bonus Barrel, while the other, located to the right of the barrels, can be hopped on to cross a small pit, which is followed by a DK Barrel. A pit is near here, and a Zinger, some bananas, and the letter O are above it. A small ledge and a stack of barrels follow this pit, and a Kaboing also jumps near these barrels. Another Kaboing can be found ahead, jumping in front of a large barrel with an arrow (formed by bananas) above it. The arrow points upwards towards a hidden DK Coin. Ahead of here, Rattly can find a group of two barrels next to a small ledge, which a pair of Kaboings stand around. There is a wide pit near here with some bananas and a pair of Zingers above it. Rattly can use his special jumping ability to cross the pit, or he can also bounce on the Zingers to cross. The level's Star Barrel is immediately after this abyss.

An Animal Barrel and a DK Barrel float at the bottom of a ledge near here. If the level is begun from the Star Barrel, the Kongs take their normal form, having to enter the Animal Barrel to turn back into the reptile. After dropping down a few ledges, Rattly reaches a large pile of barrels that support a kannonball-shooting Kannon with the letter N above it. A pair of Kaboings follow the barrels, but they are separated by a small stairway with a Banana Bunch above it. If Rattly continues, he comes up to a small pit with a Zinger flying above it. On the other side of the pit, there is a barrel-shooting Kannon, who stands in front of a pair of large barrels. A wide pit that is completely void of enemies is ahead of here, and the only way to cross it is with Rattly's high-jumping move.
A smaller abyss with two Zingers above it can be found ahead of here after the rattlesnake climbs a small stairway. It is followed by an additional gap with a Flitter above it. Once on the other side of this pit, Rattly approaches a DK Barrel and a ledge with a Kaboing at the bottom of it. In order to progress farther, the rattlesnake must cross another pit with a Zinger above it. The letter G and a small stairway with a Kaboing at the top of it are ahead of this abyss. One final abyss is after here, and two more Zingers fly in it. After the Animal Buddy reaches the other side of it, he comes up to a spring, which he must bounce on to complete the level. A Kaboing and a ledge with a Banana Coin and a Banana Bunch above it follow this spring.
Enemies
Items and objects
- Banana Coins: 2
- DK Barrels: 3
K-O-N-G letters
- K: Above the first stack of barrels
- O: Right after the second DK Barrel, Rattly reaches a pit which the letter O is above.
- N: Above the first Kannon, who appears right after the Star Barrel.
- G: Floating in midair as Rattly approaches the last pit in the level.
DK Coin
Shortly after the letter O, Rattly must go on a barrel platform, and above is a group of bananas shaping an up arrow. As indicated, Rattly must perform a superjump to go up to the DK Coin.
Bonus Level
| Image | Type and description |
|---|---|

|
Find the Token! Right before the second DK Barrel is an arrangement of barrels; three are on the bottom, and two on the top. Rattly must jump left from the top row barrels and bounce on a nearby Zinger to enter a Bonus Barrel high above. In the Bonus Level, Rattly has 20 seconds to obtain the Kremkoin. He starts from a lower part of the ship, and must bounce from some Zingers to cross a large gap. The Kremkoin is on a higher ship deck area, to the upper right. Rattly can collect the bananas above the Zingers along the way. |
Gallery
Rattly encounters a Kaboing
Rattly finds the letter G

