Tag: Disambiguation links |
|
| (2 intermediate revisions by the same user not shown) |
| Line 467: |
Line 467: |
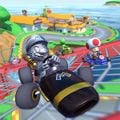
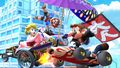
| MKT Team Wario Pipe.jpg|[[Mario|Mario (Hakama)]] tricking in the Black Kabuki Dasher on [[GBA Cheep-Cheep Island]] | | MKT Team Wario Pipe.jpg|[[Mario|Mario (Hakama)]] tricking in the Black Kabuki Dasher on [[GBA Cheep-Cheep Island]] |
| </gallery> | | </gallery> |
|
| |
|
| |
| ==List of Mario Variants in ''Mario Kart Tour''==
| |
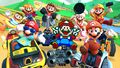
| This page contains a list of Mario's variants in ''Mario Kart Tour''. At a total of 22 (including power-up based variants), Mario has the most variants out of every character in the game.
| |
|
| |
| ==Metal Mario==
| |
| '''[[Metal Mario]]''' is a playable power-up variant of Mario, debuting at the game's launch. While he has his own unique animations and voice clips, challenges involving Mario can be completed using Metal Mario. He is classified as a High-End driver and has the Fire Flower as his [[Special Item]], much like Mario himself. Metal Mario has a small chance of being obtained after the game's tutorial.
| |
|
| |
| ===Availability===
| |
| Metal Mario has been available in all pipes since the game's launch, including regular pipes and the All-Clear Pipe. He is also available through the base Daily Selects set.
| |
| {|cellspacing=0 border=1 cellpadding=3 style="border-collapse:collapse;text-align:center" width=100%
| |
| !style="background:#c3cfdb"|Tour
| |
| !style="background:#c3cfdb"|Availability
| |
| |-
| |
| |[[New York Tour]]
| |
| |Gold gift<br><small>250 [[Grand Star]]s</small>
| |
| |-
| |
| |[[Paris Tour (2019)]]
| |
| |Gold gift<br><small>200 Grand Stars</small>
| |
| |-
| |
| |[[Trick Tour (2020)]]
| |
| |[[Trick Tour (2020)#Paid banners|Metal Mario Pack]]<br><small>$19.99 / €21.99 / AU$30.99<br>April 22, 2020–April 29, 2020</small>
| |
| |-
| |
| |[[Super Mario Kart Tour]]
| |
| |[[Super Mario Kart Tour#Paid banners|Metal Mario Pack]]<br><small>$39.99 / €43.99 / AU$62.99<br>September 9, 2020–September 23, 2020</small>
| |
| |-
| |
| |[[1st Anniversary Tour]]
| |
| |Token Shop<br><small>50 [[event token]]s</small>
| |
| |-
| |
| |[[Mario vs. Luigi Tour]]
| |
| |[[Mario vs. Luigi Tour#Paid banners|Team Mario<br>Metal Mario Pack]]<br><small>$19.99 / €21.99 / AU$30.99<br>November 25, 2020–December 2, 2020</small>
| |
| |-
| |
| |[[Rosalina Tour]]
| |
| |Tier Shop<br><small>12,000 [[coin]]s<br>December 16, 2020–December 22, 2020</small>
| |
| |-
| |
| |[[Peach vs. Daisy Tour]]
| |
| |Token Shop<br><small>100 [[Event token|team tokens]]</small>
| |
| |-
| |
| |[[Mario Tour]]
| |
| |[[Mario Tour#Paid banners|Iron Cucumber Pack]]<br><small>$39.99 / €43.99 / AU$62.99<br>March 16, 2021–March 23, 2021</small>
| |
| |-
| |
| |[[Bowser vs. DK Tour]]
| |
| |Token Shop<br><small>100 team tokens</small>
| |
| |-
| |
| |[[Summer Tour]]
| |
| |Premium Challenges card completion reward
| |
| |-
| |
| |[[Mario vs. Peach Tour]]
| |
| |Gold gift<br><small>100 Grand Stars</small>
| |
| |-
| |
| |[[2nd Anniversary Tour]]
| |
| |Token Shop<br><small>100 event tokens</small>
| |
| |-
| |
| |[[Halloween Tour (2021)]]
| |
| |Tier Shop<br><small>12,000 [[coin]]s<br>October 20, 2021–October 26, 2021</small>
| |
| |}
| |
|
| |
| ===Statistics===
| |
| {{MKT profile
| |
| |item=Fire Flower
| |
|
| |
| |I1.1=Shy Guy Bazaar|R1.1=[[3DS Shy Guy Bazaar]]
| |
| |I1.2=DK Pass T|R1.2=[[DS DK Pass|DS DK Pass T]]
| |
| |I1.3=Frappe Snowland R|R1.3=[[N64 Frappe Snowland|N64 Frappe Snowland R]]
| |
| |I1.4=Rock Rock Mountain R|R1.4=[[3DS Rock Rock Mountain|3DS Rock Rock Mountain R]]
| |
| |I1.5=Mario Circuit 2R|R1.5=[[SNES Mario Circuit 2|SNES Mario Circuit 2R]]
| |
| |I1.6=SNES Rainbow Road|R1.6=[[SNES Rainbow Road]]
| |
| |I1.7=SNES Rainbow Road T|R1.7=[[SNES Rainbow Road|SNES Rainbow Road T]]
| |
| |I1.8=RMX Mario Circuit 1|R1.8=[[RMX Mario Circuit 1]]
| |
| |I1.9=GBA Bowser's Castle 2RT|R1.9=[[GBA Bowser's Castle 2|GBA Bowser's Castle 2R/T]]
| |
| |I1.10=RMX Rainbow Road 1R|R1.10=[[RMX Rainbow Road 1|RMX Rainbow Road 1R]]
| |
| |I1.11=Tokyo Blur 4R|R1.11=[[Tokyo Blur 4|Tokyo Blur 4R]]
| |
|
| |
| |I2.1=Mario Circuit 1T|R2.1=[[SNES Mario Circuit 1|SNES Mario Circuit 1T]]
| |
| |I2.2=Yoshi Circuit R|R2.2=[[GCN Yoshi Circuit|GCN Yoshi Circuit R]]
| |
| |I2.3=Yoshi Circuit T|R2.3=[[GCN Yoshi Circuit|GCN Yoshi Circuit T]]
| |
| |I2.4=Dino Dino Jungle T|R2.4=[[GCN Dino Dino Jungle|GCN Dino Dino Jungle T]]***
| |
| |I2.5=Shy Guy Bazaar R|R2.5=[[3DS Shy Guy Bazaar|3DS Shy Guy Bazaar R]]
| |
| |I2.6=Shy Guy Bazaar T|R2.6=[[3DS Shy Guy Bazaar|3DS Shy Guy Bazaar T]]
| |
| |I2.7=DS Waluigi Pinball|R2.7=[[DS Waluigi Pinball]]**
| |
| |I2.8=Vanilla Lake 1R|R2.8=[[SNES Vanilla Lake 1|SNES Vanilla Lake 1R]]**
| |
| |I2.9=Vanilla Lake 1T|R2.9=[[SNES Vanilla Lake 1|SNES Vanilla Lake 1T]]
| |
| |I2.10=Toad Circuit|R2.10=[[3DS Toad Circuit]]*
| |
| |I2.11=SNES Rainbow Road R|R2.11=[[SNES Rainbow Road|SNES Rainbow Road R]]*
| |
| |I2.12=Vanilla Lake 1RT|R2.12=[[SNES Vanilla Lake 1|SNES Vanilla Lake 1R/T]]
| |
| |I2.13=Tokyo Blur 3T|R2.13=[[Tokyo Blur 3|Tokyo Blur 3T]]
| |
| |I2.14=Tokyo Blur 3R|R2.14=[[Tokyo Blur 3|Tokyo Blur 3R]]
| |
| |I2.15=RMX Rainbow Road 1|R2.15=[[RMX Rainbow Road 1]]
| |
| |I2.16=New York Minute 3R|R2.16=[[New York Minute 3|New York Minute 3R]]
| |
| |I2.17=Tokyo Blur 4RT|R2.17=[[Tokyo Blur 4|Tokyo Blur 4R/T]]
| |
| |I2.18=Sydney Sprint R|R2.18=[[Sydney Sprint|Sydney Sprint R]]
| |
| |I2.19=Sydney Sprint RT|R2.19=[[Sydney Sprint|Sydney Sprint R/T]]
| |
| |I2.20=Ninja Hideaway RT|R2.20=[[Ninja Hideaway|Ninja Hideaway R/T]]
| |
| }}
| |
|
| |
| ==Mario (Musician)==
| |
| '''Mario (Musician)''' is the first unique variant of Mario introduced in ''Mario Kart Tour'', debuting in the [[New York Tour]] as a spotlight character for the tour's second week pipe. This variant of Mario has him wearing the Musician Hat and Musician Outfit from ''[[Super Mario Odyssey]]''. Mario (Musician) is classified as a High-End driver with the [[Double Bob-ombs]] as his [[Special Item]].
| |
|
| |
| ===Availability===
| |
| {|cellspacing=0 border=1 cellpadding=3 style="border-collapse:collapse;text-align:center" width=100%
| |
| !style="background:#c3cfdb"|Tour
| |
| !style="background:#c3cfdb"|Availability
| |
| |-
| |
| |rowspan=2|[[New York Tour]]
| |
| |[[New York Tour#New York Pipe 1|New York Pipe 1]]
| |
| |-
| |
| |[[New York Tour#New York Pipe 2|New York Pipe 2]]<br><small>spotlight
| |
| |-
| |
| |rowspan=2|[[New Year's Tour]]
| |
| |[[New Year's Tour#New Year's Pipe 1|New Year's Pipe 1]]
| |
| |-
| |
| |[[New Year's Tour#New Year's Pipe 2|New Year's Pipe 2]]
| |
| |-
| |
| |[[Super Mario Kart Tour]]
| |
| |[[Super Mario Kart Tour#Throwback Drivers Pipe|Throwback Drivers Pipe]]
| |
| |-
| |
| |rowspan=2|[[1st Anniversary Tour]]
| |
| |[[1st Anniversary Tour#1st Anniversary Pipe 1|1st Anniversary Pipe 1]]
| |
| |-
| |
| |[[1st Anniversary Tour#1st Anniversary Pipe 2|1st Anniversary Pipe 2]]<br><small>spotlight
| |
| |-
| |
| |[[Berlin Tour]]
| |
| |[[Berlin Tour#Big City Pipe|Big City Pipe]]
| |
| |-
| |
| |[[Mario Tour]]
| |
| |Premium Challenges card completion reward
| |
| |-
| |
| |[[Paris Tour (2021)]]
| |
| |[[Paris Tour (2021)#Pull-Ahead Pipe|Pull-Ahead Pipe]]
| |
| |-
| |
| |[[Los Angeles Tour (2021)]]
| |
| |Tour Multiplayer Challenges card completion reward
| |
| |}
| |
|
| |
| ===Statistics===
| |
| {{MKT profile
| |
| |item=Double Bob-ombs
| |
| |I1.1=Yoshi Circuit R|R1.1=[[GCN Yoshi Circuit|GCN Yoshi Circuit R]]
| |
| |I1.2=DS Waluigi Pinball R|R1.2=[[DS Waluigi Pinball|DS Waluigi Pinball R]]
| |
| |I1.3=Mario Circuit 3|R1.3=[[SNES Mario Circuit 3]]
| |
| |I1.4=Paris Promenade 2RT|R1.4=[[Paris Promenade 2|Paris Promenade 2R/T]]
| |
| |I1.5=New York Minute 2RT|R1.5=[[New York Minute 2|New York Minute 2R/T]]
| |
| |I1.6=Daisy Hills|R1.6=[[3DS Daisy Hills]]
| |
| |I1.7=New York Minute T|R1.7=[[New York Minute|New York Minute T]]
| |
| |I1.8=New York Minute R|R1.8=[[New York Minute|New York Minute R]]
| |
| |I1.9=Donut Plains 1R|R1.9=[[SNES Donut Plains 1|SNES Donut Plains 1R]]
| |
| |I1.10=RMX Rainbow Road 1T|R1.10=[[RMX Rainbow Road 1|RMX Rainbow Road 1T]]
| |
| |I1.11=New York Minute 3RT|R1.11=[[New York Minute 3|New York Minute 3R/T]]
| |
| |I1.12=New York Minute 3R|R1.12=[[New York Minute 3|New York Minute 3R]]
| |
| |I1.13=Los Angeles Laps 3R|R1.13=[[Los Angeles Laps 3|Los Angeles Laps 3R]]
| |
| |I1.14=New York Minute 4RT|R1.14=[[New York Minute 4|New York Minute 4R/T]]
| |
| |I1.15=New York Minute 4R|R1.15=[[New York Minute 4|New York Minute 4R]]
| |
| |I1.16=New York Minute 4T|R1.16=[[New York Minute 4|New York Minute 4T]]
| |
|
| |
| |I2.1=Shy Guy Bazaar RT|R2.1=[[3DS Shy Guy Bazaar|3DS Shy Guy Bazaar R/T]]
| |
| |I2.2=DS Luigi's Mansion|R2.2=[[DS Luigi's Mansion]]**
| |
| |I2.3=Mario Circuit 3R|R2.3=[[SNES Mario Circuit 3|SNES Mario Circuit 3R]]*
| |
| |I2.4=Paris Promenade 2|R2.4=[[Paris Promenade 2]]
| |
| |I2.5=New York Minute 2R|R2.5=[[New York Minute 2|New York Minute 2R]]
| |
| |I2.6=Rock Rock Mountain T|R2.6=[[3DS Rock Rock Mountain|3DS Rock Rock Mountain T]]
| |
| |I2.7=Daisy Hills R|R2.7=[[3DS Daisy Hills|3DS Daisy Hills R]]
| |
| |I2.8=3DS Mario Circuit T|R2.8=[[3DS Mario Circuit|3DS Mario Circuit T]]
| |
| |I2.9=3DS Mario Circuit RT|R2.9=[[3DS Mario Circuit|3DS Mario Circuit R/T]]***
| |
| |I2.10=Neo Bowser City T|R2.10=[[3DS Neo Bowser City|3DS Neo Bowser City T]]**
| |
| |I2.11=Neo Bowser City RT|R2.11=[[3DS Neo Bowser City|3DS Neo Bowser City R/T]]*
| |
| |I2.12=SNES Rainbow Road T|R2.12=[[SNES Rainbow Road|SNES Rainbow Road T]]
| |
| |I2.13=New York Minute|R2.13=[[New York Minute]]
| |
| |I2.14=New York Minute RT|R2.14=[[New York Minute|New York Minute R/T]]
| |
| |I2.15=Paris Promenade RT|R2.15=[[Paris Promenade|Paris Promenade R/T]]
| |
| |I2.16=Donut Plains 1T|R2.16=[[SNES Donut Plains 1|SNES Donut Plains 1T]]
| |
| |I2.17=RMX Rainbow Road 1R|R2.17=[[RMX Rainbow Road 1|RMX Rainbow Road 1R]]
| |
| |I2.18=New York Minute 3T|R2.18=[[New York Minute 3|New York Minute 3T]]
| |
| |I2.19=Berlin Byways 2T|R2.19=[[Berlin Byways 2|Berlin Byways 2T]]
| |
| |I2.20=Paris Promenade 3RT|R2.20=[[Paris Promenade 3|Paris Promenade 3R/T]]
| |
| |I2.21=Los Angeles Laps 3T|R2.21=[[Los Angeles Laps 3|Los Angeles Laps 3T]]
| |
| |I2.22=Sydney Sprint 2|R2.22=[[Sydney Sprint 2]]
| |
| |I2.23=Sydney Sprint 2R|R2.23=[[Sydney Sprint 2|Sydney Sprint 2R]]
| |
| |I2.24=New York Minute 4|R2.24=[[New York Minute 4]]
| |
| }}
| |
|
| |
| ==Mario (Hakama)==
| |
| '''Mario (Hakama)''' is a variant of Mario debuting in the [[Tokyo Tour]] as a High-End driver. He is the spotlight driver for the tour's second week pipe. This variant of Mario has him wearing the Hakama outfit from ''Super Mario Odyssey''. His Special Item is the [[Coin Box]].
| |
|
| |
| ===Availability===
| |
| {|cellspacing=0 border=1 cellpadding=3 style="border-collapse:collapse;text-align:center" width=100%
| |
| !style="background:#c3cfdb"|Tour
| |
| !style="background:#c3cfdb"|Availability
| |
| |-
| |
| |rowspan=2|[[Tokyo Tour]]
| |
| |[[Tokyo Tour#Tokyo Pipe 1|Tokyo Pipe 1]]
| |
| |-
| |
| |[[Tokyo Tour#Tokyo Pipe 2|Tokyo Pipe 2]]<br><small>spotlight
| |
| |-
| |
| |rowspan=2|[[New Year's Tour]]
| |
| |[[New Year's Tour#New Year's Pipe 1|New Year's Pipe 1]]
| |
| |-
| |
| |[[New Year's Tour#New Year's Pipe 2|New Year's Pipe 2]]
| |
| |-
| |
| |rowspan=2|[[Summer Festival Tour]]
| |
| |[[Summer Festival Tour#Summer Festival Pipe 1|Summer Festival Pipe 1]]
| |
| |-
| |
| |[[Summer Festival Tour#Summer Festival Pipe 2|Summer Festival Pipe 2]]<br><small>spotlight
| |
| |-
| |
| |rowspan=2|[[1st Anniversary Tour]]
| |
| |[[1st Anniversary Tour#1st Anniversary Pipe 1|1st Anniversary Pipe 1]]<br><small>spotlight
| |
| |-
| |
| |[[1st Anniversary Tour#1st Anniversary Pipe 2|1st Anniversary Pipe 2]]
| |
| |-
| |
| |[[Mario vs. Luigi Tour]]
| |
| |[[Mario vs. Luigi Tour#Coin Box Pipe|Coin Box Pipe]]
| |
| |-
| |
| |rowspan=2|[[New Year's 2021 Tour]]
| |
| |[[New Year's 2021 Tour#New Year's 2021 Pipe 1|New Year's 2021 Pipe 1]]
| |
| |-
| |
| |[[New Year's 2021 Tour#New Year's 2021 Pipe 2|New Year's 2021 Pipe 2]]<br><small>spotlight
| |
| |-
| |
| |rowspan=2|[[Mario Tour]]
| |
| |[[Mario Tour#Mario Pipe 1|Mario Pipe 1]]
| |
| |-
| |
| |[[Mario Tour#Mario Pipe 2|Mario Pipe 2]]<br><small>spotlight
| |
| |-
| |
| |[[Mario vs. Peach Tour]]
| |
| |Token Shop<br><small>300 [[Event token|team tokens]]
| |
| |}
| |
|
| |
| ===Statistics===
| |
| {{MKT profile
| |
| |item=Coin Box
| |
| |I1.1=Mario Circuit 1|R1.1=[[SNES Mario Circuit 1]]
| |
| |I1.2=Mario Circuit 1T|R1.2=[[SNES Mario Circuit 1|SNES Mario Circuit 1T]]
| |
| |I1.3=GBA Bowser's Castle 1T|R1.3=[[GBA Bowser's Castle 1|GBA Bowser's Castle 1T]]
| |
| |I1.4=DS Waluigi Pinball R|R1.4=[[DS Waluigi Pinball|DS Waluigi Pinball R]]
| |
| |I1.5=Mario Circuit 3R|R1.5=[[SNES Mario Circuit 3|SNES Mario Circuit 3R]]
| |
| |I1.6=Tokyo Blur|R1.6=[[Tokyo Blur]]
| |
| |I1.7=Tokyo Blur RT|R1.7=[[Tokyo Blur|Tokyo Blur R/T]]
| |
| |I1.8=Mario Circuit 2|R1.8=[[SNES Mario Circuit 2]]
| |
| |I1.9=3DS Mario Circuit T|R1.9=[[3DS Mario Circuit|3DS Mario Circuit T]]
| |
| |I1.10=RMX Mario Circuit 1RT|R1.10=[[RMX Mario Circuit 1|RMX Mario Circuit 1R/T]]
| |
| |I1.11=Tokyo Blur 3T|R1.11=[[Tokyo Blur 3|Tokyo Blur 3T]]
| |
| |I1.12=Tokyo Blur 3R|R1.12=[[Tokyo Blur 3|Tokyo Blur 3R]]
| |
| |I1.13=New York Minute 3RT|R1.13=[[New York Minute 3|New York Minute 3R/T]]
| |
| |I1.14=Yoshi Valley R|R1.14=[[N64 Yoshi Valley|N64 Yoshi Valley R]]
| |
|
| |
| |I2.1=Mario Circuit 1R|R2.1=[[SNES Mario Circuit 1|SNES Mario Circuit 1R]]**
| |
| |I2.2=Dino Dino Jungle R|R2.2=[[GCN Dino Dino Jungle|GCN Dino Dino Jungle R]]
| |
| |I2.3=Dino Dino Jungle RT|R2.3=[[GCN Dino Dino Jungle|GCN Dino Dino Jungle R/T]]
| |
| |I2.4=GBA Bowser's Castle 1R|R2.4=[[GBA Bowser's Castle 1|GBA Bowser's Castle 1R]]
| |
| |I2.5=Shy Guy Bazaar T|R2.5=[[3DS Shy Guy Bazaar|3DS Shy Guy Bazaar T]]
| |
| |I2.6=DS Waluigi Pinball|R2.6=[[DS Waluigi Pinball]]*
| |
| |I2.7=DS Waluigi Pinball RT|R2.7=[[DS Waluigi Pinball|DS Waluigi Pinball R/T]]
| |
| |I2.8=DK Pass R|R2.8=[[DS DK Pass|DS DK Pass R]]
| |
| |I2.9=Tokyo Blur T|R2.9=[[Tokyo Blur|Tokyo Blur T]]
| |
| |I2.10=Tokyo Blur 2R|R2.10=[[Tokyo Blur 2|Tokyo Blur 2R]]
| |
| |I2.11=Paris Promenade 2R|R2.11=[[Paris Promenade 2|Paris Promenade 2R]]
| |
| |I2.12=Paris Promenade 2RT|R2.12=[[Paris Promenade 2|Paris Promenade 2R/T]]
| |
| |I2.13=Mario Circuit 2T|R2.13=[[SNES Mario Circuit 2|SNES Mario Circuit 2T]]
| |
| |I2.14=Ghost Valley 1T|R2.14=[[SNES Ghost Valley 1|SNES Ghost Valley 1T]]**
| |
| |I2.15=SNES Rainbow Road T|R2.15=[[SNES Rainbow Road|SNES Rainbow Road T]]*
| |
| |I2.16=Tokyo Blur 3|R2.16=[[Tokyo Blur 3]]
| |
| |I2.17=New York Minute 3T|R2.17=[[New York Minute 3|New York Minute 3T]]
| |
| |I2.18=RMX Rainbow Road 1RT|R2.18=[[RMX Rainbow Road 1|RMX Rainbow Road 1R/T]]
| |
| |I2.19=Rosalina's Ice World T|R2.19=[[3DS Rosalina's Ice World|3DS Rosalina's Ice World T]]
| |
| |I2.20=RMX Choco Island 2|R2.20=[[RMX Choco Island 2]]
| |
| |I2.21=Donut Plains 2RT|R2.21=[[SNES Donut Plains 2|SNES Donut Plains 2R/T]]***
| |
| |I2.22=Los Angeles Laps 2R|R2.22=[[Los Angeles Laps 2|Los Angeles Laps 2R]]
| |
| |I2.23=3DS Bowser's Castle RT|R2.23=[[3DS Bowser's Castle|3DS Bowser's Castle R/T]]
| |
| |I2.24=Yoshi Valley|R2.24=[[N64 Yoshi Valley]]
| |
| }}
| |
|
| |
| ==Mario (Santa)==
| |
| '''Mario (Santa)''' is a variant of Mario that debuted in the [[Winter Tour (2019)|2019 Winter Tour]] as a High-End driver. He was the spotlight driver for the tour's first week pipe. True to the name, this variant depicts Mario wearing a traditional Santa Claus outfit, specifically the one based on the outfit from ''Super Mario Odyssey'', though this variant also has him wearing a fake white beard as well. Much like normal Mario, this variant has the [[Fire Flower]] as his Special Item.
| |
|
| |
| ===Availability===
| |
| {|cellspacing=0 border=1 cellpadding=3 style="border-collapse:collapse;text-align:center" width=100%
| |
| !style="background:#c3cfdb"|Tour
| |
| !style="background:#c3cfdb"|Availability
| |
| |-
| |
| |rowspan=2|[[Winter Tour (2019)]]
| |
| |[[Winter Tour (2019)#Winter Pipe 1|Winter Pipe 1]]<br><small>spotlight
| |
| |-
| |
| |[[Winter Tour (2019)#Winter Pipe 2|Winter Pipe 2]]
| |
| |-
| |
| |rowspan=2|[[London Tour]]
| |
| |[[London Tour#London Pipe 1|London Pipe 1]]
| |
| |-
| |
| |[[London Tour#London Pipe 2|London Pipe 2]]
| |
| |-
| |
| |rowspan=2|[[Holiday Tour (2019)]]
| |
| |[[Holiday Tour (2019)#Holiday Pipe 1|Holiday Pipe 1]]
| |
| |-
| |
| |[[Holiday Tour (2019)#Holiday Pipe 2|Holiday Pipe 2]]
| |
| |-
| |
| |rowspan=2|[[Winter Tour (2020)]]
| |
| |[[Winter Tour (2020)#Winter Pipe 1|Winter Pipe 1]]
| |
| |-
| |
| |[[Winter Tour (2020)#Winter Pipe 2|Winter Pipe 2]]<br><small>spotlight
| |
| |-
| |
| |[[Rosalina Tour]]
| |
| |[[Rosalina Tour#Rosalina Pipe 1|Rosalina Pipe 1]]
| |
| |}
| |
|
| |
| ===Statistics===
| |
| {{MKT profile
| |
| |item=Fire Flower
| |
| |I1.1=Mario Circuit 1R|R1.1=[[SNES Mario Circuit 1|SNES Mario Circuit 1R]]
| |
| |I1.2=Mario Circuit 1RT|R1.2=[[SNES Mario Circuit 1|SNES Mario Circuit 1R/T]]
| |
| |I1.3=DS Luigi's Mansion|R1.3=[[DS Luigi's Mansion]]
| |
| |I1.4=DK Pass R|R1.4=[[DS DK Pass]]
| |
| |I1.5=Vanilla Lake 1T|R1.5=[[SNES Vanilla Lake 1|SNES Vanilla Lake 1T]]
| |
| |I1.6=3DS Mario Circuit RT|R1.6=[[3DS Mario Circuit|3DS Mario Circuit R/T]]
| |
| |I1.7=SNES Rainbow Road R|R1.7=[[SNES Rainbow Road|SNES Rainbow Road R]]
| |
| |I1.8=SNES Rainbow Road T|R1.8=[[SNES Rainbow Road|SNES Rainbow Road T]]
| |
| |I1.9=Paris Promenade|R1.9=[[Paris Promenade]]
| |
| |I1.10=Paris Promenade R|R1.10=[[Paris Promenade|Paris Promenade R]]
| |
| |I1.11=Merry Mountain R|R1.11=[[Merry Mountain|Merry Mountain R]]
| |
| |I1.12=Rosalina's Ice World T|R1.12=[[3DS Rosalina's Ice World|3DS Rosalina's Ice World T]]
| |
| |I1.13=Sydney Sprint 2T|R1.13=[[Sydney Sprint 2|Sydney Sprint 2T]]
| |
| |I1.14=Vanilla Lake 2R|R1.14=[[SNES Vanilla Lake 2|SNES Vanilla Lake 2R]]
| |
| |I1.15=Vanilla Lake 2|R1.15=[[SNES Vanilla Lake 2]]
| |
|
| |
| |I2.1=Choco Island 2|R2.1=[[SNES Choco Island 2]]**
| |
| |I2.2=Mario Circuit 3R|R2.2=[[SNES Mario Circuit 3|SNES Mario Circuit 3R]]*
| |
| |I2.3=DK Pass R|R2.3=[[DS DK Pass|DS DK Pass R]]**
| |
| |I2.4=DK Pass RT|R2.4=[[DS DK Pass|DS DK Pass R/T]]*
| |
| |I2.5=3DS Rainbow Road|R2.5=[[3DS Rainbow Road]]
| |
| |I2.6=3DS Rainbow Road T|R2.6=[[3DS Rainbow Road|3DS Rainbow Road T]]
| |
| |I2.7=Vanilla Lake 1R|R2.7=[[SNES Vanilla Lake 1|SNES Vanilla Lake 1R]]
| |
| |I2.8=Tokyo Blur 2|R2.8=[[Tokyo Blur 2]]
| |
| |I2.9=New York Minute 2RT|R2.9=[[New York Minute 2|New York Minute 2R/T]]
| |
| |I2.10=Rock Rock Mountain R|R2.10=[[3DS Rock Rock Mountain|3DS Rock Rock Mountain R]]
| |
| |I2.11=Mario Circuit 2RT|R2.11=[[SNES Mario Circuit 2|SNES Mario Circuit 2R/T]]
| |
| |I2.12=SNES Rainbow Road RT|R2.12=[[SNES Rainbow Road|SNES Rainbow Road R/T]]
| |
| |I2.13=London Loop T|R2.13=[[London Loop|London Loop T]]
| |
| |I2.14=Donut Plains 1|R2.14=[[SNES Donut Plains 1]]
| |
| |I2.15=RMX Choco Island 1T|R2.15=[[RMX Choco Island 1|RMX Choco Island 1T]]
| |
| |I2.16=Paris Promenade RT|R2.16=[[Paris Promenade|Paris Promenade R/T]]
| |
| |I2.17=Rosalina's Ice World|R2.17=[[3DS Rosalina's Ice World]]***
| |
| |I2.18=Rosalina's Ice World RT|R2.18=[[3DS Rosalina's Ice World|3DS Rosalina's Ice World R/T]]
| |
| |I2.19=Merry Mountain RT|R2.19=[[Merry Mountain|Merry Mountain R/T]]
| |
| |I2.20=Vancouver Velocity 2R|R2.20=[[Vancouver Velocity 2|Vancouver Velocity 2R]]
| |
| }}
| |
|
| |
| ==Mario (Happi)==
| |
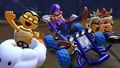
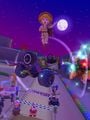
| '''Mario (Happi)''' is a variant of Mario that debuted in the [[New Year's Tour]] as a High-End driver. He appears as the spotlight driver for the tour's first week pipe. This variant depicts Mario wearing the Happi Headband and Happi Outfit from ''Super Mario Odyssey''. This variant has the [[Bob-omb Cannon]] as his Special Item.
| |
|
| |
| ===Availability===
| |
| {|cellspacing=0 border=1 cellpadding=3 style="border-collapse:collapse;text-align:center" width=100%
| |
| !style="background:#c3cfdb"|Tour
| |
| !style="background:#c3cfdb"|Availability
| |
| |-
| |
| |rowspan=2|[[New Year's Tour]]
| |
| |[[New Year's Tour#New Year's Pipe 1|New Year's Pipe 1]]<br><small>spotlight
| |
| |-
| |
| |[[New Year's Tour#New Year's Pipe 2|New Year's Pipe 2]]
| |
| |-
| |
| |rowspan=2|[[Summer Festival Tour]]
| |
| |[[Summer Festival Tour#Summer Festival Pipe 1|Summer Festival Pipe 1]]
| |
| |-
| |
| |[[Summer Festival Tour#Summer Festival Pipe 2|Summer Festival Pipe 2]]<br><small>spotlight
| |
| |-
| |
| |rowspan=2|[[New Year's 2021 Tour]]
| |
| |[[New Year's 2021 Tour#New Year's 2021 Pipe 1|New Year's 2021 Pipe 1]]
| |
| |-
| |
| |[[New Year's 2021 Tour#New Year's 2021 Pipe 2|New Year's 2021 Pipe 2]]<br><small>spotlight
| |
| |-
| |
| |rowspan=2|[[Mario Tour]]
| |
| |[[Mario Tour#Mario Pipe 1|Mario Pipe 1]]
| |
| |-
| |
| |[[Mario Tour#Mario Pipe 2|Mario Pipe 2]]<br><small>spotlight
| |
| |-
| |
| |rowspan=2|[[Mario vs. Peach Tour]]
| |
| |[[Mario vs. Peach Tour#Mario vs. Peach Pipe 1|Mario vs. Peach Pipe 1]]<br><small>spotlight
| |
| |-
| |
| |[[Mario vs. Peach Tour#Mario vs. Peach Pipe 2|Mario vs. Peach Pipe 2]]
| |
| |}
| |
|
| |
| ===Statistics===
| |
| {{MKT profile
| |
| |item=Bob-omb Cannon
| |
| |I1.1=Mario Circuit 3T|R1.1=[[SNES Mario Circuit 3|SNES Mario Circuit 3T]]
| |
| |I1.2=3DS Rainbow Road|R1.2=[[3DS Rainbow Road]]
| |
| |I1.3=Tokyo Blur 2|R1.3=[[Tokyo Blur 2]]
| |
| |I1.4=Tokyo Blur 2R|R1.4=[[Tokyo Blur 2|Tokyo Blur 2R]]
| |
| |I1.5=Rock Rock Mountain R|R1.5=[[3DS Rock Rock Mountain|3DS Rock Rock Mountain R]]
| |
| |I1.6=Koopa Troopa Beach T|R1.6=[[N64 Koopa Troopa Beach|N64 Koopa Troopa Beach T]]
| |
| |I1.7=Mario Circuit 2|R1.7=[[SNES Mario Circuit 2]]
| |
| |I1.8=Mario Circuit 2R|R1.8=[[SNES Mario Circuit 2|SNES Mario Circuit 2R]]
| |
| |I1.9=3DS Mario Circuit|R1.9=[[3DS Mario Circuit]]
| |
| |I1.10=3DS Cheep Cheep Lagoon RT|R1.10=[[3DS Cheep Cheep Lagoon|3DS Cheep Cheep Lagoon R/T]]
| |
| |I1.11=Tokyo Blur R|R1.11=[[Tokyo Blur|Tokyo Blur R]]
| |
| |I1.12=Tokyo Blur 3|R1.12=[[Tokyo Blur 3]]
| |
| |I1.13=RMX Rainbow Road 1|R1.13=[[RMX Rainbow Road 1]]
| |
| |I1.14=Tokyo Blur 4T|R1.14=[[Tokyo Blur 4|Tokyo Blur 4T]]
| |
|
| |
| |I2.1=3DS Cheep Cheep Lagoon|R2.1=[[3DS Cheep Cheep Lagoon]]**
| |
| |I2.2=GBA Bowser's Castle 1R|R2.2=[[GBA Bowser's Castle 1|GBA Bowser's Castle 1R]]
| |
| |I2.3=GBA Bowser's Castle 1T|R2.3=[[GBA Bowser's Castle 1|GBA Bowser's Castle 1T]]
| |
| |I2.4=Shy Guy Bazaar RT|R2.4=[[3DS Shy Guy Bazaar|3DS Shy Guy Bazaar R/T]]
| |
| |I2.5=Tokyo Blur 2T|R2.5=[[Tokyo Blur 2|Tokyo Blur 2T]]
| |
| |I2.6=Rock Rock Mountain|R2.6=[[3DS Rock Rock Mountain]]*
| |
| |I2.7=Mario Circuit 2T|R2.7=[[SNES Mario Circuit 2|SNES Mario Circuit 2T]]
| |
| |I2.8=Mario Circuit 2RT|R2.8=[[SNES Mario Circuit 2|SNES Mario Circuit 2R/T]]
| |
| |I2.9=3DS Mario Circuit R|R2.9=[[3DS Mario Circuit|3DS Mario Circuit R]]
| |
| |I2.10=Ghost Valley 1RT|R2.10=[[SNES Ghost Valley 1|SNES Ghost Valley 1R/T]]*
| |
| |I2.11=Royal Raceway|R2.11=[[N64 Royal Raceway]]***
| |
| |I2.12=Royal Raceway R|R2.12=[[N64 Royal Raceway|N64 Royal Raceway R]]**
| |
| |I2.13=RMX Rainbow Road 1T|R2.13=[[RMX Rainbow Road 1|RMX Rainbow Road 1T]]
| |
| |I2.14=Tokyo Blur 4|R2.14=[[Tokyo Blur 4]]
| |
| |I2.15=Royal Raceway RT|R2.15=[[N64 Royal Raceway|N64 Royal Raceway R/T]]
| |
| |I2.16=Wario Shipyard|R2.16=[[3DS Wario Shipyard]]
| |
| |I2.17=Los Angeles Laps 2RT|R2.17=[[Los Angeles Laps 2|Los Angeles Laps 2R/T]]
| |
| |I2.18=3DS Bowser's Castle RT|R2.18=[[3DS Bowser's Castle|3DS Bowser's Castle R/T]]
| |
| |I2.19=Amsterdam Drift|R2.19=[[Amsterdam Drift]]
| |
| }}
| |
|
| |
| ==Ice Mario==
| |
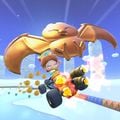
| '''[[Ice Mario (Super Mario Galaxy)|Ice Mario]]''' is a power-up variant of Mario that debuted during the [[Ice Tour]] as a High-End driver. Ice Mario takes his appearance from ''[[Super Mario Galaxy]]'' over the more modern appearances in other mainstream ''Mario series'' platformers. Ice Mario appears more based on Metal Mario, sharing the same animations and a similar phyiscal appearance as him, though retaining normal Mario's voice (albeit with a harsher reverb). Ice Mario's Special Item is the [[Ice Flower]].
| |
|
| |
| ===Availability===
| |
| Since his debut, Ice Mario has appeared in all pipes, including regular tour pipes and the All-Clear Pipe. He is not a part of the Daily Selects set, however.
| |
| {|cellspacing=0 border=1 cellpadding=3 style="border-collapse:collapse;text-align:center" width=100%
| |
| !style="background:#c3cfdb"|Tour
| |
| !style="background:#c3cfdb"|Availability
| |
| |-
| |
| |[[Ice Tour]]
| |
| |[[Ice Tour#Paid banners|Ice Mario Pack]]<br><small>$39.99 / €43.99 / AU$62.99<br>January 14, 2020 – January 21, 2020
| |
| |-
| |
| |[[Marine Tour]]
| |
| |[[Marine Tour#Paid banners|Blue Seven Pack]]<br><small>$39.99 / €43.99 / AU$62.99<br>June 30, 2020 – July 14, 2020
| |
| |-
| |
| |[[Mario vs. Luigi Tour]]
| |
| |Tier Shop<br><small>12,000 [[coin]]s<br>November 18, 2020 - November 24, 2020
| |
| |-
| |
| |[[Rosalina Tour]]
| |
| |[[Rosalina Tour#Shivers Pipe|Shivers Pipe]]
| |
| |-
| |
| |[[Snow Tour]]
| |
| |[[Snow Tour#Paid banners|Ice Mario Pack]]<br><small>$19.99 / €21.99 / AU$30.99<br>March 3, 2021 – March 9, 2021
| |
| |-
| |
| |[[Sydney Tour (April–May 2021)]]
| |
| |[[Sydney Tour (April–May 2021)#Paid banners|Blizzard Balloons Pack]]<br><small>$39.99 / €43.99 / AU$62.99<br>April 28, 2021 – May 4, 2021
| |
| |-
| |
| |[[Wedding Tour]]
| |
| |Premium Challenges card completion reward
| |
| |-
| |
| |[[Frost Tour]]
| |
| |[[Frost Tour#Paid banners|Ice Mario Pack]]<br><small>$19.99 / €21.99 / AU$30.99<br>August 11, 2021 – August 24, 2021
| |
| |-
| |
| |[[Toad vs. Toadette Tour]]
| |
| |Token Shop
| |
| |}
| |
|
| |
| ===Statistics===
| |
| {{MKT profile
| |
| |item=Ice Flower
| |
|
| |
| |I1.1=DK Pass RT|R1.1=[[DS DK Pass|DS DK Pass R/T]]
| |
| |I1.2=Frappe Snowland RT|R1.2=[[N64 Frappe Snowland|N64 Frappe Snowland R/T]]
| |
| |I1.3=Vanilla Lake 1|R1.3=[[SNES Vanilla Lake 1]]
| |
| |I1.4=Vanilla Lake 1R|R1.4=[[SNES Vanilla Lake 1|SNES Vanilla Lake 1R]]
| |
| |I1.5=Vancouver Velocity T|R1.5=[[Vancouver Velocity|Vancouver Velocity T]]
| |
| |I1.6=SNES Rainbow Road|R1.6=[[SNES Rainbow Road]]
| |
| |I1.7=SNES Rainbow Road R|R1.7=[[SNES Rainbow Road|SNES Rainbow Road R]]
| |
| |I1.8=3DS Rainbow Road R|R1.8=[[3DS Rainbow Road|3DS Rainbow Road R]]
| |
| |I1.9=3DS Rainbow Road T|R1.9=[[3DS Rainbow Road|3DS Rainbow Road T]]
| |
| |I1.10=Mario Circuit 1RT|R1.10=[[SNES Mario Circuit 1|SNES Mario Circuit 1R/T]]
| |
| |I1.11=Mario Circuit 2RT|R1.11=[[SNES Mario Circuit 2|SNES Mario Circuit 2R/T]]
| |
| |I1.12=Neo Bowser City RT|R1.12=[[3DS Neo Bowser City|3DS Neo Bowser City R/T]]
| |
| |I1.13=3DS Rainbow Road RT|R1.13=[[3DS Rainbow Road|3DS Rainbow Road R/T]]
| |
| |I1.14=Koopa Troopa Beach 2T|R1.14=[[SNES Koopa Troopa Beach 2|SNES Koopa Troopa Beach 2T]]
| |
| |I1.15=Rosalina's Ice World R|R1.15=[[3DS Rosalina's Ice World|3DS Rosalina's Ice World R]]
| |
| |I1.16=Donut Plains 2R|R1.16=[[SNES Donut Plains 2|SNES Donut Plains 2R]]
| |
| |I1.17=RMX Vanilla Lake 1R|R1.17=[[RMX Vanilla Lake 1|RMX Vanilla Lake 1R]]
| |
|
| |
| |I2.1=Mario Circuit 3RT|R2.1=[[SNES Mario Circuit 3|SNES Mario Circuit 3R/T]]
| |
| |I2.2=Frappe Snowland|R2.2=[[N64 Frappe Snowland]]
| |
| |I2.3=Frappe Snowland R|R2.3=[[N64 Frappe Snowland|N64 Frappe Snowland R]]
| |
| |I2.4=Frappe Snowland T|R2.4=[[N64 Frappe Snowland|N64 Frappe Snowland T]]***
| |
| |I2.5=Vanilla Lake 1T|R2.5=[[SNES Vanilla Lake 1|SNES Vanilla Lake 1T]]**
| |
| |I2.6=Vancouver Velocity R|R2.6=[[Vancouver Velocity|Vancouver Velocity R]]
| |
| |I2.7=RMX Mario Circuit 1|R2.7=[[RMX Mario Circuit 1]]**
| |
| |I2.8=RMX Mario Circuit 1T|R2.8=[[RMX Mario Circuit 1|RMX Mario Circuit 1T]]
| |
| |I2.9=3DS Mario Circuit RT|R2.9=[[3DS Mario Circuit|3DS Mario Circuit R/T]]*
| |
| |I2.10=London Loop 2T|R2.10=[[London Loop 2|London Loop 2T]]
| |
| |I2.11=London Loop 2RT|R2.11=[[London Loop 2|London Loop 2R/T]]
| |
| |I2.12=Koopa Troopa Beach 2|R2.12=[[SNES Koopa Troopa Beach 2]]
| |
| |I2.13=Koopa Troopa Beach 2R|R2.13=[[SNES Koopa Troopa Beach 2|SNES Koopa Troopa Beach 2R]]*
| |
| |I2.14=Rosalina's Ice World T|R2.14=[[3DS Rosalina's Ice World|3DS Rosalina's Ice World T]]
| |
| |I2.15=Donut Plains 2|R2.15=[[SNES Donut Plains 2]]
| |
| |I2.16=Sydney Sprint T|R2.16=[[Sydney Sprint|Sydney Sprint T]]
| |
| |I2.17=Vanilla Lake 2T|R2.17=[[SNES Vanilla Lake 2|SNES Vanilla Lake 2T]]
| |
| |I2.18=Koopa Cape T|R2.18=[[Wii Koopa Cape|Wii Koopa Cape T]]
| |
| }}
| |
|
| |
| ==Mario (Classic)==
| |
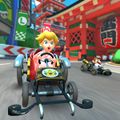
| '''Mario (Classic)''' is a variant of Mario debuting in the [[Mario Bros. Tour]] as a High-End driver. He appears as the spotlight driver for the tour's first week pipe. This variant of Mario is dressed in an inverted color scheme, matching his appearance in ''[[Donkey Kong]]'' and other early ''Mario series'' games. The outfit later returned in ''Super Mario Odyssey'', which is where it takes inspiration. This variant of Mario has the [[Triple Mushroom]]s as his Special Item.
| |
|
| |
| ===Availability===
| |
| {|cellspacing=0 border=1 cellpadding=3 style="border-collapse:collapse;text-align:center" width=100%
| |
| !style="background:#c3cfdb"|Tour(s)
| |
| !style="background:#c3cfdb"|Availability
| |
| |-
| |
| |rowspan=2|[[Mario Bros. Tour]]
| |
| |[[Mario Bros. Tour#Mario Bros. Pipe 1|Mario Bros. Pipe 1]]<br><small>spotlight
| |
| |-
| |
| |[[Mario Bros. Tour#Mario Bros. Pipe 2|Mario Bros. Pipe 2]]
| |
| |-
| |
| |[[Mario vs. Luigi Tour]]
| |
| |[[Mario vs. Luigi Tour#Paid banners|Team Mario<br>Mario (Classic) Pack]]<br><small>$39.99 / €43.99 / AU$62.99<br>November 18, 2020 – December 1, 2020
| |
| |-
| |
| |rowspan=2|[[New Year's 2021 Tour]]
| |
| |[[New Year's 2021 Tour#New Year's 2021 Pipe 1|New Year's 2021 Pipe 1]]
| |
| |-
| |
| |[[New Year's 2021 Tour#New Year's 2021 Pipe 2|New Year's 2021 Pipe 2]]<br><small>spotlight
| |
| |-
| |
| |[[Mario Tour]]
| |
| |[[Mario Tour#Paid banners|Mario (Classic) Pack]]<br><small>$39.99 / €43.99 / AU$62.99<br>March 10, 2021 – March 23, 2021
| |
| |-
| |
| |[[Summer Tour]]<br>[[Los Angeles Tour (2021)]]<br>[[Mario vs. Peach Tour]]
| |
| |Summertime Challenges 1 card completion reward
| |
| |-
| |
| |[[Mario vs. Peach Tour]]
| |
| |[[Mario vs. Peach Tour#Mario Pipe|Mario Pipe]]
| |
| |-
| |
| |[[2nd Anniversary Tour]]
| |
| |2nd Anniversary Challenges card completion reward
| |
| |}
| |
|
| |
| ===Statistics===
| |
| {{MKT profile
| |
| |item=Triple Mushrooms
| |
| |I1.1=RMX Mario Circuit 1|R1.1=[[RMX Mario Circuit 1]]
| |
| |I1.2=Mario Circuit 1|R1.2=[[SNES Mario Circuit 1]]
| |
| |I1.3=RMX Mario Circuit 1T|R1.3=[[RMX Mario Circuit 1|RMX Mario Circuit 1T]]
| |
| |I1.4=RMX Mario Circuit 1R|R1.4=[[RMX Mario Circuit 1|RMX Mario Circuit 1R]]
| |
| |I1.5=Mario Circuit 2RT|R1.5=[[SNES Mario Circuit 2|SNES Mario Circuit 2R/T]]
| |
| |I1.6=Mario Circuit 2|R1.6=[[SNES Mario Circuit 2]]
| |
| |I1.7=Mario Circuit 2T|R1.7=[[SNES Mario Circuit 2|SNES Mario Circuit 2T]]
| |
| |I1.8=RMX Mario Circuit 1RT|R1.8=[[RMX Mario Circuit 1|RMX Mario Circuit 1R/T]]
| |
| |I1.9=London Loop T|R1.9=[[London Loop|London Loop T]]
| |
| |I1.10=London Loop RT|R1.10=[[London Loop|London Loop R/T]]
| |
| |I1.11=Sunset Wilds R|R1.11=[[GBA Sunset Wilds|GBA Sunset Wilds R]]
| |
| |I1.12=Sunset Wilds RT|R1.12=[[GBA Sunset Wilds|GBA Sunset Wilds R/T]]
| |
| |I1.13=Tokyo Blur 4T|R1.13=[[Tokyo Blur 4|Tokyo Blur 4T]]
| |
|
| |
| |I2.1=Mario Circuit 1RT|R2.1=[[SNES Mario Circuit 1|SNES Mario Circuit 1R/T]]
| |
| |I2.2=Mario Circuit 3T|R2.2=[[SNES Mario Circuit 3|SNES Mario Circuit 3T]]
| |
| |I2.3=Mario Circuit 3|R2.3=[[SNES Mario Circuit 3]]**
| |
| |I2.4=London Loop 2|R2.4=[[London Loop 2]]
| |
| |I2.5=London Loop 2T|R2.5=[[London Loop 2|London Loop 2T]]
| |
| |I2.6=Donut Plains 1|R2.6=[[SNES Donut Plains 1]]***
| |
| |I2.7=Donut Plains 1T|R2.7=[[SNES Donut Plains 1|SNES Donut Plains 1T]]**
| |
| |I2.8=Mario Circuit 2R|R2.8=[[SNES Mario Circuit 2|SNES Mario Circuit 2R]]*
| |
| |I2.9=Kalimari Desert RT|R2.9=[[N64 Kalimari Desert|N64 Kalimari Desert R/T]]
| |
| |I2.10=Vanilla Lake 1|R2.10=[[SNES Vanilla Lake 1]]*
| |
| |I2.11=Vanilla Lake 1T|R2.11=[[SNES Vanilla Lake 1|SNES Vanilla Lake 1T]]
| |
| |I2.12=Donut Plains 1RT|R2.12=[[SNES Donut Plains 1|SNES Donut Plains 1R/T]]
| |
| |I2.13=Mario Circuit 3RT|R2.13=[[SNES Mario Circuit 3|SNES Mario Circuit 3R/T]]
| |
| |I2.14=Koopa Troopa Beach 2|R2.14=[[SNES Koopa Troopa Beach 2]]
| |
| |I2.15=London Loop|R2.15=[[London Loop]]
| |
| |I2.16=London Loop R|R2.16=[[London Loop|London Loop R]]
| |
| |I2.17=Maple Treeway T|R2.17=[[Wii Maple Treeway|Wii Maple Treeway T]]
| |
| |I2.18=Maple Treeway R|R2.18=[[Wii Maple Treeway|Wii Maple Treeway R]]
| |
| |I2.19=Sunset Wilds T|R2.19=[[GBA Sunset Wilds|GBA Sunset Wilds T]]
| |
| |I2.20=RMX Rainbow Road 1RT|R2.20=[[RMX Rainbow Road 1|RMX Rainbow Road 1R/T]]
| |
| |I2.21=Merry Mountain|R2.21=[[Merry Mountain]]
| |
| }}
| |
|
| |
| ==Builder Mario==
| |
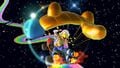
| '''[[Builder Mario]]''' is a power-up variant of Mario debuting in the [[Trick Tour (2020)|2020 Trick Tour]] as a High-End driver. He appears as the spotlight driver for the tour's first week pipe. As the name suggests, it is based off of Mario's [[Builder Mario|builder form]] from ''[[Super Mario Maker]]'' and ''[[Super Mario Maker 2]]''. His Special Item is the [[Hammer]]
| |
|
| |
| ===Availability===
| |
| {|cellspacing=0 border=1 cellpadding=3 style="border-collapse:collapse;text-align:center" width=100%
| |
| !style="background:#c3cfdb"|Tour
| |
| !style="background:#c3cfdb"|Availability
| |
| |-
| |
| |rowspan=2|[[Trick Tour (2020)]]
| |
| |[[Trick Tour (2020)#Trick Pipe 1|Trick Pipe 1]]<br><small>spotlight
| |
| |-
| |
| |[[Trick Tour (2020)#Trick Pipe 2|Trick Pipe 2]]
| |
| |-
| |
| |rowspan=2|[[Mario vs. Luigi Tour]]
| |
| |[[Mario vs. Luigi Tour#Mario vs. Luigi Pipe 1|Mario vs. Luigi Pipe 1]]<br><small>spotlight
| |
| |-
| |
| |[[Mario vs. Luigi Tour#Mario vs. Luigi Pipe 2|Mario vs. Luigi Pipe 2]]
| |
| |-
| |
| |rowspan=2|[[New Year's 2021 Tour]]
| |
| |[[New Year's 2021 Tour#New Year's 2021 Pipe 1|New Year's 2021 Pipe 1]]
| |
| |-
| |
| |[[New Year's 2021 Tour#New Year's 2021 Pipe 2|New Year's 2021 Pipe 2]]<br><small>spotlight
| |
| |-
| |
| |rowspan=2|[[Trick Tour (2021)]]
| |
| |[[Trick Tour (2021)#Trick Pipe 1|Trick Pipe 1]]
| |
| |-
| |
| |[[Trick Tour (2021)#Trick Pipe 2|Trick Pipe 2]]<br><small>spotlight
| |
| |}
| |
|
| |
| ===Statistics===
| |
| {{MKT profile
| |
|
| |
| |item=Hammer
| |
|
| |
| |I1.1=Mario Circuit 1RT|R1.1=[[SNES Mario Circuit 1|SNES Mario Circuit 1R/T]]
| |
| |I1.2=3DS Mario Circuit RT|R1.2=[[3DS Mario Circuit|3DS Mario Circuit R/T]]
| |
| |I1.3=Choco Island 2RT|R1.3=[[SNES Choco Island 2|SNES Choco Island 2R/T]]
| |
| |I1.4=Mario Circuit 1T|R1.4=[[SNES Mario Circuit 1|SNES Mario Circuit 1T]]
| |
| |I1.5=GBA Bowser's Castle 1T|R1.5=[[GBA Bowser's Castle 1|GBA Bowser's Castle 1T]]
| |
| |I1.6=RMX Choco Island 1R|R1.6=[[RMX Choco Island 1|RMX Choco Island 1R]]
| |
| |I1.7=Kalimari Desert T|R1.7=[[N64 Kalimari Desert|N64 Kalimari Desert T]]
| |
| |I1.8=RMX Mario Circuit 1T|R1.8=[[RMX Mario Circuit 1|RMX Mario Circuit 1T]]
| |
| |I1.9=Koopa Troopa Beach 2T|R1.9=[[SNES Koopa Troopa Beach 2|SNES Koopa Troopa Beach 2T]]
| |
| |I1.10=Los Angeles Laps RT|R1.10=[[Los Angeles Laps|Los Angeles Laps R/T]]
| |
| |I1.11=Los Angeles Laps T|R1.11=[[Los Angeles Laps|Los Angeles Laps T]]
| |
| |I1.12=Tokyo Blur RT|R1.12=[[Tokyo Blur|Tokyo Blur R/T]]
| |
| |I1.13=London Loop RT|R1.13=[[London Loop|London Loop R/T]]
| |
| |I1.14=Sunset Wilds T|R1.14=[[GBA Sunset Wilds|GBA Sunset Wilds T]]
| |
| |I1.15=Tokyo Blur 4RT|R1.15=[[Tokyo Blur 4|Tokyo Blur 4R/T]]
| |
| |I1.16=Sydney Sprint RT|R1.16=[[Sydney Sprint|Sydney Sprint R/T]]
| |
| |I1.17=Airship Fortress RT|R1.17=[[DS Airship Fortress|DS Airship Fortress R/T]]
| |
| |I1.18=RMX Ghost Valley 1RT|R1.18=[[RMX Ghost Valley 1|RMX Ghost Valley 1R/T]]
| |
| |I1.19=Bangkok Rush RT|R1.19=[[Bangkok Rush|Bangkok Rush R/T]]
| |
|
| |
| |I2.1=Mario Circuit 2RT|R2.1=[[SNES Mario Circuit 2|SNES Mario Circuit 2R/T]]
| |
| |I2.2=RMX Mario Circuit 1RT|R2.2=[[RMX Mario Circuit 1|RMX Mario Circuit 1R/T]]
| |
| |I2.3=Daisy Hills RT|R2.3=[[3DS Daisy Hills|3DS Daisy Hills R/T]]*
| |
| |I2.4=GBA Bowser's Castle 2RT|R2.4=[[GBA Bowser's Castle 2|GBA Bowser's Castle 2R/T]]
| |
| |I2.5=Vanilla Lake 1RT|R2.5=[[SNES Vanilla Lake 1|SNES Vanilla Lake 1R/T]]
| |
| |I2.6=Daisy Hills T|R2.6=[[3DS Daisy Hills|3DS Daisy Hills T]]*
| |
| |I2.7=Toad Circuit T|R2.7=[[3DS Toad Circuit|3DS Toad Circuit T]]**
| |
| |I2.8=RMX Choco Island 1|R2.8=[[RMX Choco Island 1]]
| |
| |I2.9=Rock Rock Mountain T|R2.9=[[3DS Rock Rock Mountain|3DS Rock Rock Mountain T]]
| |
| |I2.10=Choco Island 1T|R2.10=[[SNES Choco Island 1|SNES Choco Island 1T]]**
| |
| |I2.11=Paris Promenade T|R2.11=[[Paris Promenade|Paris Promenade T]]
| |
| |I2.12=Maple Treeway T|R2.12=[[Wii Maple Treeway|Wii Maple Treeway T]]
| |
| |I2.13=DK Summit T|R2.13=[[Wii DK Summit|Wii DK Summit T]]
| |
| |I2.14=RMX Choco Island 1RT|R2.14=[[RMX Choco Island 1|RMX Choco Island 1R/T]]***
| |
| |I2.15=RMX Ghost Valley 1T|R2.15=[[RMX Ghost Valley 1|RMX Ghost Valley 1T]]
| |
| |I2.16=Sydney Sprint 2RT|R2.16=[[Sydney Sprint 2|Sydney Sprint 2R/T]]
| |
| |I2.17=Mushroom Gorge T|R2.17=[[Wii Mushroom Gorge|Wii Mushroom Gorge T]]
| |
| |I2.18=3DS Bowser's Castle RT|R2.18=[[3DS Bowser's Castle|3DS Bowser's Castle R/T]]
| |
| |I2.19=Yoshi Valley T|R2.19=[[N64 Yoshi Valley|N64 Yoshi Valley T]]
| |
| |I2.20=Bangkok Rush T|R2.20=[[Bangkok Rush|Bangkok Rush T]]
| |
| }}
| |
|
| |
| ==Mario (Chef)==
| |
| '''Mario (Chef)''' is a variant of Mario debuting in the [[Cooking Tour]] as a High-End driver. He appears as the spotlight driver for the tour's first week pipe. This variant of Mario is depicted wearing the Chef Hat and Chef Suit from ''Super Mario Odyssey''. His Special Item is the [[Lucky Seven]].
| |
|
| |
| ===Availability===
| |
| {|cellspacing=0 border=1 cellpadding=3 style="border-collapse:collapse;text-align:center" width=100%
| |
| !style="background:#c3cfdb"|Tour
| |
| !style="background:#c3cfdb"|Availability
| |
| |-
| |
| |rowspan=2|[[Cooking Tour]]
| |
| |[[Cooking Tour#Cooking Pipe 1|Cooking Pipe 1]]<br><small>spotlight
| |
| |-
| |
| |[[Cooking Tour#Cooking Pipe 2|Cooking Pipe 2]]
| |
| |-
| |
| |rowspan=2|[[New Year's 2021 Tour]]
| |
| |[[New Year's 2021 Tour#New Year's 2021 Pipe 1|New Year's 2021 Pipe 1]]
| |
| |-
| |
| |[[New Year's 2021 Tour#New Year's 2021 Pipe 2|New Year's 2021 Pipe 2]]<br><small>spotlight
| |
| |-
| |
| |rowspan=2|[[Peach vs. Daisy Tour]]
| |
| |[[Peach vs. Daisy Tour#Peach vs. Daisy Pipe 1|Peach vs. Daisy Pipe 1]]
| |
| |-
| |
| |[[Peach vs. Daisy Tour#Peach vs. Daisy Pipe 2|Peach vs. Daisy Pipe 2]]<br><small>spotlight
| |
| |-
| |
| |[[Snow Tour]]
| |
| |[[Snow Tour#Lucky Seven Pipe|Lucky Seven Pipe]]
| |
| |-
| |
| |[[Bowser vs. DK Tour]]
| |
| |[[Bowser vs. DK Tour#Team Donkey Kong Pipe|Team Donkey Kong Pipe]]
| |
| |-
| |
| |[[Mario vs. Peach Tour]]
| |
| |[[Mario vs. Peach Tour#Mario Pipe|Mario Pipe]]
| |
| |}
| |
|
| |
| ===Statistics===
| |
| {{MKT profile
| |
| |item=Lucky Seven
| |
| |I1.1=Choco Island 1|R1.1=[[SNES Choco Island 1]]
| |
| |I1.2=DS Luigi's Mansion|R1.2=[[DS Luigi's Mansion]]
| |
| |I1.3=RMX Mario Circuit 1|R1.3=[[RMX Mario Circuit 1]]
| |
| |I1.4=Donut Plains 1|R1.4=[[SNES Donut Plains 1]]
| |
| |I1.5=Mario Circuit 3RT|R1.5=[[SNES Mario Circuit 3|SNES Mario Circuit 3R/T]]
| |
| |I1.6=3DS Mario Circuit R|R1.6=[[3DS Mario Circuit|3DS Mario Circuit R]]
| |
| |I1.7=Donut Plains 1RT|R1.7=[[SNES Donut Plains 1|SNES Donut Plains 1R/T]]
| |
| |I1.8=RMX Choco Island 1|R1.8=[[RMX Choco Island 1]]
| |
| |I1.9=RMX Choco Island 1R|R1.9=[[RMX Choco Island 1|RMX Choco Island 1R]]
| |
| |I1.10=Choco Mountain|R1.10=[[N64 Choco Mountain]]
| |
| |I1.11=Choco Mountain R|R1.11=[[N64 Choco Mountain|N64 Choco Mountain R]]
| |
| |I1.12=Choco Island 2|R1.12=[[SNES Choco Island 2]]
| |
| |I1.13=Choco Island 2R|R1.13=[[SNES Choco Island 2|SNES Choco Island 2R]]
| |
| |I1.14=Tokyo Blur 3|R1.14=[[Tokyo Blur 3]]
| |
| |I1.15=Paris Promenade 2|R1.15=[[Paris Promenade 2]]
| |
| |I1.16=DK Summit R|R1.16=[[Wii DK Summit|Wii DK Summit R]]
| |
| |I1.17=London Loop 2T|R1.17=[[London Loop 2|London Loop 2T]]
| |
| |I1.18=London Loop 2R|R1.18=[[London Loop 2|London Loop 2R]]
| |
| |I1.19=Los Angeles Laps 2R|R1.19=[[Los Angeles Laps 2|Los Angeles Laps 2R]]
| |
| |I1.20=Amsterdam Drift T|R1.20=[[Amsterdam Drift|Amsterdam Drift T]]
| |
|
| |
| |I2.1=Choco Island 1R|R2.1=[[SNES Choco Island 1|SNES Choco Island 1R]]
| |
| |I2.2=Choco Island 1T|R2.2=[[SNES Choco Island 1|SNES Choco Island 1T]]**
| |
| |I2.3=Donut Plains 1T|R2.3=[[SNES Donut Plains 1|SNES Donut Plains 1T]]*
| |
| |I2.4=3DS Mario Circuit|R2.4=[[3DS Mario Circuit]]
| |
| |I2.5=Royal Raceway T|R2.5=[[N64 Royal Raceway|N64 Royal Raceway T]]
| |
| |I2.6=Royal Raceway R|R2.6=[[N64 Royal Raceway|N64 Royal Raceway R]]***
| |
| |I2.7=Mario Circuit 2|R2.7=[[SNES Mario Circuit 2]]*
| |
| |I2.8=Mario Circuit 3|R2.8=[[SNES Mario Circuit 3]]**
| |
| |I2.9=DS Luigi's Mansion RT|R2.9=[[DS Luigi's Mansion|DS Luigi's Mansion R/T]]
| |
| |I2.10=Tokyo Blur 3T|R2.10=[[Tokyo Blur 3|Tokyo Blur 3T]]
| |
| |I2.11=Berlin Byways 2R|R2.11=[[Berlin Byways 2|Berlin Byways 2R]]
| |
| |I2.12=Berlin Byways 2|R2.12=[[Berlin Byways 2]]
| |
| |I2.13=DK Summit|R2.13=[[Wii DK Summit]]
| |
| |I2.14=Vancouver Velocity 2|R2.14=[[Vancouver Velocity 2]]
| |
| |I2.15=Los Angeles Laps 2RT|R2.15=[[Los Angeles Laps 2|Los Angeles Laps 2R/T]]
| |
| |I2.16=Amsterdam Drift R|R2.16=[[Amsterdam Drift|Amsterdam Drift R]]
| |
| }}
| |
|
| |
| ==Mario (Swimwear)==
| |
| '''Mario (Swimwear)''' is a variant of Mario debuting in the [[Marine Tour]] as a High-End driver. He is the spotlight driver for the tour's second pipe. This variant of Mario is depicted wearing the Swim Goggles and Swimwear outfit from ''Super Mario Odyssey''. His special item is the [[Dash Ring]].
| |
|
| |
| ===Availability===
| |
| {|cellspacing=0 border=1 cellpadding=3 style="border-collapse:collapse;text-align:center" width=100%
| |
| !style="background:#c3cfdb"|Tour
| |
| !style="background:#c3cfdb"|Availability
| |
| |-
| |
| |rowspan=2|[[Marine Tour]]
| |
| |[[Marine Tour#Marine Pipe 1|Mario Pipe 1]]
| |
| |-
| |
| |[[Marine Tour#Marine Pipe 2|Marine Pipe 2]]<br><small>spotlight
| |
| |-
| |
| |rowspan=2|[[New Year's 2021 Tour]]
| |
| |[[New Year's 2021 Tour#New Year's 2021 Pipe 1|New Year's 2021 Pipe 1]]
| |
| |-
| |
| |[[New Year's 2021 Tour#New Year's 2021 Pipe 2|New Year's 2021 Pipe 2]]<br><small>spotlight
| |
| |-
| |
| |rowspan=2|[[Sydney Tour (April–May 2021)]]
| |
| |[[Sydney Tour (April–May 2021)#Sydney Pipe 1|Sydney Pipe 1]]
| |
| |-
| |
| |[[Sydney Tour (April–May 2021)#Sydney Pipe 2|Sydney Pipe 2]]<br><small>spotlight
| |
| |-
| |
| |rowspan=2|[[Summer Tour]]
| |
| |[[Summer Tour#Summer Pipe 1|Summer Pipe 1]]
| |
| |-
| |
| |[[Summer Tour#Summer Pipe 2|Summer Pipe 2]]<br><small>spotlight
| |
| |}
| |
|
| |
| ===Statistics===
| |
| {{MKT profile
| |
| |item=Dash Ring
| |
| |I1.1=Koopa Troopa Beach 2T|R1.1=[[SNES Koopa Troopa Beach 2|SNES Koopa Troopa Beach 2T]]
| |
| |I1.2=Koopa Troopa Beach 2R|R1.2=[[SNES Koopa Troopa Beach 2|SNES Koopa Troopa Beach 2R]]
| |
| |I1.3=3DS Cheep Cheep Lagoon|R1.3=[[3DS Cheep Cheep Lagoon]]
| |
| |I1.4=RMX Choco Island 1R|R1.4=[[RMX Choco Island 1|RMX Choco Island 1R]]
| |
| |I1.5=Mario Circuit 2T|R1.5=[[SNES Mario Circuit 2|SNES Mario Circuit 2T]]
| |
| |I1.6=Mario Circuit 3|R1.6=[[SNES Mario Circuit 3|SNES Mario Circuit 3]]
| |
| |I1.7=Vanilla Lake 1RT|R1.7=[[SNES Vanilla Lake 1|SNES Vanilla Lake 1R/T]]
| |
| |I1.8=3DS Mario Circuit RT|R1.8=[[3DS Mario Circuit|3DS Mario Circuit R/T]]
| |
| |I1.9=RMX Mario Circuit 1|R1.9=[[RMX Mario Circuit 1]]
| |
| |I1.10=RMX Mario Circuit 1R|R1.10=[[RMX Mario Circuit 1|RMX Mario Circuit 1R]]
| |
| |I1.11=Airship Fortress|R1.11=[[DS Airship Fortress]]
| |
| |I1.12=Mario Circuit 1R|R1.12=[[SNES Mario Circuit 1|SNES Mario Circuit 1R]]
| |
| |I1.13=Los Angeles Laps|R1.13=[[Los Angeles Laps]]
| |
| |I1.14=Los Angeles Laps R|R1.14=[[Los Angeles Laps|Los Angeles Laps R]]
| |
| |I1.15=Sydney Sprint RT|R1.15=[[Sydney Sprint|Sydney Sprint R/T]]
| |
| |I1.16=Cheep-Cheep Island T|R1.16=[[GBA Cheep-Cheep Island|GBA Cheep-Cheep Island T]]
| |
| |I1.17=Sydney Sprint 2RT|R1.17=[[Sydney Sprint 2|Sydney Sprint 2R/T]]
| |
| |I1.18=Los Angeles Laps 2|R1.18=[[Los Angeles Laps 2]]
| |
|
| |
| |I2.1=3DS Cheep Cheep Lagoon T|R2.1=[[3DS Cheep Cheep Lagoon|3DS Cheep Cheep Lagoon T]]
| |
| |I2.2=3DS Cheep Cheep Lagoon R|R2.2=[[3DS Cheep Cheep Lagoon|3DS Cheep Cheep Lagoon R]]*
| |
| |I2.3=Koopa Troopa Beach T|R2.3=[[N64 Koopa Troopa Beach|N64 Koopa Troopa Beach T]]
| |
| |I2.4=Koopa Troopa Beach 2|R2.4=[[SNES Koopa Troopa Beach 2]]
| |
| |I2.5=Mario Circuit 2|R2.5=[[SNES Mario Circuit 2]]
| |
| |I2.6=Mario Circuit 3T|R2.6=[[SNES Mario Circuit 3|SNES Mario Circuit 3T]]
| |
| |I2.7=Mario Circuit 3R|R2.7=[[SNES Mario Circuit 3|SNES Mario Circuit 3R]]
| |
| |I2.8=Airship Fortress T|R2.8=[[DS Airship Fortress|DS Airship Fortress T]]**
| |
| |I2.9=Airship Fortress R|R2.9=[[DS Airship Fortress|DS Airship Fortress R]]**
| |
| |I2.10=Mario Circuit 1|R2.10=[[SNES Mario Circuit 1]]
| |
| |I2.11=Mario Circuit 1T|R2.11=[[SNES Mario Circuit 1|SNES Mario Circuit 1T]]*
| |
| |I2.12=3DS Cheep Cheep Lagoon RT|R2.12=[[3DS Cheep Cheep Lagoon|3DS Cheep Cheep Lagoon R/T]]
| |
| |I2.13=Koopa Troopa Beach RT|R2.13=[[N64 Koopa Troopa Beach|N64 Koopa Troopa Beach R/T]]***
| |
| |I2.14=Sydney Sprint R|R2.14=[[Sydney Sprint|Sydney Sprint R]]
| |
| |I2.15=Los Angeles Laps 3|R2.15=[[Los Angeles Laps 3]]
| |
| |I2.16=Los Angeles Laps 3R|R2.16=[[Los Angeles Laps 3|Los Angeles Laps 3R]]
| |
| |I2.17=Sydney Sprint 2|R2.17=[[Sydney Sprint 2]]
| |
| |I2.18=Los Angeles Laps 2T|R2.18=[[Los Angeles Laps 2|Los Angeles Laps 2T]]
| |
| }}
| |
|
| |
| ==Mario (SNES)==
| |
| '''Mario (SNES)''' is a variant of Mario debuting in the [[Super Mario Kart Tour]] as a High-End driver. He appears as the spotlight driver for the tour's first week's pipe. True to the tour's theme, this variant of Mario is based off his sprite from ''[[Super Mario Kart]]'', which uniquely rotates in place when viewed at different angles. His Special Item is the Triple Mushrooms.
| |
|
| |
| ===Availability===
| |
| {|cellspacing=0 border=1 cellpadding=3 style="border-collapse:collapse;text-align:center" width=100%
| |
| !style="background:#c3cfdb"|Tour
| |
| !style="background:#c3cfdb"|Availability
| |
| |-
| |
| |rowspan=2|[[Super Mario Kart Tour]]
| |
| |[[Super Mario Kart Tour#Super Mario Kart Pipe 1|Super Mario Kart Pipe 1]]<br><small>spotlight
| |
| |-
| |
| |[[Super Mario Kart Tour#Super Mario Kart Pipe 2|Super Mario Kart Pipe 2]]
| |
| |-
| |
| |rowspan=2|[[New Year's 2021 Tour]]
| |
| |[[New Year's 2021 Tour#New Year's 2021 Pipe 1|New Year's 2021 Pipe 1]]
| |
| |-
| |
| |[[New Year's 2021 Tour#New Year's 2021 Pipe 2|New Year's 2021 Pipe 2]]<br><small>spotlight
| |
| |-
| |
| |rowspan=2|[[Mario Tour]]
| |
| |[[Mario Tour#Mario Pipe 1|Mario Pipe 1]]
| |
| |-
| |
| |[[Mario Tour#Mario Pipe 2|Mario Pipe 2]]<br><small>spotlight
| |
| |-
| |
| |[[Summer Tour]]
| |
| |[[Summer Tour#Paid banners|Mario (SNES) Pack]]<br><small>$39.99 / €43.99 / AU$62.99<br>July 7, 2021 – July 13, 2021
| |
| |-
| |
| |[[Frost Tour]]
| |
| |[[Frost Tour#Red-Hot Pipe|Red-Hot Pipe]]
| |
| |}
| |
|
| |
| ===Statistics===
| |
| {{MKT profile
| |
| |item=Triple Mushrooms
| |
| |I1.1=Yoshi Circuit T|R1.1=[[GCN Yoshi Circuit|GCN Yoshi Circuit T]]
| |
| |I1.2=RMX Rainbow Road 1|R1.2=[[RMX Rainbow Road 1]]
| |
| |I1.3=RMX Rainbow Road 1R|R1.3=[[RMX Rainbow Road 1|RMX Rainbow Road 1R]]
| |
| |I1.4=Royal Raceway T|R1.4=[[N64 Royal Raceway|N64 Royal Raceway T]]
| |
| |I1.5=Yoshi Circuit|R1.5=[[GCN Yoshi Circuit]]
| |
| |I1.6=Tokyo Blur RT|R1.6=[[Tokyo Blur|Tokyo Blur R/T]]
| |
| |I1.7=New York Minute 3|R1.7=[[New York Minute 3]]
| |
| |I1.8=SNES Rainbow Road T|R1.8=[[SNES Rainbow Road|SNES Rainbow Road T]]
| |
| |I1.9=Ghost Valley 1RT|R1.9=[[SNES Ghost Valley 1|SNES Ghost Valley 1R/T]]
| |
| |I1.10=Choco Island 2T|R1.10=[[SNES Choco Island 2|SNES Choco Island 2T]]
| |
| |I1.11=SNES Rainbow Road RT|R1.11=[[SNES Rainbow Road|SNES Rainbow Road R/T]]
| |
| |I1.12=Mario Circuit 1RT|R1.12=[[SNES Mario Circuit 1|SNES Mario Circuit 1R/T]]
| |
| |I1.13=RMX Rainbow Road 2T|R1.13=[[RMX Rainbow Road 2|RMX Rainbow Road 2T]]
| |
| |I1.14=Berlin Byways 2T|R1.14=[[Berlin Byways 2|Berlin Byways 2T]]
| |
| |I1.15=Tokyo Blur 4RT|R1.15=[[Tokyo Blur 4|Tokyo Blur 4R/T]]
| |
| |I1.16=Cheep-Cheep Island R|R1.16=[[GBA Cheep-Cheep Island|GBA Cheep-Cheep Island R]]
| |
| |I1.17=RMX Vanilla Lake 1R|R1.17=[[RMX Vanilla Lake 1|RMX Vanilla Lake 1R]]
| |
| |I1.18=RMX Ghost Valley 1R|R1.18=[[RMX Ghost Valley 1|RMX Ghost Valley 1R]]
| |
| |I1.19=London Loop 2|R1.19=[[London Loop 2]]
| |
| |I1.20=London Loop 2T|R1.20=[[London Loop 2|London Loop 2T]]
| |
| |I1.21=New York Minute 4RT|R1.21=[[New York Minute 4|New York Minute 4R/T]]
| |
|
| |
| |I2.1=RMX Rainbow Road 1T|R2.1=[[RMX Rainbow Road 1|RMX Rainbow Road 1T]]**
| |
| |I2.2=Mario Circuit 1|R2.2=[[SNES Mario Circuit 1]]*
| |
| |I2.3=Mario Circuit 1T|R2.3=[[SNES Mario Circuit 1|SNES Mario Circuit 1T]]***
| |
| |I2.4=Vanilla Lake 1T|R2.4=[[SNES Vanilla Lake 1|SNES Vanilla Lake 1T]]**
| |
| |I2.5=RMX Mario Circuit 1|R2.5=[[RMX Mario Circuit 1]]
| |
| |I2.6=Yoshi Circuit R|R2.6=[[GCN Yoshi Circuit|GCN Yoshi Circuit R]]*
| |
| |I2.7=Los Angeles Laps|R2.7=[[Los Angeles Laps]]
| |
| |I2.8=Los Angeles Laps R|R2.8=[[Los Angeles Laps|Los Angeles Laps R]]
| |
| |I2.9=Los Angeles Laps T|R2.9=[[Los Angeles Laps|Los Angeles Laps T]]
| |
| |I2.10=Tokyo Blur T|R2.10=[[Tokyo Blur|Tokyo Blur T]]
| |
| |I2.11=New York Minute 3RT|R2.11=[[New York Minute 3|New York Minute 3R/T]]
| |
| |I2.12=New York Minute 3R|R2.12=[[New York Minute 3|New York Minute 3R]]
| |
| |I2.13=SNES Rainbow Road|R2.13=[[SNES Rainbow Road]]
| |
| |I2.14=SNES Rainbow Road R|R2.14=[[SNES Rainbow Road|SNES Rainbow Road R]]
| |
| |I2.15=Choco Island 2|R2.15=[[SNES Choco Island 2]]
| |
| |I2.16=Berlin Byways 2R|R2.16=[[Berlin Byways 2|Berlin Byways 2R]]
| |
| |I2.17=DK Summit T|R2.17=[[Wii DK Summit|Wii DK Summit T]]
| |
| |I2.18=Sydney Sprint RT|R2.18=[[Sydney Sprint|Sydney Sprint R/T]]
| |
| |I2.19=Cheep-Cheep Island T|R2.19=[[GBA Cheep-Cheep Island|GBA Cheep-Cheep Island T]]
| |
| |I2.20=RMX Ghost Valley 1T|R2.20=[[RMX Ghost Valley 1|RMX Ghost Valley 1T]]
| |
| |I2.21=London Loop 2R|R2.21=[[London Loop 2|London Loop 2R]]
| |
| |I2.22=Wario Shipyard T|R2.22=[[3DS Wario Shipyard|3DS Wario Shipyard T]]
| |
| }}
| |
|
| |
| ==Mario (Sunshine)==
| |
| '''Mario (Sunshine)''' is a variant of Mario that debuted in the [[Los Angeles Tour (2020)|2020 Los Angeles Tour]] as the High-End spotlight driver for the first week of the tour. This version of Mario is depicted wearing his [[Shine Sprite]] print shirt from ''[[Super Mario Sunshine]]'' and ''Super Mario Odyssey'', as well as a pair of sunglasses. His Special Item is the [[Giant Banana]].
| |
|
| |
| ===Availability===
| |
| {|cellspacing=0 border=1 cellpadding=3 style="border-collapse:collapse;text-align:center" width=100%
| |
| !style="background:#c3cfdb"|Tour
| |
| !style="background:#c3cfdb"|Availability
| |
| |-
| |
| |rowspan=2|[[Los Angeles Tour (2020)]]
| |
| |[[Los Angeles Tour (2020)#Los Angeles Pipe 1|Los Angeles Pipe 1]]<br><small>spotlight
| |
| |-
| |
| |[[Los Angeles Tour (2020)#Los Angeles Pipe 2|Los Angeles Pipe 2]]
| |
| |-
| |
| |rowspan=2|[[New Year's 2021 Tour]]
| |
| |[[New Year's 2021 Tour#New Year's 2021 Pipe 1|New Year's 2021 Pipe 1]]
| |
| |-
| |
| |[[New Year's 2021 Tour#New Year's 2021 Pipe 2|New Year's 2021 Pipe 2]]<br><small>spotlight
| |
| |-
| |
| |[[Yoshi Tour (2021)]]
| |
| |[[Yoshi Tour (2021)#Banana Pipe|Banana Pipe]]
| |
| |-
| |
| |rowspan=2|[[Los Angeles Tour (2021)]]
| |
| |[[Los Angeles Tour (2021)#Los Angeles Pipe 1|Los Angeles Pipe 1]]
| |
| |-
| |
| |[[Los Angeles Tour (2021)#Los Angeles Pipe 2|Los Angeles Pipe 2]]<br><small>spotlight
| |
| |}
| |
|
| |
| ===Statistics===
| |
| {{MKT profile
| |
| |item=Giant Banana
| |
| |I1.1=Los Angeles Laps|R1.1=[[Los Angeles Laps]]
| |
| |I1.2=RMX Choco Island 1T|R1.2=[[RMX Choco Island 1|RMX Choco Island 1T]]
| |
| |I1.3=Kalimari Desert 2|R1.3=[[N64 Kalimari Desert 2|N64 Kalimari Desert 2]]
| |
| |I1.4=RMX Rainbow Road 1T|R1.4=[[RMX Rainbow Road 1|RMX Rainbow Road 1T]]
| |
| |I1.5=Tokyo Blur RT|R1.5=[[Tokyo Blur|Tokyo Blur R/T]]
| |
| |I1.6=Paris Promenade T|R1.6=[[Paris Promenade|Paris Promenade T]]
| |
| |I1.7=London Loop T|R1.7=[[London Loop|London Loop T]]
| |
| |I1.8=Vancouver Velocity T|R1.8=[[Vancouver Velocity|Vancouver Velocity T]]
| |
| |I1.9=New York Minute 3T|R1.9=[[New York Minute 3|New York Minute 3T]]
| |
| |I1.10=Choco Island 2R|R1.10=[[SNES Choco Island 2|SNES Choco Island 2R]]
| |
| |I1.11=Choco Island 2T|R1.11=[[SNES Choco Island 2|SNES Choco Island 2T]]
| |
| |I1.12=Koopa Troopa Beach|R1.12=[[N64 Koopa Troopa Beach]]
| |
| |I1.13=Koopa Troopa Beach T|R1.13=[[N64 Koopa Troopa Beach|N64 Koopa Troopa Beach T]]
| |
| |I1.14=RMX Mario Circuit 1RT|R1.14=[[RMX Mario Circuit 1|RMX Mario Circuit 1R/T]]
| |
| |I1.15=RMX Mario Circuit 1T|R1.15=[[RMX Mario Circuit 1|RMX Mario Circuit 1T]]
| |
| |I1.16=RMX Rainbow Road 2T|R1.16=[[RMX Rainbow Road 2|RMX Rainbow Road 2T]]
| |
| |I1.17=Donut Plains 2T|R1.17=[[SNES Donut Plains 2|SNES Donut Plains 2T]]
| |
| |I1.18=Sydney Sprint R|R1.18=[[Sydney Sprint|Sydney Sprint R]]
| |
| |I1.19=Los Angeles Laps 3RT|R1.19=[[Los Angeles Laps 3|Los Angeles Laps 3R/T]]
| |
| |I1.20=Los Angeles Laps 3R|R1.20=[[Los Angeles Laps 3|Los Angeles Laps 3R]]
| |
| |I1.21=Tokyo Blur 2R|R1.21=[[Tokyo Blur 2|Tokyo Blur 2R]]
| |
| |I1.22=Tokyo Blur 3|R1.22=[[Tokyo Blur 3]]
| |
| |I1.23=Singapore Speedway RT|R1.23=[[Singapore Speedway|Singapore Speedway R/T]]
| |
| |I1.24=Bangkok Rush R|R1.24=[[Bangkok Rush|Bangkok Rush R]]
| |
|
| |
| |I2.1=Los Angeles Laps RT|R2.1=[[Los Angeles Laps|Los Angeles Laps R/T]]
| |
| |I2.2=RMX Choco Island 1|R2.2=[[RMX Choco Island 1]]
| |
| |I2.3=3DS Cheep Cheep Lagoon RT|R2.3=[[3DS Cheep Cheep Lagoon|3DS Cheep Cheep Lagoon R/T]]**
| |
| |I2.4=Los Angeles Laps R|R2.4=[[Los Angeles Laps|Los Angeles Laps R]]
| |
| |I2.5=Kalimari Desert 2T|R2.5=[[N64 Kalimari Desert 2|N64 Kalimari Desert 2T]]*
| |
| |I2.6=RMX Rainbow Road 1|R2.6=[[RMX Rainbow Road 1]]
| |
| |I2.7=Choco Mountain T|R2.7=[[N64 Choco Mountain|N64 Choco Mountain T]]*
| |
| |I2.8=Tokyo Blur T|R2.8=[[Tokyo Blur|Tokyo Blur T]]
| |
| |I2.9=Paris Promenade R|R2.9=[[Paris Promenade|Paris Promenade R]]
| |
| |I2.10=London Loop RT|R2.10=[[London Loop|London Loop RT]]
| |
| |I2.11=Vancouver Velocity|R2.11=[[Vancouver Velocity]]
| |
| |I2.12=New York Minute 3|R2.12=[[New York Minute 3]]
| |
| |I2.13=Choco Island 2|R2.13=[[SNES Choco Island 2]]
| |
| |I2.14=SNES Rainbow Road T|R2.14=[[SNES Rainbow Road|SNES Rainbow Road T]]
| |
| |I2.15=SNES Rainbow Road R|R2.15=[[SNES Rainbow Road|SNES Rainbow Road R]]**
| |
| |I2.16=Koopa Troopa Beach R|R2.16=[[N64 Koopa Troopa Beach|N64 Koopa Troopa Beach R]]
| |
| |I2.17=3DS Mario Circuit R|R2.17=[[3DS Mario Circuit|3DS Mario Circuit R]]***
| |
| |I2.18=RMX Mario Circuit 1|R2.18=[[RMX Mario Circuit 1]]
| |
| |I2.19=RMX Mario Circuit 1R|R2.19=[[RMX Mario Circuit 1|RMX Mario Circuit 1R]]
| |
| |I2.20=Donut Plains 2R|R2.20=[[SNES Donut Plains 2|SNES Donut Plains 2R]]
| |
| |I2.21=Sydney Sprint|R2.21=[[Sydney Sprint]]
| |
| |I2.22=Los Angeles Laps 3|R2.22=[[Los Angeles Laps 3]]
| |
| |I2.23=Tokyo Blur 2|R2.23=[[Tokyo Blur 2]]
| |
| |I2.24=Singapore Speedway T|R2.24=[[Singapore Speedway|Singapore Speedway T]]
| |
| |I2.25=Coconut Mall R|R2.25=[[Wii Coconut Mall|Wii Coconut Mall R]]
| |
| }}
| |
|
| |
| ==Mario (Halloween)==
| |
| '''Mario (Halloween)''' is a variant of Mario that made his debut in the [[Halloween Tour (2020)|2020 Halloween Tour]] as a High-End driver. He was the spotlight driver for the tour's first week. He is depicted wearing his pumpkin themed Halloween costume, a costume he wears in a Halloween themed [[Nintendo 3DS]] home screen theme, as well as various Halloween themed artworks released by Nintendo. This version of Mario has the Lucky Seven Special Item.
| |
|
| |
| ===Availability===
| |
| {|cellspacing=0 border=1 cellpadding=3 style="border-collapse:collapse;text-align:center" width=100%
| |
| !style="background:#c3cfdb"|Tour
| |
| !style="background:#c3cfdb"|Availability
| |
| |-
| |
| |rowspan=2|[[Halloween Tour (2020)]]
| |
| |[[Halloween Tour (2020)#Halloween Pipe 1|Halloween Pipe 1]]<br><small>spotlight
| |
| |-
| |
| |[[Halloween Tour (2020)#Halloween Pipe 2|Halloween Pipe 2]]
| |
| |-
| |
| |rowspan=2|[[New Year's 2021 Tour]]
| |
| |[[New Year's 2021 Tour#New Year's 2021 Pipe 1|New Year's 2021 Pipe 1]]
| |
| |-
| |
| |[[New Year's 2021 Tour#New Year's 2021 Pipe 2|New Year's 2021 Pipe 2]]<br><small>spotlight
| |
| |-
| |
| |[[Mario vs. Peach Tour]]
| |
| |[[Mario vs. Peach Tour#Mario Pipe|Mario Pipe]]
| |
| |}
| |
|
| |
| ===Statistics===
| |
|
| |
| {{MKT profile
| |
| |item=Lucky Seven
| |
| |I1.1=Maple Treeway|R1.1=[[Wii Maple Treeway]]
| |
| |I1.2=DS Luigi's Mansion R|R1.2=[[DS Luigi's Mansion|DS Luigi's Mansion R]]
| |
| |I1.3=DS Luigi's Mansion T|R1.3=[[DS Luigi's Mansion|DS Luigi's Mansion T]]
| |
| |I1.4=Neo Bowser City R|R1.4=[[3DS Neo Bowser City|3DS Neo Bowser City R]]
| |
| |I1.5=3DS Mario Circuit T|R1.5=[[3DS Mario Circuit|3DS Mario Circuit T]]
| |
| |I1.6=RMX Mario Circuit 1RT|R1.6=[[RMX Mario Circuit 1|RMX Mario Circuit 1R/T]]
| |
| |I1.7=Sunset Wilds RT|R1.7=[[GBA Sunset Wilds|GBA Sunset Wilds R/T]]
| |
| |I1.8=Merry Mountain T|R1.8=[[Merry Mountain|Merry Mountain T]]
| |
| |I1.9=RMX Rainbow Road 2T|R1.9=[[RMX Rainbow Road 2|RMX Rainbow Road 2T]]
| |
| |I1.10=Mario Circuit 1|R1.10=[[SNES Mario Circuit 1]]
| |
| |I1.11=Mario Circuit 1R|R1.11=[[SNES Mario Circuit 1|SNES Mario Circuit 1R]]
| |
| |I1.12=Mario Circuit 3|R1.12=[[SNES Mario Circuit 3]]
| |
| |I1.13=DK Summit R|R1.13=[[Wii DK Summit|Wii DK Summit R]]
| |
| |I1.14=London Loop R|R1.14=[[London Loop|London Loop R]]
| |
| |I1.15=London Loop 2R|R1.15=[[London Loop 2|London Loop 2R]]
| |
| |I1.16=London Loop 3RT|R1.16=[[London Loop 3|London Loop 3R/T]]
| |
| |I1.17=Wario Shipyard|R1.17=[[3DS Wario Shipyard]]
| |
|
| |
| |I2.1=3DS Rainbow Road RT|R2.1=[[3DS Rainbow Road|3DS Rainbow Road R/T]]**
| |
| |I2.2=Maple Treeway T|R2.2=[[Wii Maple Treeway|Wii Maple Treeway T]]**
| |
| |I2.3=Maple Treeway R|R2.3=[[Wii Maple Treeway|Wii Maple Treeway R]]
| |
| |I2.4=Kalimari Desert|R2.4=[[N64 Kalimari Desert]]*
| |
| |I2.5=Frappe Snowland|R2.5=[[N64 Frappe Snowland]]*
| |
| |I2.6=Frappe Snowland R|R2.6=[[N64 Frappe Snowland|N64 Frappe Snowland R]]
| |
| |I2.7=3DS Mario Circuit|R2.7=[[3DS Mario Circuit]]
| |
| |I2.8=3DS Mario Circuit R|R2.8=[[3DS Mario Circuit|3DS Mario Circuit R]]
| |
| |I2.9=Neo Bowser City T|R2.9=[[3DS Neo Bowser City|3DS Neo Bowser City T]]
| |
| |I2.10=Sunset Wilds|R2.10=[[GBA Sunset Wilds]]***
| |
| |I2.11=Sunset Wilds T|R2.11=[[GBA Sunset Wilds|GBA Sunset Wilds T]]
| |
| |I2.12=Mario Circuit 1RT|R2.12=[[SNES Mario Circuit 1|SNES Mario Circuit 1R/T]]
| |
| |I2.13=RMX Mario Circuit 1|R2.13=[[RMX Mario Circuit 1]]
| |
| |I2.14=Merry Mountain|R2.14=[[Merry Mountain]]
| |
| |I2.15=Mario Circuit 1T|R2.15=[[SNES Mario Circuit 1|SNES Mario Circuit 1T]]
| |
| |I2.16=Berlin Byways 2R|R2.16=[[Berlin Byways 2|Berlin Byways 2R]]
| |
| |I2.17=Berlin Byways 2|R2.17=[[Berlin Byways 2]]
| |
| |I2.18=Donut Plains 2R|R2.18=[[SNES Donut Plains 2|SNES Donut Plains 2R]]
| |
| |I2.19=DK Summit|R2.19=[[Wii DK Summit]]
| |
| |I2.20=Cheep-Cheep Island|R2.20=[[GBA Cheep-Cheep Island]]
| |
| |I2.21=Cheep-Cheep Island R|R2.21=[[GBA Cheep-Cheep Island|GBA Cheep-Cheep Island R]]
| |
| |I2.22=New York Minute 4|R2.22=[[New York Minute 4]]
| |
| |I2.23=London Loop 3T|R2.23=[[London Loop 3|London Loop 3T]]
| |
| |I2.24=Kalimari Desert 2RT|R2.24=[[N64 Kalimari Desert 2|N64 Kalimari Desert 2R/T]]
| |
| |I2.25=Wario Shipyard R|R2.25=[[3DS Wario Shipyard|3DS Wario Shipyard R]]
| |
| }}
| |
|
| |
| ==Mario (Racing)==
| |
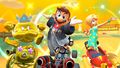
| '''Mario (Racing)''' is a variant of Mario that debuted in the [[Mario Tour]] as the High-End driver for the tour's first week. This variant of Mario is shown wearing his Racing Helmet and Racing Outfit from ''Super Mario Odyssey''. His Special Item is the Triple Mushrooms.
| |
|
| |
| ===Availability===
| |
| {|cellspacing=0 border=1 cellpadding=3 style="border-collapse:collapse;text-align:center" width=100%
| |
| !style="background:#c3cfdb"|Tour
| |
| !style="background:#c3cfdb"|Availability
| |
| |-
| |
| |rowspan=2|[[Mario Tour]]
| |
| |[[Mario Tour#Mario Pipe 1|Mario Pipe 1]]<br><small>spotlight
| |
| |-
| |
| |[[Mario Tour#Mario Pipe 2|Mario Pipe 2]]
| |
| |-
| |
| |[[Paris Tour (2021)]]
| |
| |[[Paris Tour (2021)#Pull-Ahead Pipe|Pull-Ahead Pipe]]
| |
| |-
| |
| |[[Mario vs. Peach Tour]]
| |
| |[[Mario vs. Peach Tour#Mario Pipe|Mario Pipe]]
| |
| |}
| |
|
| |
| ===Statistics===
| |
|
| |
| {{MKT profile
| |
| |item=Triple Mushrooms
| |
| |I1.1=RMX Mario Circuit 1RT|R1.1=[[RMX Mario Circuit 1|RMX Mario Circuit 1R/T]]
| |
| |I1.2=Tokyo Blur 4|R1.2=[[Tokyo Blur 4]]
| |
| |I1.3=Mario Circuit 1R|R1.3=[[SNES Mario Circuit 1|SNES Mario Circuit 1R]]
| |
| |I1.4=Toad Circuit T|R1.4=[[3DS Toad Circuit|3DS Toad Circuit T]]
| |
| |I1.5=Mario Circuit 1RT|R1.5=[[SNES Mario Circuit 1|SNES Mario Circuit 1R/T]]
| |
| |I1.6=DK Summit T|R1.6=[[Wii DK Summit|Wii DK Summit T]]
| |
| |I1.7=Royal Raceway RT|R1.7=[[N64 Royal Raceway|N64 Royal Raceway R/T]]
| |
| |I1.8=3DS Mario Circuit|R1.8=[[3DS Mario Circuit]]
| |
| |I1.9=3DS Mario Circuit T|R1.9=[[3DS Mario Circuit|3DS Mario Circuit T]]
| |
| |I1.10=Toad Circuit RT|R1.10=[[3DS Toad Circuit|3DS Toad Circuit R/T]]
| |
| |I1.11=RMX Rainbow Road 2|R1.11=[[RMX Rainbow Road 2]]
| |
| |I1.12=Sydney Sprint RT|R1.12=[[Sydney Sprint|Sydney Sprint R/T]]
| |
| |I1.13=Royal Raceway T|R1.13=[[N64 Royal Raceway|N64 Royal Raceway T]]
| |
| |I1.14=Royal Raceway R|R1.14=[[N64 Royal Raceway|N64 Royal Raceway R]]
| |
| |I1.15=Paris Promenade 3R|R1.15=[[Paris Promenade 3|Paris Promenade 3R]]
| |
| |I1.16=Daisy Hills T|R1.16=[[3DS Daisy Hills|3DS Daisy Hills T]]
| |
| |I1.17=Mario Circuit 2|R1.17=[[SNES Mario Circuit 2]]
| |
| |I1.18=Mario Circuit 2T|R1.18=[[SNES Mario Circuit 2|SNES Mario Circuit 2T]]
| |
| |I1.19=London Loop|R1.19=[[London Loop]]
| |
| |I1.20=London Loop 2|R1.20=[[London Loop 2]]
| |
|
| |
| |I2.1=Mario Circuit 1|R2.1=[[SNES Mario Circuit 1]]**
| |
| |I2.2=Toad Circuit R|R2.2=[[3DS Toad Circuit|3DS Toad Circuit R]]*
| |
| |I2.3=RMX Mario Circuit 1|R2.3=[[RMX Mario Circuit 1]]
| |
| |I2.4=RMX Mario Circuit 1T|R2.4=[[RMX Mario Circuit 1|RMX Mario Circuit 1T]]*
| |
| |I2.5=Tokyo Blur 4RT|R2.5=[[Tokyo Blur 4|Tokyo Blur 4R/T]]**
| |
| |I2.6=Tokyo Blur 4R|R2.6=[[Tokyo Blur 4|Tokyo Blur 4R]]
| |
| |I2.7=Yoshi Circuit R|R2.7=[[GCN Yoshi Circuit|GCN Yoshi Circuit R]]
| |
| |I2.8=3DS Mario Circuit R|R2.8=[[3DS Mario Circuit|3DS Mario Circuit R]]
| |
| |I2.9=RMX Rainbow Road 2T|R2.9=[[RMX Rainbow Road 2|RMX Rainbow Road 2T]]
| |
| |I2.10=Sydney Sprint R|R2.10=[[Sydney Sprint|Sydney Sprint R]]
| |
| |I2.11=Mario Circuit 3RT|R2.11=[[SNES Mario Circuit 3|SNES Mario Circuit 3R/T]]
| |
| |I2.12=3DS Mario Circuit RT|R2.12=[[3DS Mario Circuit|3DS Mario Circuit R/T]]
| |
| |I2.13=Mario Circuit 2RT|R2.13=[[SNES Mario Circuit 2|SNES Mario Circuit 2R/T]]
| |
| |I2.14=Paris Promenade 3RT|R2.14=[[Paris Promenade 3|Paris Promenade 3R/T]]
| |
| |I2.15=Daisy Hills|R2.15=[[3DS Daisy Hills|3DS Daisy Hills]]
| |
| |I2.16=Mario Circuit 2R|R2.16=[[SNES Mario Circuit 2|SNES Mario Circuit 2R]]***
| |
| |I2.17=London Loop T|R2.17=[[London Loop|London Loop T]]
| |
| |I2.18=Los Angeles Laps|R2.18=[[Los Angeles Laps]]
| |
| |I2.19=Maple Treeway RT|R2.19=[[Wii Maple Treeway|Wii Maple Treeway R/T]]
| |
| |I2.20=Vancouver Velocity 2R|R2.20=[[Vancouver Velocity 2|Vancouver Velocity 2R]]
| |
| |I2.21=3DS Bowser's Castle RT|R2.21=[[3DS Bowser's Castle|3DS Bowser's Castle R/T]]
| |
| }}
| |
|
| |
| ==Mario (Tuxedo)==
| |
| '''Mario (Tuxedo)''' is a variant of Mario that debuted in the [[Wedding Tour]] as a High-End driver. He was the spotlight driver for the first week of the tour. Fitting the tour's theme, this variant of Mario is depicted wearing his Top Hat and Tuxedo outfit from ''Super Mario Odyssey''. His Special Item is the [[Coin Box]].
| |
|
| |
| ===Availability===
| |
| {|cellspacing=0 border=1 cellpadding=3 style="border-collapse:collapse;text-align:center" width=100%
| |
| !style="background:#c3cfdb"|Tour
| |
| !style="background:#c3cfdb"|Availability
| |
| |-
| |
| |rowspan=2|[[Wedding Tour]]
| |
| |[[Wedding Tour#Wedding Pipe 1|Wedding Pipe 1]]<br><small>spotlight
| |
| |-
| |
| |[[Wedding Tour#Wedding Pipe 2|Wedding Pipe 2]]
| |
| |-
| |
| |[[Mario vs. Peach Tour]]
| |
| |[[Mario vs. Peach Tour#Mario Pipe|Mario Pipe]]
| |
| |}
| |
|
| |
| ===Statistics===
| |
| {{MKT profile
| |
| |item=Coin Box
| |
| |I1.1=Royal Raceway R|R1.1=[[N64 Royal Raceway|N64 Royal Raceway R]]
| |
| |I1.2=Choco Mountain RT|R1.2=[[N64 Choco Mountain|N64 Choco Mountain R/T]]
| |
| |I1.3=RMX Rainbow Road 2T|R1.3=[[RMX Rainbow Road 2|RMX Rainbow Road 2T]]
| |
| |I1.4=RMX Mario Circuit 1R|R1.4=[[RMX Mario Circuit 1|RMX Mario Circuit 1R]]
| |
| |I1.5=Royal Raceway|R1.5=[[N64 Royal Raceway]]
| |
| |I1.6=Paris Promenade 3R|R1.6=[[Paris Promenade 3|Paris Promenade 3R]]
| |
| |I1.7=Paris Promenade 3T|R1.7=[[Paris Promenade 3|Paris Promenade 3T]]
| |
| |I1.8=Shy Guy Bazaar T|R1.8=[[3DS Shy Guy Bazaar|3DS Shy Guy Bazaar T]]
| |
| |I1.9=Shy Guy Bazaar R|R1.9=[[3DS Shy Guy Bazaar|3DS Shy Guy Bazaar R]]
| |
| |I1.10=Airship Fortress RT|R1.10=[[DS Airship Fortress|DS Airship Fortress R/T]]
| |
| |I1.11=Mario Circuit 3RT|R1.11=[[SNES Mario Circuit 3|SNES Mario Circuit 3R/T]]
| |
| |I1.12=Choco Mountain T|R1.12=[[N64 Choco Mountain|N64 Choco Mountain T]]
| |
| |I1.13=Tokyo Blur 2T|R1.13=[[Tokyo Blur 2|Tokyo Blur 2T]]
| |
| |I1.14=Tokyo Blur 2R|R1.14=[[Tokyo Blur 2|Tokyo Blur 2R]]
| |
| |I1.15=Mario Circuit 1R|R1.15=[[SNES Mario Circuit 1|SNES Mario Circuit 1R]]
| |
| |I1.16=Mario Circuit 1T|R1.16=[[SNES Mario Circuit 1|SNES Mario Circuit 1T]]
| |
| |I1.17=SNES Rainbow Road RT|R1.17=[[SNES Rainbow Road|SNES Rainbow Road R/T]]
| |
| |I1.18=Sydney Sprint R|R1.18=[[Sydney Sprint|Sydney Sprint R]]
| |
| |I1.19=London Loop|R1.19=[[London Loop]]
| |
| |I1.20=London Loop 2T|R1.20=[[London Loop 2|London Loop 2T]]
| |
| |I1.21=Dino Dino Jungle T|R1.21=[[GCN Dino Dino Jungle|GCN Dino Dino Jungle T]]
| |
| |I1.22=Daisy Hills RT|R1.22=[[3DS Daisy Hills|3DS Daisy Hills R/T]]
| |
| |I1.23=Merry Mountain|R1.23=[[Merry Mountain]]
| |
|
| |
| |I2.1=3DS Mario Circuit|R2.1=[[3DS Mario Circuit]]
| |
| |I2.2=3DS Mario Circuit R|R2.2=[[3DS Mario Circuit|3DS Mario Circuit R]]*
| |
| |I2.3=RMX Mario Circuit 1T|R2.3=[[RMX Mario Circuit 1|RMX Mario Circuit 1T]]*
| |
| |I2.4=Royal Raceway T|R2.4=[[N64 Royal Raceway|N64 Royal Raceway T]]**
| |
| |I2.5=RMX Rainbow Road 2|R2.5=[[RMX Rainbow Road 2]]**
| |
| |I2.6=Paris Promenade 3|R2.6=[[Paris Promenade 3]]
| |
| |I2.7=Shy Guy Bazaar|R2.7=[[3DS Shy Guy Bazaar]]
| |
| |I2.8=Daisy Hills T|R2.8=[[3DS Daisy Hills|3DS Daisy Hills T]]
| |
| |I2.9=Cheep-Cheep Island|R2.9=[[GBA Cheep-Cheep Island]]
| |
| |I2.10=Cheep-Cheep Island R|R2.10=[[GBA Cheep-Cheep Island|GBA Cheep-Cheep Island R]]
| |
| |I2.11=Los Angeles Laps 3RT|R2.11=[[Los Angeles Laps 3|Los Angeles Laps 3R/T]]
| |
| |I2.12=Los Angeles Laps 3R|R2.12=[[Los Angeles Laps 3|Los Angeles Laps 3R]]
| |
| |I2.13=Royal Raceway RT|R2.13=[[N64 Royal Raceway|N64 Royal Raceway R/T]]
| |
| |I2.14=Ninja Hideaway RT|R2.14=[[Ninja Hideaway|Ninja Hideaway R/T]]
| |
| |I2.15=DS Waluigi Pinball|R2.15=[[DS Waluigi Pinball]]
| |
| |I2.16=Sydney Sprint 2|R2.16=[[Sydney Sprint 2]]
| |
| |I2.17=Sydney Sprint 2R|R2.17=[[Sydney Sprint 2|Sydney Sprint 2R]]
| |
| |I2.18=London Loop R|R2.18=[[London Loop|London Loop R]]
| |
| |I2.19=New York Minute 4|R2.19=[[New York Minute 4]]
| |
| |I2.20=New York Minute 4R|R2.20=[[New York Minute 4|New York Minute 4R]]
| |
| |I2.21=Choco Island 1RT|R2.21=[[SNES Choco Island 1|SNES Choco Island 1R/T]]
| |
| |I2.22=London Loop 3|R2.22=[[London Loop 3]]
| |
| |I2.23=3DS Mario Circuit RT|R2.23=[[3DS Mario Circuit|3DS Mario Circuit R/T]]
| |
| |I2.24=Kalimari Desert 2RT|R2.24=[[N64 Kalimari Desert 2|N64 Kalimari Desert 2R/T]]***
| |
| |I2.25=Merry Mountain RT|R2.25=[[Merry Mountain|Merry Mountain R/T]]
| |
| |I2.26=Vancouver Velocity 2T|R2.26=[[Vancouver Velocity 2|Vancouver Velocity 2T]]
| |
| |I2.27=Singapore Speedway T|R2.27=[[Singapore Speedway|Singapore Speedway T]]
| |
| |I2.28=Singapore Speedway|R2.28=[[Singapore Speedway]]
| |
| |I2.29=Wario Shipyard RT|R2.29=[[3DS Wario Shipyard|3DS Wario Shipyard R/T]]
| |
| }}
| |
|
| |
|
| ==MKT Karts and Glider Variants== | | ==MKT Karts and Glider Variants== |