Glimmer's Galleon (Donkey Kong Land 2)
Template:Levelbox Glimmer's Galleon is the twelfth level of Donkey Kong Land 2. It is the seventh area in Krem Cauldron.
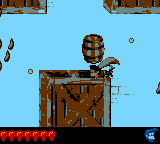
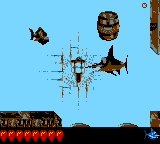
This level takes place in a pitch-dark cargo hold of a crashed galleon. The level might prove difficult since its layout cannot be initially seen. In spite of this, certain barrels are scattered throughout the level, which light up the area when touched, allowing the player to distinguish the walls and grounds. However, the barrels cease giving off light after a few moments. Enguarde appears again, helping the Kongs swim easier.
Level layout
The Kongs begin the level in a dark area with a trail of bananas and a Flotsam in it. If they head east from here, they can find an alcove that contains a Banana Bunch and a hidden passage that leads them to a pair of light-giving barrels, some bananas, a few Flotsams, and a Bonus Barrel. A small area containing the letter K branches off of this passage. If the primates travel west from the level's beginning, rather than east, they come up to a light-bearing barrel and an arrow pointing downwards that is formed by a group of bananas. If they follow this arrow, they come down to a passage leading to the west, which contains a DK Barrel, a pair of Flotsams, a Lockjaw, and other obstacles. An Animal Barrel containing Enguarde the Swordfish sits below the Lockjaw in this area, who is followed by a light-giving barrel that the heroes must touch to illuminate the area. A passage is to the north of the barrel, and it contains an arrow pointing upwards that is formed by bananas. The passage allows the heroes to take a shortcut through the level, as if they continue west from the previous light-giving barrel, they make their way through a longer path towards a Shuri, a Flotsam, and another passage that leads to the north.
While they make their way up through this area, they come up to a Lockjaw and a Puftup and then travel to the east, where they can find the meeting point between the shortcut passage and the longer path. Above the meeting point, the heroes can find a Puftup and an arrow pointing to the east that is formed by more bananas. The heroes can follow this area to reach a passage that contains some more Flotsams and another light-bearing barrel. There is a hidden room below this barrel that consists of a few bananas, a Puftup, and a Banana Coin. A Lockjaw is also to the east of this barrel, and it is followed by a DK Barrel, an arrow of bananas pointing farther to the east, a Puftup, and an additional light-giving barrel. Two separate passages are above and below this uncommon barrel; the passage above it leads to a Shuri, another light-giving barrel, and a Flotsam, while the area below it leads to a Flotsam, some bananas, and yet another barrel that brightens the area when touched. The upper passage also contains a quadruplet of crates that the duo can journey through to reach a hidden section that holds two Banana Bunches. The two passages meet in an area that contains an arrow pointing to the east that is formed by a group of bananas.
If they follow this arrow, they head through a passage that leads them towards a Flotsam, a light-giving barrel, and then farther downwards into a lower area that holds a Puftup and another barrel that can remove the surrounding darkness for a limited amount of time. The barrel is followed by a Flotsam, an arrow formed by bananas pointing to the north, a DK Barrel, and another Lockjaw. The arrow points to a wall, but a passage is below it that leads into a wide room that holds a Lockjaw and a Banana Bunch, which is located in the bottom-right corner of the area. To the right of the arrow, the primates can find a passage leading to the north with a light-giving barrel at the beginning of it. If they continue past this barrel, they come up to a Flotsam and another arrow pointing to the north that is formed by bananas. There are two separate passages above here; the one of the right is void of obstacles, but the one of the left contains a few Puftups. As Diddy and Dixie continue farther north, they come up to a small channel between the two passages. A light-bearing barrel and the level's Star Barrel are ahead of here at another meeting point between the two passages. The Kongs can find a small channel immediately before the Star Barrel that leads them to the letter N and acts as a shortcut through the level.
An arrow made of bananas pointing to the west is next to the level's Star Barrel, and if it is followed, the heroes come up to a few Flotsams and a small alcove that contains a banana. The Kongs can find a passage below this banana that contains another Animal Barrel, which contains Enguarde. If they enter it in their usual forms, they turn into the swordfish, but if Enguarde himself enters it, he is simply given a second life in case he is attacked by an enemy. An area is to the right of the Animal Barrel with a Lockjaw, a Banana Bunch, and the letter N in it. The duo can also find a passage to the left of here that holds a few Flotsams and some bananas located in small alcoves. The passage leads to a wider area with a light-bearing barrel and a Lockjaw in it. At the top of this area, they can find an alcove that holds a DK Barrel, and to the left of here, they can find a thin passage that consists of a small alcove with a Banana Bunch and a light-giving barrel in it. After the heroes pass this barrel, they enter a more open area that contains a trio of Puftups that float upwards. In the bottom of this area under these puffer-fish-like foes, there is a small area that contains a Lockjaw, a few bananas, and the letter G.
If the heroes head west from the top of the Puftup-filled area, they come up to a Shuri, a Lockjaw, and some bananas in a narrower area. Soon, they reach a lone Puftup, who is followed by a light-giving barrel in a U-shaped passage. At the bottom of the passage, Diddy and Dixie can find another Puftup and a Banana Bunch in a small alcove. Soon after, as they swim up north through the curved passage, they reach a DK Barrel and an additional Puftup that guards a barrel that is able to light up the dark, underwater area. After the primates head past the Flotsams and the Shuri northeast of here, they reach a No Animal Sign that causes Enguarde to disappear when passed. A shallow area of water is ahead of here, and the primates soon come up to a deeper area under it that holds another light-giving barrel, some Flotsams, and another Lockjaw. An alcove is also hidden to the left of the first Flotsam, and it holds a Banana Coin. The primates then come up to another Flotsam as they approach another light-giving barrel, which sits next to an arrow pointing upwards that is formed by a group of bananas. If they follow this arrow, they reach a No Animal Sign, which is positioned on top of a pile of crates that the heroes can swim through. If they make their way through these crates, they can find a hidden area that contains a light-giving barrel, a Flotsam, and a few Puftups. A Bonus Barrel is also at the top of this area above the surface of the water, and a Banana Bunch is at the bottom of the room in a corner. If the heroes pass the No Animal Sign mentioned previously, they come up to a group of crates that they can jump on to find a spring, which they must bounce on to successfully complete the level. There is also a small pool of water to the right of this spring that holds a Banana Bunch.
Enemies
Items
- Banana Coin: 3
- DK Barrels: 4
K-O-N-G Letters
- K: At the beginning of the level, the Kongs should head backwards towards the level's first Bonus Barrel until they reach the first light-bearing barrel. A thin passage leading upwards to the letter K is slightly ahead of here.
- O: The primates can find a few small crates at the top of the area that they can travel through shortly before the second DK Barrel in the level. A room that contains the letter O is on the other side of these crates.
- N: The Kongs should head slightly downwards from the location of the level's Star Barrel to find a thin passage that they must head through to find a small room with the letter N in it.
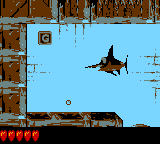
- G: Shortly after the heroes pass the first DK Barrel from the Star Barrel, they can find a light-giving barrel that is followed by a line of three Puftups. A hidden area is southwest from these enemies, and the area contains the letter G at the end of it.
DK Coin
- A while before reaching the Star Barrel, the heroes find an arrow, formed by bananas, pointing to the east with a light-bearing barrel next to it. From this point, the Kongs need to swim to the wall and up to the top-right corner of the area, where they can find three small crates that they can move through. If they head through the crates, they make their way into a wide room that contains a few enemies and a DK Coin.
Bonus Levels
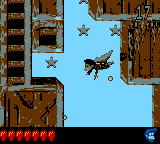
- At the beginning of the level, the Kongs must travel backwards and not follow the trail of bananas in front of them. As they swim east, they come up to a few Flotsams, two light-giving barrels, and eventually, a Bonus Barrel, which sends them to a Bonus Level when entered. Here, the Kongs need to collect 40 stars that are scattered around an underwater area. If they collect all of the stars within 25 seconds, a Kremkoin appears at the beginning of the stage (due to them traveling in a circle during the bonus) to grab before the remaining time runs out.
- Immediately after the heroes pass the final No Animal Sign in the level, they must feel around the crates to the right of them. They are able to swim through a row of three crates, which are followed by a long, thin passage that leads to a vast area consisting of a few Puftups and a Flotsam. At the top of the area above the surface of the water, a Bonus Barrel can be found that is able to send the heroes into a Bonus Level, where they must make way through an underwater maze. The Bonus Level sometimes becomes pitch black, so it is up to the Kongs to make sure they hit the many light-giving barrels around the area. If they reach the end of the maze within 20 seconds, they can find a Kremkoin to grab within the remaining time.
Trivia
- Glimmer the Angler Fish appears on the box art of Donkey Kong Land 2, but the game does not feature him in the game at all. However, the level's title remains as "Glimmer's Galleon".


