Soli-Tree
| Soli-Tree | |
|---|---|

| |
| Appears in | Mario & Luigi: Brothership (2024) |
| Greater location | Concordia, Stormstar Sea |
| Ruler | Reclusa |
| Inhabitants | Weeping Troopers, Reclusiffs, Seedlusas, Doom Blooms |
The Soli-Tree is the final area of Mario & Luigi: Brothership, also serving as the final boss after Reclusa merges with it, becoming Weeping Reclusa. It is built using the remains of Fortress Zokket and is located in the Stormstar Sea, at the exact center of Concordia, where the original Uni-Tree once stood. The tree itself is split into three sections, each with a distinct visual flair: the lower, middle and upper levels. Despite not having a lighthouse, there is a cannon present near the Soli-Tree's entrance for returning to Shipshape Island.
History[edit]
After Zokket's defeat, he gives the last of his energy to the egg, freeing Cozette but also reawakening Reclusa. Reclusa creates the Soli-Tree by spawning a swarm of Doom Blooms and having them intertwine around Fortress Zokket, then summons a gleaming red barrier to prevent Mario and Luigi from getting in. In order to counteract the barrier, the brothers use Cozette's Bonding Can to obtain energy from seven significant Bonds from various characters they have met throughout their adventure. After they collect the sixth bond, Reclusa appears via hologram and bounces off a few names for his lair such as the Darkwood and the Enmitree, before settling on the Soli-Tree. After collecting all seven of them, Connie douses Mario and Luigi with the power of the Bonds so they can break into the Soli-Tree. They launch into it via Shipshape Island's cannon, and the brothers use a Bro Bomb to smash open the front entrance. Connie joins the Mario Bros. as they explore the Soli-Tree, wanting to rescue her mentor Cozette, who had ventured in alone to confront Reclusa to make up for her mistakes. Inside, they find flowers capable of releasing spores that separate the brothers if they come into contact with one of them, forcing the other to find and awaken the unconscious brother before proceeding. They arrive in a chamber with an elevator and eight rooms linked to it, including the one they came from. The elevator is blocked off until they travel through the rooms and retrieve eight lanterns, lighting them with fireballs and iceballs.
Once all eight lanterns are set and lit, Mario, Luigi, and Connie ride the elevator to the tree's middle level, where they find an injured Cozette lying on the ground, having failed to stop Reclusa on her own. Connie stays behind to tend to her mentor's wounds while Mario and Luigi continue onward. However, the brothers get caught by Reclusa's mind-altering flowers. This traps them in an illusory copy of the Mushroom Kingdom, where Princess Peach and the Toads are celebrating their supposed victory and return home, and Bowser and his minions have made peace with them. The brothers are surprised to discover that Snoutlet is still with them, and they eventually realize that Reclusa has them trapped in a fantasy world. They chase Reclusa around the illusion, using Lakitu's camera to track him until he hides in a fake ? Block, then hit the block to flush him out. After doing this six times, then Bro Bombing him when he pretends to be a rock, Reclusa becomes frustrated and flees into Peach's Castle. The brothers pursue him inside, finding themselves in a dark hallway with a light at the end. The fake Peach materializes in front of them and tries to convince them to go back. After they say "no" three times, she disappears, and they continue toward the light, leaving the illusion behind. They wake up and pull the flowers off their heads, freeing themselves. Afterwards, the illusory Mushroom Kingdom cannot be accessed again.
Reclusa throws a tantrum, and the brothers head for the upper level of the tree, where he sends a large horde of minions after them. Mario and Luigi attempt to fight them off, but they soon realize they are outnumbered. However, Bowser arrives in an airship and blasts the minions with cannonballs. After this point, the main area of Bowser's Castle in Wayaway Island cannot be visited again as the front door of the Bowser's Castle remains locked. When Snoutlet comments on the timely rescue, Bowser is quick to clarify that he did not intervene on their behalf and just wanted to get back at Zokket, despite Kamek's attempts to explain to him that "Zokket" was just a brainwashed puppet and that Reclusa is their real enemy. As the Mario Bros. press on, Reclusa confronts them once again and reveals that the Soli-Tree is almost ready for him to fuse with before running off. Snoutlet then creates a giant plug and Mario and Luigi ride it ride on it as they chase down Reclusa, dodging his Doom Blooms and countering their fire and iceballs with the brothers' own. When they catch up to him, they use a Bro Bomb to stun Reclusa so they can attack him. After supposedly defeating him, it turns out to have been a trick to stall for time and Reclusa fuses with the Soli-Tree, becoming Weeping Reclusa. He immediately swats away Bowser and his remaining forces and releases a Glohm fog which incapacitates the Mario Bros. and Snoutlet.
Connie arrives and uses her Bonding Can to awaken and revitalize the brothers, allowing them to fight once again. The Doom Blooms swallow Snoutlet, forcing Mario and Luigi to fight them while dodging and countering Weeping Reclusa's attacks. Once they free Snoutlet and stun Weeping Reclusa, they hop onto another plug and fly up into Weeping Reclusa's mouth. Reclusa shields himself within the Weeping Core, and, when it is destroyed, fights the brothers head-on. After seemingly falling in battle, Reclusa feigns regret for his actions before angrily destroying the battlefield, sending all three of them plummeting in a last ditch attempt to eliminate Mario and Luigi. As they fall, the brothers charge up their Bonds and repeatedly smash Reclusa with their hammers to finish him off. In his final words, Reclusa bemoans his failure, and without him, the Soli-Tree crumbles apart and sinks into the ocean, allowing Shipshape Island to enter the center of Concordia and become the new Uni-Tree.
Layout[edit]

After breaking through the Soli-Tree's barrier with the power of the Bonds, Mario and Luigi arrive at its entrance along with Connie. The entrance to the Soli-Tree is the same one as in Fortress Zokket, but overgrown with the tree's flora. Like before, the bros. must use Bro Bomb to break into the main area. The Soli-Tree has three levels, each of which are separated by elevators:
Lower level[edit]
The lower level of the Soli-Tree resembles the interior of Fortress Zokket, but with a slightly different layout and is overgrown with the plantation familiar to the Soli-Tree itself. It starts with a narrow, winding path patrolled by Reclusa's minions and Glohmed enemies. It also features flowers that release spores, which forcibly separate the brothers if one comes in contact with them. If this happens, the affected brother will be rendered unconscious and warped to a designated spot in the room until the other brother finds him. This path leads to the lower level's main area, a large chamber with an elevator in the middle surrounded by eight outlets. The elevator is only accessible after lanterns are plugged into all eight outlets and lit using fire or ice balls, depending on the color.
While the first lantern is located right inside the chamber, the brothers must traverse the seven other rooms linked to the chamber to find the other lanterns and carry them back to the central chambers. The paths to the connected rooms are blocked by gates, which are also opened by placing and lighting the lanterns. Regardless of which outlets the lanterns are placed in, the rooms always unlock in the same order. The first lantern unlocks the northern room, the second lantern unlocks the west, east, and southeast rooms, and the fifth lantern unlocks the southwest, northwest, and northeast rooms.
- North: This is another winding, narrow path filled with enemies and spore-releasing flowers. After making it to the end and using a Bro Bomb to destroy one of the flowers, the lantern can be carried back, with a switch-activated staircase acting as a shortcut.
- West: This room has the brothers spinning over spike pits and avoiding moving electrical orbs. At the end, pressing a switch causes the platform holding the lantern to slowly move to the right, and the brothers must make it to the other side and get the lantern before the platform moves back.
- East: The brothers must step on twenty-five numbered panels in the correct order to open the gate that blocks access to the lantern.
- Southeast: Upon entering this room, Mario and Luigi are immediately gated in. It is filled with enemies and spore-releasing flowers. The brothers must carry a plug around and place it in outlets to open closed off parts of the room to access the lantern and leave the room.
- Southwest: This room has more enemies and spore-releasing flowers, as well as flower gates that need to be destroyed with Bro Bombs.
- Northwest: This is a large area with many seesaws. The brothers must hit five purple ! Blocks to obtain the lantern, with Mario bouncing Luigi up with the seesaws to access otherwise unreachable spots. There is a secret room on the far left with eight Grampy Turnips, including a golden one. A ninth Grampy Turnip is found at the top of the area and gives a hint on how to hit the nearby ! Block. A second secret room at the top features many coins and items.
- Northeast: After hitting a switch, Mario and Luigi must race the lantern to its destination using Bro Ball and Ball Blitz, picking it up before the platform with the lantern on it returns to its starting point.
Middle level[edit]
The middle level consists only of a short, one-way path that leads to the elevator to the upper level with no enemies or puzzles. However, on their way through it, Mario and Luigi get captured by Reclusa's flowers and trapped in a fantasy of a peaceful Mushroom Kingdom. The fake Mushroom Kingdom consists of a short forested path followed by a bridge that leads to a wide open grassy area with a fountain in the center and Peach's Castle in the far back. There are four different versions of the fantasy:
- The first one simply has Peach, Starlow, and the Toads congratulating Mario and Luigi on their safe return and inviting him into the castle. Entering it simply respawns them back in front of the bridge and commences the second version.
- The second one is where Mario and Luigi are challenged to celebratory minigames where they must climb platforms and hit an orange ! Block. On the way, there are suspicious, jittering, backwards ? Blocks that roll around and burst into red particles when hit, with the second one revealing Reclusa. After hitting both fake ? Blocks and clearing both challenges, Mario and Luigi are invited into the castle again.
- If the brothers complete the minigame without hitting the suspicious blocks, the Toads will tell them to play again and get all blocks and coins along the way, and the fake ? Blocks will glow, further hinting to the player that they need to hit them to progress.
- In the third fantasy, Bowser and his minions have made peace with the Mushroom Kingdom, and they are all celebrating with a feast. A Lakitu tracks the Mario and Luigi's movements with a camera, and there are invisible objects such as coin vents, wooden boxes, and platforms that can only be seen on the camera (though the shadows of the platforms are still normally visible). The camera also makes Reclusa visible, and the brothers can use it to track his position until he hides in another fake ? Block. Each time they find Reclusa, he changes the layout of the invisible platforms. After being found three more times, he leads them into Peach's Castle and changes the fantasy again.
- Occasionally, Reclusa will laugh, causing visual effects depicting his laughter noises to appear from his direction. This can help the player keep track of his location.
- The fourth and final version of the fantasy is similar to the previous one, but without Bowser. Notably, the final challenges feature invisible hurt zones that will harm Mario and Luigi in a similar fashion to Spike Traps, and are only visible on the Lakitu's camera as well. On the final time Reclusa is found, Mario and Luigi needs to use a Bro Bomb on an unreachable giant rock that Reclusa is hiding in. Once found two more times, Reclusa loses his temper and flees into the castle again. At this point, all of the fake characters have vanished, and Mario and Luigi can head into the castle to return to the real world.
Upon entering the fake Peach's Castle for the final time, the bros. find themselves in a hallway that consists of a large, linear void with a carpet leading into a bright light at the end that will release the brothers out of the fantasy. Halfway through the hallway, the fake Peach appears and attempts to convince both Mario and Luigi to stay with them at the castle; answering "no" three times will allow them to avoid her and go back to the real world. However, answering "yes" to the fake Peach only features her escorting the brothers back to the plaza with her and two Toads standing in front of the fountain.
Upper level[edit]
The upper level is just a straight path forward leading up to the Soli-Tree where Reclusa attempts to swarm Mario and Luigi with an army of minions. After Bowser takes them out, they can proceed onward to face Reclusa himself. Before the fight, there is a Save Block, a Heart Block, and a Warp Pipe that leads back to the entrance.
Items[edit]
NOTE: Coins from the Plug Radishes respawn.
Field/Given/Object[edit]
| Item | Location | Image |
|---|---|---|
| Coin | 5 in the northwestern area of the Lower Level, above the second see-saw. Luigi automatically collects it after being launched. | .png)
|
| 14 in the northwestern area of the Lower Level, above the third see-saw. Mario collects the right ones, while Luigi collects the left ones after being launched. | .png)
| |
| 20 in the northwestern area of the Lower Level, in the 4 Plug Radishes found near the entrance to the Grampy Turnip room. | .png)
| |
| 3 in the northwestern area of the Lower Level, between the first and the second see-saws in the see-saw puzzle found in the northwest of the area. | .png)
| |
| 3 in the northwestern area of the Lower Level, between the second and the third see-saws in the see-saw puzzle found in the northwest of the area. | .png)
| |
| 3 in the northwestern area of the Lower Level, between the third and the fourth see-saws in the see-saw puzzle found in the northwest of the area. | .png)
| |
| 3 in the northwestern area of the Lower Level, between the fourth and the fifth see-saws in the see-saw puzzle found in the northwest of the area. | .png)
| |
| 4 in the northwestern area of the Lower Level, between the fifth and the sixth see-saws in the see-saw puzzle found in the northwest of the area. | .png)
| |
| 18 in the northwestern area of the Lower Level, above the last see-saw in the see-saw puzzle found in the northwest of the area. Mario collects the right ones, while Luigi collects the left ones after being launched. | .png)
| |
| 23 in the northwestern area of the Lower Level, above the see-saw found in the northeastern corner of the area. | .png)
| |
| 10 in the illusionary Mushroom Kingdom, during the first loop, in the west. | .png)
| |
| 35 in the illusionary Mushroom Kingdom, during the first loop, at the western end. | .png)
| |
| 6 in the illusionary Mushroom Kingdom, during the first loop, in the east. | .png)
| |
| 35 in the illusionary Mushroom Kingdom, during the first loop, at the eastern end. | .png)
| |
| 35 in the illusionary Mushroom Kingdom, during the first loop, in the northeastern corner. | .png)
| |
| 32 in the illusionary Mushroom Kingdom, during the first loop, in the 4 Plug Radishes and Golden Plug Radish, in the northwestern corner. | .png)
| |
| 15 in the illusionary Mushroom Kingdom, during the first loop, in the 3 Plug Radishes, in the southwestern corner. | .png)
| |
| 32 in the illusionary Mushroom Kingdom, during the first loop, in the 4 Plug Radishes and Golden Plug Radish, in the southeastern corner. | .png)
| |
| 27 in the illusionary Mushroom Kingdom, during the first loop, in the 3 Plug Radishes and Golde Plug Radish, in the northeast. | .png)
| |
| 16 in the illusionary Mushroom Kingdom, during the second loop, on the stone structure in the northwest, as a part of the first platforming challenge. Required to be collected to progress. | .png)
| |
| 28 in the illusionary Mushroom Kingdom, during the second loop, in the moving platform part of the second platforming challenge. Required to be collected to progress. | .png)
| |
| 8 in the illusionary Mushroom Kingdom, during the third loop, in the vent which is seen only on the Lakitu's camera, found in the northwest. | .png)
| |
| 8 in the illusionary Mushroom Kingdom, during the third loop, in the vent which is seen only on the Lakitu's camera, found in the west. | .png)
| |
| 8 in the illusionary Mushroom Kingdom, during the third loop, in the vent which is seen only on the Lakitu's camera, found in the west, close to the fountain. | .png)
| |
| 8 in the illusionary Mushroom Kingdom, during the third loop, in the vent which is seen only on the Lakitu's camera, found in the southeastern corner. | .png)
| |
| 8 in the illusionary Mushroom Kingdom, during the third loop, in the vent which is seen only on the Lakitu's camera, found in the east. | .png)
| |
| 8 in the illusionary Mushroom Kingdom, during the third loop, in the vent which is seen only on the Lakitu's camera, found in the east, close to the fountain. | .png)
| |
| 8 in the illusionary Mushroom Kingdom, during the third loop, in the vent which is seen only on the Lakitu's camera, found at the lower part of western end. | .png)
| |
| 10-Coin | 58 in the northwestern area of the Lower Level, in the secret area found in the northeast. | .png)
|
| In the illusionary Mushroom Kingdom, during the second loop, above the fourth panel in the M/L panel part of the first platforming challenge. Required to be collected to progress. | .png)
| |
| In the illusionary Mushroom Kingdom, during the second loop, above the first platform in the second platforming challenge. Required to be collected to progress. | .png)
| |
| Coin and 10-Coin | 3 Coins and 8 10-Coins in the illusionary Mushroom Kingdom, during the first loop, in the northwest. | .png)
|
| 3 Coins and 10 10-Coins in the illusionary Mushroom Kingdom, during the first loop, in the south | .png)
| |
| 15 Coins and 8 10-Coins in the illusionary Mushroom Kingdom, during the first loop, in the northeast. | .png)
| |
| 6 Coins and 4 10-Coins in the illusionary Mushroom Kingdom, during the second loop, left of the fountain, as a part of the first platforming challenge. Required to be collected to progress. | .png)
| |
| 6 Coins and 4 10-Coins in the illusionary Mushroom Kingdom, during the second loop, right of the fountain, as a part of the second platforming challenge. Required to be collected to progress. | .png)
| |
 Max Mushroom |
In the northwestern area of the Lower Level, in the Grampy Turnip room found in the south east of the area, given by the middle Grampy Turnip of the five Grampy Turnips found on the lower part of the room. | .png)
|
 Max Syrup Jar |
In the northwestern area of the Lower Level, in the Grampy Turnip room found in the south east of the area, given by the right Grampy Turnip of the two Grampy Turnips found on the middle part of the room. | .png)
|
? Blocks[edit]
| Item/s | Description | Image |
|---|---|---|
| 47 ? Blocks | ||
Ultra Mushroom and Ultra Syrup Jar |
Lower Level, Area 1: After dropping down from the high entrance part, found to the east of it. | 
|
 1-Up Mushroom |
Lower Level, Area 1: After coming across the crossroads, the Bros. should go to the left to find the block at the end of this path. | 
|
 Max Syrup Jar and Speed Bean DX |
Lower Level, Area 1: After coming across the crossroads, the Bros. should go to the right to find the blocks at the end of this path. | 
|
1-Up DX |
Lower Level, Area 2: Near the entrance. | 
|
Stache Bean DX |
Lower Level, Northern Area: At the easternmost point, hidden behind four large wooden crates and guarded by a Weeping Trooper. | 
|
Heart Bean |
Lower Level, Northern Area: At the northernmost point. | 
|
 Ultra Nut |
Lower Level, Southeastern Area: In the southwest. | 
|
10 50-Coins and Heart Bean DX |
Lower Level, Southeastern Area: At the easternmost ledge. | 
|
 Crowd-Control Boots DX |
Lower Level, Southeastern Area: In the northeast. | 
|
Max Mushroom |
Lower Level, Western Area: In the southeasternmost point. | 
|
| 10 100-Coins | Lower Level, Western Area: At the end of the detour found to the right of the first purple floor. | 
|
Max Syrup Jar |
Lower Level, Western Area: At the end of the detour found to the right of the second purple floor. | 
|
| 2x Speed Bean and Stache Bean |
Lower Level, Western Area: North of the entrance, accessible only after going through the whole area, due to iron bars blocking the way. | 
|
Power Bean |
Lower Level, Area 2: To the left of the entrance of the northwestern area. | 
|
1-Up DX |
Lower Level, Northwestern Area: Above the first seesaw of the area. | 
|
Ultra Nut |
Lower Level, Northwestern Area: After reaching the middle section of the area, found next to the wire path. | 
|
 Ultra Candy |
Lower Level, Northwestern Area: In the west part of the middle section of the area, behind the gate that need to be lower by Luigi standing on a button. | 
|
1-Up Mushroom |
Lower Level, Northwestern Area: Above the seesaw found at the east end of the middle section of the area. | 
|
3 100-Coins, Max Nut and Power Bean DX |
Lower Level, Northwestern Area: In the secret area found east of the eastern end of the middle section of the area, above the first 3 seesaws. | 
|
Ultra Mushroom |
Lower Level, Northwestern Area: In the secret area found east of the eastern end of the middle section of the area, at the end of the path reached by the stairs. | 
|
 Gamble Hammer DX |
Lower Level, Northwestern Area: In the secret area found east of the eastern end of the middle section of the area, above the last seesaw. Only Luigi launched by Mario jumping onto the seesaw can collect it. | 
|
Ultra Syrup Jar |
Lower Level, Northwestern Area: In the upper section of the area, southwest after the second set of stairs. | 
|
Defense Bean DX |
Lower Level, Southwestern Area: North of the entrance. | 
|
| 5 100-Coins | Lower Level, Southwestern Area: In the south of the area. | 
|
 1-Up Mushroom and Ampberry |
Lower Level, Southwestern Area: In the northwestern corner of the area. | 
|
Ultra Mushroom |
Lower Level, Northeastern Area: Above the iron grate platform found northwest of the entrance. | 
|
Ultra Syrup Jar |
Lower Level, Northeastern Area: Above the third platform from the start. | 
|
Mushroom |
NOTE: Following 9 blocks are permamently missable after Bros. leave the area. Illusionary Mushroom Kingdom, First Loop: Southeast of the fountain. |

|
Mushroom |
Illusionary Mushroom Kingdom, First Loop: West of the fountain. | 
|
Mushroom |
Illusionary Mushroom Kingdom, First Loop: Above the third stump of the group of three found west of the fountain. | 
|
Mushroom |
Illusionary Mushroom Kingdom, First Loop: Above the stump found next to the stone structure found west of the fountain. | 
|
Mushroom |
Illusionary Mushroom Kingdom, First Loop: In the northeast, between the fountain and the mushroom platforms. | 
|
Mushroom |
Illusionary Mushroom Kingdom, Second Loop: In the northwestern corner of the stone structure found west of the fountain, after accepting the first platforming challenge. | 
|
| 2x 2 Mushrooms |
Illusionary Mushroom Kingdom, Second Loop: Southeast of the fountain, after accepting the second platforming challenge. | 
|
Mushroom |
Illusionary Mushroom Kingdom, Fourth Loop: At the end of the invisible platforms starting from the wooden stump found southwest of the entrance to the castle. | 
|
Max Mushroom |
Middle Level: At the end of the area, next to the exit elevator. | 
|
1-Up DX, Max Candy and Max Nut |
Upper Level: At the end of the area, to the left of the path leading towards the final boss. | 
|
Grampy Turnips[edit]
| Location | Image |
|---|---|
| Eight are found in a secret area in the far left end of the seesaw room called the Grampy Turnip Room, with the one on the top ledge being another Golden Grampy Turnip. | .png)
|
| In front of a high seesaw puzzle. | .png)
|
Golden Grampy Turnip rewards[edit]
Golden Grampy Turnip will reward the duo with items, depending on the number of Grampy Turnips found during the game. If these items are collected here, they cannot be collect again on the Shipshape Island from the other Golden Grampy Turnip.
| Number of Grampy Turnips discovered | Reward | Image |
|---|---|---|
| 3 | Super Candy |
.png)
|
| 5 | 2x 2 Heart Beans |
.png)
|
| 9 | Stache Bean DX |
.png)
|
| 18 |  Grampy Turnip Gloves |
.png)
|
Hidden Blocks[edit]
| Item/s | Description | Image |
|---|---|---|
| 3 Hidden Blocks | ||
Max Mushroom |
At the northernmost point in the north room on the lower level. |
|
 Repel Wear DX |
In the northwestern corner of the southwestern room of the lower level. |
|
Whittledown Hammer DX |
To the left of the entrance of the northeastern room in the second room of the lower level. | 
|
Enemies[edit]
 Doom Bloom (Support)
 Glohm Koopa Troopa (Support)
 Glohm Magikoopa (Support)
 Glohm Spike Zok Trooper (Support)
 Weeping Reclusa (Final Boss)
 Weeping Core (Final Boss)
 Reclusa (Final Boss)


Profile[edit]
- In-game description: Reclusa's locus of loneliness that stands at the center of the world.
Music[edit]
The music that plays when the Bros. explore the Soli-Tree, titled "Infiltrate Soli-Tree!", is an unsettling atonal tune.
When Reclusa ambushes Mario and Luigi with Dream Flowers, the music changes to "The Mushroom Kingdom?", a cheerful arrangement of "World 1 Map (Grass Land)" from Super Mario Bros. 3. While progressing through the illusory world, the music becomes increasingly ominous as instruments are replaced with static drones and screeches; in the last version, heartbeats may be heard through the left and right channels.
When Mario and Luigi escape from the false Mushroom Kingdom, "Where Are You Planning to Go?", a creepy arrangement of "Peach's Castle", plays.
 Infiltrate Soli-Tree Infiltrate Soli-Tree | File info |
| The Mushroom Kingdom? | File info |
| The M*shroom K*ngdom? | File info |
| The M*shr**m K*ngd*m? | File info |
| The M******m K*****m? | File info |
| Where Are You Planning to Go? | File info |
Gallery[edit]
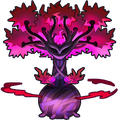 Map icon
 Awakened map icon (unused)
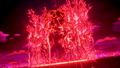 The Soli-Tree protected by a barrier
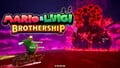 The Soli-Tree on the title screen
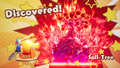 Discovering the Soli-Tree
 The Soli-Tree after Mario and Luigi destroy its barrier
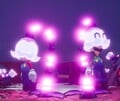 Mario and Luigi being held in an illusion by Reclusa's flowers
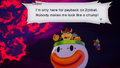 Bowser and Kamek at the Soli-Tree
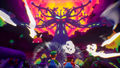 Reclusa after merging with the Soli-Tree


Naming[edit]
"Soli-Tree" is a portmanteau of "solitary" and "tree", serving as a counterpart of the Uni-Tree.
Names in other languages[edit]
| Language | Name | Meaning | Note(s) | Ref. |
|---|---|---|---|---|
| Japanese | シャダーンツリー Shadān Tsurī | Elongation of「遮断」(shadan, "isolation") + "tree" | [?] | |
| Chinese (Simplified) | 遮蔽树 Zhēbì Shù (Mandarin) Jēbai Syuh (Cantonese) | Obstruction Tree | [?] | |
| Chinese (Traditional) | 遮蔽樹 Zhēbì Shù (Mandarin) Jēbai Syuh (Cantonese) | [?] | ||
| Dutch | Afzondereik | Portmanteau of afzonderlijk ("separate") and eik ("oak") | [?] | |
| French (Europe) | Solicéa | Portmanteau of "solitude" and épicéa ("spruce") | [1] | |
| German | Deskonektarbor | Portmanteau of Konektarbor ("Uni-Tree") and "disconnect" | [?] | |
| Italian | Ysolalbero | Portmanteau of Ysoll ("Reclusa") and albero ("tree") | [2] | |
| Korean | 차단트리 Chadan Teuri | Isolation Tree | [?] | |
| Portuguese | Solitárvore | Portmanteau of solitário ("lonely") and árvore ("tree") | [3] | |
| Spanish | Aislárbol | Portmanteau of aislar (both "to insulate" and "to isolate") and árbol ("tree") | [?] |
References[edit]
- ^ La dernière ATTAQUE FRÈRE ! MARIO & LUIGI L'ÉPOPÉE FRATERNELLE #38. By Kirbendo - Let's Play on YouTube. Retrieved on February 5, 2025.
- ^ Mario & Luigi: Fraternauti alla carica - LIVE #12. By Mariuigi Khed on YouTube. Retrieved on December 17, 2024.
- ^ Mario & Luigi: Brothership in-game name (Brazilian Portuguese localization)

