Wario Land 4
- This article is about the Game Boy Advance game. For the gamebook, see Warioland 4 (book).
| Wario Land 4 | |||||||||||||
|---|---|---|---|---|---|---|---|---|---|---|---|---|---|
 For alternate box art, see the related gallery. | |||||||||||||
| Developer | Nintendo R&D1 | ||||||||||||
| Publisher | Nintendo | ||||||||||||
| Platforms | Game Boy Advance, LodgeNet, Virtual Console (3DS, Wii U), Game Boy Advance – Nintendo Classics | ||||||||||||
| Release dates | Game Boy Advance: August 21, 2001[1] August 21, 2001[1] November 9, 2001[?] November 9, 2001[?] November 19, 2001[?] November 19, 2001[?] November 23, 2001[2] November 23, 2001[2] June 8, 2004[3] June 8, 2004[3]Virtual Console (3DS) (Ambassador Program): [4] December 15, 2011[?] December 16, 2011[?] December 16, 2011[?] December 16, 2011[?]Virtual Console (Wii U): April 30, 2014[?] May 8, 2014[?] June 5, 2014[?] June 5, 2014[?]Game Boy Advance - Nintendo Classics: February 13, 2025[5] February 14, 2025[6] February 14, 2025[7] February 14, 2025[8] February 14, 2025[9] February 14, 2025[9] | ||||||||||||
| Languages | English Japanese Chinese (Simplified) | ||||||||||||
| Genre | 2D Platformer | ||||||||||||
| Ratings |
| ||||||||||||
| Mode | Single-player | ||||||||||||
| Format |  Digital download Digital download Digital download Digital download Game Pak Digital download Game Pak Digital download | ||||||||||||
| Input |  Wii Remote (horizontal) Wii Remote (horizontal) Joy-Con (horizontal) Joy-Con (horizontal) | ||||||||||||
| Serial codes | AGB-AWAJ-JPN AGB-AWAE-USA AGB-AWAP-EUR (AWAE) AGB-AWAP-AUS (AWAE) AGB-AWAC-CHN | ||||||||||||
 - Everyone
 - All ages
 - Three years and older
 - Three years and older
 Twelve years and older
 - General




Wario Land 4 is a platformer game released for the Game Boy Advance in 2001. It was later re-released for the Nintendo 3DS on December 16, 2011 via the Nintendo 3DS Ambassadors program (just after its ten-year anniversary), the Virtual Console for the Wii U on May 8, 2014, and for the Nintendo Switch's Game Boy Advance – Nintendo Classics service on February 14, 2025. It is the fifth game in the Wario Land series, which is a spin-off of the Super Mario series. It is also the final Wario Land game to be released on a handheld system and the last installment in the series for seven years until Wario Land: Shake It!
In the game, Wario travels to the Golden Pyramid after reading a newspaper article about a rumor of a legendary treasure hidden inside. His intention is to rob the pyramid, but he accidentally goes on a quest to save the legendary Princess Shokora from the money-crazed Golden Diva, evil ruler of the Golden Pyramid. The game features 2D graphics with linear transformations (similar to Super Mario World and Super Mario World 2: Yoshi's Island). Wario Land 4 has received very positive reviews from websites and game critics alike, enjoying praise for its soundtrack, collectibles throughout the game, and level design.
Story[edit]
Does Wario smell treasure again? Oh yes he does! Whilst reading his morning paper and picking his nose, he reads about the legendary Pyramid of Shokora! With no delay, and even forgetting to take his mid-morning nap, Wario hops into his fantastic car and heads off to find the Golden Pyramid.
– Story from the official European Wario Land 4 website

Sometime before the events of the game, the legendary Golden Pyramid was discovered deep within a jungle. Expeditions were mounted to find the pyramid's treasure, but a series of accidents prevented anything from being found. The game's story properly begins one morning with Wario reading the newspaper in his house. He reads an article about the Golden Pyramid and all the treasure within, and decides to go steal it for himself. He then hops in his car and heads towards the pyramid, almost running over a black cat on the road.

Upon arriving at the pyramid, Wario climbs the outer stairs and heads inside, where he finds the same black cat that he almost ran over earlier. The Cat leads Wario deeper into the pyramid and down a hole. Wario lands in a room near the center of the pyramid, and proceeds to complete the challenges of its five passages, thus opening the way to the inner pyramid, where the evil ruler of the Golden Pyramid, the Golden Diva, resides.
After exploring the Golden Passage, Wario comes face to face with the Golden Diva. The black cat then jumps in front of Wario and attacks the Golden Diva in vain. The Cat gets swallowed by the Diva, who proceeds to fight Wario and gradually uncovers her many kabuki masks.

After the Golden Diva's defeat, the pyramid begins to crumble. Grabbing his treasure, and with the black cat in tow, Wario hurries to escape the pyramid. They both make it out, and watch the pyramid crumble to the ground from a distance. The Golden Diva's jewelry then flies out of the treasure sack and toward the black cat. This causes the Cat to change form into Princess Shokora, the ancient ruler of the Golden Pyramid who was cursed by the Golden Diva. With the Diva's defeat, the curse is broken, and the princess thanks Wario by kissing him on the cheek. She is taken away by angels into the afterlife, and Wario takes his treasure to his car and heads home.
The ending cutscene shows Wario speeding through the city, almost running over a cat once more. A newspaper flies into the cat's face, with an article that reads: "STEAKS! EAT AS MUCH AS YOU CAN!!". The game ends with gold bars forming the words THE END.
Gameplay[edit]
Game mode[edit]

Upon creating a save file, the player is asked which game mode they prefer to play. The available game modes are as follows:


 (unlockable, by completing Hard mode)


The chosen game mode affects various aspects of gameplay, such as the location of the jewel pieces, the type and quantity of enemies, and the health the player begins with upon entering the level. For example, on S-Hard mode, Wario enters the level with only one heart instead of the full eight. The game mode also affects the time given to get back to the vortex after the player hits the switch. In a few levels on S-Hard mode, the switch even changes its location.
Less time is given to defeat the bosses on more difficult modes, and prices at the Item Shop are more expensive. When beating the game on Hard or S-Hard mode, extra parts of the credits sequence are shown which feature Wario picking up women in his car.
Objectives[edit]
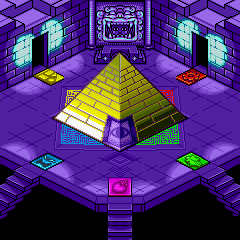

The game begins in the Entry Passage which includes one level and a boss, Spoiled Rotten. On completion, the next four areas of the game are revealed. This consists of four more passages, each with four levels relating to a different theme with a boss at the end. The four passages are the Emerald Passage, Ruby Passage, Topaz Passage, and Sapphire Passage. These can be completed in any order. Once each bosses of these four passages have been cleared, an inner pyramid is revealed on the main map. This includes one last level, the Golden Passage and the final boss, the Golden Diva.

Unlike previous installments in the series, Wario is given a Heart Meter, containing a total of eight hearts. Wario can collect additional hearts throughout the stages. Wario loses a heart by touching a threatening part of an enemy, such as spikes. He can fully replenish his meter by opening a Full Health Item box. Below the Heart Meter is a heart gauge. Most enemies drop a little heart when defeated, which fills the gauge by an eighth. Filling it gives Wario an extra heart, and the gauge is then emptied. Completely filling Wario's hearts and gauge will cause most enemies to drop an extra 100-point coin.
Each of the eighteen levels contains four jewel pieces, found within boxes, that need to be collected. When four jewel pieces in a level are joined, they form a jewel. The color of the Jewels varies on the passage they are collected in. The player must collect all jewel pieces in a passage to gain access to the boss. A Keyzer must be collected to unlock the next level. Without the Keyzer, the four jewel pieces in that level can still be collected, but the door to the next level remains locked.
Wario enters a level through a vortex which closes behind him. The only way to open it again is to find the switch somewhere in the level. This reopens the vortex and allows Wario to return to the map screen. A time limit is given to return to the vortex. The player should focus on finding the four jewel pieces and the Keyzer before hitting the switch if possible. However, there are some areas that can only be accessed by hitting the switch, due to the Kaeru Blocks. When the switch is hit, all transparent Kaeru Blocks become solid, while all solid blocks become transparent. This opens up new areas that can only be accessed when the switch is hit, so there may be some other jewel pieces or the Keyzer to find in that new area.

As soon as the switch is hit, a timer appears on screen. The amount of time given to reach the vortex varies on the level and the game mode the player has selected. If the timer runs out, the player's score quickly depletes and the level becomes black and white. When the score reaches zero, Wario is sent back to the main map and must start the level again.


The game records the player's best score according to their points collected in each level. The amount of points obtained in a level affects what icon appears on the map screen when standing at the entrance of that level, next to the best score. A score of above 10,000 shows a gold crown, 8,000 to 9,990 shows a silver crown, and a score of 6,000 to 7,990 shows a bronze crown. A score of below 6,000 shows no crown.
There are a total of twelve treasure chests in Wario Land 4. Each of the four main boss rooms contain three treasure chests which are embedded into the wall in the background, as well as a piece of jewellery kept by the boss. During the boss battle when the time starts to run low (usually under a minute), the treasure chests in the background begin to disappear one by one.
Once Wario defeats a boss in a main passage, the treasure chests that are left over are collected and stored in the Golden Pyramid, along with the jewellery retrieved from the boss. The amount of treasure chests collected does not affect the main game. However, it does affect the game's completion, as the more treasure chests Wario obtains, the more beautiful Princess Shokora appears in the game's ending cutscene.
Bosses cannot be fought again after the player beats them for the first time, which causes any treasures that disappeared during a boss fight to be unobtainable during a playthrough. Once the player beats the game, however, they can fight them again (with exception to Spoiled Rotten) to obtain the missing treasures that would then be send to the Golden Pyramid or to purposely lose them in the repeated playthrough. This will allow players to see Princess Shokora's different appearance at the game's ending cutscene after defeating Golden Diva again on the same save file and can be repeated at any time after defeating the final boss again.
Controls[edit]
- “So these are my basic controls! You got a problem with that?”
- —Wario, Wario Land 4 instruction booklet
| Controls | Purpose |
|---|---|

|
Open pause menu, confirm |

|
Jump, swim upwards, confirm |

|
Attack, throw (hold to build power), swim forwards or in direction of 
|
|
|
Move ( ), look up ( ), look up ( ) )
|
| +
|
Throw upwards |

|
Smash Attack (break blocks below or defeat enemies; ends when player releases the D-pad), roll on 45 degree slope, Super Smash Attack (break stronger blocks; hold for more than one second while falling; does not end if the player releases the D-pad)
|
| +
|
Slide down ladder |
| +
|
Crawl |
 or or 
|
Dash Attack |
Wario's moves[edit]
- “How 'bout it? You can even do this stuff!”
- —Wario, Wario Land 4 instruction booklet
Wario has several different moves which are all required to make progress in the game.
| Image | Name | Description |
|---|---|---|

|
Attack | Wario can shift his body weight to ram into objects. He can hit the weak spot of enemies to destroy them, or break blocks to make a path. |

|
Dash Attack | Just like the regular Attack, but with more power. Wario must run for a short distance to build up momentum, allowing him to break stronger, more solid blocks. |

|
Smash Attack | A version of the Ground Pound that is mainly used in the Super Mario franchise. Wario can use it to break blocks below, or defeat enemies. |

|
Super Smash Attack | Similar to the normal Smash Attack but with more strength. Triggered by continuously Smash Attacking for a certain amount of time without hitting the ground, Wario can break more solid blocks by performing this move. The move will not cancel until he hits the ground. |

|
Roll | On a 45 degree slope in the floor, Wario can begin to roll. He can jump while moving, destroy blocks, and defeat enemies by using this move. He stops rolling if he either hits something solid or falls into water. |

|
Swim | Wario is able to swim when he is in a body of water. He is unable to swim against water currents. |

|
Crawl | When Wario has a small space to squeeze through, he can crawl to pass through. He can also jump while crawling. |

|
Throw | If Wario picks up an enemy, rock or Chomp ball, he is able throw it upwards or sidewards. He can also break blocks from a long distance away. |
Wario's reactions[edit]
- “Even the powerful Wario gets into some embarrassing situations in this game! I eat too much and get all chubby, a bee stings my face and makes it swell like a balloon, my body catches fire, and all kinds of other bad things happen to me!!”
- —Wario, Wario Land 4 instruction booklet
All of Wario's reactions in Wario Land 4 return from the last two games, though instead of each reaction having its own music, they instead change the current level's music when used, such as distorting it, slowing it down, or speeding it up. Wario has a total of ten different reactions in the game, all having a different purpose to assist Wario in progressing through the level. This can include turning into a bat to reach a high place or catching fire to break certain blocks.
| Image | Name | Description |
|---|---|---|

|
Wario | Wario in his standard form. He can perform a Smash Attack, ram enemies or blocks, crawl to get through narrow spaces, and throw small objects like enemies or rocks. |

|
Puffy Wario | Wario after getting stung by a Beezley, or getting struck by the arrow of a Bow Balloon. His cheeks puff up in a supposed allergic reaction, and he is able to float continually upwards. When Wario hits a ceiling or gets hurt, he will turn back into his normal form. |

|
Flaming Wario | Wario after catching fire from a Kaentsubo or Pig Head Statue. He runs without stopping while the fire spreads, but the player can still make Wario jump by pressing . He runs in the opposite direction when he hits a wall, and can destroy Fire Blocks towards the end of his reaction. Touching water returns Wario to his normal form.
|

|
Flat Wario | Wario after being crushed by a piston. His body becomes very flat and lightweight, and he is able to get into small spaces. If he leaves the ground or jumps, he falls down slowly while swaying from side to side. Wario can turn back into his normal form by entering a Decompressor or touching water. |

|
Fat Wario | Wario, only heavier and fatter. He can turn into this form by eating apples thrown by a Ringosukī. Wario is invulnerable to enemy attacks, and enemies are killed by only touching them. Wario returns to normal after walking a certain distance or jumping a number of times. |

|
Bubble Wario | Wario after touching an underwater bubble. He can float upwards until he reaches the surface. This allows him to bypass water currents, allowing the player to access certain areas. |

|
Snowman Wario | Wario after a mound of snow falls on him from a ceiling. If he touches a slope, Wario turns into a snowball and start rolling, breaking any Snow Blocks that get in his way. |

|
Frozen Wario | Wario after getting hit by a Yeti's sneeze. He becomes immobile and start sliding backwards. He can pass through spikes in this form. The ice breaks once Wario hits a wall or object. |

|
Bouncy Wario | Wario when a Menhanmā strikes him with its hammer. He curls up into a spring and transforms into Bouncy Wario. The player is able to make Wario bounce up high by pressing . After a while or if Wario bounces up high and hits a ceiling, he will transform back into his normal form.
|

|
Zombie Wario | Wario when a Skeleton Bird regurgitates on him. He moves slow, and jumping above a thin platform causes him to fall through the floor, reaching otherwise inaccessible places. Like Wario Land 3, he is still able to jump, but not as high as he would normally. Wario can transform back by either touching water or being exposed to bright light. |

|
Bat Wario | Wario after touching a Minicula. In this form, Wario takes on the appearance of a bat, and is able to fly by repeatedly pressing . Unlike Wario Land 3, he cannot transform into an actual vampire. He can return to normal by touching water or being exposed to bright light (similar to Zombie Wario).
|
Objects and obstacles[edit]
| Image | Name | Description |
|---|---|---|

|
Switch | Stepping on a switch opens a vortex, which transports Wario to and from levels. Switches found within levels reveal a bomb when pressed, initiating a time limit for Wario to find the vortex and return to the Golden Pyramid. If Wario runs out of time, he loses coins until he runs out and is kicked out of the level. |

|
Vortex | A vortex opens whenever a switch is pressed. Entering it can transport Wario from the Golden Pyramid to a level, and vice versa. |

|
Kaeru Block | Kaeru Blocks can be found either solid or transparent. The form of these blocks swap once Wario presses the switch, granting access to new areas or preventing the player from returning to previous ones. |

|
Brown block | Regular stone blocks which are found blocking paths or concealing Diamonds. They can be destroyed using any of Wario's attacks. |

|
Blue block | More solid blocks which can only be destroyed by using a Dash Attack or Super Smash Attack. |

|
Jewel piece | Quarter pieces of a jewel which can be found in each level. Their color depends on the passage they are found in. Collecting them all is necessary for gaining access to the passage's boss. |

|
Full Health Item | An item which fully restores Wario's Heart Meter. One can be found in every level, with the exception of the Golden Passage. |

|
CD | A colored CD which can be played in the Sound Room once collected. A total of sixteen CDs can be found in each of the game's main levels, and they are often well-hidden. |

|
Heart and little heart | Hearts restore Wario’s Heart Meter. Little hearts are small, red orbs which fill up a meter under Wario’s health. These red orbs can be found by killing enemies. If the meter is full then Wario will regain a heart. If Wario has full health and fills his meter to the max, then the meter will stay full and enemies will drop an additional 100 coin. |

|
Coins | The game's point system and currency, which can be spent at the Mini-Game Shop. The variants are Small Coins, Bronze Coins, Silver Coins and Gold Coins, which are respectively worth 10, 50, 100, and 500 points. They are found after defeating enemies or by opening boxes. |

|
Red and Blue Crystals | Red and Blue Crystals are worth 10 and 100 points respectively. Unlike coins, they are found suspended in mid-air and do not disappear after an amount of time. |

|
Diamond | Diamonds are often hidden throughout levels, within pink areas and as a prize from a chance wheel. They are worth 1,000 points. |

|
Medal | Medals are the currency used in the Item Shop, and are collected by scoring high in the mini-games at the Mini-Game Shop. |

|
"!" Buttons | "!" Buttons can be pressed to fill transparent blocks and vice versa. Sloped varieties exist which allow Wario to roll. "!" Buttons are often found in pink areas as part of puzzle sections. |

|
Ladders | Wario can climb and descend ladders. Their design varies depending on the passage. |

|
Pipes | Warp Pipes take Wario to a different area. Purple warp pipes lead to pink areas. |

|
Rock | Wario can pick up and throw rocks to break brown blocks or defeat enemies. |

|
Flower | Only being seen in Wildflower Fields, flowers are pollinated by Beezleys to produce coins. The value of the coins depend on how ripe the flower's fruit is. |

|
Bubble | Wario can swim into a bubble to become Bubble Wario, allowing him to move through water currents. In some areas, bubbles should be avoided as they can divert Wario back to an unwanted area. |

|
Togetoge | Togetoge resemble a chestnut and are only seen in Mystic Lake. They fall out of trees and harm Wario on contact. |

|
Spikes | Spikes are immovable objects which can only be passed through by Frozen Wario and Zombie Wario. |

|
Piston | Pistons turn Wario into Flat Wario if they hit him. A decompressor reverses this effect. |

|
Fire Block | Fire Blocks are unbreakable unless Wario is fully engulfed in flames, which happens a short period of time after gaining the Flaming Wario reaction. |

|
Snow Block | These are blocks which can only be broken by Snowman Wario, after he has fallen down a slope and gained some speed while rolling. |

|
Icicle | Icicles continually form and fall from the ceiling. They can be safely passed through while rolling as Snowman Wario or as Frozen Wario. |
 
|
Chomp ball and blue box | In Pinball Zone, Wario must carry and throw each Chomp ball into a blue box to open the door to the next room. |

|
Pinball digital counter | This counts how many blue boxes remain in a room. It disappears once it reaches zero, releasing a 500 coin and opening up the door to the next room. |

|
Electric spark | These continuously emit sparks which travel across the ground, harming Wario. |

|
Triangle block | An object in Toy Block Tower which must be carried to Toy Block Doors, filling a slot to open a door. |

|
Round red rock | Wario can use round red rocks to reach higher areas. They can be rolled in either direction using an attack. |

|
Chance wheel and Goal Block | In The Big Board, chance wheels spin and can cause certain events depending on the number hit. Such events include switching blocks, causing lightning to strike or making enemies appear. |

|
Buttons | These are found at the end of rows of dominos in Domino Row. If Wario hits the button before the dominos fall, it will break nearby domino blocks. |

|
Domino blocks | These conceal doors or alternate paths, and can only be broken if Wario hits the button before the row of dominos does. |

|
Flying carpet | Wario can ride flying carpets to gain height and descend slowly. |

|
Tube | Tubes are only seen in a single room in Arabian Night. Depending on which tube Wario enters, Beezleys or Miniculas will appear. |

|
Chandelier | In the Golden Passage, certain chandeliers will sway and fall when Wario approaches. They then burst into blue flames and transform Wario into Flaming Wario. |
Passages and levels[edit]
- “My game unfolds inside a pyramid made up of six passages!”
- —Wario, Wario Land 4 instruction booklet
Each of the four main passages have four levels, with a boss at the end of the passage. The Entry Passage and the Golden Pyramid have only one level before the boss.
| Passage | Level | Description | Boss |
|---|---|---|---|
 Entry Passage |
 Hall of Hieroglyphs |
A tutorial level which shows hieroglyphs of the shop owner on the walls. They indicate actions and animated button commands for the player to learn, such entering a pipe and attacking to break blocks. |  Spoiled Rotten |
 Emerald Passage |
 Palm Tree Paradise |
A straightforward level with few alternate paths. It contains many blocks, basic enemies, and introduces the Fat Wario transformation. |  Cractus |
 Wildflower Fields |
Wildflower Fields often utilizes the Puffy Wario transformation, allowing the player to access high areas. There are some underground locations, water currents, and a sub-area where Wario climbs inside a hollow sunflower. | ||
 Mystic Lake |
Much of the Mystic Lake takes place underwater. The Bouncy and Bubble Wario transformations are introduced. Togenobi is unique to this level, which the player must pass to reach the Keyzer. The remainder of the level takes place above ground. | ||
 Monsoon Jungle |
The Monsoon Jungle contains many bodies of water and large areas with vines. On the way back to the vortex, the player progresses through an underground area with winding tree roots. | ||
 Ruby Passage |
 The Curious Factory |
A level which takes place in an industrial setting, with moving machinery, conveyor belts and pistons which transform Wario into Flat Wario. The Flaming Wario transformation is also used. |  Cuckoo Condor |
 |