World 1-Castle (Super Mario 3D Land): Difference between revisions
m (Minor fixes.) |
LinkTheLefty (talk | contribs) mNo edit summary |
||
| Line 7: | Line 7: | ||
|game=''[[Super Mario 3D Land]]'' | |game=''[[Super Mario 3D Land]]'' | ||
|limit=400 seconds | |limit=400 seconds | ||
|boss=[[ | |boss=[[Tail Bowser]] ([[Goomba]]) | ||
|beforealt= | |beforealt= | ||
|before=[[World 1-4 (Super Mario 3D Land)|<<]] | |before=[[World 1-4 (Super Mario 3D Land)|<<]] | ||
| Line 17: | Line 17: | ||
==Layout== | ==Layout== | ||
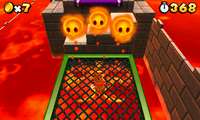
[[File:Mario 3D Land Bowser's Castle.png|thumb|left|A group of three Lava Bubbles]] | [[File:Mario 3D Land Bowser's Castle.png|thumb|left|A group of three Lava Bubbles]] | ||
In the first area, Mario must dodge two [[Draglet]]s and cross a [[ | In the first area, Mario must dodge two [[Draglet]]s and cross a [[Fire Bar]]. A [[Lava Bubble]] and a [[Lava Geyser]] come out of the lava. In the next area, there is a spinning rock gear, with coins above it, a Lava Bubble and a Star Medal in the center. Ahead is another spinning stone gear with a Fire Bar in the middle. A platform with a [[Dry Bones]] and a rectangular ? Block with a [[Super Leaf]] is ahead. Near is a platform that rises from the lava, which Mario uses to reach on the top of a wall. Mario lands on a wire platform with a lava geyser and three Lava Bubbles under it. At this point, Mario finds a corridor and a [[Hammer Bro]]. Another wire platform (with another lava geyser under it) connects the corridor to the another area, where the [[Checkpoint Flag]] and a Fire Bar are placed. Near is a castle wall with two Thwomps. After Mario leaves the area, he finds a passage with another [[Dry Bones]]. Once in the far right, a [[Tail Bowser]] appears and Mario notices Toad, who is kept captive in a cell past the Tail Bowser. He starts to breathe several fireballs at Mario, while he is running through a path to the boss's bridge. When Mario arrives at the bridge, he must dodge the Tail Bowser's attacks and press the button at the end. When the switch is pressed, the bridge breaks and the Tail Bowser is revealed to be a [[Goomba]]. Once defeated, Mario rescues the kidnapped Toad. After, he can go to a [[Warp Box]] that leads Mario to the top of a tower, where the [[Goal Pole]] and a green [[+ Clock]] is found. | ||
{{br|left}} | {{br|left}} | ||
==[[Star Medal]]s== | ==[[Star Medal]]s== | ||
*'''Star Medal 1''': The first Star Medal is in the middle of the first rotating platform, guarded by a Lava Bubble. | *'''Star Medal 1''': The first Star Medal is in the middle of the first rotating platform, guarded by a Lava Bubble. | ||
*'''Star Medal 2''': The second Star Medal is near the | *'''Star Medal 2''': The second Star Medal is near the Fire Bar after the Checkpoint Flag. | ||
*'''Star Medal 3''': The third Star Medal is in a narrow space behind the second Thwomp, accessible only by [[Wall Jump]]ing. | *'''Star Medal 3''': The third Star Medal is in a narrow space behind the second Thwomp, accessible only by [[Wall Jump]]ing. | ||
| Line 27: | Line 27: | ||
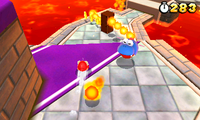
[[File:SM3DL - Draglet Screenshot.png|thumb]] | [[File:SM3DL - Draglet Screenshot.png|thumb]] | ||
*[[Draglet]]s | *[[Draglet]]s | ||
*[[ | *[[Fire Bar]]s | ||
*[[Lava Bubble]]s | *[[Lava Bubble]]s | ||
*[[Hammer Bro]]s. | *[[Hammer Bro]]s. | ||
*[[Thwomp]]s | *[[Thwomp]]s | ||
*[[Dry Bones]] | *[[Dry Bones]] | ||
*Boss: [[ | *Boss: [[Tail Bowser]] ([[Goomba]]) | ||
{{SM3DL}} | {{SM3DL}} | ||
{{SM3DL Levels}} | {{SM3DL Levels}} | ||
Revision as of 16:23, March 8, 2020
Template:Levelbox
World 1-![]() Castle is the Castle course of World 1, the fifth level, and the first Castle in Super Mario 3D Land. It is primarily filled with lava and sinking platforms. The level icon is a generic castle.
Castle is the Castle course of World 1, the fifth level, and the first Castle in Super Mario 3D Land. It is primarily filled with lava and sinking platforms. The level icon is a generic castle.
Layout
In the first area, Mario must dodge two Draglets and cross a Fire Bar. A Lava Bubble and a Lava Geyser come out of the lava. In the next area, there is a spinning rock gear, with coins above it, a Lava Bubble and a Star Medal in the center. Ahead is another spinning stone gear with a Fire Bar in the middle. A platform with a Dry Bones and a rectangular ? Block with a Super Leaf is ahead. Near is a platform that rises from the lava, which Mario uses to reach on the top of a wall. Mario lands on a wire platform with a lava geyser and three Lava Bubbles under it. At this point, Mario finds a corridor and a Hammer Bro. Another wire platform (with another lava geyser under it) connects the corridor to the another area, where the Checkpoint Flag and a Fire Bar are placed. Near is a castle wall with two Thwomps. After Mario leaves the area, he finds a passage with another Dry Bones. Once in the far right, a Tail Bowser appears and Mario notices Toad, who is kept captive in a cell past the Tail Bowser. He starts to breathe several fireballs at Mario, while he is running through a path to the boss's bridge. When Mario arrives at the bridge, he must dodge the Tail Bowser's attacks and press the button at the end. When the switch is pressed, the bridge breaks and the Tail Bowser is revealed to be a Goomba. Once defeated, Mario rescues the kidnapped Toad. After, he can go to a Warp Box that leads Mario to the top of a tower, where the Goal Pole and a green + Clock is found.
Star Medals
- Star Medal 1: The first Star Medal is in the middle of the first rotating platform, guarded by a Lava Bubble.
- Star Medal 2: The second Star Medal is near the Fire Bar after the Checkpoint Flag.
- Star Medal 3: The third Star Medal is in a narrow space behind the second Thwomp, accessible only by Wall Jumping.

