Loopy Lights: Difference between revisions
m (→Bonus Levels) |
No edit summary |
||
| (48 intermediate revisions by 25 users not shown) | |||
| Line 1: | Line 1: | ||
{{ | {{DKC level infobox | ||
|title=Loopy Lights | |title=Loopy Lights | ||
|image=[[File: | |image=[[File:Loopy Lights SNES.png]] | ||
|code=6 - 4 (SNES & GBA)<br>6 - 5 (GBC) | |code=6 - 4 (SNES & GBA)<br>6 - 5 (GBC) | ||
|game=''[[Donkey Kong Country]] | |game=''[[Donkey Kong Country]] | ||
| | |before4=[[Misty Mine|<<]] | ||
|after4=[[Platform Perils|>>]] | |||
| | |before5=[[Necky Nutmare|<<]] | ||
| | |after5=[[Platform Perils|>>]] | ||
| | |||
}} | }} | ||
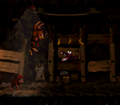
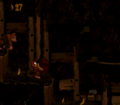
'''Loopy Lights''' is the thirty-second level in | '''Loopy Lights''' is the thirty-second level in ''[[Donkey Kong Country]]'', as well as the fourth level of [[Chimp Caverns]]. In the [[Donkey Kong Country (Game Boy Color)|Game Boy Color version]], Loopy Lights is instead the fifth level due to the game adding another level, [[Necky Nutmare]], making Loopy Lights the thirty-third level overall instead. Similarly to [[Stop & Go Station]], Loopy Lights takes place in a mine and has barrels that affect the environment of the level, in this case, [[On & Off Barrel]]s, which affect the lighting. By default, the barrels are set to 'Off', which makes the whole area dark. This effect is similar to [[Blackout Basement]], although in Loopy Lights, the enemies' eyes remain visible. [[Donkey Kong]] and [[Diddy Kong]] can jump at the barrels to temporarily turn on the lights, allowing them to see the path ahead. The Kongs must avoid [[Kritter]]s and [[Zinger]]s along the way and jumping [[Klaptrap]]s. There is also a [[Manky Kong]] at the end. In the [[Game Boy Color]] and the [[Game Boy Advance]] remakes, while dark, the level is far more visible than in the original version. | ||
==Layout== | |||
{{multiframe|[[File:LoopyLights GBC 1.png]] [[File:LoopyLights GBA 2.png|180px]]|Loopy Lights' appearance in the Game Boy Color version, top, and the Game Boy Advance version, bottom|align=left|size=200}} | |||
When the level begins, the Kongs find themselves under a barrel switch that displays the word, "Off." If they hit it, the lights turn on, putting a purple Klaptrap near a ledge in view. Another barrel switch can be found on the top of the ledge just before a small pit with the third barrel switch on the other side of it. As the Kongs approach a [[DK Barrel]] near here, a purple Klaptrap marches towards them. They find another one of these Klaptraps shortly after here next to another barrel switch that can be used to illuminate the area for a limited amount on time. The primates can find a pit containing a moving platform ahead. They can use the platform to cross and access an area with another purple Klaptrap and a barrel switch. | When the level begins, the Kongs find themselves under a barrel switch that displays the word, "Off." If they hit it, the lights turn on, putting a purple Klaptrap near a ledge in view. Another barrel switch can be found on the top of the ledge just before a small pit with the third barrel switch on the other side of it. As the Kongs approach a [[DK Barrel]] near here, a purple Klaptrap marches towards them. They find another one of these Klaptraps shortly after here next to another barrel switch that can be used to illuminate the area for a limited amount on time. The primates can find a pit containing a moving platform ahead. They can use the platform to cross and access an area with another purple Klaptrap and a barrel switch. | ||
Another wide abyss is ahead, but the Kongs can cross it with the aid of two small platforms that move across it. On the other side of the pit, they can find a barrel switch and a purple Klaptrap, who is followed by a smaller abyss containing a stationary platform with a tire sticking out of it. The Kongs encounter two more purple Klaptraps on the opposite end of the pit, and a tire sits between them, which can help the two primates bounce to a barrel switch high in the air. Six small platforms float in an abyss near here. The primates can use the stationary platforms to cross the wide pit and access an area containing a barrel switch on a high piece of ground. Purple Klaptraps march nearby at a lower elevation, which is followed by a small pit with another barrel switch above it. Several large, solid platforms stand ahead of here. The first of the platforms holds a group of [[banana]]s, while the [[KONG Letters|letter O]] can be found between the second and third platforms. A few purple Klaptraps also travel through this area, which is followed by a long pathway leading to a barrel switch and the level's [[Star Barrel|Continue Barrel]]. | |||
Another wide abyss is ahead, but the Kongs can cross it with the aid of two small platforms that move across it. On the other side of the pit, they can find a barrel switch and a purple Klaptrap, who is followed by a smaller abyss containing a stationary platform with a tire sticking out of it. The Kongs encounter two more purple Klaptraps on the opposite end of the pit, and a tire sits between them, which can help the two primates bounce to a barrel switch high in the air. Six small platforms float in an abyss near here. The primates can use the stationary platforms to cross the wide pit and access an area containing a barrel switch on a high piece of ground. Purple Klaptraps march nearby at a lower elevation, which is followed by a small pit with another barrel switch above it. Several large, solid platforms stand ahead of here. The first of the platforms holds a group of [[banana]]s, while the [[ | |||
A barrel switch is placed immediately after here that can be hit to activate the lights again, as hitting all other barrel switches in the level does. After dropping down a small ledge near here, the primates encounter a Kritter hopping over a small alcove in the ground, which contains a DK Barrel. A raised piece of ground with a tire and a Kritter on it can be discovered next to a nearby barrel switch. The heroes can push the tire under another barrel switch found high in the air and then bounce on it to reach the most recently discovered switch. An abyss is ahead that can be crossed with the assistance of a small, moving platform that hovers back and forth over the whole pit. The primates can find a couple of purple Klaptraps in the area ahead of here, which also contains another barrel switch that floats near a small pit. On the other side of this abyss, the Kongs can find many small ledges that they must climb to reach the top of a pyramid-like structure. | A barrel switch is placed immediately after here that can be hit to activate the lights again, as hitting all other barrel switches in the level does. After dropping down a small ledge near here, the primates encounter a Kritter hopping over a small alcove in the ground, which contains a DK Barrel. A raised piece of ground with a tire and a Kritter on it can be discovered next to a nearby barrel switch. The heroes can push the tire under another barrel switch found high in the air and then bounce on it to reach the most recently discovered switch. An abyss is ahead that can be crossed with the assistance of a small, moving platform that hovers back and forth over the whole pit. The primates can find a couple of purple Klaptraps in the area ahead of here, which also contains another barrel switch that floats near a small pit. On the other side of this abyss, the Kongs can find many small ledges that they must climb to reach the top of a pyramid-like structure. | ||
At the top of this area, a Necky on a barrel switch can be found, along with a simple [[barrel]] that can be used to defeat enemies or open secret areas. Several more ledges that lead to the bottom of the pyramid-like structure are ahead, and a small pit is at the bottom of them. The heroes can find a barrel switch and a raised piece of land with a purple Klaptrap on it on the opposite side of this pit. More purple Klaptraps march near the next barrel switch, which is followed by an abyss that can only be crossed with the aid of two small platforms in it that move back and forth in a vertical path. A Kritter can be found on the other side of the pit near another barrel switch. Four tires are located after here in a wide abyss, each with a tire on it. Using the platforms, they can cross in order to access an area containing a high piece of land with a barrel switch at the end of it. | At the top of this area, a Necky on a barrel switch can be found, along with a simple [[barrel]] that can be used to defeat enemies or open secret areas. Several more ledges that lead to the bottom of the pyramid-like structure are ahead, and a small pit is at the bottom of them. The heroes can find a barrel switch and a raised piece of land with a purple Klaptrap on it on the opposite side of this pit. More purple Klaptraps march near the next barrel switch, which is followed by an abyss that can only be crossed with the aid of two small platforms in it that move back and forth in a vertical path. A Kritter can be found on the other side of the pit near another barrel switch. Four tires are located after here in a wide abyss, each with a tire on it. Using the platforms, they can cross in order to access an area containing a high piece of land with a barrel switch at the end of it. | ||
| Line 27: | Line 24: | ||
{{br}} | {{br}} | ||
== | ==Enemies== | ||
The following enemies appear in the following quantities: | |||
<gallery> | |||
Klaptrap DKC.png|[[Klap Trap]] (16) | |||
Kritter-DKC.png|[[Kritter]] (4) | |||
Manky Kong DKC.png|[[Manky Kong]] (1) | |||
Necky.png|[[Necky]] (1) | |||
Zinger DKC.png|[[Zinger]] (9) | |||
</gallery> | |||
==Items and objects== | |||
The following items and objects appear in the following quantities: | |||
<gallery> | |||
Expresso Token Sprite SNES.png|[[Expresso]] [[animal token|Token]] (1, in the second Bonus Level) | |||
DK Barrel DKC.png|[[DK Barrel]] (2){{footnote|main|a}} | |||
Red Balloon DKC SNES.png|[[Red Balloon|Life Balloon]] (1, in the second Bonus Level) | |||
</gallery> | |||
{{footnote|note|a|In the Japanese release of the original version, an extra DK Barrel was added near the level's first Necky.}} | |||
===K-O-N-G Letters=== | ===K-O-N-G Letters=== | ||
*K: The | [[File:LoopyLights SNES 4.png|thumb|The location of the letter G]] | ||
*O: The letter O is located in a small gap shortly before the | *'''K:''' The letter K is at the end of the first Bonus Level. | ||
*N: The letter N is placed on the edge of the second platform in the | *'''O:''' The letter O is located in a small gap shortly before the Continue Barrel and after a pair of Klaptraps. The Kongs can perform a roll jump to safely collect it. | ||
*G: Near the end of the level, the Kongs | *'''N:''' The letter N is placed on the edge of the second platform in the second Bonus Level. | ||
*'''G:''' Near the end of the level, the Kongs encounter several Zingers. One of the Zingers flies vertically at the letter G. | |||
* | |||
* | ===Key item=== | ||
*'''[[Photograph]]''' (Game Boy Advance version only): When starting the level, Donkey Kong and Diddy must go left to find a [[photograph]] behind the entrance. The photograph shows a picture of the Kongs in a mine shaft, and it appears in the sixteenth page of the [[Scrapbook (Donkey Kong Country series)|scrapbook]]. | |||
{{br}} | |||
==Bonus Levels== | |||
[[File:LoopyLights GBA 3.png|thumb|The second Bonus Level in the Game Boy Advance version]] | |||
Loopy Lights has two Bonus Levels, listed by their type in the Game Boy Advance version: | |||
*'''Find the Exit''': At the start, when the Kongs come up to the first pit, they must jump down to a banana in the pit to land in a [[Bonus Barrel]]. The [[Bonus Level]] is similar to the first one of [[Barrel Cannon Canyon]] except with an On & Off Barrel at the start; the Kongs must blast between some [[Barrel Cannon]]s, and collect a few bananas and two Banana Bunches on the way. The letter K is between the last two Barrel Cannons. The Kongs can exit the Bonus Level by either falling into the pit or exiting from the opening on the rightmost platform. | |||
*'''Find the Exit''': Shortly after the Continue Barrel, the Kongs encounter three bouncing Klaptraps. Afterward, they must go up some stairs to encounter a perched Necky over an On & Off Barrel. The Kongs must pick up the barrel and run down a few more stairs while avoiding the nuts thrown by the Necky. The Kongs must jump over a small gap and put down the barrel under an On & Off Barrel. They must then jump on a nearby bouncing Klaptrap, then go back to the barrel, pick it up, and run it into the wall to make an opening into the second Bonus Level. Here, the Kongs must jump at an On & Off Barrel to turn on the lights, and then they must jump from a few ground platforms until reaching the exit. An item is at the right edge of each platform, in order of a banana, a Banana Bunch, the letter N, an Expresso Token, and lastly a Life Balloon. The Kongs can reach the Life Balloon by bouncing from a half tire in the ground, which is also used to bounce up to the last platform which has a few bananas on the ground which lead to the exit. | |||
== | ==Gallery== | ||
<gallery> | |||
==Names in other | LoopyLights SNES 1.png | ||
{{foreign names | LoopyLights SNES 2.png | ||
LoopyLights SNES 3.png | |||
LoopyLights SNES 5.png|The Kongs travel in the dark | |||
LoopyLights SNES 6.png|Diddy Kong runs down a few ledges with a barrel in his hands | |||
LoopyLights GBC 2.png | |||
LoopyLights GBC 3.png | |||
LoopyLights GBA 1.png | |||
LoopyLights GBA 4.png | |||
</gallery> | |||
==Names in other languages== | |||
{{foreign names | |||
|Jap=やみのスイッチトンネル | |Jap=やみのスイッチトンネル | ||
|JapR=Yami no | |JapR=Yami no suicchi tonneru | ||
|JapM=Dark Switch Tunnel | |JapM=Dark Switch Tunnel | ||
|Spa=Luces Turulatas | |Spa=Luces Turulatas | ||
|SpaM= | |SpaM=Loopy Lights | ||
|Fre=Lumière Lunatiques | |||
|FreM=Lunatic Lights | |||
{{DKC | |Ita=Luci Truci | ||
[[Category: | |ItaM=Grim Lights | ||
}} | |||
{{DKC levels}} | |||
[[Category:Mines]] | |||
[[Category:Donkey Kong Island]] | [[Category:Donkey Kong Island]] | ||
[[Category:Donkey Kong Country | [[Category:Donkey Kong Country levels]] | ||
Latest revision as of 14:46, January 20, 2024
| Level | |
|---|---|
| Loopy Lights | |

| |
| Level code | 6 - 4 (SNES & GBA) 6 - 5 (GBC) |
| Game | Donkey Kong Country |
| << Directory of levels (SNES & GBA) >> | |
| << Directory of levels (GBC) >> | |
Loopy Lights is the thirty-second level in Donkey Kong Country, as well as the fourth level of Chimp Caverns. In the Game Boy Color version, Loopy Lights is instead the fifth level due to the game adding another level, Necky Nutmare, making Loopy Lights the thirty-third level overall instead. Similarly to Stop & Go Station, Loopy Lights takes place in a mine and has barrels that affect the environment of the level, in this case, On & Off Barrels, which affect the lighting. By default, the barrels are set to 'Off', which makes the whole area dark. This effect is similar to Blackout Basement, although in Loopy Lights, the enemies' eyes remain visible. Donkey Kong and Diddy Kong can jump at the barrels to temporarily turn on the lights, allowing them to see the path ahead. The Kongs must avoid Kritters and Zingers along the way and jumping Klaptraps. There is also a Manky Kong at the end. In the Game Boy Color and the Game Boy Advance remakes, while dark, the level is far more visible than in the original version.
Layout[edit]


When the level begins, the Kongs find themselves under a barrel switch that displays the word, "Off." If they hit it, the lights turn on, putting a purple Klaptrap near a ledge in view. Another barrel switch can be found on the top of the ledge just before a small pit with the third barrel switch on the other side of it. As the Kongs approach a DK Barrel near here, a purple Klaptrap marches towards them. They find another one of these Klaptraps shortly after here next to another barrel switch that can be used to illuminate the area for a limited amount on time. The primates can find a pit containing a moving platform ahead. They can use the platform to cross and access an area with another purple Klaptrap and a barrel switch.
Another wide abyss is ahead, but the Kongs can cross it with the aid of two small platforms that move across it. On the other side of the pit, they can find a barrel switch and a purple Klaptrap, who is followed by a smaller abyss containing a stationary platform with a tire sticking out of it. The Kongs encounter two more purple Klaptraps on the opposite end of the pit, and a tire sits between them, which can help the two primates bounce to a barrel switch high in the air. Six small platforms float in an abyss near here. The primates can use the stationary platforms to cross the wide pit and access an area containing a barrel switch on a high piece of ground. Purple Klaptraps march nearby at a lower elevation, which is followed by a small pit with another barrel switch above it. Several large, solid platforms stand ahead of here. The first of the platforms holds a group of bananas, while the letter O can be found between the second and third platforms. A few purple Klaptraps also travel through this area, which is followed by a long pathway leading to a barrel switch and the level's Continue Barrel.
A barrel switch is placed immediately after here that can be hit to activate the lights again, as hitting all other barrel switches in the level does. After dropping down a small ledge near here, the primates encounter a Kritter hopping over a small alcove in the ground, which contains a DK Barrel. A raised piece of ground with a tire and a Kritter on it can be discovered next to a nearby barrel switch. The heroes can push the tire under another barrel switch found high in the air and then bounce on it to reach the most recently discovered switch. An abyss is ahead that can be crossed with the assistance of a small, moving platform that hovers back and forth over the whole pit. The primates can find a couple of purple Klaptraps in the area ahead of here, which also contains another barrel switch that floats near a small pit. On the other side of this abyss, the Kongs can find many small ledges that they must climb to reach the top of a pyramid-like structure.
At the top of this area, a Necky on a barrel switch can be found, along with a simple barrel that can be used to defeat enemies or open secret areas. Several more ledges that lead to the bottom of the pyramid-like structure are ahead, and a small pit is at the bottom of them. The heroes can find a barrel switch and a raised piece of land with a purple Klaptrap on it on the opposite side of this pit. More purple Klaptraps march near the next barrel switch, which is followed by an abyss that can only be crossed with the aid of two small platforms in it that move back and forth in a vertical path. A Kritter can be found on the other side of the pit near another barrel switch. Four tires are located after here in a wide abyss, each with a tire on it. Using the platforms, they can cross in order to access an area containing a high piece of land with a barrel switch at the end of it.
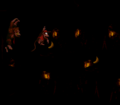
The duo can find a long pathway ahead of here consisting of a great extent of Zingers that float in place and move. The letter G is located behind one of the Zingers, who is followed by two more of the wasp enemies and a barrel switch. After crossing a small pit that follows this area of Zingers, the primates can find a sign that indicates that the level is near complete and several small ledges. Several barrels being thrown by a Manky Kong found ahead roll down the ledges as the heroes climb them. They meet the Manky Kong under a barrel switch at the highest ledge, which is followed by a small pit. When the Kongs cross it, they land on a raised piece of land with another barrel switch in front of it. Once the Kongs drop down the raised piece of ground and travel slightly farther into the level, they come up to an exit sign and a small tunnel that leads out of the level. A purple Klaptrap guards the exit.
Enemies[edit]
The following enemies appear in the following quantities:

Klap Trap (16)

Kritter (4)

Manky Kong (1)

Necky (1)

Zinger (9)


Items and objects[edit]
The following items and objects appear in the following quantities:

Life Balloon (1, in the second Bonus Level)

a - In the Japanese release of the original version, an extra DK Barrel was added near the level's first Necky.
K-O-N-G Letters[edit]

- K: The letter K is at the end of the first Bonus Level.
- O: The letter O is located in a small gap shortly before the Continue Barrel and after a pair of Klaptraps. The Kongs can perform a roll jump to safely collect it.
- N: The letter N is placed on the edge of the second platform in the second Bonus Level.
- G: Near the end of the level, the Kongs encounter several Zingers. One of the Zingers flies vertically at the letter G.
Key item[edit]
- Photograph (Game Boy Advance version only): When starting the level, Donkey Kong and Diddy must go left to find a photograph behind the entrance. The photograph shows a picture of the Kongs in a mine shaft, and it appears in the sixteenth page of the scrapbook.
Bonus Levels[edit]

Loopy Lights has two Bonus Levels, listed by their type in the Game Boy Advance version:
- Find the Exit: At the start, when the Kongs come up to the first pit, they must jump down to a banana in the pit to land in a Bonus Barrel. The Bonus Level is similar to the first one of Barrel Cannon Canyon except with an On & Off Barrel at the start; the Kongs must blast between some Barrel Cannons, and collect a few bananas and two Banana Bunches on the way. The letter K is between the last two Barrel Cannons. The Kongs can exit the Bonus Level by either falling into the pit or exiting from the opening on the rightmost platform.
- Find the Exit: Shortly after the Continue Barrel, the Kongs encounter three bouncing Klaptraps. Afterward, they must go up some stairs to encounter a perched Necky over an On & Off Barrel. The Kongs must pick up the barrel and run down a few more stairs while avoiding the nuts thrown by the Necky. The Kongs must jump over a small gap and put down the barrel under an On & Off Barrel. They must then jump on a nearby bouncing Klaptrap, then go back to the barrel, pick it up, and run it into the wall to make an opening into the second Bonus Level. Here, the Kongs must jump at an On & Off Barrel to turn on the lights, and then they must jump from a few ground platforms until reaching the exit. An item is at the right edge of each platform, in order of a banana, a Banana Bunch, the letter N, an Expresso Token, and lastly a Life Balloon. The Kongs can reach the Life Balloon by bouncing from a half tire in the ground, which is also used to bounce up to the last platform which has a few bananas on the ground which lead to the exit.
Gallery[edit]
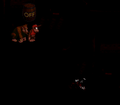
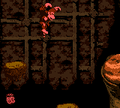
The Kongs travel in the dark
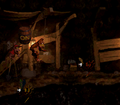
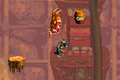
Diddy Kong runs down a few ledges with a barrel in his hands


Names in other languages[edit]
| Language | Name | Meaning |
|---|---|---|
| Japanese | やみのスイッチトンネル Yami no suicchi tonneru |
Dark Switch Tunnel |
| French | Lumière Lunatiques |
Lunatic Lights |
| Italian | Luci Truci |
Grim Lights |
| Spanish | Luces Turulatas |
Loopy Lights |