|
Tags: Mobile edit Advanced mobile edit |
| (36 intermediate revisions by 12 users not shown) |
| Line 1: |
Line 1: |
| {{DKJB Kingdom | | {{DKJB kingdom infobox |
| |barrel=J Barrel | | |barrel=J Barrel (GameCube)<br>B Barrel (Wii) |
| |image=[[Image:Arctic_Plunge.PNG|220px]] | | |image=[[File:PeachKingdomIcon.png]] |
| |crests=14 | | |crests=14 |
| |levels=Arctic Plunge<br>Ancient Foundry | | |levels=[[Arctic Plunge]]<br>[[Ancient Foundry]] |
| |boss=[[Torch Tusk]] (GameCube version)<br>[[Bloat-Hog]] (Wii version) | | |boss=[[Torch Tusk]] (GameCube)<br>[[Bloat-Hog]] (Wii) |
| |notes=Hoofer appears in this kingdom.
| |
| |before=[[Cherry Kingdom|<<]] | | |before=[[Cherry Kingdom|<<]] |
| |after=[[Melon Kingdom|>>]] | | |after=[[Melon Kingdom|>>]] |
| }} | | }} |
| The '''Peach Kingdom''' is the tenth kingdom in ''[[Donkey Kong Jungle Beat]]'' and the second kingdom linked to the [[Barrel|J Barrel]]. The kingdom is located under a body of ice and in an old foundry. The Peach Kingdom can be accessed by completing all the kingdoms linked to the K Barrel and collecting fourteen or more [[Crest]]s. The Peach Kingdom is the dominion of [[Torch Tusk]] in the [[Nintendo GameCube]] version of the game, but is instead the dominion of [[Bloat-Hog]] in the ''[[New Play Control!]]'' version. [[Donkey Kong]] travels through this kingdom to fight one of these mighty foes, and at the end of every level he eats a giant [[Peach (item)|peach]]. | | The '''Peach Kingdom''' is the tenth kingdom in ''[[Donkey Kong Jungle Beat]]''. In the original version of the game, it is the second kingdom linked to the [[Barrel|J Barrel]] and can be accessed by completing all the kingdoms linked to the K Barrel and collecting fourteen or more [[Crest]]s. In the ''[[New Play Control!]]'' version, it is the first kingdom linked to the B Barrel and is accessed by completing the [[Cherry Kingdom]]. The Peach Kingdom is the dominion of [[Torch Tusk]] in the [[Nintendo GameCube]] version of the game, but is instead the dominion of [[Bloat-Hog]] in the ''New Play Control!'' version. At the end of every level, [[Donkey Kong]] eats a giant peach. |
|
| |
|
| ==Levels== | | ==Levels== |
| ===Arctic Plunge=== | | {|border=1 cellspacing=0 cellpadding=3 style="border-collapse:collapse" style="text-align: center; |
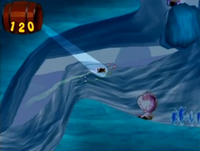
| '''Arctic Plunge''' is the first area of the Peach Kingdom. The level takes place on and underneath some icy glaciers. Under the glaciers is a large body of water, which Donkey Kong has to swim through for most of the level. Although level takes place in a cold area, Donkey Kong is not harmed by the coldness of the water, and can easily swim around the many enemies in the water, including the [[Birimēra]]s and [[Puchimēra]]s midway through the level. Other enemies include a large, round reptile enemy and a giant piranha-like foe, who must be defeat for the ape to progress. Because the level is mostly submerged, Donkey Kong does not encounter many obstacles to interact with in it, other than some [[Helper Monkey]]s and a crack in the ice that can be opened. At the end of the level, the [[Jungle Buddy]], [[Hoofer]] appears near a straight path, and Donkey Kong can ride him to finish off the level and play through a bonus game.
| | !width="140px"|Level |
| | | !Preview |
| ====Level Layout====
| | !Description |
| The level starts out on a flat, icy surface. There is a straight pathway leading to many yellow fairies flying over a small crack in the ice. If they are hit by a sound wave, the crack opens, revealing the way into the underwater parts of the level. As Donkey Kong falls through this gap, he encounters a few Helper Monkeys and some [[Bloom]]s. Once he makes it into the water, he finds a curved pathway with some sharp ice crystals and bananas. A wider area is located after this tight passage, and it is occupied by two [[Haribonbon]]s. A few small platforms are also in the center of this area, as well as a few bananas and icy crystal obstacles. Traveling farther underneath the glaciers takes Donkey Kong into another narrow pathway. A current is in this passage, which forces the Kong into the next part of the underwater area. As the path widens, many [[Puchimēra]]s can be found in the way. Past them is a much larger area underwater. This area is paved with some more sharp ice crystals and a lone clam, which lets out bananas if opened. [[Birimēra]]s enemies are at the edges of this area as well, and a few large, circular platforms are around the center of it. A few yellow fairies are at the surface of the water north from here. If hit by Donkey Kong's [[Sound Wave Attack]], they form a round trampoline that bounces that ape out of the water and to a wall.
| | |- |
| | | ![[Arctic Plunge]] |
| There is a small gap above this wall, and he must climb up inside of the gap before it closes. At the top of the wall, there is a long slide leading to a few bananas and a small ramp formed from the ice. Above this ramp is a strange platform, which can be [[Wall Jump]]ed off of to reach a hidden Helper Monkey. The monkey can throw Donkey Kong to a secret area above the main path, where there are some more Helper Monkeys and small, floating platforms. The lone Helper Monkey in the hidden area is able to throw the ape to a curved platform with three Banana Bunches. The Kong can head down this platform to find some other floating platforms made of ice. The platforms lead him to a set of four Banana Bunches, and then onto a large, curved platform that can help the ape jump to more Banana Bunches. If Donkey Kong jumps down from this large series of icy platforms, he can end up back on the main path, where there are a few hills of ice to skate on. The area soon becomes slanted, and the ape begins to fall down some stair-like platforms leading into water.
| | |[[File:Arctic_Plunge.png|200px]] |
| | | |align=left|Arctic Plunge is the first area of the Peach Kingdom. The level takes place on and underneath a large iceberg. Under the iceberg is a body of water, which [[Donkey Kong]] has to swim through for most of the level. Although level takes place in a cold area, Donkey Kong is not harmed by the coldness of the water, and can easily swim around the many enemies in the water, including the [[Jelly Fish]] and [[Pea Jelly Fish]] midway through the level. Other enemies include a [[Rolling Frog]] and a [[Tar Fish]], who must be defeat for the ape to progress. Because the level is mostly submerged, Donkey Kong does not encounter many obstacles to interact with in it, other than some [[Helper Monkey]]s and a crack in the ice that can be opened. At the end of the level, [[Hoofer]] appears near a straight path, and Donkey Kong can ride him to finish off the level and play through a bonus game. |
| This underwater area begins with a pathway leading southeast to a small, open area. There is a small section of dry land under this part of the glacier, and just above the surface of the water is a Helper Monkey, who can throw the ape over an icy platform to some bananas, then back into the water. Farther ahead from here is a narrow passage leading to a Squid creature, who give the ape bananas if followed down the area. The deeper parts of this passage is occupied by a round lizard enemy. This foe takes up every bit of space in the path, and must be defeated for the Kong to progress. Because of the foe's roundness, it rolls downwards through the slightly slanted pathway. A large piece of ice sitting over a gap is in its path, and when the reptile rolls into the platform, it breaks, revealing a hidden area. In the center of this circular area, which has a few ice crystals paving its lowest parts, Donkey Kong can find a lone Banana Bunch encased in a bubble. If it is collected, several [[Sea Bucky|Sea Buckies]] appear in the water to attack the ape; however, they can be defeated to be more bananas.
| | |- |
| | | ![[Ancient Foundry]] |
| If Donkey Kong swims back up to the main path, he meets the reptile enemy again, whom he can defeat to progress. A pathway leading south is farther ahead of here, and as the Kong swims through it, spikes begin to fall towards him. If he manages to avoid them, he can make his way to a flower, which gives him bananas when hit by a sound wave, and a new area. This area is wider than the previous and is covered in ice crystals, however, a piranha enemy is fought here. The foe blocks the way outside of the body of water. It can eventually be tamed by the Kong to pull the ape through a very wide area full of Banana Bunches. Soon, the piranha takes Donkey Kong above the surface of the water and the glacier. It then lands on the icy surface of a large, ice platform, where it is defeated once and for all. Hoofer is located near here, and Donkey Kong can ride to him pass through the giant peach, which ends the level when touched. However, even after getting the fruit, Hoofer moves ahead to a bonus game with Donkey Kong, where the two must head over many large gaps to earn beats.
| | |[[File:Ancient_Foundry.png|200px]] |
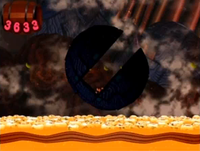
| | | |align=left|Ancient Foundry is the second area of the Peach Kingdom. This level contains [[lava]] and fire bubbles which can cause Donkey Kong to lose beats if he comes into contact with them. The main obstacle in the level, however, is its many large, round, moving platforms, each which have a small gap in them for the ape to head into to travel over lava. A [[Dragon Pipe]] also appears here as a minor obstacle to take the ape to different areas, and a Helper Monkey also appears here. The level features three mini-bosses: A [[Big Bee]], a [[Tar Man]], and a [[Gōrumondo]]. |
| ===Ancient Foundry===
| | |- |
| [[Image:Ancient_Foundry.PNG|200px|left|thumb|'''Ancient Foundry''']] | | !VS. [[Torch Tusk]]<br>(GameCube version) |
| '''Ancient Foundry''' is the second area of the Peach Kingdom. As its name suggests, the level takes place in an ancient foundry. Ancient Foundry contains [[lava]] and fire bubbles which can cause Donkey Kong to lose beats if he comes into contact with them. The main obstacle in the level, however, is its many large, round, moving platforms, each which have a small gap in them for the ape to head into to travel over lava. A dragon head also appears here as a minor obstacle to take the ape to different areas, and a [[Helper Monkey]] also appears here. The Jungle Buddy, [[Helibird]] is in this level as well to help Donkey Kong progress. The level features three mini-bosses: A [[Hatchīfu]], a giant, ghostly monster, and an [[Goal Mondo]]. After Donkey Kong completes this level, he fights Torch Tusk (or Bloat-Hog in the Wii version).
| | |[[File:Torch_Tusk.png|200px]] |
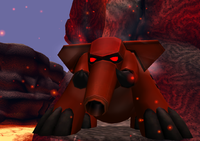
| | | |align=left|In the GameCube version, Donkey Kong faces Torch Tusk. He looks exactly like the others, more specifically [[Grave Tusk]]. He is fought in a volcano-like setting. Torch Tusk, at the beginning, attacks by using the other [[Tusk]]s' attacks ([[Turret Tusk]]'s triple fire attack and Grave Tusk's laser attack). After half its health is lost, Torch Tusk begins to attack by shooting four consecutive flaming cannonballs. After he is defeated, Torch Tusk slightly falls apart and deactivates. |
| ====Level Layout====
| | |- |
| This level begins in a large, circular platform. There is a pathway leading out of the center of the object, and it leads to another round platform. This platform turns clockwise so that the small space in its center is facing the small gap in the ceiling. Donkey Kong can wall jump up the gap to enter a higher area. Here, there is a straight pathway to the right covered in [[White Butapokkī|White]] and [[Black Butapokkī]]es. A [[Nap Butapoppo]] also waits at the end of this pathway, blocking the ape's path. Once it is defeated, the wall behind it opens, allowing him to progress to a small gap. [[Fire Miniga]]s are scattered around the gap, but they can be forced to the outside edges if hit by a sound wave. Blooms also appear at the bottom of this gap if Donkey Kong uses his Sound Wave Attack. If he follows them, he makes his way to the left into another gap. When he lands on the ground below the gap, he can find a pathway leading east to a small gap of lava.
| | !VS. [[Bloat-Hog]]<br>(''New Play Control!'' version) |
| | | |[[File:Bloat-Hog.png|200px]] |
| Above this gap are some more Fire Minigas. More Blooms lead Donkey Kong to a wall farther ahead. He can use the walls in the area to wall jump up a small opening and make his way to a little area with a dragon head. The head is able to suck him up and take him to a different room, where the Kong is sent over a pit of lava to four Banana Bunches in mid-air. He then falls to the ground on the other end of the pit, where there are more Fire Minigas and a giant platform with a wide gap going across it. If the Kong pounds on his chest while standing at the corner of the area, some bananas appear. Once Donkey Kong jumps into the gap inside the giant platform near here, he is lifted to a wall in the ceiling, which he can climb with some simple wall jumps. At the top of the wall is a lone Helibird, who can fly Donkey Kong towards a Hatchīfu nearby, or to a set of four Banana Bunches. The Hatchīfu is able to blow the duo away, however, if they manage to defeat the insect, they can advance to the next part of the level, where there is a small gap leading into a lower area filled with [[Kamikami]]es. This area has a pit of lava in it, and the only way to cross it is by using the giant platform above it, which has a gap in the center of it. Donkey Kong can wall jump within the platform as it moves over the lava to progress to a flat area of land, covered by a few Fire Minigas.
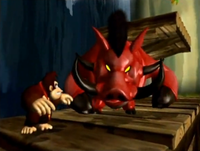
| | |align=left|In the ''New Play Control!'' version, Donkey Kong faces Bloat-Hog. Bloat Hog looks like the other [[Hog]]s, but with red skin and a black Mohawk, and is fought on a cliff side and bridge near a waterfall. He fights by using the other Hogs attacks. When it is half defeated, Bloat-Hog gains the ability to mentally create and fire bursts of electricity. When he is defeated, Bloat-Hog will fall over, unconscious. |
| | | |} |
| Another round platform is to the right of this area. The bottom section of the platform, along with the gap in its center, is dipped in and out of the lava, and there are three Banana Bunches in the center. A large monster is located on the ceiling near here. Once the foe is defeated, a Helper Monkey appears under its previous location to throw Donkey Kong into the gap in the ceiling the monster created. Another Helper Monkey is up in this gap to throw the ape around some Fire Minigas and into a dragon head, which sends the Kong to the next room. As the ape enters this new area, he is sent to a set of four Banana Bunches, each being encased a small bubble, and more Kamikamies. A pit of lava if to the left of here, and a large, round platform is above it. When the Kong enters the gap in the platform, it begins to move over a path of floating bananas, until its top is facing the entrance into the gap of another platform. This round platform moves the ape upwards to some more bananas. A third round platform is in this small room as well, and it soon heads under the second platform, allowing the ape to fall into its gap. This final platform moves him to a stationary area, where a Goal Mondo can be found. Once the foe is defeated, a giant peach appears on a nearby tree branch. If Donkey Kong bites into it, the level ends.
| |
| | |
| ===VS. Torch Tusk===
| |
| Torch Tusk must then be fought. He looks exactly like the others, more specifically Grave Tusk. He is fought in a volcano-like setting. Torch Tusk, at the beginning, attacks by using the other [[Tusk]]'s attacks (Turret Tusk's triple fire attack and Grave Tusk's laser attack). After half its health is lost, Torch Tusk will begin to attack by shooting four consecutive flaming cannonballs. After he is defeated, Torch Tusk will slightly fall apart and deactivate. | |
|
| |
|
| ==Names in other languages== | | ==Names in other languages== |
| {{foreignname | | {{foreign names |
| |Jap=モモ<span class="explain" title="おうこく">王国</span> | | |Jap=モモ{{hover|王国|おうこく}} |
| |JapR=Momo Ōkoku | | |JapR=Momo Ōkoku |
| |JapM=Literal translation}} | | |JapM=Peach Kingdom |
| | | }} |
| ===Arctic Plunge===
| |
| {{foreignname
| |
| |Jap=<span class="explain" title="きょっかい">曲解</span>の<span class="explain" title="ひょうざん">氷山</span>
| |
| |JapR=Kyokkai no hyōzan
| |
| |JapM=Dive into the Iceberg}}
| |
|
| |
|
| ===Ancient Foundry===
| |
| {{foreignname
| |
| |Jap=<エイリアンプラント
| |
| |JapR=Eirian Puranto
| |
| |JapM=Alien Plant}}
| |
| <br clear=all>
| |
| {{NIWA|DKWiki=1}}
| |
| {{DKJB}} | | {{DKJB}} |
| [[Category:Kingdoms]]
| | {{DKJB levels}} |
| [[Category:Donkey Kong Jungle Beat]] | | [[Category:Donkey Kong Jungle Beat kingdoms]] |
| [[Category:Donkey Kong Places]]
| |
| [[Category:Worlds]]
| |


