Switch Scramble Circus: Difference between revisions
No edit summary |
m (Text replacement - "Fra([AE]?M? *)=" to "Fre$1=") |
||
| (26 intermediate revisions by 16 users not shown) | |||
| Line 1: | Line 1: | ||
{{ | {{level infobox | ||
|title=Switch Scramble Circus | |title=Switch Scramble Circus | ||
|image=[[File:SM3DW Switch Scramble Circus.png|250px]] | |image=[[File:SM3DW Switch Scramble Circus.png|250px]] | ||
|code=World 1-5 | |code=World 1-5 | ||
|world=[[World 1 (Super Mario 3D World)|World 1]] | |world=[[World 1 (Super Mario 3D World)|World 1]] | ||
|game=''[[Super Mario 3D World]]'' | |game=''[[Super Mario 3D World]]''<br>''[[Super Mario 3D World + Bowser's Fury]]'' | ||
|limit=400 seconds | |limit=400 seconds | ||
| | |before_alt= | ||
|before=[[Mount Beanpole|<<]] | |before=[[Mount Beanpole|<<]] [[Plessie's Plunging Falls|<<]] | ||
|after=[[Bowser's Highway Showdown|>>]] | |after=[[Plessie's Plunging Falls|>>]] [[Bowser's Highway Showdown|>>]] | ||
|secret= | |secret= | ||
}} | }} | ||
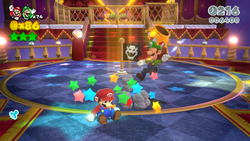
'''Switch Scramble Circus''', also known as '''World 1-5''', is the fifth standard course of [[World 1 (Super Mario 3D World)|World 1]] in ''[[Super Mario 3D World]]''. It is a large colorful circus with [[Flipswitch Panel|Switch Panel]]s, and the music in the course changes depending on the section. The course is unlocked by completing [[Mount Beanpole]] and its own completion unlocks [[Bowser's Highway Showdown]] if cleared before [[Plessie's Plunging Falls]]. | '''Switch Scramble Circus''', also known as '''World 1-5''', is the fifth standard course of [[World 1 (Super Mario 3D World)|World 1]] in ''[[Super Mario 3D World]]'' and its [[Nintendo Switch]] port ''[[Super Mario 3D World + Bowser's Fury]]''. It is a large colorful circus with [[Flipswitch Panel|Switch Panel]]s, and the music in the course changes depending on the section. The course is unlocked by completing [[Mount Beanpole]] and its own completion unlocks [[Bowser's Highway Showdown]] if cleared before [[Plessie's Plunging Falls]]. | ||
==Layout== | ==Layout== | ||
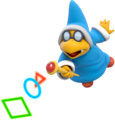
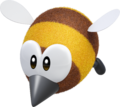
This course begins in an area filled with [[Biddybud]]s and Switch Panels, which need to be activated in order to gain access to the next area. The same must be done in the next area, where [[Stingby|Stingbies]] and moving platforms are now present, along with an [[Roulette Block]]. A [[Checkpoint Flag]] and an area with [[Para-Biddybud]]s follows. A straightforward area with [[Biddybud]]s appears soon after that. The player then reaches another Switch Panel area with a [[Magikoopa]] present. A Clear Pipe takes the player to the [[Goal Pole]]. | This course begins in an area filled with [[Biddybud]]s and Switch Panels, which need to be activated in order to gain access to the next area. The same must be done in the next area, where [[Stingby|Stingbies]] and moving platforms are now present, along with an [[Roulette Block]]. A [[Checkpoint Flag]] and an area with [[Para-Biddybud]]s follows. A straightforward area with [[Biddybud]]s appears soon after that. The player then reaches another Switch Panel area with a [[Magikoopa]] present. A Clear Pipe takes the player to the [[Goal Pole]]. | ||
==Collectibles== | ==Collectibles== | ||
===[[Green | ===[[Green Star]]s=== | ||
*'''Green Star 1''': Just before the midpoint, players must [[Wall Jump]] off the walls near the [[Warp Box]] onto a platform with the first Green Star. | *'''Green Star 1''': Just before the midpoint, players must [[Wall Jump]] off the walls near the [[Warp Box]] onto a platform with the first Green Star. | ||
*'''Green Star 2''': After the [[Checkpoint Flag]], players will find a | *'''Green Star 2''': After the [[Checkpoint Flag]], players will find a [[Mystery Box]] guarded by Biddybuds that leads to a room filled with crates. The crate in the left-hand corner needs to be destroyed by a [[Fire Flower]] to reveal the second Green Star. | ||
*'''Green Star 3''': | *'''Green Star 3''': Right after the second Green Star, players must climb onto a moving platform with Flipswitch Panels, with the final Green Star in the middle. | ||
===[[Stamp (Super Mario 3D World)|Stamp]]=== | ===[[Stamp (Super Mario 3D World)|Stamp]]=== | ||
{{Multiple image | |||
Atop the platform closest to the [[Goal Pole]] is the course's stamp. If the player activates all the switches in that area, the platform will fall down. The stamp is [[Super Bell]], which can be collected via [[Spin Jump]]. If the player is not using [[Rosalina]], then they can | |align=right | ||
|direction=horizontal | |||
|width=70 | |||
|image1=SM3DW-SuperBellStamp.png | |||
|alt1=Wii U version | |||
|image2=SM3DW_BF_SuperBellStamp.png | |||
|alt2=Switch version | |||
}} | |||
Atop the platform closest to the [[Goal Pole]] is the course's stamp. If the player activates all the switches in that area, the platform will fall down. The stamp is [[Super Bell]], which can be collected via [[Spin Jump]]. If the player is not using [[Rosalina]], then they can collect the stamp by [[Wall Jump]]ing. | |||
==Luigi | ==[[List of Luigi sightings in Super Mario 3D World|Luigi sighting]]== | ||
On the first spade-shaped mirror at the beginning of the level, an 8-bit Luigi can be seen running in its reflection. | On the first spade-shaped mirror at the beginning of the level, an 8-bit Luigi can be seen running in its reflection at 386 on the timer. | ||
==Enemies== | ==Enemies== | ||
<gallery> | <gallery> | ||
Biddybud SM3DW Prima.jpg|[[Biddybud]]s | Biddybud SM3DW Prima.jpg|[[Biddybud]]s (8) | ||
Magikoopa Artwork - Super Mario 3D World.png|[[Magikoopa]] | Magikoopa Artwork - Super Mario 3D World.png|[[Magikoopa]] | ||
Stingby Artwork - Super Mario 3D World.png|[[Stingby|Stingbies]] | Stingby Artwork - Super Mario 3D World.png|[[Stingby|Stingbies]] (8) | ||
Para-Biddybuds Artwork - Super Mario 3D World.png|[[Para-Biddybud]]s | Para-Biddybuds Artwork - Super Mario 3D World.png|[[Para-Biddybud]]s (6) | ||
</gallery> | </gallery> | ||
| Line 43: | Line 50: | ||
|JapM=On! Off! Switch Circus | |JapM=On! Off! Switch Circus | ||
|Spa=El circo de los interruptores | |Spa=El circo de los interruptores | ||
|SpaM= | |SpaM=Switch Circus | ||
| | |Fre=Cirque aux cent clics | ||
| | |FreM=Hundred click circus | ||
|Dut=Schakelcircus | |Dut=Schakelcircus | ||
|DutM=Switch Circus | |DutM=Switch Circus | ||
| Line 53: | Line 60: | ||
|ItaM=Switches galore | |ItaM=Switches galore | ||
|Por=Labirinto de interruptores | |Por=Labirinto de interruptores | ||
|PorM= | |PorM=Switch maze | ||
|Rus=Цирк с переключателями | |Rus=Цирк с переключателями | ||
|RusR=Tsirk s pereklyuchatelyami | |RusR=Tsirk s pereklyuchatelyami | ||
|RusM=Circus with switches | |RusM=Circus with switches | ||
|ChiS=开!关!开关马戏团 | |||
|ChiSR=Kāi! Guān! Kāiguān Mǎxìtuán | |||
|ChiSM=On! Off! Switch Circus | |||
|ChiT=開!關!開關馬戲團 | |||
|ChiTR=Kāi! Guān! Kāiguān Mǎxìtuán | |||
|ChiTM=On! Off! Switch Circus | |||
|Kor=온! 오프! 스위치 서커스 | |||
|KorR=On! Opeu! Seuwichi seokeoseu | |||
|KorM=On! Off! Switch Circus | |||
}} | }} | ||
{{SM3DW}} | |||
{{SM3DW levels}} | |||
[[Category:Super Mario 3D World | [[Category:Circuses]] | ||
[[Category:Super Mario 3D World levels]] | |||
[[de:Schalter an, Manege frei]] | [[de:Schalter an, Manege frei]] | ||
Latest revision as of 09:42, January 8, 2024
| Level | |
|---|---|
| Switch Scramble Circus | |

| |
| Level code | World 1-5 |
| World | World 1 |
| Game | Super Mario 3D World Super Mario 3D World + Bowser's Fury |
| Time limit | 400 seconds |
| << << Directory of levels >> >> | |
Switch Scramble Circus, also known as World 1-5, is the fifth standard course of World 1 in Super Mario 3D World and its Nintendo Switch port Super Mario 3D World + Bowser's Fury. It is a large colorful circus with Switch Panels, and the music in the course changes depending on the section. The course is unlocked by completing Mount Beanpole and its own completion unlocks Bowser's Highway Showdown if cleared before Plessie's Plunging Falls.
Layout[edit]
This course begins in an area filled with Biddybuds and Switch Panels, which need to be activated in order to gain access to the next area. The same must be done in the next area, where Stingbies and moving platforms are now present, along with an Roulette Block. A Checkpoint Flag and an area with Para-Biddybuds follows. A straightforward area with Biddybuds appears soon after that. The player then reaches another Switch Panel area with a Magikoopa present. A Clear Pipe takes the player to the Goal Pole.
Collectibles[edit]
Green Stars[edit]
- Green Star 1: Just before the midpoint, players must Wall Jump off the walls near the Warp Box onto a platform with the first Green Star.
- Green Star 2: After the Checkpoint Flag, players will find a Mystery Box guarded by Biddybuds that leads to a room filled with crates. The crate in the left-hand corner needs to be destroyed by a Fire Flower to reveal the second Green Star.
- Green Star 3: Right after the second Green Star, players must climb onto a moving platform with Flipswitch Panels, with the final Green Star in the middle.
Stamp[edit]
Atop the platform closest to the Goal Pole is the course's stamp. If the player activates all the switches in that area, the platform will fall down. The stamp is Super Bell, which can be collected via Spin Jump. If the player is not using Rosalina, then they can collect the stamp by Wall Jumping.
Luigi sighting[edit]
On the first spade-shaped mirror at the beginning of the level, an 8-bit Luigi can be seen running in its reflection at 386 on the timer.
Enemies[edit]
Biddybuds (8)
Stingbies (8)
Para-Biddybuds (6)
Names in other languages[edit]
| Language | Name | Meaning |
|---|---|---|
| Japanese | オン!オフ!スイッチサーカス On! Ofu! Suicchi sākasu |
On! Off! Switch Circus |
| Chinese (simplified) | 开!关!开关马戏团 Kāi! Guān! Kāiguān Mǎxìtuán |
On! Off! Switch Circus |
| Chinese (traditional) | 開!關!開關馬戲團 Kāi! Guān! Kāiguān Mǎxìtuán |
On! Off! Switch Circus |
| Dutch | Schakelcircus |
Switch Circus |
| French | Cirque aux cent clics |
Hundred click circus |
| German | Schalter an, Manege frei |
Switch, Circus Free |
| Italian | Interruttori à gogo |
Switches galore |
| Korean | 온! 오프! 스위치 서커스 On! Opeu! Seuwichi seokeoseu |
On! Off! Switch Circus |
| Portuguese | Labirinto de interruptores |
Switch maze |
| Russian | Цирк с переключателями Tsirk s pereklyuchatelyami |
Circus with switches |
| Spanish | El circo de los interruptores |
Switch Circus |


