Switch Shock Circus: Difference between revisions
(→Layout) |
|||
| (32 intermediate revisions by 23 users not shown) | |||
| Line 1: | Line 1: | ||
{{ | {{about|the level in ''[[Super Mario 3D World]]''|the level in ''[[New Super Mario Bros. 2]]''|{{world-link|flower|1|World Flower-1 (New Super Mario Bros. 2)}}}} | ||
{{level infobox | |||
{{ | |||
|title=Switch Shock Circus | |title=Switch Shock Circus | ||
|image=[[File:Switch Shock Circus.jpg|250px]] | |image=[[File:Switch Shock Circus.jpg|250px]] | ||
|code={{world| | |code={{world|flower2|1}} | ||
|world=[[World Flower (Super Mario 3D World)|World Flower]] | |world=[[World Flower (Super Mario 3D World)|World Flower]] | ||
|game=''[[Super Mario 3D World]]'' | |game=''[[Super Mario 3D World]]''<br>''[[Super Mario 3D World + Bowser's Fury]]'' | ||
|limit=400 seconds | |||
|before=[[Broken Blue Bully Belt|<<]] | |before=[[Broken Blue Bully Belt|<<]] | ||
|after=[[Floating Fuzzy Time Mine|>>]] [[Piranha Creeper Creek after Dark|>>]] | |after=[[Floating Fuzzy Time Mine|>>]] [[Piranha Creeper Creek after Dark|>>]] | ||
}} | }} | ||
'''Switch Shock Circus''', otherwise known as '''{{world|flower2|1}}''', is the first level of [[World Flower (Super Mario 3D World)|World Flower]] in ''[[Super Mario 3D World]]''. It is unlocked after completing [[Broken Blue Bully Belt | '''Switch Shock Circus''', otherwise known as '''{{world|flower2|1}}''', is the first level of [[World Flower (Super Mario 3D World)|World Flower]] in ''[[Super Mario 3D World]]'' and its [[Nintendo Switch]] port ''[[Super Mario 3D World + Bowser's Fury]]''. It is unlocked after completing [[Broken Blue Bully Belt]], and its own completion unlocks [[Floating Fuzzy Time Mine]] and [[Piranha Creeper Creek after Dark]]. | ||
==Layout== | ==Layout== | ||
The course is a remixed version of [[Switch Scramble Circus]] and shares many of the same elements, although having more enemies within the stage. | The course is a remixed version of [[Switch Scramble Circus]] and shares many of the same elements, although having more enemies within the stage. | ||
The player starts off in a circular area which leads to another area containing [[Flipswitch Panel]]s. The | The player starts off in a circular area which leads to another area containing [[Flipswitch Panel|Switch Panel]]s. The Switch Panels, however, have [[Fizzlit]]s moving across them, which are not seen in the original level. The player needs to flip all the switches to the "ON" position while avoiding the Fizzlits to progress further. | ||
The player | The player is then met by a [[Hammer Bro]]. The area behind the Hammer Bro. contains [[Mushroom Trampoline]]s that the player must use to get up onto higher platforms. A [[? Block]] containing a [[Lucky Bell]] can also be found to the left. The platforms in this area are patrolled by Fizzlits, so the player needs to be careful navigating or defeating them. The area above these platforms is filled with more Switch Panels, some of which are moving, as well as Fizzlits and Hammer Bros. If timed correctly, the Hammer Bros'. hammers can be used to defeat the Fizzlits. Flipping all the switches to the correct position opens to a clear pipe cannon. | ||
The final area contains more | The final area contains more Switch Panels and Fizzlits. The player could jump onto the [[Goal Pole]] at this point, though flipping the switches to the correct position allows the player to reach the top. | ||
==Green Stars== | ==Green Stars== | ||
*'''Green Star 1:''' In a | *'''Green Star 1:''' In a [[Mystery Box]] behind the starting location. The player must turn on four switch panels on the wall to earn the Green Star. | ||
*'''Green Star 2:''' | *'''Green Star 2:''' The second Green Star can be collected by obtaining all eight [[Green Coin]]s from the [[Green Ring]]. | ||
*'''Green Star 3:''' At the end of the level, floating right of the ledge. The player must use a baseball to obtain this Green Star. | *'''Green Star 3:''' At the end of the level, floating right of the ledge. The player must use a baseball or a Boomerang Flower to obtain this Green Star. | ||
==Enemies== | ==Enemies== | ||
<gallery> | |||
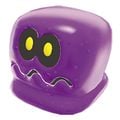
Fizzlit SM3DW Prima.jpg|[[Fizzlit]]s | |||
Hammer Bro SM3DW Prima.jpg|[[Hammer Bro]]s. | |||
</gallery> | |||
==Names in other languages== | ==Names in other languages== | ||
{{ | {{foreign names | ||
|Jap=ビリビリ!スイッチサーカス | |Jap=ビリビリ!スイッチサーカス | ||
|JapR=Biribiri! | |JapR=Biribiri! Suicchi sākasu | ||
|JapM=Shocking! Switch Circus | |JapM=Shocking! Switch Circus | ||
| | |Spa=El electrizante circo de los interruptores | ||
| | |SpaM=The shocking switches' circus | ||
|Dut=Hoogspanningscircus | |Dut=Hoogspanningscircus | ||
|DutM=High voltage circus}} | |DutM=High voltage circus | ||
|Ita=Interruttori degli orrori | |||
|ItaM=Horror's switches | |||
|Por=Eletrizante labirinto de interruptores | |||
|PorM=Electrifying maze of switches | |||
|Ger=Strom an, Manege frei | |||
|GerM=Electricity on, manege free | |||
|Chi=霹靂電擊!開關馬戲團 | |||
|ChiR=Pīlì Diànjī! Kāiguān Mǎxìtuán | |||
|ChiM=Shocking! Switch Circus | |||
}} | |||
{{SM3DW levels}} | |||
{{SM3DW}} | [[Category:Circuses]] | ||
[[Category:Super Mario 3D World levels]] | |||
[[Category:Super Mario 3D World | [[de:Strom an, Manege frei]] | ||
Latest revision as of 07:53, October 8, 2023
- This article is about the level in Super Mario 3D World. For the level in New Super Mario Bros. 2, see World
 Flower-1.
| Level | |
|---|---|
| Switch Shock Circus | |

| |
| Level code | World |
| World | World Flower |
| Game | Super Mario 3D World Super Mario 3D World + Bowser's Fury |
| Time limit | 400 seconds |
| << Directory of levels >> >> | |
Switch Shock Circus, otherwise known as World ![]() Flower-1, is the first level of World Flower in Super Mario 3D World and its Nintendo Switch port Super Mario 3D World + Bowser's Fury. It is unlocked after completing Broken Blue Bully Belt, and its own completion unlocks Floating Fuzzy Time Mine and Piranha Creeper Creek after Dark.
Flower-1, is the first level of World Flower in Super Mario 3D World and its Nintendo Switch port Super Mario 3D World + Bowser's Fury. It is unlocked after completing Broken Blue Bully Belt, and its own completion unlocks Floating Fuzzy Time Mine and Piranha Creeper Creek after Dark.
Layout[edit]
The course is a remixed version of Switch Scramble Circus and shares many of the same elements, although having more enemies within the stage.
The player starts off in a circular area which leads to another area containing Switch Panels. The Switch Panels, however, have Fizzlits moving across them, which are not seen in the original level. The player needs to flip all the switches to the "ON" position while avoiding the Fizzlits to progress further.
The player is then met by a Hammer Bro. The area behind the Hammer Bro. contains Mushroom Trampolines that the player must use to get up onto higher platforms. A ? Block containing a Lucky Bell can also be found to the left. The platforms in this area are patrolled by Fizzlits, so the player needs to be careful navigating or defeating them. The area above these platforms is filled with more Switch Panels, some of which are moving, as well as Fizzlits and Hammer Bros. If timed correctly, the Hammer Bros'. hammers can be used to defeat the Fizzlits. Flipping all the switches to the correct position opens to a clear pipe cannon.
The final area contains more Switch Panels and Fizzlits. The player could jump onto the Goal Pole at this point, though flipping the switches to the correct position allows the player to reach the top.
Green Stars[edit]
- Green Star 1: In a Mystery Box behind the starting location. The player must turn on four switch panels on the wall to earn the Green Star.
- Green Star 2: The second Green Star can be collected by obtaining all eight Green Coins from the Green Ring.
- Green Star 3: At the end of the level, floating right of the ledge. The player must use a baseball or a Boomerang Flower to obtain this Green Star.
Enemies[edit]
Names in other languages[edit]
| Language | Name | Meaning |
|---|---|---|
| Japanese | ビリビリ!スイッチサーカス Biribiri! Suicchi sākasu |
Shocking! Switch Circus |
| Chinese | 霹靂電擊!開關馬戲團 Pīlì Diànjī! Kāiguān Mǎxìtuán |
Shocking! Switch Circus |
| Dutch | Hoogspanningscircus |
High voltage circus |
| German | Strom an, Manege frei |
Electricity on, manege free |
| Italian | Interruttori degli orrori |
Horror's switches |
| Portuguese | Eletrizante labirinto de interruptores |
Electrifying maze of switches |
| Spanish | El electrizante circo de los interruptores |
The shocking switches' circus |

