Mine Cart Carnage: Difference between revisions
mNo edit summary |
mNo edit summary |
||
| (41 intermediate revisions by 19 users not shown) | |||
| Line 1: | Line 1: | ||
{{level | {{level infobox | ||
|image=[[File:Mine Cart Carnage SNES.png]] | |||
|image=[[File: | |||
|code=2-2 | |code=2-2 | ||
|world=[[Monkey Mines]] | |world=[[Monkey Mines]] | ||
|game=''[[Donkey Kong Country]] | |game=''[[Donkey Kong Country]] | ||
|before=[[Winky's Walkway|<<]] | |before=[[Winky's Walkway|<<]] | ||
|after=[[Bouncy Bonanza|>>]] | |after=[[Bouncy Bonanza|>>]] | ||
| | |track=Mine Cart Madness | ||
}} | }} | ||
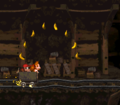
'''Mine Cart Carnage''' is the seventh level in | '''Mine Cart Carnage''' is the seventh level in ''[[Donkey Kong Country]]'' and the second level of [[Monkey Mines]]. It takes place in a mine shaft where [[Donkey Kong]] and [[Diddy Kong]] must ride a [[Mine Cart]] across a series of rail segments. The segments are divided by gaps, which the [[Kong]]s must jump over, and some of the longer jumps allow them to collect [[Red Balloon|Life Balloon]]s along the way. The Kongs must jump over many tipped Mine Carts along the tracks throughout, though some were removed from the original Japanese version. During the second half of the level, the Kongs encounter many [[Krash]]es, the only enemy in the level, including one just before the [[exit]]. | ||
==Layout== | |||
== | The Kongs begin the level on a solid ledge with a [[DK Barrel]] and a [[Blast Barrel]] on it. The Blast Barrel can blast the primates over an abyss and onto a mine cart, which immediately begins to pull them through a trail of [[banana]]s and down a hill to a few more bananas floating in the air. After dropping off of the edge of the track and landing on a separate track, they are lead up a hill towards a pit with the [[KONG Letters|letter K]] hovering above it. A large hill with another small pit at the end of it follows here, with a separate track after it that the primates must jump to so they do not fall. Three more pits separating a trio of solid platforms are ahead. Once the Kongs cross them all, they ride down a steep hill and approach two more pits. They find themselves on a higher platform each time they cross one of the abysses. After they cross the pits, they ride downwards and encounter another pit that is followed by the letter O and a large hill. As the cart wheels the heroes down this hill, they come past a small pit with a Banana Bunch in it. They then ride up a smaller hill, where another abyss is present. Another hill follows the pit, but a large piece of it is broken off. A small section of the track is left between the two broken parts of it, and it holds an [[Enguarde]] [[animal token|Token]]. After passing this broken piece of the track with the smaller track in the center of it, the primates ride down a straight, bumpy railway with another track hanging above it. The level's [[Star Barrel|Continue Barrel]] and a DK Barrel can be found here. | ||
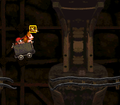
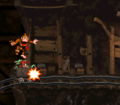
The Kongs begin the level on a solid ledge with a [[DK Barrel]] and | [[File:MineCartCarnage-SNES-3.png|left|thumb|Diddy Kong jumps over a Krash]] | ||
Once the Kongs pass the Continue Barrel, they ride up a hill and reach a small pit with a broken mine cart at the beginning of it. Another broken cart can be found on the bottom of a curved track on the opposite side of the abyss. The large gap is located in the track ahead of here, but a slanted part of the track is also within the gap. The Kongs can use this piece of the track to progress safely to another broken mine cart that they must dodge. Immediately after jumping over it, their mine cart rolls them down a hill towards a small pit with another broken cart next to it. A second pit can be found just ahead of here after the letter N with an additional broken cart in front of it. If the heroes manage to pass over this pit, they make their way onto a straight, bumpy track with a Krash rolling down it. A separate piece of a track hangs above this with some bananas on it. An abyss is located ahead, and two tracks are after it. The top track is small and does not hold a [[Red Balloon|Life Balloon]], unlike the lower track. After passing this area, the primates ride up a hill with a Krash on it and then encounter another small pit with an additional hill after it. As they ride along the curvy track ahead of them, a few more Krashes get in their way, until they reach the end of the track. | |||
Another piece of a track is located below it that can catch the Kongs. A pit follows this area with a Krash found immediately after it. Once they pass the foe, they head up a small hill and ride towards the letter G, placed just before a small pit that it followed by a few others. After the duo jumps over the final abyss, they ride down a curved path with a broken part of the track ahead of it. A slanted piece of a track floats between the broken sides of the main track, and the primates can use it to cross. After they make their way over the abyss, they immediately reach another that is followed by a hill with a Krash traveling along it. A large, broken part of the track can be found near here with two smaller, slanted piece of a track within it. They can use the track pieces to progress over the abyss and towards a hill slanted in a downward position. A few Krashes ride up it. The primates travel towards four small pits after reaching the bottom of the hill. Broken mine carts lay before the last three of the pits. After crossing the last of the obstacles, the heroes reach a sign that indicates that the level is near complete. After riding along the remaining part of the curvy track, one final Krash approaches them. Afterwards, they pass an exit sign and enter a tunnel that leads out of the level. | |||
==Enemies== | |||
The following enemies appear, in the following quantities: | |||
<gallery> | |||
Krash DKC.png|[[Krash]] (9) | |||
</gallery> | |||
==Items and objects== | |||
The following items and objects appear, in the following quantities: | |||
<gallery> | |||
Banana DKC SNES.png|[[Banana]] (86) | |||
DK Barrel DKC.png|[[DK Barrel]] (2) | |||
Enguarde Token Sprite SNES.png|[[Enguarde]] [[animal token|Token]] (1)<br>After the letter O, the Kongs must jump over a gap while ascending the rails; just before they descend, the Kongs must jump to the Enguarde Token above a slanted rail. | |||
Red Balloon DKC SNES.png|[[Red Balloon|Life Balloon]] (1)<br>After the first Krash, the Kongs must make an early jump to the next platform to land on the bottom one with the Life Balloon. | |||
</gallery> | |||
===K-O-N-G Letters=== | ===K-O-N-G Letters=== | ||
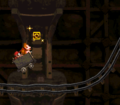
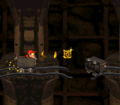
[[File:MineCartCarnage-SNES-2.png|thumb|The location of the letter N]] | |||
*O: | |||
*N: The | *'''K:''' Hovering over the first gap between the rails. | ||
*G: The letter G is | *'''O:''' After the letter K, the Kongs must ride the [[Mine Cart]] across some rail segments. Right after going down second hill, which has a gap in it, the Kongs can jump to the letter O above. | ||
*'''N:''' The letter N is on the edge of a small platform before encountering the first Krash in the level. | |||
*'''G:''' The letter G is shortly after the fifth Krash. | |||
===Key items=== | |||
*'''[[Photograph]]''' (Game Boy Advance version only): The photograph is above the hidden Warp Barrel. It shows a group picture of Donkey Kong and Diddy Kong riding in a Mine Cart, in the ninth page of the [[scrapbook]]. | |||
==Warp Barrel== | |||
At the start of the level, the Kongs must jump over the [[Blast Barrel]] and fall to the left, against the wall, to land into a hidden [[Warp Barrel]], which sends them to the last Krash in the level, right before the exit. The Warp Barrel does not appear in the [[Game Boy Color]] remake. | |||
==Gallery== | ==Gallery== | ||
<gallery> | <gallery> | ||
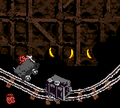
Mine Cart Carnage 2.png|The Kongs ride under some bananas at the beginning of the level | |||
MineCartCarnage-SNES-1.png|The letter K | |||
Mine Cart Carnage 3.png|The Kongs approach a broken cart | |||
MineCartCarnage-SNES-O.png|The letter O | |||
MineCartCarnage-SNES-G.png|The letter G | |||
Mine Cart Carnage 4.png|Donkey Kong is hit by the last Krash in the level | |||
MineCartCarnage-GBC.png|Diddy approaches a tipped-over Mine Cart in the Game Boy Color version | |||
Mine Cart Carnage design.jpg|Design sheet for the level by [[Gregg Mayles]]<ref>Ghoulyboy (September 11, 2015). [https://twitter.com/Ghoulyboy/status/642387327822766080 More #DKCrevealed levels. Mine Cart! Coral! The Mine Cart was inspired by Indy Jones, watched it loads on Laser Disc.] ''Twitter.'' Retrieved July 23, 2018.</ref> | |||
</gallery> | </gallery> | ||
==Names in other languages== | ==Names in other languages== | ||
{{ | {{foreign names| | ||
|Jap=マインカートコースター | |Jap=マインカートコースター | ||
|JapR=Mainkāto kōsutā | |JapR=Mainkāto kōsutā | ||
|JapM=Mine Cart Coaster | |JapM=Mine Cart Coaster | ||
| | |Fre=Carnage du Chariot Minier | ||
| | |FreM=Mine Cart Carnage | ||
|Ger=Loren-Crash | |Ger=Loren-Crash | ||
|GerM= | |GerM=Mine Cart Crash | ||
|Ita=Rotaie Rapide | |||
|ItaM=Rapid Rails | |||
|Spa=Estragos en la Mina | |Spa=Estragos en la Mina | ||
|SpaM= | |SpaM=Havoc in the Mine | ||
}} | }} | ||
{{ | |||
==Trivia== | |||
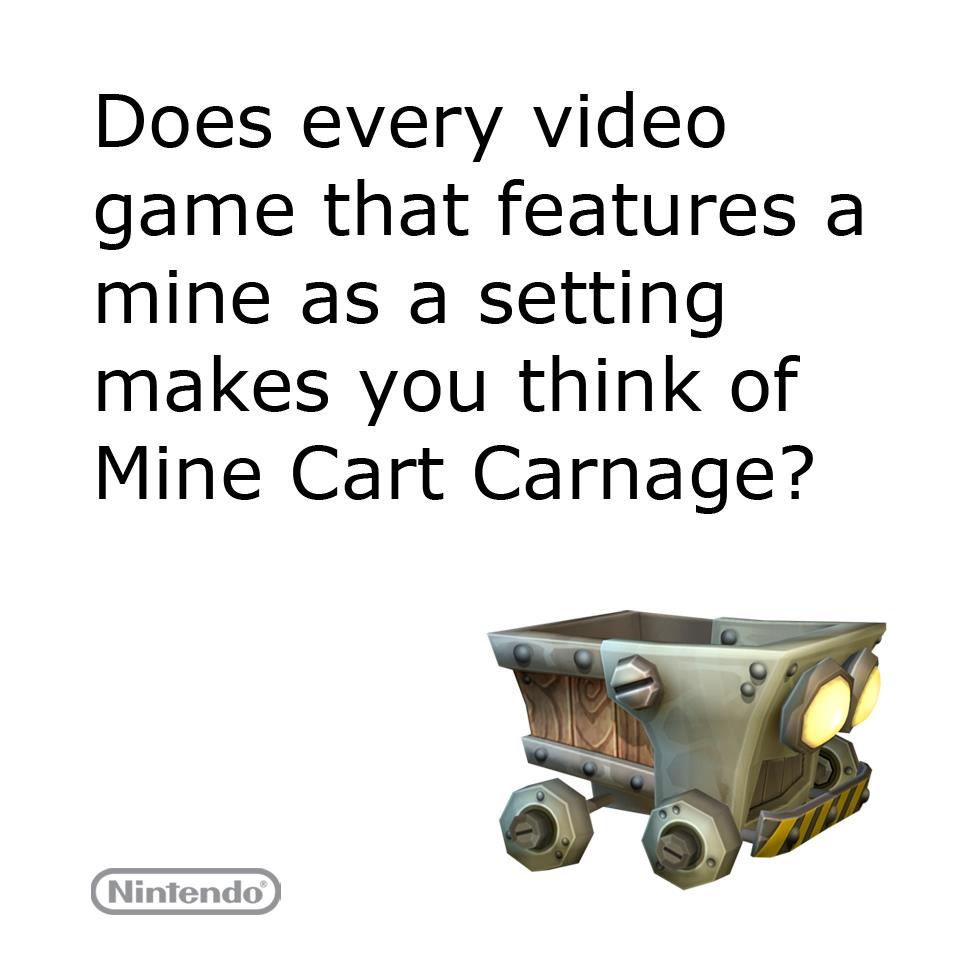
*On March 18, 2013, [[Nintendo]] uploaded an image to Facebook which asks others if they are reminded of Mine Cart Carnage whenever they see a mine in a video game. Inconsistently, the Mine Cart artwork from ''[[Donkey Kong Country Returns]]'' is shown at the bottom-right of the image.<ref>Nintendo (March 18, 2013). {{media link|Nintendo Facebook Mine 2013.jpg|Facebook image}}.</ref> | |||
{{DKC | |||
[[Category: | ==References== | ||
<references/> | |||
{{DKC levels}} | |||
[[Category:Mines]] | |||
[[Category:Railways]] | [[Category:Railways]] | ||
[[Category:Donkey Kong Country | [[Category:Donkey Kong Country levels]] | ||
[[Category:Donkey Kong Island]] | [[Category:Donkey Kong Island]] | ||
[[de:Loren-Crash]] | |||
Revision as of 14:04, January 20, 2024
| Level | |
|---|---|
| Mine Cart Carnage | |

| |
| Level code | 2-2 |
| World | Monkey Mines |
| Game | Donkey Kong Country |
| Music track | Mine Cart Madness |
| << Directory of levels >> | |
Mine Cart Carnage is the seventh level in Donkey Kong Country and the second level of Monkey Mines. It takes place in a mine shaft where Donkey Kong and Diddy Kong must ride a Mine Cart across a series of rail segments. The segments are divided by gaps, which the Kongs must jump over, and some of the longer jumps allow them to collect Life Balloons along the way. The Kongs must jump over many tipped Mine Carts along the tracks throughout, though some were removed from the original Japanese version. During the second half of the level, the Kongs encounter many Krashes, the only enemy in the level, including one just before the exit.
Layout
The Kongs begin the level on a solid ledge with a DK Barrel and a Blast Barrel on it. The Blast Barrel can blast the primates over an abyss and onto a mine cart, which immediately begins to pull them through a trail of bananas and down a hill to a few more bananas floating in the air. After dropping off of the edge of the track and landing on a separate track, they are lead up a hill towards a pit with the letter K hovering above it. A large hill with another small pit at the end of it follows here, with a separate track after it that the primates must jump to so they do not fall. Three more pits separating a trio of solid platforms are ahead. Once the Kongs cross them all, they ride down a steep hill and approach two more pits. They find themselves on a higher platform each time they cross one of the abysses. After they cross the pits, they ride downwards and encounter another pit that is followed by the letter O and a large hill. As the cart wheels the heroes down this hill, they come past a small pit with a Banana Bunch in it. They then ride up a smaller hill, where another abyss is present. Another hill follows the pit, but a large piece of it is broken off. A small section of the track is left between the two broken parts of it, and it holds an Enguarde Token. After passing this broken piece of the track with the smaller track in the center of it, the primates ride down a straight, bumpy railway with another track hanging above it. The level's Continue Barrel and a DK Barrel can be found here.

Once the Kongs pass the Continue Barrel, they ride up a hill and reach a small pit with a broken mine cart at the beginning of it. Another broken cart can be found on the bottom of a curved track on the opposite side of the abyss. The large gap is located in the track ahead of here, but a slanted part of the track is also within the gap. The Kongs can use this piece of the track to progress safely to another broken mine cart that they must dodge. Immediately after jumping over it, their mine cart rolls them down a hill towards a small pit with another broken cart next to it. A second pit can be found just ahead of here after the letter N with an additional broken cart in front of it. If the heroes manage to pass over this pit, they make their way onto a straight, bumpy track with a Krash rolling down it. A separate piece of a track hangs above this with some bananas on it. An abyss is located ahead, and two tracks are after it. The top track is small and does not hold a Life Balloon, unlike the lower track. After passing this area, the primates ride up a hill with a Krash on it and then encounter another small pit with an additional hill after it. As they ride along the curvy track ahead of them, a few more Krashes get in their way, until they reach the end of the track.
Another piece of a track is located below it that can catch the Kongs. A pit follows this area with a Krash found immediately after it. Once they pass the foe, they head up a small hill and ride towards the letter G, placed just before a small pit that it followed by a few others. After the duo jumps over the final abyss, they ride down a curved path with a broken part of the track ahead of it. A slanted piece of a track floats between the broken sides of the main track, and the primates can use it to cross. After they make their way over the abyss, they immediately reach another that is followed by a hill with a Krash traveling along it. A large, broken part of the track can be found near here with two smaller, slanted piece of a track within it. They can use the track pieces to progress over the abyss and towards a hill slanted in a downward position. A few Krashes ride up it. The primates travel towards four small pits after reaching the bottom of the hill. Broken mine carts lay before the last three of the pits. After crossing the last of the obstacles, the heroes reach a sign that indicates that the level is near complete. After riding along the remaining part of the curvy track, one final Krash approaches them. Afterwards, they pass an exit sign and enter a tunnel that leads out of the level.
Enemies
The following enemies appear, in the following quantities:

Krash (9)

Items and objects
The following items and objects appear, in the following quantities:

Banana (86)

DK Barrel (2)

Life Balloon (1)
After the first Krash, the Kongs must make an early jump to the next platform to land on the bottom one with the Life Balloon.


K-O-N-G Letters

- K: Hovering over the first gap between the rails.
- O: After the letter K, the Kongs must ride the Mine Cart across some rail segments. Right after going down second hill, which has a gap in it, the Kongs can jump to the letter O above.
- N: The letter N is on the edge of a small platform before encountering the first Krash in the level.
- G: The letter G is shortly after the fifth Krash.
Key items
- Photograph (Game Boy Advance version only): The photograph is above the hidden Warp Barrel. It shows a group picture of Donkey Kong and Diddy Kong riding in a Mine Cart, in the ninth page of the scrapbook.
Warp Barrel
At the start of the level, the Kongs must jump over the Blast Barrel and fall to the left, against the wall, to land into a hidden Warp Barrel, which sends them to the last Krash in the level, right before the exit. The Warp Barrel does not appear in the Game Boy Color remake.
Gallery
The Kongs ride under some bananas at the beginning of the level
The letter K
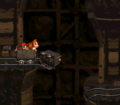
The Kongs approach a broken cart
The letter O
The letter G
Donkey Kong is hit by the last Krash in the level
Diddy approaches a tipped-over Mine Cart in the Game Boy Color version
![Design sheet for the level by Gregg Mayles[1]](https://mario.wiki.gallery/images/thumb/1/1d/Mine_Cart_Carnage_design.jpg/120px-Mine_Cart_Carnage_design.jpg)
Design sheet for the level by Gregg Mayles[1]


![Design sheet for the level by Gregg Mayles[1]](/File:Mine_Cart_Carnage_design.jpg)
Names in other languages
| Language | Name | Meaning |
|---|---|---|
| Japanese | マインカートコースター Mainkāto kōsutā |
Mine Cart Coaster |
| French | Carnage du Chariot Minier |
Mine Cart Carnage |
| German | Loren-Crash |
Mine Cart Crash |
| Italian | Rotaie Rapide |
Rapid Rails |
| Spanish | Estragos en la Mina |
Havoc in the Mine |
Trivia
- On March 18, 2013, Nintendo uploaded an image to Facebook which asks others if they are reminded of Mine Cart Carnage whenever they see a mine in a video game. Inconsistently, the Mine Cart artwork from Donkey Kong Country Returns is shown at the bottom-right of the image.[2]
References
- ^ Ghoulyboy (September 11, 2015). More #DKCrevealed levels. Mine Cart! Coral! The Mine Cart was inspired by Indy Jones, watched it loads on Laser Disc. Twitter. Retrieved July 23, 2018.
- ^ Nintendo (March 18, 2013). Facebook image.