Beanstalk Way: Difference between revisions
Trig Jegman (talk | contribs) mNo edit summary |
GlobinGoblin (talk | contribs) |
||
| (36 intermediate revisions by 12 users not shown) | |||
| Line 1: | Line 1: | ||
{{ | {{WW location infobox | ||
|subject= | |subject=level | ||
|image=[[File:BeanstalkWay.png| | |image=[[File:BeanstalkWay.png|256px]] | ||
|world=[[Thrillsville]] | |world=[[Thrillsville]] | ||
|neighbor=[[Shivering Mountains]] | |neighbor=[[Shivering Mountains]] | ||
| | |diamonds_needed=5 | ||
|boss=[[Spideraticus]] | |boss=[[Spideraticus]] | ||
|before=[[Shivering Mountains|<<]] | |before=[[Shivering Mountains|<<]] | ||
|after=[[Mirror Mansion|>>]] | |after=[[Mirror Mansion|>>]] | ||
|list=[[:Category:Wario World | |list=[[:Category:Wario World levels|List of levels]] | ||
}} | }} | ||
'''Beanstalk Way''' is the second level of [[Thrillsville]] and sixth level overall in ''[[Wario World]]''. It is a mountainous, grassy valley full of giant beanstalks and other large plants, as well as small shallow rivers. Much of the level involves climbing beanstalks, leaping across [[Glue Globe]]s, raising [[Swirly Slab]]s, or jumping on [[Monstrous Magnet]]s to reach high places. [[Spideraticus]] is the boss of this level. | '''Beanstalk Way''' is the second level of [[Thrillsville]] and sixth level overall in ''[[Wario World]]''. It is a mountainous, grassy valley full of giant beanstalks and other large plants, as well as small shallow rivers. Much of the level involves climbing beanstalks, leaping across [[Glue Globe]]s, raising [[Swirly Slab]]s, or jumping on [[Monstrous Magnet]]s to reach high places. [[Spideraticus]] is the boss of this level. | ||
==Level layout== | ==Level layout== | ||
The player starts off in a grassy area with a few stumps and a river. There are also buds that open up into flowers when [[Ground Pound]]ed. These flowers function exactly like the Swirly Slabs previously seen in [[Horror Manor]]. The flower next to the [[ | The player starts off in a grassy area with a few stumps and a river. There are also buds that open up into flowers when [[Ground Pound]]ed. These flowers function exactly like the Swirly Slabs previously seen in [[Horror Manor]]. The flower next to the [[enemy generator]] can be used to reach a [[Gold Statue]] part. The flower near the beanstalk will rise to allow the player to climb said beanstalk. The beanstalk splits into three paths. The one on the lower left leads to the red [[Spriteling]] and the chartreuse [[treasure button]]. The one on the upper left leads to the red treasure button. The one on the right leads to a [[wooden chest]], a [[trapdoor (Wario World)|trapdoor]], and the red [[treasure chest|treasure]]'s spawn point. The yellow Spriteling is inside the trapdoor. At the top of the beanstalk is a small structure that leads into a field with several enemies. At the end of the field is the first [[Tree Freak]]. After defeating it, Wario will encounter [[Tulipatooie]]s, tall, flower-like creatures that spit out Glue Globes. In between them is a beanstalk leading to a trapdoor with a Gold Statue part inside. Below them is a stream where [[Wario]] will find [[Grizzly|Grizzlies]], an enemy generator, and another trapdoor housing a Gold Statue part. Behind the Tulipatooies are a wooden chest and the yellow treasure button respectively. The yellow treasure's spawn point is back at the beginning of the level. After the second Tulipatooie is a [[Garlic Dispenser]] and a horde of enemies, with a steel trapdoor nearby containing yet another Gold Statue part. Ground Pounding through the [[Rock Block]] ahead leads Wario into a [[Battle Ring (Wario World)|Battle Ring]] while obtaining another Gold Statue part in the process. | ||
After the Battle Ring is the chartreuse treasure's spawn point and an area with a wooden bridge built over a stream of water. Underneath the bridge is a steel trapdoor, which houses the green Spriteling. After crossing the bridge, the player will find a metal panel. There are Monstrous Magnets ahead which can be thrown into it to make a platform, allowing Wario to reach the ledge above and hit the purple treasure button. Where the Monstrous Magnets are encountered, there are more metal panels, and using the Magnets is necessary to make progress. In between two of the ledges here is the green treasure button. To find the corresponding chest, the player should drop down to the area below, where they will find a wooden chest and some [[ | After the Battle Ring is the chartreuse treasure's spawn point and an area with a wooden bridge built over a stream of water. Underneath the bridge is a steel trapdoor, which houses the green Spriteling. After crossing the bridge, the player will find a metal panel. There are Monstrous Magnets ahead which can be thrown into it to make a platform, allowing Wario to reach the ledge above and hit the purple treasure button. Where the Monstrous Magnets are encountered, there are more metal panels, and using the Magnets is necessary to make progress. In between two of the ledges here is the green treasure button. To find the corresponding chest, the player should drop down to the area below, where they will find a wooden chest and some [[Ram]]s. Ground Pounding the Rock Block will take Wario to an underground area with an enemy generator and a steel trapdoor with the blue Spriteling inside. The cyan treasure button is high up on the wall here. There is a Swirly Slab to help reach it, but a [[Piledriver]] can be used to hit it instead. To the right are some vines that lead back to the area with the Rams. The green treasure and a Gold Statue part are on the way. Going left from here leads back to the wooden bridge. | ||
After traversing the ledges with Monstrous Magnets, the player will have to pass through a sloped area with many Rams running down it. These Rams are unlike the other Rams in the level; they behave more like the [[ | After traversing the ledges with Monstrous Magnets, the player will have to pass through a sloped area with many Rams running down it. These Rams are unlike the other Rams in the level; they behave more like the [[Sled Creature]]s in [[Shivering Mountains]] and can shove Wario off the cliff. The cyan treasure's spawn point is amongst the charging Rams. The cliffside has Glue Globes leading downward; they lead to a wooden chest and the pink treasure button. There is also another set of Glue Globes leading down to a Gold Statue part. After the slope is a Garlic Dispenser and a second encounter with a Tree Freak. After this is a vine leading downward to a small area with more Monstrous Magnets. There are Glue Globes leading upward; climbing them takes Wario to a second Battle Ring. After this is a giant flower platform where Wario must battle a blue [[Crystal Entity]]. There are smaller flower platforms ahead, one of which has a wooden chest on it. Below are some Rams, the purple treasure's spawn point, and a steel trapdoor containing the purple Spriteling. To the left of the purple spawn point is the blue treasure button across a bottomless pit, which can be hit by throwing an enemy. To find the corresponding chest, the player must backtrack to the slope with the charging Rams. A Swirly Slab is used to return to where the flower platforms are; jumping right from here leads to the third and final Tree Freak. Behind it is an enemy generator and a path leading to the pink treasure and the final trapdoor, which houses a Gold Statue part. Back by the enemy generator is a set of Glue Globes leading to a beanstalk that Wario can climb. There are [[Spike Ball|spiked ball]]s rotating around the beanstalk to watch out for. At the top is a bridge leading to a field with a Garlic Dispenser, numerous enemies, [[ByeBye Balloon]]s, and the goal. | ||
If Wario reenters the level after defeating the boss, there will be a set of ByeBye Balloons at the beginning that will take him to the wooden bridge after the first Battle Ring. | If Wario reenters the level after defeating the boss, there will be a set of ByeBye Balloons at the beginning that will take him to the wooden bridge after the first Battle Ring. | ||
==Enemies== | ==Enemies== | ||
*[[ | *[[Wolf|Wolves]] | ||
*[[ | *[[Grizzly|Grizzlies]] | ||
*[[ | *[[Hawk]]s | ||
*[[Ankiron | *[[Rhino Ankiron]]s | ||
*[[Enemy | *[[Enemy generator]]s | ||
*[[ | *[[Stingray]]s | ||
*[[Tulipatooie]]s | *[[Tulipatooie]]s | ||
*[[Monstrous Magnet]]s | *[[Monstrous Magnet]]s | ||
*[[Ram]]s | *[[Ram]]s | ||
*[[Wind Winder]]s | *[[Wind Winder]]s | ||
*[[ | *[[Crystal Entity|Blue Crystal Entity]] | ||
*[[Tree Freak]] | *[[Tree Freak]] | ||
*[[Spideraticus]] (Boss) | *[[Spideraticus]] (Boss) | ||
==Red diamond sub-levels== | ==Red diamond sub-levels== | ||
{|border=1 cellspacing=0 cellpadding=3 style="border-collapse:collapse" style="text-align: center; width: 100%" | {|border=1 cellspacing=0 cellpadding=3 style="border-collapse:collapse"style="text-align: center; width: 100%" | ||
!width="2%"|# | !width="2%"|# | ||
!width="1%"|Image | !width="1%"|Image | ||
| Line 51: | Line 50: | ||
|[[File:BeanstalkWaySub2.png|150px]] | |[[File:BeanstalkWaySub2.png|150px]] | ||
|In the stream where the Tulipatooies are. | |In the stream where the Tulipatooies are. | ||
|There is a Glue Globe moving through rings with spiked balls here. Wario must grab the Glue Globe and position himself so that he goes through the open part of the rings. This is similar to a previous sub-level in [[Greenhorn Forest]]. If done successfully, the Glue Globe will take Wario to the red diamond and a Gold Statue | |There is a Glue Globe moving through rings with spiked balls here. Wario must grab the Glue Globe and position himself so that he goes through the open part of the rings. This is similar to a previous sub-level in [[Greenhorn Forest]]. If done successfully, the Glue Globe will take Wario to the red diamond and a Gold Statue part. | ||
|- | |- | ||
|3 | |3 | ||
|[[File:BeanstalkWaySub3.png|150px]] | |[[File:BeanstalkWaySub3.png|150px]] | ||
|On top of a ledge accessed by climbing a beanstalk in between the two Tulipatooies. | |On top of a ledge accessed by climbing a beanstalk in between the two Tulipatooies. | ||
|Chests containing [[ | |Chests containing [[bomb]]s will drop down from above. Wario should pick one up and throw it at the lever while standing on the metal block in the middle; this will immediately propel the block upward to where the red diamond and Gold Statue part are. | ||
|- | |- | ||
|4 | |4 | ||
|[[File:BeanstalkWaySub4.png|150px]] | |[[File:BeanstalkWaySub4.png|150px]] | ||
|In the field with a Rock Block right before the first Battle Ring. | |In the field with a Rock Block right before the first Battle Ring. | ||
|In this sky sub-level, Wario must make a long drop onto a platform below where the red diamond is. Another long drop leads to a very small where the [[Escape Spring]] is. A Gold Statue | |In this sky sub-level, Wario must make a long drop onto a platform below where the red diamond is. Another long drop leads to a very small platform where the [[Escape Spring]] is. A Gold Statue part is hovering directly over it. | ||
|- | |- | ||
|5 | |5 | ||
| Line 81: | Line 80: | ||
|[[File:BeanstalkWaySub8.png|150px]] | |[[File:BeanstalkWaySub8.png|150px]] | ||
|To the right of the flower platforms after the second Battle Ring. | |To the right of the flower platforms after the second Battle Ring. | ||
|In the middle of a cluster of rising and falling Rock Blocks is the red diamond and the Gold Statue | |In the middle of a cluster of rising and falling Rock Blocks is the red diamond and the Gold Statue part underneath it. | ||
|} | |} | ||
==Gold Statue | ==Gold Statue parts== | ||
*High above a Swirly Slab near the beginning of the level. | *High above a Swirly Slab near the beginning of the level. | ||
*Inside the second red diamond sub-level. | *Inside the second red diamond sub-level. | ||
| Line 90: | Line 89: | ||
*Inside the fourth red diamond sub-level. | *Inside the fourth red diamond sub-level. | ||
*Below the Rock Block that leads into the first Battle Ring. | *Below the Rock Block that leads into the first Battle Ring. | ||
*Among the vines leading out of the underground area with an | *Among the vines leading out of the underground area with an enemy generator and steel trapdoor. | ||
*On the side of the cliff that Rams charge off of, toward the right. | *On the side of the cliff that Rams charge off of, toward the right. | ||
*Inside the eighth red diamond sub-level. | *Inside the eighth red diamond sub-level. | ||
==Treasures== | ==Treasures== | ||
{|border=1 cellspacing=0 cellpadding=3 style="border-collapse:collapse" style="text-align: center; width: 100%" | {|border=1 cellspacing=0 cellpadding=3 style="border-collapse:collapse"style="text-align: center; width: 100%" | ||
!width="1%"|Chest color | !width="1%"|Chest color | ||
!width="4%"|Treasure | !width="4%"|Treasure | ||
!width="5%"|Image | |||
!width="20%"|Button location | !width="20%"|Button location | ||
!width="20%"|Chest location | !width="20%"|Chest location | ||
| Line 103: | Line 103: | ||
|Red | |Red | ||
|Nice Goblet | |Nice Goblet | ||
|[[File:WW Nice Goblet.png]] | |||
|Accessed by climbing the first beanstalk and going left at the second opportunity. | |Accessed by climbing the first beanstalk and going left at the second opportunity. | ||
|To the right of the same beanstalk, near a wooden trapdoor. | |To the right of the same beanstalk, near a wooden trapdoor. | ||
| Line 108: | Line 109: | ||
|Yellow | |Yellow | ||
|Violin | |Violin | ||
|[[File:WW Violin.png]] | |||
|In the stream behind a Tulipatooie. | |In the stream behind a Tulipatooie. | ||
|On a beanstalk stump at the start of the level. | |On a beanstalk stump at the start of the level. | ||
| Line 113: | Line 115: | ||
|Chartreuse | |Chartreuse | ||
|Earring | |Earring | ||
|[[File:WW Earring.png]] | |||
|Accessed by climbing the first beanstalk and going left at the first opportunity. | |Accessed by climbing the first beanstalk and going left at the first opportunity. | ||
|Right next to the first Battle Ring. | |Right next to the first Battle Ring. | ||
| Line 118: | Line 121: | ||
|Green | |Green | ||
|Jeweled Sword | |Jeweled Sword | ||
|[[File:WW Jeweled Sword.png]] | |||
|On the wall in between two ledges with Monstrous Magnets. | |On the wall in between two ledges with Monstrous Magnets. | ||
|In the area below the button. Accessed by Ground Pounding the Rock Block, then climbing the vines. | |In the area below the treasure button. Accessed by Ground Pounding the Rock Block, then climbing the vines. | ||
|- | |- | ||
|Cyan | |Cyan | ||
|Gold Tiara | |Gold Tiara | ||
|On a wall in the underground area with an | |[[File:WW Gold Tiara.png]] | ||
|On a wall in the underground area with an enemy generator and steel trapdoor. | |||
|On the slope with Rams charging off a cliff. | |On the slope with Rams charging off a cliff. | ||
|- | |- | ||
|Blue | |Blue | ||
|Nice Scepter | |Nice Scepter | ||
|[[File:WW Nice Scepter.png]] | |||
|On a wall to the left of the area below the giant yellow flower platform after the second Battle Ring. | |On a wall to the left of the area below the giant yellow flower platform after the second Battle Ring. | ||
|On the slope with Rams charging off a cliff. | |On the slope with Rams charging off a cliff. | ||
| Line 133: | Line 139: | ||
|Purple | |Purple | ||
|King's Crown | |King's Crown | ||
|[[File:WW King's Crown.png]] | |||
|On top of a ledge after the wooden bridge by the first Battle Ring. A Monstrous Magnet is necessary to reach it. | |On top of a ledge after the wooden bridge by the first Battle Ring. A Monstrous Magnet is necessary to reach it. | ||
|Below the giant yellow flower platform. | |Below the giant yellow flower platform. | ||
| Line 138: | Line 145: | ||
|Pink | |Pink | ||
|[[Game Boy Advance]] | |[[Game Boy Advance]] | ||
|[[File:WW GBA.png]] | |||
|On the side of the cliff that Rams charge off of, toward the left. | |On the side of the cliff that Rams charge off of, toward the left. | ||
|To the right of the flower platforms, next to a trapdoor. | |To the right of the flower platforms, next to a trapdoor. | ||
| Line 143: | Line 151: | ||
==Spritelings== | ==Spritelings== | ||
{|border=1 cellspacing=0 cellpadding=3 style="border-collapse:collapse" style="text-align: center; width: 100%" | {|border=1 cellspacing=0 cellpadding=3 style="border-collapse:collapse"style="text-align: center; width: 100%" | ||
!width="1%"|Color | !width="1%"|Color | ||
!width="20%"|Location | !width="20%"|Location | ||
| Line 150: | Line 158: | ||
|Red | |Red | ||
|Accessed by climbing the first beanstalk and going left at the first opportunity. | |Accessed by climbing the first beanstalk and going left at the first opportunity. | ||
|'' | |"''Knock down the {{color|fruit|blue}} of the [[Tree Freak]]s! Careful! Their fruit has thorns! {{color|Pound the ground to jostle them|red}}, then grab them!''" | ||
|- | |- | ||
|Yellow | |Yellow | ||
|Inside the first red diamond sub-level. | |Inside the first red diamond sub-level. | ||
|'' | |"''The [[Tulipatooie]] sucks up Glue Globes shortly after it spits them out! Yuck! {{color|Grab on quickly|red}}, and use them to cross!''" | ||
|- | |- | ||
|Green | |Green | ||
|Inide the fifth red diamond sub-level. | |Inide the fifth red diamond sub-level. | ||
|'' | |"''The [[Monstrous Magnet]]s do more than just get in your way, you know! Think about it... What do magnets do? You can figure this out, Wario!''" | ||
|- | |- | ||
|Blue | |Blue | ||
|Inside the sixth red diamond sub-level. | |Inside the sixth red diamond sub-level. | ||
|'' | |"''This kind of place holds many [[treasures]]! I bet the {{color|cliff bases|blue}} do, too!''" | ||
|- | |- | ||
|Purple | |Purple | ||
|Inside the seventh red diamond sub-level. | |Inside the seventh red diamond sub-level. | ||
|'' | |"''Up ahead is the giant [[Spideraticus]]! Don't get stuck in the sticky spots of its web or you won't be able to jump! You can use the Glue Globes the monster spits out to get a closer look! Oh! {{color|Use a Dash Attack|red}} in the tug-of-war!''" | ||
|} | |} | ||
==Gallery== | ==Gallery== | ||
<gallery> | <gallery> | ||
WarioWorldFlowerySlabMoving.png | |||
WarioWorldFlowerySlabClosed.png | |||
Landmantaray.png|Stingray | |||
Tulipatooie.png|Wario approaches a Tulipatooie. | Tulipatooie.png|Wario approaches a Tulipatooie. | ||
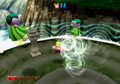
Wario World Wind Winder Beanstalk Way.png|The first Battle Ring. | |||
MonstrousMagnet.png|Wario standing on top of a Monstrous Magnet. | MonstrousMagnet.png|Wario standing on top of a Monstrous Magnet. | ||
BeanstalkWayBattleRing2.png|The second Battle Ring. | BeanstalkWayBattleRing2.png|The second Battle Ring. | ||
RamWarioWorld.png|Wario carrying a Ram. | |||
Tree Freak. | Tree Freak.png|Wario fighting a Tree Freak. | ||
BeanstalkWayUnithornsLair.png|[[Unithorn's Lair]]. | BeanstalkWayUnithornsLair.png|[[Unithorn's Lair]]. | ||
</gallery> | </gallery> | ||
| Line 182: | Line 193: | ||
==Music== | ==Music== | ||
{{media table | {{media table | ||
| | |file1=BeanstalkWay1.oga | ||
|title1=Beanstalk Way 1 | |||
| | |file2=BeanstalkWay2.oga | ||
| | |title2=Beanstalk Way 2 | ||
| | |||
}} | }} | ||
| Line 199: | Line 208: | ||
|Fre=Folie végétale | |Fre=Folie végétale | ||
|FreM=Vegetal Madness | |FreM=Vegetal Madness | ||
|Ita=Valle Rigogliosa | |||
|ItaM=Flourishing Valley | |||
|Spa=Praderas Peligrosas | |||
|SpaM=Dangerous Meadows | |||
}} | }} | ||
{{Wario World}} | {{Wario World}} | ||
[[Category:Grasslands]] | [[Category:Grasslands]] | ||
[[Category:Wario World | [[Category:Mountains]] | ||
[[Category:Wario World levels]] | |||
Latest revision as of 09:55, January 13, 2024
| Wario World level | |
|---|---|
| Beanstalk Way | |

| |
| World | Thrillsville |
| Neighbor level | Shivering Mountains |
| Red diamond requirement |
5 |
| Boss | Spideraticus |
| << List of levels >> | |
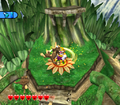
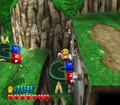
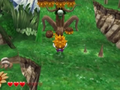
Beanstalk Way is the second level of Thrillsville and sixth level overall in Wario World. It is a mountainous, grassy valley full of giant beanstalks and other large plants, as well as small shallow rivers. Much of the level involves climbing beanstalks, leaping across Glue Globes, raising Swirly Slabs, or jumping on Monstrous Magnets to reach high places. Spideraticus is the boss of this level.
Level layout[edit]
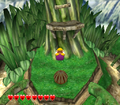
The player starts off in a grassy area with a few stumps and a river. There are also buds that open up into flowers when Ground Pounded. These flowers function exactly like the Swirly Slabs previously seen in Horror Manor. The flower next to the enemy generator can be used to reach a Gold Statue part. The flower near the beanstalk will rise to allow the player to climb said beanstalk. The beanstalk splits into three paths. The one on the lower left leads to the red Spriteling and the chartreuse treasure button. The one on the upper left leads to the red treasure button. The one on the right leads to a wooden chest, a trapdoor, and the red treasure's spawn point. The yellow Spriteling is inside the trapdoor. At the top of the beanstalk is a small structure that leads into a field with several enemies. At the end of the field is the first Tree Freak. After defeating it, Wario will encounter Tulipatooies, tall, flower-like creatures that spit out Glue Globes. In between them is a beanstalk leading to a trapdoor with a Gold Statue part inside. Below them is a stream where Wario will find Grizzlies, an enemy generator, and another trapdoor housing a Gold Statue part. Behind the Tulipatooies are a wooden chest and the yellow treasure button respectively. The yellow treasure's spawn point is back at the beginning of the level. After the second Tulipatooie is a Garlic Dispenser and a horde of enemies, with a steel trapdoor nearby containing yet another Gold Statue part. Ground Pounding through the Rock Block ahead leads Wario into a Battle Ring while obtaining another Gold Statue part in the process.
After the Battle Ring is the chartreuse treasure's spawn point and an area with a wooden bridge built over a stream of water. Underneath the bridge is a steel trapdoor, which houses the green Spriteling. After crossing the bridge, the player will find a metal panel. There are Monstrous Magnets ahead which can be thrown into it to make a platform, allowing Wario to reach the ledge above and hit the purple treasure button. Where the Monstrous Magnets are encountered, there are more metal panels, and using the Magnets is necessary to make progress. In between two of the ledges here is the green treasure button. To find the corresponding chest, the player should drop down to the area below, where they will find a wooden chest and some Rams. Ground Pounding the Rock Block will take Wario to an underground area with an enemy generator and a steel trapdoor with the blue Spriteling inside. The cyan treasure button is high up on the wall here. There is a Swirly Slab to help reach it, but a Piledriver can be used to hit it instead. To the right are some vines that lead back to the area with the Rams. The green treasure and a Gold Statue part are on the way. Going left from here leads back to the wooden bridge.
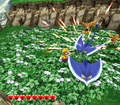
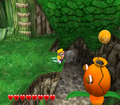
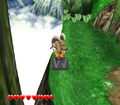
After traversing the ledges with Monstrous Magnets, the player will have to pass through a sloped area with many Rams running down it. These Rams are unlike the other Rams in the level; they behave more like the Sled Creatures in Shivering Mountains and can shove Wario off the cliff. The cyan treasure's spawn point is amongst the charging Rams. The cliffside has Glue Globes leading downward; they lead to a wooden chest and the pink treasure button. There is also another set of Glue Globes leading down to a Gold Statue part. After the slope is a Garlic Dispenser and a second encounter with a Tree Freak. After this is a vine leading downward to a small area with more Monstrous Magnets. There are Glue Globes leading upward; climbing them takes Wario to a second Battle Ring. After this is a giant flower platform where Wario must battle a blue Crystal Entity. There are smaller flower platforms ahead, one of which has a wooden chest on it. Below are some Rams, the purple treasure's spawn point, and a steel trapdoor containing the purple Spriteling. To the left of the purple spawn point is the blue treasure button across a bottomless pit, which can be hit by throwing an enemy. To find the corresponding chest, the player must backtrack to the slope with the charging Rams. A Swirly Slab is used to return to where the flower platforms are; jumping right from here leads to the third and final Tree Freak. Behind it is an enemy generator and a path leading to the pink treasure and the final trapdoor, which houses a Gold Statue part. Back by the enemy generator is a set of Glue Globes leading to a beanstalk that Wario can climb. There are spiked balls rotating around the beanstalk to watch out for. At the top is a bridge leading to a field with a Garlic Dispenser, numerous enemies, ByeBye Balloons, and the goal.
If Wario reenters the level after defeating the boss, there will be a set of ByeBye Balloons at the beginning that will take him to the wooden bridge after the first Battle Ring.
Enemies[edit]
- Wolves
- Grizzlies
- Hawks
- Rhino Ankirons
- Enemy generators
- Stingrays
- Tulipatooies
- Monstrous Magnets
- Rams
- Wind Winders
- Blue Crystal Entity
- Tree Freak
- Spideraticus (Boss)
Red diamond sub-levels[edit]
| # | Image | Location | Description |
|---|---|---|---|
| 1 | 
|
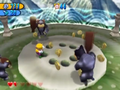
Accessed by climbing the first beanstalk and going right at the first opportunity. | This room has a tall stack of metal blocks in the middle, surrounded on all four sides by stacks of Rock Blocks of varying height. The red diamond is on top of one of the Rock Block stacks, while the yellow Spriteling is on top of the metal block stack. Wario must destroy the Rock Blocks to the point where he can climb them. |
| 2 | 
|
In the stream where the Tulipatooies are. | There is a Glue Globe moving through rings with spiked balls here. Wario must grab the Glue Globe and position himself so that he goes through the open part of the rings. This is similar to a previous sub-level in Greenhorn Forest. If done successfully, the Glue Globe will take Wario to the red diamond and a Gold Statue part. |
| 3 | 
|
On top of a ledge accessed by climbing a beanstalk in between the two Tulipatooies. | Chests containing bombs will drop down from above. Wario should pick one up and throw it at the lever while standing on the metal block in the middle; this will immediately propel the block upward to where the red diamond and Gold Statue part are. |
| 4 | 
|
In the field with a Rock Block right before the first Battle Ring. | In this sky sub-level, Wario must make a long drop onto a platform below where the red diamond is. Another long drop leads to a very small platform where the Escape Spring is. A Gold Statue part is hovering directly over it. |
| 5 | 
|
Near the wooden bridge after the first Battle Ring. | Three levers cause three different platforms to start moving when activated. The farthest platform is already active from the start. The middle lever should be activated when the already moving platform is next to it. The left lever should then be activated when the middle and farthest platforms are next to each other. If done correctly, Wario can then ride the platforms to the end, where the red diamond and green Spriteling await. |
| 6 | 
|
In an underground area beneath a Rock Block near trapdoor #5. | A single large, rotating platform separates the start of this sub-level from the end, where the red diamond and blue Spriteling are. |
| 7 | 
|
Below the giant yellow flower after the second Battle Ring. | This sub-level has several platforms which sink slowly, then propel themselves upward. Wario must jump off of them when they are launching upward to propel himself into the air and reach the higher platforms that he would not be able to otherwise. The red diamond and purple Spriteling are at the end. |
| 8 | 
|
To the right of the flower platforms after the second Battle Ring. | In the middle of a cluster of rising and falling Rock Blocks is the red diamond and the Gold Statue part underneath it. |
Gold Statue parts[edit]
- High above a Swirly Slab near the beginning of the level.
- Inside the second red diamond sub-level.
- Inside the third red diamond sub-level.
- Inside the fourth red diamond sub-level.
- Below the Rock Block that leads into the first Battle Ring.
- Among the vines leading out of the underground area with an enemy generator and steel trapdoor.
- On the side of the cliff that Rams charge off of, toward the right.
- Inside the eighth red diamond sub-level.
Treasures[edit]
| Chest color | Treasure | Image | Button location | Chest location |
|---|---|---|---|---|
| Red | Nice Goblet | Accessed by climbing the first beanstalk and going left at the second opportunity. | To the right of the same beanstalk, near a wooden trapdoor. | |
| Yellow | Violin | In the stream behind a Tulipatooie. | On a beanstalk stump at the start of the level. | |
| Chartreuse | Earring | Accessed by climbing the first beanstalk and going left at the first opportunity. | Right next to the first Battle Ring. | |
| Green | Jeweled Sword | 
|
On the wall in between two ledges with Monstrous Magnets. | In the area below the treasure button. Accessed by Ground Pounding the Rock Block, then climbing the vines. |
| Cyan | Gold Tiara | On a wall in the underground area with an enemy generator and steel trapdoor. | On the slope with Rams charging off a cliff. | |
| Blue | Nice Scepter | On a wall to the left of the area below the giant yellow flower platform after the second Battle Ring. | On the slope with Rams charging off a cliff. | |
| Purple | King's Crown | 
|
On top of a ledge after the wooden bridge by the first Battle Ring. A Monstrous Magnet is necessary to reach it. | Below the giant yellow flower platform. |
| Pink | Game Boy Advance | On the side of the cliff that Rams charge off of, toward the left. | To the right of the flower platforms, next to a trapdoor. |
Spritelings[edit]
| Color | Location | Dialogue |
|---|---|---|
| Red | Accessed by climbing the first beanstalk and going left at the first opportunity. | "Knock down the fruit of the Tree Freaks! Careful! Their fruit has thorns! Pound the ground to jostle them, then grab them!" |
| Yellow | Inside the first red diamond sub-level. | "The Tulipatooie sucks up Glue Globes shortly after it spits them out! Yuck! Grab on quickly, and use them to cross!" |
| Green | Inide the fifth red diamond sub-level. | "The Monstrous Magnets do more than just get in your way, you know! Think about it... What do magnets do? You can figure this out, Wario!" |
| Blue | Inside the sixth red diamond sub-level. | "This kind of place holds many treasures! I bet the cliff bases do, too!" |
| Purple | Inside the seventh red diamond sub-level. | "Up ahead is the giant Spideraticus! Don't get stuck in the sticky spots of its web or you won't be able to jump! You can use the Glue Globes the monster spits out to get a closer look! Oh! Use a Dash Attack in the tug-of-war!" |
Gallery[edit]
Stingray
Wario approaches a Tulipatooie.
The first Battle Ring.
Wario standing on top of a Monstrous Magnet.
The second Battle Ring.
Wario carrying a Ram.
Wario fighting a Tree Freak.


Music[edit]
| File info |
| File info |
Names in other languages[edit]
| Language | Name | Meaning |
|---|---|---|
| Japanese | マメのきこうげん Mame no ki kōgen |
Beanstalk Plateau |
| French | Folie végétale |
Vegetal Madness |
| German | Rankenkletterei |
Tendril Climbing |
| Italian | Valle Rigogliosa |
Flourishing Valley |
| Spanish | Praderas Peligrosas |
Dangerous Meadows |