Horror Manor
| Wario World level | |
|---|---|
| Horror Manor | |

| |
| World | Spooktastic World |
| Neighbor level | Wonky Circus |
| Red diamond requirement |
4 |
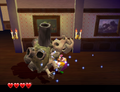
| Boss | Brawl Doll |
| << List of levels >> | |
Horror Manor is the third level Wario visits during the events of Wario World. It is the first level of Spooktastic World. This level has two major areas: the outside portion (a decaying forest, graveyard, and a courtyard), and the inside portion (the mansion interior and its basement). The mansion's interior is relatively normal-looking, but the basement of the manor contains many electrical hazards, traps, and giant cogs. This level introduces Swirly Slabs, which appear only in this level and Beanstalk Way. Wario must use a Wild Swing-Ding to raise them upward and reach higher places. The basic enemies here are skeletal versions of the ones that appeared in the first two levels. Wario must fight Brawl Doll at the end of this stage.
Layout[edit]
Wario starts the level on a pathway leading to the north with some graves and dead trees to the left and a large abyss on the right. Up ahead, he encounters some small Zombie Magons and the red Spriteling. After that, the pathway veers to the right and Wario is stopped by a Big Bone-Fist, which he must defeat to proceed. Further to the right are more small Zombie Magons, some large ones, and the red treasure button. From here, Wario approaches a fork in the road where he can either continue going to the right and progress toward the goal or go up a hill to the left and get more collectibles. Going up the hill takes him past some dead trees and the red treasure's spawn point and leads to a Glue Globe Ghost that rises out of the ground repeatedly. Clinging to it allows Wario to reach a narrow ledge, and walking across it takes him to both the yellow treasure button and the first trapdoor of the level, which houses both the first red diamond and the first Gold Statue part.
Back at the fork, the path to the right is narrow and features several small Zombie Magons. At the end of this path, Wario is forced into battle with a yellow Crystal Entity. There is a Swirly Slab nearby which Wario can use to access a Gold Statue part by performing a Wild Swing-Ding on it. Up ahead is a graveyard with Zombie Magons, statues, the yellow treasure's spawn point, and the second trapdoor. The sub-level within the trapdoor houses the yellow Spriteling alongside the red diamond. To the right of the graveyard are two paths, one going uphill and one going downhill. Most of the uphill path is blocked by a boarded door, but the chartreuse treasure button is on the left side of the door and can be pressed from here. In order to take the downhill path, Wario must take down another Big Bone-Fist. Past the Big Bone-Fist are two Bone Cractyls and a Gold Statue part on top of a post, which can be obtained by using the nearby Swirly Slab. At the bottom of the hill is a puddle with some Swordfish in it and a steel trapdoor. From here, Wario can either go straight towards the manor ahead or begin ascending the nearby tower by climbing up the staircase.
At the top of the staircase is a Garlic Dispenser and a ladder that leads further up the tower. From there, going to the left takes Wario past some small Zombie Magons and brings him to an area with a wooden chest and two Glue Globe Ghosts. The Glue Globe on the left leads to an area with three Bone Cractyls, the chartreuse treasure's spawn point, and a steel trapdoor, which contains the next Gold Statue part and red diamond. The Glue Globe on the left takes Wario to the next floor of the tower. Up here, there are small Zombie Magons, spiked balls, and another Glue Globe Ghost. The globe leads to the top of the tower, where the cyan treasure button is. However, going up here also triggers a battle with a red Crystal Entity, so Wario must take it down if he wants to press the treasure button.
The pathway to the manor leads past some small Zombie Magons and Skelosaurs. A Door Spirit blocks the way in; once it is defeated, Wario can enter the manor. The first room of the manor has an enemy generator and two Glue Globe Ghosts, both of which lead to the second floor. The green treasure button can be accessed by climbing on some chains. The cyan treasure chest's spawn point is up here as well, in the center of two electrical hazards. On the left, there is another Door Spirit. Defeating it opens access to a series of balconies which lead to the green Spriteling. Alternatively, this Spriteling can be accessed by jumping off the top of the tower where the red Crystal Entity was fought, and the manor can be entered from there. On the right is yet another Door Spirit, and defeating it is necessary to make progress. On the other side of the Door Spirit is a corridor which houses the blue Spriteling and a Skeletal Ankiron. At the end of the corridor, the way into the next room is guarded by a Silver Door Spirit. The next room has a wooden trapdoor in it, as well as some Bone Cractyls and a staircase. The blue treasure button is in the middle of the staircase. At the bottom, there is a wooden chest. There is a Silver Door Spirit to the left which guards a room with a big hole in the center. There is a Gold Statue part on the left side of this room, and dropping down the hole takes Wario into the basement.
Immediately upon entering the basement, Wario is placed in the middle of a Battle Ring. After fighting in the Battle Ring, there is nowhere to go but right, where there is a puddle with Swordfish in it, as well as some columns and a Garlic Dispenser. There is a Swirly Slab here which Wario must use to reach a nearby ledge. Up here is the green treasure's spawn point placed behind an electrical hazard and a Glue Globe Ghost which will take Wario further up, where the path splits. The path to the left takes Wario past two large mechanisms with spikes on the bottom end that he must avoid, and there is a gap at the end that Wario should clear with a Corkscrew Conk to reach the ledge on the other side, where there is a wooden trapdoor. The next Gold Statue part is inside. The path to the right takes Wario down a ladder and into another puddle with Swordfish as well as one Skelosaur. On the upper-right corner is a wooden chest. There is also a steel trapdoor here which contains another Gold Statue part and red diamond.
At the back of this area is a wheel with Glue Globes on it, and clinging to one allows Wario to ascend upward, where there are two more Glue Globes, one leading to the left and the other to the right. The left path isn't useful at this point, so Wario should go to the right. Going south leads past two electrical hazards. From there, the blue treasure's spawn point is to the left, and some Bone Cractyls and a wooden chest are to the right. From here, if Wario jumps down, he will end up in a pit with two enemy generators. The pink treasure button is at the upper-right corner of this pit. There is a Swirly Slab on the left that when raised, allows Wario to reach a ledge with a Skeletal Ankiron and a steel trapdoor, where the final red diamond and Gold Statue part are. By riding the Glue Globe wheel or cogs, Wario can reach a pair of chains with a platform in the middle, where the purple treasure button is. The corresponding chest can be found by returning to the Glue Globe wheel and going to the left, dodging the electrical hazards on the way. Back by the cogs, continuing to the right takes Wario to a ledge with two pounding spike hazards; the purple Spriteling is between them. The pink treasure's spawn point is below this ledge, behind an electrical hazard. The goal trapdoor is further south. There is a set of Glue Globes to the right that lead to a Garlic Dispenser if the player wishes to replenish Wario's health before fighting the boss.
If Wario reenters the level after defeating the boss, there will be a set of ByeBye Balloons at the beginning that will take him to the first room of the manor, in between the enemy generators.
Enemies[edit]
- Zombie Magons
- Bone Cractyls
- Swordfish
- Skelosaurs
- Door Spirits
- Enemy generators
- Skeletal Ankirons
- Silver Door Spirits
- Yellow Crystal Entity
- Red Crystal Entity
- Big Bone-Fist
- Brawl Doll (Boss)
Red diamond sub-levels[edit]
| # | Image | Location | Description |
|---|---|---|---|
| 1 | 
|
On a narrow ledge on the far left end of the level, accessed via a Glue Globe Ghost near the red treasure button and its corresponding chest. | In this room, Wario must weave through a miniature maze of blocks. On top of the block maze are both the red diamond and a Gold Statue part. |
| 2 | 
|
In the graveyard near where the yellow Crystal Entity is fought. | This room features platforms that rise upward when Wario hits the levers. Wario needs to hit each lever and then quickly jump to the corresponding platform so he can reach the top, where the red diamond and yellow Spriteling are. |
| 3 | 
|
In the Swordfish puddle near the tower to the left of the manor. | This sub-level has a ring of floating cubic platforms rotating in a counter-clockwise fashion. Wario should hop across them clockwise in order to avoid the spiked balls on the right. The red diamond is on the other side. There is also a platform that will take Wario to a wooden chest in the center which contains garlic. |
| 4 | 
|
In the area with Bone Cractyls to the left of the tower, accessed via a Glue Globe Ghost. | Wario must cross two sets of platforms that continuously change formation. They start out in horizontal lines, they change to a diagonal formation, then vertical, then diagonal again, then back to horizontal. In the middle is a Gold Statue part, and at the end is the red diamond. |
| 5 | 
|
Inside the manor, near a staircase. | A small room with some electrical currents that serve as hazards. The red diamond is in the center. The wooden chest contains garlic. |
| 6 | 
|
On a ledge near the Battle Ring, accessed by leaping across a gap from a platform with two large spike hazards. | To reach the red diamond and Gold Statue part here, Wario must platform across small floating blocks which rotate in an alternating pattern. |
| 7 | 
|
In a puddle with Swordfish and a Skelosaur, near the Glue Globe wheel in the basement. | This sub-level has numerous evenly-spaced out platforms that move in unison. Some of the platforms are made of ice and therefore slippery. The red diamond and Gold Statue part are at the end. |
| 8 | 
|
On a ledge in between the Glue Globe wheel and cogs in the basement. | Wario needs to platform across several small blocks of varying size to reach the red diamond and Gold Statue part at the end. |
Gold Statue parts[edit]
- Inside the first red diamond sub-level.
- Accessed by raising the first Swirly Slab in the level, near where the yellow Crystal Entity is fought.
- On top of a post with two Bone Cractyls near it, accessed by raising a Swirly Slab.
- Inside the fourth red-diamond sub-level.
- On the left side of the room in the manor with the hole in the center.
- Inside the sixth red diamond sub-level.
- Inside the seventh red diamond sub-level.
- Inside the eighth red diamond sub-level.
Treasures[edit]
| Color | Treasure | Image | Button location | Chest location |
|---|---|---|---|---|
| Red | Candlestick | Near the beginning of the level, right after the first Big Bone-Fist. | On a ledge behind where the treasure button is. | |
| Yellow | Silver Candlestick | On a narrow ledge on the far left end of the level, accessed via a Glue Globe Ghost near the red treasure button and its corresponding chest. | In the graveyard near where the yellow Crystal Entity is fought. | |
| Chartreuse | Forest Painting | To the right of the graveyard, in front of a boarded door. | In the area with Bone Cractyls to the left of the tower, accessed via a Glue Globe Ghost. | |
| Green | Castle Painting | On the second floor of the manor, on a ledge between two chains. | Behind an electrical hazard near a Glue Globe Ghost in the basement. | |
| Cyan | Crystal Ball | 
|
At the top of the tower near the entrance to the manor. | On the second floor of the manor, between two electrical hazards. |
| Blue | Knight's Helmet | On a staircase inside the manor. | Accessed by clinging to the Glue Globe wheel in the basement, then taking the Glue Globe to the high platform on the right. The chest is south, past two electrical hazards. | |
| Purple | Gladiator's Helmet | On a platform between two chains above the Glue Globe cogs in the basement. | Accessed by clinging to the Glue Globe wheel in the basement, then taking the Glue Globe to the high platform on the left. The chest is south, past two electrical hazards. | |
| Pink | Ornate Bag | In a pit with two enemy generators in front of the Glue Globe cogs the basement. | Behind an electrical hazard near the goal. |
Spritelings[edit]
| Color | Location | Dialogue |
|---|---|---|
| Red | Near the start of the level. | "You've gotta beat the Big Bone-Fist up ahead or you can't move on! That thing is bad! If you watch carefully, though, it'll reveal its weak point directly after its slam attack!" |
| Yellow | Inside the second red diamond sub-level. | "Looks like the Swirly Slabs can move! Those spiral designs remind me of spinning in circles. Why is that, do you think?" |
| Green | On a balcony outside the manor, accessible by either defeating a Door Spirit inside the manor or jumping off of the top of the tower. | "Use Hyper Suction by pressing the L Button to suck up lots of coins at one time! Use this trick to grab coins really fast!" |
| Blue | Sitting in a corridor inside the manor. | "Oh yeah! Once you get a Wild Swing-Ding going, Autospin will kick in! Once it does, you'll rotate automatically even if you stop rotating the Control Stick! And you can even move while spinning! You don't mind being dizzy, do you, Wario?" |
| Purple | On a ledge near the goal, between two pounding spike hazards. | "Yikes! Brawl Doll is waiting inside the Goal! It's floating in the air, so it'll be hard to punch... You should do a Corkscrew Conk by pressing the A Button during a Dash Attack!" |
Gallery[edit]
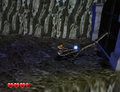
The first Big Bone-Fist

Wario being chased by Unithorns in Unithorn's Lair

Wario raising a Swirly Slab
Wario about to Mega Toss a Skeletal Ankiron into a Silver Door Spirit
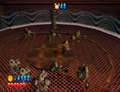
The Battle Ring
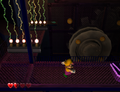
The mechanical basement


Music[edit]
Horror Manor has two background music tracks. One plays during the outdoor portion of the level, while the other one plays once Wario enters the manor.
Names in other languages[edit]
| Language | Name | Meaning | Note(s) | Ref. |
|---|---|---|---|---|
| Japanese | ホラホラハウス Horahora Hausu |
Reduplication of「ホラー」(horā, "horror") + English word "house" | [?] | |
| French | Maison de l'horreur | Horror House | [?] | |
| German | Horror Haus | Horror House | [?] | |
| Italian | Reggia Lugubre | Gloomy Palace | [?] | |
| Spanish | Mansión del Horror | Mansion of Horror | [?] |