Greenhorn Ruins
| Wario World level | |
|---|---|
| Greenhorn Ruins | |

| |
| World | Excitement Central |
| Neighbor level | Greenhorn Forest |
| Red diamond requirement |
3 |
| Boss | Sandworm |
| << List of levels >> | |
Greenhorn Ruins is the second level of Wario World as well as the second level of Excitement Central. This stage is, as the name implies, an old-looking building. Some other details include leafage and waterfalls. Here, Wario makes use of the Wild Swing-Ding move to turn Swirly Spinners and Glue Globes or chains to climb walls. This level introduces several elements that will recur throughout the game, such as enemy generators, Crystal Entities, Battle Rings, and most notably, steel trapdoors, which require a Piledriver to open and house vast, platform-centric, sky-based sub-levels, unlike the small underground rooms hidden beneath wooden trapdoors.
Layout[edit]
Immediately upon entering the level, there is a Rock Block behind Wario which can be used to climb up to a higher ledge where the red treasure button sits. After hitting it, a treasure chest appears inside the Rock Block and can be obtained by breaking it. To the right are more Rock Blocks, and breaking them reveals both the yellow treasure button and the spawn point for its corresponding chest. Behind the blocks is a ladder that leads to an area with some small Magons and a pedestal with the red Spriteling on it. Further ahead are more Magons and the yellow Spriteling on another pedestal, as well as a wooden chest. Beyond the yellow Spriteling is a gate, which is operated by a Swirly Spinner. Wario must pick up one of the nearby Magons and perform a clockwise Wild Swing-Ding to turn the spinner and open the gate. The gate leads to a stairwell where the chartreuse treasure button can be found. At the top of the stairwell is an open area with some columns, a statue, and two Magon-spawning enemy generators. Further north is an area with three Clubosaurs and the first trapdoor in the level, which is also the first steel trapdoor. The sub-level beneath the trapdoor houses both the first red diamond and the first Gold Statue part of the level.
To the left of the trapdoor is a staircase which takes Wario to where the green Spriteling is. Near the Spriteling are some Magons and a set of Glue Globes which takes Wario to a higher level. After climbing the Glue Globes, Wario can simply proceed further into the level by continuing upward, but there is area to the left with more collectibles. This area has Magons, Cractyls, a Garlic Dispenser, and a wooden trapdoor. To the south are some narrow paths with small Magons on them which lead to the green treasure spawn point. Further south is the chartreuse treasure spawn point. Back by the Glue Globes, Wario can continue climbing upward to reach a climbable chain, which takes him even further up. This leads Wario to a circular arena where he is forced into a battle with a red Crystal Entity. After defeating it, Wario can climb down another set of chains to reach an area with some Magons and an Old Red-Mug. At the bottom-left corner of this small area is the green treasure button, and defeating the Old Red-Mug creates a shortcut back to the area where the corresponding chest spawns.
To the right of this area is a small pit with an arch of Glue Globes over it. If Wario falls into the pit, two Clubosaurs will spawn, but Wario can easily get out of the pit using a Glue Globe to the left. The arch of Glue Globes can be used to get over the pit while collecting a Gold Statue part in the process. From here, going to the right takes Wario to a stairway of sorts with platforms and Glue Globes which contains both the cyan treasure spawn point and a Garlic Dispenser. At the bottom of this section are some Magons and Clubosaurs. To the left is a Swirly Spinner, which opens a gate. Beyond the gate is an area with an enemy generator and some Glue Globes that lead to a Gold Statue part. The blue treasure button is at the bottom left of this area, and taking down the Old Red-Mug on the left creates a bridge to where the treasure chest spawns.
Back by the Swirly Spinner, there is a platform to the right with an Ankiron and the cyan treasure button, and to the right of those are some Rock Blocks which conceal a wooden trapdoor, which houses the fourth Gold Statue part. Near here, there are some Glue Globes which Wario can climb to reach another wooden trapdoor, the blue Spriteling, and the game's first Battle Ring. After fighting in the Battle Ring, Wario can proceed to the right and climb down a chain to reach an area with an enemy generator and a steel trapdoor, which holds another Gold Statue part. There is an Old Red-Mug on the right which blocks the path ahead; defeating it opens the way to the next part of this area, which has another enemy generator, a gate, and some Rock Blocks to the right. Climbing on the Rock Blocks allows Wario to reach an elevated platform where the purple treasure button is, and breaking the blocks reveals the pink treasure button and another steel trapdoor with a Gold Statue part inside.
In order to proceed, Wario must open the gate by turning the Swirly Spinner, exposing a ladder. After climbing it, there is a lone Glue Globe can be used to climb onto a platform with an Ankiron and a wooden trapdoor. There are Glue Globes on both the left and right sides of this platform; the one on the left takes Wario to the purple treasure's spawn point, while the ones on the right lead to a Garlic Dispenser, two Clubosaurs, small Magons, Cractyls, and the purple Spriteling. South of the Spriteling is the pink treasure's spawn point, and to the right is the goal point as well as a steel trapdoor housing the final red diamond and Gold Statue part.
If Wario reenters the level after defeating the boss, there will be a set of ByeBye Balloons at the beginning that will place him after the Clubosaurs pit with an arch of Glue Globes over it.
Enemies[edit]
Red diamond sub-levels[edit]
| # | Image | Location | Description |
|---|---|---|---|
| 1 | 
|
In an area with some Clubosaurs, to the north of the first two enemy generators. | The first of the "sky" sub-levels in the game; this area starts with a winding path that can be either walked across or jumped across. After that, there is a lever-activated Glue Globe on a stick that takes Wario to a platform with a Gold Statue part on it. Ahead are some pairs of cubic platforms rotating around each other. The red diamond is at the end. |
| 2 | 
|
In an area with Magons, Cractyls, and a Garlic Dispenser accessed by climbing the first set of Glue Globes. | A room with rings of coins, rotating spiked balls, and a chest with garlic in it. The red diamond is in the center. |
| 3 | 
|
To the right of the cyan treasure button, past some Rock Blocks. | This room has a tower made of blocks in the middle with some spiked balls rotating around it. There's a wooden chest with garlic in it, and the red diamond is at the top. |
| 4 | 
|
To the left of the Battle Ring. | To reach the top of the platform on the right where the red diamond and Gold Statue part are, Wario simply needs to punch the Arrow Block from the left side so it collides with the stack of blocks on the right. |
| 5 | 
|
In an area with an enemy generator and an Old Red-Mug, shortly after the Battle Ring. | This sub-level consists largely of cog-like platforms that rotate in different directions. Wario must travel across these platforms to reach the red diamond and Gold Statue part at the end. |
| 6 | 
|
To the right of some Rock Blocks near the third Swirly Spinner-operated gate. | In this sub-level, there is a trail in the middle with a Gold Statue part at the end. Several narrow platforms with spiked balls on them move back and forth from the center of the trail. Afterward, there are some platforms that rotate vertically around each other which lead to the red diamond. |
| 7 | 
|
In an area to the left of where the goal is, behind an Ankiron. | This room is filled with statues. The red diamond is hidden underneath one, and a Gold Statue part is under another. The sounds that these collectables emit can be used to find them more easily. |
| 8 | 
|
Near the goal. | This area has a large cluster of blocks moving in a wave-like pattern. Traveling across them takes Wario to the red diamond and Gold Statue part. |
Gold Statue parts[edit]
- Inside the first red-diamond sub-level.
- Above the arch of Glue Globes to the right of where the first Old Red-Mug is.
- To the left of the second Swirly Spinner-operated gate, accessed by climbing on some Glue Globes.
- Inside the fourth red-diamond sub-level.
- Inside the fifth red-diamond sub-level.
- Inside the sixth red-diamond sub-level.
- Inside the seventh red-diamond sub-level.
- Inside the eighth red-diamond sub-level.
Treasures[edit]
| Color | Treasure | Image | Button location | Chest location |
|---|---|---|---|---|
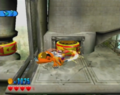
| Red | Porcelain Urn | Up on a ledge at the start of the level. The nearby Rock Block must be intact to access it. | Inside the Rock Block near the ledge where the treasure button is. | |
| Yellow | Fine China | Hidden within the cluster of Rock Blocks near the beginning of the level. | Close to the treasure button, also hidden inside a Rock Block. | |
| Chartreuse | Ceramic Vase | By the staircase beyond the first Swirly Spinner-operated gate. | South of the area where the first wooden trapdoor and Garlic Dispenser are, beyond some narrow paths with small Magons and the green treasure spawn point. | |
| Green | Teapot | 
|
In the bottom-left corner of the area where the first Old Red-Mug is, below where the Crystal Entity is fought. | South of the area where the first wooden trapdoor and Garlic Dispenser are, past the first of the narrow paths with small Magons. |
| Cyan | Vase | To the right of the second Swirly Spinner-operated gate, near an Ankiron. | In the vertical passage connecting the area with an arch of Glue Globes over a pit and the area where the treasure button is. | |
| Blue | Precious Pot | 
|
To the left of the second Swirly Spinner-operated gate. | Near the first set of Glue Globes, easily reached from where the treasure button is by defeating the nearby Old Red-Mug. |
| Purple | Lucky Figurine | On a platform near the third Swirly Spinner-operated gate, accessed by climbing on some Rock Blocks. | On a platform to the left of where the second-to-last (and final wooden) trapdoor is. | |
| Pink | NES | Hidden behind some Rock Blocks near the third Swirly Spinner-operated gate. | Close to the goal, south of the pedestal where the purple Spriteling is found. |
Spritelings[edit]
| Color | Location | Dialogue |
|---|---|---|
| Red | On a pedestal near the start of the level. | "If you're surrounded by monsters, pull out a Mad Move and knock them out with one blow! When you're holding a monster up in the air, rotate the Control Stick to do a Wild Swing-Ding! If you jump and press the R Button while holding a foe, you'll do a Piledriver! It's earth-shaking!" |
| Yellow | On a pedestal shortly to the right of the red Spriteling. | "The Wild Swing-Ding is a spinning move! And the Piledriver is a Ground Pound move! Master the finer points of these two Mad Moves to turn gears, break down iron doors, and ! Use your head, Wario!" |
| Green | On a pedestal near the first trapdoor. | "Using the Glue Globes on the walls up ahead, you can jump and stick to the walls! When you see these sticky orbs, try some of your moves! When jumping to a Glue Globe, check your footing, mark your goal, and then jump! It takes practice, so don't get frustrated, OK?" |
| Blue | On a pedestal next to the Battle Ring. | "There's a Battle Ring up ahead! One-minute battles begin when you enter Battle Rings! Fight everything that enters the ring! The number of coins you get depends on the number of monsters you defeat, so fight hard!" |
| Purple | On a pedestal near the goal. | "Many more of my friends are being held against their will up ahead! If you see any of them, I'd really appreciate it if you'd save them! You'll be rewarded for coming to their aid, of course, Wario! We know how you like rewards! So, um...OK! Off you go, Wario!" |
Gallery[edit]
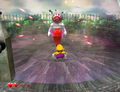
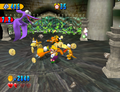
Wario fighting the Crystal Entity.
Wario jumping across Glue Globes.
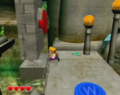
Wario opening a Swirly Spinner-operated gate.
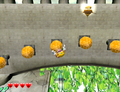
An Old Red-Mug.
The Battle Ring.


Music[edit]
| File info |
Names in other languages[edit]
| Language | Name | Meaning | Note(s) | Ref. |
|---|---|---|---|---|
| Japanese | はじまりのいせき Hajimari no Iseki |
Beginning Ruins | [?] | |
| French | Ruines des débuts | Ruins of Beginning | [?] | |
| German | Dino-Arkaden | Dinosaur Arcades | [?] | |
| Italian | Rovine Sommerse | Underwater Ruins | [?] | |
| Spanish | Acuápolis | Aquapolis | [?] |
Notes[edit]
- An arrangement of this level's music is used for Glittertown in Wario Land: Shake It!