Greenhorn Forest
| Wario World level | |
|---|---|
| Greenhorn Forest | |

| |
| World | Excitement Central |
| Neighbor level | Greenhorn Ruins |
| Red diamond requirement |
3 |
| Boss | Greenfist |
| << List of levels >> | |
Greenhorn Forest is the first level of Wario World as well as the first level of Excitement Central. The stage is set in a forest, where basic enemies are fought and the mechanics of the game are explained. The collectibles are relatively easy to find as well. The level's name refers to this; "greenhorn" being a term for an inexperienced person.
An arrangement of the music to Greenhorn Forest appears in Mario Power Tennis, where it plays on the Wario Factory Court. The theme receives another rendition on Dance Dance Revolution: Mario Mix, featured under the title "Starring Wario!". It is the song featured in level 3-4, when Mario engages in a dance-off against Wario.
Layout[edit]
The level begins in a bushy area with some tree stumps. Shortly to the right is a climbable tree that leads to a wooden platform with some Magons and columns. The pink treasure button and its corresponding chest are also on this ledge. To the right of the climbable tree is an imprisoned red Spriteling, who Wario automatically rescues. Ahead of the Spriteling are some tree stumps that Wario must jump over, leading to the first Gold Statue part. After that, Wario comes to an area with some Magons. Behind them is a climbable tree stump leading to another Gold Statue part. To the right are more Magons, along with the red treasure button, its corresponding chest, and a wooden chest all right next to each other. Further ahead is an area with wooden platforms and climbable poles. Down below is another wooden chest as well as the yellow treasure button. The yellow treasure's spawn point is up above on a wooden platform. Past the poles are more Magons, the yellow Spriteling, and a trapdoor leading to the first sub-level in the game, which houses both the first red diamond and a Gold Statue part.
To the right of the trapdoor is a Garlic Dispenser and an area with some Rock Blocks and another trapdoor. Inside the trapdoor is another red diamond and Gold Statue part. Beyond the blocks is the green treasure's spawn point and a Bunny Spring that leads to an area with the green Spriteling, a Clubosaur, and the third trapdoor. To the left of the trapdoor is a wooden chest, and even further left is another Bunny Spring, which leads to area with some Cractyls and another trapdoor, which has another red diamond and Gold Statue part inside. Near the trapdoor is the chartreuse treasure's spawn point and a climbable tree. The climbable tree leads to two sets of wooden platforms. The platforms to the left have Magons, a Clubosaur, and the chartreuse treasure button. The platforms to the right lead to a Gold Statue part, some Magons, and the green treasure button. If Wario drops down from where this treasure button is, he will end up back by the third trapdoor.
Up ahead are some Magons and a Garlic Dispenser. Further ahead is a puddle with even more Magons and two large rocks. The rock on the left has a Gold Statue part hovering over it, while the rock on the right has a trapdoor on it. Behind the puddle is a wooden chest and a climbable tree which leads to a wooden platform with two Clubosaurs, two statues, and the cyan treasure button. To the right of the puddle is a Bunny Spring which Wario can use to get over some fallen logs. Beyond the logs are some Cractyls, the cyan treasure chest, the purple treasure's spawn point, and the blue Spriteling. Behind a fallen log near the Spriteling is a trapdoor. Ahead are two bridges, but whichever bridge Wario tries to cross first will break, dropping him into Unithorn's Lair. However, it is possible to avoid falling with a well timed Corkscrew Conk. The bridges lead to an area with a Garlic Dispenser, the purple Spriteling, and the goal. As long as Wario has at least three red diamonds, he can remove the Stone Doohickey and fight the boss, but there are more collectibles beyond this area.
Past the goal, there are some Rock Blocks, the blue treasure button, and a trapdoor. Further ahead are some Magons, a Clubosaur, and a wooden chest. Behind the chest is a climbable tree which leads up to a half of a log laid out like a bridge. Wario can jump off of the log to land on a tall stump with the purple treasure button. Going left from the half log leads to an area with Clubosaurs, Magons, and the final trapdoor, housing the final red diamond in the level as well the final Gold Statue part. To the left of this area is a thinner half log which leads to a wooden platform with Magons, an Ankiron, and the blue treasure's spawn point.
If Wario reenters the level after defeating the boss, there will be a set of ByeBye Balloons at the beginning that will take him to where the fourth trapdoor is.
Enemies[edit]
- Magons
- Clubosaurs
- Cractyls
- Ankirons
- Greenfist (Boss)
Red diamond sub-levels[edit]
| # | Image | Location | Description |
|---|---|---|---|
| 1 | 
|
To the right of the first area with climbable poles. | The first red diamond sub-level of the game; it has a simple layout. All Wario needs to do is hop across two Drop Blocks to reach the diamond, as well as a Gold Statue part. |
| 2 | 
|
In the first area with Rock Blocks. | A simple room with some stationary platforms. There is a Gold Statue part in this sub-level as well. |
| 3 | 
|
After the first Bunny Spring, near where the green Spriteling is rescued. | A room with three stacks of Rock Blocks. By breaking four of the blocks on either the left or right stacks (but not both) and two of the blocks on the middle stack, Wario can platform on them to reach a floating platform with the red diamond and a chest with garlic in it. |
| 4 | 
|
In the area with Cractyls to the left of the third trapdoor and green Spriteling, accessed via Bunny Spring. | The centerpiece of this sub-level is a large cube of Rock Blocks. A Gold Statue part is on top of the cluster, while the red diamond in the center of it. There are many ways to reach the center, but the quickest is break two of the blocks directly in front of where Wario starts, then Ground Pound the blocks behind them. |
| 5 | 
|
On the right rock in the big puddle with Magons. | This sub-level features a Glue Globe which moves back and forth through a ring with a spiked ball in the middle. Wario must grab the Glue Globe and position himself so that he goes through the open part of the ring. The Glue Globe will take Wario to a platform with the red diamond and a wooden chest with garlic in it. |
| 6 | 
|
Behind a fallen log before the two bridges that lead to where the goal is. | A very basic room. All Wario needs to do is hit the lever to raise the platforms, which lead to a wooden chest and the red diamond. |
| 7 | 
|
Beyond the goal, between two sets of Rock Blocks. | This room has an L-shaped platform and two levers that control it. Pressing the left lever twice and the right lever three times places the platform in the position that it can be used to reach the red diamond and a wooden chest with garlic in it. |
| 8 | 
|
Beyond the goal, in an area with some Clubosaurs and Magons. | This room has spiked balls circling a platform, which has the red diamond and a Gold Statue part on it. Wario must cling onto the platform then jump quickly to avoid getting hit. |
Gold Statue parts[edit]
- Over a tree stump in front of the second waterfall.
- Over a tree stump behind some Magons, shortly after the first part.
- Inside the first red diamond sub-level.
- Inside the second red diamond sub-level.
- Inside the fourth red diamond sub-level.
- Accessed by climbing the tree near the fourth trapdoor and going to the right.
- Above the left rock in the big puddle with Magons.
- Inside the eighth red diamond sub-level.
Treasures[edit]
| Color | Treasure | Image | Button location | Chest location |
|---|---|---|---|---|
| Red | Ruby | On a tree stump next to a wooden chest before the first area with climbable poles. | Right next to the treasure button. | |
| Yellow | Opal | 
|
In the bottom section of the first area with climbable poles. | On a wooden platform at the top of this section. |
| Chartreuse | Amethyst | 
|
On a wooden platform with Magons and a Clubosaur, accessed by climbing the tree near the fourth trapdoor and going to the left. | Next to the climbable tree near the fourth trapdoor. |
| Green | Amber | On a wooden platform with Magons, accessed by climbing the tree near the fourth trapdoor and going to the right. | Next to the first Bunny Spring. | |
| Cyan | Sapphire | On a wooden platform with two Clubosaurs, accessed by climbing the tree near the big puddle with Magons. | On a tree stump in the area to the right of the Magon puddle. | |
| Blue | Topaz | 
|
Beyond the goal, between two sets of Rock Blocks. | On a wooden platform above the goal. |
| Purple | Emerald | On top of a tall stump to the right of where the goal is. | Near the two bridges that lead to where the goal is. | |
| Pink | Diamond | 
|
On a wooden platform at the top of a climbable tree near the beginning of the level. | Same area as the treasure button. |
Spritelings[edit]
| Color | Location | Dialogue |
|---|---|---|
| Red | On a tree stump near the beginning of the level. Rescued by Wario automatically. | "Wario! Hi! I've been waiting for you! I'm one of the Spritelings of the forest! I have really bad news. That evil black jewel you stole is sucking up all of the negative greed energy swirling around in your castle, and terrible things are starting to happen! Honest! If you wanna survive, press the A Button to jump and the B Button to punch! Also, press the B Button to pick up and hurl KO'd monsters! Practice up, OK?" |
| Yellow | To the right of the first area with climbable poles, near the first trapdoor of the level. | "Listen, eventually you're going to have to deal with the Stone Doohickey that sits on the Goal. To get rid of it, you've gotta collect a certain number of red diamonds. Below every ground hatch is a sub-level that holds one! Jump and then press the R Button to do a Ground Pound. You can crash through most hatches this way! For this area, you only need three diamonds!" |
| Green | On a tree stump right after the first Bunny Spring. | "Wario, are you using the B Button correctly? First, hold down the B Button for a Dash Attack! Just face the direction you want to dash and then charge!! One more thing: While holding a monster above your head, hold down the B Button then release it for a Mega Toss! This is great for KO'ing monsters that can survive ordinary throws!" |
| Blue | Before the two bridges that lead to where the goal is. | "Careful, Wario! All the cliffs and deep chasms around here are really, really, dangerous! If you fall, you'll land in Unithorn's Lair! Scary! You'll lose coins as long as you're in Unithorn's Lair, so if you fall in, you'd better hurry up and find the Escape Spring before you go broke!" |
| Purple | Near the goal. | "Hey! There's the Goal, Wario! If you've found enough red diamonds, the Stone Doohickey blocking the way will vanish! If not, the ByeBye Balloons can take you back to the Start Point! Up ahead, the diamonds you need will appear more frequently. If you want to know how many you have, just press START/PAUSE and check your inventory screen. OK? OK!" |
Gallery[edit]
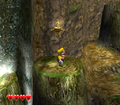
Wario about to obtain a Gold Statue part
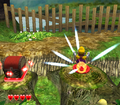
Wario Ground Pounding a treasure button
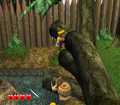
Wario bouncing off of a Bunny Spring
Wario in between some Rock Blocks
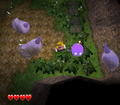
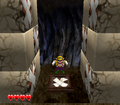
Unithorn's Lair


Music[edit]
| File info |
Names in other languages[edit]
| Language | Name | Meaning | Note(s) | Ref. |
|---|---|---|---|---|
| Japanese | はじまりのもり Hajimari no Mori |
Forest of Beginnings; a reference to Famicom Bunko: Hajimari no Mori | [?] | |
| French | Forêt des débuts | Forest of Beginning | [?] | |
| German | Wunderlicher Wald | Strange Forest | [?] | |
| Italian | Foresta Arcaica | Archaic Forest | [?] | |
| Spanish | Bosque Entroncado | Entangled Forest | [?] |