Mario Golf: Toadstool Tour: Difference between revisions
mNo edit summary |
Tag: Rollback |
||
| (323 intermediate revisions by more than 100 users not shown) | |||
| Line 1: | Line 1: | ||
{{italic title}} | {{italic title}} | ||
{{ | {{game infobox | ||
|image=[[File:Mario Golf Toadstool Tour.jpg|250px]]<br>American box art | |||
|image=[[File: | |||
|developer=[[Camelot Software Planning]] | |developer=[[Camelot Software Planning]] | ||
|publisher=[[Nintendo]] | |publisher=[[Nintendo]] | ||
| | |release='''Original Release:'''<br>{{release|USA|July 28, 2003|Japan|September 5, 2003|Australia|February 11, 2004|Europe|June 18, 2004<ref>[http://themushroomkingdom.net/games/mgtt Date info of Mario Golf: Toadstool Tour from TMK], retrieved 11/26/2012</ref>}} '''[[Player's Choice|Player's Choice Release]]:'''<br>{{release|USA|2004|Australia|2005}} | ||
|languages={{languages|en_us=y|es_es=y|fr_fr=y|de=y|it=y|jp=y}} | |||
|genre=[[Mario Golf (series)|Golf]] | |genre=[[Mario Golf (series)|Golf]] | ||
|modes= | |modes=1–4 players | ||
|ratings={{ratings|esrb=E|pegi=3|cero=A|acb=G}} | |ratings={{ratings|esrb=E|pegi=3|cero=A|acb=G}} | ||
|platforms=[[Nintendo GameCube]] | |platforms=[[Nintendo GameCube]] | ||
|media={{ | |media={{media|gcn=1}} | ||
|input={{input| | |input={{input|gcn=1}} | ||
}} | }} | ||
'''''Mario Golf: Toadstool Tour''''' is the third game in the ''[[Mario Golf (series)|Mario Golf]]'' series ( | '''''Mario Golf: Toadstool Tour''''' is a [[Nintendo GameCube]] game that is the third game in the ''[[Mario Golf (series)|Mario Golf]]'' series and the second home console installment. Its handheld console counterpart is ''[[Mario Golf: Advance Tour]]'' on the [[Game Boy Advance]]. About a year after its release, ''Mario Golf: Toadstool Tour'' earned a [[Player's Choice]] re-release in North America in 2004 and Australia in 2005. It is the first ''[[Super Mario (franchise)|Super Mario]]'' spinoff to include substantial content from ''[[Super Mario Sunshine]]'' (released the previous year), such as [[Bowser Jr.]], [[Shadow Mario]], and [[Petey Piranha]] making their respective second appearance overall and playable debut; it is also the first to include [[Diddy Kong]] from the ''[[Donkey Kong (franchise)|Donkey Kong]]'' games, effectively taking [[Donkey Kong Jr.]]'s previous role as secondary ''Donkey Kong'' character in ''Super Mario'' games following the acquisition of ''[[Donkey Kong Country]]'' assets from [[Rare Ltd.]] | ||
==Opening cinematic== | |||
[[File:MGTT Luigi's Shot Intro Screenshot.png|thumb|left|150px|Daisy, Peach, Luigi, and Mario celebrating the results of excellent tee shots.]] | |||
The game's opening starts with [[Mario]] and [[Luigi]] looking at a [[trophy]] and commenting on how nice it looks. [[Princess Peach|Peach]] and [[Princess Daisy|Daisy]] call on the brothers, exclaiming that it is time to play as the four form a quartet and go on an exploration in freestyle exhibition golf. Peach gets her turn first, then comes Mario, then comes Daisy, and last comes Luigi, whose shot strikes the flagpole of the hole, impressing the crew. [[Wario]] and [[Waluigi]] are shown from behind, extremely jealous of how well Mario, Luigi, Peach, and Daisy do. The two hear a noise and turn around to see [[Yoshi]] and [[Koopa Troopa]] entering the frame before they begin their round of golf. Wario and Waluigi clench their golf clubs while laughing, and prepare to join forces with them. They all take turns hitting their golf balls, and Yoshi hits near a [[Chain Chomp]]. When he tries to get it back, the Chain Chomp wakes up and barks at Yoshi, scaring him and making him fall over. Wario attempts to hit the ball out of the bunker, which causes sand to spray into Waluigi's face in recoil. Moments later, Waluigi attempts to putt the ball into the hole, but fails miserably after a few tries, resulting in Yoshi and Koopa Troopa dozing off. | |||
Meanwhile, [[Donkey Kong]] and [[Diddy Kong]] walk past the sleeping Yoshi and Koopa Troopa, so Wario and Waluigi attempt to challenge them next. After Donkey Kong shows his golf prowess, Wario, despite his terrible swing, attempts to hit the ball a long way, until it goes out of sight into the forest. Wario and Waluigi start celebrating until they hear an ominous roar. The ball unknowingly deflects back and lands in front of Wario. The two look up and see [[Bowser]] coming out of the forest, completely enraged because he has a black eye from the golf ball. Bowser gives chase after Wario and Waluigi in his [[Koopa Clown Car]] and starts throwing Bob-ombs at the two as they run around [[Lakitu Valley]] past [[Birdo]] and [[Boo]], who were playing a game of golf on their own. Wario and Waluigi find a yellow [[Warp Pipe]] that is too small for Bowser and his Koopa Clown Car to fit through and come out the other side of the pipe and stop to catch their breath. However, Bowser flies right above them seconds later, intending to drop another Bob-omb and making them run for their lives. | |||
[[File:MGTT Mario's Swing Intro Screenshot.png|thumb|150px|left|Mario attempting another shot as Daisy, Luigi, and Peach watch from behind.]] | |||
Meanwhile, Mario is preparing to take a shot on that same course with Luigi, Peach, and Daisy observing from behind. As Wario and Waluigi still try frantically to escape from Bowser's looming threat by going through an enormous metal door, Mario hits his ball with his golf club. Wario and Waluigi open the door and continue their escape attempt, but Mario's ball hits them, giving them black eyes as well. The ball then strikes Bowser, causing him to fumble the bomb. This ultimately results in an explosion claiming Wario, Waluigi, and Bowser as the victims. Mario, Luigi, Peach, and Daisy witness the explosion from afar, completely baffled in terms of what was the cause behind it. | |||
{{br}} | |||
===Screenshots=== | |||
<gallery> | |||
MGTTIntro1.png|Mario and Luigi are by the trophy. | |||
MGTT Peach Intro Screenshot.png|Peach makes her move. | |||
MGTT Daisy Intro Screenshot.png|Daisy makes her move. | |||
MGTTIntro4.png|Wario and Waluigi enter the frame. | |||
MGTTIntro7.png|Waluigi gets pumped up. | |||
MGTTIntro5.png|Donkey Kong and Diddy Kong see Yoshi and Koopa dozing off. | |||
MGTTIntro6.png|Donkey Kong makes his move. | |||
MGTTIntro8.png|Wario and Waluigi run from Bowser. | |||
MGTTIntro9.png|Mario, Luigi, Peach, and Daisy stroll around. | |||
</gallery> | |||
==Gameplay== | ==Gameplay== | ||
[[File:MGTT Gameplay.png|thumb|Gameplay of ''Mario Golf: Toadstool Tour'']] | |||
While playing fairly similarly to the previous two games, particularly ''[[Mario Golf (Nintendo 64)|Mario Golf]]'' for the [[Nintendo 64]], this game makes various additions and alterations to the formula present in both controls and visuals. The game uses 3D renders for the designs of characters and courses, like the previous home console game, allowing for the camera to be changed to view more of each hole in detail. Pressing {{button|gcn|X}} or {{button|gcn|Y}} allows the player to see an overview of the hole and study the topography of the both the course and specifically the green. In order to adjust their shot, the player can use the aforementioned controls and look around using {{button|gcn|C}}. The green also now displays moving topographic lines that follow down its path, increasing in speed the more the green slopes. A new control system has also been added, with manual and automatic swinging. The automatic swing is used by pressing {{button|gcn|A}} to set the power for the shot and then letting the game decide where the sweet spot marker ends up. A manual swing involves pressing {{button|gcn|B}} when choosing power, then pressing either {{button|gcn|A}} or {{button|gcn|B}} to set the sweet spot impact marker. This allows the use of a new feature, spin, to be used on shots. Backspin, topspin, super backspin or super topspin can be used, affecting the ball's line of movement on the ground. Topspin sends the ball rolling forward while backspin causes the ball to roll back; these spins make the ball roll a shorter distance than their super versions. Different characters' spin will be more powerful with higher spin levels. The ability to change where the ball is hit is also makes a return from the two previous games, allowing different types of shots to be taken. Approach shots, used when players approach the pin, appear in this game, as well as the limited number of [[Power Shot (Mario Golf series)|power shots]]. Power shots have longer drives than normal shots, and only six can be used at a time. If a player does a perfect power shot (meaning they have aligned the first bar at the far left and perfectly aligned the second bar), it is not used up. | |||
===Controls=== | ===Controls=== | ||
| Line 27: | Line 49: | ||
*{{button|gcn|L}} - Left-Handed Character | *{{button|gcn|L}} - Left-Handed Character | ||
*{{button|gcn|R}} - Star Character | *{{button|gcn|R}} - Star Character | ||
*{{button|gcn| | *{{button|gcn|X}} - Change Clubs (only available when data is transferred from ''[[Mario Golf: Advance Tour]]'') | ||
====Golf==== | ====Golf==== | ||
*{{button|gcn|A}} - Start Swing/Choose Power (automatic) | *{{button|gcn|A}} - Start Swing/Choose Power (automatic) | ||
| Line 42: | Line 64: | ||
*{{button|gcn|Pad}} / {{button|gcn|Stick}} - Change ball meet area | *{{button|gcn|Pad}} / {{button|gcn|Stick}} - Change ball meet area | ||
===Game | ===Scores=== | ||
Depending on how many strokes the player required to take to hit the ball into the hole, players receive a score and a name for the score. The following is a list of them, from best to worst scores: | |||
{| class=wikitable cellspacing=0 cellpadding=3 border=1 align=center width=100% style="text-align:center; border-collapse:collapse; font-family:Arial" | |||
|- | |||
!width=25% |Name | |||
!width=25% |Image | |||
!width=50% |Description | |||
|- | |||
|[[List of golfing terms#Hole-in-One|Hole-in-One]] | |||
|[[File:LuigiHIO.png|200px]] | |||
|The player has sunk the ball in the hole with one stroke. It is easiest to receive this result on a par 3, but it is possible to attain a Hole-in-One on a par 4 or 5 as well. | |||
|- | |||
|[[List of golfing terms#Albatross|Albatross]] | |||
|[[File:MGTT Petey Piranha Albatross.png|200px]] | |||
|The player has sunk the ball three below par. The game awards this for a score of 2 on a par 5, or 1 on a par 4. Without linking with ''Mario Golf: Advance Tour'', this is a very hard task; however, it is not as hard as a hole-in-one on a par 5 hole. | |||
|- | |||
|[[List of golfing terms#Eagle|Eagle]] | |||
|[[File:EagleDaisy.png|200px]] | |||
|The player has sunk the ball two below par. On a par 3, the game records this as a Hole-in-One instead. | |||
|- | |||
|[[List of golfing terms#Birdie|Birdie]] | |||
|[[File:MGTTPeachBirdieReaction.png|200px]] | |||
|The player has sunk the ball one below par. | |||
|- | |||
|[[List of golfing terms#Par|Par]] | |||
|[[File:Bowser Jr scoring a Par MGTT.png|200px]] | |||
|The player has sunk the ball with a neutral score for the hole. | |||
|- | |||
|[[List of golfing terms#Bogey|Bogey]] | |||
|[[File:DonkeyKongBogeyToadstoolTour.png|200px]] | |||
|The player has sunk the ball one above par. | |||
|- | |||
|[[List of golfing terms#Double Bogey or worse|Double Bogey, Triple Bogey, or worse]] | |||
|[[File:MGTT Yoshi and Wario Double Bogey.png|200px]] | |||
|The player has sunk the ball the number indicated above par. The highest score a player can take is equivalent to triple par (i.e. +6 for a par 3, +8 for a par 4, and +10 for a par 5). Selecting Give Up will penalize the player with a triple par score and retire the hole. | |||
|} | |||
* <b>NOTE</b>: The US version of the game has a glitch that records Hole-In-Ones on par 4 and 5 holes as Albatrosses. This is fixed in the PAL and Japanese versions. | |||
===Terrain, hazards, and other features=== | |||
{| class=wikitable cellspacing=0 cellpadding=3 border=1 align=center width=100% style="text-align:center; border-collapse:collapse; font-family:Arial" | |||
|- bgcolor=yellowgreen | |||
|colspan=3|'''Terrain''' | |||
|- | |||
!width=25% |Name | |||
!width=25% |Image | |||
!width=50% |Description | |||
|- | |||
|[[List of golfing terms#Fairway|Fairway]] | |||
|[[File:MGTT Fairway.png|200px]] | |||
|align=left|A large and common terrain that is the easiest to hit the ball from. It has no effect on the golf ball. | |||
|- | |||
|[[List of golfing terms#Fast Fairway|Fast Fairway]] | |||
|[[File:Fast Fairway.png|200px]] | |||
|align=left|Similar to fairway, except there is less friction between it and a regular fairway, meaning balls bounce farther and higher and roll more. | |||
|- | |||
|[[List of golfing terms#Green|Green]] | |||
|[[File:MGTT Green.png|200px]] | |||
|align=left|The terrain where the [[pin]], [[hole]], and flag are located. It is surrounded by a Fringe, and golfers need to use putters if they are on the green. | |||
|- | |||
|[[List of golfing terms#Tournament Green|Tournament Green]] | |||
|[[File:TournamentGreen.png|200px]] | |||
|align=left|Similar to regular greens, but, as with fast fairways, there is less friction in the ball, meaning it rolls farther. | |||
|- | |||
|[[List of golfing terms#Fringe|Fringe]] | |||
|[[File:MGTTFringe.png|200px]] | |||
|align=left|The area of grass surrounding the green, with a topography in-between the green and the fairway. | |||
|- | |||
|[[List of golfing terms#Bunker|Bunker]] | |||
|[[File:MGTT Bunker Screenshot.png|200px]] | |||
|align=left|The most common negatively affecting terrain, bunkers affect the ball's lie and the ability to hit the ball accurately. Sand wedges are typically used to get balls out of bunkers. | |||
|- | |||
|[[List of golfing terms#Beach Bunker|Beach Bunker]] | |||
|[[File:BBMGTT.png|200px]] | |||
|align=left|Found only in [[Blooper Bay]], these act similar to regular bunkers, except they do not negatively affect the ball's lie as much as them. As their name suggests, they are found next to the ocean. | |||
|- | |||
|[[List of golfing terms#Grass Bunker|Grass Bunker]] | |||
|[[File:GrassBunkerMGTT.png|200px]] | |||
|align=left|Found only in [[Bowser Badlands]], these bunkers are heavier than the heaviest rough and greatly affect a ball's lie. | |||
|- | |||
|[[List of golfing terms#Semi-Rough|Semi-Rough]] | |||
|[[File:MGTT SemiRough.png|200px]] | |||
|align=left|Semi-Rough is found in the fringe area, between fairways and the rough. They slightly affect the ball's lie. | |||
|- | |||
|[[List of golfing terms#Rough|Rough]] | |||
|[[File:MGTT Rough.png|200px]] | |||
|align=left|Roughs are deeper than the semi-rough. They affect the ball's lie more than semi-rough, but less than a bunker. | |||
|- | |||
|[[List of golfing terms#Heavy Rough|Heavy Rough]] | |||
|[[File:MGTT Heavy Rough.png|200px]] | |||
|align=left|The heaviest rough, these greatly affect the ball's lie, even more than a Bunker or Beach Bunker. They are located on the deepest areas of the rough, usually before an [[List of golfing terms#Out of Bounds|O.B.]] | |||
|- | |||
|[[List of golfing terms#Flower Patch|Flower Patch]] | |||
|[[File:MGTT Flower Patch.png|200px]] | |||
|align=left| Uncommon terrain that affects a ball's lie found only in [[Peach's Castle Grounds]], however, not as much as bunkers and the rough. Whenever a shot lands in a Flower Patch, [[Pikmin]] will be shot out, wailing. | |||
|- | |||
|[[List of golfing terms#Rock|Rock]] | |||
|[[File:RockMGTT.png|200px]] | |||
|align=left|Terrain that does not have much friction and causes balls to bounce out of it. When a ball lands on it, it hurts the ball's lie, though not as much as Grass Bunkers or Heavy Rough. | |||
|- | |||
|[[List of golfing terms#Brick|Brick]] | |||
|[[File:BrickMGTT.png|200px]] | |||
|align=left|Like Rock, terrain that does not have much friction and causes balls to bounce out of it, and also hurts the ball's lie. Brick has a very harsh, echoing ricochet sound. | |||
|- | |||
|[[List of golfing terms#Wood|Wood]] | |||
|[[File:MGTT Wood.png|200px]] | |||
|align=left|Similar to Rock, Pipe, or Brick, where the ball frequently bounces off of it. Like those three terrains, it also hurts the ball's lie. | |||
|- | |||
|[[List of golfing terms#Pipe|Pipe]] | |||
|[[File:PipeMGTT.png|200px]] | |||
|align=left|Terrain that also does not have much friction and causes balls to bounce out of it. Like Rock, Brick and Wood, it adversely affects the ball's lie. They are only found on [[Peach's Castle Grounds]], where they are usually used to transport balls from one part of a hole to another (similar to [[Warp Pipe]]s); however, some pipes are used as tunnels, where the ball will roll through the pipe and land out of the other side from where it entered (usually into rough). | |||
|- | |||
|[[List of golfing terms#Waste Area|Waste Area]] | |||
|[[File:WasteAreaMGTT.png|200px]] | |||
|align=left|Waste areas have high friction and prevent a ball from bouncing. They affect the ball's lie, though not as much as Rock. | |||
|- | |||
|[[List of golfing terms#Heath|Heath]] | |||
|[[File:HeathTerrain.png|200px]] | |||
|align=left|Found only in [[Bowser Badlands]], this terrain very heavily affects a ball's lie the most, moreso than the deep rough and grass bunkers. The player must time their shot perfectly if they want to get out of the heath. | |||
|} | |||
{|class=wikitable cellspacing=0 cellpadding=3 border=1 align=center width=100% style="text-align:center; border-collapse:collapse; font-family:Arial" | |||
|-bgcolor=salmon | |||
|colspan=3|'''Hazards''' | |||
|- | |||
!width=25% |Name | |||
!width=25% |Image | |||
!width=50% |Description | |||
|- | |||
|[[List of golfing terms#Out of Bounds|Out of Bounds]] | |||
|[[File:MGTT Out-of-Bounds.png|200px]] | |||
|align=left|These are designated areas of the course that players cannot land their balls in. These include endless pits, being too far off-course, water, lava, and areas with Chain Chomps occupied in. When players receive an O.B., they need to redo their shot with a cost of a stroke penalty. The hazard is signified by a [[Koopa Paratroopa]]. | |||
|- | |||
|Water Hazard | |||
|[[File:MGTT Water Hazard.png|200px]] | |||
|align=left|If a ball lands in water or lava, it is considered an [[List of golfing terms#Out of Bounds|O.B.]] and players need to reshoot the ball with a stroke penalty. The hazard is signified by a [[Lakitu]]. | |||
|- | |||
|Tree Hazard | |||
|[[File:TreeHazard.png|200px]] | |||
|align=left|If a ball gets stuck in a tree or lands too close to a tree, players need to reshoot the ball with a stroke penalty. | |||
|- | |||
|[[Warp Pipe]] | |||
|[[File:MGTTWarpPipe.png|200px]] | |||
|align=left|Warp Pipes warp balls to another location on the golf course. | |||
|- | |||
|Bouncing Mushroom | |||
|[[File:BouncingShroomMGTT.png|200px]] | |||
|align=left|Located only in [[Peach's Castle Grounds]]. Bouncing Mushrooms causes balls to bounce off of the mushroom. | |||
|- | |||
|[[Boo]] | |||
|[[File:BooHazardMGTT.png|200px]] | |||
|align=left|Located only in [[Bowser Badlands]], these enemies act as walls to flying balls, slowing or stopping a ball's progress through the air. | |||
|- | |||
|[[Thwomp]] | |||
|[[File:MGTT Thwomp.png|200px]] | |||
|align=left|Located only in [[Bowser Badlands]], if a ball rolls underneath a Thwomp, the Thwomp smashes the ball, which heavily hurts its lie. Thwomps also act as walls to block balls. | |||
|- | |||
|[[Whomp]] | |||
|[[File:MGTT Whomp Screenshot.png|200px]] | |||
|align=left|Located only on holes 16 and 17 of [[Bowser Badlands]], Whomps squish the ball, causing the player to get a stroke penalty. | |||
|- | |||
|[[Bob-omb]] | |||
|[[File:MGTT Bob-omb.png|200px]] | |||
|align=left|Located only in [[Bowser Badlands]], if a ball hits a Bob-omb, it explodes, sending the ball backward. It affects flying balls more than grounded balls. When the Bob-omb explodes, it leaves behind a bunker. | |||
|- | |||
|[[Piranha Plant]] | |||
|[[File:MGTT Piranha Plant.png|200px]] | |||
|align=left|These enemies eat balls that roll into their Warp Pipes, and then spit them out to a spot. Some Piranha Plants spit balls into O.B. zones. | |||
|- | |||
|[[Chain Chomp]] | |||
|[[File:ChainChompMGTT.png|200px]] | |||
|align=left|These enemies occupy certain O.B. zones. If a ball rolls into an area with a Chain Chomp, the Chain Chomp wakes up and an O.B. is called. | |||
|} | |||
{| class=wikitable cellspacing=0 cellpadding=3 border=1 align=center width=100% style="text-align:center; border-collapse:collapse; font-family:Arial" | |||
|- bgcolor=Blue | |||
|colspan=3|'''Weather''' | |||
|- | |||
!width=25% |Name | |||
!width=25% |Image | |||
!width=50% |Description | |||
|- | |||
|[[Wind]] | |||
|[[File:MGTTWind.png|200px]] | |||
|align=left|Wind causes the ball to travel in the direction it is blown at. Higher wind means the ball is more affected by the wind. Crosswinds (ie winds that blow from the left or right of the direction of the player's aim) affect the ball more than winds that blow from front or behind. In addition, balls with a higher trajectory are more affected by the wind than balls hit with lower trajectories. | |||
|- | |||
|Rain | |||
|[[File:RainMGTT.png|200px]] | |||
|align=left|Rain lowers the drive distance of the ball, as well as increasing ball friction so that the ball rolls less, especially while putting. | |||
|} | |||
===Game modes=== | |||
[[File:Mario Golf Toadstool Tour Title Screen.png|thumb|The title screen to the game.]] | [[File:Mario Golf Toadstool Tour Title Screen.png|thumb|The title screen to the game.]] | ||
''Mario Golf: Toadstool Tour'' offers a wide variety of game modes, including tournaments, training sessions, collecting coins and shooting the ball through rings. Multiplayer for up to four players is supported, and can be played with one to four controllers. All of the game modes are explained briefly below. Note that multi-player game modes not marked with an asterisk (*) can also be played with 1 player and AI opponents. | |||
====Single- | ====Single-player==== | ||
*'''Tournament''' - The player competes against others for first place in an 18-hole round of golf and to earn [[Best Badge|best badge]]s on specific holes. The lowest score at the end of the tournament is the winner. | *'''Tournament''' - The player competes against others for first place in an 18-hole round of golf and to earn [[Best Badge|best badge]]s on specific holes. The lowest score at the end of the tournament is the winner. | ||
*'''Character Match''' - Compete in a one-on-one challenge against a computer character on | *'''Character Match''' - Compete in a one-on-one challenge against a computer character on any course using match play rules. Star Characters can be unlocked by accepting challenge from characters and winning. | ||
*'''Ring Shot''' - Compete by hitting | *'''Ring Shot''' - Compete by hitting shots through various rings on a course while still finishing at or under par. | ||
**'''Challenge''' - Complete Ring Shot holes to earn stars which unlock even more holes! Complete them all to unlock a special surprise. | **'''Challenge''' - Complete Ring Shot holes to earn stars which unlock even more holes! Complete them all to unlock a special surprise. | ||
*'''Speed Golf''' - Complete a round of golf in the fastest time possible. | *'''Speed Golf''' - Complete a round of golf in the fastest time possible. | ||
*'''Training''' - Practice golfing on | *'''Training''' - Practice golfing on any hole. During gameplay, the player can select a course and hole, adjust the wind strength and direction, switch between sunny or rainy weather, front or back tees, and regular or tournament greens, and change the pin's location. | ||
==== | ====Multiplayer==== | ||
*'''Doubles''' - A 2-on-2 game of golf. For 1-4 players. | *'''Doubles''' - A 2-on-2 game of golf. For 1-4 players. | ||
*'''Club Slots''' - Play using a limited amount of clubs. When playing with four slots, there is an added gimmick for the fourth slot (i.e. no wind, double points, extra mulligan, etc.). | *'''Club Slots''' - Play using a limited amount of clubs. When playing with four slots, there is an added gimmick for the fourth slot (i.e. no wind, double points, extra mulligan, etc.). | ||
*'''Ring Shot''' | *'''Ring Shot''' - Hit the ball through all the rings and finish the hole in par or better. | ||
**'''Face-Off''' - Play six holes against opponents to see who can complete the most holes successfully.* | **'''Face-Off''' - Play six holes against opponents to see who can complete the most holes successfully.* | ||
*'''Coin Shoot''' - Hit the ball near coins to collect them. Earn the highest coin total to win. The coins make up various | *'''Coin Shoot''' - Hit the ball near coins to collect them. Earn the highest coin total to win. The coins make up various patterns, such as the Triforce from the ''Legend of Zelda'' series, while another looks like the [[Nintendo GameCube]]. | ||
**'''Quick Cash''' - Collect as many coins as possible in | **'''Quick Cash''' - Collect as many coins as possible in two shots under par (for example, on a par 5 hole, the player has 3 shots to collect coins), without worrying about sinking the ball. | ||
**'''Cash Cup''' - Collect as many coins as possible and finish the hole with par or better. Failure to do so will result in 0 coins for the hole. | **'''Cash Cup''' - Collect as many coins as possible and finish the hole with par or better. Failure to do so will result in 0 coins for the hole. | ||
*'''Stroke Play''' - Get the fewest total strokes on a course to win. Beat courses in tournament mode to unlock them here. | *'''Stroke Play''' - Get the fewest total strokes on a course to win. Beat courses in tournament mode to unlock them here. | ||
| Line 70: | Line 284: | ||
*'''Near-Pin''' - Compete in [[Congo Canopy]] to get the shortest total distance from the pin in one stroke. If your ball is not on the green in one stroke, it will count as being 100 feet away. | *'''Near-Pin''' - Compete in [[Congo Canopy]] to get the shortest total distance from the pin in one stroke. If your ball is not on the green in one stroke, it will count as being 100 feet away. | ||
====Unlockable | ====Unlockable==== | ||
*'''[[Star Tournament]]''' - Unlocked once the tournament mode on [[Bowser Badlands]] is beaten and a star version of a character is obtained. Same as tournament mode, except the player will compete against tougher star characters while using the back tees and tournament greens. Beat these to be able to use the tournament greens in other game modes. For 1 player. | *'''[[Star Tournament]]''' - Unlocked once the tournament mode on [[Bowser Badlands]] is beaten and a star version of a character is obtained. Same as tournament mode, except the player will compete against tougher star characters while using the back tees and tournament greens. Beat these to be able to use the tournament greens in other game modes. For 1 player. | ||
*'''Side Games''' | *'''Side Games''' | ||
**'''Birdie Challenge''' | **'''Birdie Challenge''' | ||
***'''One-On One-Putt''' - Unlocked by beating birdie challenge on all 18 holes (which will also unlock [[Bowser Jr.]]). Similar to birdie challenge, except the first shot must land on the green and the second must go in the hole (resulting in a birdie). If the first shot is not on the green, the player will lose. | ***'''One-On One-Putt''' - Unlocked by beating birdie challenge on all 18 holes (which will also unlock [[Bowser Jr.]]). Similar to birdie challenge, except the first shot must land on the green and the second must go in the hole (resulting in a birdie). If the first shot is not on the green, the player will lose. The player must clear this with 1 player to unlock the tournament greens for [[Congo Canopy]]. For 1-4 players. | ||
*'''Special Tournament''' - Unlocked by holding {{button|gcn|Z}} on the title screen and pressing the {{button|gcn|A}} button. | *'''Special Tournament''' - Unlocked by holding {{button|gcn|Z}} on the title screen and pressing the {{button|gcn|A}} button. | ||
**'''Hole-in-One Contest''' - Like the Near-Pin Contest, except the game is played on the Par-3 holes of a selected course. For 1 player. | **'''Hole-in-One Contest''' - Like the Near-Pin Contest, except the game is played on the Par-3 holes of a selected course. For 1 player. | ||
**'''Password Tournament''' - | **'''Password Tournament''' - The player must compete in special tournaments with preset rules by entering certain passwords. For 1 player. | ||
*'''Ace Computer Difficulty Mode''' - Different unlocking criteria | *'''Ace Computer Difficulty Mode''' - Different unlocking criteria dependent on the version: | ||
** | **American version - The player must place first in every Star Tournament with all (non-GBA) characters. Whether the characters are in their regular or star form does not matter. 102 tournaments in total (six normal tournaments needed to unlock Star Tournament). | ||
** | **Japanese and European/Australian versions - The player must accept the challenge from Bowser and win in Character Match mode. This will also unlock Bowser's star form. | ||
==Playable characters== | |||
Including transferable characters, a total of 18 playable characters are featured in ''Mario Golf: Toadstool Tour'', consisting of 12 default characters, 4 unlockable characters, and 2 transferable characters. [[Princess Daisy|Daisy]], [[Koopa Troopa|Koopa]], [[Diddy Kong]], [[Waluigi]], [[Birdo]], [[Bowser Jr.]], [[Boo]], [[Shadow Mario]], and [[Petey Piranha]] are playable for the first time in the ''Mario Golf'' series, with Bowser Jr., Shadow Mario, and Petey Piranha also making their overall playable debuts. This is also Diddy Kong's first appearance in a ''[[Super Mario (franchise)|Super Mario]]'' game. | |||
*'''Drive''' - How far the ball travels in the air for on a perfect shot with a driver (1W). | |||
*'''Height''' - How high or low the ball travels in the air. The higher the ball travels, the more affected by wind it is, the higher it bounces, and the more it is affected by spin. The lower it is, the less it gets affected by wind; additionally, it makes the ball bounce further, roll more and get more affected by lie. | |||
*'''Shot''' - What trajectory the ball travels in when hit. For right-handed players, if the ball curves to the left, it's a draw; to the right, a fade; far to the left, a hook or far to the right, a slice, and vice-versa for left-handed players. | |||
*'''Impact''' - The amount of the sweet-spot marker left for certain shots. Less makes bunker shots much harder to land and often results in mis-hits. | |||
*'''Control''' - The amount of movement away from the targeted spot when hit off the perfect impact point. The higher the amount, the less the ball moves from the target spot. | |||
*'''Spin''' - The amount of affect spin has on the ball. Having a higher amount will mean that the ball will roll further with the use of spin. | |||
Impact, Control, and Spin are on a scale of 21. Numbers in parentheses for all stats indicate how they are shown when selecting Advance Tour Clubs. The quotes above the stats are each character's challenge invitation and instruction manual profile. | |||
{|class="autoresize" border=1 style="text-align:center" | |||
|- | |||
! colspan=4 style="background:green;color:white;font-size:120%"|Default characters | |||
|-valign=top | |||
|width=25%| | |||
{|border=1 cellspacing=0 cellpadding=4 margin=0 padding=0 style="border:1px solid black; border-collapse:collapse; height:100%" width=100% | |||
|- | |||
!style="background:greenyellow; height:100%; font-size:120%"" align="center" colspan=2|[[File:ToadstoolTour Mario Mug.png]]<br><big>{{text outline|{{color-link|Mario|#FF0001}}}}</big> | |||
|- | |||
!style="background:white; height:300px" align="center" colspan=2|[[File:MGTT Mario Driver Follow Through Artwork.png|300x300px]] | |||
|- | |||
|style="height:80px" align="center" colspan=2|''"It's-a me! I've been on fire lately, but I hope you'll challenge me!"'' | |||
|- | |||
!width=50% style="background:#EAECF0"|Drive: | |||
|width=50%|212 yards | |||
|- | |||
!style="background:#EAECF0"|Star Drive: | |||
|280 yards | |||
|- | |||
!style="background:#EAECF0"|Height: | |||
|High (+4) | |||
|- | |||
!style="background:#EAECF0"|Shot: | |||
|Straight (±0) | |||
|- | |||
!style="background:#EAECF0"|Impact: | |||
|11 (+1) | |||
|- | |||
!style="background:#EAECF0"|Star Impact: | |||
|6 (-4) | |||
|- | |||
!style="background:#EAECF0"|Control: | |||
|6 (-4) | |||
|- | |||
!style="background:#EAECF0"|Spin: | |||
|15 (+5) | |||
|} | |||
|width=25%| | |||
{|border=1 cellspacing=0 cellpadding=4 margin=0 padding=0 style="border:1px solid black; border-collapse:collapse; height:100%" width=100% | |||
|- | |||
!style="background:greenyellow; height:100%; font-size:120%"" align="center" colspan=2|[[File:ToadstoolTour Luigi Mug.png]]<br><big>{{text outline|{{color-link|Luigi|#00C100}}}}</big> | |||
|- | |||
!style="background:white; height:300px" align="center" colspan=2|[[File:MGLuigi.png|300x300px]] | |||
|- | |||
|style="height:80px" align="center" colspan=2|''"Oh dear... I've practiced, but no one will play me. Will you play against me?"'' | |||
|- | |||
!width=50% style="background:#EAECF0"|Drive: | |||
|width=50%|206 yards | |||
|- | |||
!style="background:#EAECF0"|Star Drive: | |||
|240 yards | |||
|- | |||
!style="background:#EAECF0"|Height: | |||
|Low (-4) | |||
|- | |||
!style="background:#EAECF0"|Shot: | |||
|Fade (-3) | |||
|- | |||
!style="background:#EAECF0"|Impact: | |||
|13 (+3) | |||
|- | |||
!style="background:#EAECF0"|Star Impact: | |||
|10 (±0) | |||
|- | |||
!style="background:#EAECF0"|Control: | |||
|12 (+2) | |||
|- | |||
!style="background:#EAECF0"|Spin: | |||
|7 (-3) | |||
|} | |||
|width=25%| | |||
{|border=1 cellspacing=0 cellpadding=4 margin=0 padding=0 style="border:1px solid black; border-collapse:collapse; height:100%" width=100% | |||
|- | |||
!style="background:greenyellow; height:100%; font-size:120%"" align="center" colspan=2|[[File:ToadstoolTour Peach Mug.png]]<br><big>{{text outline|{{color-link|Princess Peach|#FF599B|Peach}}}}</big> | |||
|- | |||
!style="background:white; height:300px" align="center" colspan=2|[[File:Peach MGTT art.png|300x300px]] | |||
|- | |||
|style="height:80px" align="center" colspan=2|''"Hey! I adore golf! It seems you do, too! Want to play a round of 18?"'' | |||
|- | |||
!width=50% style="background:#EAECF0"|Drive: | |||
|width=50%|203 yards | |||
|- | |||
!style="background:#EAECF0"|Star Drive: | |||
|235 yards | |||
|- | |||
!style="background:#EAECF0"|Height: | |||
|Moderate (-1) | |||
|- | |||
!style="background:#EAECF0"|Shot: | |||
|Straight (±0) | |||
|- | |||
!style="background:#EAECF0"|Impact: | |||
|14 (+4) | |||
|- | |||
!style="background:#EAECF0"|Star Impact: | |||
|11 (+1) | |||
|- | |||
!style="background:#EAECF0"|Control: | |||
|13 (+3) | |||
|- | |||
!style="background:#EAECF0"|Spin: | |||
|5 (-5) | |||
|} | |||
|width=25%| | |||
{|border=1 cellspacing=0 cellpadding=4 margin=0 padding=0 style="border:1px solid black; border-collapse:collapse; height:100%" width=100% | |||
|- | |||
!style="background:greenyellow; height:100%; font-size:120%"" align="center" colspan=2|[[File:ToadstoolTour Daisy Mug.png]]<br><big>{{text outline|{{color-link|Princess Daisy|#FF7226|Daisy}}}}</big> <sup><small>(new)</small></sup> | |||
|- | |||
!style="background:white; height:300px" align="center" colspan=2|[[File:MGDaisy.png|300x300px]] | |||
|- | |||
|style="height:80px" align="center" colspan=2|''"What's up? I'm new, but golf is my thing! And I'll go toe-to-toe to prove it!"'' | |||
|- | |||
!width=50% style="background:#EAECF0"|Drive: | |||
|width=50%|213 yards | |||
|- | |||
!style="background:#EAECF0"|Star Drive: | |||
|270 yards | |||
|- | |||
!style="background:#EAECF0"|Height: | |||
|High (+5) | |||
|- | |||
!style="background:#EAECF0"|Shot: | |||
|Draw (+4) | |||
|- | |||
!style="background:#EAECF0"|Impact: | |||
|11 (+1) | |||
|- | |||
!style="background:#EAECF0"|Star Impact: | |||
|7 (-3) | |||
|- | |||
!style="background:#EAECF0"|Control: | |||
|7 (-3) | |||
|- | |||
!style="background:#EAECF0"|Spin: | |||
|14 (+4) | |||
|} | |||
|-valign=top | |||
| | |||
{|border=1 cellspacing=0 cellpadding=4 margin=0 padding=0 style="border:1px solid black; border-collapse:collapse; height:100%" width=100% | |||
|- | |||
!style="background:greenyellow; height:100%; font-size:120%"" align="center" colspan=2|[[File:ToadstoolTour Yoshi Mug.png]]<br><big>{{text outline|{{color-link|Yoshi|#36D836}}}}</big> | |||
|- | |||
!style="background:white; height:300px" align="center" colspan=2|[[File:Yoshi MGTT art.png|300x300px]] | |||
|- | |||
|style="height:80px" align="center" colspan=2|''"Golf is perfect for me, 'cause I love to roam! Why don't we square off?"'' | |||
|- | |||
!width=50% style="background:#EAECF0"|Drive: | |||
|width=50%|208 yards | |||
|- | |||
!style="background:#EAECF0"|Star Drive: | |||
|250 yards | |||
|- | |||
!style="background:#EAECF0"|Height: | |||
|Moderate (±0) | |||
|- | |||
!style="background:#EAECF0"|Shot: | |||
|Straight (±0) | |||
|- | |||
!style="background:#EAECF0"|Impact: | |||
|13 (+3) | |||
|- | |||
!style="background:#EAECF0"|Star Impact: | |||
|10 (±0) | |||
|- | |||
!style="background:#EAECF0"|Control: | |||
|10 (±0) | |||
|- | |||
!style="background:#EAECF0"|Spin: | |||
|10 (±0) | |||
|} | |||
| | |||
{|border=1 cellspacing=0 cellpadding=4 margin=0 padding=0 style="border:1px solid black; border-collapse:collapse; height:100%" width=100% | |||
|- | |||
!style="background:greenyellow; height:100%; font-size:120%"" align="center" colspan=2|[[File:ToadstoolTour Koopa Mug.png]]<br><big>{{text outline|{{color-link|Koopa Troopa|#FFDE0C|Koopa}}}}</big> <sup><small>(new)</small></sup> | |||
|- | |||
!style="background:white; height:300px" align="center" colspan=2|[[File:Koopa MGTT art.png|300x300px]] | |||
|- | |||
|style="height:80px" align="center" colspan=2|''"Hi! I may be small, but I'm a huge fan of golf! Care to match skills?"'' | |||
|- | |||
!width=50% style="background:#EAECF0"|Drive: | |||
|width=50%|200 yards | |||
|- | |||
!style="background:#EAECF0"|Star Drive: | |||
|230 yards | |||
|- | |||
!style="background:#EAECF0"|Height: | |||
|Moderate (+1) | |||
|- | |||
!style="background:#EAECF0"|Shot: | |||
|Draw (+1) | |||
|- | |||
!style="background:#EAECF0"|Impact: | |||
|14 (+4) | |||
|- | |||
!style="background:#EAECF0"|Star Impact: | |||
|13 (+3) | |||
|- | |||
!style="background:#EAECF0"|Control: | |||
|14 (+4) | |||
|- | |||
!style="background:#EAECF0"|Spin: | |||
|8 (-2) | |||
|} | |||
| | |||
{|border=1 cellspacing=0 cellpadding=4 margin=0 padding=0 style="border:1px solid black; border-collapse:collapse; height:100%" width=100% | |||
|- | |||
!style="background:greenyellow; height:100%; font-size:120%"" align="center" colspan=2|[[File:ToadstoolTour Donkey Kong Mug.png]]<br><big>{{text outline|{{color-link|Donkey Kong|#7F3013}}}}</big> | |||
|- | |||
!style="background:white; height:300px" align="center" colspan=2|[[File:DK MGTT art.png|300x300px]] | |||
|- | |||
|style="height:80px" align="center" colspan=2|''"Smacking the ball a mile is great. Now let me show you what I mean!"'' | |||
|- | |||
!width=50% style="background:#EAECF0"|Drive: | |||
|width=50%|215 yards | |||
|- | |||
!style="background:#EAECF0"|Star Drive: | |||
|285 yards | |||
|- | |||
!style="background:#EAECF0"|Height: | |||
|Low (-3) | |||
|- | |||
!style="background:#EAECF0"|Shot: | |||
|Slice (-6) | |||
|- | |||
!style="background:#EAECF0"|Impact: | |||
|11 (+1) | |||
|- | |||
!style="background:#EAECF0"|Star Impact: | |||
|5 (-5) | |||
|- | |||
!style="background:#EAECF0"|Control: | |||
|6 (-4) | |||
|- | |||
!style="background:#EAECF0"|Spin: | |||
|12 (+2) | |||
|} | |||
== | | | ||
[[File: | {|border=1 cellspacing=0 cellpadding=4 margin=0 padding=0 style="border:1px solid black; border-collapse:collapse; height:100%" width=100% | ||
|- | |||
!style="background:greenyellow; height:100%; font-size:120%"" align="center" colspan=2|[[File:ToadstoolTour Diddy Kong Mug.png]]<br><big>{{text outline|{{color-link|Diddy Kong|#A54021}}}}</big> <sup><small>(new)</small></sup> | |||
|- | |||
!style="background:white; height:300px" align="center" colspan=2|[[File:Diddy Kong MGTT.png|300x300px]] | |||
|- | |||
|style="height:80px" align="center" colspan=2|''"It's me, Diddy! I'm hooked on this game, and I wanna show you my skills! Ready?"'' | |||
|- | |||
!width=50% style="background:#EAECF0"|Drive: | |||
|width=50%|207 yards | |||
|- | |||
!style="background:#EAECF0"|Star Drive: | |||
|245 yards | |||
|- | |||
!style="background:#EAECF0"|Height: | |||
|High (+3) | |||
|- | |||
!style="background:#EAECF0"|Shot: | |||
|Draw (+2) | |||
|- | |||
!style="background:#EAECF0"|Impact: | |||
|13 (+3) | |||
|- | |||
!style="background:#EAECF0"|Star Impact: | |||
|10 (±0) | |||
|- | |||
!style="background:#EAECF0"|Control: | |||
|11 (+1) | |||
|- | |||
!style="background:#EAECF0"|Spin: | |||
|9 (-1) | |||
|} | |||
|-valign=top | |||
[[File: | | | ||
{|border=1 cellspacing=0 cellpadding=4 margin=0 padding=0 style="border:1px solid black; border-collapse:collapse; height:100%" width=100% | |||
{{ | |- | ||
==== | !style="background:greenyellow; height:100%; font-size:120%"" align="center" colspan=2|[[File:ToadstoolTour Wario Mug.png]]<br><big>{{text outline|{{color-link|Wario|#FFE500}}}}</big> | ||
|- | |||
!style="background:white; height:300px" align="center" colspan=2|[[File:MGWario.png|300x300px]] | |||
|- | |||
|style="height:80px" align="center" colspan=2|''"Challenge me? You? I'm the best golfer in the world. I'm not scared!"'' | |||
|- | |||
!width=50% style="background:#EAECF0"|Drive: | |||
|width=50%|210 yards | |||
|- | |||
!style="background:#EAECF0"|Star Drive: | |||
|265 yards | |||
|- | |||
!style="background:#EAECF0"|Height: | |||
|Very Low (-5) | |||
|- | |||
!style="background:#EAECF0"|Shot: | |||
|Slice (-6) | |||
|- | |||
!style="background:#EAECF0"|Impact: | |||
|12 (+2) | |||
|- | |||
!style="background:#EAECF0"|Star Impact: | |||
|8 (-2) | |||
|- | |||
!style="background:#EAECF0"|Control: | |||
|8 (-2) | |||
|- | |||
!style="background:#EAECF0"|Spin: | |||
|10 (±0) | |||
|} | |||
| | |||
{|border=1 cellspacing=0 cellpadding=4 margin=0 padding=0 style="border:1px solid black; border-collapse:collapse; height:100%" width=100% | |||
|- | |||
!style="background:greenyellow; height:100%; font-size:120%"" align="center" colspan=2|[[File:ToadstoolTour Waluigi Mug.png]]<br><big>{{text outline|{{color-link|Waluigi|#6D2DC3}}}}</big> <sup><small>(new)</small></sup> | |||
|- | |||
!style="background:white; height:300px" align="center" colspan=2|[[File:Waluigi MGTT art.png|300x300px]] | |||
|- | |||
|style="height:80px" align="center" colspan=2|''"You might be gettin' better, but nobody cheats better than me! You got that?!"'' | |||
|- | |||
!width=50% style="background:#EAECF0"|Drive: | |||
|width=50%|209 yards | |||
|- | |||
!style="background:#EAECF0"|Star Drive: | |||
|260 yards | |||
|- | |||
!style="background:#EAECF0"|Height: | |||
|Moderate (±0) | |||
|- | |||
!style="background:#EAECF0"|Shot: | |||
|Draw (+3) | |||
|- | |||
!style="background:#EAECF0"|Impact: | |||
|13 (+3) | |||
|- | |||
!style="background:#EAECF0"|Star Impact: | |||
|8 (-2) | |||
|- | |||
!style="background:#EAECF0"|Control: | |||
|9 (-1) | |||
|- | |||
!style="background:#EAECF0"|Spin: | |||
|12 (+2) | |||
|} | |||
== | | | ||
{|border=1 cellspacing=0 cellpadding=4 margin=0 padding=0 style="border:1px solid black; border-collapse:collapse; height:100%" width=100% | |||
|- | |||
!style="background:greenyellow; height:100%; font-size:120%"" align="center" colspan=2|[[File:ToadstoolTour Birdo Mugshot.png]]<br><big>{{text outline|{{color-link|Birdo|#C33FFF}}}}</big> <sup><small>(new)</small></sup> | |||
|- | |||
!style="background:white; height:300px" align="center" colspan=2|[[File:Birdo Mario Golf artwork.jpg|300x300px]] | |||
|- | |||
|style="height:80px" align="center" colspan=2|''"I love to golf, and now I want to play other golfers! Are you in?"'' | |||
|- | |||
!width=50% style="background:#EAECF0"|Drive: | |||
|width=50%|209 yards | |||
|- | |||
!style="background:#EAECF0"|Star Drive: | |||
|255 yards | |||
|- | |||
!style="background:#EAECF0"|Height: | |||
|High (+2) | |||
|- | |||
!style="background:#EAECF0"|Shot: | |||
|Fade (-2) | |||
|- | |||
!style="background:#EAECF0"|Impact: | |||
|12 (+2) | |||
|- | |||
!style="background:#EAECF0"|Star Impact: | |||
|9 (-1) | |||
|- | |||
!style="background:#EAECF0"|Control: | |||
|9 (-1) | |||
|- | |||
!style="background:#EAECF0"|Spin: | |||
|13 (+3) | |||
|} | |||
| | |||
{|border=1 cellspacing=0 cellpadding=4 margin=0 padding=0 style="border:1px solid black; border-collapse:collapse; height:100%" width=100% | |||
{| border=1 cellspacing=0 cellpadding=4 style="border:1px solid black; border-collapse:collapse" width =100% | |- | ||
!style="background:greenyellow; height:100%; font-size:120%"" align="center" colspan=2|[[File:ToadstoolTour Bowser Mug.png]]<br><big>{{text outline|{{color-link|Bowser|#669900}}}}</big> | |||
|- | |||
!style="background:white; height:300px" align="center" colspan=2|[[File:Bowser MGTT.png|300x300px]] | |||
|- | |||
|style="height:80px" align="center" colspan=2|''"Bwaaahhh ha HA! I'm so good, golfing is starting to get boring! BORING!!"'' | |||
|- | |||
!width=50% style="background:#EAECF0"|Drive: | |||
|width=50%|217 yards | |||
|- | |- | ||
! | !style="background:#EAECF0"|Star Drive: | ||
|290 yards | |||
|- | |- | ||
! | !style="background:#EAECF0"|Height: | ||
|Moderate (±0) | |||
|- | |- | ||
| | !style="background:#EAECF0"|Shot: | ||
|Hook (+6) | |||
| | |||
|- | |- | ||
| | !style="background:#EAECF0"|Impact: | ||
|10 (±0) | |||
| | |||
|- | |- | ||
| | !style="background:#EAECF0"|Star Impact: | ||
|5 (-5) | |||
| | |||
|- | |- | ||
| | !style="background:#EAECF0"|Control: | ||
|5 (-5) | |||
| | |||
|- | |- | ||
| | !style="background:#EAECF0"|Spin: | ||
| | |16 (+6) | ||
| | |} | ||
|- | |- | ||
| | ! colspan=4 style="background:green;color:white;font-size:120%"|Unlockable characters | ||
|-valign=top | |||
| | |||
| | | | ||
{|border=1 cellspacing=0 cellpadding=4 margin=0 padding=0 style="border:1px solid black; border-collapse:collapse; height:100%" width=100% | |||
|- | |- | ||
| | !style="background:greenyellow; height:100%; font-size:120%"" align="center" colspan=2|[[File:ToadstoolTour BowserJr Mug.png]]<br><big>{{text outline|{{color-link|Bowser Jr.|#99CC00}}}}</big> <sup><small>(new)</small></sup> | ||
| | |||
|- | |- | ||
| | !style="background:white; height:300px" align="center" colspan=2|[[File:MGTT Bowser Jr Artwork.png|300x300px]] | ||
|- | |- | ||
! | !width=50% style="background:#EAECF0"|Drive: | ||
|width=50%|211 yards | |||
|- | |- | ||
! | !style="background:#EAECF0"|Star Drive: | ||
|268 yards | |||
|- | |- | ||
| | !style="background:#EAECF0"|Height: | ||
|Low (-2) | |||
| | |||
|- | |- | ||
| | !style="background:#EAECF0"|Shot: | ||
|Straight (±0) | |||
| | |||
|- | |- | ||
| | !style="background:#EAECF0"|Impact: | ||
|12 (+2) | |||
| | |||
|- | |- | ||
| | !style="background:#EAECF0"|Star Impact: | ||
|7 (-3) | |||
| | |||
|- | |- | ||
| | !style="background:#EAECF0"|Control: | ||
|8 (-2) | |||
| | |||
|- | |- | ||
| | !style="background:#EAECF0"|Spin: | ||
|11 (+1) | |||
| | |||
|- | |- | ||
| | !style="background:#EAECF0" height=90px|To unlock: | ||
| | |height=100%|Complete the 18 hole Birdie Challenge | ||
| | |} | ||
| | |||
| | |||
{|border=1 cellspacing=0 cellpadding=4 margin=0 padding=0 style="border:1px solid black; border-collapse:collapse; height:100%" width=100% | |||
|- | |- | ||
| | !style="background:greenyellow; height:100%; font-size:120%"" align="center" colspan=2|[[File:ToadstoolTour Boo Mug.png]]<br><big>{{text outline|{{color-link|Boo|#A0BECE}}}}</big> <sup><small>(new)</small></sup> | ||
| | |||
|- | |- | ||
! | !style="background:white; height:300px" align="center" colspan=2|[[File:Boomgtt.png|300x300px]] | ||
|- | |- | ||
! | !width=50% style="background:#EAECF0"|Drive: | ||
|width=50%|208 yards | |||
|- | |- | ||
| | !style="background:#EAECF0"|Star Drive: | ||
|253 yards | |||
| | |||
|- | |- | ||
| | !style="background:#EAECF0"|Height: | ||
|Moderate (-1) | |||
| | |||
|- | |- | ||
| | !style="background:#EAECF0"|Shot: | ||
|Hook (+5) | |||
|- | |- | ||
| | !style="background:#EAECF0"|Impact: | ||
|13 (+3) | |||
| | |||
|- | |- | ||
| | !style="background:#EAECF0"|Star Impact: | ||
|9 (-1) | |||
| | |||
|- | |- | ||
| | !style="background:#EAECF0"|Control: | ||
|10 (±0) | |||
| | |||
|- | |- | ||
| | !style="background:#EAECF0"|Spin: | ||
|8 (-2) | |||
|- | |- | ||
| | !style="background:#EAECF0" height=90px|To unlock: | ||
|height=100%|Obtain 50 [[Best Badge]]s in Tournament Mode | |||
| | |||
|} | |} | ||
| | |||
{| border=1 cellspacing=0 cellpadding=4 style="border:1px solid black; border-collapse:collapse" width =100% | {|border=1 cellspacing=0 cellpadding=4 margin=0 padding=0 style="border:1px solid black; border-collapse:collapse; height:100%" width=100% | ||
|- | |||
!style="background:greenyellow; height:100%; font-size:120%"" align="center" colspan=2|[[File:ToadstoolTour Shadow Mario Mug.png]]<br><big>{{text outline|{{color-link|Shadow Mario|#8A99E8}}}}</big> <sup><small>(new)</small></sup> | |||
|- | |- | ||
! | !style="background:white; height:300px" align="center" colspan=2|[[File:MGTT Shadow Mario Artwork.png|300x300px]] | ||
|- | |- | ||
! | !width=50% style="background:#EAECF0"|Drive: | ||
|width=50%|212 yards | |||
|- | |- | ||
| | !style="background:#EAECF0"|Star Drive: | ||
|275 yards | |||
| | |||
|- | |- | ||
| | !style="background:#EAECF0"|Height: | ||
|Low (-4) | |||
| | |||
|- | |- | ||
| | !style="background:#EAECF0"|Shot: | ||
|Fade (-4) | |||
|- | |- | ||
| | !style="background:#EAECF0"|Impact: | ||
|11 (+1) | |||
| | |||
|- | |- | ||
| | !style="background:#EAECF0"|Star Impact: | ||
|6 (-4) | |||
| | |||
|- | |- | ||
| | !style="background:#EAECF0"|Control: | ||
|7 (-3) | |||
|- | |- | ||
| | !style="background:#EAECF0"|Spin: | ||
|7 (-3) | |||
|- | |- | ||
| | !style="background:#EAECF0" height=90px|To unlock: | ||
|height=100%|Complete all Ring Attack holes | |||
| | |||
|} | |} | ||
===== | | | ||
{|border=1 cellspacing=0 cellpadding=4 margin=0 padding=0 style="border:1px solid black; border-collapse:collapse; height:100%" width=100% | |||
|- | |||
!style="background:greenyellow; height:100%; font-size:120%"" align="center" colspan=2|[[File:ToadstoolTour Petey Piranha Mug.png]]<br><big>{{text outline|{{color-link|Petey Piranha|#009933}}}}</big> <sup><small>(new)</small></sup> | |||
|- | |||
!style="background:white; height:300px" align="center" colspan=2|[[File:Petey Piranha Sticker.png|300x300px]] | |||
|- | |||
!width=50% style="background:#EAECF0"|Drive: | |||
|width=50%|220 yards | |||
|- | |- | ||
! | !style="background:#EAECF0"|Star Drive: | ||
|300 yards | |||
|- | |- | ||
!style="background:# | !style="background:#EAECF0"|Height: | ||
| | |Very High (+6) | ||
|- | |- | ||
!style="background:# | !style="background:#EAECF0"|Shot: | ||
| | |Straight (±0) | ||
|- | |- | ||
!style="background:# | !style="background:#EAECF0"|Impact: | ||
| | |10 (±0) | ||
|- | |- | ||
!style="background:# | !style="background:#EAECF0"|Star Impact: | ||
| | |4 (-6) | ||
|- | |- | ||
!style="background:#EAECF0"|Control: | |||
|5 (-5) | |||
|- | |||
!style="background:#EAECF0"|Spin: | |||
|10 (±0) | |||
|- | |||
!style="background:#EAECF0" height=90px|To unlock: | |||
|height=100%|Complete Shot Practice, Approach Practice, and Putting Practice on all difficulty levels | |||
|} | |} | ||
|- | |||
! colspan=4 style="background:green;color:white;font-size:120%"|Transferable characters | |||
|-valign=top | |||
|colspan=2 width=50%| | |||
{|border=1 cellspacing=0 cellpadding=4 margin=0 padding=0 style="border:1px solid black; border-collapse:collapse; height:100%" width=100% | |||
|- | |||
!style="background:greenyellow; height:100%; font-size:120%"" align="center" colspan=2|<big>{{text outline|{{color-link|Neil|blue}}}}</big> | |||
|- | |||
!style="background:white; height:300px" align="center" colspan=2|[[File:Neil MGAT artwork 2.png|300x300px]] | |||
|- | |||
!width=50% style="background:#EAECF0"|Drive: | |||
|width=50%|205 yards | |||
|- | |||
!style="background:#EAECF0"|Height: | |||
| -1 | |||
|- | |||
!style="background:#EAECF0"|Shot: | |||
|Draw (+2) | |||
|- | |||
!style="background:#EAECF0"|Impact: | |||
| +4 | |||
|- | |||
!style="background:#EAECF0"|Control: | |||
| +4 | |||
|- | |||
!style="background:#EAECF0"|Spin: | |||
| -3 | |||
|} | |||
=== | |colspan=2 width=50%| | ||
< | {|border=1 cellspacing=0 cellpadding=4 margin=0 padding=0 style="border:1px solid black; border-collapse:collapse; height:100%" width=100% | ||
|- | |||
File: | !style="background:greenyellow; height:100%; font-size:120%"" align="center" colspan=2|<big>{{text outline|{{color-link|Ella|red}}}}</big> | ||
|- | |||
!style="background:white; height:300px" align="center" colspan=2|[[File:Ella MGAT artwork 2.png|300x300px]] | |||
|- | |||
!width=50% style="background:#EAECF0"|Drive: | |||
|width=50%|200 yards | |||
|- | |||
!style="background:#EAECF0"|Height: | |||
| +3 | |||
|- | |||
!style="background:#EAECF0"|Shot: | |||
|Straight (±0) | |||
|- | |||
!style="background:#EAECF0"|Impact: | |||
| +5 | |||
|- | |||
!style="background:#EAECF0"|Control: | |||
| +6 | |||
|- | |||
!style="background:#EAECF0"|Spin: | |||
| 0 | |||
|} | |||
|} | |||
Neil and Ella can be transferred into the game by connecting ''[[Mario Golf: Advance Tour]]'' for the [[Game Boy Advance]] with the [[Nintendo GameCube]]. | Neil and Ella can be transferred into the game by connecting ''[[Mario Golf: Advance Tour]]'' for the [[Game Boy Advance]] with the [[Nintendo GameCube]]. Up to four different pairs can be linked via different save files, with each pair wearing different colors. | ||
==Golf | ==Golf courses== | ||
{| class=sortable | {| class="wikitable sortable" style="width:100%;text-align:center" | ||
|- | |- | ||
!width=10% |Name | !width=10% |Name | ||
!width= | !width=10% |Image | ||
!width= | !width=30% |Description | ||
!width= | !width=20% |How to unlock | ||
|- | |- | ||
|[[Lakitu Valley]] | |[[Lakitu Valley]]<br>[[File:LakituValleyIcon.png]] | ||
|[[File:LakituValley fr.png|150px]] | |[[File:LakituValley fr.png|150px]] | ||
|A basic course surrounded by trees. It is often used for tutorials, due to it being beginner-friendly. | |A basic course surrounded by trees. It is often used for tutorials, due to it being beginner-friendly. | ||
|Unlocked by Default | |Unlocked by Default | ||
|- | |- | ||
|[[Cheep Cheep Falls]] | |[[Cheep Cheep Falls]]<br>[[File:MGTT Cheep Cheep Falls Icon.png]] | ||
|[[File:Cheep Cheep Falls. | |[[File:MGTT Cheep Cheep Falls.png|150px]] | ||
|This course has a conventional nature like Lakitu Valley, but also contains ponds and rivers as water hazards. Trees and subtle traps are also more abundant. | |This course has a conventional nature like Lakitu Valley, but also contains ponds and rivers as water hazards. Trees and subtle traps are also more abundant. | ||
|Beating the Lakitu Cup. | |Beating the Lakitu Cup. | ||
|- | |- | ||
|[[Shifting Sands]] | |[[Shifting Sands]]<br>[[File:MGTT Shifting Sands Icon.png]] | ||
|[[File:Shifting Sands. | |[[File:MGTT Shifting Sands.png|150px]] | ||
|This course is likely based off [[Shifting Sand Land]] and contains many [[Bunker (obstacle)| | |This course is likely based off [[Shifting Sand Land]] and contains many [[Bunker (obstacle)|bunkers]]. There are also waste areas, cacti and rocks that act as hazards. | ||
|Beating the Cheep Cheep Tournament. | |Beating the Cheep Cheep Tournament. | ||
|- | |- | ||
|[[Blooper Bay]] | |[[Blooper Bay]]<br>[[File:MGTT Blooper Bay Icon.png]] | ||
|[[File: | |[[File:Blooper Bay TT.png|150px]] | ||
|This course features some unconventional elements, such as Fast Fairways, where surfaces on which the ball roles further than normal, and is set in a tropical resort area. Many of the bunkers are shaped like recognizable objects, such as | |This course features some unconventional elements, such as Fast Fairways, where surfaces on which the ball roles further than normal, and is set in a tropical resort area. Many of the bunkers are shaped like recognizable objects, such as seagulls or [[Super Star]]s. | ||
|Beating the Sands Classic. | |Beating the Sands Classic. | ||
|- | |- | ||
|[[Peach's Castle Grounds]] | |[[Peach's Castle Grounds]]<br>[[File:MGTT Peach's Castle Grounds Icon.png]] | ||
|[[File:Peach Castle Grounds. | |[[File:Peach Castle Grounds TT.png|150px]] | ||
|This course features many elements unique to the ''[[Mario ( | |This course features many elements unique to the ''[[Super Mario (franchise)|Super Mario]]'' franchise, such as [[Warp Pipe]]s, [[Chain Chomp]]s, and giant [[Mushroom]]s. [[King Bob-omb]] also makes a cameo here, as well as [[Pikmin]]. | ||
|Beating the Blooper Open. | |Beating the Blooper Open. | ||
|- | |- | ||
|[[Bowser Badlands]] | |[[Bowser Badlands]]<br>[[File:MGTT Bowser Badlands Icon.png]] | ||
|[[File:BChole 12 shot.png|150px]] | |[[File:BChole 12 shot.png|150px]] | ||
|This dark, difficult course designed by [[Bowser]] contains [[Bob-omb]]s, [[Piranha Plant]]s, and [[Whomp]]s, as well as elements such as lava. Extra care will need to be taken when playing on this course. | |This dark, difficult course presumably designed by [[Bowser]] contains [[Bob-omb]]s, [[Piranha Plant]]s, and [[Whomp]]s, as well as elements such as lava. Extra care will need to be taken when playing on this course. | ||
|Beating the Peach's Invitational. | |Beating the Peach's Invitational. | ||
|- | |- | ||
|[[Congo Canopy]] | |[[Congo Canopy]]<br>[[File:MGTT Congo Canopy Icon.png]] | ||
|[[File:Congo Canopy. | |[[File:Congo Canopy TT.png|150px]] | ||
|Set in the [[Kongo Jungle]], this is a special Par 3 course used in pin-shot and birdie challenges. It can be easy to miss the mark and land out of bounds and there are also a few water hazards to be found. | |Set in the [[Kongo Jungle]], this is a special Par 3 course used in pin-shot and birdie challenges. It can be easy to miss the mark and land out of bounds and there are also a few water hazards to be found. | ||
|Unlocked by Default | |||
|} | |||
====Score table==== | |||
{| class=wikitable style="width:20%;text-align:center" | |||
! colspan=2 | # Scores for Trophy | |||
|- | |||
| Lakitu Cup | |||
| +6 | |||
|- | |||
| Cheep Cheep Tournament | |||
| +4 | |||
|- | |||
| Sands Classic | |||
| +3 | |||
|- | |||
| Blooper Open | |||
| +2 | |||
|- | |||
| Peach's Invitational | |||
| +1 | |||
|- | |||
| Bowser Championship | |||
| ±0 | |||
|- | |||
| Lakitu Cup★ | |||
| -9 | |||
|- | |||
| Cheep Cheep Tournament★ | |||
| -7 | |||
|- | |||
| Sands Classic★ | |||
| -5 | |||
|- | |||
| Blooper Open★ | |||
| -3 | |||
|- | |||
| Peach's Invitational★ | |||
| -1 | |||
|- | |||
| Bowser Championship★ | |||
| ±0 | |||
|} | |} | ||
=="Target Bullseye Tour" | =="Target Bullseye Tour" version== | ||
On July 28, 2003, [[Nintendo|Nintendo of America]] released '''Mario Golf: Toadstool Tour (Target Bullseye Tour Included -- Exclusive Version)''' through | On July 28, 2003, [[Nintendo|Nintendo of America]] released '''Mario Golf: Toadstool Tour (Target Bullseye Tour Included -- Exclusive Version)''' through {{wp|Target Corporation|Target}} stores. This version allowed players to play the Bullseye Tour in the Special Tournament mode. Codes issued from this version of the game could be submitted through the official website. Nintendo prizes were mailed out to the winners. The promotion ended on August 31, 2003.<ref>[http://cube.ign.com/objects/142/14216969.html Mario Golf: Toadstool Tour (Target Bullseye Tour Included -- Exclusive Version) Game Profile]. ''[http://cube.ign.com/ IGN GameCube]''. Retrieved on March 29, 2008.</ref> | ||
==References to other games== | |||
*''[[Super Mario Bros.]]'': In the character select screen, Princess Peach sings the first few notes of the overworld theme. A remix of the underground theme is heard during the player's attempt to score a birdie. | |||
*''[[Super Mario 64]]'': Shifting Sands is possibly based on [[Shifting Sand Land]] from this game. A remix of the Peach's Castle theme is heard in Peach's Castle Grounds. A remix of the Bowser boss fight music is heard in Bowser Badlands. Hole 8 of Peach's Castle Grounds has a mountain with a similar layout to the one in [[Bob-omb Battlefield]], and [[King Bob-omb|Big Bob-omb]] appears there, too. Shadow Mario’s voice clips are mostly taken from this game but edited to be slower. | |||
*''[[Mario Party]]'': The sound effect that plays when [[Toad]] trips on the menu screens is taken from ''Mario Party'', as is the sound that plays when attempting to use a Power Shot when out of them. | |||
*''[[Donkey Kong 64]]'': Donkey Kong and Diddy Kong's voice clips were reused from this game. | |||
*''[[pikipedia:Pikmin (game)|Pikmin]]'': Whenever a player's golf ball lands in a flower patch, Pikmin fly out. | |||
*''[[Super Mario Sunshine]]'': Hole 10 of Blooper Bay shares a similar overwater cabana and bridge with [[Gelato Beach]], an area in [[Isle Delfino]]. [[Bowser Jr.]], [[Shadow Mario]], and [[Petey Piranha]]'s animations are heavily based on those from this game. | |||
==References in later games== | ==References in later games== | ||
*''[[Mario Kart: Double Dash!!]]'' | *''[[Mario Kart: Double Dash!!]]'': The countdown timer sound effect is reused in this game to signal the start of the race or battle for the characters. | ||
*''[[Mario Power Tennis]]'' | *''[[Mario Power Tennis]]'': The opening logos are reused. | ||
*''[[Super Smash Bros. Brawl]]'': The main theme appears as part of an arranged medley alongside the main theme of ''Mario Power Tennis'' as a selectable music track. It returns unchanged in ''[[Super Smash Bros. for Wii U]]'' and ''[[Super Smash Bros. Ultimate]]''. | |||
*''[[Mario Golf: Super Rush]]'': Some of the characters' voice clips are reused in this game. | |||
==Reception== | |||
{| class="wikitable reviews" | |||
!colspan="4" style="font-size:120%; text-align:center; background-color:silver;"|Reviews | |||
|-style="background-color:#E6E6E6" | |||
|Release | |||
|Reviewer, Publication | |||
|Score | |||
|Comment | |||
|- | |||
|[[Nintendo GameCube]] | |||
|Matt Casamassina,<br>[https://www.ign.com/articles/2003/07/30/mario-golf-toadstool-tour IGN] | |||
|8/10 | |||
|''Tiger is still king. But if you're looking for something more on the arcade side, Mario Golf more than delivers, especially if you consider yourself a Nintendo fan and can appreciate the wide selection of classic characters -- all playable -- in the game.'' | |||
|- | |||
|Nintendo GameCube | |||
|Ryan Davis,<br>[https://www.gamespot.com/reviews/mario-golf-toadstool-tour-review/1900-6072783/ GameSpot] | |||
|7.2/10 | |||
|''When you stand back and look at Mario Golf: Toadstool Tour on its own terms, you'll find an excellent game of golf that provides a different experience from that in other golf games currently on the market. But, as a sequel to Mario Golf for the N64, which was originally released four years ago, the game doesn't make too many enhancements to the basic formula established back in 1999. If you haven't played the N64 game, you need not concern yourself with this. But, if you have, you may want to give Mario Golf a rental before you take the plunge. Unless, of course, you're eager for more of what made that game as great as this one.'' | |||
|- | |||
|Nintendo GameCube | |||
|Raymond "Psylancer" Padilla,<br>[https://web.archive.org/web/20031003221220/http://www.gamespy.com/reviews/august03/mariogolfgcn/ Gamespy] | |||
|8.3/10 | |||
|''Despite its camera problems, its visual deficiencies, and the fact that it does some things worse than the original, I'm having lots of fun with Toadstool Tour. Sure it's not as good as the latest Tiger Woods or even Hot Shots Golf 3. Nor is there much new here from the original Mario Golf. But I love playing as these characters. Seeing the behavior of Mario, Koopa, Peach (my favorite) Waluigi, and the others makes for a really fun time. Even though the game's problems keep it from being great, it's still an enjoyable title for Nintendo fans and gamers looking for a simple golf game.'' | |||
|- | |||
!colspan="4" style="font-size:120%; text-align:center; background-color:silver;"|Aggregators | |||
|-style="background-color:#E6E6E6" | |||
|colspan=2|Compiler | |||
|colspan=2|{{nowrap|Platform / Score}} | |||
|- | |||
|colspan=2|Metacritic | |||
|colspan=2 style="background-color:LimeGreen"|[https://www.metacritic.com/game/gamecube/mario-golf-toadstool-tour 81] | |||
|- | |||
|colspan=2|GameRankings | |||
|colspan=2|[https://www.gamerankings.com/gamecube/557720-mario-golf-toadstool-tour/index.html 82.02%] | |||
|} | |||
==Staff== | ==Staff== | ||
{{main|List of Mario Golf: Toadstool Tour staff}} | {{main|List of Mario Golf: Toadstool Tour staff}} | ||
As with ''[[Mario Golf (Nintendo 64)|Mario Golf]]'' on the [[Nintendo 64]], Hiroyuki Takahashi and Shugo Takahashi served as the game's lead designers. It was directed by Haruki Kodera, who previously served as a lead programmer for the aforementioned game. This is also the first ''Super Mario'' game where [[Deanna Mustard]] voices Princess Daisy, which would portray her all the way through ''[[Mario Strikers: Battle League]]''. | |||
==Regional differences== | |||
As the game was first released in North America, the NTSC-J and PAL versions of the game were subjected to further refinements. | |||
*Ball in-flight trails were made much shorter in length. Most full-power shot particle effects were toned down as well, excluding those of Mario, Bowser, Shadow Mario, and Bowser Jr. | |||
*Various fonts were changed, including the ones used for the "PAR" indicator at the upper left corner of the screen in gameplay and the post-shot distance/lie description. | |||
*The text colors for messages like "Nice shot!", "Excellent!", and so on were revised. | |||
*Various menu transitions were made much quicker, most notably when opening the pause menu and moving on to the scoreboard from the character celebration animation. | |||
*New sounds were created for fire when the ball is given spin and when the ball skips over the hole. | |||
*Computer-controlled characters are much quicker to calculate their shots and cycle through clubs faster. | |||
*The method for unlocking the “Ace” difficulty was changed. Rather than needing to finish first in every Star Tournament with every character, it is unlocked by defeating Bowser’s character match challenge. | |||
*A glitch that records Hole-In-Ones on par 4 and 5 holes as Albatrosses was fixed. | |||
*In the PAL version, Shadow Mario has proper taunts instead of repeated period punctuation marks. | |||
==Gallery== | ==Gallery== | ||
{{ | {{main-gallery}} | ||
<gallery> | <gallery> | ||
MGMarioLuigi.png|[[Mario]] and [[Luigi]]. | |||
Peach and Daisy MGTT group artwork.jpg|[[Princess Peach|Peach]] and [[Princess Daisy|Daisy]] | |||
MGWarioWaluigi.png|[[Wario]] and [[Waluigi]] | |||
MGTT characters.jpg|Group art | |||
</gallery> | </gallery> | ||
== | ==Media== | ||
{{ | {{media table | ||
|file1=LuigiBirdie.ogv | |||
|title1=''Mario Golf: Toadstool Tour'' | |||
|description1=Luigi scoring a birdie on the second hole of Lakitu Valley | |||
|length1=0:40 | |||
|file2=MGTTTitle.oga | |||
|title2=''Mario Golf: Toadstool Tour'' | |||
|description2=Title screen | |||
|length2=0:30 | |||
|file3=MGTTLakituValley.oga | |||
|title3=''Mario Golf: Toadstool Tour'' | |||
|description3=Excerpt from [[Lakitu Valley]] | |||
|length3=0:30 | |||
|file4=Tournament-Course-Intro.oga | |||
|title4=''Mario Golf: Toadstool Tour'' | |||
|description4=Viewing the course before taking the first stroke | |||
|length4=0:22 | |||
|file5=MGTTPar.oga | |||
|title5=''Mario Golf: Toadstool Tour'' | |||
|description5=Scoring a par | |||
|length5=0:30 | |||
|file6=MGTTUnderPar.oga | |||
|title6=''Mario Golf: Toadstool Tour'' | |||
|description6=Attempting a putt under par | |||
|length6=0:30 | |||
}} | |||
==Names in other languages== | |||
{{foreign names | |||
|Jap=マリオゴルフ ファミリーツアー | |Jap=マリオゴルフ ファミリーツアー | ||
|JapR=Mario Gorufu Famirī Tsuā | |JapR=Mario Gorufu Famirī Tsuā | ||
| Line 427: | Line 1,135: | ||
|SpaE= | |SpaE= | ||
|SpaEM= | |SpaEM= | ||
| | |Fre= | ||
| | |FreM= | ||
| | |FreA= | ||
| | |FreAM= | ||
| | |FreE= | ||
| | |FreEM= | ||
|Dut= | |Dut= | ||
|DutM= | |DutM= | ||
| Line 454: | Line 1,162: | ||
==Trivia== | ==Trivia== | ||
*This game's scoreboard features many [[characters]] from other ''Mario'' games, including [[Goombario]] and [[Hammer Bro]]. Possibly coincidentally, [[Toadster|one of these referenced characters]] has actually never been seen since the ''[[Super Mario Adventures]]'' comic, where he was a minor hero. | *This game's scoreboard features many [[List of characters|characters]] from other ''Super Mario'' games, including [[Goombario]] and [[Hammer Bro]]. Possibly coincidentally, [[Toadster|one of these referenced characters]] has actually never been seen since the ''[[Super Mario Adventures]]'' comic, where he was a minor hero. | ||
*Professional golfer {{wp|Gary McCord}} recommended the game in his book {{wp|For Dummies|Golf for Dummies}}, notably referring to Mario as "the mustachioed plumber from ''[[Donkey Kong (game)|Donkey Kong]]''". | |||
*This was one of the last games Nintendo published to have the "Official Nintendo Seal of Quality" label on the box and the disc, as Nintendo changed the label in late-2003 to read "Official Nintendo Seal". A Player's Choice box was released after 2003; however, on this version, the "[[Official Nintendo Seal]]" appears on the back only, while the "Official Nintendo Seal of Quality" appears on the front and the disc. | |||
[ | |||
==References== | ==References== | ||
<references/> | <references/> | ||
{{ | ==External links== | ||
{{NIWA|StrategyWiki=1}} | |||
*[https://www.nintendo.co.jp/ngc/gftj/index.html Japanese site] | |||
*[https://www.nintendo.co.uk/Games/Nintendo-GameCube/Mario-Golf-Toadstool-Tour-268258.html UK site] | |||
{{MGTT}} | {{MGTT}} | ||
{{ | {{Super Mario games}} | ||
{{ | {{GCN}} | ||
[[de:Mario Golf: Toadstool Tour]] | [[de:Mario Golf: Toadstool Tour]] | ||
[[it:Mario Golf: Toadstool Tour]] | [[it:Mario Golf: Toadstool Tour]] | ||
[[Category:Mario | [[Category:Mario Golf: Toadstool Tour|*]] | ||
[[Category:Games]] | [[Category:Games]] | ||
[[Category:Nintendo GameCube games]] | |||
[[Category:Player's Choice]] | [[Category:Player's Choice]] | ||
[[Category:Sports | [[Category:Sports games]] | ||
[[Category:2003 games]] | [[Category:2003 games]] | ||
[[Category:2004 games]] | [[Category:2004 games]] | ||
Latest revision as of 03:03, March 13, 2024
| Mario Golf: Toadstool Tour | |||||||||
|---|---|---|---|---|---|---|---|---|---|
 American box art For alternate box art, see the game's gallery. | |||||||||
| Developer | Camelot Software Planning | ||||||||
| Publisher | Nintendo | ||||||||
| Platform(s) | Nintendo GameCube | ||||||||
| Release date | Original Release: Player's Choice Release: | ||||||||
| Language(s) | Deutsch English (United States) Español (España) Français (France) Italiano 日本語 | ||||||||
| Genre | Golf | ||||||||
| Rating(s) |
| ||||||||
| Mode(s) | 1–4 players | ||||||||
| Media | Nintendo GameCube:
| ||||||||
| Input | Nintendo GameCube:
| ||||||||
Mario Golf: Toadstool Tour is a Nintendo GameCube game that is the third game in the Mario Golf series and the second home console installment. Its handheld console counterpart is Mario Golf: Advance Tour on the Game Boy Advance. About a year after its release, Mario Golf: Toadstool Tour earned a Player's Choice re-release in North America in 2004 and Australia in 2005. It is the first Super Mario spinoff to include substantial content from Super Mario Sunshine (released the previous year), such as Bowser Jr., Shadow Mario, and Petey Piranha making their respective second appearance overall and playable debut; it is also the first to include Diddy Kong from the Donkey Kong games, effectively taking Donkey Kong Jr.'s previous role as secondary Donkey Kong character in Super Mario games following the acquisition of Donkey Kong Country assets from Rare Ltd.
Opening cinematic[edit]

The game's opening starts with Mario and Luigi looking at a trophy and commenting on how nice it looks. Peach and Daisy call on the brothers, exclaiming that it is time to play as the four form a quartet and go on an exploration in freestyle exhibition golf. Peach gets her turn first, then comes Mario, then comes Daisy, and last comes Luigi, whose shot strikes the flagpole of the hole, impressing the crew. Wario and Waluigi are shown from behind, extremely jealous of how well Mario, Luigi, Peach, and Daisy do. The two hear a noise and turn around to see Yoshi and Koopa Troopa entering the frame before they begin their round of golf. Wario and Waluigi clench their golf clubs while laughing, and prepare to join forces with them. They all take turns hitting their golf balls, and Yoshi hits near a Chain Chomp. When he tries to get it back, the Chain Chomp wakes up and barks at Yoshi, scaring him and making him fall over. Wario attempts to hit the ball out of the bunker, which causes sand to spray into Waluigi's face in recoil. Moments later, Waluigi attempts to putt the ball into the hole, but fails miserably after a few tries, resulting in Yoshi and Koopa Troopa dozing off.
Meanwhile, Donkey Kong and Diddy Kong walk past the sleeping Yoshi and Koopa Troopa, so Wario and Waluigi attempt to challenge them next. After Donkey Kong shows his golf prowess, Wario, despite his terrible swing, attempts to hit the ball a long way, until it goes out of sight into the forest. Wario and Waluigi start celebrating until they hear an ominous roar. The ball unknowingly deflects back and lands in front of Wario. The two look up and see Bowser coming out of the forest, completely enraged because he has a black eye from the golf ball. Bowser gives chase after Wario and Waluigi in his Koopa Clown Car and starts throwing Bob-ombs at the two as they run around Lakitu Valley past Birdo and Boo, who were playing a game of golf on their own. Wario and Waluigi find a yellow Warp Pipe that is too small for Bowser and his Koopa Clown Car to fit through and come out the other side of the pipe and stop to catch their breath. However, Bowser flies right above them seconds later, intending to drop another Bob-omb and making them run for their lives.

Meanwhile, Mario is preparing to take a shot on that same course with Luigi, Peach, and Daisy observing from behind. As Wario and Waluigi still try frantically to escape from Bowser's looming threat by going through an enormous metal door, Mario hits his ball with his golf club. Wario and Waluigi open the door and continue their escape attempt, but Mario's ball hits them, giving them black eyes as well. The ball then strikes Bowser, causing him to fumble the bomb. This ultimately results in an explosion claiming Wario, Waluigi, and Bowser as the victims. Mario, Luigi, Peach, and Daisy witness the explosion from afar, completely baffled in terms of what was the cause behind it.
Screenshots[edit]

Mario and Luigi are by the trophy.
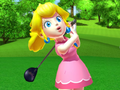
Peach makes her move.
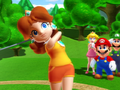
Daisy makes her move.
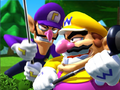
Wario and Waluigi enter the frame.
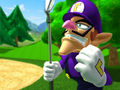
Waluigi gets pumped up.
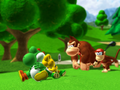
Donkey Kong and Diddy Kong see Yoshi and Koopa dozing off.
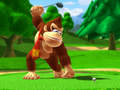
Donkey Kong makes his move.
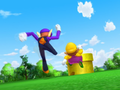
Wario and Waluigi run from Bowser.
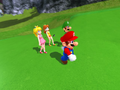
Mario, Luigi, Peach, and Daisy stroll around.


Gameplay[edit]

While playing fairly similarly to the previous two games, particularly Mario Golf for the Nintendo 64, this game makes various additions and alterations to the formula present in both controls and visuals. The game uses 3D renders for the designs of characters and courses, like the previous home console game, allowing for the camera to be changed to view more of each hole in detail. Pressing ![]() or
or ![]() allows the player to see an overview of the hole and study the topography of the both the course and specifically the green. In order to adjust their shot, the player can use the aforementioned controls and look around using
allows the player to see an overview of the hole and study the topography of the both the course and specifically the green. In order to adjust their shot, the player can use the aforementioned controls and look around using ![]() . The green also now displays moving topographic lines that follow down its path, increasing in speed the more the green slopes. A new control system has also been added, with manual and automatic swinging. The automatic swing is used by pressing
. The green also now displays moving topographic lines that follow down its path, increasing in speed the more the green slopes. A new control system has also been added, with manual and automatic swinging. The automatic swing is used by pressing ![]() to set the power for the shot and then letting the game decide where the sweet spot marker ends up. A manual swing involves pressing
to set the power for the shot and then letting the game decide where the sweet spot marker ends up. A manual swing involves pressing ![]() when choosing power, then pressing either
when choosing power, then pressing either ![]() or
or ![]() to set the sweet spot impact marker. This allows the use of a new feature, spin, to be used on shots. Backspin, topspin, super backspin or super topspin can be used, affecting the ball's line of movement on the ground. Topspin sends the ball rolling forward while backspin causes the ball to roll back; these spins make the ball roll a shorter distance than their super versions. Different characters' spin will be more powerful with higher spin levels. The ability to change where the ball is hit is also makes a return from the two previous games, allowing different types of shots to be taken. Approach shots, used when players approach the pin, appear in this game, as well as the limited number of power shots. Power shots have longer drives than normal shots, and only six can be used at a time. If a player does a perfect power shot (meaning they have aligned the first bar at the far left and perfectly aligned the second bar), it is not used up.
to set the sweet spot impact marker. This allows the use of a new feature, spin, to be used on shots. Backspin, topspin, super backspin or super topspin can be used, affecting the ball's line of movement on the ground. Topspin sends the ball rolling forward while backspin causes the ball to roll back; these spins make the ball roll a shorter distance than their super versions. Different characters' spin will be more powerful with higher spin levels. The ability to change where the ball is hit is also makes a return from the two previous games, allowing different types of shots to be taken. Approach shots, used when players approach the pin, appear in this game, as well as the limited number of power shots. Power shots have longer drives than normal shots, and only six can be used at a time. If a player does a perfect power shot (meaning they have aligned the first bar at the far left and perfectly aligned the second bar), it is not used up.
Controls[edit]
Menu[edit]
 - Confirm
 - Back
 - Select
 - Left-Handed Character
 - Star Character
 - Change Clubs (only available when data is transferred from Mario Golf: Advance Tour)
Golf[edit]
- - Start Swing/Choose Power (automatic)
- - Change shot type/Choose Power (manual)
- + - Topspin
- + - Backspin
- + - Super Topspin
- + - Super Backspin
 / - Change Direction/Change Clubs
- - Increase Power Bar
- - Decrease Power Bar
- /
 - Change Camera
  - Move Camera angle
- / - Change ball meet area
Scores[edit]
Depending on how many strokes the player required to take to hit the ball into the hole, players receive a score and a name for the score. The following is a list of them, from best to worst scores:
| Name | Image | Description |
|---|---|---|
| Hole-in-One | 
|
The player has sunk the ball in the hole with one stroke. It is easiest to receive this result on a par 3, but it is possible to attain a Hole-in-One on a par 4 or 5 as well. |
| Albatross | 
|
The player has sunk the ball three below par. The game awards this for a score of 2 on a par 5, or 1 on a par 4. Without linking with Mario Golf: Advance Tour, this is a very hard task; however, it is not as hard as a hole-in-one on a par 5 hole. |
| Eagle | 
|
The player has sunk the ball two below par. On a par 3, the game records this as a Hole-in-One instead. |
| Birdie | 
|
The player has sunk the ball one below par. |
| Par | 
|
The player has sunk the ball with a neutral score for the hole. |
| Bogey | 
|
The player has sunk the ball one above par. |
| Double Bogey, Triple Bogey, or worse | 
|
The player has sunk the ball the number indicated above par. The highest score a player can take is equivalent to triple par (i.e. +6 for a par 3, +8 for a par 4, and +10 for a par 5). Selecting Give Up will penalize the player with a triple par score and retire the hole. |
- NOTE: The US version of the game has a glitch that records Hole-In-Ones on par 4 and 5 holes as Albatrosses. This is fixed in the PAL and Japanese versions.
Terrain, hazards, and other features[edit]
| Terrain | ||
| Name | Image | Description |
|---|---|---|
| Fairway | 
|
A large and common terrain that is the easiest to hit the ball from. It has no effect on the golf ball. |
| Fast Fairway | 
|
Similar to fairway, except there is less friction between it and a regular fairway, meaning balls bounce farther and higher and roll more. |
| Green | 
|
The terrain where the pin, hole, and flag are located. It is surrounded by a Fringe, and golfers need to use putters if they are on the green. |
| Tournament Green | 
|
Similar to regular greens, but, as with fast fairways, there is less friction in the ball, meaning it rolls farther. |
| Fringe | 
|
The area of grass surrounding the green, with a topography in-between the green and the fairway. |
| Bunker | 
|
The most common negatively affecting terrain, bunkers affect the ball's lie and the ability to hit the ball accurately. Sand wedges are typically used to get balls out of bunkers. |
| Beach Bunker | 
|
Found only in Blooper Bay, these act similar to regular bunkers, except they do not negatively affect the ball's lie as much as them. As their name suggests, they are found next to the ocean. |
| Grass Bunker | 
|
Found only in Bowser Badlands, these bunkers are heavier than the heaviest rough and greatly affect a ball's lie. |
| Semi-Rough | 
|
Semi-Rough is found in the fringe area, between fairways and the rough. They slightly affect the ball's lie. |
| Rough | 
|
Roughs are deeper than the semi-rough. They affect the ball's lie more than semi-rough, but less than a bunker. |
| Heavy Rough | 
|
The heaviest rough, these greatly affect the ball's lie, even more than a Bunker or Beach Bunker. They are located on the deepest areas of the rough, usually before an O.B. |
| Flower Patch | 
|
Uncommon terrain that affects a ball's lie found only in Peach's Castle Grounds, however, not as much as bunkers and the rough. Whenever a shot lands in a Flower Patch, Pikmin will be shot out, wailing. |
| Rock | 
|
Terrain that does not have much friction and causes balls to bounce out of it. When a ball lands on it, it hurts the ball's lie, though not as much as Grass Bunkers or Heavy Rough. |
| Brick | 
|
Like Rock, terrain that does not have much friction and causes balls to bounce out of it, and also hurts the ball's lie. Brick has a very harsh, echoing ricochet sound. |
| Wood | 
|
Similar to Rock, Pipe, or Brick, where the ball frequently bounces off of it. Like those three terrains, it also hurts the ball's lie. |
| Pipe | 
|
Terrain that also does not have much friction and causes balls to bounce out of it. Like Rock, Brick and Wood, it adversely affects the ball's lie. They are only found on Peach's Castle Grounds, where they are usually used to transport balls from one part of a hole to another (similar to Warp Pipes); however, some pipes are used as tunnels, where the ball will roll through the pipe and land out of the other side from where it entered (usually into rough). |
| Waste Area | 
|
Waste areas have high friction and prevent a ball from bouncing. They affect the ball's lie, though not as much as Rock. |
| Heath | 
|
Found only in Bowser Badlands, this terrain very heavily affects a ball's lie the most, moreso than the deep rough and grass bunkers. The player must time their shot perfectly if they want to get out of the heath. |
| Hazards | ||
| Name | Image | Description |
|---|---|---|
| Out of Bounds | 
|
These are designated areas of the course that players cannot land their balls in. These include endless pits, being too far off-course, water, lava, and areas with Chain Chomps occupied in. When players receive an O.B., they need to redo their shot with a cost of a stroke penalty. The hazard is signified by a Koopa Paratroopa. |
| Water Hazard | 
|
If a ball lands in water or lava, it is considered an O.B. and players need to reshoot the ball with a stroke penalty. The hazard is signified by a Lakitu. |
| Tree Hazard | 
|
If a ball gets stuck in a tree or lands too close to a tree, players need to reshoot the ball with a stroke penalty. |
| Warp Pipe | 
|
Warp Pipes warp balls to another location on the golf course. |
| Bouncing Mushroom | 
|
Located only in Peach's Castle Grounds. Bouncing Mushrooms causes balls to bounce off of the mushroom. |
| Boo | 
|
Located only in Bowser Badlands, these enemies act as walls to flying balls, slowing or stopping a ball's progress through the air. |
| Thwomp | 
|
Located only in Bowser Badlands, if a ball rolls underneath a Thwomp, the Thwomp smashes the ball, which heavily hurts its lie. Thwomps also act as walls to block balls. |
| Whomp | 
|
Located only on holes 16 and 17 of Bowser Badlands, Whomps squish the ball, causing the player to get a stroke penalty. |
| Bob-omb | 
|
Located only in Bowser Badlands, if a ball hits a Bob-omb, it explodes, sending the ball backward. It affects flying balls more than grounded balls. When the Bob-omb explodes, it leaves behind a bunker. |
| Piranha Plant | 
|
These enemies eat balls that roll into their Warp Pipes, and then spit them out to a spot. Some Piranha Plants spit balls into O.B. zones. |
| Chain Chomp | 
|
These enemies occupy certain O.B. zones. If a ball rolls into an area with a Chain Chomp, the Chain Chomp wakes up and an O.B. is called. |
| Weather | ||
| Name | Image | Description |
|---|---|---|
| Wind | 
|
Wind causes the ball to travel in the direction it is blown at. Higher wind means the ball is more affected by the wind. Crosswinds (ie winds that blow from the left or right of the direction of the player's aim) affect the ball more than winds that blow from front or behind. In addition, balls with a higher trajectory are more affected by the wind than balls hit with lower trajectories. |
| Rain | 
|
Rain lowers the drive distance of the ball, as well as increasing ball friction so that the ball rolls less, especially while putting. |
Game modes[edit]

Mario Golf: Toadstool Tour offers a wide variety of game modes, including tournaments, training sessions, collecting coins and shooting the ball through rings. Multiplayer for up to four players is supported, and can be played with one to four controllers. All of the game modes are explained briefly below. Note that multi-player game modes not marked with an asterisk (*) can also be played with 1 player and AI opponents.
Single-player[edit]
- Tournament - The player competes against others for first place in an 18-hole round of golf and to earn best badges on specific holes. The lowest score at the end of the tournament is the winner.
- Character Match - Compete in a one-on-one challenge against a computer character on any course using match play rules. Star Characters can be unlocked by accepting challenge from characters and winning.
- Ring Shot - Compete by hitting shots through various rings on a course while still finishing at or under par.
- Challenge - Complete Ring Shot holes to earn stars which unlock even more holes! Complete them all to unlock a special surprise.
- Speed Golf - Complete a round of golf in the fastest time possible.
- Training - Practice golfing on any hole. During gameplay, the player can select a course and hole, adjust the wind strength and direction, switch between sunny or rainy weather, front or back tees, and regular or tournament greens, and change the pin's location.
Multiplayer[edit]
- Doubles - A 2-on-2 game of golf. For 1-4 players.
- Club Slots - Play using a limited amount of clubs. When playing with four slots, there is an added gimmick for the fourth slot (i.e. no wind, double points, extra mulligan, etc.).
- Ring Shot - Hit the ball through all the rings and finish the hole in par or better.
- Face-Off - Play six holes against opponents to see who can complete the most holes successfully.*
- Coin Shoot - Hit the ball near coins to collect them. Earn the highest coin total to win. The coins make up various patterns, such as the Triforce from the Legend of Zelda series, while another looks like the Nintendo GameCube.
- Quick Cash - Collect as many coins as possible in two shots under par (for example, on a par 5 hole, the player has 3 shots to collect coins), without worrying about sinking the ball.
- Cash Cup - Collect as many coins as possible and finish the hole with par or better. Failure to do so will result in 0 coins for the hole.
- Stroke Play - Get the fewest total strokes on a course to win. Beat courses in tournament mode to unlock them here.
- Side Games - Fun challenges that test and improve your golfing skills.
- Birdie Challenge - Compete on Congo Canopy to see how many consecutive birdies you can earn.
- Practice Games - Hone your approaching and putting skills by playing these unique challenges. There are novice, intermediate and expert difficulties.
- Match Play - Standard golfing with a different scoring system. Winning a hole earns you a medal; earn the highest amount of medals or mathematically eliminate the opponent to win. For 2 players only.
- Skins Match - Similar to Match Play, but for 2-4 players. The player who finishes with the lowest score on a hole earns a point. Whoever has the most amount of points at the end wins.
- Near-Pin - Compete in Congo Canopy to get the shortest total distance from the pin in one stroke. If your ball is not on the green in one stroke, it will count as being 100 feet away.
Unlockable[edit]
- Star Tournament - Unlocked once the tournament mode on Bowser Badlands is beaten and a star version of a character is obtained. Same as tournament mode, except the player will compete against tougher star characters while using the back tees and tournament greens. Beat these to be able to use the tournament greens in other game modes. For 1 player.
- Side Games
- Birdie Challenge
- One-On One-Putt - Unlocked by beating birdie challenge on all 18 holes (which will also unlock Bowser Jr.). Similar to birdie challenge, except the first shot must land on the green and the second must go in the hole (resulting in a birdie). If the first shot is not on the green, the player will lose. The player must clear this with 1 player to unlock the tournament greens for Congo Canopy. For 1-4 players.
- Birdie Challenge
- Special Tournament - Unlocked by holding
 on the title screen and pressing the button.
- Hole-in-One Contest - Like the Near-Pin Contest, except the game is played on the Par-3 holes of a selected course. For 1 player.
- Password Tournament - The player must compete in special tournaments with preset rules by entering certain passwords. For 1 player.
- Ace Computer Difficulty Mode - Different unlocking criteria dependent on the version:
- American version - The player must place first in every Star Tournament with all (non-GBA) characters. Whether the characters are in their regular or star form does not matter. 102 tournaments in total (six normal tournaments needed to unlock Star Tournament).
- Japanese and European/Australian versions - The player must accept the challenge from Bowser and win in Character Match mode. This will also unlock Bowser's star form.
Playable characters[edit]
Including transferable characters, a total of 18 playable characters are featured in Mario Golf: Toadstool Tour, consisting of 12 default characters, 4 unlockable characters, and 2 transferable characters. Daisy, Koopa, Diddy Kong, Waluigi, Birdo, Bowser Jr., Boo, Shadow Mario, and Petey Piranha are playable for the first time in the Mario Golf series, with Bowser Jr., Shadow Mario, and Petey Piranha also making their overall playable debuts. This is also Diddy Kong's first appearance in a Super Mario game.
- Drive - How far the ball travels in the air for on a perfect shot with a driver (1W).
- Height - How high or low the ball travels in the air. The higher the ball travels, the more affected by wind it is, the higher it bounces, and the more it is affected by spin. The lower it is, the less it gets affected by wind; additionally, it makes the ball bounce further, roll more and get more affected by lie.
- Shot - What trajectory the ball travels in when hit. For right-handed players, if the ball curves to the left, it's a draw; to the right, a fade; far to the left, a hook or far to the right, a slice, and vice-versa for left-handed players.
- Impact - The amount of the sweet-spot marker left for certain shots. Less makes bunker shots much harder to land and often results in mis-hits.
- Control - The amount of movement away from the targeted spot when hit off the perfect impact point. The higher the amount, the less the ball moves from the target spot.
- Spin - The amount of affect spin has on the ball. Having a higher amount will mean that the ball will roll further with the use of spin.
Impact, Control, and Spin are on a scale of 21. Numbers in parentheses for all stats indicate how they are shown when selecting Advance Tour Clubs. The quotes above the stats are each character's challenge invitation and instruction manual profile.
| Default characters | |||||||||||||||||||||||||||||||||||||||||||||||||||||||||||||||||||||||||||||||||||||||||||
|---|---|---|---|---|---|---|---|---|---|---|---|---|---|---|---|---|---|---|---|---|---|---|---|---|---|---|---|---|---|---|---|---|---|---|---|---|---|---|---|---|---|---|---|---|---|---|---|---|---|---|---|---|---|---|---|---|---|---|---|---|---|---|---|---|---|---|---|---|---|---|---|---|---|---|---|---|---|---|---|---|---|---|---|---|---|---|---|---|---|---|---|
|
|
|
| ||||||||||||||||||||||||||||||||||||||||||||||||||||||||||||||||||||||||||||||||||||||||
|
|
|
| ||||||||||||||||||||||||||||||||||||||||||||||||||||||||||||||||||||||||||||||||||||||||
|
|
|
| ||||||||||||||||||||||||||||||||||||||||||||||||||||||||||||||||||||||||||||||||||||||||
| Unlockable characters | |||||||||||||||||||||||||||||||||||||||||||||||||||||||||||||||||||||||||||||||||||||||||||
|
|
|
| ||||||||||||||||||||||||||||||||||||||||||||||||||||||||||||||||||||||||||||||||||||||||
| Transferable characters | |||||||||||||||||||||||||||||||||||||||||||||||||||||||||||||||||||||||||||||||||||||||||||
|
| ||||||||||||||||||||||||||||||||||||||||||||||||||||||||||||||||||||||||||||||||||||||||||


Neil and Ella can be transferred into the game by connecting Mario Golf: Advance Tour for the Game Boy Advance with the Nintendo GameCube. Up to four different pairs can be linked via different save files, with each pair wearing different colors.
Golf courses[edit]
| Name | Image | Description | How to unlock |
|---|---|---|---|
Lakitu Valley
|

|
A basic course surrounded by trees. It is often used for tutorials, due to it being beginner-friendly. | Unlocked by Default |
| Cheep Cheep Falls |

|
This course has a conventional nature like Lakitu Valley, but also contains ponds and rivers as water hazards. Trees and subtle traps are also more abundant. | Beating the Lakitu Cup. |
| Shifting Sands |

|
This course is likely based off Shifting Sand Land and contains many bunkers. There are also waste areas, cacti and rocks that act as hazards. | Beating the Cheep Cheep Tournament. |
| Blooper Bay |

|
This course features some unconventional elements, such as Fast Fairways, where surfaces on which the ball roles further than normal, and is set in a tropical resort area. Many of the bunkers are shaped like recognizable objects, such as seagulls or Super Stars. | Beating the Sands Classic. |
| Peach's Castle Grounds |

|
This course features many elements unique to the Super Mario franchise, such as Warp Pipes, Chain Chomps, and giant Mushrooms. King Bob-omb also makes a cameo here, as well as Pikmin. | Beating the Blooper Open. |
| Bowser Badlands |

|
This dark, difficult course presumably designed by Bowser contains Bob-ombs, Piranha Plants, and Whomps, as well as elements such as lava. Extra care will need to be taken when playing on this course. | Beating the Peach's Invitational. |
| Congo Canopy |

|
Set in the Kongo Jungle, this is a special Par 3 course used in pin-shot and birdie challenges. It can be easy to miss the mark and land out of bounds and there are also a few water hazards to be found. | Unlocked by Default |
Score table[edit]
| # Scores for Trophy | |
|---|---|
| Lakitu Cup | +6 |
| Cheep Cheep Tournament | +4 |
| Sands Classic | +3 |
| Blooper Open | +2 |
| Peach's Invitational | +1 |
| Bowser Championship | ±0 |
| Lakitu Cup★ | -9 |
| Cheep Cheep Tournament★ | -7 |
| Sands Classic★ | -5 |
| Blooper Open★ | -3 |
| Peach's Invitational★ | -1 |
| Bowser Championship★ | ±0 |
"Target Bullseye Tour" version[edit]
On July 28, 2003, Nintendo of America released Mario Golf: Toadstool Tour (Target Bullseye Tour Included -- Exclusive Version) through Target stores. This version allowed players to play the Bullseye Tour in the Special Tournament mode. Codes issued from this version of the game could be submitted through the official website. Nintendo prizes were mailed out to the winners. The promotion ended on August 31, 2003.[2]
References to other games[edit]
- Super Mario Bros.: In the character select screen, Princess Peach sings the first few notes of the overworld theme. A remix of the underground theme is heard during the player's attempt to score a birdie.
- Super Mario 64: Shifting Sands is possibly based on Shifting Sand Land from this game. A remix of the Peach's Castle theme is heard in Peach's Castle Grounds. A remix of the Bowser boss fight music is heard in Bowser Badlands. Hole 8 of Peach's Castle Grounds has a mountain with a similar layout to the one in Bob-omb Battlefield, and Big Bob-omb appears there, too. Shadow Mario’s voice clips are mostly taken from this game but edited to be slower.
- Mario Party: The sound effect that plays when Toad trips on the menu screens is taken from Mario Party, as is the sound that plays when attempting to use a Power Shot when out of them.
- Donkey Kong 64: Donkey Kong and Diddy Kong's voice clips were reused from this game.
- Pikmin: Whenever a player's golf ball lands in a flower patch, Pikmin fly out.
- Super Mario Sunshine: Hole 10 of Blooper Bay shares a similar overwater cabana and bridge with Gelato Beach, an area in Isle Delfino. Bowser Jr., Shadow Mario, and Petey Piranha's animations are heavily based on those from this game.
References in later games[edit]
- Mario Kart: Double Dash!!: The countdown timer sound effect is reused in this game to signal the start of the race or battle for the characters.
- Mario Power Tennis: The opening logos are reused.
- Super Smash Bros. Brawl: The main theme appears as part of an arranged medley alongside the main theme of Mario Power Tennis as a selectable music track. It returns unchanged in Super Smash Bros. for Wii U and Super Smash Bros. Ultimate.
- Mario Golf: Super Rush: Some of the characters' voice clips are reused in this game.
Reception[edit]
| Reviews | |||
|---|---|---|---|
| Release | Reviewer, Publication | Score | Comment |
| Nintendo GameCube | Matt Casamassina, IGN |
8/10 | Tiger is still king. But if you're looking for something more on the arcade side, Mario Golf more than delivers, especially if you consider yourself a Nintendo fan and can appreciate the wide selection of classic characters -- all playable -- in the game. |
| Nintendo GameCube | Ryan Davis, GameSpot |
7.2/10 | When you stand back and look at Mario Golf: Toadstool Tour on its own terms, you'll find an excellent game of golf that provides a different experience from that in other golf games currently on the market. But, as a sequel to Mario Golf for the N64, which was originally released four years ago, the game doesn't make too many enhancements to the basic formula established back in 1999. If you haven't played the N64 game, you need not concern yourself with this. But, if you have, you may want to give Mario Golf a rental before you take the plunge. Unless, of course, you're eager for more of what made that game as great as this one. |
| Nintendo GameCube | Raymond "Psylancer" Padilla, Gamespy |
8.3/10 | Despite its camera problems, its visual deficiencies, and the fact that it does some things worse than the original, I'm having lots of fun with Toadstool Tour. Sure it's not as good as the latest Tiger Woods or even Hot Shots Golf 3. Nor is there much new here from the original Mario Golf. But I love playing as these characters. Seeing the behavior of Mario, Koopa, Peach (my favorite) Waluigi, and the others makes for a really fun time. Even though the game's problems keep it from being great, it's still an enjoyable title for Nintendo fans and gamers looking for a simple golf game. |
| Aggregators | |||
| Compiler | Platform / Score | ||
| Metacritic | 81 | ||
| GameRankings | 82.02% | ||
Staff[edit]
- Main article: List of Mario Golf: Toadstool Tour staff
As with Mario Golf on the Nintendo 64, Hiroyuki Takahashi and Shugo Takahashi served as the game's lead designers. It was directed by Haruki Kodera, who previously served as a lead programmer for the aforementioned game. This is also the first Super Mario game where Deanna Mustard voices Princess Daisy, which would portray her all the way through Mario Strikers: Battle League.
Regional differences[edit]
As the game was first released in North America, the NTSC-J and PAL versions of the game were subjected to further refinements.
- Ball in-flight trails were made much shorter in length. Most full-power shot particle effects were toned down as well, excluding those of Mario, Bowser, Shadow Mario, and Bowser Jr.
- Various fonts were changed, including the ones used for the "PAR" indicator at the upper left corner of the screen in gameplay and the post-shot distance/lie description.
- The text colors for messages like "Nice shot!", "Excellent!", and so on were revised.
- Various menu transitions were made much quicker, most notably when opening the pause menu and moving on to the scoreboard from the character celebration animation.
- New sounds were created for fire when the ball is given spin and when the ball skips over the hole.
- Computer-controlled characters are much quicker to calculate their shots and cycle through clubs faster.
- The method for unlocking the “Ace” difficulty was changed. Rather than needing to finish first in every Star Tournament with every character, it is unlocked by defeating Bowser’s character match challenge.
- A glitch that records Hole-In-Ones on par 4 and 5 holes as Albatrosses was fixed.
- In the PAL version, Shadow Mario has proper taunts instead of repeated period punctuation marks.
Gallery[edit]
- For this subject's image gallery, see Gallery:Mario Golf: Toadstool Tour.
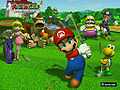
Group art


Media[edit]
| File info 0:40 |
| File info 0:30 |
| File info 0:30 |
| File info 0:22 |
| File info 0:30 |
| File info 0:30 |
Names in other languages[edit]
| Language | Name | Meaning |
|---|---|---|
| Japanese | マリオゴルフ ファミリーツアー Mario Gorufu Famirī Tsuā |
Mario Golf Family Tour |
Trivia[edit]
- This game's scoreboard features many characters from other Super Mario games, including Goombario and Hammer Bro. Possibly coincidentally, one of these referenced characters has actually never been seen since the Super Mario Adventures comic, where he was a minor hero.
- Professional golfer Gary McCord recommended the game in his book Golf for Dummies, notably referring to Mario as "the mustachioed plumber from Donkey Kong".
- This was one of the last games Nintendo published to have the "Official Nintendo Seal of Quality" label on the box and the disc, as Nintendo changed the label in late-2003 to read "Official Nintendo Seal". A Player's Choice box was released after 2003; however, on this version, the "Official Nintendo Seal" appears on the back only, while the "Official Nintendo Seal of Quality" appears on the front and the disc.
References[edit]
- ^ Date info of Mario Golf: Toadstool Tour from TMK, retrieved 11/26/2012
- ^ Mario Golf: Toadstool Tour (Target Bullseye Tour Included -- Exclusive Version) Game Profile. IGN GameCube. Retrieved on March 29, 2008.
External links[edit]
| Mario Golf: Toadstool Tour | ||
|---|---|---|
| Characters | Default | Mario • Luigi • Princess Peach • Princess Daisy • Yoshi • Koopa Troopa • Donkey Kong • Diddy Kong • Wario • Waluigi • Birdo • Bowser |
| Unlockable | Bowser Jr. • Boo • Shadow Mario • Petey Piranha | |
| Transfer | Neil • Ella | |
| Courses | Lakitu Valley • Cheep Cheep Falls • Shifting Sands • Blooper Bay • Peach's Castle Grounds • Bowser Badlands • Congo Canopy | |
| Miscellaneous | Best Badge • Gallery • List of golfing terms • Staff | |
| Nintendo GameCube games | |
|---|---|
| Super Mario franchise | Luigi's Mansion (2001) • Super Mario Sunshine (2002) • Mario Party 4 (2002) • Mario Golf: Toadstool Tour (2003) • Mario Kart: Double Dash!! (2003) • Mario Party 5 (2003) • Paper Mario: The Thousand-Year Door (2004) • Mario Power Tennis (2004) • Mario Party 6 (2004) • Dance Dance Revolution: Mario Mix (2005) • Mario Superstar Baseball (2005) • Mario Party 7 (2005) • Super Mario Strikers (2005) |
| Donkey Kong franchise | Donkey Konga (2003) • Donkey Konga 2 (2004) • Donkey Kong Jungle Beat (2004) • Donkey Konga 3 JP (2005) |
| Wario franchise | Wario World (2003) • WarioWare, Inc.: Mega Party Game$! (2003) |
| Other | Super Mario 128 (2000, demo) • Super Smash Bros. Melee (2001) • Nintendo Puzzle Collection (2003) • NBA Street V3 (2005) • SSX on Tour (Nintendo Village) (2005) • Donkey Kong Racing (cancelled) • Diddy Kong Racing Adventure (cancelled) |