Itadaki Street DS: Difference between revisions
Tags: Reverted Mobile edit |
No edit summary |
||
| (22 intermediate revisions by 8 users not shown) | |||
| Line 1: | Line 1: | ||
{{italic title}} | {{italic title}} | ||
{{game infobox | {{game infobox | ||
|title=Itadaki Street DS | |title=Itadaki Street DS | ||
|image=[[File:Orig ita01.jpg|250px]] | |image=[[File:Orig ita01.jpg|250px]] | ||
|developer={{wp| | |developer=[[TOSE Software Co.]]<br>{{wp|Think Garage}} | ||
|publisher=[[Square Enix]] | |publisher=[[Square Enix]] | ||
|release={{release|Japan|June 21, 2007 | |release={{release|Japan|June 21, 2007}} | ||
|genre= | |genre=[[Genre#Party games|Party]] | ||
|modes=Single | |modes=Single player, multiplayer (up to four players) | ||
|ratings={{ratings|cero=A}} | |ratings={{ratings|cero=A}} | ||
|platforms=[[Nintendo DS]] | |platforms=[[Nintendo DS]] | ||
|media={{media|ds=1}} | |media={{media|ds=1}} | ||
|input={{input|ds=1}} | |input={{input|ds=1}} | ||
}} | }} | ||
'''''Itadaki Street DS'''''<ref> | '''''Itadaki Street DS'''''<ref>{{cite|url=www.hd.square-enix.com/eng/ir/library/pdf/ar_2008en.pdf|title=SQUARE ENIX ANNUAL REPORT 2008|publisher=Square Enix|format=PDF|accessdate=May 6, 2023}}</ref> is a game for the [[Nintendo DS]] developed by [[TOSE Software Co.|TOSE]] and {{wp|Think Garage}}, and published by [[Square Enix]]. Like other installments in the ''Itadaki Street'' series, ''Itadaki Street DS'' is a {{wp|Monopoly (game)|Monopoly}}-like game starring ''[[Super Mario (franchise)|Super Mario]]'' characters, as well as from the ''Dragon Quest'' series. It was released in Japan only, on June 21, 2007. | ||
A follow-up to this game, titled ''[[Fortune Street]]'', was released internationally for the [[Wii]] in December 2011. | A follow-up to this game, titled ''[[Fortune Street]]'', was released internationally for the [[Wii]] in December 2011. | ||
==Gameplay== | ==Gameplay== | ||
Players move around the board, buying shops and collecting money from others who land on their shop spaces. Depending on circumstances, some players can forcibly take over another player's shop spaces, or make them inactive for a turn. Players can also hold shares of a block of spaces so that they get paid when someone lands on any space in that block, even if it is not their own. | Players move around the board, buying shops and collecting money from others who land on their shop spaces. Depending on circumstances, some players can forcibly take over another player's shop spaces, or make them inactive for a turn. Players can also hold shares of a block of spaces so that they get paid when someone lands on any space in that block, even if it is not their own. | ||
| Line 42: | Line 41: | ||
==Areas and stock system== | ==Areas and stock system== | ||
All shops are divided in many areas, each given a unique name and color. Most areas contain four shops. Shops start with a given price when players buy them and by investing into them, the price increases. The player can invest up to 999 gold into a shop at a time, but this amount is limited by the shop's max capital. If a player gets another shop in the same area as other shops owned by them, the shops' prices grow, and the player can invest more money on that shop. The player can achieve a monopoly by owning all shops in the area. Shops in monopolized areas have their value boosted and accept even bigger investments. The appearance of a shop changes based on how much gold is invested in it, though this is only cosmetic. | |||
All shops are divided in many areas | |||
A player | A player who crosses onto the bank square or stops on a broker square may buy stocks. The player can choose any area to invest gold into. Players may buy up to 99 stocks at a time and can hold a max number of 999 stocks in an area. Whenever gold is exchanged between players by landing on a shop, stockholders in that area get a bonus percentage of gold based on how many stocks they have. When gold is invested in a shop, the area's stock price may get raised and make stocks more valuable. When a shop loses value, the stock price may go down. Likewise, when a player buys or sells more than 10 stocks in an area, the price of stock in that area goes up or down by 8%, respectively. Players can sell their stocks at the start of their turn. | ||
Players may also force buyout on the opponents' shops when they land on them. To buy a shop out, the player must pay 5x its real value | Players can exchange shops before rolling the die. They can choose to exchange one to two of their own shops for one to two of an opponent's shop. Gold can be added as a supplement to the deal. After the initial terms of the trade are decided, the opponent may ask for more gold, accept the terms of the deal, or decline the trade. Players may also force buyout on the opponents' shops when they land on them. To buy a shop out, the player must pay 5x its real value. | ||
Each | Each CPU rank invests differently: | ||
{|class="wikitable" | {|class="wikitable" | ||
|- | |- | ||
!CPU Rank!!Max. stock buying per bank pass!!Max. investment per invest!!Chance of buyout for others!!Other notes | !CPU Rank!!Max. stock buying per bank pass!!Max. investment per invest!!Chance of buyout for others!!Other notes | ||
|- | |- | ||
|Rank D||29||100G||Very rarely|| | |Rank D||29||100G||Very rarely||None | ||
|- | |- | ||
|Rank C||49||200G||?|| | |Rank C||49||200G||?||None | ||
|- | |- | ||
|Rank B||Maximum||Maximum||Often|| | |Rank B||Maximum||Maximum||Often||They usually invest too early, preventing them from buying stocks in their areas. | ||
|- | |- | ||
|Rank A||Maximum||Maximum||Often|| | |Rank A||Maximum||Maximum||Often||They invest later than Rank B CPUs, letting them buy more stocks before raising their price. They also try to buy stocks in opponents' areas. | ||
|- | |- | ||
|Rank S||Maximum||Maximum||Often|| | |Rank S||Maximum||Maximum||Often||They sometimes sell stock to lower opponents' assets. | ||
|} | |} | ||
==Vacant Plots== | ==Vacant Plots== | ||
| Line 82: | Line 79: | ||
===''Super Mario'' franchise=== | ===''Super Mario'' franchise=== | ||
<gallery> | <gallery> | ||
Mario Itadaki Street DS artwork.jpg|[[Mario]] (Rank | Mario Itadaki Street DS artwork.jpg|[[Mario]] (Rank A) | ||
Luigi Itadaki Street DS artwork.jpg|[[Luigi]]* (Rank C) | Luigi Itadaki Street DS artwork.jpg|[[Luigi]]* (Rank C) | ||
Yoshi Itadaki Street DS artwork.jpg|[[Yoshi]] (Rank | Yoshi Itadaki Street DS artwork.jpg|[[Yoshi]] (Rank B) | ||
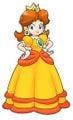
Peach Itadaki Street DS artwork.jpg|[[Princess Peach]] (Rank | Peach Itadaki Street DS artwork.jpg|[[Princess Peach]] (Rank S) | ||
DK Itadaki Street DS artwork.jpg|[[Donkey Kong]]* (Rank D) | DK Itadaki Street DS artwork.jpg|[[Donkey Kong]]* (Rank D) | ||
Wario Itadaki Street DS artwork.jpg|[[Wario]]* (Rank B) | Wario Itadaki Street DS artwork.jpg|[[Wario]]* (Rank B) | ||
| Line 147: | Line 144: | ||
When a player lands on the Casino square (Which was renamed to Arcade square in Fortune Street), that player gets to play a game of chance. There are four of them: | When a player lands on the Casino square (Which was renamed to Arcade square in Fortune Street), that player gets to play a game of chance. There are four of them: | ||
*[[Itadaki Slot]]: The Player rolls a slot to get some prizes. The player must make rows of pictures to win. Three Slimes/Goombas are worth 100GxLVL, two Slimes/Goombas are worth 30GxLVL, one Slime/Goomba is worth 10GxLVL, three Wild Cards are worth one Wild Card, three Warp Pipes/Chimera Wings let the player warp to any square and three Stocks (株) give the player five Stocks x LVL in the most valuable area. | *[[Itadaki Slot]]: The Player rolls a slot to get some prizes. The player must make rows of pictures to win. Three Slimes/Goombas are worth 100GxLVL, two Slimes/Goombas are worth 30GxLVL, one Slime/Goomba is worth 10GxLVL, three Wild Cards are worth one Wild Card, three Warp Pipes/Chimera Wings let the player warp to any square and three Stocks (株) give the player five Stocks x LVL in the most valuable area. | ||
*[[Amida | *[[Amida Dokan]]: This game takes place in the [[Warp Zone]] from ''[[Super Mario Bros.]]'' The player must choose one of the three pipes and the pipe will either lead to coins (10GxLVL each one), a [[? Block]] that may have coins, a mushroom that lets one of the player's shops grow, a Wild Card or a Poison Mushroom that makes the player sleep for one turn. One of the pipes leads to a Piranha Plant. If the player chooses that one, Mario loses a life and the player gets no reward. | ||
*[[Silver Tarot]]: The player is given some concealed Tarot cards, and they must choose two. The first card decides which players are gonna get something (The one in last place, everyone except the player, etc), and the second card decides the event. The events usually reward the player(s) with money or the effect of a boon square, except for the Grim Reaper card, that makes the player(s) sleep and plays the same fanfare that is heard when somebody gets chance card #13. | *[[Silver Tarot]]: The player is given some concealed Tarot cards, and they must choose two. The first card decides which players are gonna get something (The one in last place, everyone except the player, etc), and the second card decides the event. The events usually reward the player(s) with money or the effect of a boon square, except for the Grim Reaper card, that makes the player(s) sleep and plays the same fanfare that is heard when somebody gets chance card #13. | ||
*[[Monster Colosseum]]: A list of five Dragon Quest monsters appear, and the players must choose one of them. After the monsters are chosen, they will fight and the owner of the last monster alive wins some Gold. | *[[Monster Colosseum]]: A list of five Dragon Quest monsters appear, and the players must choose one of them. After the monsters are chosen, they will fight and the owner of the last monster alive wins some Gold. | ||
==Chance | ==Chance Cards== | ||
# | {{more images|Rest of the cards}} | ||
This is a translated list of Chance Cards that can be found upon landing on a Suit Square or Chance Square. | |||
{|style="text-align: center" class=wikitable | |||
!# | |||
!Image | |||
!Description | |||
!Notes | |||
|- | |||
|01||{{No image|50px}}||You may change direction!||- | |||
|- | |||
|02||{{No image|50px}}||B-Dash! Roll again!||- | |||
|- | |||
|03||{{No image|50px}}||Warp to any space except a chance space!||- | |||
|- | |||
|04||{{No image|50px}}||You must give 100g to a rival of your choice!||- | |||
|- | |||
|05||{{No image|50px}}||Warp to a Lot of your choice!||- | |||
|- | |||
|06||{{No image|50px}}||Warp to a Chance Space of your choice!||- | |||
|- | |||
|07||{{No image|50px}}||The value of all your lots increases by 7%!||- | |||
|- | |||
|08||{{No image|50px}}||Rent on all owned lots is increased by 30% until the owner's next turn! Roll again!||- | |||
|- | |||
|09||{{No image|50px}}||All shops close until the owner's next turn! Roll again!||- | |||
|- | |||
|10||{{No image|50px}}||Rent on all owned lots is decreased by 50% until the owner's next turn! Roll again!||- | |||
|- | |||
|11||{{No image|50px}}||Steals gold equal to 11 times the result of the dice roll from all your rivals!||- | |||
|- | |||
|12||{{No image|50px}}||You may invest one of your lots!||- | |||
|- | |||
|13||{{No image|50px}}||The value of all your lots decreases by 13%!||- | |||
|- | |||
|14||{{No image|50px}}||You must give all rivals 30g!||- | |||
|- | |||
|15||{{No image|50px}}||You will receive gold equal to 50 times the result of the dice roll!||- | |||
|- | |||
|16||{{No image|50px}}||A roulette is spun three times, whichever streets the wheel stops on will have its lots increase by 10%!||- | |||
|- | |||
|17||{{No image|50px}}||You get half your level up bonus!||Dictated by current level | |||
|- | |||
|18||{{No image|50px}}||You must sell a house back to the bank, but you get twice its value!||- | |||
|- | |||
|19||{{No image|50px}}||Rent of your lots is increased by 30% until your next turn!||- | |||
|- | |||
|20||{{No image|50px}}||Increases the Worth of any owned lot of your choice by 20%!||- | |||
|- | |||
|21||{{No image|50px}}||A roulette is spun, you get 20 shares in whichever street the wheel stops on!||- | |||
|- | |||
|22||{{No image|50px}}||You may sell a Space back to the bank for twice its value!||- | |||
|- | |||
|23||{{No image|50px}}||Increases the Worth of any owned lot of your choice by 50%!||- | |||
|- | |||
|24||{{No image|50px}}||You must sell a house back to the bank, but you get 200g + its value!||- | |||
|- | |||
|25||{{No image|50px}}||Rent of all your lots is halved until your next turn!||- | |||
|- | |||
|26||{{No image|50px}}||You will receive a share of any rent paid until your next turn!||Same effect as the Lucky Star space | |||
|- | |||
|27||{{No image|50px}}||You will receive 27 gold for every space you own!||- | |||
|- | |||
|28||[[File:ISDS Card 028.png|50px]]||Summons [[Dancing Jewels]]!||- | |||
|- | |||
|29||{{No image|50px}}||You must warp to a rival of your choice!||- | |||
|- | |||
|30||{{No image|50px}}||Rent on all owned lots is set to 100g until the owner's next turn! Roll again!||- | |||
|- | |||
|31||{{No image|50px}}||A roulette is spun, whichever street the wheel stops on will have its lots increased by 10%!||- | |||
|- | |||
|32||{{No image|50px}}||A roulette is spun, whichever street the wheel stops on will have its lots increased by 20%!||- | |||
|- | |||
|33||{{No image|50px}}||You may sell a Space back to the bank for triple its value!||- | |||
|- | |||
|34||{{No image|50px}}||Sweetbreathed! All your lots will close for one turn!||- | |||
|- | |||
|35||{{No image|50px}}||You may sell any number of shares owned in one block back to the bank for 35% more!||- | |||
|- | |||
|36||{{No image|50px}}||You may pay 100g to invest in one of your lots!||- | |||
|- | |||
|37||{{No image|50px}}||A roulette is spun, whichever street the wheel stops on will have its lots increased by 30%!||- | |||
|- | |||
|38||{{No image|50px}}||You may buy stock... but it will cost 10% more!||- | |||
|- | |||
|39||{{No image|50px}}||You must give 50g to a rival of your choice!||- | |||
|- | |||
|40||{{No image|50px}}||A roulette is spun, whichever street the wheel stops on will have its lots decreased by 20%!||- | |||
|- | |||
|41||{{No image|50px}}||A roulette is spun, whichever street the wheel stops on will have its stock decrease by 10%!||- | |||
|- | |||
|42||{{No image|50px}}||A roulette is spun, whichever street the wheel stops on will have its stock decrease by 20%!||- | |||
|- | |||
|43||{{No image|50px}}||Capital Tax! You must pay two gold for every share owned!||- | |||
|- | |||
|44||{{No image|50px}}||Explodet is casted! All lots next to you decrease by 20%!||- | |||
|- | |||
|45||{{No image|50px}}||You must pay 20 gold for every space you own!||- | |||
|- | |||
|46||{{No image|50px}}||Speeding Fee! You must pay 150 gold!||- | |||
|- | |||
|47||{{No image|50px}}||Randomly decreases lots valued between 50g-100g to 49g! Sometimes increases random lots below 49g to 50g!||- | |||
|- | |||
|48||{{No image|50px}}||A roulette is spun, whichever street the wheel stops on will have its lots decreased by 10%!||- | |||
|- | |||
|49||{{No image|50px}}||A roulette is spun, whichever street the wheel stops on will have its lots decreased by 20%!||- | |||
|- | |||
|50||{{No image|50px}}||Move again with the same number you rolled!||- | |||
|- | |||
|51||{{No image|50px}}||Move one space!||- | |||
|- | |||
|52||{{No image|50px}}||Move two spaces!||- | |||
|- | |||
|53||{{No image|50px}}||You must warp to the bank!||- | |||
|- | |||
|54||{{No image|50px}}||You may pay 100g to warp to the bank!||- | |||
|- | |||
|55||{{No image|50px}}||Roll again! You don't pay rent to any rivals this roll!||- | |||
|- | |||
|56||{{No image|50px}}||Roll again! You pay rent to any rivals this roll at half price!||- | |||
|- | |||
|57||{{No image|50px}}||Warp to any space of your choice!||- | |||
|- | |||
|58||{{No image|50px}}||You may pay 100g to warp to anywhere except a chance space!||- | |||
|- | |||
|59||{{No image|50px}}||Buy any stock with a 10% discount!||- | |||
|- | |||
|60||{{No image|50px}}||A roulette is spun, whichever street the wheel stops on will have its stock increased by 10%!||- | |||
|- | |||
|61||{{No image|50px}}||Receive Gold equal to 10% of the sum of all owned stock!||- | |||
|- | |||
|62||{{No image|50px}}||Receive Gold equal to 20% of the sum of all owned stock!||- | |||
|- | |||
|63||{{No image|50px}}||A roulette is spun, whichever street the wheel stops on will have its stock increased by 20%!||- | |||
|- | |||
|64||{{No image|50px}}||A roulette is spun, whichever street the wheel stops on will have its stock increased by 30%!||- | |||
|- | |||
|65||{{No image|50px}}||Buy any lot of your choice for five times its value!||- | |||
|- | |||
|66||{{No image|50px}}||You receive 10 shares in the most expensive stock!||- | |||
|- | |||
|67||{{No image|50px}}||Buy any stock of your choice!||- | |||
|- | |||
|68||{{No image|50px}}||Super High Tension! Rent of all your lots is doubled!||- | |||
|- | |||
|69||{{No image|50px}}||You may sell any number of shares owned in one block back to the bank for 20% more!||- | |||
|- | |||
|70||{{No image|50px}}||Levels you up and gives you the bonus!||Player forfeits any collected suits. | |||
|- | |||
|71||{{No image|50px}}||Gain gold!||Proportional to current character level | |||
|- | |||
|72||{{No image|50px}}||You receive 20 gold for every lot you own!||- | |||
|- | |||
|73||{{No image|50px}}||You may buy any empty lot of your choice!||- | |||
|- | |||
|74||{{No image|50px}}||You must auction one of your lots to your rivals; However, the lot opens at twice its value! If no one bids, the bank buys it at the opening price!||- | |||
|- | |||
|75||{{No image|50px}}||You may buy any empty lot of your choice! However, it will cost twice as much.||- | |||
|- | |||
|76||{{No image|50px}}||You receive 500g!||- | |||
|- | |||
|77||{{No image|50px}}||You receive five shares on each street!||- | |||
|- | |||
|78||{{No image|50px}}||You may buy any empty lot of your choice! However, it will cost 200g more.||- | |||
|- | |||
|79||{{No image|50px}}||Buy any lot of your choice for three times its value!||- | |||
|- | |||
|80||{{No image|50px}}||Sets all lots with rent between 1g-49g to 50g!||- | |||
|- | |||
|81||{{No image|50px}}||Makes all rivals roll a one on the next dice roll!||- | |||
|- | |||
|82||{{No image|50px}}||A LUKSeed is found! All lots next to you increase by 10%!||- | |||
|- | |||
|83||{{No image|50px}}||Randomly relocates rivals!||- | |||
|- | |||
|84||{{No image|50px}}||Blazemost is casted! A random lot's rent below 300g is reduced to 1g! If there are none, it halves the rent of a lot instead!||- | |||
|- | |||
|85||{{No image|50px}}||You will receive gold equal to 100 times the result of the dice roll!||- | |||
|- | |||
|86||{{No image|50px}}||Steal 100g from all your rivals!||- | |||
|- | |||
|87||{{No image|50px}}||You receive 50g!||- | |||
|- | |||
|88||{{No image|50px}}||Your rivals rotate places with each other!||- | |||
|- | |||
|89||{{No image|50px}}||Everyone gets a wild card!||- | |||
|- | |||
|90||{{No image|50px}}||All players' rent are increased by 30% until their next turn!||- | |||
|- | |||
|91||{{No image|50px}}||Summons [[Healslime]]!||- | |||
|- | |||
|92||{{No image|50px}}||Summons [[Lakitu]]!||- | |||
|- | |||
|93||{{No image|50px}}||Hazzle Dance! The bank invests 10G in all your shops!||- | |||
|- | |||
|94||{{No image|50px}}||Get gold to equal 20% of total house values!||- | |||
|- | |||
|95||{{No image|50px}}||Warps everyone to you!||- | |||
|- | |||
|96||{{No image|50px}}||Warps everyone to a player other than you!||- | |||
|- | |||
|97||{{No image|50px}}||Increase the Stock of a street of your choice by 20%!||- | |||
|- | |||
|98||{{No image|50px}}||Buy any lot of your choice for four times its value!||- | |||
|- | |||
|99||{{No image|50px}}||Gives you all four suits!||Gives the player a wild card if all four suits are already obtained | |||
|- | |||
|100||{{No image|50px}}||You receive a wild card!||- | |||
|} | |||
==Unlockable Accessories== | ==Unlockable Accessories== | ||
| Line 350: | Line 456: | ||
ISDS Icon.png|Game icon | ISDS Icon.png|Game icon | ||
</gallery> | </gallery> | ||
==Media== | |||
{{main-media}} | |||
{{media table | |||
|file1=ISDS Menu.oga | |||
|title1=Menu | |||
|description1=The music in the menus | |||
|length1=0:30 | |||
|file2=ISDS Yoshi's Island SMW.oga | |||
|title2=Number Machine | |||
|description2=The music used while the turn order is being decided | |||
|length2=0:30 | |||
|file3=ISDS Mario Circuit.oga | |||
|title3=Mario Circuit | |||
|description3=The music for the Mario Circuit board | |||
|length3=0:30 | |||
|file4=ISDS Toward the Horizon.oga | |||
|title4=Mt. Magmageddon | |||
|description4=The music for the Mt. Magmageddon board | |||
|length4=0:30 | |||
|file5=ISDS Monopoly.oga | |||
|title5=Monopoly | |||
|description5=The music for getting a monopoly in a district | |||
|length5=0:30 | |||
}} | |||
==References to other games== | ==References to other games== | ||
*''[[Super Mario RPG: Legend of the Seven Stars]]'': | *''[[Super Mario Bros.]]'': The [[Super Mario Bros. (board)|Super Mario Bros.]] board is based off this game. Additionally, the music of this board is an arrangement of the [[Ground Theme (Super Mario Bros.)|Ground Theme]] of this game. Upon completing a ''Super Mario'' board, an arrangement of the "[[World Clear]]" music plays, followed by an arrangement of the "[[Ending (Super Mario Bros.)|Ending]]" theme. [[Amida Dokan]] is based on this game's underground [[Warp Zone]]. | ||
*[[dragonquest:Dragon Quest (series)|''Dragon Quest'' (series)]]: Arrangements of the level up, inn, and save jingles are used. When a player matches lucky sevens in Itadaki Slot on a ''Dragon Quest'' board, an arrangement of the medium fanfare plays. [[dragonquest:Chimaera wing|Chimaera wings]] appear in Itadaki Slot. The jingle that plays when Chance Card #13 is drawn is an arrangement of the "Curse" jingle. Various recurring monsters appear. | |||
*''[[dragonquest:Dragon Quest|Dragon Quest]]'': Alefgard is a playable board and it uses the overworld music from this game. An arrangement of the ending music is used when a player wins a ''Dragon Quest'' board. An arrangement of the [[Game Over]] jingle is used when a player is bankrupted. | |||
*''[[Super Mario Bros.: The Lost Levels]]'': The arrangement of the "Ending" theme is based on the one from this game. | |||
*''[[dragonquest:Dragon Quest III: The Seeds of Salvation|Dragon Quest III: The Seeds of Salvation]]'': The Ghost Ship is a playable board and it uses the overworld music from this game. The file select music is an arrangement of "Rolling Dice". | |||
*''[[Super Mario Bros. 3]]'': During an auction, an arrangement of the [[Toad House (theme)|Toad House/P Switch]] music plays. An arrangement of the [[Pipe Land]] map music also plays in the stock menu. Also, an arrangement of the "3 Matching Cards" fanfare plays whenever a line is made in Itadaki Slot on a ''Super Mario'' board or when the ''Super Mario'' Tour is completed in Tour mode, as well as an arrangement of the "World Clear" fanfare playing when a line of lucky 7's is made in Itadaki Slot on a ''Super Mario'' board. | |||
*''[[dragonquest:Dragon Quest IV: Chapters of the Chosen|Dragon Quest IV: Chapters of the Chosen]]'': Colossus is a playable board and it uses an arrangement of "Wagon Wheel's March". When a player reaches the target net worth on a ''Dragon Quest'' board, it plays an arrangement of this game's battle theme. | |||
*''[[Super Mario World]]'': An arrangement of the {{media link|SMW The Evil King Koopa BGM.oga|final boss}} music plays when someone reaches the target amount in a ''Super Mario'' board. An arrangement of the [[Bonus Men BGM|bonus]] music is heard in the minigame Itadaki Slot if it is played on a Mario board. | |||
*''[[Super Mario Kart]]'': An arrangement of "[[Mario Circuit (theme)|Mario Circuit]]" plays as the music for the [[Mario Circuit (board)|Mario Circuit]] board. | |||
*''[[dragonquest:Dragon Quest V: Hand of the Heavenly Bride|Dragon Quest V: Hand of the Heavenly Bride]]'': Mt. Magmageddon is a playable board and it uses an arrangement of this game's overworld theme. | |||
*''[[Super Mario World 2: Yoshi's Island]]'': [[Yoshi's Island (location)|Yoshi's Island]] appears as a ''Super Mario'' franchise [[Yoshi's Island (board)|board]] based on the one from this game, with an arrangement of the title screen music playing as the music for the board. Also, an arrangement of the [[Obstacle Course|athletic theme]] is heard in the Venture square or when Dart of Gold is being played. | |||
*''[[Super Mario RPG: Legend of the Seven Stars]]'': An arrangement of "[[Mushroom Kingdom|Hello, Happy Kingdom]]" plays on the [[Peach's Castle (board)|Peach's Castle]] board. | |||
*''[[dragonquest:Dragon Quest VII: Fragments of the Forgotten Past|Dragon Quest VII: Fragments of the Forgotten Past]]'': "Singing Stadium" plays in the menus. | |||
*''[[Super Mario Sunshine]]'': [[Delfino Plaza]] appears as a ''Super Mario'' franchise [[Delfino Plaza (board)|board]], with an arrangement of "[[Isle Delfino (theme)|Isle Delfino]]" playing as the music for the board. | |||
*''[[dragonquest:Slime MoriMori Dragon Quest: Shougeki no Shippo Dan|Slime MoriMori Dragon Quest: Shougeki no Shippo Dan]]'': Slimenia appears as a board and it plays an arrangement of "Blue Skies, Blue Slime". | |||
*''[[dragonquest:Dragon Quest VIII: Journey of the Cursed King|Dragon Quest VIII: Journey of the Cursed King]]'': Castle Trodain is a playable board and uses an arrangement of its area music. When Itadaki Slot is played on a ''Dragon Quest'' board, it plays an arrangement of "Fun Casino". | |||
*''[[Mario Superstar Baseball]]'': [[Mario Stadium (baseball stadium)|Mario Stadium]] appears as a ''Super Mario'' franchise [[Mario Stadium (board)|board]], with an arrangement of its music playing for the board. | |||
*''[[dragonquest:Dragon Quest: Shōnen Yangus to Fushigi no Dungeon|Dragon Quest: Shōnen Yangus to Fushigi no Dungeon]]'': Robbin' Hood Ruins appears as a board and it uses its area music. Yangus appearance originates from this game. | |||
*''[[New Super Mario Bros.]]'': An arrangement of the castle theme plays on the [[Bowser's Castle (board)|Bowser's Castle]] board. Gaining a level with a ''Super Mario'' franchise character plays an arrangement of the "Course Clear" music. | |||
==Names in other languages== | ==Names in other languages== | ||
| Line 369: | Line 522: | ||
*[https://web.archive.org/web/20090302010358/http://www.square-enix.co.jp/itastds/ Japanese website (Square Enix, Flash-based)] | *[https://web.archive.org/web/20090302010358/http://www.square-enix.co.jp/itastds/ Japanese website (Square Enix, Flash-based)] | ||
{{FS}} | |||
{{Super Mario games}} | {{Super Mario games}} | ||
{{DS}} | {{DS}} | ||
Latest revision as of 15:08, April 5, 2024
| Itadaki Street DS | |||
|---|---|---|---|
 For alternate box art, see the game's gallery. | |||
| Developer | TOSE Software Co. Think Garage | ||
| Publisher | Square Enix | ||
| Platform(s) | Nintendo DS | ||
| Release date | |||
| Genre | Party | ||
| Rating(s) |
| ||
| Mode(s) | Single player, multiplayer (up to four players) | ||
| Media | Nintendo DS:
Game Card
| ||
| Input | Nintendo DS:
| ||
Itadaki Street DS[1] is a game for the Nintendo DS developed by TOSE and Think Garage, and published by Square Enix. Like other installments in the Itadaki Street series, Itadaki Street DS is a Monopoly-like game starring Super Mario characters, as well as from the Dragon Quest series. It was released in Japan only, on June 21, 2007.
A follow-up to this game, titled Fortune Street, was released internationally for the Wii in December 2011.
Gameplay[edit]
Players move around the board, buying shops and collecting money from others who land on their shop spaces. Depending on circumstances, some players can forcibly take over another player's shop spaces, or make them inactive for a turn. Players can also hold shares of a block of spaces so that they get paid when someone lands on any space in that block, even if it is not their own.
Players get bonuses for leveling up, which is done by passing four special spaces on the board (each marked with a suit- Club, Diamond, Heart, and Spade) and then going to the Bank space. If the player lands on one of these special spaces instead of passing them, they get a chance to randomly draw a "chance card", which affects gameplay or a player. Usually, the goal is to reach a certain total property value and get to the Bank, or to make a player bankrupt. There is also a special "Casino" space where themed games of chance occur.
Squares[edit]
- Shop: The player can use his money to buy it. If this shop is owned by somebody else, the player must pay its price. If this shop is already owned by the one that lands on it, he can invest money in one of his shops.
- Boon Square: The player gets a quarter of all the fees for one turn.
- Boom Square: The player gets the half of all the fees for one turn.
- Vacant Plot: The player can build anything on it.
- Casino: The player can play a minigame and win some money, stocks or suits.
- Break Square: All the player's shops get closed for a turn.
- Suit Square: The player gets a suit and chooses a chance card if he lands on it.
- Chance Square: The player chooses a chance card.
- Cannon Square: The player goes to the chosen opponent's location.
- Warp Square (Either a Warp Pipe or a Portal): The player warps to the Warp Square of the same color.
- Switch Square: The Board's shape changes.
- Magmalicious Square: If the Square is active, the player goes to an inactive Magmalicious Square and then it becomes inactive. It only appears in the Death Volcano.
- Suit Change Square: The suit offered by the square is not fixed; it changes as players pass by it.
- Die Square: The player rolls another die.
- Bank Square: All players start and end in this square. When a player passes by this square, they may buy stocks. If the player bring the four suits to the Bank, they get a Salary and their level increases by one. When they have the goal assets, they have to go to the bank in order to win.
- Broker Square: The player may buy stocks.
Areas and stock system[edit]
All shops are divided in many areas, each given a unique name and color. Most areas contain four shops. Shops start with a given price when players buy them and by investing into them, the price increases. The player can invest up to 999 gold into a shop at a time, but this amount is limited by the shop's max capital. If a player gets another shop in the same area as other shops owned by them, the shops' prices grow, and the player can invest more money on that shop. The player can achieve a monopoly by owning all shops in the area. Shops in monopolized areas have their value boosted and accept even bigger investments. The appearance of a shop changes based on how much gold is invested in it, though this is only cosmetic.
A player who crosses onto the bank square or stops on a broker square may buy stocks. The player can choose any area to invest gold into. Players may buy up to 99 stocks at a time and can hold a max number of 999 stocks in an area. Whenever gold is exchanged between players by landing on a shop, stockholders in that area get a bonus percentage of gold based on how many stocks they have. When gold is invested in a shop, the area's stock price may get raised and make stocks more valuable. When a shop loses value, the stock price may go down. Likewise, when a player buys or sells more than 10 stocks in an area, the price of stock in that area goes up or down by 8%, respectively. Players can sell their stocks at the start of their turn.
Players can exchange shops before rolling the die. They can choose to exchange one to two of their own shops for one to two of an opponent's shop. Gold can be added as a supplement to the deal. After the initial terms of the trade are decided, the opponent may ask for more gold, accept the terms of the deal, or decline the trade. Players may also force buyout on the opponents' shops when they land on them. To buy a shop out, the player must pay 5x its real value.
Each CPU rank invests differently:
| CPU Rank | Max. stock buying per bank pass | Max. investment per invest | Chance of buyout for others | Other notes |
|---|---|---|---|---|
| Rank D | 29 | 100G | Very rarely | None |
| Rank C | 49 | 200G | ? | None |
| Rank B | Maximum | Maximum | Often | They usually invest too early, preventing them from buying stocks in their areas. |
| Rank A | Maximum | Maximum | Often | They invest later than Rank B CPUs, letting them buy more stocks before raising their price. They also try to buy stocks in opponents' areas. |
| Rank S | Maximum | Maximum | Often | They sometimes sell stock to lower opponents' assets. |
Vacant Plots[edit]
There are special spaces with a "Sale" sign on them. In those spaces, the player can build one of the following:
- Gate: It starts with a price of 10G, and when somebody passes by it, that player has to pay the price of the Gate and it increases by 10G. Platypunk, Slime, Birdo, Donkey Kong, Dragonlord and Bowser often build it.
- Circus Tent: The tent price starts being 100G, and if the owner lands on it he may increase it to 500G, 1000G, and finally, 2000G. The player has to pay 100G for each investment and the Circus Tent's value also increases by 100G. Luigi, Daisy, Toad and Yangus often build it.
- Balloon Landing: The owner can fly anywhere when he lands on it. Other players have to pay 10% of the owner's salary. Mario, Bianca, Alena, Peach and Yoshi often build it.
- Shrine: The owner can get a 5% bonus on all his assets if he lands on it. Other players have to pay 10% of all their assets, making it one of the most expensive buildings. But it can be easily bought out with 1000G, which is a small amount of money in the late stages of the game. Pudding, Kiryl, Jessica and Angelo often build it.
- Bar: The owner can invite everybody to a party in the bar, which means that everybody must warp to the Bar space. If other players land on it, they must give the owner a "gift" of 30GxLVL. Wario, Waluigi and Hassan often build it.
- Real Estate Agency: The owner can buy any ownerless shop. If other players land on it, they must "sleep" and their shops close for a turn. It is the least used building in all the game and the AI buys it very rarely.
- Wood Shop: It acts like a normal shop. But since it is worth 1000G, when it is built, the stock price of the area where it was built rises highly. A good strategy with those buildings for the player is to get more than 99 Stocks in an area where they have any building and then turn it into a Wood Shop to raise their asset value. They must have at least 850G in money, because the strategy could fail if they are prompted to sell stocks and then they have to sell most of the area's stocks and then win very little money. B, A and S-Ranked characters may use this strategy.
All vacant plots are worth 200G, and the Wood Shop is worth 1000G. Players can renovate a vacant plot whenever they want, and they get 150G for the destruction of the former building, which means that they only have to pay 50G for a normal building and 850G for a Wood Shop. Players will get 750G for the destruction of a Wood Shop. As shown before, what the AI builds in a Vacant Plot depends in the character.
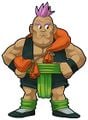
Characters[edit]

There are 23 playable characters in Itadaki Street DS (if the male and female avatars are counted as one character): Eleven from the Super Mario franchise and eleven from the Dragon Quest series. Players are also able to create and customize their own characters that can be played as. Although only four of the characters from both series are playable to begin with, the others can be unlocked by playing through the Tour Mode of the game. Additionally, there are also three Support/Guest characters that players can summon with the help of a card, but are not playable.
Super Mario franchise[edit]
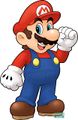
Mario (Rank A)
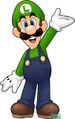
Luigi* (Rank C)
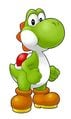
Yoshi (Rank B)

Princess Peach (Rank S)
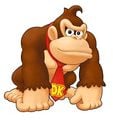
Donkey Kong* (Rank D)
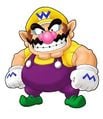
Wario* (Rank B)
Princess Daisy* (Rank C)

Waluigi* (Rank C)
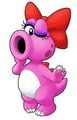
Birdo* (Rank D)
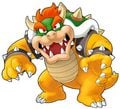
Bowser* (Rank A)
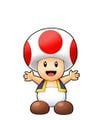
Toad (Rank C)


Dragon Quest series[edit]

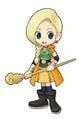
Slime (Rank D)
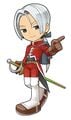
Angelo* (Rank A)
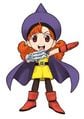
Jessica* (Rank S)

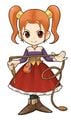
Pudding (Rank C)
Bianca* (Rank B)
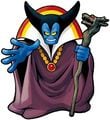
Dragonlord* (Rank S)
Alena* (Rank B)
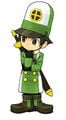
Kiryl (Rank C)
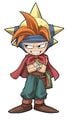
Yangus (Rank D)
Carver* (Rank C)
Platypunk* (Rank C)


Other[edit]
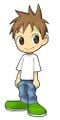
Boy
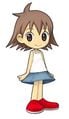
Girl


* - Unlockable characters.
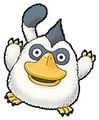
Support/Guest Characters[edit]
- Lakitu (shuts down spaces he passes or lands on for one turn)
- Healslime (gives marks necessary for leveling up when player passes it)
- Dancing Jewels (pays out to the owner of any space it lands on)
Stages[edit]
There are 14 playable stages in this game.
Super Mario Stages[edit]


Dragon Quest Stages[edit]
Minigames[edit]
When a player lands on the Casino square (Which was renamed to Arcade square in Fortune Street), that player gets to play a game of chance. There are four of them:
- Itadaki Slot: The Player rolls a slot to get some prizes. The player must make rows of pictures to win. Three Slimes/Goombas are worth 100GxLVL, two Slimes/Goombas are worth 30GxLVL, one Slime/Goomba is worth 10GxLVL, three Wild Cards are worth one Wild Card, three Warp Pipes/Chimera Wings let the player warp to any square and three Stocks (株) give the player five Stocks x LVL in the most valuable area.
- Amida Dokan: This game takes place in the Warp Zone from Super Mario Bros. The player must choose one of the three pipes and the pipe will either lead to coins (10GxLVL each one), a ? Block that may have coins, a mushroom that lets one of the player's shops grow, a Wild Card or a Poison Mushroom that makes the player sleep for one turn. One of the pipes leads to a Piranha Plant. If the player chooses that one, Mario loses a life and the player gets no reward.
- Silver Tarot: The player is given some concealed Tarot cards, and they must choose two. The first card decides which players are gonna get something (The one in last place, everyone except the player, etc), and the second card decides the event. The events usually reward the player(s) with money or the effect of a boon square, except for the Grim Reaper card, that makes the player(s) sleep and plays the same fanfare that is heard when somebody gets chance card #13.
- Monster Colosseum: A list of five Dragon Quest monsters appear, and the players must choose one of them. After the monsters are chosen, they will fight and the owner of the last monster alive wins some Gold.
Chance Cards[edit]
It has been requested that more images be uploaded for this article. Remove this notice only after the additional image(s) have been added. Reason: Rest of the cards
This is a translated list of Chance Cards that can be found upon landing on a Suit Square or Chance Square.
| # | Image | Description | Notes |
|---|---|---|---|
| 01 |  |
You may change direction! | - |
| 02 | |
B-Dash! Roll again! | - |
| 03 | |
Warp to any space except a chance space! | - |
| 04 | |
You must give 100g to a rival of your choice! | - |
| 05 | |
Warp to a Lot of your choice! | - |
| 06 | |
Warp to a Chance Space of your choice! | - |
| 07 | |
The value of all your lots increases by 7%! | - |
| 08 | |
Rent on all owned lots is increased by 30% until the owner's next turn! Roll again! | - |
| 09 | |
All shops close until the owner's next turn! Roll again! | - |
| 10 | |
Rent on all owned lots is decreased by 50% until the owner's next turn! Roll again! | - |
| 11 | |
Steals gold equal to 11 times the result of the dice roll from all your rivals! | - |
| 12 | |
You may invest one of your lots! | - |
| 13 | |
The value of all your lots decreases by 13%! | - |
| 14 | |
You must give all rivals 30g! | - |
| 15 | |
You will receive gold equal to 50 times the result of the dice roll! | - |
| 16 | |
A roulette is spun three times, whichever streets the wheel stops on will have its lots increase by 10%! | - |
| 17 | |
You get half your level up bonus! | Dictated by current level |
| 18 | |
You must sell a house back to the bank, but you get twice its value! | - |
| 19 | |
Rent of your lots is increased by 30% until your next turn! | - |
| 20 | |
Increases the Worth of any owned lot of your choice by 20%! | - |
| 21 | |
A roulette is spun, you get 20 shares in whichever street the wheel stops on! | - |
| 22 | |
You may sell a Space back to the bank for twice its value! | - |
| 23 | |
Increases the Worth of any owned lot of your choice by 50%! | - |
| 24 | |
You must sell a house back to the bank, but you get 200g + its value! | - |
| 25 | |
Rent of all your lots is halved until your next turn! | - |
| 26 | |
You will receive a share of any rent paid until your next turn! | Same effect as the Lucky Star space |
| 27 | |
You will receive 27 gold for every space you own! | - |
| 28 |  |
Summons Dancing Jewels! | - |
| 29 | |
You must warp to a rival of your choice! | - |
| 30 | |
Rent on all owned lots is set to 100g until the owner's next turn! Roll again! | - |
| 31 | |
A roulette is spun, whichever street the wheel stops on will have its lots increased by 10%! | - |
| 32 | |
A roulette is spun, whichever street the wheel stops on will have its lots increased by 20%! | - |
| 33 | |
You may sell a Space back to the bank for triple its value! | - |
| 34 | |
Sweetbreathed! All your lots will close for one turn! | - |
| 35 | |
You may sell any number of shares owned in one block back to the bank for 35% more! | - |
| 36 | |
You may pay 100g to invest in one of your lots! | - |
| 37 | |
A roulette is spun, whichever street the wheel stops on will have its lots increased by 30%! | - |
| 38 | |
You may buy stock... but it will cost 10% more! | - |
| 39 | |
You must give 50g to a rival of your choice! | - |
| 40 | |
A roulette is spun, whichever street the wheel stops on will have its lots decreased by 20%! | - |
| 41 | |
A roulette is spun, whichever street the wheel stops on will have its stock decrease by 10%! | - |
| 42 | |
A roulette is spun, whichever street the wheel stops on will have its stock decrease by 20%! | - |
| 43 | |
Capital Tax! You must pay two gold for every share owned! | - |
| 44 | |
Explodet is casted! All lots next to you decrease by 20%! | - |
| 45 | |
You must pay 20 gold for every space you own! | - |
| 46 | |
Speeding Fee! You must pay 150 gold! | - |
| 47 | |
Randomly decreases lots valued between 50g-100g to 49g! Sometimes increases random lots below 49g to 50g! | - |
| 48 | |
A roulette is spun, whichever street the wheel stops on will have its lots decreased by 10%! | - |
| 49 | |
A roulette is spun, whichever street the wheel stops on will have its lots decreased by 20%! | - |
| 50 | |
Move again with the same number you rolled! | - |
| 51 | |
Move one space! | - |
| 52 | |
Move two spaces! | - |
| 53 | |
You must warp to the bank! | - |
| 54 | |
You may pay 100g to warp to the bank! | - |
| 55 | |
Roll again! You don't pay rent to any rivals this roll! | - |
| 56 | |
Roll again! You pay rent to any rivals this roll at half price! | - |
| 57 | |
Warp to any space of your choice! | - |
| 58 | |
You may pay 100g to warp to anywhere except a chance space! | - |
| 59 | |
Buy any stock with a 10% discount! | - |
| 60 | |
A roulette is spun, whichever street the wheel stops on will have its stock increased by 10%! | - |
| 61 | |
Receive Gold equal to 10% of the sum of all owned stock! | - |
| 62 | |
Receive Gold equal to 20% of the sum of all owned stock! | - |
| 63 | |
A roulette is spun, whichever street the wheel stops on will have its stock increased by 20%! | - |
| 64 | |
A roulette is spun, whichever street the wheel stops on will have its stock increased by 30%! | - |
| 65 | |
Buy any lot of your choice for five times its value! | - |
| 66 | |
You receive 10 shares in the most expensive stock! | - |
| 67 | |
Buy any stock of your choice! | - |
| 68 | |
Super High Tension! Rent of all your lots is doubled! | - |
| 69 | |
You may sell any number of shares owned in one block back to the bank for 20% more! | - |
| 70 | |
Levels you up and gives you the bonus! | Player forfeits any collected suits. |
| 71 | |
Gain gold! | Proportional to current character level |
| 72 | |
You receive 20 gold for every lot you own! | - |
| 73 | |
You may buy any empty lot of your choice! | - |
| 74 | |
You must auction one of your lots to your rivals; However, the lot opens at twice its value! If no one bids, the bank buys it at the opening price! | - |
| 75 | |
You may buy any empty lot of your choice! However, it will cost twice as much. | - |
| 76 | |
You receive 500g! | - |
| 77 | |
You receive five shares on each street! | - |
| 78 | |
You may buy any empty lot of your choice! However, it will cost 200g more. | - |
| 79 | |
Buy any lot of your choice for three times its value! | - |
| 80 | |
Sets all lots with rent between 1g-49g to 50g! | - |
| 81 | |
Makes all rivals roll a one on the next dice roll! | - |
| 82 | |
A LUKSeed is found! All lots next to you increase by 10%! | - |
| 83 | |
Randomly relocates rivals! | - |
| 84 | |
Blazemost is casted! A random lot's rent below 300g is reduced to 1g! If there are none, it halves the rent of a lot instead! | - |
| 85 | |
You will receive gold equal to 100 times the result of the dice roll! | - |
| 86 | |
Steal 100g from all your rivals! | - |
| 87 | |
You receive 50g! | - |
| 88 | |
Your rivals rotate places with each other! | - |
| 89 | |
Everyone gets a wild card! | - |
| 90 | |
All players' rent are increased by 30% until their next turn! | - |
| 91 | |
Summons Healslime! | - |
| 92 | |
Summons Lakitu! | - |
| 93 | |
Hazzle Dance! The bank invests 10G in all your shops! | - |
| 94 | |
Get gold to equal 20% of total house values! | - |
| 95 | |
Warps everyone to you! | - |
| 96 | |
Warps everyone to a player other than you! | - |
| 97 | |
Increase the Stock of a street of your choice by 20%! | - |
| 98 | |
Buy any lot of your choice for four times its value! | - |
| 99 | |
Gives you all four suits! | Gives the player a wild card if all four suits are already obtained |
| 100 | |
You receive a wild card! | - |
Unlockable Accessories[edit]
Super Mario franchise[edit]
Headgear[edit]
- Mario's Hat
- Luigi's Hat
- Peach Hair
- Daisy Hair
- Yoshi Cap
- Birdo Head
- Toad Head
- DK Head
- Wario's Hat
- Waluigi's Hat
- Bowser Cap
- Dr. Mario Hair
- Peach Sport Hair
- Tailed Mario's Hat
- Hammer Bros. Head
- Shy Guy Mask
- Piranha Plant
- Cannon Head
- Thwomp Head
Body[edit]
- Mario's Clothing
- Luigi's Clothing
- Peach's Dress
- Daisy's Dress
- Yoshi Suit
- Birdo Suit
- Toad Suit
- DK Suit
- Wario's Clothings
- Waluigi's Clothings
- Bowser Suit
- Dr. Mario's White Shirt
- Peach's Sport Clothes
- Daisy's Sport Clothes
- Koopa Troopa Suit
- Shy Guy's Clothings
- Tube Suit
- Bullet Bill Suit
- Mario's Soccer Clothes
Hand[edit]
- Fireball
- Hammer
- Peach's Parasol
- Fire Flower
- Mushroom
- P Switch
- Toadsworth Wooden Staff
- Barrel
- Bat
- Bob-omb
- Magikoopa's Staff
- Capsule
- Tennis Racket
- Driver
- Shine
- Star
- Banana
- 1UP Mushroom
- DS Lite
- Wii Remote
Other[edit]
- Mario's Mustache
- Luigi's Mustache
- Poltergust 4000
- Triple Shell
- Yoshi Egg
- Flower
- Chain Chomp
- Triple Banana
- Wario's Mustache
- Waluigi's Mustache
- Bowser Jr.'s Bandana
- Virus
- MicroGoomba
- Tailed Mario's Tail
- Pump
- Koopa Troopa
- Buzzy Beetle
- Goomba
- Boo
- Soccer Ball
Gallery[edit]
- For this subject's image gallery, see Gallery:Itadaki Street DS.
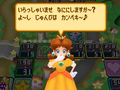
Gameplay screenshot of Daisy talking

Japanese logo

Game icon

Media[edit]
- For a complete list of media for this subject, see List of Itadaki Street DS media.
| File info 0:30 |
| File info 0:30 |
| File info 0:30 |
| File info 0:30 |
| File info 0:30 |
References to other games[edit]
- Super Mario Bros.: The Super Mario Bros. board is based off this game. Additionally, the music of this board is an arrangement of the Ground Theme of this game. Upon completing a Super Mario board, an arrangement of the "World Clear" music plays, followed by an arrangement of the "Ending" theme. Amida Dokan is based on this game's underground Warp Zone.
- Dragon Quest (series): Arrangements of the level up, inn, and save jingles are used. When a player matches lucky sevens in Itadaki Slot on a Dragon Quest board, an arrangement of the medium fanfare plays. Chimaera wings appear in Itadaki Slot. The jingle that plays when Chance Card #13 is drawn is an arrangement of the "Curse" jingle. Various recurring monsters appear.
- Dragon Quest: Alefgard is a playable board and it uses the overworld music from this game. An arrangement of the ending music is used when a player wins a Dragon Quest board. An arrangement of the Game Over jingle is used when a player is bankrupted.
- Super Mario Bros.: The Lost Levels: The arrangement of the "Ending" theme is based on the one from this game.
- Dragon Quest III: The Seeds of Salvation: The Ghost Ship is a playable board and it uses the overworld music from this game. The file select music is an arrangement of "Rolling Dice".
- Super Mario Bros. 3: During an auction, an arrangement of the Toad House/P Switch music plays. An arrangement of the Pipe Land map music also plays in the stock menu. Also, an arrangement of the "3 Matching Cards" fanfare plays whenever a line is made in Itadaki Slot on a Super Mario board or when the Super Mario Tour is completed in Tour mode, as well as an arrangement of the "World Clear" fanfare playing when a line of lucky 7's is made in Itadaki Slot on a Super Mario board.
- Dragon Quest IV: Chapters of the Chosen: Colossus is a playable board and it uses an arrangement of "Wagon Wheel's March". When a player reaches the target net worth on a Dragon Quest board, it plays an arrangement of this game's battle theme.
- Super Mario World: An arrangement of the final boss music plays when someone reaches the target amount in a Super Mario board. An arrangement of the bonus music is heard in the minigame Itadaki Slot if it is played on a Mario board.
- Super Mario Kart: An arrangement of "Mario Circuit" plays as the music for the Mario Circuit board.
- Dragon Quest V: Hand of the Heavenly Bride: Mt. Magmageddon is a playable board and it uses an arrangement of this game's overworld theme.
- Super Mario World 2: Yoshi's Island: Yoshi's Island appears as a Super Mario franchise board based on the one from this game, with an arrangement of the title screen music playing as the music for the board. Also, an arrangement of the athletic theme is heard in the Venture square or when Dart of Gold is being played.
- Super Mario RPG: Legend of the Seven Stars: An arrangement of "Hello, Happy Kingdom" plays on the Peach's Castle board.
- Dragon Quest VII: Fragments of the Forgotten Past: "Singing Stadium" plays in the menus.
- Super Mario Sunshine: Delfino Plaza appears as a Super Mario franchise board, with an arrangement of "Isle Delfino" playing as the music for the board.
- Slime MoriMori Dragon Quest: Shougeki no Shippo Dan: Slimenia appears as a board and it plays an arrangement of "Blue Skies, Blue Slime".
- Dragon Quest VIII: Journey of the Cursed King: Castle Trodain is a playable board and uses an arrangement of its area music. When Itadaki Slot is played on a Dragon Quest board, it plays an arrangement of "Fun Casino".
- Mario Superstar Baseball: Mario Stadium appears as a Super Mario franchise board, with an arrangement of its music playing for the board.
- Dragon Quest: Shōnen Yangus to Fushigi no Dungeon: Robbin' Hood Ruins appears as a board and it uses its area music. Yangus appearance originates from this game.
- New Super Mario Bros.: An arrangement of the castle theme plays on the Bowser's Castle board. Gaining a level with a Super Mario franchise character plays an arrangement of the "Course Clear" music.
Names in other languages[edit]
| Language | Name | Meaning |
|---|---|---|
| Japanese | いただきストリートDS Itadaki Sutorīto Dī Esu |
Top Street DS |
References[edit]
- ^ SQUARE ENIX ANNUAL REPORT 2008 (PDF). Square Enix. Retrieved May 6, 2023.
External links[edit]
- Japanese website (Nintendo)
- Japanese website (Square Enix)
- Japanese website (Square Enix, Flash-based)