Gallery:Mario vs. Donkey Kong 2: March of the Minis: Difference between revisions
From the Super Mario Wiki, the Mario encyclopedia
Jump to navigationJump to search
m (→Worlds: Corrected names of boss battles) |
|||
| Line 109: | Line 109: | ||
MvDK2_Room_1-8.png|[[Room 1-8]] | MvDK2_Room_1-8.png|[[Room 1-8]] | ||
MvDK2_Room_1-9.png|[[Room 1-9]] | MvDK2_Room_1-9.png|[[Room 1-9]] | ||
MvDK2_Room_1-DK.png|[[ | MvDK2_Room_1-DK.png|[[Boss Game 1]] | ||
Motmscreenshot1.png|A perfect chain with a Gold Mini Mario bonus set up in Room 1-3 | Motmscreenshot1.png|A perfect chain with a Gold Mini Mario bonus set up in Room 1-3 | ||
ShyGuySmashMushroomMayhem.png|[[Shy Guy Smash!]] | ShyGuySmashMushroomMayhem.png|[[Shy Guy Smash!]] | ||
MvDK2 Room_1-DK Intro.png|Intro screen shown before | MvDK2 Room_1-DK Intro.png|Intro screen shown before Boss Game 1 | ||
MvDK2 Room_1-DK Intro (No Text).png|Intro screen shown before | MvDK2 Room_1-DK Intro (No Text).png|Intro screen shown before Boss Game 1 (no text) | ||
MvDK2 Room 1-DK Victory.png|Victory screen shown after completing | MvDK2 Room 1-DK Victory.png|Victory screen shown after completing Boss Game 1 | ||
MvDK2 Room 1-DK Victory (No Text).png|Victory screen shown after completing | MvDK2 Room 1-DK Victory (No Text).png|Victory screen shown after completing Boss Game 1 (no text) | ||
</gallery> | </gallery> | ||
| Line 131: | Line 131: | ||
MvDK2_Room_2-8.png|[[Room 2-8]] | MvDK2_Room_2-8.png|[[Room 2-8]] | ||
MvDK2_Room_2-9.png|[[Room 2-9]] | MvDK2_Room_2-9.png|[[Room 2-9]] | ||
MvDK2_Room_2-DK.png|[[ | MvDK2_Room_2-DK.png|[[Boss Game 2]] | ||
Tropical_Island.png|A Mini Mario captured by a Capture Kong in Room 2-9 | Tropical_Island.png|A Mini Mario captured by a Capture Kong in Room 2-9 | ||
ShyGuySmashTropicalIsland.png|Shy Guy Smash! | ShyGuySmashTropicalIsland.png|Shy Guy Smash! | ||
MvDK2 Room 2-DK Intro.png|Intro screen shown before | MvDK2 Room 2-DK Intro.png|Intro screen shown before Boss Game 2 | ||
MvDK2 Room 2-DK Intro (No Text).png|Intro screen shown before | MvDK2 Room 2-DK Intro (No Text).png|Intro screen shown before Boss Game 2 (no text) | ||
MvDK2 Room 2-DK Victory.png|Victory screen shown after completing | MvDK2 Room 2-DK Victory.png|Victory screen shown after completing Boss Game 2 | ||
MvDK2 Room 2-DK Victory (No Text).png|Victory screen shown after completing | MvDK2 Room 2-DK Victory (No Text).png|Victory screen shown after completing Boss Game 2 (no text) | ||
</gallery> | </gallery> | ||
| Line 153: | Line 153: | ||
MvDK2_Room_3-8.png|[[Room 3-8]] | MvDK2_Room_3-8.png|[[Room 3-8]] | ||
MvDK2_Room_3-9.png|[[Room 3-9]] | MvDK2_Room_3-9.png|[[Room 3-9]] | ||
MvDK2_Room_3-DK.png|[[ | MvDK2_Room_3-DK.png|[[Boss Game 3]] | ||
ShyGuySmashPipeWorks.png|Shy Guy Smash! | ShyGuySmashPipeWorks.png|Shy Guy Smash! | ||
MvDK2 Room 3-DK Intro.png|Intro screen shown before | MvDK2 Room 3-DK Intro.png|Intro screen shown before Boss Game 3 | ||
MvDK2 Room 3-DK Intro (No Text).png|Intro screen shown before | MvDK2 Room 3-DK Intro (No Text).png|Intro screen shown before Boss Game 3 (no text) | ||
MvDK2 Room 3-DK Victory.png|Victory screen shown after completing | MvDK2 Room 3-DK Victory.png|Victory screen shown after completing Boss Game 3 | ||
MvDK2 Room 3-DK Victory (No Text).png|Victory screen shown after completing | MvDK2 Room 3-DK Victory (No Text).png|Victory screen shown after completing Boss Game 3 (no text) | ||
</gallery> | </gallery> | ||
| Line 174: | Line 174: | ||
MvDK2_Room_4-8.png|[[Room 4-8]] | MvDK2_Room_4-8.png|[[Room 4-8]] | ||
MvDK2_Room_4-9.png|[[Room 4-9]] | MvDK2_Room_4-9.png|[[Room 4-9]] | ||
MvDK2_Room_4-DK.png|[[ | MvDK2_Room_4-DK.png|[[Boss Game 4]] | ||
MvsDK2 Magnet Mania 4-2.png|Room 4-2 | MvsDK2 Magnet Mania 4-2.png|Room 4-2 | ||
ShyGuySmashMagnetMania.png|Shy Guy Smash! | ShyGuySmashMagnetMania.png|Shy Guy Smash! | ||
MvDK2 Room 4-DK Intro.png|Intro screen shown before | MvDK2 Room 4-DK Intro.png|Intro screen shown before Boss Game 4 | ||
MvDK2 Room 4-DK Intro (No Text).png|Intro screen shown before | MvDK2 Room 4-DK Intro (No Text).png|Intro screen shown before Boss Game 4 (no text) | ||
MvDK2 Room 4-DK Victory.png|Victory screen shown after completing | MvDK2 Room 4-DK Victory.png|Victory screen shown after completing Boss Game 4 | ||
MvDK2 Room 4-DK Victory (No Text).png|Victory screen shown after completing | MvDK2 Room 4-DK Victory (No Text).png|Victory screen shown after completing Boss Game 4 (no text) | ||
</gallery> | </gallery> | ||
| Line 196: | Line 196: | ||
MvDK2_Room_5-8.png|[[Room 5-8]] | MvDK2_Room_5-8.png|[[Room 5-8]] | ||
MvDK2_Room_5-9.png|[[Room 5-9]] | MvDK2_Room_5-9.png|[[Room 5-9]] | ||
MvDK2_Room_5-DK.png|[[ | MvDK2_Room_5-DK.png|[[Boss Game 5]] | ||
Swing_Bar.PNG|A Mini Mario and a Gold Mini Mario on a Swing Bar in Room 5-7 | Swing_Bar.PNG|A Mini Mario and a Gold Mini Mario on a Swing Bar in Room 5-7 | ||
Lava_Dome_9.png|A Mini Mario hanging from a [[Cool Kong]] in Room 5-9 | Lava_Dome_9.png|A Mini Mario hanging from a [[Cool Kong]] in Room 5-9 | ||
ShyGuySmashLavaDome.png|Shy Guy Smash! | ShyGuySmashLavaDome.png|Shy Guy Smash! | ||
MvDK2 Room 5-DK Intro.png|Intro screen shown before | MvDK2 Room 5-DK Intro.png|Intro screen shown before Boss Game 5 | ||
MvDK2 Room 5-DK Intro (No Text).png|Intro screen shown before | MvDK2 Room 5-DK Intro (No Text).png|Intro screen shown before Boss Game 5 (no text) | ||
MvDK2 Room 5-DK Victory.png|Victory screen shown after completing | MvDK2 Room 5-DK Victory.png|Victory screen shown after completing Boss Game 5 | ||
MvDK2 Room 5-DK Victory (No Text).png|Victory screen shown after completing | MvDK2 Room 5-DK Victory (No Text).png|Victory screen shown after completing Boss Game 5 (no text) | ||
</gallery> | </gallery> | ||
| Line 219: | Line 219: | ||
MvDK2_Room_6-8.png|[[Room 6-8]] | MvDK2_Room_6-8.png|[[Room 6-8]] | ||
MvDK2_Room_6-9.png|[[Room 6-9]] | MvDK2_Room_6-9.png|[[Room 6-9]] | ||
MvDK2_Room_6-DK.png|[[ | MvDK2_Room_6-DK.png|[[Boss Game 6]] | ||
Toadstoolcastle.png|[[Room 6-4]] | Toadstoolcastle.png|[[Room 6-4]] | ||
ShyGuySmashToadstoolCastle.png|Shy Guy Smash! | ShyGuySmashToadstoolCastle.png|Shy Guy Smash! | ||
MvDK2 Room 6-DK Intro.png|Intro screen shown before | MvDK2 Room 6-DK Intro.png|Intro screen shown before Boss Game 6 | ||
MvDK2 Room 6-DK Intro (No Text).png|Intro screen shown before | MvDK2 Room 6-DK Intro (No Text).png|Intro screen shown before Boss Game 6 (no text) | ||
MvDK2 Room 6-DK Victory.png|Victory screen shown after completing | MvDK2 Room 6-DK Victory.png|Victory screen shown after completing Boss Game 6 | ||
MvDK2 Room 6-DK Victory (No Text).png|Victory screen shown after completing | MvDK2 Room 6-DK Victory (No Text).png|Victory screen shown after completing Boss Game 6 (no text) | ||
</gallery> | </gallery> | ||
| Line 241: | Line 241: | ||
MvDK2_Room_7-8.png|[[Room 7-8]] | MvDK2_Room_7-8.png|[[Room 7-8]] | ||
MvDK2_Room_7-9.png|[[Room 7-9]] | MvDK2_Room_7-9.png|[[Room 7-9]] | ||
MvDK2_Room_7-DK.png|[[ | MvDK2_Room_7-DK.png|[[Boss Game 7]] | ||
ShyGuySmashSpookyAttic.png|Shy Guy Smash! | ShyGuySmashSpookyAttic.png|Shy Guy Smash! | ||
MvDK2 Room 7-DK Intro.png|Intro screen shown before | MvDK2 Room 7-DK Intro.png|Intro screen shown before Boss Game 7 | ||
MvDK2 Room 7-DK Intro (No Text).png|Intro screen shown before | MvDK2 Room 7-DK Intro (No Text).png|Intro screen shown before Boss Game 7 (no text) | ||
MvDK2 Room 7-DK Victory.png|Victory screen shown after completing | MvDK2 Room 7-DK Victory.png|Victory screen shown after completing Boss Game 7 | ||
MvDK2 Room 7-DK Victory (No Text).png|Victory screen shown after completing | MvDK2 Room 7-DK Victory (No Text).png|Victory screen shown after completing Boss Game 7 (no text) | ||
</gallery> | </gallery> | ||
| Line 262: | Line 262: | ||
MvDK2_Room_8-8.png|[[Room 8-8]] | MvDK2_Room_8-8.png|[[Room 8-8]] | ||
MvDK2_Room_8-9.png|[[Room 8-9]] | MvDK2_Room_8-9.png|[[Room 8-9]] | ||
MvDK2_Room_8-DK.png|[[ | MvDK2_Room_8-DK.png|[[Boss Game 8]] | ||
ShyGuySmashJungleHijinks.png|Shy Guy Smash! | ShyGuySmashJungleHijinks.png|Shy Guy Smash! | ||
MvDK2 Room 8-DK Intro.png|Intro screen shown before | MvDK2 Room 8-DK Intro.png|Intro screen shown before Boss Game 8 | ||
MvDK2 Room 8-DK Intro (No Text).png|Intro screen shown before | MvDK2 Room 8-DK Intro (No Text).png|Intro screen shown before Boss Game 8 (no text) | ||
MvDK2 Room 8-DK Victory.png|Victory screen shown after completing | MvDK2 Room 8-DK Victory.png|Victory screen shown after completing Boss Game 8 | ||
MvDK2 Room 8-DK Victory (No Text).png|Victory screen shown after completing | MvDK2 Room 8-DK Victory (No Text).png|Victory screen shown after completing Boss Game 8 (no text) | ||
</gallery> | </gallery> | ||
====Roof==== | ====Roof==== | ||
<gallery> | <gallery> | ||
MOTH Roof.png| | MOTH Roof.png|[[Roof (Mario vs. Donkey Kong 2: March of the Minis)#Final Boss|Final Boss]] | ||
MvDK2 Roof Intro.png|Intro screen shown before | MvDK2 Roof Intro.png|Intro screen shown before Final Boss | ||
MvDK2 Roof Intro (Gallery).png|Intro screen shown before | MvDK2 Roof Intro (Gallery).png|Intro screen shown before Final Boss (from the in-game Gallery) | ||
</gallery> | </gallery> | ||
Revision as of 17:06, July 17, 2022
This is a gallery of images for the game Mario vs. Donkey Kong 2: March of the Minis.
Logos
It has been requested that more images be uploaded for this article. Remove this notice only after the additional image(s) have been added. Reason: European-languages logos
Artwork
Characters
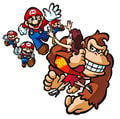
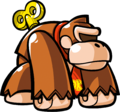
Mario and the Mini Mario toys chasing after Donkey Kong with Pauline
Donkey Kong holds a Barrel
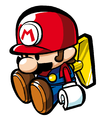
Mini Mario with a Blue Spring
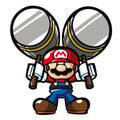
Mini Mario with Hammers
Enemies
Sprites and models
In-game sprites
Level backgrounds
Screenshots
Title screens
Worlds
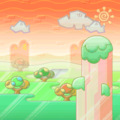
Mushroom Mayhem
Tropical Island
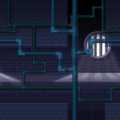
Pipe Works
Magnet Mania
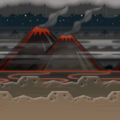
Lava Dome
A Mini Mario hanging from a Cool Kong in Room 5-9
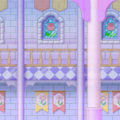
Toadstool Castle
Spooky Attic
Jungle Hijinks
Roof
DK's Hideout
DK's Hideout on the level selection screen
Construction Zone
Unlocking kits
Pre-release
Movies
Pre Title
Introduction
Ending
Musical
Credits artwork
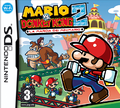
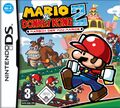
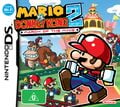
Box art
| Mario vs. Donkey Kong 2: March of the Minis | |
|---|---|
| Main characters | Mario • Donkey Kong • Pauline |
| Minis | Mini Mario • Gold Mini Mario • Fire Mini Mario • Mini Toad • Mini Peach • Mini Donkey Kong |
| Enemies | Bird • Blooper • Bob-omb • Bob-omb Fish • Candle • Cuttacutta • Fire Bar • Fireball • Jack • Magnet Sparky • Monkey robots (Capture Kong · Circus Kong · Cool Kong · Crash Kong · Kongā) • Mummy Guy • Piranha Plant • Phantom Guy • Podoboo • Shy Guy • Snapjaw • Snifit • Spyguy • Swoop • Thwomp |
| Floors | DK's Hideout • Mushroom Mayhem • Tropical Island • Pipe Works • Magnet Mania • Lava Dome • Toadstool Castle • Spooky Attic • Jungle Hijinks • Roof |
| Items and objects | ? Block • Balance Beam • Blue Spring • Bolt • Coin (large) • Color Blocks (Bomb Block · Fire Block · Magnetic Block · Pink Block) • Color Switch • Conveyor belt • Donut Block • Elevator • Fire Flower • Girder • Hammer • Lava Fountain • Magnet Ground • Mini Mario Card • Moving Platform • Raft • Rotate Pipe • Rotating Magnet Stick • Spike • Swing Bar • Vine • Water Valve • Warp Pipe • Yellow Spring |
| Miscellaneous | Cannon Kaos • Construction Zone • Gallery • Shy Guy Smash! • Special Kit 1 • Special Kit 2 • Special Kit 3 • Staff |

