Gallery:Mario vs. Donkey Kong 2: March of the Minis: Difference between revisions
(Added lots of images to gallery) |
(Added screenshots of floors on the floor selection screen to gallery) |
||
| Line 91: | Line 91: | ||
<gallery> | <gallery> | ||
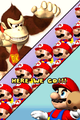
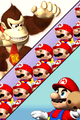
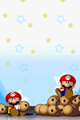
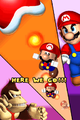
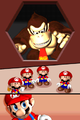
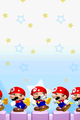
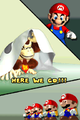
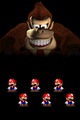
EnteringMushroomMayhem.png|Mario, Donkey Kong, and the Mini Marios enter Mushroom Mayhem | EnteringMushroomMayhem.png|Mario, Donkey Kong, and the Mini Marios enter Mushroom Mayhem | ||
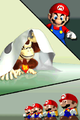
MvsDK2 Mushroom Mayhem.png|Mushroom Mayhem on the floor selection screen | |||
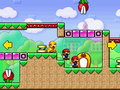
MvDK2_Room_1-1.png|[[Room 1-1 (Mario vs. Donkey Kong 2: March of the Minis)|Room 1-1]] | MvDK2_Room_1-1.png|[[Room 1-1 (Mario vs. Donkey Kong 2: March of the Minis)|Room 1-1]] | ||
MvDK2_Room_1-2.png|[[Room 1-2 (Mario vs. Donkey Kong 2: March of the Minis)|Room 1-2]] | MvDK2_Room_1-2.png|[[Room 1-2 (Mario vs. Donkey Kong 2: March of the Minis)|Room 1-2]] | ||
| Line 112: | Line 113: | ||
<gallery> | <gallery> | ||
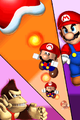
EnteringTropicalIsland.png|Mario, Donkey Kong, and the Mini Marios enter Tropical Island | EnteringTropicalIsland.png|Mario, Donkey Kong, and the Mini Marios enter Tropical Island | ||
MvsDK2 Tropical Island.png|Tropical Island on the floor selection screen | |||
MvDK2_Room_2-1.png|[[Room 2-1 (Mario vs. Donkey Kong 2: March of the Minis)|Room 2-1]] | MvDK2_Room_2-1.png|[[Room 2-1 (Mario vs. Donkey Kong 2: March of the Minis)|Room 2-1]] | ||
MvDK2_Room_2-2.png|[[Room 2-2 (Mario vs. Donkey Kong 2: March of the Minis)|Room 2-2]] | MvDK2_Room_2-2.png|[[Room 2-2 (Mario vs. Donkey Kong 2: March of the Minis)|Room 2-2]] | ||
| Line 133: | Line 135: | ||
<gallery> | <gallery> | ||
EnteringPipeWorks.png|Mario, Donkey Kong, and the Mini Marios enter Pipe Works | EnteringPipeWorks.png|Mario, Donkey Kong, and the Mini Marios enter Pipe Works | ||
MvsDK2 Pipe Works.png|Pipe Works on the floor selection screen | |||
MvDK2_Room_3-1.png|[[Room 3-1 (Mario vs. Donkey Kong 2: March of the Minis)|Room 3-1]] | MvDK2_Room_3-1.png|[[Room 3-1 (Mario vs. Donkey Kong 2: March of the Minis)|Room 3-1]] | ||
MvDK2_Room_3-2.png|[[Room 3-2 (Mario vs. Donkey Kong 2: March of the Minis)|Room 3-2]] | MvDK2_Room_3-2.png|[[Room 3-2 (Mario vs. Donkey Kong 2: March of the Minis)|Room 3-2]] | ||
| Line 153: | Line 156: | ||
<gallery> | <gallery> | ||
EnteringMagnetMania.png|Mario, Donkey Kong, and the Minis enter Magnet Mania | EnteringMagnetMania.png|Mario, Donkey Kong, and the Minis enter Magnet Mania | ||
MvsDK2 Magnet Mania.png|Magnet Mania on the floor selection screen | |||
MvDK2_Room_4-1.png|[[Room 4-1 (Mario vs. Donkey Kong 2: March of the Minis)|Room 4-1]] | MvDK2_Room_4-1.png|[[Room 4-1 (Mario vs. Donkey Kong 2: March of the Minis)|Room 4-1]] | ||
MvDK2_Room_4-2.png|[[Room 4-2 (Mario vs. Donkey Kong 2: March of the Minis)|Room 4-2]] | MvDK2_Room_4-2.png|[[Room 4-2 (Mario vs. Donkey Kong 2: March of the Minis)|Room 4-2]] | ||
| Line 174: | Line 178: | ||
<gallery> | <gallery> | ||
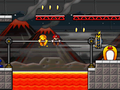
EnteringLavaDome.png|Mario, Donkey Kong, and the Mini Marios enter Lava Dome | EnteringLavaDome.png|Mario, Donkey Kong, and the Mini Marios enter Lava Dome | ||
MvsDK2 Lava Dome.png|Lava Dome on the floor selection screen | |||
MvDK2_Room_5-1.png|[[Room 5-1]] | MvDK2_Room_5-1.png|[[Room 5-1]] | ||
MvDK2_Room_5-2.png|[[Room 5-2]] | MvDK2_Room_5-2.png|[[Room 5-2]] | ||
| Line 196: | Line 201: | ||
<gallery> | <gallery> | ||
EnteringToadstoolCastle.png|Mario, Donkey Kong, and the Mini Marios enter Toadstool Castle | EnteringToadstoolCastle.png|Mario, Donkey Kong, and the Mini Marios enter Toadstool Castle | ||
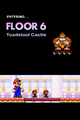
MvsDK2 Toadstool Castle.png|Toadstool Castle on the floor selection screen | |||
MvDK2_Room_6-1.png|[[Room 6-1]] | MvDK2_Room_6-1.png|[[Room 6-1]] | ||
MvDK2_Room_6-2.png|[[Room 6-2]] | MvDK2_Room_6-2.png|[[Room 6-2]] | ||
| Line 217: | Line 223: | ||
<gallery> | <gallery> | ||
EnteringSpookyAttic.png|Mario, Donkey Kong, and the Mini Marios enter Spooky Attic | EnteringSpookyAttic.png|Mario, Donkey Kong, and the Mini Marios enter Spooky Attic | ||
MvsDK2 Spooky Attic.png|Spooky Attic on the floor selection screen | |||
MvDK2_Room_7-1.png|[[Room 7-1]] | MvDK2_Room_7-1.png|[[Room 7-1]] | ||
MvDK2_Room_7-2.png|[[Room 7-2]] | MvDK2_Room_7-2.png|[[Room 7-2]] | ||
| Line 237: | Line 244: | ||
<gallery> | <gallery> | ||
EnteringJungleHijinks.png|Mario, Donkey Kong, and the Mini Marios enter Jungle Hijinks | EnteringJungleHijinks.png|Mario, Donkey Kong, and the Mini Marios enter Jungle Hijinks | ||
MvsDK2 Jungle Hijinks.png|Jungle Hijinks on the floor selection screen | |||
MvDK2_Room_8-1.png|[[Room 8-1]] | MvDK2_Room_8-1.png|[[Room 8-1]] | ||
MvDK2_Room_8-2.png|[[Room 8-2]] | MvDK2_Room_8-2.png|[[Room 8-2]] | ||
Revision as of 13:17, July 12, 2022
This is a gallery of images for the game Mario vs. Donkey Kong 2: March of the Minis.
Logos

English logo
Spanish logo
Japanese logo
Early logo (E3 2006)


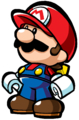
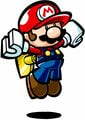
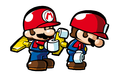
Artwork
Characters
Box artwork
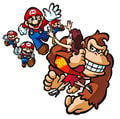
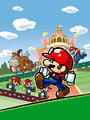
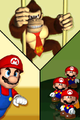
Mario and the Mini Mario toys chasing after Donkey Kong with Pauline

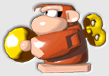
Donkey Kong holds a Barrel
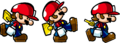
Mini Mario
Mini Mario

Mini Mario
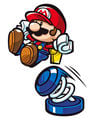
Mini Mario winding another
Three Mini Marios
Mini Mario with a Blue Spring
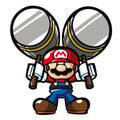
Mini Mario with Hammers


_-_Mario_vs._Donkey_Kong.png)


Enemies


Sprites and models
In-game sprites

Empty Pink Block

Empty Fire Block

Empty Magnetic Block

Empty Bomb Block


Level backgrounds


Screenshots
Worlds
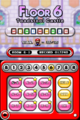
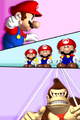
Mushroom Mayhem
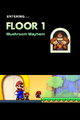
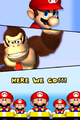
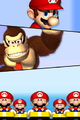
Mario, Donkey Kong, and the Mini Marios enter Mushroom Mayhem
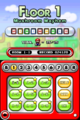
Mushroom Mayhem on the floor selection screen
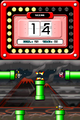
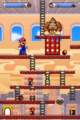
A perfect chain with a Gold Mini Mario bonus set up in Room 1-3
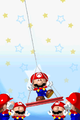
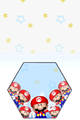
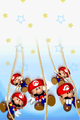
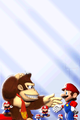
Intro screen shown before Room 1-DK
Intro screen shown before Room 1-DK (no text)
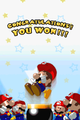
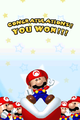
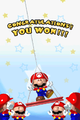
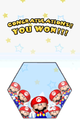
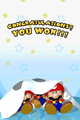
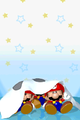
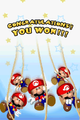
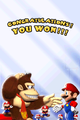
Victory screen shown after completing Room 1-DK

Victory screen shown after completing Room 1-DK (no text)


.png)

.png)
Tropical Island
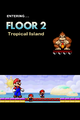
Mario, Donkey Kong, and the Mini Marios enter Tropical Island
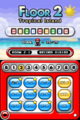
Tropical Island on the floor selection screen
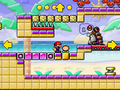
A Mini Mario captured by a Capture Kong in Room 2-9
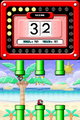
Shy Guy Smash!
Intro screen shown before Room 2-DK
Intro screen shown before Room 2-DK (no text)
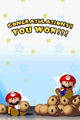
Victory screen shown after completing Room 2-DK
Victory screen shown after completing Room 2-DK (no text)


.png)

.png)
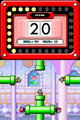
Pipe Works
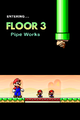
Mario, Donkey Kong, and the Mini Marios enter Pipe Works
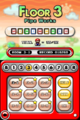
Pipe Works on the floor selection screen
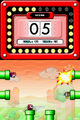
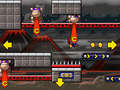
Shy Guy Smash!
Intro screen shown before Room 3-DK
Intro screen shown before Room 3-DK (no text)
Victory screen shown after completing Room 3-DK
Victory screen shown after completing Room 3-DK (no text)


.png)

.png)
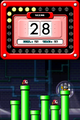
Magnet Mania
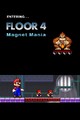
Mario, Donkey Kong, and the Minis enter Magnet Mania

Magnet Mania on the floor selection screen
Shy Guy Smash!
Intro screen shown before Room 4-DK
Intro screen shown before Room 4-DK (no text)
Victory screen shown after completing Room 4-DK
Victory screen shown after completing Room 4-DK (no text)


.png)

.png)
Lava Dome
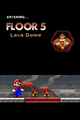
Mario, Donkey Kong, and the Mini Marios enter Lava Dome
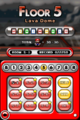
Lava Dome on the floor selection screen
A Mini Mario and a Gold Mini Mario on a Swing Bar in Room 5-7
A Mini Mario hanging from a Cool Kong in Room 5-9
Shy Guy Smash!
Intro screen shown before Room 5-DK
Intro screen shown before Room 5-DK (no text)
Victory screen shown after completing Room 5-DK
Victory screen shown after completing Room 5-DK (no text)


.png)

.png)
Toadstool Castle
Mario, Donkey Kong, and the Mini Marios enter Toadstool Castle
Toadstool Castle on the floor selection screen
Shy Guy Smash!

Intro screen shown before Room 6-DK
Intro screen shown before Room 6-DK (no text)
Victory screen shown after completing Room 6-DK
Victory screen shown after completing Room 6-DK (no text)


.png)

.png)
Spooky Attic
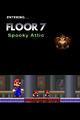
Mario, Donkey Kong, and the Mini Marios enter Spooky Attic
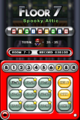
Spooky Attic on the floor selection screen
Shy Guy Smash!
Intro screen shown before Room 7-DK
Intro screen shown before Room 7-DK (no text)
Victory screen shown after completing Room 7-DK
Victory screen shown after completing Room 7-DK (no text)


.png)

.png)
Jungle Hijinks
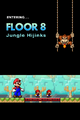
Mario, Donkey Kong, and the Mini Marios enter Jungle Hijinks
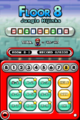
Jungle Hijinks on the floor selection screen
Shy Guy Smash!
Intro screen shown before Room 8-DK
Intro screen shown before Room 8-DK (no text)
Victory screen shown after completing Room 8-DK
Victory screen shown after completing Room 8-DK (no text)


.png)

.png)
Roof
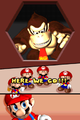
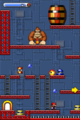
Mario and the Mini Marios battle Donkey Kong on the Roof
Intro screen shown before the final battle

Intro screen shown before the final battle (from the in-game Gallery)


.png)
DK's Hideout
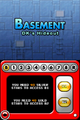
DK's Hideout on the level selection screen
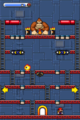
B1
B2
Victory screen shown after completing B1
Victory screen shown after completing B1 (no text)


.png)
Construction Zone
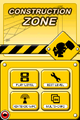
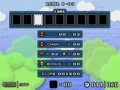
Menu screen

Kit select screen
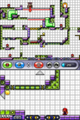
Edit Level screen


Unlocking kits
Tropical Island

Pipe Works

Magnet Mania

Lava Dome
Toadstool Castle
Spooky Attic

Jungle Hijinks

Special Kit 1

Special Kit 2

Special Kit 3


Pre-release
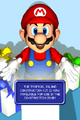
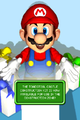
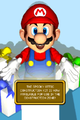
An early version of the top screen

Cutscenes
Pre Title

Introduction


Credits artwork

Mini Mario

Mini Peach

Mini Toad

Shy Guy

Bob-omb

Mini Donkey Kong

Circus Kong

Cool Kong

Thwomp

Donkey Kong

Donkey Kong waving
Crash Kong

Mario

Blooper

Capture Kong

Piranha Plant

Blue Spring

Barrel
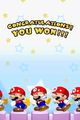
"Thank You for Playing" screen, shown after the credits roll for the first time


Box art

North American box art
Canadian box art

UK box art
French and Dutch box art
Spanish box art
Italian box art
German box art
German box art (alternate)
Australian box art
Japanese box art


| Mario vs. Donkey Kong 2: March of the Minis | |
|---|---|
| Main characters | Mario • Donkey Kong • Pauline |
| Minis | Mini Mario • Gold Mini Mario • Fire Mini Mario • Mini Toad • Mini Peach • Mini Donkey Kong |
| Enemies | Bird • Blooper • Bob-omb • Bob-omb Fish • Candle • Cuttacutta • Fire Bar • Fireball • Jack • Magnet Sparky • Monkey robots (Capture Kong · Circus Kong · Cool Kong · Crash Kong · Kongā) • Mummy Guy • Piranha Plant • Phantom Guy • Podoboo • Shy Guy • Snapjaw • Snifit • Spyguy • Swoop • Thwomp |
| Floors | DK's Hideout • Mushroom Mayhem • Tropical Island • Pipe Works • Magnet Mania • Lava Dome • Toadstool Castle • Spooky Attic • Jungle Hijinks • Roof |
| Items and objects | ? Block • Balance Beam • Blue Spring • Bolt • Coin (large) • Color Blocks (Bomb Block · Fire Block · Magnetic Block · Pink Block) • Color Switch • Conveyor belt • Donut Block • Elevator • Fire Flower • Girder • Hammer • Lava Fountain • Log • Magnet Ground • Mini Mario Card • Moving Platform • Raft • Rotate Pipe • Rotating Magnet Stick • Spike • Swing Bar • Vine • Wall Jump Bar • Water Valve • Warp Pipe • Yellow Spring |
| Miscellaneous | Cannon Kaos • Construction Zone • Gallery • Shy Guy Smash! • Special Kit 1 • Special Kit 2 • Special Kit 3 • Staff |