List of Dry Bowser profiles and statistics: Difference between revisions
From the Super Mario Wiki, the Mario encyclopedia
Jump to navigationJump to search
SonicSpeed48 (talk | contribs) |
MarioMan25 (talk | contribs) |
||
| (26 intermediate revisions by 10 users not shown) | |||
| Line 3: | Line 3: | ||
==''[[Mario Kart (series)|Mario Kart]]'' series== | ==''[[Mario Kart (series)|Mario Kart]]'' series== | ||
===''[[Mario Kart Wii]]''=== | ===''[[Mario Kart Wii]]''=== | ||
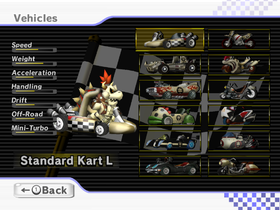
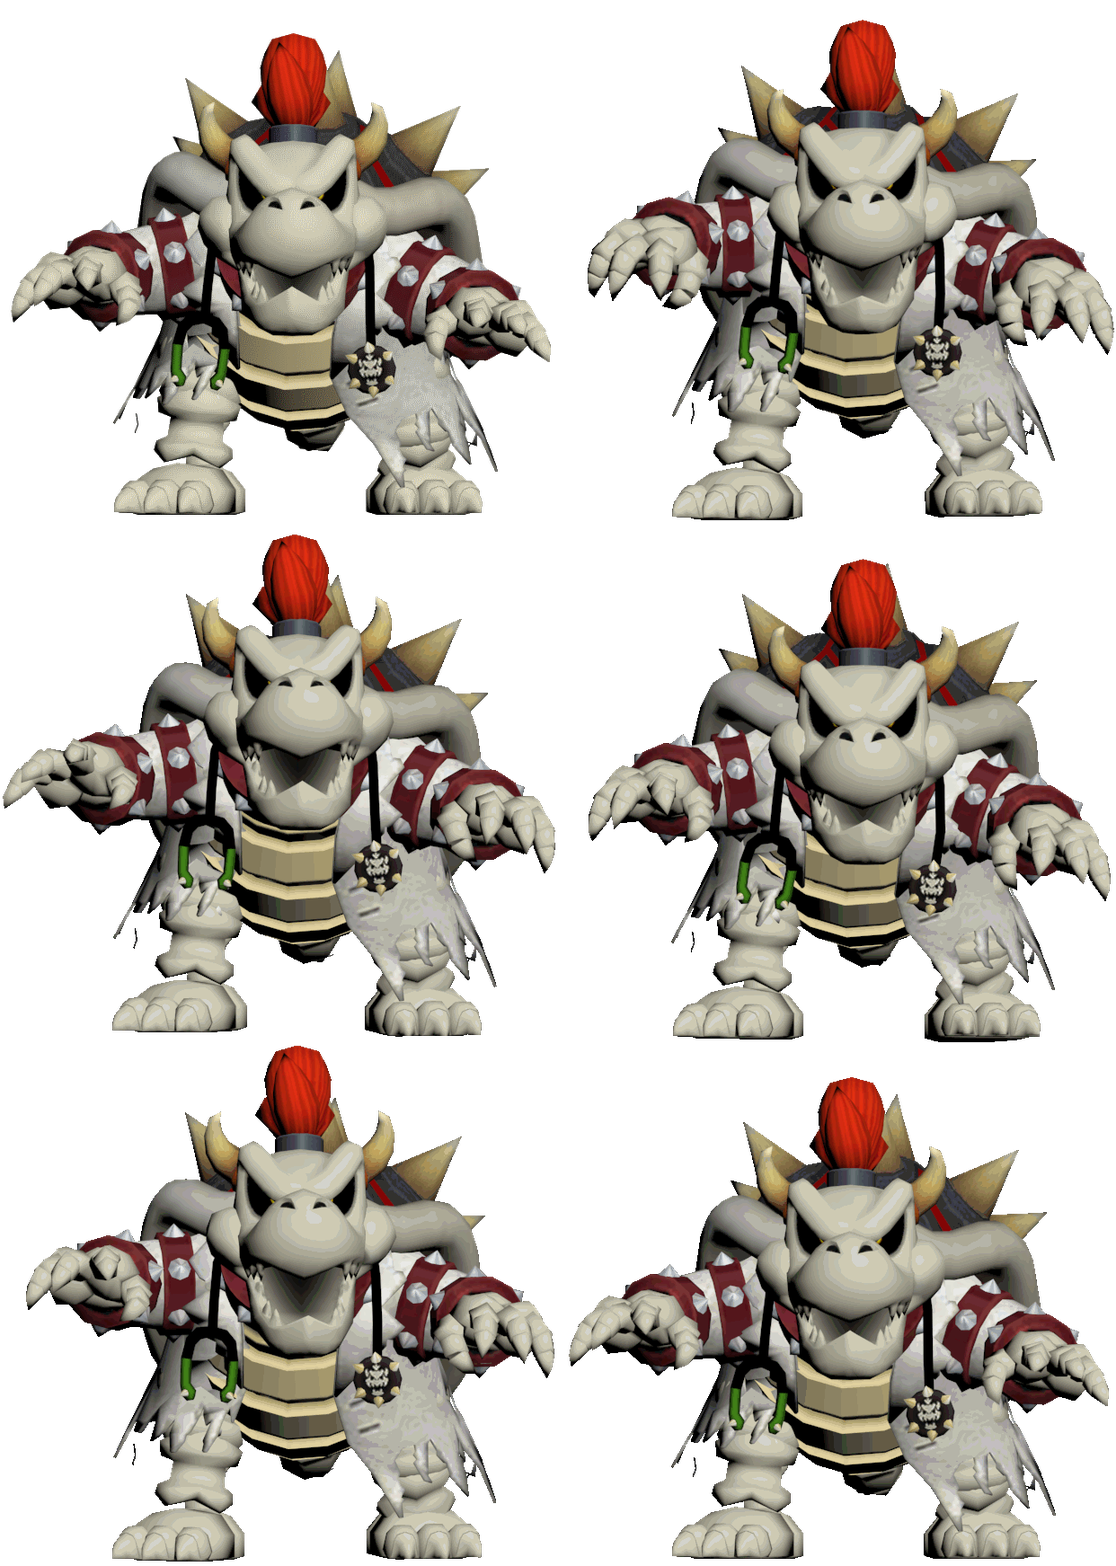
[[File:RosterDryBowser.png|thumb|upright=1.4 | [[File:RosterDryBowser.png|thumb|upright=1.4|Dry Bowser's complete vehicle roster]] | ||
*'''Size:''' Large | *'''Size:''' Large | ||
*Actual Bonuses | *Actual Bonuses | ||
| Line 15: | Line 15: | ||
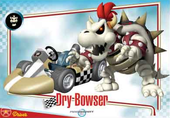
[[File:MKW Dry Bowser Trading Card.png|thumb|upright=0.85]] | [[File:MKW Dry Bowser Trading Card.png|thumb|upright=0.85]] | ||
*'''Bios''' | *'''Bios''' | ||
**'''Site:''' '' | **'''Site:''' ''If the King of the Koopas wasn't scary enough already, his appearance as a surly skeleton should have the other drivers shaken in their seats!'' | ||
**'''[[Prima Games|Prima]] Guide:''' '' | **'''[[Prima Games|Prima]] Guide:''' ''After a little dip in lava, Dry Bowser, King of the Dry Bones, returns invincible! Fortunately though, he's driving the same karts and bikes as everyone else! | ||
**'''Trading Card:''' '' | **'''Trading Card:''' ''Is this the result of Bowser taking a lava bath? Dry Bowser knows how to turn on the boost juice with effective Mini-Turbos and excellent Off Road handling. Unlock him if you're on a tight track & like to go fast! | ||
===''[[Mario Kart 8]]''=== | ===''[[Mario Kart 8]]''=== | ||
{{multiframe | {{multiframe | ||
|[[File:MK8 Dry Bowser Emblem.png|100px]][[File:MK8 Dry Bowser Car Horn Emblem.png|100px]] | |[[File:MK8 Dry Bowser Emblem.png|100px]][[File:MK8 Dry Bowser Car Horn Emblem.png|100px]] | ||
|Dry Bowser's emblems | |Dry Bowser's emblems from ''Mario Kart 8'' | ||
|size=200 | |size=200 | ||
|align=right | |align=right | ||
| Line 151: | Line 151: | ||
===''[[Mario Kart Tour]]''=== | ===''[[Mario Kart Tour]]''=== | ||
====Dry Bowser==== | ====Dry Bowser==== | ||
{{ | {{MKT profile | ||
|collapse=y | |||
|item=Bowser's Shell | |item=Bowser's Shell | ||
|I1.1=Dino Dino Jungle|R1.1=[[GCN Dino Dino Jungle]] | |||
|I1.2=Dino Dino Jungle T|R1.2=[[GCN Dino Dino Jungle|GCN Dino Dino Jungle T]] | |||
|I1.3=GBA Bowser's Castle 1R|R1.3=[[GBA Bowser's Castle 1|GBA Bowser's Castle 1R]] | |||
|I1.4=GBA Bowser's Castle 1RT|R1.4=[[GBA Bowser's Castle 1|GBA Bowser's Castle 1R/T]] | |||
|I1.5=Shy Guy Bazaar R|R1.5=[[3DS Shy Guy Bazaar|3DS Shy Guy Bazaar R]] | |||
|I1.6=DK Pass R|R1.6=[[DS DK Pass|DS DK Pass R]] | |||
|I1.7=Neo Bowser City T|R1.7=[[3DS Neo Bowser City|3DS Neo Bowser City T]] | |||
|I1.8=Neo Bowser City RT|R1.8=[[3DS Neo Bowser City|3DS Neo Bowser City R/T]] | |||
|I1.9=GBA Bowser's Castle 2|R1.9=[[GBA Bowser's Castle 2]] | |||
|I1.10=GBA Bowser's Castle 2R|R1.10=[[GBA Bowser's Castle 2|GBA Bowser's Castle 2R]] | |||
|I1.11=Choco Mountain R|R1.11=[[N64 Choco Mountain|N64 Choco Mountain R]] | |||
|I1.12=New York Minute 3T|R1.12=[[Tour New York Minute|New York Minute 3T]] | |||
|I2.1=GBA Bowser's Castle 1|R2.1=[[GBA Bowser's Castle 1]] | |||
|I2.2=DK Pass RT|R2.2=[[DS DK Pass|DS DK Pass R/T]]* | |||
|I2.3=Rock Rock Mountain|R2.3=[[3DS Rock Rock Mountain]] | |||
|I2.4=Rock Rock Mountain T|R2.4=[[3DS Rock Rock Mountain|3DS Rock Rock Mountain T]]** | |||
|I2.5=Daisy Hills T|R2.5=[[3DS Daisy Hills|3DS Daisy Hills T]] | |||
|I2.6=Kalimari Desert T|R2.6=[[N64 Kalimari Desert|N64 Kalimari Desert T]] | |||
|I2.7=Kalimari Desert RT|R2.7=[[N64 Kalimari Desert|N64 Kalimari Desert R/T]] | |||
|I2.8=Neo Bowser City|R2.8=[[3DS Neo Bowser City]] | |||
|I2.9=Neo Bowser City R|R2.9=[[3DS Neo Bowser City|3DS Neo Bowser City R]] | |||
|I2.1=GBA Bowser's Castle 1|R2.1=[[ | |||
|I2.2=DK Pass RT|R2.2=[[DK Pass|DS DK Pass R/T]]* | |||
|I2.3=Rock Rock Mountain|R2.3=[[ | |||
|I2.4=Rock Rock Mountain T|R2.4=[[Rock Rock Mountain|3DS Rock Rock Mountain T]]** | |||
|I2.5=Daisy Hills T|R2.5=[[Daisy Hills|3DS Daisy Hills T]] | |||
|I2.6=Kalimari Desert T|R2.6=[[Kalimari Desert|N64 Kalimari Desert T]] | |||
|I2.7=Kalimari Desert RT|R2.7=[[Kalimari Desert|N64 Kalimari Desert R/T]] | |||
|I2.8=Neo Bowser City|R2.8=[[ | |||
|I2.9=Neo Bowser City R|R2.9=[[Neo Bowser City|3DS Neo Bowser City R]] | |||
|I2.10=RMX Mario Circuit 1T|R2.10=[[RMX Mario Circuit 1|RMX Mario Circuit 1T]]** | |I2.10=RMX Mario Circuit 1T|R2.10=[[RMX Mario Circuit 1|RMX Mario Circuit 1T]]** | ||
|I2.11=GBA Bowser's Castle 2T|R2.11=[[Bowser Castle 2 | |I2.11=GBA Bowser's Castle 2T|R2.11=[[GBA Bowser's Castle 2|GBA Bowser's Castle 2T]]* | ||
|I2.12=Choco Mountain T|R2.12=[[Choco Mountain|N64 Choco Mountain T]] | |I2.12=Choco Mountain T|R2.12=[[N64 Choco Mountain|N64 Choco Mountain T]] | ||
|I2.13=New York Minute 3|R2.13=[[New York Minute 3]] | |I2.13=New York Minute 3|R2.13=[[Tour New York Minute|New York Minute 3]] | ||
|I2.14=Sunset Wilds RT|R2.14=[[Sunset Wilds|GBA Sunset Wilds R/T]] | |I2.14=Sunset Wilds RT|R2.14=[[GBA Sunset Wilds|GBA Sunset Wilds R/T]] | ||
|I2.15=RMX Rainbow Road 1RT|R2.15=[[RMX Rainbow Road 1|RMX Rainbow Road 1R/T]] | |I2.15=RMX Rainbow Road 1RT|R2.15=[[RMX Rainbow Road 1|RMX Rainbow Road 1R/T]]*** | ||
|I2.16=RMX Rainbow Road 2R|R2.16=[[RMX Rainbow Road 2|RMX Rainbow Road 2R]] | |I2.16=RMX Rainbow Road 2R|R2.16=[[RMX Rainbow Road 2|RMX Rainbow Road 2R]] | ||
|I2.17=Berlin Byways 2R|R2.17=[[Berlin Byways | |I2.17=Berlin Byways 2R|R2.17=[[Tour Berlin Byways|Berlin Byways 2R]] | ||
|I2.18=Ninja Hideaway T|R2.18=[[Ninja Hideaway|Ninja Hideaway T]] | |I2.18=Ninja Hideaway T|R2.18=[[Ninja Hideaway|Ninja Hideaway T]] | ||
|I2.19=Ninja Hideaway R|R2.19=[[Ninja Hideaway|Ninja Hideaway R]] | |I2.19=Ninja Hideaway R|R2.19=[[Ninja Hideaway|Ninja Hideaway R]] | ||
|I2.20=Cheep-Cheep Island T|R2.20=[[GBA Cheep-Cheep Island|GBA Cheep-Cheep Island T]] | |||
|I2.21=Sydney Sprint 2|R2.21=[[Tour Sydney Sprint|Sydney Sprint 2]] | |||
|I2.22=Baby Park T|R2.22=[[GCN Baby Park|GCN Baby Park T]] | |||
|I2.23=RMX Bowser's Castle 1R|R2.23=[[RMX Bowser's Castle 1|RMX Bowser's Castle 1R]] | |||
|I2.24=GBA Bowser's Castle 3T|R2.24=[[GBA Bowser's Castle 3|GBA Bowser's Castle 3T]] | |||
|I2.25=Ghost Valley 2|R2.25=[[SNES Ghost Valley 2]] | |||
|I2.26=GBA Battle Course 1|R2.26=[[GBA Battle Course 1]] | |||
|I2.27=Twilight House|R2.27=[[DS Twilight House]] | |||
|I2.28=GBA Bowser's Castle 3RT|R2.28=[[GBA Bowser's Castle 3|GBA Bowser's Castle 3R/T]] | |||
|I2.29=GCN Waluigi Stadium RT|R2.29=[[GCN Waluigi Stadium|GCN Waluigi Stadium R/T]] | |||
}} | }} | ||
====Dry Bowser (Gold)==== | ====Dry Bowser (Gold)==== | ||
{{ | {{MKT profile | ||
|collapse=y | |||
|item=Bob-omb Cannon | |item=Bob-omb Cannon | ||
|I1.1=DS Luigi's Mansion T|R1.1=[[DS Luigi's Mansion|DS Luigi's Mansion T]] | |||
|I1.1=DS Luigi's Mansion T|R1.1=[[Luigi's Mansion | |I1.2=Choco Island 1T|R1.2=[[SNES Choco Island 1|SNES Choco Island 1T]] | ||
|I1.2=Choco Island 1T|R1.2=[[Choco Island 1|SNES Choco Island 1T]] | |I1.3=Rock Rock Mountain R|R1.3=[[3DS Rock Rock Mountain|3DS Rock Rock Mountain R]] | ||
|I1.3=Rock Rock Mountain R|R1.3=[[Rock Rock Mountain|3DS Rock Rock Mountain R]] | |I1.4=Kalimari Desert R|R1.4=[[N64 Kalimari Desert|N64 Kalimari Desert R]] | ||
|I1.4=Kalimari Desert R|R1.4=[[Kalimari Desert|N64 Kalimari Desert R]] | |I1.5=GBA Bowser's Castle 2RT|R1.5=[[GBA Bowser's Castle 2|GBA Bowser's Castle 2R/T]] | ||
|I1.5=GBA Bowser's Castle 2RT|R1.5=[[Bowser Castle 2 | |I1.6=Neo Bowser City|R1.6=[[3DS Neo Bowser City]] | ||
|I1.6=Neo Bowser City|R1.6=[[ | |I1.7=Neo Bowser City T|R1.7=[[3DS Neo Bowser City|3DS Neo Bowser City T]] | ||
|I1.7=Neo Bowser City T|R1.7=[[Neo Bowser City|3DS Neo Bowser City T]] | |I1.8=DS Waluigi Pinball T|R1.8=[[DS Waluigi Pinball|DS Waluigi Pinball T]] | ||
|I1.8=DS Waluigi Pinball T|R1.8=[[Waluigi Pinball | |I1.9=DS Waluigi Pinball R|R1.9=[[DS Waluigi Pinball|DS Waluigi Pinball R]] | ||
|I1.9=DS Waluigi Pinball R|R1.9=[[Waluigi Pinball | |I1.10=3DS Rainbow Road R|R1.10=[[3DS Rainbow Road|3DS Rainbow Road R]] | ||
|I1.10=3DS Rainbow Road R|R1.10=[[Rainbow Road | |I1.11=3DS Rainbow Road T|R1.11=[[3DS Rainbow Road|3DS Rainbow Road T]] | ||
|I1.11=3DS Rainbow Road T|R1.11=[[Rainbow Road | |I1.12=Dino Dino Jungle|R1.12=[[GCN Dino Dino Jungle]] | ||
|I1.12=Dino Dino Jungle|R1.12=[[ | |I1.13=Dino Dino Jungle T|R1.13=[[GCN Dino Dino Jungle|GCN Dino Dino Jungle T]] | ||
|I1.13=Dino Dino Jungle T|R1.13=[[Dino Dino Jungle|GCN Dino Dino Jungle T]] | |I1.14=Airship Fortress|R1.14=[[DS Airship Fortress]] | ||
|I1.14=Airship Fortress|R1.14=[[ | |I1.15=Airship Fortress R|R1.15=[[DS Airship Fortress|DS Airship Fortress R]] | ||
|I1.15=Airship Fortress R|R1.15=[[Airship Fortress|DS Airship Fortress R]] | |||
|I1.16=RMX Rainbow Road 1R|R1.16=[[RMX Rainbow Road 1|RMX Rainbow Road 1R]] | |I1.16=RMX Rainbow Road 1R|R1.16=[[RMX Rainbow Road 1|RMX Rainbow Road 1R]] | ||
|I1.17=Vancouver Velocity R|R1.17=[[Vancouver Velocity|Vancouver Velocity R]] | |I1.17=Vancouver Velocity R|R1.17=[[Vancouver Velocity|Vancouver Velocity R]] | ||
|I1.18=Rosalina's Ice World T|R1.18=[[Rosalina's Ice World|3DS Rosalina's Ice World T]] | |I1.18=Rosalina's Ice World T|R1.18=[[3DS Rosalina's Ice World|3DS Rosalina's Ice World T]] | ||
|I1.19=Koopa Cape T|R1.19=[[Wii Koopa Cape|Wii Koopa Cape T]] | |||
|I1.20=Koopa Cape R|R1.20=[[Wii Koopa Cape|Wii Koopa Cape R]] | |||
|I1.21=Berlin Byways T|R1.21=[[Tour Berlin Byways|Berlin Byways T]] | |||
|I1.22=Ghost Valley 2RT|R1.22=[[SNES Ghost Valley 2|SNES Ghost Valley 2R/T]] | |||
|I1.23=GCN Waluigi Stadium|R1.23=[[GCN Waluigi Stadium]] | |||
|I1.24=GBA Lakeside Park T|R1.24=[[GBA Lakeside Park|GBA Lakeside Park T]] | |||
|I2.1=Choco Island 1|R2.1=[[ | |I2.1=Choco Island 1|R2.1=[[SNES Choco Island 1]] | ||
|I2.2=Rock Rock Mountain T|R2.2=[[Rock Rock Mountain|3DS Rock Rock Mountain T]] | |I2.2=Rock Rock Mountain T|R2.2=[[3DS Rock Rock Mountain|3DS Rock Rock Mountain T]] | ||
|I2.3=Kalimari Desert|R2.3=[[ | |I2.3=Kalimari Desert|R2.3=[[N64 Kalimari Desert]] | ||
|I2.4=Kalimari Desert T|R2.4=[[Kalimari Desert|N64 Kalimari Desert T]]* | |I2.4=Kalimari Desert T|R2.4=[[N64 Kalimari Desert|N64 Kalimari Desert T]]* | ||
|I2.5=Neo Bowser City R|R2.5=[[Neo Bowser City|3DS Neo Bowser City R]]** | |I2.5=Neo Bowser City R|R2.5=[[3DS Neo Bowser City|3DS Neo Bowser City R]]** | ||
|I2.6=DS Waluigi Pinball|R2.6=[[ | |I2.6=DS Waluigi Pinball|R2.6=[[DS Waluigi Pinball]]* | ||
|I2.7=3DS Rainbow Road|R2.7=[[ | |I2.7=3DS Rainbow Road|R2.7=[[3DS Rainbow Road]]*** | ||
|I2.8=Dino Dino Jungle R|R2.8=[[Dino Dino Jungle|GCN Dino Dino Jungle R]] | |I2.8=Dino Dino Jungle R|R2.8=[[GCN Dino Dino Jungle|GCN Dino Dino Jungle R]] | ||
|I2.9=RMX Rainbow Road 1|R2.9=[[RMX Rainbow Road 1]]** | |I2.9=RMX Rainbow Road 1|R2.9=[[RMX Rainbow Road 1]]** | ||
|I2.10=RMX Rainbow Road 1T|R2.10=[[RMX Rainbow Road 1|RMX Rainbow Road 1T]] | |I2.10=RMX Rainbow Road 1T|R2.10=[[RMX Rainbow Road 1|RMX Rainbow Road 1T]] | ||
| Line 225: | Line 241: | ||
|I2.13=Ninja Hideaway R|R2.13=[[Ninja Hideaway|Ninja Hideaway R]] | |I2.13=Ninja Hideaway R|R2.13=[[Ninja Hideaway|Ninja Hideaway R]] | ||
|I2.14=Ninja Hideaway|R2.14=[[Ninja Hideaway]] | |I2.14=Ninja Hideaway|R2.14=[[Ninja Hideaway]] | ||
|I2.15=3DS Bowser's Castle|R2.15=[[3DS Bowser's Castle]] | |||
|I2.16=3DS Bowser's Castle T|R2.16=[[3DS Bowser's Castle|3DS Bowser's Castle T]] | |||
|I2.17=Baby Park|R2.17=[[GCN Baby Park]] | |||
|I2.18=Berlin Byways R|R2.18=[[Tour Berlin Byways|Berlin Byways R]] | |||
|I2.19=GBA Bowser's Castle 3|R2.19=[[GBA Bowser's Castle 3]] | |||
|I2.20=RMX Bowser's Castle 1|R2.20=[[RMX Bowser's Castle 1]] | |||
|I2.21=Ghost Valley 2|R2.21=[[SNES Ghost Valley 2]] | |||
|I2.22=Singapore Speedway 2RT|R2.22=[[Singapore Speedway|Singapore Speedway 2R/T]] | |||
|I2.23=Berlin Byways 3R|R2.23=[[Tour Berlin Byways|Berlin Byways 3R]] | |||
|I2.24=Twilight House|R2.24=[[DS Twilight House]] | |||
|I2.25=GCN Waluigi Stadium T|R2.25=[[GCN Waluigi Stadium|GCN Waluigi Stadium T]] | |||
|I2.26=GBA Lakeside Park RT|R2.26=[[GBA Lakeside Park|GBA Lakeside Park R/T]] | |||
}} | }} | ||
| Line 242: | Line 270: | ||
{| align=center width=100% cellspacing=0 border=1 cellpadding=3 style="text-align:center; border-collapse:collapse; font-family:Arial; font-size:85%;" | {| align=center width=100% cellspacing=0 border=1 cellpadding=3 style="text-align:center; border-collapse:collapse; font-family:Arial; font-size:85%;" | ||
|- | |- | ||
!rowspan=2 width=3%|# | |||
!rowspan=2 width=8%|Name | !rowspan=2 width=8%|Name | ||
!rowspan=2 class=unsortable width=10%|Image | !rowspan=2 class=unsortable width=10%|Image | ||
!rowspan=2 width=8%| | !rowspan=2 width=8%|Series / game | ||
!rowspan=2 width=5%|Type | !rowspan=2 width=5%|Type | ||
!rowspan=2 width=5%|Class | !rowspan=2 width=5%|Class | ||
!rowspan=2 width=8%| | !rowspan=2 width=8%|Strength / effect(s) | ||
!rowspan=2 width=13%|How to obtain | !rowspan=2 width=13%|How to obtain | ||
!colspan=4 width=40%|Spirit battle | !colspan=4 width=40%|Spirit battle | ||
|- | |- | ||
!width=7%| | !width=7%|Opponent(s) | ||
!class=unsortable width=19%|Battle conditions | !class=unsortable width=19%|Battle conditions | ||
!width=7%|Stage | !width=7%|Stage | ||
!width=7%|Song | !width=7%|Song | ||
|- | |- | ||
|63 | |||
!Dry Bowser | !Dry Bowser | ||
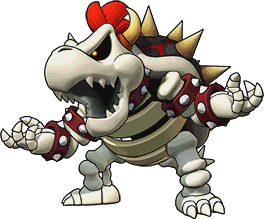
|[[File:Dry Bowser Artwork.png|100px]] | |[[File:Dry Bowser Artwork.png|100px]] | ||
|''Super Mario'' Series | |''[[Super Mario (series)|Super Mario]]'' Series | ||
|Primary (1) | |Primary (1) | ||
|Legend | |Legend | ||
| Line 283: | Line 313: | ||
==''[[Mario & Luigi: Paper Jam]]''== | ==''[[Mario & Luigi: Paper Jam]]''== | ||
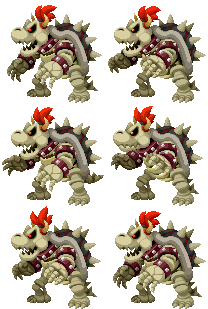
{{:Mario & Luigi: Paper Jam bestiary|transcludesection=Dry Bowser|align=horizontal}} | {{:Mario & Luigi: Paper Jam bestiary|transcludesection=Dry Bowser|align=horizontal}} | ||
==''[[Puzzle & Dragons: Super Mario Bros. Edition]]''== | |||
{| | |||
| | |||
{{P&DSMBE teammate infobox | |||
|title=Dry Bowser | |||
|image=[[File:PDSMBE-DryBowser-TeamImage.png]] | |||
|card=[[File:PDSMBE-DryBowserCard.png]] | |||
|attribute=[[File:PDSMBE-DarkOrb.png|20px]]Dark<br>[[File:PDSMBE-FireOrb.png|20px]]Fire | |||
|number=135 | |||
|maxlvl=99 | |||
|hp=★★★★★ | |||
|atk=★★★★★★ | |||
|rcv=0 | |||
|plus=N/A | |||
|skill=Bowser Smash | |||
|turns=23 | |||
|skilldesc=''Greatly reduces HP of all foes.'' | |||
|skillitems=[[File:PDSMBE-BowsersShell.png|20px|Spiky Shell]] (x5, x8, x11)<br>[[File:PDSMBE-GrandBowsersShell.png|35px|Grand Spiky Shell]] (x5, x8, x11) | |||
|skill2=Flame of Vengeance | |||
|skilldesc2=''Raises your team's ATK by 4x after attacking with 7+ combos.">4</span> attributes at once.'' | |||
|transform=N/A | |||
}} | |||
|} | |||
==''[[Dr. Mario World]]''== | ==''[[Dr. Mario World]]''== | ||
| Line 295: | Line 349: | ||
|align="center" |[[File:DrDryBowser Idle - DrMarioWorld.gif|150px]] | |align="center" |[[File:DrDryBowser Idle - DrMarioWorld.gif|150px]] | ||
| | | | ||
*'''Stage mode:''' | *'''Stage mode:''' ''Clears rows (2) at random, including objects that require multiple matches.'' | ||
*'''Versus mode:''' | *'''Versus mode:''' ''Clears rows (1/2/3/3/3) at random, including objects that require multiple matches.'' | ||
|{{ | |{{DMW attack|Attack=4}} | ||
|align="center"|{{ | |align="center"|{{DMW speed|Speed=39}} | ||
|align="center"|[[File:DMW - SpriteVS AttackBomb1.png|40px]]<br>20%||align="center"|[[File:DMW - SpriteVS AttackBomb2.png|40px]]<br>20%||align="center"|[[File:DMW - SpriteVS AttackBomb3.png|40px]]<br>15%||align="center"|[[File:DMW - SpriteVS AttackBomb4.png|40px]]<br>10% | |align="center"|[[File:DMW - SpriteVS AttackBomb1.png|40px]]<br>20%||align="center"|[[File:DMW - SpriteVS AttackBomb2.png|40px]]<br>20%||align="center"|[[File:DMW - SpriteVS AttackBomb3.png|40px]]<br>15%||align="center"|[[File:DMW - SpriteVS AttackBomb4.png|40px]]<br>10% | ||
|} | |} | ||
| Line 310: | Line 364: | ||
|align=center|1||align=center|100||align=center|''Clears rows (1) at random, including objects that require multiple matches.''||align=center|89 | |align=center|1||align=center|100||align=center|''Clears rows (1) at random, including objects that require multiple matches.''||align=center|89 | ||
|- | |- | ||
|align=center|2||align=center| ||align=center|''Clears rows (2) at random, including objects that require multiple matches.''||align=center|89 | |align=center|2||align=center|94||align=center|''Clears rows (2) at random, including objects that require multiple matches.''||align=center|89 | ||
|- | |- | ||
|align=center|3||align=center| ||align=center|''Clears rows (3) at random, including objects that require multiple matches.''||align=center|89 | |align=center|3||align=center|88||align=center|''Clears rows (3) at random, including objects that require multiple matches.''||align=center|89 | ||
|- | |- | ||
|align=center|4||align=center| ||align=center|''Clears rows (3) at random, including objects that require multiple matches. Fills skill meter faster (medium).''||align=center| | |align=center|4||align=center|82||align=center|''Clears rows (3) at random, including objects that require multiple matches. Fills skill meter faster (medium).''||align=center|66 | ||
|- | |- | ||
|align=center|5||align=center| ||align=center|''Clears rows (3) at random, including objects that require multiple matches. Fills skill meter faster (high).''||align=center| | |align=center|5||align=center|76||align=center|''Clears rows (3) at random, including objects that require multiple matches. Fills skill meter faster (high).''||align=center|50 | ||
|} | |} | ||
| Line 324: | Line 378: | ||
<references/> | <references/> | ||
{{ | {{profiles and statistics}} | ||
[[Category:Profiles and statistics|Dry Bowser]] | [[Category:Profiles and statistics|Dry Bowser]] | ||
Latest revision as of 08:47, July 26, 2023
This is a list of profiles and statistics for Dry Bowser.
Mario Kart series[edit]
Mario Kart Wii[edit]
- Size: Large
- Actual Bonuses
- Off-Road: +6
- Mini-Turbo: +6
- Website Stats:
- Acceleration: 1/3
- Top Speed: 3/3
- Off-Road: 1/3
- Bios
- Site: If the King of the Koopas wasn't scary enough already, his appearance as a surly skeleton should have the other drivers shaken in their seats!
- Prima Guide: After a little dip in lava, Dry Bowser, King of the Dry Bones, returns invincible! Fortunately though, he's driving the same karts and bikes as everyone else!
- Trading Card: Is this the result of Bowser taking a lava bath? Dry Bowser knows how to turn on the boost juice with effective Mini-Turbos and excellent Off Road handling. Unlock him if you're on a tight track & like to go fast!
Mario Kart 8[edit]
- Weight Class: Heavy
- Stats
- Speed
- Ground: 4.75
- Water: 5.25
- Air: 4.75
- Anti-Gravity: 5
- Acceleration: 2
- Weight: 4.75
- Handling
- Ground: 2.25
- Water: 2.25
- Air: 2
- Anti-Gravity: 2.5
- Traction: 3.25
- Mini-Turbo: 2.25
- Speed
- Staff ghost time
| Course | Staff Name | Country | Time | Vehicle Combination | ||
|---|---|---|---|---|---|---|
| Body | Tires | Glider | ||||
| 3DS Neo Bowser City | Nin★Guile | United States | 2:09.513 | Bone Rattler | Metal | Super Glider |
Mario Kart 8 Deluxe[edit]
| Driver statistics | ||||||||||||
|---|---|---|---|---|---|---|---|---|---|---|---|---|
| Vehicle size | Speed | Acceleration | Weight | Handling | Traction | Mini-Turbo | ||||||
| Ground | Water | Air | Anti-Gravity | Ground | Water | Air | Anti-Gravity | |||||
| Large | 10 | 10 | 10 | 10 | 0 | 9 | 1 | 1 | 1 | 1 | 1 | 0 |
- 150cc staff ghost time
| Course | Staff Name | Country | Time | Vehicle Combination | ||
|---|---|---|---|---|---|---|
| Body | Tires | Glider | ||||
| 3DS Neo Bowser City | Nin★Rui | Portugal | 2:13.138 | Bone Rattler | Metal | Super Glider |
- 200cc staff ghost time
| Course | Staff Name | Country | Time | Vehicle Combination | ||
|---|---|---|---|---|---|---|
| Body | Tires | Glider | ||||
| Bowser's Castle | Nin★Mark | Netherlands | 1:40.953 | Flame Rider | Slim | Bowser Kite |
Mario Kart Tour[edit]
Dry Bowser[edit]
Dry Bowser (Gold)[edit]
| Special skill | |||||||||||||||||||||||||||
| Favorite courses (Three items per Item Box) |
| ||||||||||||||||||||||||||
|---|---|---|---|---|---|---|---|---|---|---|---|---|---|---|---|---|---|---|---|---|---|---|---|---|---|---|---|
| Favored courses (Two items per Item Box) |
| ||||||||||||||||||||||||||
|
* indicates a favored course upgraded to a favorite course after reaching level 3. ** indicates a favored course upgraded to a favorite course after reaching level 6. | |||||||||||||||||||||||||||
Mario Tennis series[edit]
Mario Tennis Open[edit]
- Type: Defense
- Site Bio: He's a little slow, but Dry Bowser can cover a wide range with his big body. His specialty is powerful strokes and Drop Shots.
- Bio 2: Though he is rather slow, Dry Bowser's huge body enables him to cover a large part of the court. He is capable of both powerful drives and delicate dropshots.
Mario Tennis Aces[edit]
- Type: Defensive
- Trick Shots: Dive Bomb (forward), Shell Spin (side)
- Special Shot: Blazing Barrage
Super Smash Bros. Ultimate spirit[edit]
| # | Name | Image | Series / game | Type | Class | Strength / effect(s) | How to obtain | Spirit battle | |||
|---|---|---|---|---|---|---|---|---|---|---|---|
| Opponent(s) | Battle conditions | Stage | Song | ||||||||
| 63 | Dry Bowser | 
|
Super Mario Series | Primary (1) | Legend | Shield Fire Attack ↑ |
World of Light (Dracula's Castle); Spirit Board | Bowser | Rule: Defense ↑; Curry-Filled Hazard: Lava Floor
|
Reset Bomb Forest (Battlefield) | King Bowser - Super Mario Bros. 3 |
Mario & Sonic at the Rio 2016 Olympic Games[edit]
Flag description (Wii U version)[edit]
- Bowser's skeletal form. This bony transformation grants him the agility of lightweight competitors while maintaining his heavyweight power. Only those who've boned up on their skill set can hope to pull off such a humerus technique.
Miis' dialogues (Wii U version)[edit]
- What color are Dry Bowser's eyes again? Yellow? Blue? Maybe both? I'll have to pay more attention next time I see him.
- Dry Bowser isn't just powerful — he's a real nasty fellow who has all sorts of evil plans he wants to carry out! I'm thankful he seems more laid back this time around. I hear he and his buddies actually tried to disrupt the previous Olympic Games!
- Dry Bowser is as creepy as he is terrifying. You'd think someone made of bones would be brittle, but he's a rough-and-tumble force to be reckoned with! He'd definitely be able to use his amazing power to great effect in Olympic Games events, don't you think?
Mario & Luigi: Paper Jam[edit]
| Mario & Luigi: Paper Jam enemy | ||||||||||
|---|---|---|---|---|---|---|---|---|---|---|
| Dry Bowser | ||||||||||
|
HP | 2880 | POW | 500 (499) | Defense | 614 (610) | Speed | 298 | ||
| Role | Battle Ring boss | Type | Shelled | Weakness | None | Location(s) | Arcade | |||
| Level | 48 | Experience | 0 (0) | Coins | 0 | Item drop | None - 0% None - 0% | |||
| Notice: Stats in parentheses are from the game's Easy Mode. | ||||||||||
Puzzle & Dragons: Super Mario Bros. Edition[edit]
| ||||||||||||||||||||||||||||||||||||
Dr. Mario World[edit]
| Image | Abilities | Attack | Speed | Defense | ||||||
|---|---|---|---|---|---|---|---|---|---|---|
|
|
|
|
20% |
20% |
15% |
10% | |||
| Stage Mode | Versus Mode | ||
|---|---|---|---|
| Level | Speed | Description | Speed |
| 1 | 100 | Clears rows (1) at random, including objects that require multiple matches. | 89 |
| 2 | 94 | Clears rows (2) at random, including objects that require multiple matches. | 89 |
| 3 | 88 | Clears rows (3) at random, including objects that require multiple matches. | 89 |
| 4 | 82 | Clears rows (3) at random, including objects that require multiple matches. Fills skill meter faster (medium). | 66 |
| 5 | 76 | Clears rows (3) at random, including objects that require multiple matches. Fills skill meter faster (high). | 50 |
- Dr. Mario World Twitter: Blue: "The Dr. Dry Bowser Pack is available for purchase for a limited time. Apparently this is a rare doctor that you can't get through staffing. Wait, the flames are blue? Just like me! It also comes with 260 diamonds."[1]
References[edit]
| Profiles and statistics | |
|---|---|
| Characters | Baby Daisy • Baby Luigi • Baby Mario • Baby Peach • Baby Rosalina • Birdo • Boom Boom • Bowser • Bowser Jr. • Cranky Kong • Diddy Kong • Dixie Kong • Donkey Kong • Donkey Kong Jr. • Dr. Crygor • Dr. Mario • Dry Bowser • Fire Mario • Funky Kong • Iggy Koopa • Kamek • King Boo • King K. Rool • Larry Koopa • Lemmy Koopa • Ludwig von Koopa • Luigi • Mario (Mario Kart Tour) • Metal Mario • Mii • Mii Racing Suits in Mario Kart Tour (Red–Yellow · Moo Moo–Koopa Clown) • Morton Koopa Jr. • Nabbit • Pauline • Petey Piranha • Pink Gold Peach • Poochy • Princess Daisy • Princess Peach • Rosalina • Roy Koopa • Tiny Kong • Toad • Toadette • Waluigi • Wario • Wendy O. Koopa • Yoshi |
| Enemies | Blooper • Bob-omb • Boo • Boomerang Bro • Bullet Bill • Buzzy Beetle • Chain Chomp • Cheep Cheep • Dry Bones • Fire Bro • Goomba • Hammer Bro • Ice Bro • Koopa Paratroopa • Koopa Troopa • Lakitu • Lava Bubble • Monty Mole • Piranha Plant • Pokey • Shy Guy • Spike • Spiny • Thwomp • Wiggler |
