Gallery:Mario vs. Donkey Kong 2: March of the Minis: Difference between revisions
LinkTheLefty (talk | contribs) mNo edit summary |
m (Text replacement - "{{[Mm]ore images" to "{{image|more=yes") |
||
| (36 intermediate revisions by 8 users not shown) | |||
| Line 1: | Line 1: | ||
{{italic title}} | {{italic title}} | ||
This is a gallery of images for the game ''[[Mario vs. Donkey Kong 2: March of the Minis]]''. | This is a gallery of images for the game ''[[Mario vs. Donkey Kong 2: March of the Minis]]''. | ||
==Logos== | ==Logos== | ||
<gallery widths=" | {{image|more=yes|European-languages logos}} | ||
<gallery widths="250"> | |||
Mario vs. Donkey Kong 2 - March of the Minis.svg| | Mario vs. Donkey Kong 2 - March of the Minis.svg|English logo | ||
MvsDK2 MotM logo ESP.png|Spanish logo | |||
Logo JP - Mario vs. Donkey Kong 2 March of the Minis.png|Japanese logo | Logo JP - Mario vs. Donkey Kong 2 March of the Minis.png|Japanese logo | ||
BetaLogo MvsDK2.png|Early logo (E3 2006) | |||
</gallery> | </gallery> | ||
==Artwork== | ==Artwork== | ||
===Characters=== | |||
<gallery> | <gallery> | ||
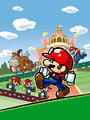
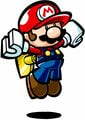
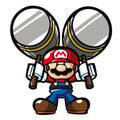
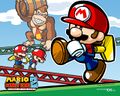
Mini Mario art.png| | MvsDK2-Box Art.jpg|Key artwork | ||
MvDK2 UK eShop Art.jpg|Nintendo UK [[Nintendo eShop|eShop]] artwork | |||
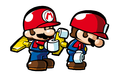
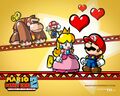
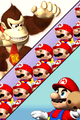
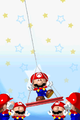
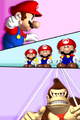
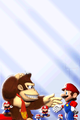
Minismario.jpg|[[Mario]] and the [[Mini Mario (toy)|Mini Mario]] toys chasing after [[Donkey Kong]] with [[Pauline]] | |||
DK MvsDK.jpg|Donkey Kong holding a [[barrel]] | |||
Mini Mario art.png|Mini Mario | |||
Mini Mario Sitting MvDK2.png|Mini Mario | |||
Mini-Mario MvDK2 art.jpg|Mini Mario | Mini-Mario MvDK2 art.jpg|Mini Mario | ||
Mini Mario | Mini Mario (winding) - Mario vs. Donkey Kong.png|Mini Mario winding another | ||
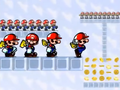
MiniMariowalk MvsDK2.png|Three Mini Marios | MiniMariowalk MvsDK2.png|Three Mini Marios | ||
MvsDK2 BlueSpring.jpg|Mini Mario with a [[Blue Spring]] | MvsDK2 BlueSpring.jpg|Mini Mario with a [[Blue Spring]] | ||
Motmhammer.jpg|Mini Mario with [[Hammer]]s | |||
Fireminimario.png|[[Fire Mario#Mario vs. Donkey Kong 2: March of the Minis|Fire Mini Mario]] | |||
MiniToadtoy.png|[[Mini Toad]] | |||
MiniPeachtoy.png|[[Mini Peach]] | MiniPeachtoy.png|[[Mini Peach]] | ||
MiniDKtoy.png|[[Mini Donkey Kong]] | MiniDKtoy.png|[[Mini Donkey Kong]] | ||
</gallery> | |||
===Enemies=== | |||
<gallery> | |||
MiniShyGuy.png|[[Shy Guy]] | |||
Normal minibobomb.jpg|[[Bob-omb]] | |||
CircusKong MvsDK2.png|[[Circus Kong]] | CircusKong MvsDK2.png|[[Circus Kong]] | ||
CaptureKong MvsDK2.png|[[Capture Kong]] | CaptureKong MvsDK2.png|[[Capture Kong]] | ||
CrashKong MvsDK2.png|[[Crash Kong]] | CrashKong MvsDK2.png|[[Crash Kong]] | ||
CoolKong MvsDK2.png|[[Cool Kong]] | |||
</gallery> | |||
===Wallpapers=== | |||
<gallery> | |||
MvDK2 Wallpaper 1.jpg|Desktop wallpaper featuring [[Mini Mario (toy)|Mini Mario]] bouncing on a [[Blue Spring]] | |||
MvDK2 Wallpaper 2.jpg|Desktop wallpaper featuring [[Fire Mario#Mario vs. Donkey Kong 2: March of the Minis|Fire Mini Mario]] | |||
MvDK2 Wallpaper 3.jpg|Desktop wallpaper featuring many [[Mini]]s | |||
MvDK2 Wallpaper 4.jpg|Desktop wallpaper featuring Mini Mario and [[Mini Peach]] | |||
MvDK2 Wallpaper 5.jpg|Desktop wallpaper featuring Mini Marios and [[Donkey Kong]] | |||
MvDK2 Wallpaper 6.jpg|Desktop wallpaper featuring Donkey Kong kidnapping [[Pauline]] | |||
</gallery> | |||
===Instant messaging icons=== | |||
<gallery> | |||
MvDK2 IM Mini Mario 1.gif|[[Mini Mario (toy)|Mini Mario]] | |||
MvDK2 IM Mini Mario 2.gif|Mini Mario | |||
MvDK2 IM Mini Mario 3.gif|Mini Mario | |||
MvDK2 IM Mini Mario 4.gif|Mini Mario | |||
MvDK2 IM Fire Mini Mario.gif|[[Fire Mario#Mario vs. Donkey Kong 2: March of the Minis|Fire Mini Mario]] | |||
MvDK2 IM Mini Toad.gif|[[Mini Toad]] | |||
MvDK2 IM Mini Peach.gif|[[Mini Peach]] | |||
MvDK2 IM Mini DK.gif|[[Mini Donkey Kong]] | |||
MvDK2 IM Shy Guy.gif|[[Shy Guy]] | |||
MvDK2 IM Bob-omb.gif|[[Bob-omb]] | |||
MvDK2 IM Capture Kong.gif|[[Capture Kong]] | |||
MvDK2 IM Crash Kong.gif|[[Crash Kong]] | |||
</gallery> | </gallery> | ||
| Line 34: | Line 69: | ||
===In-game sprites=== | ===In-game sprites=== | ||
<gallery> | <gallery> | ||
MvDK2 Mario.png|[[Mario]] | |||
Mini MarioS.png|[[Mini Mario (toy)|Mini Mario]] | Mini MarioS.png|[[Mini Mario (toy)|Mini Mario]] | ||
Mini PeachS.png|[[Mini Peach]] | Mini PeachS.png|[[Mini Peach]] | ||
| Line 39: | Line 75: | ||
Mini DKS.png|[[Mini Donkey Kong]] | Mini DKS.png|[[Mini Donkey Kong]] | ||
Gold Mini MarioS.png|[[Gold Mini Mario]] | Gold Mini MarioS.png|[[Gold Mini Mario]] | ||
Fire Mini MarioS.png|[[Fire Mini Mario]] | Fire Mini MarioS.png|[[Fire Mario|Fire Mini Mario]] | ||
Fire Mini DKS.png|[[Fire | Fire Mini DKS.png|[[Fire Mario|Fire Mini Donkey Kong]] | ||
Fire Mini PeachS.png|[[Fire | Fire Mini PeachS.png|[[Fire Mario|Fire Mini Peach]] | ||
Fire Mini ToadS.png|[[Fire | Fire Mini ToadS.png|[[Fire Mario|Fire Mini Toad]] | ||
M vs DK 2 DK Sprite.PNG|[[Donkey Kong]] | M vs DK 2 DK Sprite.PNG|[[Donkey Kong]] | ||
MvDK2 Sprite Donkey Kong Idle Animation.gif|Donkey Kong | |||
File:PiranhaPlantMvsDK2MOTM.png|[[Piranha Plant]] | File:PiranhaPlantMvsDK2MOTM.png|[[Piranha Plant]] | ||
BlooperMVDK2.png|[[Blooper]] | BlooperMVDK2.png|[[Blooper]] | ||
MVDK2MOTM Thwomp.png|[[Thwomp]] | |||
FireFlowerSprite.png|[[Fire Flower]] | FireFlowerSprite.png|[[Fire Flower]] | ||
Color Switch1.PNG|[[Color Switch]]es | Color Switch1.PNG|[[Color Switch]]es | ||
| Line 58: | Line 96: | ||
MVDK2_Bomb_Block Empty.png|Empty Bomb Block | MVDK2_Bomb_Block Empty.png|Empty Bomb Block | ||
Mini-Mario Card.PNG|[[Mini Mario Card]] | Mini-Mario Card.PNG|[[Mini Mario Card]] | ||
Mini Door.png|[[Door (Mario vs. Donkey Kong)| | Mini Door.png|[[Goal Door (Mario vs. Donkey Kong series)|Exit]] | ||
</gallery> | </gallery> | ||
=== | ===Level backgrounds=== | ||
<gallery> | <gallery> | ||
Mushroom Mayhembk.png|[[Mushroom Mayhem]] | Mushroom Mayhembk.png|[[Mushroom Mayhem]] | ||
| Line 76: | Line 114: | ||
</gallery> | </gallery> | ||
=== | ==Screenshots== | ||
===Title screens=== | |||
<gallery> | |||
MvDK2 Title Screen.png|North American title screen (Mini Marios) | |||
MvDK2 Title Screen (Mini Toads).png|North American title screen (Mini Toads) | |||
MvDK2 Title Screen (Mini Peaches).png|North American title screen (Mini Peaches) | |||
MvDK2 Title Screen (Mini DKs).png|North American title screen (Mini Donkey Kongs) | |||
</gallery> | |||
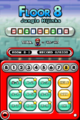
===Floors=== | |||
====Mushroom Mayhem==== | |||
<gallery> | |||
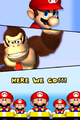
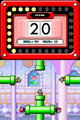
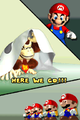
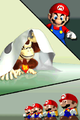
EnteringMushroomMayhem.png|Mario, Donkey Kong, and the Mini Marios enter Mushroom Mayhem | |||
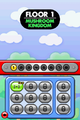
MvsDK2 Mushroom Mayhem.png|Mushroom Mayhem on the floor selection screen | |||
MvDK2_Room_1-1.png|[[Room 1-1 (Mario vs. Donkey Kong 2: March of the Minis)|Room 1-1]] | |||
MvDK2_Room_1-2.png|[[Room 1-2 (Mario vs. Donkey Kong 2: March of the Minis)|Room 1-2]] | |||
MvDK2_Room_1-3.png|[[Room 1-3 (Mario vs. Donkey Kong 2: March of the Minis)|Room 1-3]] | |||
MvDK2_Room_1-4.png|[[Room 1-4 (Mario vs. Donkey Kong 2: March of the Minis)|Room 1-4]] | |||
MvDK2_Room_1-5.png|[[Room 1-5 (Mario vs. Donkey Kong 2: March of the Minis)|Room 1-5]] | |||
MvDK2_Room_1-6.png|[[Room 1-6 (Mario vs. Donkey Kong 2: March of the Minis)|Room 1-6]] | |||
MvDK2_Room_1-7.png|[[Room 1-7 (Mario vs. Donkey Kong 2: March of the Minis)|Room 1-7]] | |||
MvDK2_Room_1-8.png|[[Room 1-8]] | |||
MvDK2_Room_1-9.png|[[Room 1-9]] | |||
MvDK2_Room_1-DK.png|[[Boss Game 1]] | |||
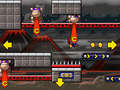
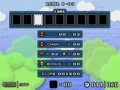
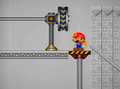
Motmscreenshot1.png|A perfect chain with a Gold Mini Mario bonus set up in Room 1-3 | |||
ShyGuySmashMushroomMayhem.png|[[Shy Guy Smash!]] | |||
MvDK2 Room_1-DK Intro.png|Intro screen shown before Boss Game 1 | |||
MvDK2 Room_1-DK Intro (No Text).png|Intro screen shown before Boss Game 1 (no text) | |||
MvDK2 Room 1-DK Victory.png|Victory screen shown after completing Boss Game 1 | |||
MvDK2 Room 1-DK Victory (No Text).png|Victory screen shown after completing Boss Game 1 (no text) | |||
</gallery> | |||
====Tropical Island==== | |||
<gallery> | |||
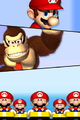
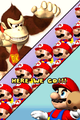
EnteringTropicalIsland.png|Mario, Donkey Kong, and the Mini Marios enter Tropical Island | |||
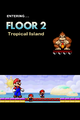
MvsDK2 Tropical Island.png|Tropical Island on the floor selection screen | |||
MvDK2_Room_2-1.png|[[Room 2-1 (Mario vs. Donkey Kong 2: March of the Minis)|Room 2-1]] | |||
MvDK2_Room_2-2.png|[[Room 2-2 (Mario vs. Donkey Kong 2: March of the Minis)|Room 2-2]] | |||
MvDK2_Room_2-3.png|[[Room 2-3 (Mario vs. Donkey Kong 2: March of the Minis)|Room 2-3]] | |||
MvDK2_Room_2-4.png|[[Room 2-4 (Mario vs. Donkey Kong 2: March of the Minis)|Room 2-4]] | |||
MvDK2_Room_2-5.png|[[Room 2-5 (Mario vs. Donkey Kong 2: March of the Minis)|Room 2-5]] | |||
MvDK2_Room_2-6.png|[[Room 2-6 (Mario vs. Donkey Kong 2: March of the Minis)|Room 2-6]] | |||
MvDK2_Room_2-7.png|[[Room 2-7 (Mario vs. Donkey Kong 2: March of the Minis)|Room 2-7]] | |||
MvDK2_Room_2-8.png|[[Room 2-8]] | |||
MvDK2_Room_2-9.png|[[Room 2-9]] | |||
MvDK2_Room_2-DK.png|[[Boss Game 2]] | |||
Tropical_Island.png|A Mini Mario captured by a Capture Kong in Room 2-9 | |||
ShyGuySmashTropicalIsland.png|Shy Guy Smash! | |||
MvDK2 Room 2-DK Intro.png|Intro screen shown before Boss Game 2 | |||
MvDK2 Room 2-DK Intro (No Text).png|Intro screen shown before Boss Game 2 (no text) | |||
MvDK2 Room 2-DK Victory.png|Victory screen shown after completing Boss Game 2 | |||
MvDK2 Room 2-DK Victory (No Text).png|Victory screen shown after completing Boss Game 2 (no text) | |||
</gallery> | |||
====Pipe Works==== | |||
<gallery> | |||
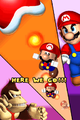
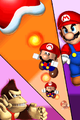
EnteringPipeWorks.png|Mario, Donkey Kong, and the Mini Marios enter Pipe Works | |||
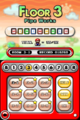
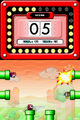
MvsDK2 Pipe Works.png|Pipe Works on the floor selection screen | |||
MvDK2_Room_3-1.png|[[Room 3-1 (Mario vs. Donkey Kong 2: March of the Minis)|Room 3-1]] | |||
MvDK2_Room_3-2.png|[[Room 3-2 (Mario vs. Donkey Kong 2: March of the Minis)|Room 3-2]] | |||
MvDK2_Room_3-3.png|[[Room 3-3 (Mario vs. Donkey Kong 2: March of the Minis)|Room 3-3]] | |||
MvDK2_Room_3-4.png|[[Room 3-4 (Mario vs. Donkey Kong 2: March of the Minis)|Room 3-4]] | |||
MvDK2_Room_3-5.png|[[Room 3-5 (Mario vs. Donkey Kong 2: March of the Minis)|Room 3-5]] | |||
MvDK2_Room_3-6.png|[[Room 3-6 (Mario vs. Donkey Kong 2: March of the Minis)|Room 3-6]] | |||
MvDK2_Room_3-7.png|[[Room 3-7 (Mario vs. Donkey Kong 2: March of the Minis)|Room 3-7]] | |||
MvDK2_Room_3-8.png|[[Room 3-8]] | |||
MvDK2_Room_3-9.png|[[Room 3-9]] | |||
MvDK2_Room_3-DK.png|[[Boss Game 3]] | |||
ShyGuySmashPipeWorks.png|Shy Guy Smash! | |||
MvDK2 Room 3-DK Intro.png|Intro screen shown before Boss Game 3 | |||
MvDK2 Room 3-DK Intro (No Text).png|Intro screen shown before Boss Game 3 (no text) | |||
MvDK2 Room 3-DK Victory.png|Victory screen shown after completing Boss Game 3 | |||
MvDK2 Room 3-DK Victory (No Text).png|Victory screen shown after completing Boss Game 3 (no text) | |||
</gallery> | |||
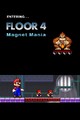
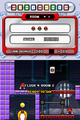
====Magnet Mania==== | |||
<gallery> | |||
EnteringMagnetMania.png|Mario, Donkey Kong, and the Minis enter Magnet Mania | |||
MvsDK2 Magnet Mania.png|Magnet Mania on the floor selection screen | |||
MvDK2_Room_4-1.png|[[Room 4-1 (Mario vs. Donkey Kong 2: March of the Minis)|Room 4-1]] | |||
MvDK2_Room_4-2.png|[[Room 4-2 (Mario vs. Donkey Kong 2: March of the Minis)|Room 4-2]] | |||
MvDK2_Room_4-3.png|[[Room 4-3 (Mario vs. Donkey Kong 2: March of the Minis)|Room 4-3]] | |||
MvDK2_Room_4-4.png|[[Room 4-4 (Mario vs. Donkey Kong 2: March of the Minis)|Room 4-4]] | |||
MvDK2_Room_4-5.png|[[Room 4-5 (Mario vs. Donkey Kong 2: March of the Minis)|Room 4-5]] | |||
MvDK2_Room_4-6.png|[[Room 4-6 (Mario vs. Donkey Kong 2: March of the Minis)|Room 4-6]] | |||
MvDK2_Room_4-7.png|[[Room 4-7 (Mario vs. Donkey Kong 2: March of the Minis)|Room 4-7]] | |||
MvDK2_Room_4-8.png|[[Room 4-8]] | |||
MvDK2_Room_4-9.png|[[Room 4-9]] | |||
MvDK2_Room_4-DK.png|[[Boss Game 4]] | |||
MvsDK2 Magnet Mania 4-2.png|Room 4-2 | |||
ShyGuySmashMagnetMania.png|Shy Guy Smash! | |||
MvDK2 Room 4-DK Intro.png|Intro screen shown before Boss Game 4 | |||
MvDK2 Room 4-DK Intro (No Text).png|Intro screen shown before Boss Game 4 (no text) | |||
MvDK2 Room 4-DK Victory.png|Victory screen shown after completing Boss Game 4 | |||
MvDK2 Room 4-DK Victory (No Text).png|Victory screen shown after completing Boss Game 4 (no text) | |||
</gallery> | |||
====Lava Dome==== | |||
<gallery> | |||
EnteringLavaDome.png|Mario, Donkey Kong, and the Mini Marios enter Lava Dome | |||
MvsDK2 Lava Dome.png|Lava Dome on the floor selection screen | |||
MvDK2_Room_5-1.png|[[Room 5-1]] | |||
MvDK2_Room_5-2.png|[[Room 5-2]] | |||
MvDK2_Room_5-3.png|[[Room 5-3]] | |||
MvDK2_Room_5-4.png|[[Room 5-4]] | |||
MvDK2_Room_5-5.png|[[Room 5-5]] | |||
MvDK2_Room_5-6.png|[[Room 5-6]] | |||
MvDK2_Room_5-7.png|[[Room 5-7]] | |||
MvDK2_Room_5-8.png|[[Room 5-8]] | |||
MvDK2_Room_5-9.png|[[Room 5-9]] | |||
MvDK2_Room_5-DK.png|[[Boss Game 5]] | |||
Swing_Bar.PNG|A Mini Mario and a Gold Mini Mario on a Swing Bar in Room 5-7 | |||
Lava_Dome_9.png|A Mini Mario hanging from a [[Cool Kong]] in Room 5-9 | |||
ShyGuySmashLavaDome.png|Shy Guy Smash! | |||
MvDK2 Room 5-DK Intro.png|Intro screen shown before Boss Game 5 | |||
MvDK2 Room 5-DK Intro (No Text).png|Intro screen shown before Boss Game 5 (no text) | |||
MvDK2 Room 5-DK Victory.png|Victory screen shown after completing Boss Game 5 | |||
MvDK2 Room 5-DK Victory (No Text).png|Victory screen shown after completing Boss Game 5 (no text) | |||
</gallery> | |||
====Toadstool Castle==== | |||
<gallery> | |||
EnteringToadstoolCastle.png|Mario, Donkey Kong, and the Mini Marios enter Toadstool Castle | |||
MvsDK2 Toadstool Castle.png|Toadstool Castle on the floor selection screen | |||
MvDK2_Room_6-1.png|[[Room 6-1]] | |||
MvDK2_Room_6-2.png|[[Room 6-2]] | |||
MvDK2_Room_6-3.png|[[Room 6-3]] | |||
MvDK2_Room_6-4.png|[[Room 6-4]] | |||
MvDK2_Room_6-5.png|[[Room 6-5]] | |||
MvDK2_Room_6-6.png|[[Room 6-6]] | |||
MvDK2_Room_6-7.png|[[Room 6-7]] | |||
MvDK2_Room_6-8.png|[[Room 6-8]] | |||
MvDK2_Room_6-9.png|[[Room 6-9]] | |||
MvDK2_Room_6-DK.png|[[Boss Game 6]] | |||
Toadstoolcastle.png|[[Room 6-4]] | |||
ShyGuySmashToadstoolCastle.png|Shy Guy Smash! | |||
MvDK2 Room 6-DK Intro.png|Intro screen shown before Boss Game 6 | |||
MvDK2 Room 6-DK Intro (No Text).png|Intro screen shown before Boss Game 6 (no text) | |||
MvDK2 Room 6-DK Victory.png|Victory screen shown after completing Boss Game 6 | |||
MvDK2 Room 6-DK Victory (No Text).png|Victory screen shown after completing Boss Game 6 (no text) | |||
</gallery> | |||
====Spooky Attic==== | |||
<gallery> | |||
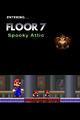
EnteringSpookyAttic.png|Mario, Donkey Kong, and the Mini Marios enter Spooky Attic | |||
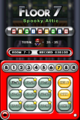
MvsDK2 Spooky Attic.png|Spooky Attic on the floor selection screen | |||
MvDK2_Room_7-1.png|[[Room 7-1]] | |||
MvDK2_Room_7-2.png|[[Room 7-2]] | |||
MvDK2_Room_7-3.png|[[Room 7-3]] | |||
MvDK2_Room_7-4.png|[[Room 7-4]] | |||
MvDK2_Room_7-5.png|[[Room 7-5]] | |||
MvDK2_Room_7-6.png|[[Room 7-6]] | |||
MvDK2_Room_7-7.png|[[Room 7-7]] | |||
MvDK2_Room_7-8.png|[[Room 7-8]] | |||
MvDK2_Room_7-9.png|[[Room 7-9]] | |||
MvDK2_Room_7-DK.png|[[Boss Game 7]] | |||
ShyGuySmashSpookyAttic.png|Shy Guy Smash! | |||
MvDK2 Room 7-DK Intro.png|Intro screen shown before Boss Game 7 | |||
MvDK2 Room 7-DK Intro (No Text).png|Intro screen shown before Boss Game 7 (no text) | |||
MvDK2 Room 7-DK Victory.png|Victory screen shown after completing Boss Game 7 | |||
MvDK2 Room 7-DK Victory (No Text).png|Victory screen shown after completing Boss Game 7 (no text) | |||
</gallery> | |||
====Jungle Hijinks==== | |||
<gallery> | |||
EnteringJungleHijinks.png|Mario, Donkey Kong, and the Mini Marios enter Jungle Hijinks | |||
MvsDK2 Jungle Hijinks.png|Jungle Hijinks on the floor selection screen | |||
MvDK2_Room_8-1.png|[[Room 8-1]] | |||
MvDK2_Room_8-2.png|[[Room 8-2]] | |||
MvDK2_Room_8-3.png|[[Room 8-3]] | |||
MvDK2_Room_8-4.png|[[Room 8-4]] | |||
MvDK2_Room_8-5.png|[[Room 8-5]] | |||
MvDK2_Room_8-6.png|[[Room 8-6]] | |||
MvDK2_Room_8-7.png|[[Room 8-7]] | |||
MvDK2_Room_8-8.png|[[Room 8-8]] | |||
MvDK2_Room_8-9.png|[[Room 8-9]] | |||
MvDK2_Room_8-DK.png|[[Boss Game 8]] | |||
ShyGuySmashJungleHijinks.png|Shy Guy Smash! | |||
MvDK2 Room 8-DK Intro.png|Intro screen shown before Boss Game 8 | |||
MvDK2 Room 8-DK Intro (No Text).png|Intro screen shown before Boss Game 8 (no text) | |||
MvDK2 Room 8-DK Victory.png|Victory screen shown after completing Boss Game 8 | |||
MvDK2 Room 8-DK Victory (No Text).png|Victory screen shown after completing Boss Game 8 (no text) | |||
</gallery> | |||
====Roof==== | |||
<gallery> | <gallery> | ||
MOTH Roof.png|[[Roof (Mario vs. Donkey Kong 2: March of the Minis)#Final Boss|Final Boss]] | |||
MvDK2 Roof Intro.png|Intro screen shown before Final Boss | |||
MvDK2 Roof Intro (Gallery).png|Intro screen shown before Final Boss (from the in-game Gallery) | |||
</gallery> | |||
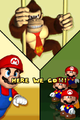
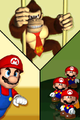
====DK's Hideout==== | |||
<gallery> | |||
DKHideout_levelscreen.png|[[DK's Hideout]] on the level selection screen | |||
MvsDK2 B1.png|B1 | |||
MvsDK2 B2.png|B2 | |||
MvDK2 B1 Victory.png|Victory screen shown after completing B1 | |||
MvDK2 B1 Victory (No Text).png|Victory screen shown after completing B1 (no text) | |||
</gallery> | |||
===Construction Zone=== | |||
<gallery> | |||
ConstructionZone.png|Menu screen | |||
ConstructionZoneKits.png|Kit select screen | |||
EditLevels.png|Edit Level screen | |||
</gallery> | |||
====Unlocking construction kits==== | |||
<gallery> | |||
TropicalIslandKitUnlocked.png|Tropical Island | |||
PipeWorksKitUnlocked.png|Pipe Works | |||
MagnetManiaKitUnlocked.png|Magnet Mania | |||
LavaDomeKitUnlocked.png|Lava Dome | |||
ToadstoolCastleKitUnlocked.png|Toadstool Castle | |||
SpookyAtticKitUnlocked.png|Spooky Attic | |||
JungleHijinksKitUnlocked.png|Jungle Hijinks | |||
SpecialKit1Unlocked.png|Special Kit 1 | |||
SpecialKit2Unlocked.png|Special Kit 2 | |||
SpecialKit3Unlocked.png|Special Kit 3 | |||
</gallery> | |||
===Pre-release=== | |||
<gallery> | |||
MvsDK2 Betaimage1.png|An early version of the top screen | |||
MvDK2 Proto Title.png|Title screen | |||
MvDK2 Proto Level Select.png|Level select screen | |||
MvDK2 Proto Gameplay.png|Gameplay | |||
MvDK2 Proto Map.png|Map feature | |||
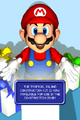
MvDK2 Proto Thank You.png|"Thank You for Playing" screen | |||
</gallery> | |||
===Movies=== | |||
====Pre Title==== | |||
<gallery> | |||
MvDK2 Pre Title 1.png | |||
MvDK2 Pre Title 2.png | |||
MvDK2 Pre Title 3.png | |||
MvDK2 Pre Title 4.png | |||
MarioandDKMinis.PNG | |||
</gallery> | </gallery> | ||
== | ====Introduction==== | ||
= | |||
<gallery> | <gallery> | ||
Cutscene - MMTC news.png | Cutscene - MMTC news.png | ||
| Line 109: | Line 374: | ||
Cutscene - Mini Mario in Pauline's hands.png | Cutscene - Mini Mario in Pauline's hands.png | ||
Cutscene - DK grabs Pauline.png | Cutscene - DK grabs Pauline.png | ||
Cutscene - Mario falls over.png | |||
Cutscene - Pauline captured.png | Cutscene - Pauline captured.png | ||
Cutscene - Mario about to head for the elevator.png | Cutscene - Mario about to head for the elevator.png | ||
| Line 117: | Line 383: | ||
Cutscene - Mario getting help from the Mini Marios.png | Cutscene - Mario getting help from the Mini Marios.png | ||
Cutscene - Mario ready to get DK.png | Cutscene - Mario ready to get DK.png | ||
</gallery> | |||
====Ending==== | |||
<gallery> | |||
MvDK2 Ending 1.png | |||
MvDK2 Ending 2.png | |||
MvDK2 Ending 3.png | |||
MvDK2 Ending 4.png | |||
MvDK2 Ending 5.png | |||
MvDK2 Ending 6.png | |||
MvDK2 Ending 7.png | |||
MvDK2 Ending 8.png | |||
MvDK2 Ending 9.png | |||
MvDK2 Ending 10.png | |||
MvDK2 Ending 11.png | |||
MvDK2 Ending 12.png | |||
MvDK2 Ending 13.png | |||
MvDK2 Ending 14.png | |||
MvDK2 Ending 15.png | |||
MvDK2 Ending 16.png | |||
MvDK2 Ending 17.png | |||
MvDK2 Ending 18.png | |||
PAULINE 11.png | |||
MvDK2 Ending 19.png | |||
MvDK2 Ending 20.png | |||
MvDK2 Ending 21.png | |||
MvDK2 Ending 22.png | |||
</gallery> | |||
====Musical==== | |||
<gallery> | |||
MvDK2 Musical 1.png | |||
MvDK2 Musical 2.png | |||
MvDK2 Musical 3.png | |||
MvDK2 Musical 4.png | |||
MvDK2 Musical 5.png | |||
MvDK2 Musical 6.png | |||
MvDK2 Musical 7.png | |||
MvDK2 Musical 8.png | |||
MvDK2 Musical 9.png | |||
MvDK2 Musical 10.png | |||
MvDK2 Musical 11.png | |||
MvDK2 Musical 12.png | |||
MvDK2 Musical 13.png | |||
MvDK2 Musical 14.png | |||
MvDK2 Musical 15.png | |||
MvDK2 Musical 16.png | |||
MvDK2 Musical 17.png | |||
</gallery> | |||
===Credits artwork=== | |||
<gallery> | |||
MvDK2 Credits Mini Mario.png|Mini Mario | |||
MvDK2 Credits Mini Peach.png|Mini Peach | |||
MvDK2 Credits Mini Toad.png|Mini Toad | |||
MvDK2 Credits Shy Guy.png|Shy Guy | |||
MvDK2 Credits Bob-omb.png|Bob-omb | |||
Thwomp Kong.png|[[Kongā]] | |||
MvDK2 Credits Mini DK.png|Mini Donkey Kong | |||
MvDK2 Credits Circus Kong.png|Circus Kong | |||
MvDK2 Credits Cool Kong.png|Cool Kong | |||
MvDK2 Credits Thwomp.png|Thwomp | |||
CuttacuttaMvsDK2.png|[[Cuttacutta]] | |||
SnapjawMvsDK2.png|[[Snapjaw]] | |||
MvDK2 Credits Donkey Kong 1.png|Donkey Kong | |||
FireballMvsDKMOTM.png|[[Fireball (Donkey Kong)|Fireball]] | |||
MvDK2 Credits Donkey Kong 2.png|Donkey Kong waving | |||
MvDK2 Credits Crash Kong.png|Crash Kong | |||
MvDK2 Credits Mario.png|Mario | |||
MummyGuyMvsDK2.png|[[Mummy Guy]] | |||
MvDK2 Credits Blooper.png|Blooper | |||
Mini-Snifit.png|[[Snifit]] | |||
MvDK2 Credits Capture Kong.png|Capture Kong | |||
NitpickerMvsDK2.png|[[Bird (Mario vs. Donkey Kong series)|Bird]] | |||
SpyGuyMvsDK2.png|[[Spyguy]] | |||
MvDK2 Credits Piranha Plant.png|Piranha Plant | |||
MvDK2 Credits Blue Spring.png|Blue Spring | |||
CandleMvsDK2.png|[[Candle]] | |||
MvDK2 Credits Barrel.png|Barrel | |||
PolterguyMvsDK2.png|[[Polterguy|Phantom Guy]] | |||
MvDK2 Credits Swoop.png|[[Swoop]] | |||
OilDrumMvsDK2.png|[[Oil drum|Oil can]] | |||
MvDK2 Thank You.png|"Thank You for Playing" screen, shown after the credits roll for the first time | |||
</gallery> | |||
==Scans== | |||
<gallery> | |||
MvDK2 Shogakukan Book.jpg|Pages from a {{wp|Shogakukan}} guidebook | |||
MvDK2 Shogakukan Book 2.jpg|Pages from a Shogakukan guidebook | |||
</gallery> | </gallery> | ||
==Box art== | ==Box art== | ||
<gallery> | <gallery> | ||
Mvsdk2motmcoverart.jpg|American box art | Mvsdk2motmcoverart.jpg|North American box art | ||
MvsDK2 EU.png| | MvsDK2 MotM Box CAN.jpg|Canadian box art | ||
MvsDK2 EU.png|UK box art | |||
MvsDK2 MotM Box FRA DU.jpg|French and Dutch box art | |||
MvsDK2 MotM Box ESP.jpg|Spanish box art | |||
MvsDK2 MotM Box ITA.png|Italian box art | |||
MvsDK2 MotM Box DE.jpg|German box art | |||
MvsDK2 MotM Box DE alt.jpg|German box art (alternate) | |||
MvsDK2 MotM Box AUS.jpg|Australian box art | |||
MvsDK2JP.jpg|Japanese box art | MvsDK2JP.jpg|Japanese box art | ||
</gallery> | </gallery> | ||
{{ | |||
==Miscellaneous== | |||
<gallery> | |||
MvsDK2 Ad USA.png|North American commercial | |||
MvsDK2 Ad Japan.png|Japanese commercial | |||
MvsDK2 Print Ad FRA.jpg|French print ad | |||
</gallery> | |||
{{galleries}} | |||
{{MVDKMOTM}} | {{MVDKMOTM}} | ||
[[Category:Galleries]] | [[Category:Galleries]] | ||
[[Category:Mario vs. Donkey Kong 2: March of the Minis|*]] | [[Category:Mario vs. Donkey Kong 2: March of the Minis|*]] | ||
Latest revision as of 20:26, May 28, 2024
This is a gallery of images for the game Mario vs. Donkey Kong 2: March of the Minis.
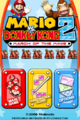
Logos[edit]
It has been requested that more images be uploaded for this article. Remove this notice only after the additional images have been added. Specific(s): European-languages logos

English logo
Spanish logo
Japanese logo
Early logo (E3 2006)


Artwork[edit]
Characters[edit]
Key artwork
Nintendo UK eShop artwork
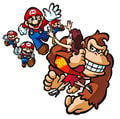
Mario and the Mini Mario toys chasing after Donkey Kong with Pauline
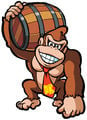
Donkey Kong holding a barrel
Mini Mario

Mini Mario
Mini Mario
Mini Mario winding another
Three Mini Marios
Mini Mario with a Blue Spring
Mini Mario with Hammers


_-_Mario_vs._Donkey_Kong.png)


Enemies[edit]


Wallpapers[edit]
Desktop wallpaper featuring Mini Mario bouncing on a Blue Spring
Desktop wallpaper featuring Fire Mini Mario
Desktop wallpaper featuring many Minis
Desktop wallpaper featuring Mini Mario and Mini Peach
Desktop wallpaper featuring Mini Marios and Donkey Kong
Desktop wallpaper featuring Donkey Kong kidnapping Pauline


Instant messaging icons[edit]

Mini Mario

Mini Mario

Mini Mario


Sprites and models[edit]
In-game sprites[edit]

Donkey Kong

Empty Pink Block

Empty Fire Block

Empty Magnetic Block

Empty Bomb Block


Level backgrounds[edit]


Screenshots[edit]
Title screens[edit]
North American title screen (Mini Marios)

North American title screen (Mini Toads)

North American title screen (Mini Peaches)
North American title screen (Mini Donkey Kongs)

.png)
.png)
.png)
Floors[edit]
Mushroom Mayhem[edit]
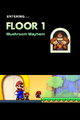
Mario, Donkey Kong, and the Mini Marios enter Mushroom Mayhem
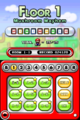
Mushroom Mayhem on the floor selection screen
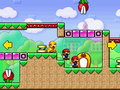
A perfect chain with a Gold Mini Mario bonus set up in Room 1-3
Intro screen shown before Boss Game 1
Intro screen shown before Boss Game 1 (no text)
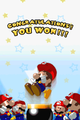
Victory screen shown after completing Boss Game 1

Victory screen shown after completing Boss Game 1 (no text)


.png)

.png)
Tropical Island[edit]
Mario, Donkey Kong, and the Mini Marios enter Tropical Island
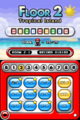
Tropical Island on the floor selection screen
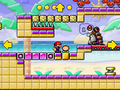
A Mini Mario captured by a Capture Kong in Room 2-9
Shy Guy Smash!
Intro screen shown before Boss Game 2
Intro screen shown before Boss Game 2 (no text)
Victory screen shown after completing Boss Game 2
Victory screen shown after completing Boss Game 2 (no text)


.png)

.png)
Pipe Works[edit]
Mario, Donkey Kong, and the Mini Marios enter Pipe Works
Pipe Works on the floor selection screen
Shy Guy Smash!
Intro screen shown before Boss Game 3
Intro screen shown before Boss Game 3 (no text)
Victory screen shown after completing Boss Game 3
Victory screen shown after completing Boss Game 3 (no text)


.png)

.png)
Magnet Mania[edit]
Mario, Donkey Kong, and the Minis enter Magnet Mania

Magnet Mania on the floor selection screen
Room 4-2
Shy Guy Smash!
Intro screen shown before Boss Game 4
Intro screen shown before Boss Game 4 (no text)
Victory screen shown after completing Boss Game 4
Victory screen shown after completing Boss Game 4 (no text)


.png)

.png)
Lava Dome[edit]
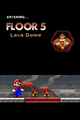
Mario, Donkey Kong, and the Mini Marios enter Lava Dome
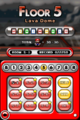
Lava Dome on the floor selection screen
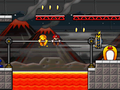
A Mini Mario and a Gold Mini Mario on a Swing Bar in Room 5-7
A Mini Mario hanging from a Cool Kong in Room 5-9
Shy Guy Smash!
Intro screen shown before Boss Game 5
Intro screen shown before Boss Game 5 (no text)
Victory screen shown after completing Boss Game 5
Victory screen shown after completing Boss Game 5 (no text)


.png)

.png)
Toadstool Castle[edit]
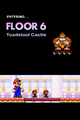
Mario, Donkey Kong, and the Mini Marios enter Toadstool Castle
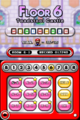
Toadstool Castle on the floor selection screen
Shy Guy Smash!

Intro screen shown before Boss Game 6
Intro screen shown before Boss Game 6 (no text)
Victory screen shown after completing Boss Game 6
Victory screen shown after completing Boss Game 6 (no text)


.png)

.png)
Spooky Attic[edit]
Mario, Donkey Kong, and the Mini Marios enter Spooky Attic
Spooky Attic on the floor selection screen
Shy Guy Smash!
Intro screen shown before Boss Game 7
Intro screen shown before Boss Game 7 (no text)
Victory screen shown after completing Boss Game 7
Victory screen shown after completing Boss Game 7 (no text)


.png)

.png)
Jungle Hijinks[edit]
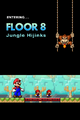
Mario, Donkey Kong, and the Mini Marios enter Jungle Hijinks
Jungle Hijinks on the floor selection screen
Shy Guy Smash!
Intro screen shown before Boss Game 8
Intro screen shown before Boss Game 8 (no text)
Victory screen shown after completing Boss Game 8
Victory screen shown after completing Boss Game 8 (no text)


.png)

.png)
Roof[edit]
Intro screen shown before Final Boss
Intro screen shown before Final Boss (from the in-game Gallery)


.png)
DK's Hideout[edit]
DK's Hideout on the level selection screen
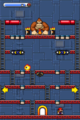
B1
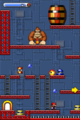
B2
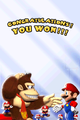
Victory screen shown after completing B1
Victory screen shown after completing B1 (no text)


.png)
Construction Zone[edit]
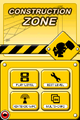
Menu screen

Kit select screen
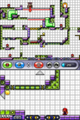
Edit Level screen


Unlocking construction kits[edit]
Tropical Island

Pipe Works

Magnet Mania

Lava Dome
Toadstool Castle
Spooky Attic

Jungle Hijinks

Special Kit 1

Special Kit 2

Special Kit 3


Pre-release[edit]
An early version of the top screen

Title screen
Level select screen
Gameplay
Map feature
"Thank You for Playing" screen


Movies[edit]
Pre Title[edit]


Introduction[edit]


Ending[edit]


Musical[edit]


Credits artwork[edit]

Mini Mario

Mini Peach

Mini Toad

Shy Guy

Bob-omb

Mini Donkey Kong

Circus Kong

Cool Kong

Thwomp

Donkey Kong

Donkey Kong waving
Crash Kong

Mario

Blooper

Capture Kong

Piranha Plant

Blue Spring

Barrel
"Thank You for Playing" screen, shown after the credits roll for the first time


Scans[edit]

Pages from a Shogakukan guidebook
Pages from a Shogakukan guidebook


Box art[edit]

North American box art
Canadian box art

UK box art
French and Dutch box art
Spanish box art
Italian box art
German box art
German box art (alternate)
Australian box art
Japanese box art


Miscellaneous[edit]
North American commercial
Japanese commercial
French print ad


| Mario vs. Donkey Kong 2: March of the Minis | |
|---|---|
| Main characters | Mario • Donkey Kong • Pauline |
| Minis | Mini Mario • Gold Mini Mario • Fire Mini Mario • Mini Toad • Mini Peach • Mini Donkey Kong |
| Enemies | Bird • Blooper • Bob-omb • Bob-omb Fish • Candle • Cuttacutta • Fire Bar • Fireball • Jack • Magnet Sparky • Monkey robots (Capture Kong · Circus Kong · Cool Kong · Crash Kong · Kongā) • Mummy Guy • Piranha Plant • Phantom Guy • Podoboo • Shy Guy • Snapjaw • Snifit • Spyguy • Swoop • Thwomp |
| Floors | DK's Hideout • Mushroom Mayhem • Tropical Island • Pipe Works • Magnet Mania • Lava Dome • Toadstool Castle • Spooky Attic • Jungle Hijinks • Roof |
| Items and objects | ? Block • Balance Beam • Blue Spring • Bolt • Coin (large) • Color Blocks (Bomb Block · Fire Block · Magnetic Block · Pink Block) • Color Switch • Conveyor belt • Donut Block • Elevator • Fire Flower • Girder • Hammer • Lava Fountain • Log • Magnet Ground • Mini Mario Card • Moving Platform • Raft • Rotate Pipe • Rotating Magnet Stick • Spike • Swing Bar • Vine • Wall Jump Bar • Water Valve • Warp Pipe • Yellow Spring |
| Miscellaneous | Cannon Kaos • Construction Zone • Gallery • Shy Guy Smash! • Special Kit 1 • Special Kit 2 • Special Kit 3 • Staff |