Gallery:Wario Land: Super Mario Land 3: Difference between revisions
Thejohnston7 (talk | contribs) (I added the rare save data error screen.) |
|||
| (75 intermediate revisions by 27 users not shown) | |||
| Line 1: | Line 1: | ||
{{italic title}} | {{italic title}} | ||
This is a gallery of images for the game ''[[Wario Land: Super Mario Land 3]]''. | This is a gallery of images for the game ''[[Wario Land: Super Mario Land 3]]''. | ||
==Logos== | ==Logos== | ||
<gallery widths="250"> | <gallery widths="250"> | ||
WarioLandLogo.png| | WarioLandLogo.png|International logo | ||
WL-Japanese Logo.png|Japanese logo | WL-Japanese Logo.png|Japanese logo | ||
WLSML3TitleIngame.png|In-game logo | WLSML3TitleIngame.png|In-game logo | ||
| Line 13: | Line 12: | ||
<gallery> | <gallery> | ||
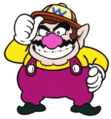
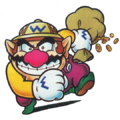
Wario artwork WLSML3.png|[[Wario]] | Wario artwork WLSML3.png|[[Wario]] | ||
WARIO_CharacterManual.png | Wario | |||
Wario walking WL.png|Wario walking | Wario walking WL.png|Wario walking | ||
Wario | Wario with folded arms WL.jpg|Wario with his arms folded | ||
WL Wario Swimming Artwork.png|Wario swimming | |||
BubblesWario_CharacterManual.png |Wario swimming | |||
WarioLandArt1.png|[[Dash Attack]] | WarioLandArt1.png|[[Dash Attack]] | ||
WarioLandArt4.png|Wario, with a bag of money | WarioLandArt4.png|Wario, with a bag of money | ||
Bull Wario WL. | Bull Wario WL art.jpg|[[Bull Wario]] | ||
Bull Wario holding Goom WL. | Bull Wario holding Pirate Goom WL art.jpg|Bull Wario holding a [[Pirate Goom]] | ||
WL | Dragon Wario WL art.jpg|[[Dragon Wario (Wario Land series)|Dragon Wario]] | ||
DragonWario_CharacterManual.png |Dragon Wario | |||
WL_JetWario.png|[[Jet Wario]] | |||
JetWario_CharacterManual.png|Jet Wario | |||
Tiny Wario SML3 Wario Land.png|[[Tiny Wario|Small Wario]] | Tiny Wario SML3 Wario Land.png|[[Tiny Wario|Small Wario]] | ||
WarioLandArt2.png|Wario head | WarioLandArt2.png|Wario head | ||
Wario ssh.jpg|Wario shushing | |||
</gallery> | </gallery> | ||
===Bosses=== | ===Bosses=== | ||
<gallery> | <gallery> | ||
SpikedKoop.jpg|[[Spiked | SpikedKoop.jpg|[[Spiked Koopa]] | ||
WL | Minotaur WL.jpg|[[Minotaur]] | ||
RagingBull_CharacterManual.png|[[Minotaur]] | |||
Hinyari Artwork.png|[[Penguin (boss)|Penguin]] | |||
SyrupNintendoCharacterManual.png|[[Captain Syrup]] | |||
GenieCharacterManual.png|[[Genie (Wario Land: Super Mario Land 3)|Genie]] | |||
</gallery> | </gallery> | ||
| Line 40: | Line 46: | ||
WL DangerousDuck.jpg|D.D. | WL DangerousDuck.jpg|D.D. | ||
WL Dropper.png|[[Dropper]] | WL Dropper.png|[[Dropper]] | ||
WL Helmut. | File:WL-Gaugau.png|[[Gaugau]] | ||
WL Penkoon. | WL Helmut.png|[[Helmut]] | ||
WL Pinwheel. | WL Penkoon.png|[[Penkoon]] | ||
WL Pinwheel.png|[[Pinwheel (Wario Land: Super Mario Land 3)|Pinwheel]] | |||
WL Pirate Goom.png|[[Pirate Goom]] | WL Pirate Goom.png|[[Pirate Goom]] | ||
WL Pouncer. | WL Pouncer.png|[[Pouncer]] | ||
WanderinGoomSML3.png|[[Wanderin' Goom]] | WanderinGoomSML3.png|[[Wanderin' Goom]] | ||
Watch WL.png|[[ | Watch WL artwork.jpg|[[Watch]] | ||
Batto Shuruken & Komori Missile Artwork.png|[[Batto Shuruken]] & [[Kōmori Missile]] | |||
Be Artwork.png|[[Bee Fly]] | |||
Big Artwork.png|[[Big]] | |||
Botsu Artwork.png|[[Bō]] | |||
Chicken Duck Artwork.png|[[Chicken Duck]] | |||
Goboten Artwork.png|[[Goboten]] | |||
Demon Bat Artwork.png|[[Demon Bat]] | |||
Guragura Artwork.png|[[Guragura]] | |||
Knight Artwork.png|[[Knight]] | |||
Maizo Artwork.png|[[Maizo]] | |||
Pecan Artwork.png|[[Pecan]] | |||
Pikkarikun Artwork.png|[[Pikkarikun]] | |||
Sparky WL Artwork.png|[[Sparky (Wario Land: Super Mario Land 3)|Sparky]] | |||
Spiked Ball WL Artwork.png|[[Spike Ball|Spiked ball]] | |||
Togemaru Artwork.png|[[Togemaru]] | |||
Ukiwani Artwork.png|[[Ukiwani]] | |||
White Puff Artwork.png|[[White puff]] | |||
Yadora Artwork.png|[[Yadorā]] | |||
Yarikuri Obake Artwork.png|[[Yarikuri Obake]] | |||
</gallery> | </gallery> | ||
| Line 52: | Line 78: | ||
<gallery> | <gallery> | ||
Wario Land Super Mario Land 3 main visual.jpg|Wario on [[Kitchen Island]], artwork used for the box art | Wario Land Super Mario Land 3 main visual.jpg|Wario on [[Kitchen Island]], artwork used for the box art | ||
WarioLand Art.jpg|Artwork of Wario on Kitchen Island without the logo | |||
WarioLandOverworld.png|Map of Kitchen Island | WarioLandOverworld.png|Map of Kitchen Island | ||
WL KitchenIsland.jpg|Artwork of Kitchen Island map | WL KitchenIsland.jpg|Artwork of Kitchen Island map | ||
WL Floater. | WL Floater.png|[[Floater]] | ||
Npissue6.jpg|The first [[Nintendo Power]] cover art of Wario | Npissue6.jpg|The first [[Nintendo Power]] cover art of Wario | ||
Wario Land BonBon character art.png|Character art from the ''[[Super Mario (Kodansha manga)|Super Mario]]'' Kodansha manga series | |||
</gallery> | </gallery> | ||
| Line 63: | Line 91: | ||
WLSML3WarioSprite.png|[[Wario]] | WLSML3WarioSprite.png|[[Wario]] | ||
WLSML3WarioSprite2.png|Wario (Classic) | WLSML3WarioSprite2.png|Wario (Classic) | ||
WLSML3TinyWarioSprite.png|[[Tiny Wario]] | WLSML3TinyWarioSprite.png|[[Tiny Wario|Small Wario]] | ||
WLSML3BullWarioSprite.png|[[Bull Wario]] | WLSML3BullWarioSprite.png|[[Bull Wario]] | ||
WLSML3DragonWarioSprite.png|[[Dragon Wario (Wario Land series)|Dragon Wario]] | WLSML3DragonWarioSprite.png|[[Dragon Wario (Wario Land series)|Dragon Wario]] | ||
| Line 72: | Line 100: | ||
===Bosses=== | ===Bosses=== | ||
<gallery> | <gallery> | ||
SpikedkoopaWL.png|[[Spiked | SpikedkoopaWL.png|[[Spiked Koopa]] | ||
Beefnewl.png|[[ | Beefnewl.png|[[Minotaur]] | ||
Penguinwl.png|[[ | Penguinwl.png|[[Penguin (boss)|Penguin]] | ||
BigHeadwl.png|[[ | BigHeadwl.png|[[Devil's Head]] | ||
BoboWL1.png|[[Bobo]] | BoboWL1.png|[[Bobo]] | ||
Giantghostwl.png|[[ | Giantghostwl.png|[[Ghost (Wario Land: Super Mario Land 3)|Ghost]] | ||
CaptainSyrupWL.png|[[Captain Syrup]] | CaptainSyrupWL.png|[[Captain Syrup]] | ||
Denpuwl.png|[[Genie]] | Denpuwl.png|[[Genie (Wario Land: Super Mario Land 3)|Genie]] | ||
</gallery> | </gallery> | ||
| Line 85: | Line 113: | ||
<gallery> | <gallery> | ||
Batshuruken.png|[[Batto Shuruken]] | Batshuruken.png|[[Batto Shuruken]] | ||
Fireballwl.png|[[ | Fireballwl.png|[[Bō]] | ||
Shyfly.png|[[ | Shyfly.png|[[Bee Fly]] | ||
Boulder.png|[[Big]] | Boulder.png|[[Big]] | ||
Bucket head wl.png|[[Bucket Head]] | Bucket head wl.png|[[Bucket Head]] | ||
| Line 98: | Line 126: | ||
Guragura.png|[[Guragura]] | Guragura.png|[[Guragura]] | ||
Harisu.png|[[Harisu]] | Harisu.png|[[Harisu]] | ||
WL1-Harisu.png|Harisu | |||
Helmut.png|[[Helmut]] | Helmut.png|[[Helmut]] | ||
WL sentry knight.png|[[Knight]] | |||
Konotako.png|[[Konotako]] | Konotako.png|[[Konotako]] | ||
Botsufire.png|[[Kōmori Missile]] | Botsufire.png|[[Kōmori Missile]] | ||
| Line 107: | Line 137: | ||
Penkoon.png|[[Penkoon]] | Penkoon.png|[[Penkoon]] | ||
Pikkarikun.png|[[Pikkarikun]] | Pikkarikun.png|[[Pikkarikun]] | ||
Pinwheel.png|[[Pinwheel]] | Pinwheel.png|[[Pinwheel (Wario Land: Super Mario Land 3)|Pinwheel]] | ||
WL1-Pinwheel.png|Pinwheel | |||
RagingMuncherWL.png|[[Piranha Plant]] | RagingMuncherWL.png|[[Piranha Plant]] | ||
WLPirategoom.png|[[Pirate Goom]] | WLPirategoom.png|[[Pirate Goom]] | ||
Pouncer.png|[[Pouncer]] | Pouncer.png|[[Pouncer]] | ||
Chikuri.png|[[Sparky]] | Pillars.png|[[Skewer]] | ||
Spiked ball.png|[[Spiked | Chikuri.png|[[Sparky (Wario Land: Super Mario Land 3)|Sparky]] | ||
Spiked ball.png|[[Spike Ball|Spiked ball]] | |||
Togemaru.png|[[Togemaru]] | Togemaru.png|[[Togemaru]] | ||
Ukiwani.png|[[Ukiwani]] | Ukiwani.png|[[Ukiwani]] | ||
WLGoom.png|[[Wanderin' Goom]] | |||
Goom animation.gif|Wanderin' Goom | |||
Watch.png|[[Watch]] | Watch.png|[[Watch]] | ||
WL1-WhitePuffSmall.png|[[White puff]] | |||
White puff.png|White puff | |||
Yadora.png|[[Yadora]] | Yadora.png|[[Yadora]] | ||
Ghostgoom.png|[[Yarikuri Obake]] | Ghostgoom.png|[[Yarikuri Obake]] | ||
| Line 124: | Line 158: | ||
===Items=== | ===Items=== | ||
<gallery> | <gallery> | ||
WL1 Coin.png|[[Coin]] | WL1 Coin.png|[[Coin|1 Gold Coin]] | ||
WL1 10 Gold Coin.png|[[10 Gold Coin]] | WL1 10 Gold Coin.png|[[10-Coin|10 Gold Coin]] | ||
Garlic Pot.png|[[Garlic | Garlic Pot.png|[[Garlic bottle|Garlic Pot]] | ||
Bull Pot.png|[[Bull Pot]] | Bull Pot.png|[[Viking helmet|Bull Pot]] | ||
Dragon pot.png|[[Dragon Pot]] | Dragon pot.png|[[Dragon Pot]] | ||
Jet Pot.png|[[Jet Pot]] | Jet Pot.png|[[Jet Pot]] | ||
WL Heart.gif|[[Heart (Wario Land series)|Heart]] | WL Heart.gif|[[Heart (Wario Land series)|Heart]] | ||
WL 3-Up Heart.gif|[[3-Up Heart]] | WL 3-Up Heart.gif|[[3-Up Heart]] | ||
WL SML3 Star.gif|[[Super Star|Star]] | |||
</gallery> | |||
====Treasures==== | |||
<gallery> | |||
WLSML3 Treasure A.png|A | |||
WLSML3 Treasure B.png|B | |||
WLSML3 Treasure C.png|C | |||
WLSML3 Treasure D.png|D | |||
WLSML3 Treasure E.png|E | |||
WLSML3 Treasure F.png|F | |||
WLSML3 Treasure G.png|G | |||
WLSML3 Treasure H.png|H | |||
WLSML3 Treasure I.png|I | |||
WLSML3 Treasure J.png|J | |||
WLSML3 Treasure K.png|K | |||
WLSML3 Treasure L.png|L | |||
WLSML3 Treasure M.png|M | |||
WLSML3 Treasure N.png|N | |||
WLSML3 Treasure O.png|O | |||
</gallery> | </gallery> | ||
===Other=== | ===Other=== | ||
<gallery> | <gallery> | ||
WLSML3-CheckpointAni.gif|[[ | WLSML3-CheckpointAni.gif|[[Save point]] | ||
WL Mario.png|[[Mario]] | WL Mario.png|[[Mario]] | ||
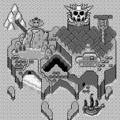
Syrup castle.png|[[Syrup Castle]] | Syrup castle.png|[[Syrup Castle]] | ||
| Line 181: | Line 234: | ||
SML3 Course 25.png | SML3 Course 25.png | ||
SSTeaCupWL.png | SSTeaCupWL.png | ||
Sherbert | Sherbert Land.png | ||
SherbetLandCourse18.png | SherbetLandCourse18.png | ||
ShyFlyWL.png | ShyFlyWL.png | ||
| Line 197: | Line 250: | ||
WL1 Shot - Ending6 Planet.png | WL1 Shot - Ending6 Planet.png | ||
WL1SGB.png | WL1SGB.png | ||
WL Perfect Ending.png | |||
WLSML3-CheckpointUnactivated.png | WLSML3-CheckpointUnactivated.png | ||
WLSML3-CheckpointActivated.png | WLSML3-CheckpointActivated.png | ||
| Line 203: | Line 256: | ||
WarioLandTinyWario.png | WarioLandTinyWario.png | ||
WarioLandTitleScreen.png | WarioLandTitleScreen.png | ||
WLSML3 GBC Title screen.png | |||
WLSML3 File select.png | |||
Wlcastle.png | Wlcastle.png | ||
WLSML3 Time Up.png | |||
WL SaveDataError.png | |||
</gallery> | </gallery> | ||
| Line 210: | Line 267: | ||
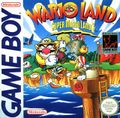
WarioLandBoxArt.jpg|North American box art (front) | WarioLandBoxArt.jpg|North American box art (front) | ||
WLBackAmerica.jpg|North American box art (back) | WLBackAmerica.jpg|North American box art (back) | ||
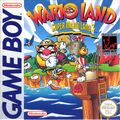
WLSML3PCCoverHighQuality.png|North American box art ([[Player's Choice]]) | |||
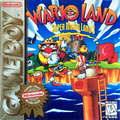
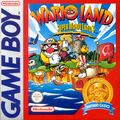
Wario Land - Box PAL.jpg|UK and Australian box art (front) | |||
WLBackEurope.jpg|UK box art (back) | |||
Wario Land - Box AU back.jpg|Australian box art (back) | |||
Wario Land - Box FRA.jpg|French and Dutch box art | |||
Wario Land - Box FRA Classic Series.jpg|French and Dutch box art (Classic Series) | |||
WLSML3 EU Cover.jpg|German box art | |||
Wario Land - Box EU Nintendo Classics.jpg|European box art (Nintendo Classics) | |||
WLSML3 JP Cover.jpg|Japanese box art (front) | WLSML3 JP Cover.jpg|Japanese box art (front) | ||
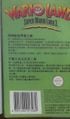
WLBackJapan.jpg|Japanese box art (back) | WLBackJapan.jpg|Japanese box art (back) | ||
NP SML3 Wario Land.jpg|[[Nintendo Power (cartridge)|GB Memory Cartridge]] with ''Wario Land: Super Mario Land 3'' already written on it | NP SML3 Wario Land.jpg|[[Nintendo Power (cartridge)|GB Memory Cartridge]] with ''Wario Land: Super Mario Land 3'' already written on it | ||
Wario Land Chinese boxart front(only half).jpg|Chinese box art (front) | |||
Wario Land Chinese boxart back(only half).jpg|Chinese box art (back) | |||
</gallery> | |||
==Cartridges== | |||
<gallery> | |||
WLSML3 CN Cartridge.jpg|Chinese cartridge | |||
</gallery> | </gallery> | ||
| Line 221: | Line 290: | ||
<gallery> | <gallery> | ||
WarioLand3JPCommercial.png|Japanese commercial | WarioLand3JPCommercial.png|Japanese commercial | ||
WL Unused Bobo.gif|[[List of Wario Land: Super Mario Land 3 pre-release and unused content|Unused]] cutscene of Bobo | |||
WLSML3 3DS VC trailer title screen.jpg|Widescreen still used in the trailer of the [[Nintendo 3DS]] [[Virtual Console]] release | |||
</gallery> | </gallery> | ||
{{Galleries}} | {{Galleries}} | ||
{{WL}} | {{WL}} | ||
[[Category:Wario Land: Super Mario Land 3|*]] | [[Category:Wario Land: Super Mario Land 3|*]] | ||
[[Category:Galleries | [[Category:Galleries]] | ||
[[de:Wario Land: Super Mario Land 3/Galerie]] | |||
Revision as of 13:24, April 12, 2024
This is a gallery of images for the game Wario Land: Super Mario Land 3.
Logos
International logo
Japanese logo
In-game logo


Artwork
Wario
Wario
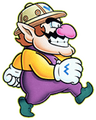
Wario walking
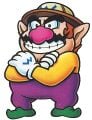
Wario with his arms folded
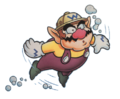
Wario swimming
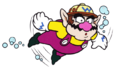
Wario swimming
Wario, with a bag of money

Bull Wario holding a Pirate Goom
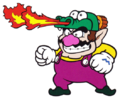
Dragon Wario
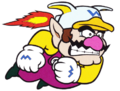
Jet Wario
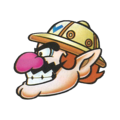
Wario head
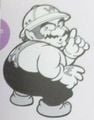
Wario shushing


Bosses


Enemies
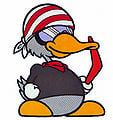
D.D.


Other
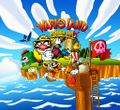
Wario on Kitchen Island, artwork used for the box art
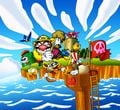
Artwork of Wario on Kitchen Island without the logo
Map of Kitchen Island
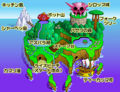
Artwork of Kitchen Island map
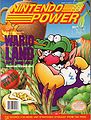
The first Nintendo Power cover art of Wario
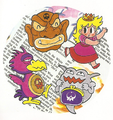
Character art from the Super Mario Kodansha manga series


Sprites
Wario

Wario (Classic)

Bosses


Enemies

Harisu

Pinwheel

Wanderin' Goom

White puff


Items


Treasures

A

B

C

D

E

F

G

H

I

J

K

L

M

N

O


Other

Spike

Stone Block

Stone Spike


Screenshots


.png)


.png)


Box art
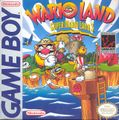
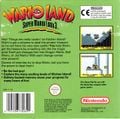
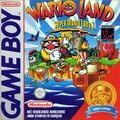
North American box art (front)
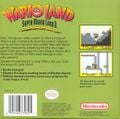
North American box art (back)
North American box art (Player's Choice)
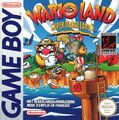
UK and Australian box art (front)
UK box art (back)
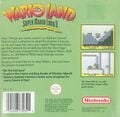
Australian box art (back)
French and Dutch box art
French and Dutch box art (Classic Series)
German box art
European box art (Nintendo Classics)
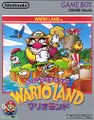
Japanese box art (front)
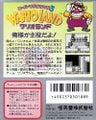
Japanese box art (back)
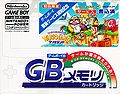
GB Memory Cartridge with Wario Land: Super Mario Land 3 already written on it

Chinese box art (front)
Chinese box art (back)


.jpg)
.jpg)
Cartridges
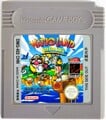
Chinese cartridge

Other

Japanese commercial
Unused cutscene of Bobo
Widescreen still used in the trailer of the Nintendo 3DS Virtual Console release


| Wario Land: Super Mario Land 3 | |||
|---|---|---|---|
| Characters | Wario • Brown Sugar Pirates • Mario | ||
| Bosses | Spiked Koopa • Minotaur • Penguin • Devil's Head • Bobo • Ghost • Captain Syrup • Genie | ||
| Worlds | Rice Beach • Mt. Teapot • Sherbet Land • Stove Canyon • SS Tea Cup • Parsley Woods • Syrup Castle | ||
| Power-ups | Bull Pot • Dragon Pot • Garlic Pot • Jet Pot • Star | ||
| Collectibles | ? Block • 1 Gold Coin • 10 Gold Coin • 100 Coin • 3-Up Heart • Heart • Key • Treasure | ||
| Enemies and obstacles | Batto Shuruken • Bee Fly • Big • Bō • Bucket Head • Chicken Duck • D.D. • Demon Bat • Dropper • Floater • Gaugau • Goboten • Guragura • Harisu • Helmut • Knight • Konotako • Kōmori Missile • Lance • Maizō • Mine • Muncher • Paidan • Pecan • Penkoon • Pikkarikun • Pinwheel • Piranha Plant • Pirate Goom • Pouncer • Skewer • Sparky • Spiked ball • Togemaru • Ukiwani • Wanderin' Goom • Watch • White puff • Yadorā • Yarikuri Obake | ||
| Miscellaneous | Gallery • Glitches • Media • Pre-release and unused content • Staff | ||