Gallery:Paper Mario: The Thousand-Year Door: Difference between revisions
(→Objects: added more objects) |
|||
| (33 intermediate revisions by 18 users not shown) | |||
| Line 1: | Line 1: | ||
{{italic title}} | {{italic title}} | ||
This is a gallery of images for the game ''[[Paper Mario: The Thousand-Year Door]]''. | This is a gallery of images for the game ''[[Paper Mario: The Thousand-Year Door]]''. For images related to its remake, see [[Gallery:Paper Mario: The Thousand-Year Door (Nintendo Switch)|here]]. | ||
==Logos== | ==Logos== | ||
<gallery widths="230"> | <gallery widths="230"> | ||
| Line 10: | Line 11: | ||
Paper Mario RPG Logo.png|Japanese logo | Paper Mario RPG Logo.png|Japanese logo | ||
PM2 BetaLogo.jpg|Preliminary logo (E3 2004) | PM2 BetaLogo.jpg|Preliminary logo (E3 2004) | ||
</gallery> | |||
===In-game=== | |||
<gallery widths="195"> | |||
PMTTYD NA In-game Logo.png|English logo | |||
PMTTYD ESP In-game Logo.png|Spanish logo | |||
PMTTYD FRA In-game Logo.png|French logo | |||
PMTTYD ITA In-game Logo.png|Italian logo | |||
PMTTYD DE In-game Logo.png|German logo | |||
PMTTYD JN In-game Logo.png|Japanese logo | |||
PMTTYD E3 In-game Logo.png|Preliminary logo | |||
</gallery> | </gallery> | ||
| Line 27: | Line 39: | ||
PMTTYD Curious Mario Artwork.png|Curious Mario | PMTTYD Curious Mario Artwork.png|Curious Mario | ||
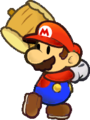
PMTTYD Mario Waving Artwork.png|Mario waving | PMTTYD Mario Waving Artwork.png|Mario waving | ||
Mariofaint.png|Mario | Mariofaint.png|Mario knocked out | ||
PMTTYD Princess Peach Artwork.png|[[Princess Peach]] | PMTTYD Princess Peach Artwork.png|[[Princess Peach]] | ||
PMTTYD Professor Frankly Closed Mouth Artwork.jpg|[[Professor Frankly]] | PMTTYD Professor Frankly Closed Mouth Artwork.jpg|[[Professor Frankly]] | ||
| Line 71: | Line 83: | ||
SMRPG HyperGoomba.jpg|[[Hyper Goomba]] | SMRPG HyperGoomba.jpg|[[Hyper Goomba]] | ||
PMTTYD Gloomba Artwork.jpg|[[Gloomba]] | PMTTYD Gloomba Artwork.jpg|[[Gloomba]] | ||
SPM Red KoopaTroopa.png|[[Koopa Troopa]] | |||
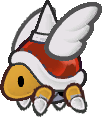
Dull Bones - Paper Mario The Thousand-Year Door.png|[[Dull Bones]] | Dull Bones - Paper Mario The Thousand-Year Door.png|[[Dull Bones]] | ||
PMTTYD Red Bones Artwork.jpg|[[Red Bones]] | PMTTYD Red Bones Artwork.jpg|[[Red Bones]] | ||
| Line 164: | Line 177: | ||
8bitMarioPartnersPMTTYD.png|8-bit sprites of Mario and his partners | 8bitMarioPartnersPMTTYD.png|8-bit sprites of Mario and his partners | ||
</gallery> | </gallery> | ||
====Unused==== | ====Unused==== | ||
<gallery> | <gallery> | ||
| Line 182: | Line 194: | ||
Bub-ulb better.PNG|[[Bub-ulb]] (pink) | Bub-ulb better.PNG|[[Bub-ulb]] (pink) | ||
PMTTYDBubulbBlue.png|Bub-ulb (blue) | PMTTYDBubulbBlue.png|Bub-ulb (blue) | ||
PMTTYD Ratooey Businessman Sprite.png|[[Businessman]] | PMTTYD Ratooey Businessman Sprite.png|[[Businessman]] | ||
Charlieton PM.png|[[Charlieton]] | Charlieton PM.png|[[Charlieton]] | ||
| Line 194: | Line 205: | ||
PMTTYD Don Pianta Sprite.png|[[Don Pianta]] | PMTTYD Don Pianta Sprite.png|[[Don Pianta]] | ||
Ton Vin.png|Don Pianta's guards ([[Tony (Paper Mario: The Thousand-Year Door)|Tony]], [[Vinny]] and [[Rocko]]) | Ton Vin.png|Don Pianta's guards ([[Tony (Paper Mario: The Thousand-Year Door)|Tony]], [[Vinny]] and [[Rocko]]) | ||
Doogan.png|[[Doogan]] | Doogan.png|[[Doogan]] (Yellow) | ||
DooganGreen.png|Doogan (Green) | |||
DooganOrange.png|Doogan (Orange) | |||
PMTTYDDupreeSprite.png|[[Dupree]] | PMTTYDDupreeSprite.png|[[Dupree]] | ||
Eve.png|[[Eve]] | Eve.png|[[Eve]] | ||
| Line 216: | Line 229: | ||
PMTTYD Herb T Sprite.png|[[Herb T.]] | PMTTYD Herb T Sprite.png|[[Herb T.]] | ||
Ishnail.png|[[Ishnail]] | Ishnail.png|[[Ishnail]] | ||
Jerry.png|[[ | Jerry.png|[[Jerry]] | ||
PMTTYDJoleneSprite.png|[[Jolene]] | PMTTYDJoleneSprite.png|[[Jolene]] | ||
PMTTYD Jolene Juice Bar Sprite.png|Jolene in casual clothes | PMTTYD Jolene Juice Bar Sprite.png|Jolene in casual clothes | ||
KP Koopa TTYD.png|[[King K]] | |||
PMTTYD Green Koopa Troopa NPC Sprite.png|[[Koopa Troopa]] (NPC) | PMTTYD Green Koopa Troopa NPC Sprite.png|[[Koopa Troopa]] (NPC) | ||
PMTTYD Green Koopa Troopa Audience Sprite.png|Koopa Troopa in the audience | PMTTYD Green Koopa Troopa Audience Sprite.png|Koopa Troopa in the audience | ||
Koopie Koo Sprite.png|[[Koopie Koo]] | Koopie Koo Sprite.png|[[Koopie Koo]] | ||
Kroop.png|[[Kroop]] | Kroop.png|[[Kroop]] | ||
Lady Bow PM2.png|[[Lady Bow]] | Lady Bow PM2.png|[[Lady Bow]] | ||
| Line 229: | Line 242: | ||
PMTTYDLakiSprite.png|[[Laki]] | PMTTYDLakiSprite.png|[[Laki]] | ||
CameraBlueLakitu.png|Lakitu from the Glitz Pit | CameraBlueLakitu.png|Lakitu from the Glitz Pit | ||
Lucky.png|[[Lucky]] | Lucky.png|[[Lucky]] | ||
PMTTYD Luigi Sprite.png|[[Luigi]] | PMTTYD Luigi Sprite.png|[[Luigi]] | ||
| Line 241: | Line 253: | ||
Parakarry.png|[[Parakarry]] | Parakarry.png|[[Parakarry]] | ||
PMTTYD Parrot Sprite.png|[[Parrot (character)|Parrot]] | PMTTYD Parrot Sprite.png|[[Parrot (character)|Parrot]] | ||
PMTTYDBumpty.png|[[Bumpty|Penguin]] | |||
Pennington.png|[[Pennington]] | Pennington.png|[[Pennington]] | ||
PMTTYD Podley and Podler Sprite.png|[[Podley]] / [[Podler]] | PMTTYD Podley and Podler Sprite.png|[[Podley]] / [[Podler]] | ||
PMTTYD Porter.png|[[Porter]] | PMTTYD Porter.png|[[Porter]] | ||
Prince Mush.png|[[Prince Mush]] | Prince Mush.png|[[Prince Mush]] | ||
PMTTYD Peach Sprite.png|[[Princess Peach]] | |||
Lumpy.png|[[Ratooey]] | Lumpy.png|[[Ratooey]] | ||
PMTTYD Screamy Sprite.png|[[Screamy]] | PMTTYD Screamy Sprite.png|[[Screamy]] | ||
| Line 250: | Line 264: | ||
TTYD Swooper.png|[[Sir Swoop]] | TTYD Swooper.png|[[Sir Swoop]] | ||
PMTTYD Red Spike Top Sprite.png|[[Spiky Joe]] | PMTTYD Red Spike Top Sprite.png|[[Spiky Joe]] | ||
MouserPMTTD.png|[[Little Mouser|Squeek]] | |||
PMTTYD Stewart Sprite.png|[[Stewart]] | PMTTYD Stewart Sprite.png|[[Stewart]] | ||
Sylvia.png|[[Sylvia (Paper Mario: The Thousand-Year Door)|Sylvia]] | Sylvia.png|[[Sylvia (Paper Mario: The Thousand-Year Door)|Sylvia]] | ||
| Line 265: | Line 280: | ||
PMTTYDToadKidGreen.png|Toad child (green) | PMTTYDToadKidGreen.png|Toad child (green) | ||
PMTTYDToadKidChartreuse.png|Toad child (chartreuse) | PMTTYDToadKidChartreuse.png|Toad child (chartreuse) | ||
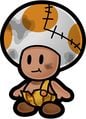
PMTTYD Toad Inkeeper.png|Toad innkeeper | |||
PMTTYD Toadette Sprite.png|[[Toadette]] | PMTTYD Toadette Sprite.png|[[Toadette]] | ||
Toadsworth PM2.png|[[Toadsworth]] | Toadsworth PM2.png|[[Toadsworth]] | ||
| Line 275: | Line 291: | ||
Zip Toad.png|[[Zip Toad]] | Zip Toad.png|[[Zip Toad]] | ||
</gallery> | </gallery> | ||
====Unused==== | ====Unused==== | ||
<gallery> | <gallery> | ||
| Line 406: | Line 421: | ||
Z Yux.png|[[Z-Yux]] | Z Yux.png|[[Z-Yux]] | ||
</gallery> | </gallery> | ||
====Unused==== | ====Unused==== | ||
<gallery> | <gallery> | ||
| Line 420: | Line 434: | ||
===Bosses=== | ===Bosses=== | ||
{{more images|section=y}} | {{more images|section=y|Missing Cortez / Rawk Hawk / Magnus von Grapple / Smorg combined form}} | ||
<gallery> | <gallery> | ||
Atomic Boo.png|[[Big Boo|Atomic Boo]] | Atomic Boo.png|[[Big Boo|Atomic Boo]] | ||
| Line 440: | Line 454: | ||
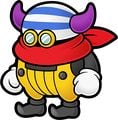
MagentaSmorg.png|[[Smorg]] | MagentaSmorg.png|[[Smorg]] | ||
</gallery> | </gallery> | ||
====Unused==== | ====Unused==== | ||
<gallery> | <gallery> | ||
| Line 462: | Line 475: | ||
PMTTYD Tattle Log - Paratroopa.png|[[Paratroopa]] | PMTTYD Tattle Log - Paratroopa.png|[[Paratroopa]] | ||
PMTTYD Tattle Log - KP Koopa.png|[[KP Koopa]] | PMTTYD Tattle Log - KP Koopa.png|[[KP Koopa]] | ||
PMTTYD Tattle Log - KP Paratroopa.png|[[Paratroopa]] | PMTTYD Tattle Log - KP Paratroopa.png|[[KP Paratroopa]] | ||
PMTTYD Tattle Log - Shady Koopa.png|[[Shady Koopa]] | PMTTYD Tattle Log - Shady Koopa.png|[[Shady Koopa]] | ||
PMTTYD Tattle Log - Shady Paratroopa.png|[[Shady Paratroopa]] | PMTTYD Tattle Log - Shady Paratroopa.png|[[Shady Paratroopa]] | ||
| Line 710: | Line 723: | ||
Zess Tea TTYD.png|[[Zess Tea]] | Zess Tea TTYD.png|[[Zess Tea]] | ||
</gallery> | </gallery> | ||
====Important Things==== | ====Important Things==== | ||
<gallery | <gallery widths=40 heights=40> | ||
Autograph TTYD.png|[[Autograph]] | Autograph TTYD.png|[[Autograph]] | ||
Battle Trunks TTYD.png|[[Battle Trunks]] | Battle Trunks TTYD.png|[[Battle Trunks]] | ||
| Line 794: | Line 806: | ||
{{footnote|note|2|Elevator Key from [[X-Naut Fortress]], level 1}} | {{footnote|note|2|Elevator Key from [[X-Naut Fortress]], level 1}} | ||
{{footnote|note|3|Elevator Key from X-Naut Fortress, sublevel 1}} | {{footnote|note|3|Elevator Key from X-Naut Fortress, sublevel 1}} | ||
====Unused==== | ====Unused==== | ||
<gallery widths=40 heights=40> | <gallery widths=40 heights=40> | ||
| Line 894: | Line 905: | ||
Zap Tap.png|[[Zap Tap]] | Zap Tap.png|[[Zap Tap]] | ||
</gallery> | </gallery> | ||
====Unused==== | ====Unused==== | ||
<gallery widths=40 heights=40> | <gallery widths=40 heights=40> | ||
| Line 912: | Line 922: | ||
Super Charge P.png|Super Charge P | Super Charge P.png|Super Charge P | ||
Unknown Badge TTYD.png|An unknown badge, most likely an early version of an [[Ice Power]] or [[Ice Smash]]. | Unknown Badge TTYD.png|An unknown badge, most likely an early version of an [[Ice Power]] or [[Ice Smash]]. | ||
</gallery> | |||
===Objects=== | |||
{{More images|section=yes|Crystal stars}} | |||
<gallery> | |||
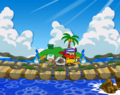
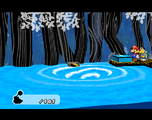
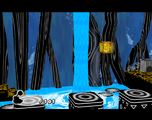
Boat Panel.png|[[Boat panel]] | |||
PMTTYD Jump Pad render (blue).png|Blue [[Trampoline|jump pad]] | |||
PMTTYD Jump Pad render (red).png|Red jump pad | |||
PMTTYD Lock render.png|Lock | |||
Plane Panel.png|[[Plane panel]] | |||
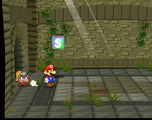
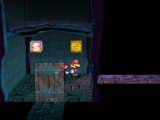
PMTTYD Sign.png|Sign | |||
PMTTYD TattleLog.png|[[Tattle Log]] | |||
File:PMTTYD chest.png|[[Treasure chest]] | |||
Blue Pipe.png|[[Warp Pipe]] | |||
</gallery> | |||
====Blocks==== | |||
<gallery> | |||
PMTTYD Question Mark Block Sprite.png|[[? Block|? block]] | |||
PMTTYD ! Switch.png|[[! Switch]] | |||
PMTTYD brick block.png|[[Brick block]] | |||
PMTTYDHeartBlock.png|[[Recovery block]] | |||
Ttyd metalblock.png|[[Metal block]] | |||
PMTTYDSaveBlock.png|[[Save Block]] | |||
PMTTYD Shine Block.png|[[Shine Block]] | |||
Ttyd stoneblock.png|[[Stone block]] | |||
Giantstoneblock.png|Stone block (giant) | |||
PMTTYD yellow block.png|[[Yellow block]] | |||
PMTTYD big yellow block.png|Yellow block (giant) | |||
</gallery> | |||
===Status effects=== | |||
<gallery widths=40 heights=40> | |||
Allergic.gif|[[Allergic]] | |||
Burn.png|[[Burn]] | |||
Confused.png|[[Confused]] | |||
PMTTYD DEF-Up Battle Icon.png|[[DEF-Up]] | |||
Dizzy PMTTYD icon.png|[[Dizzy]] | |||
Dodgy TTYD.png|[[Dodgy]] | |||
Electrifying.png|[[Electrified]] | |||
Fast TTYD Status.png|[[Fast]] | |||
Frozen Block.png|[[Frozen]] | |||
Huge TTYD.png|[[Huge]] | |||
Immobilize.png|[[Immobilized]] | |||
Invisible icon TTYD.png|[[Invisible]] | |||
SpitePaybacktime.png|[[Payback]] | |||
Poison.png|[[Poison (status effect)|Poison]] | |||
PMTTYD POW-Up Battle Icon.png|[[POW-Up]] | |||
Sleeping.png|[[Sleep]] | |||
Slowstatus.png|[[Slow]] | |||
PMTTYD DEF-Down Battle Icon.png|[[DEF-Down]] | |||
Tiny.png|[[Tiny (status effect)|Tiny]] | |||
</gallery> | </gallery> | ||
===Menus and Level up=== | ===Menus and Level up=== | ||
<gallery> | <gallery> | ||
PMTTYD Level up Heart.png| | PMTTYD Level up Heart.png|[[Heart Point]] | ||
PMTTYD Level up Flower.png| | PMTTYD Level up Flower.png|[[Flower Point]] | ||
PMTTYD Level up Badge.png| | PMTTYD Level up Badge.png|[[Badge Point]] | ||
</gallery> | </gallery> | ||
| Line 962: | Line 1,025: | ||
PMTTYD Staff Credits 20.png | PMTTYD Staff Credits 20.png | ||
PMTTYD Staff Credits 21.png | PMTTYD Staff Credits 21.png | ||
PMTTYD Staff Credits 22.png | PMTTYD Staff Credits 22.png|A Dark Koopatrol faces off against Rawk Hawk at the Glitz Pit. | ||
PMTTYD Staff Credits 23.png | PMTTYD Staff Credits 23.png|A mysterious egg sits atop the roof of a hog dog kiosk at Glitzville. | ||
PMTTYD Staff Credits 24.png | PMTTYD Staff Credits 24.png | ||
PMTTYD Staff Credits 25.png | PMTTYD Staff Credits 25.png | ||
PMTTYD Staff Credits 26.png | PMTTYD Staff Credits 26.png|Mario witnesses pigs at Twilight Town. | ||
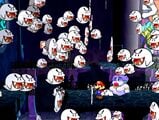
PMTTYD Staff Credits 27.png | PMTTYD Staff Credits 27.png|A swarm of Boos surround the entrance hall of the Creepy Steeple. | ||
PMTTYD Staff Credits 28.png | PMTTYD Staff Credits 28.png | ||
PMTTYD Staff Credits 29.png | PMTTYD Staff Credits 29.png | ||
| Line 974: | Line 1,037: | ||
PMTTYD Staff Credits 32.png | PMTTYD Staff Credits 32.png | ||
PMTTYD Staff Credits 33.png | PMTTYD Staff Credits 33.png | ||
PMTTYD Staff Credits 34.png | PMTTYD Staff Credits 34.png|Bands between Bowser and Lord Crump clash at Twilight Town. | ||
PMTTYD Staff Credits 35.png | PMTTYD Staff Credits 35.png | ||
PMTTYD Staff Credits 36.png | PMTTYD Staff Credits 36.png | ||
PMTTYD Staff Credits 37.png | PMTTYD Staff Credits 37.png | ||
PMTTYD Staff Credits 38.png | PMTTYD Staff Credits 38.png | ||
PMTTYD Staff Credits 39.png | PMTTYD Staff Credits 39.png|Mario arrives at Poshley Heights. | ||
PMTTYD Staff Credits 40.png | PMTTYD Staff Credits 40.png|Peach takes a bath at the X-Naut Fortress. | ||
PMTTYD Staff Credits 41.png | PMTTYD Staff Credits 41.png | ||
PMTTYD Staff Credits 42.png | PMTTYD Staff Credits 42.png | ||
| Line 986: | Line 1,049: | ||
PMTTYD Staff Credits 44.png | PMTTYD Staff Credits 44.png | ||
TEC-XX Face JP.png | TEC-XX Face JP.png | ||
PMTTYD Staff Credits 45.png | PMTTYD Staff Credits 45.png|The Thousand-Year Doors opens up. | ||
PMTTYD Staff Credits 46.png | PMTTYD Staff Credits 46.png | ||
PMTTYD Staff Credits 47.png | PMTTYD Staff Credits 47.png | ||
| Line 1,161: | Line 1,224: | ||
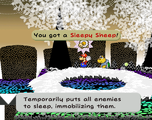
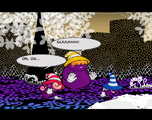
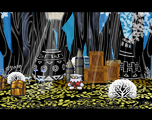
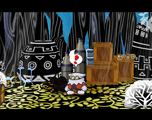
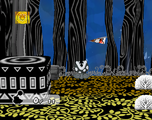
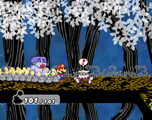
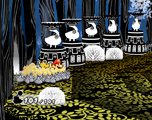
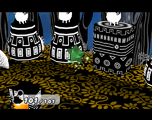
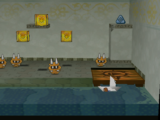
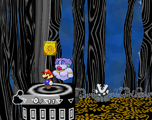
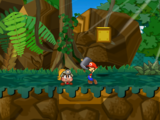
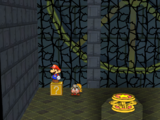
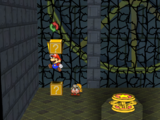
PMTTYD Dull Bones Swarm.png|The [[Dull Bones]] swarm | PMTTYD Dull Bones Swarm.png|The [[Dull Bones]] swarm | ||
RedBones Fight PMTTYD.png|Mid-boss battle | RedBones Fight PMTTYD.png|Mid-boss battle | ||
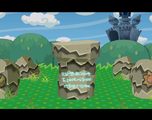
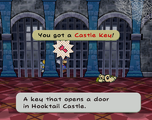
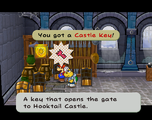
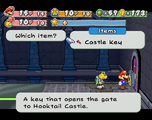
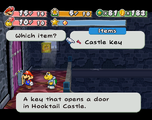
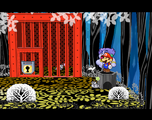
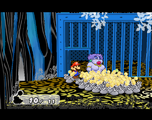
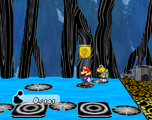
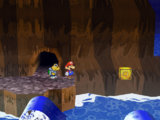
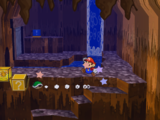
Castle Key 1 PMTTYD.png|The first key | Castle Key 1 PMTTYD.png|The first key | ||
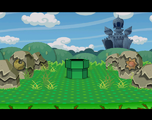
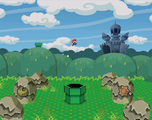
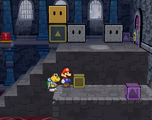
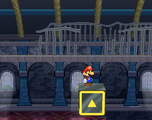
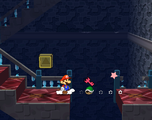
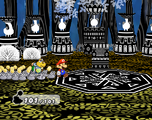
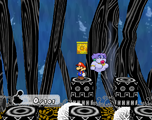
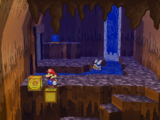
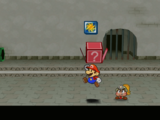
HooktailPuzzle 1 PMTTYD.png|The ! Switch and various blocks | HooktailPuzzle 1 PMTTYD.png|The ! Switch and various blocks | ||
| Line 1,179: | Line 1,239: | ||
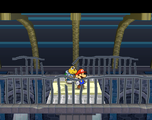
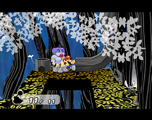
HooktailPuzzle 2 PMTTYD.png|Koops being shot at a switch | HooktailPuzzle 2 PMTTYD.png|Koops being shot at a switch | ||
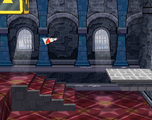
PMTTYD Hooktail Castle Revealing Path.png | PMTTYD Hooktail Castle Revealing Path.png | ||
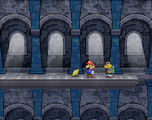
PMTTYD Mario Jumping Through Window.png | PMTTYD Mario Jumping Through Window.png | ||
PMTTYD Second Dungeon Area.png | PMTTYD Second Dungeon Area.png | ||
| Line 1,191: | Line 1,250: | ||
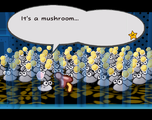
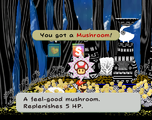
MushroomHooktailCastle.png|[[Mushroom]] | MushroomHooktailCastle.png|[[Mushroom]] | ||
Castle Key 3 PMTTYD.png|The third key | Castle Key 3 PMTTYD.png|The third key | ||
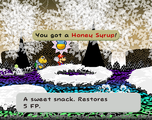
HoneySyrupHooktailCastle.png|[[Honey Syrup]] | HoneySyrupHooktailCastle.png|[[Honey Syrup]] | ||
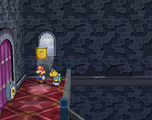
Castle Door Unlocked.png|Mario is unlocking the third castle door | Castle Door Unlocked.png|Mario is unlocking the third castle door | ||
| Line 1,202: | Line 1,260: | ||
Mario Falling Down PMTTYD.png|Mario and Koops are falling down the fourth area | Mario Falling Down PMTTYD.png|Mario and Koops are falling down the fourth area | ||
Last Stand P Platform PMTTYD.png|[[Last Stand P]] | Last Stand P Platform PMTTYD.png|[[Last Stand P]] | ||
Last Castle Door Chapter 1.png|Mario opened the fourth castle door | Last Castle Door Chapter 1.png|Mario opened the fourth castle door | ||
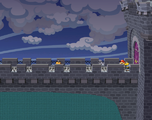
HooktailCastle Bridge.png|The bridge | HooktailCastle Bridge.png|The bridge | ||
| Line 1,243: | Line 1,300: | ||
PMTTYD Peach Typing on Keyboard.png | PMTTYD Peach Typing on Keyboard.png | ||
</gallery> | </gallery> | ||
====Bowser==== | ====Bowser==== | ||
<gallery widths="160"> | <gallery widths="160"> | ||
| Line 1,260: | Line 1,318: | ||
PMTTYD Kammy and Bowser Leaving.png | PMTTYD Kammy and Bowser Leaving.png | ||
</gallery> | </gallery> | ||
====Pre-Chapter 2==== | ====Pre-Chapter 2==== | ||
<gallery widths="160"> | <gallery widths="160"> | ||
| Line 1,520: | Line 1,579: | ||
PMTTYD Post Ch2 TEC-XX Weeeeird Computer.png | PMTTYD Post Ch2 TEC-XX Weeeeird Computer.png | ||
</gallery> | </gallery> | ||
====Bowser==== | ====Bowser==== | ||
<gallery widths="160"> | <gallery widths="160"> | ||
| Line 1,538: | Line 1,598: | ||
PMTTYD Post Ch2 Bowser and Kammy Peach Poster 5.png | PMTTYD Post Ch2 Bowser and Kammy Peach Poster 5.png | ||
</gallery> | </gallery> | ||
====Pre-Chapter 3==== | ====Pre-Chapter 3==== | ||
<gallery widths="160"> | <gallery widths="160"> | ||
| Line 1,611: | Line 1,672: | ||
</gallery> | </gallery> | ||
=== Chapter 4 === | ===Chapter 4=== | ||
<gallery widths="160"> | <gallery widths="160"> | ||
PMTTYDChapter4Title.png|[[Paper Mario: The Thousand-Year Door#Chapter 4: For Pigs the Bell Tolls|Chapter 4: For Pigs the Bell Tolls]] | PMTTYDChapter4Title.png|[[Paper Mario: The Thousand-Year Door#Chapter 4: For Pigs the Bell Tolls|Chapter 4: For Pigs the Bell Tolls]] | ||
| Line 1,748: | Line 1,809: | ||
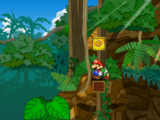
PM2 Riddle Tower.png|Full view of the [[Riddle Tower]] | PM2 Riddle Tower.png|Full view of the [[Riddle Tower]] | ||
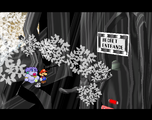
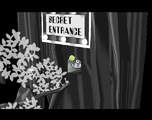
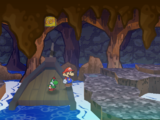
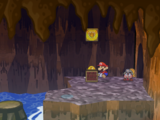
Pit Entrance.png|[[Pit of 100 Trials (Paper Mario: The Thousand-Year Door)|Pit of 100 Trials]] | Pit Entrance.png|[[Pit of 100 Trials (Paper Mario: The Thousand-Year Door)|Pit of 100 Trials]] | ||
</gallery> | |||
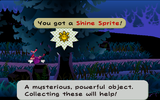
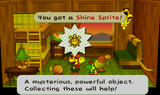
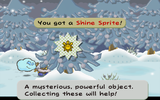
===Shine Sprites=== | |||
====Hooktail Castle==== | |||
<gallery widths="160"> | |||
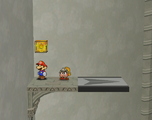
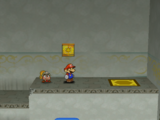
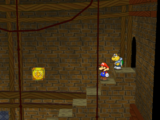
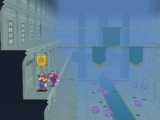
PMTTYD Shine Sprite HooktailCastleCellRoom.png|The first [[Shine Sprite]] | |||
PMTTYD Shine Sprite HooktailCastleStoreroom.png|Mario getting the Shine Sprite in the storeroom of Hooktail Castle. | |||
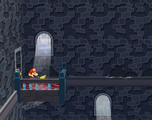
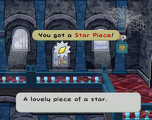
PMTTYD Star Piece HooktailCastlePurpleBlock.png|Mario getting the Star Piece in the high platform after taking the purple block | |||
PMTTYD Star Piece HooktailCastleWall.png|Mario getting the Star Piece on the wall ledge after taking the big black and yellow block | |||
PMTTYD Star Piece HooktailCastleBehindWindow.png|Mario getting the Star Piece behind the windows in the third area. | |||
PMTTYD Shine Sprite HooktailCastleHighRoom.png| Mario and Koops next to the last Shine Sprite on the fourth floor. | |||
</gallery> | |||
====Rogueport Sewers==== | |||
<gallery widths="160"> | |||
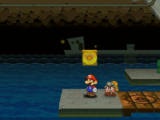
PMTTYD Shine Sprite RogueSewerThousandYearDoor.png|Mario next to the Shine Sprite above the left airplane panel before the Thousand-Year Door | |||
PMTTYD Shine Sprite RogueSewerWest.png|Mario next to the Shine Sprite to the left of the west entrance of Rogueport Sewers | |||
PMTTYD Shine Sprite RogueSewerWarp.png|Mario next to the Shine Sprite in the warp area | |||
PMTTYD Shine Sprite RogueSewerEastSea.png|Mario next to the Shine Sprite above the sea on the east of Rogueport Sewers | |||
PMTTYD Shine Sprite RogueSewerRiver.png|Mario next to the Shine Sprite in the secret room to the very right of Rogueport Sewers | |||
PMTTYD Shine Sprite RogueSewerCenterRoof.png| Mario next to the Shine Sprite on the roof of the rightmost column in the center room of level 1 of Rogueport Sewers | |||
</gallery> | |||
====Boggly Tree==== | |||
<gallery widths="160"> | |||
PMTTYD Shine Sprite BooglyWoods.png|Mario next to the Shine Sprite near the airplane panel | |||
</gallery> | |||
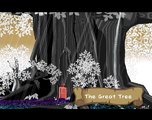
====The Great Tree==== | |||
<gallery widths="160"> | |||
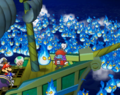
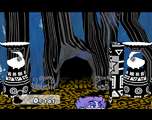
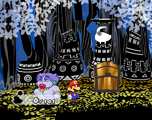
PMTTYD Shine Sprite GreatTreeBubbleRoom.png|Mario next to the Shine Sprite in the bubble room | |||
PMTTYD Shine Sprite GreatTreePlaneRoom.png|Mario next to the Shine Sprite in the airplane room | |||
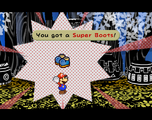
PMTTYD Shine Sprite GreatTreeSymbolRoom.png|Mario next to the Shine Sprite in the room below the Super Boots area | |||
PMTTYD Shine Sprite GreatTreePond.png|Mario next to the Shine Sprite above water | |||
</gallery> | |||
====Glitzville==== | |||
<gallery widths="160"> | |||
PMTTYD Shine Sprite Glitzville.png | |||
</gallery> | |||
====Rogueport==== | |||
<gallery widths="160"> | |||
PMTTYD Shine Sprite RogueEastCargo.png|Mario next to the Shine Sprite in the back-east corner of the east Rogueport room | |||
PMTTYD Shine Sprite RogueEastRoof.png|Mario next to the Shine Sprite on the roof of the north house in the east area of Rogueport | |||
PMTTYD Shine Sprite RogueEastBobberyHouse.png|Mario next to the Shine Sprite in Bobbery's house | |||
PMTTYD Shine Sprite RogueWestBackyard.png|Mario next to the Shine Sprite in the backyard of the rightmost house in the west Rogueport | |||
PMTTYD Shine Sprite RogueWestStore.png|Mario next to the Shine Sprite after the wall to the left of the store in west Rogueport | |||
</gallery> | |||
====Glitz Pitz==== | |||
<gallery widths="160"> | |||
PMTTYD Shine Sprite GlitzStoreroom.png|Mario next to the Shine Sprite on the second floor of Glitz Pit's storeroom | |||
</gallery> | |||
====Twilight Trail==== | |||
<gallery widths="160"> | |||
PMTTYD Shine Sprite TwilightTrail.png|Mario next to the Shine Sprite in Twilight Trail behind the last tree | |||
</gallery> | |||
====Creepy Steeple==== | |||
<gallery widths="160"> | |||
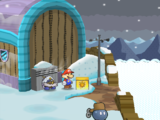
PMTTYD Shine Sprite CreepySteepleWellRoom.png|Mario next to the Shine Sprite down the pipe outside Creepy Steeple | |||
PMTTYD Shine Sprite CreepySteepleTreasureRoom.png|Mario next to the Shine Sprite in the treasure room | |||
PMTTYD Shine Sprite CreepySteepleWellPassage.png|Mario next to the Shine Sprite halfway from the outdoor pipe to the inside of Creepy Steeple | |||
</gallery> | |||
====Keelhaul Key==== | |||
<gallery widths="160"> | |||
PMTTYD Shine Sprite KeelhaulKeyCliff.png|Mario next to the Shine Sprite to the left of the piranha room of Keelhaul Key | |||
PMTTYD Shine Sprite KeelhaulKeyTree.png|Mario next to the Shine Sprite behind the leaves of the tree to the right of the bridge | |||
</gallery> | |||
====Pirate's Grotto==== | |||
<gallery widths="160"> | |||
PMTTYD Shine Sprite PiratesGrottoBoat.png|Mario next to the Shine Sprite near the entrance of the Pirate's Grotto | |||
PMTTYD Shine Sprite PiratesGrottoStair.png|Mario next to the Shine Sprite above water | |||
PMTTYD Shine Sprite PiratesGrottoBarrel.png|Mario next to the Shine Sprite in the storeroom with a ! switch | |||
PMTTYD Shine Sprite PiratesGrottoWaveRoomOverwater.png|Mario next to the Shine Sprite above water in the Pirate's Grotto | |||
PMTTYD Shine Sprite PiratesGrottoWaveRoomLeft.png|Mario next to the Shine Sprite in the floating barrel room | |||
</gallery> | |||
====Excess Express==== | |||
<gallery widths="160"> | |||
PMTTYD Shine Sprite ExcessExpressCabin5.png|Mario next to the Shine Sprite in Cabin 5 of Excess Express | |||
PMTTYD Shine Sprite ExcessExpressBub.png|Mario next to the Shine Sprite from Bub | |||
</gallery> | |||
====Riverside Station==== | |||
<gallery widths="160"> | |||
PMTTYD Shine Sprite RiversideStationOutside.png|Mario next to the Shine Sprite in the sunset area of Riverside Station | |||
PMTTYD Shine Sprite RiversideStationStair.png|Mario next to the Shine Sprite over the stairs | |||
</gallery> | |||
====Poshley Heights==== | |||
<gallery widths="160"> | |||
PMTTYD Shine Sprite PoshleyHeights.png|Mario next to the Shine Sprite outside Poshley Sanctum in Poshley Heights | |||
</gallery> | |||
====Poshley Sanctum==== | |||
<gallery widths="160"> | |||
PMTTYD Shine Sprite PoshleySanctum.png|Mario next to the Shine Sprite on the left side of the inner room in Poshley Sanctum | |||
</gallery> | |||
====Fahr Outpost==== | |||
<gallery widths="160"> | |||
PMTTYD Shine Sprite FahrOutpostBehindVillage.png|Mario next to the Shine Sprite at the very right of Fahr Outpost's village | |||
PMTTYD Shine Sprite FahrOutpostBehindTree.png|Mario getting the Shine Sprite behind the first tree | |||
</gallery> | |||
===Hidden Blocks=== | |||
====Rogueport Sewers==== | |||
<gallery widths="160"> | |||
PMTTYDHiddenBlocks1.png|[[Rogueport Sewers]] | |||
PMTTYDHiddenBlocks1R.png|Rogueport Sewers | |||
</gallery> | |||
====Boggly Woods==== | |||
<gallery widths="160"> | |||
PMTTYDHiddenBlocks2.png|[[Boggly Woods]] | |||
PMTTYDHiddenBlocks2R.png|Boggly Woods | |||
</gallery> | |||
====The Great Tree==== | |||
<gallery widths="160"> | |||
PMTTYDHiddenBlocks3.png|[[The Great Tree]] | |||
PMTTYDHiddenBlocks3R.png|The Great Tree | |||
</gallery> | |||
====Glitzville==== | |||
<gallery widths="160"> | |||
PMTTYDHiddenBlocks4.png|[[Glitzville]] | |||
PMTTYDHiddenBlocks4R.png|Glitzville | |||
</gallery> | |||
====Twilight Trail==== | |||
<gallery widths="160"> | |||
PMTTYDHiddenBlocks5.png|[[Twilight Trail]] | |||
PMTTYDHiddenBlocks5R.png|Twilight Trail | |||
PMTTYDHiddenBlocks6.png|Twilight Trail | |||
PMTTYDHiddenBlocks6R.png|Twilight Trail | |||
</gallery> | |||
====Creepy Steeple==== | |||
<gallery widths="160"> | |||
PMTTYDHiddenBlocks7.png|[[Creepy Steeple]] | |||
PMTTYDHiddenBlocks7R.png|Creepy Steeple | |||
</gallery> | |||
====Keelhaul Key==== | |||
<gallery widths="160"> | |||
PMTTYDHiddenBlocks8.png|[[Keelhaul Key]] | |||
PMTTYDHiddenBlocks8R.png|Keelhaul Key | |||
PMTTYDHiddenBlocks9.png|Keelhaul Key | |||
PMTTYDHiddenBlocks9R.png|Keelhaul Key | |||
</gallery> | |||
====Pirate's Grotto==== | |||
<gallery widths="160"> | |||
PMTTYDHiddenBlocks10.png|[[Pirate's Grotto]] | |||
PMTTYDHiddenBlocks10R.png|Pirate's Grotto | |||
PMTTYDHiddenBlocks11.png|Pirate's Grotto | |||
PMTTYDHiddenBlocks11R.png|Pirate's Grotto | |||
</gallery> | |||
====Riverside Station==== | |||
<gallery widths="160"> | |||
PMTTYDHiddenBlocks12.png|[[Riverside Station]] | |||
PMTTYDHiddenBlocks12R.png|Riverside Station | |||
</gallery> | |||
====Fahr Outpost==== | |||
<gallery widths="160"> | |||
PMTTYDHiddenBlocks13.png|[[Fahr Outpost]] | |||
PMTTYDHiddenBlocks13R.png|Fahr Outpost | |||
</gallery> | |||
====Palace of Shadow==== | |||
<gallery widths="160"> | |||
PMTTYDHiddenBlocks14.png|[[Palace of Shadow]] | |||
PMTTYDHiddenBlocks14R.png|Palace of Shadow | |||
PMTTYDHiddenBlocks15.png|Palace of Shadow | |||
PMTTYDHiddenBlocks15R.png|Palace of Shadow | |||
</gallery> | </gallery> | ||
| Line 1,780: | Line 2,024: | ||
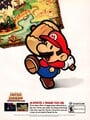
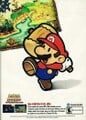
PMTTYD print ad NA.jpg|North American print ad | PMTTYD print ad NA.jpg|North American print ad | ||
PMTTYD print ad NA paper airplane.jpg|The opposite page of the North American print ad which can be made into a Mario paper airplane | PMTTYD print ad NA paper airplane.jpg|The opposite page of the North American print ad which can be made into a Mario paper airplane | ||
PMTTYD print ad MEX.jpg|Mexican print ad | |||
PMTTYD print ad MEX paper aeroplane.jpg|The opposite page of the Mexican print ad which can be made into a Mario paper aeroplane | |||
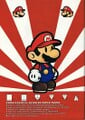
PaperMario2JPAdvert.jpg|Japanese print ad | PaperMario2JPAdvert.jpg|Japanese print ad | ||
PMTTYD Disc North America.png|North American game disc | PMTTYD Disc North America.png|North American game disc | ||
TTYDMemoryIcon.png|Memory card save data icon | TTYDMemoryIcon.png|Memory card save data icon | ||
Paper Mario The Thousand-Year Door Player's Guide.jpg|[[Nintendo Power]] Player's Guide | Paper Mario The Thousand-Year Door Player's Guide.jpg|[[Nintendo Power]] Player's Guide | ||
TTYD Web 1.jpg| | TTYD Web 1.jpg|Official American website | ||
TTYD Web 2.jpg | TTYD Web 2.jpg | ||
TTYD Web 3.jpg | TTYD Web 3.jpg | ||
Revision as of 15:07, April 29, 2024
This is a gallery of images for the game Paper Mario: The Thousand-Year Door. For images related to its remake, see here.
Logos
English logo

Spanish logo
French logo
Italian logo

German logo

Japanese logo
Preliminary logo (E3 2004)

In-game
English logo
Spanish logo
French logo
Italian logo

German logo

Japanese logo
Preliminary logo
Artwork
Main characters

Mario jumping

Mario jumping (early variant)
- PMTTYD Mario with Hammer.jpg
Mario with a Hammer
Mario swinging his hammer

Alternate artwork of Mario with the hammer

Mario with the Magical Map

Mario in an angry pose

Mario and Mini-Yoshi

Mario thinking

Curious Mario

Mario waving

Mario knocked out
Professor Frankly


Partners

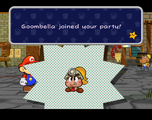
Goombella

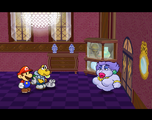
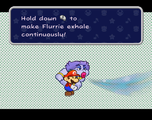
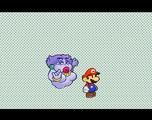
Flurrie

Vivian


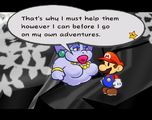
Bosses

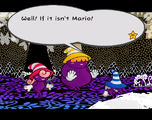
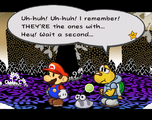
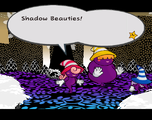
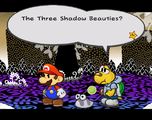
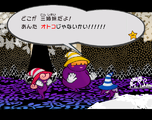
The Shadow Sirens


Enemies


Other characters

Blue Twilighter (purple)
Blue Twilighter (orange)
Blue Twilighter (green)
Shopkeeper
Shopkeeper's wife
Sailor Toad
Shipwrecked Sailor Toad
Lord Crump as Four Eyes


Items and objects

Group art


Japanese character bios


Sprites and models
Mario and partners

Mario idle

Mario equipped with the L Emblem

Mario equipped with the W Emblem

Mario equipped with the W Emblem and the L Emblem
Mario using his hammer

Mario guarding

8-bit sprites of Mario and his partners


Unused
Early sprite of Admiral Bobbery.

NPCs

Beldam in a hooded cloak

Black Chest Demon's face
Bob-omb from Fahr Outpost

Bub-ulb (pink)

Bub-ulb (blue)

Doogan (Yellow)

Doogan (Green)

Doogan (Orange)

Glitz Pit Reporter

Jolene in casual clothes
Koopa Troopa (NPC)

Koopa Troopa in the audience

Lahla/Peeka (localized versions)

Lakitu from the Glitz Pit

Toad (red)

Toad (blue)

Toad (green)

Toad girl (orange)

Toad girl (red)

Toad girl (green)

Toad girl (purple)

Toad child (red)

Toad child (light blue)

Toad child (green)

Toad child (chartreuse)

Toad innkeeper


Unused

Bub-ulb (green)

Bub-ulb (white with yellow center)

Bub-ulb (white with pink center)

Toad conductor (green)

Cheep Cheep businessman

Hamburger Spinia

Rainbow Spania


Enemies

Boo, with its tongue sticking out
Green Magikoopa with broom

Iron Cleft (Green)

Iron Cleft (Red)


Unused

Okooru

Red Buzzy Beetle
Red Parabuzzy
Red Spiky Parabuzzy
Hyper Bob-omb
Ultra Bob-omb

An enemy resembling Screamy.

A purple version of the Screamy-like enemy.


Bosses


Unused

Dark Atomic Boo

Early sprite of Bonetail's head.
An early design of a black Smorg.


Tattle Log
Iron Cleft (Red)
Iron Cleft (Green)


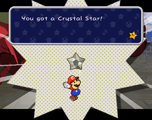
Crystal Stars


Equipment


Items and objects

Mario Poster (unused)
Important Things

Card Key

Card Key

Card Key

Elevator Key3

Palace Key (door)

Palace Key (pedestal)

Station Key (alt)

Steeple Key (basement)
1 - Elevator Key from Riverside Station
2 - Elevator Key from X-Naut Fortress, level 1
3 - Elevator Key from X-Naut Fortress, sublevel 1
Unused

Snow Bunny (unused)

Trade Off

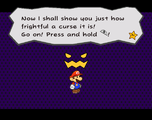
Koopa Curse

The unused coconut recipe.

An unused key with Hooktail's face embedded in it.

An unused item resembling a Fire Flower with a candy cane-like stick.

A pillow
Badges
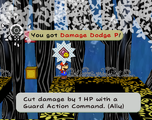
Unused

FP Drain P

Possible early version of a Damage Dodge

Possible early version of a Damage Dodge P

Super Charge

Super Charge P
Objects

Blue jump pad
Red jump pad

Lock
Sign

.png)
.png)


Blocks
Stone block (giant)

Yellow block (giant)


Status effects
Menus and Level up


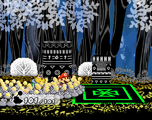
Introduction
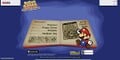
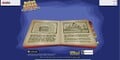
Book
Page 1
Page 2
Page 3
Page 4
Page 5


Chapter coins

Mario

Peach

Bowser

X-Naut insignia


Ending pictures

A Dark Koopatrol faces off against Rawk Hawk at the Glitz Pit.
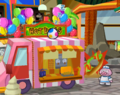
A mysterious egg sits atop the roof of a hog dog kiosk at Glitzville.
Mario witnesses pigs at Twilight Town.

A swarm of Boos surround the entrance hall of the Creepy Steeple.

Bands between Bowser and Lord Crump clash at Twilight Town.

Mario arrives at Poshley Heights.
Peach takes a bath at the X-Naut Fortress.
The Thousand-Year Doors opens up.


Screenshots
This section is under construction. Therefore, please excuse its informal appearance while it is being worked on. We hope to have it completed by finding screenshots elsewhere on the wiki.
Non-specific chapters
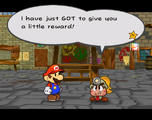
Princess Peach meeting with a mysterious merchant
Princess Peach receiving a gift
Title screen
Title screen (Japanese version)


X-Nauts vs. Koopa Troop
Mario and Bobbery on the lowest floor after defeating Bonetail.
A regular battle

The Game Over screen / Mario defeated
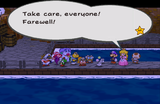
Farewell


Prologue
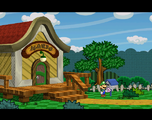
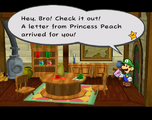
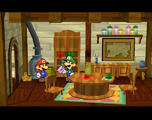
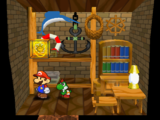
Inside the Mario Bros.' house
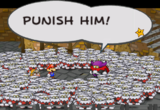
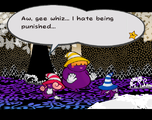
Lord Crump shouting "PUNISH HIM!"

Hooktail Castle in the sun

Diamond Star revealed


Chapter 1

Hooktail flying in the background
Use
 to Tattle
The bridge appearing
Mario interacting with the background.
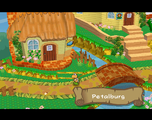
The introduction to Petalburg
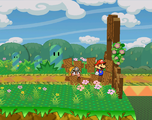
Mario talking to Kroop
The Koopa Troopa that is a fan of Peach
The duo entering the first 1000-year-old ruins
The ruins with Bald Clefts
The ruins with Bristles
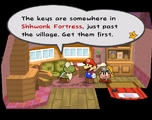
The entrance to Shhwonk Fortress
The above area.
Failed the quiz

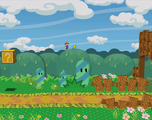
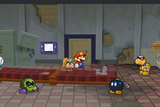
The sewers
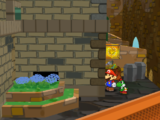
The underground area.
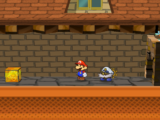
The Gold Fuzzy
With Koops, Mario can reach this Happy Heart badge
The inscription on the stone
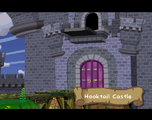
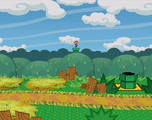
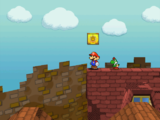
Hooktail Castle introduction
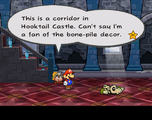
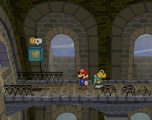
Goombella tattling the first corridor of Hooktail Castle
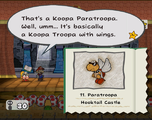
Goombella tattling a Koopa Paratroopa
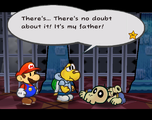
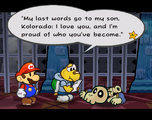
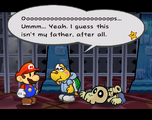
The dead body of Kolorado's father on the ground.
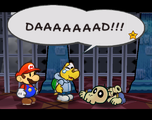
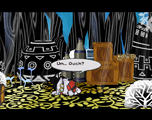
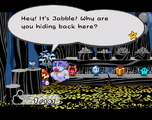
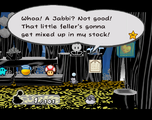
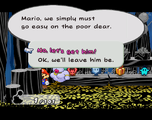
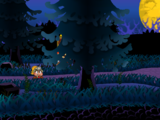
Koops mistakes the Dull Bones for his own father.
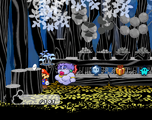
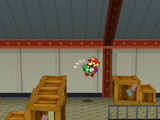
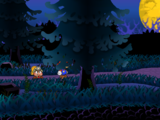
The Dull Bones swarm
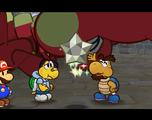
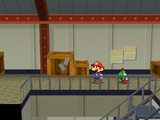
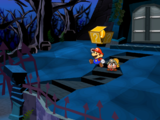
Mid-boss battle
The first key
The ! Switch and various blocks

The spiked ceiling is about to lower down.
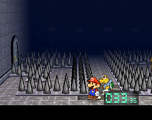
The spike room
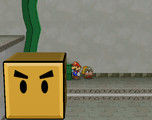
The Black Chest Demon explaining how to use Paper Mode

Mario slipping past the bars in Hooktail Castle.
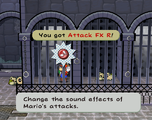
Mario obtains the Attack FX R badge, the key to defeat Hooktail.
The second key
Koops being shot at a switch


Encountering Ms. Mowz

Mario meets Ms. Mowz.
Mario gets kissed by Ms. Mowz.
The third key
Mario is unlocking the third castle door

Mario gets elevated up to the plane panel

Mario getting the Star Piece in the upper-north-east corner of the plane room
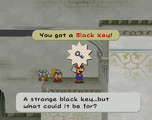
The fourth key

Mario and Koops are falling down the fourth area
Mario opened the fourth castle door
The bridge
Hooktail's lair
Mario and Koops encounter Hooktail
Hooktail threatens to devour the heroes.
Mario prepares to swing his hammer at Hooktail

Hooktail breathing her "stinky, fiery breath" at Goombella and Mario
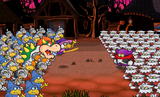
Hooktail gobbles the Toads in the audience and restores 10 HP.
Hooktail faints.
Hooktail defeated.
Hooktail spitting Koopley's shell out
Koopley


Post Chapter 1
Peach


Bowser


Pre-Chapter 2


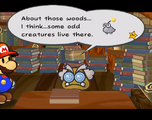
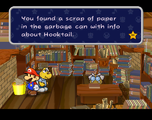
The garbage can is great for filling missed Tattle Log entries for one-time battles only.


Chapter 2
Out of the Warp Pipe


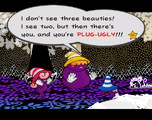
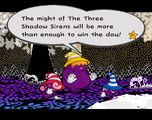
Shadow Sirens fight

Flurrie kisses Mario

Mario faints after being kissed
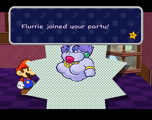
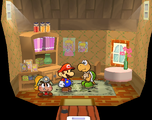
Flurrie first joins Mario at her home.
Flurrie commonly makes the ILY sign hand gesture when Mario succeeds at something
Flurrie using field move on a Dark Puff


Post Chapter 2
Peach


Bowser


Pre-Chapter 3


Chapter 3

Outside of the arena

The lobby
The ring
The hallway

The Storage Room
The Minor-League locker room
The Major-League locker room

The Champion's room

End-of-chapter storyline text


Chapter 4
The dungeon
The Crystal Star statue
The moving staircase
The unleashed Boos

The garden of Creepy Steeple
A cave
Doopliss's lair
The kitchen
The parrot room
The Boo hall


Post Chapter 4
Bowser

Chapter 5


Chapter 6


Post Chapter 6
Bowser

Chapter 7
Wild goose chase with General White
General White sleeping in his house at Fahr Outpost
Battle on the moon
Peach's holding quarters in X-Naut Fortress


Chapter 8


Places
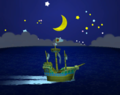
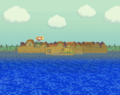
A nightscape view of the S.S. Flavion
Full view of the Riddle Tower


Shine Sprites
Hooktail Castle
The first Shine Sprite
Mario getting the Shine Sprite in the storeroom of Hooktail Castle.
Mario getting the Star Piece in the high platform after taking the purple block
Mario getting the Star Piece on the wall ledge after taking the big black and yellow block
Mario getting the Star Piece behind the windows in the third area.
Mario and Koops next to the last Shine Sprite on the fourth floor.


Rogueport Sewers
Mario next to the Shine Sprite above the left airplane panel before the Thousand-Year Door
Mario next to the Shine Sprite to the left of the west entrance of Rogueport Sewers
Mario next to the Shine Sprite in the warp area
Mario next to the Shine Sprite above the sea on the east of Rogueport Sewers
Mario next to the Shine Sprite in the secret room to the very right of Rogueport Sewers
Mario next to the Shine Sprite on the roof of the rightmost column in the center room of level 1 of Rogueport Sewers
Boggly Tree
Mario next to the Shine Sprite near the airplane panel
The Great Tree
Mario next to the Shine Sprite in the bubble room
Mario next to the Shine Sprite in the airplane room
Mario next to the Shine Sprite in the room below the Super Boots area
Mario next to the Shine Sprite above water
Glitzville
Rogueport
Mario next to the Shine Sprite in the back-east corner of the east Rogueport room
Mario next to the Shine Sprite on the roof of the north house in the east area of Rogueport
Mario next to the Shine Sprite in Bobbery's house
Mario next to the Shine Sprite in the backyard of the rightmost house in the west Rogueport
Mario next to the Shine Sprite after the wall to the left of the store in west Rogueport
Glitz Pitz
Mario next to the Shine Sprite on the second floor of Glitz Pit's storeroom
Twilight Trail
Mario next to the Shine Sprite in Twilight Trail behind the last tree
Creepy Steeple
Mario next to the Shine Sprite down the pipe outside Creepy Steeple
Mario next to the Shine Sprite in the treasure room
Mario next to the Shine Sprite halfway from the outdoor pipe to the inside of Creepy Steeple
Keelhaul Key
Mario next to the Shine Sprite to the left of the piranha room of Keelhaul Key
Mario next to the Shine Sprite behind the leaves of the tree to the right of the bridge
Pirate's Grotto
Mario next to the Shine Sprite near the entrance of the Pirate's Grotto
Mario next to the Shine Sprite above water
Mario next to the Shine Sprite in the storeroom with a ! switch
Mario next to the Shine Sprite above water in the Pirate's Grotto
Mario next to the Shine Sprite in the floating barrel room
Excess Express

Mario next to the Shine Sprite in Cabin 5 of Excess Express
Mario next to the Shine Sprite from Bub
Riverside Station
Mario next to the Shine Sprite in the sunset area of Riverside Station
Mario next to the Shine Sprite over the stairs
Poshley Heights
Mario next to the Shine Sprite outside Poshley Sanctum in Poshley Heights
Poshley Sanctum
Mario next to the Shine Sprite on the left side of the inner room in Poshley Sanctum
Fahr Outpost
Mario next to the Shine Sprite at the very right of Fahr Outpost's village
Mario getting the Shine Sprite behind the first tree
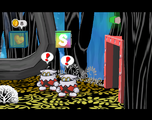
Hidden Blocks
Rogueport Sewers
Rogueport Sewers


Boggly Woods
Boggly Woods


The Great Tree
The Great Tree


Glitzville
Glitzville


Twilight Trail
Twilight Trail
Twilight Trail
Twilight Trail


Creepy Steeple
Creepy Steeple


Keelhaul Key
Keelhaul Key
Keelhaul Key
Keelhaul Key


Pirate's Grotto
Pirate's Grotto
Pirate's Grotto
Pirate's Grotto


Riverside Station
Riverside Station


Fahr Outpost
Fahr Outpost


Palace of Shadow
Palace of Shadow
Palace of Shadow
Palace of Shadow


Box art
North American box art (front)

North American box art (back)
North American box art (Best Seller)
North American box art (Player's Choice)

Canadian box art (Best Seller)
Canadian box art (Best Seller, alternate)
Canadian box art (Player's Choice)
Canadian box art (back)
European box art (front)
European box art (back)
Spanish box art
Italian box art
German box art
Australian box art
Japanese box art (front)
Japanese box art (back)


Instruction booklet covers
Canadian instruction booklet (front)
Canadian instruction booklet (back)


Miscellaneous
North American print ad
The opposite page of the North American print ad which can be made into a Mario paper airplane
Mexican print ad
The opposite page of the Mexican print ad which can be made into a Mario paper aeroplane
Japanese print ad
North American game disc

Memory card save data icon

Nintendo Power Player's Guide
Official American website


| Paper Mario: The Thousand-Year Door (GCN) / Paper Mario: The Thousand-Year Door (Switch) | ||
|---|---|---|
| Main characters | Admiral Bobbery • Flurrie • Goombella • Koops • Mario • Ms. Mowz • Princess Peach • Vivian • Yoshi Kid | |
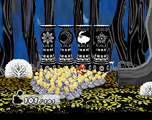
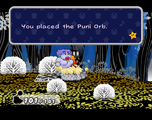
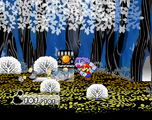
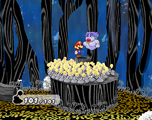
| Species | Bub-ulb • Business Bro • Craw • Crow • Doogan • Duplighost • Glitz Pit Security • Jabbi • Little Mouser • Luff • Nibbles • Para-bomb • Penguin • Pianta • Pig • Puni • Ratooey • Smorg • Toad • Twilighter • Yoshi | |
| Chapters | Prologue • Chapter 1 • Chapter 2 • Chapter 3 • Chapter 4 • Chapter 5 • Chapter 6 • Chapter 7 • Chapter 8 | |
| Crystal Stars | Diamond Star • Emerald Star • Gold Star • Ruby Star • Sapphire Star • Garnet Star • Crystal Star | |
| Bosses | Beldam • Blooper • Bowser • Doopliss • Gloomtail • Gold Fuzzy • Iron Adonis Twins • Kammy Koopa • Lord Crump • Marilyn • Rawk Hawk • Sir Grodus • Three Shadows • Vivian | |
| Chapter bosses | Cortez • Doopliss • Hooktail • Macho Grubba • Magnus von Grapple • Magnus von Grapple 2.0 • Shadow Queen • Smorg | |
| Optional bosses | Atomic Boo • Bonetail • Gus • Prince Musha • Whackaa | |
| Minor characters | Arfur • Audience • Bandy Andy • Battle Mastera • Billy • Blooey • Bob • Bob-omb Squad • Bobolink • Bomberto • Bootler • Bub • Bub-ulber • Businessman • Charlieton • Chef Shimi • Chestnut King • Chet Rippo • Chomp Country • Cleftor • Cranberry • Craw-Daddy • Creepy Steeple Boo • Darkly • Dazzle • Dead Bones • Destructors • Doe T. • Don Pianta • Dupree • Eddy the Mask • Eve • Excess Express conductor • Excess Express engineer • Excess Express waitress • Fahr Outpost mayor • Flavio • Flo • Four heroes • Francesca • Frankie • Fred • Fuzz • Garf • General White • Ghost T. • Glitzville reporter • Gloomer • Gob • Goldbob • Goom Goom • Goomba Bros. • Goomez • Goomfrey • Goomther • Goose • Grifty • Grubba • Hamma, Bamma, and Flare • Hamma Jamma • Hamma Jamma's father • Hamma Jamma's grandfather • Hand-It-Overs • Hayzee • Heff T. • Herb T. • Hizza • Ian Foomusa • Ishnail • Jabble • Jerry • Johnson • Jolene • King K • Kolorado's father • Koopie Koo • Koopley • Koopook • KP Koopas • Kroop • Lady Bow • Lahla • Laki • Larson • Lucky • Luigi • Lumpy • Magikoopa Masters • Maitre Delish • Master Crash • Mayor Dour • McGoomba • Merlee • Merlon • Merluvlee • Maude • Mind-Bogglers • Minister Crepe • Mousimilian • Mover • Mr. Hoggle • Niff T. • Nob • Old Man Skoo • Pa-Patch • Parakarry • Parrot • Peeka • Pennington • Petuni • Pianta syndicate • Pierre • Pine T. Jr. • Pine T. Sr. • Plenn T. • Podler • Podley • Poker Faces • Pokey Triplets • Porter • Prince Mush • Princess Eclair • Professor Frankly • Pungent • Pungry • Punio • Puniper • Puni elder • Punk Rocks • Rob • Robbo Thieves • Rocko • Ronnie • Scarlette • Screamy • Shellshock • Shellshockers • Sir Swoop • Spike Storm • Spiky Joe • Stewart • Swindell • Swob • Sylvia • TEC-XX • The Koopinator • Thriff T. • Tiny Spinies • Toad sailor • Toad sailor's brother • Toadette • Toadia • Toadsworth • Toce T. • Tony • Toodles • Torque • Traveling Sisters Three • Vinny • Whacka • Wings of Night • Wonky • Zess T. • Zip Toad | |
| Enemies | Bandit (Badge · Big) • Bill Blaster (Bombshell) • Blooper • Bob-omb (Bob-ulk · Bulky) • Boo (Atomic · Dark) • Bristle (Dark) • Bullet Bill (Bombshell) • Buzzy Beetle (Parabuzzy (Spiky) · Spike Top (Red)) • Chain-Chomp (Red) • Cleft (Bald (Hyper) · Hyper · Iron · Moon) • Crazee Dayzee (Amazy) • Dark Craw • Dry Bones (Dark · Dull · Red) • Ember (Lava Bubble · Phantom) • Fire Bar • Fuzzy (Green · Flower · Horde) • Goomba (Gloomba (Para · Spiky) · Hyper (Para · Spiky) · Para · Spiky) • Goomboarda • Hammer Bro (Boomerang · Fire) • Koopa Troopa (Dark (Para) · Koopatrol (Dark) · KP (Para) · Para · Shady (Para)) • Lakitu (Dark) • Magikoopa (Green · Red · White) • Pale Piranha (Frost · Piranha Plant · Putrid) • Pider (Arantula) • Pokey (Poison) • Ruff Puff (Dark · Ice · Poison) • Spinia (Spania · Spunia) • Spiny (Sky-Blue) • Swooper (Swampire · Swoopula) • Wizzerd (Dark · Elite) • X-Fist (Punch) • X-Naut (Elite · PhD · Platoon) • Yux (Grodus X · Mini · X-Yux (Mini) · Z-Yux (Mini)) | |
| Locations | Boggly Woods • Broadshroom • Circuit Break Island • Creepy Steeple • Deepdown Depot • Excess Express • Fahr Outpost • Flurrie's House • Fresh Juice Shop • Glitz Pit • Glitzville • Goomstar Temple • Great Tree • Grimble Forest • Hatesong Tower • Herb T.'s place • Hooktail Castle • Hot Dog Stand • Inn • Item Shop • Jazzafrazz Town • Keelhaul Key • Keelhaul Galleria • Lovely Howz of Badges • Mario Bros.' House • Moon • Netherworld • Niff T.'s shop • Northwinds Mart • Palace of Shadow • Palace of Shadow Tower • Path to Fahr Outpost • Path to Shhwonk Fortress • Petalburg • Petal Meadows • Pianta Parlor • Pirate's Grotto • Pit of 100 Trials • Podley's Place • Plumpbelly Village • Poshley Heights • Poshley Sanctum • Pudding Continent • Pungent's Great Tree Shop • Rapturous Ruins • Riverside Station • Rogueport • Rogueport Underground • Rumblebump Volcano • Sales Stall • Shhwonk Fortress • Souvenir shop • Strudel Continent • Toad Bros. Bazaar • Trouble Center • Twilight Shop • Twilight Town • Twilight Trail • Waffle Kingdom • Westside Goods • X-Naut Fortress | |
| Bowser levels | World 1 • World 2 • World 3 | |
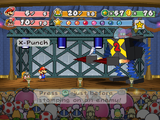
| Moves | Action Command • Appeal • Art Attack • Boat Mode • Bob-ombast • Body Slam • Bomb • Bomb Squad • Charge • Clock Out • Dodgy Fog • Earth Tremor • Fiery Jinx • First Strike • Flee • Gale Force • Ground Pound • Guard • Gulp • Headbonk • Hold Fast • Infatuate • Jump • Kiss Thief • Lip Lock • Love Slap • Mini-Egg • Multibonk • Paper Mode • Plane Mode • Power Lift • Power Shell • Rally Wink • Shade Fist • Shell Shield • Shell Slam • Shell Toss • Showstopper • Smooch • Spin Hammer • Spring Jump • Stampede • Stylish move • Superguard • Supernova • Sweet Feast • Sweet Treat • Tattle • Tease • Tube Mode • Veil | |
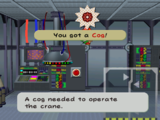
| Objects | Badge • Big Bob • Black chest • Black Skull • Blimp • Boat panel • Brick block • Candy Pop • Chomp Rock • Cog • Coin • Coin block • Coral • Crystal Ball • Elevator • Flagpole • Flower • Heart • Hidden block • Koopa Clown Car • Meat • Metal Block • Pianta token • Plane panel • Power-draining machine • Recovery block • S.S. Flavion • Save Block • Shine Block • Star Piece • Stone Block • Stone keys • Switch • Teleporter • The Thousand-Year Door • Treasure chest • Warp Pipe • X-Ship • Yellow Block | |
| Stats / statuses | Allergic • Badge Point • Burn • Charged • Confused • Danger • Defense • DEF-Up • Dizzy • Dodgy • Electrified • Fast • Flower Point • Frozen • Heart Point • Huge • Immobilized • Invisible • Payback • Peril • Poison • Power • POW-Down • POW-Up • Prohibited Command • Regeneration • Sleep • Slow • Soft • Star Point • Star Power • Tiny | |
| Miscellaneous | ? Block locations (Hidden) • 65th Trivia Quiz-Off • 66th Trivia Quiz-Off • Art Gallery • Badges • Bestiary • Boom-bassa-boom Festival • Bingo! • Enemy formations • Gallery (GameCube · Switch) • Glitches • Goldbobbington's • Goombsley University • Happy Lucky Lottery • Koopa Troop • Level up • Luigi Fan Club • Jazzafrazz Town Drama Slam • Mist • Mushroom Ball • On Golden Toad 2 • Parade • Pre-release and unused content • Quotes (By character: A–K · L–Z) • Recipe • Rogueport Direct Mail Service • Rogueport Restoration Committee • Selling prices • Shine Sprites • Shops • Sound Gallery • Staff (GameCube · Nintendo Switch) • Star Pieces • Star Point amounts • Stump Petuni • The Toad Warrior • Treasure chest locations • University of Goom • Unnamed NPCs • X-Nauts | |