Donkey Kong Adventure: Difference between revisions
m (→Story) |
m (No contractions) Tag: Manual revert |
||
| (39 intermediate revisions by 18 users not shown) | |||
| Line 2: | Line 2: | ||
[[File:M+R KB Donkey Kong Adventure logo.jpg|thumb]] | [[File:M+R KB Donkey Kong Adventure logo.jpg|thumb]] | ||
'''Donkey Kong Adventure''' is a story expansion for ''[[Mario + Rabbids Kingdom Battle]]'', included in ''Mario + Rabbids Kingdom Battle Gold Edition'' and available as add-on content that can be purchased from [[Nintendo eShop]] for other versions of the game. As its name suggests, it prominently features [[Donkey Kong]]. The expansion becomes available when the [[Top Banana]] level of the base game has been completed. The expansion follows Donkey Kong, [[Rabbid Peach]], [[Beep-0]], and [[Rabbid Cranky]] as they work to defeat [[Rabbid Kong]], who seeks revenge for his defeat in the main game, and has formed an army. It features exclusive enemies, weapons, collectibles, and worlds not available in the main game. Donkey Kong and Rabbid Cranky are also exclusively playable in Donkey Kong Adventure. | '''Donkey Kong Adventure''' is a story expansion for ''[[Mario + Rabbids Kingdom Battle]]'', included in ''Mario + Rabbids Kingdom Battle Gold Edition'' and available as add-on content that can be purchased from [[Nintendo eShop]] for other versions of the game. As its name suggests, it prominently features [[Donkey Kong]]. The expansion becomes available when the [[Top Banana]] level of the base game has been completed. The expansion follows Donkey Kong, [[Rabbid Peach]], [[Beep-0]], and [[Rabbid Cranky]] as they work to defeat [[Rabbid Kong]], who seeks revenge for his defeat in the main game, and has formed an army. It features exclusive enemies, weapons, collectibles, and worlds not available in the main game. Donkey Kong and Rabbid Cranky are also exclusively playable in Donkey Kong Adventure. | ||
==Story== | ==Story== | ||
The story begins just after the defeat of Rabbid Kong | The story begins just after the defeat of Rabbid Kong in [[Ancient Gardens]]. [[Bowser Jr.]] and [[Spawny]] are seen spying on [[Peach's Castle]], though they also see [[Rabbid Kong]] near the [[Time Washing Machine]]. He later touches it after being encouraged by some Rabbids, but he gets electrocuted and causes it to malfunction. Rabbid Kong, as well as some various junk and Rabbids, are sucked into the machine, which stresses Spawny out, causing him to fire a ray from the [[SupaMerge]] headset into the machine. Bowser Jr. and Spawny escape just as [[Mario]], [[Luigi]], Rabbid Peach, and [[Rabbid Luigi]] arrive. Rabbid Peach later goes over to the machine to plug in her phone, but she gets sucked into the machine along with Beep-0, who was trying to get her away from the machine. | ||
In an alternate dimension, the Time Washing Machine falls onto an unknown island. During the fall, Rabbid Peach and Beep-0 fly off and land at a small area of [[Banana Lagoon]]. There, the two wake up to find themselves on the unknown island. They attempt to talk to some locals, who turn out to be [[Ziggy|Tropical Ziggies]] who attack them. Rabbid Peach left her Blasters back at Peach's Castle to roast mushrooms, so she cannot fight back. Suddenly, Donkey Kong appears, causing the Ziggies to flee. Alongside him is [[Rabbid Cranky]], an elderly and grouchy Rabbid dressed as [[Cranky Kong]]. The three defeat the Ziggies after Rabbid Cranky gives Rabbid Peach a new Blaster. | |||
While exploring, they come across parts of the Time Washing Machine, only for them to be taken by [[Collector (Rabbid)|Collector]]s. They also face [[Smuggler]]s that carry some Bad Bananas. After collecting a few parts, Rabbid Cranky leads the team to Rabbid Kong, who notices Rabbid Peach and remembers their battle in the main game, enraging him and causing him to punch her into the ground. This also angers Donkey Kong and Rabbid Cranky, who then proceed to attack him. Rabbid Kong then commands his minions to attack them, and after Rabbid Peach comes back out of the ground, the trio proceed to fight Rabbid Kong's minions. | |||
After | After that, Rabbid Cranky explains how the main part of the Time Washing Machine ended up at Rabbid Kong's fort and powered him up. The gang then head off to find the two keys to reach his hideout. They also learn that the Time Washing Machine was being used to create [[Bad Banana]]s, which can power up Rabbids and are the source of Rabbid Kong's new powers. Each one of the keys is located at a different path, with one of the paths leading to a broken bridge to the [[Reef]]. They then battle a big Rabbid with a key known as [[Side Eye]], who is tricked into fighting them. After defeating Side Eye, it is revealed that he is one of the Rabbids that were with Rabbid Kong at the start of the story. | ||
After obtaining the | After obtaining the first key, they free some Rabbids from the [[Megabug]]'s control, and they fix the bridge to the [[Reef]]. They soon came across [[Finn]], another big Rabbid who owns the second key. After defeating him, it is revealed that Finn was the other Rabbid who was with Rabbid Kong at the start of the story. | ||
After obtaining the second key, they unlock the gate and storm into the [[Jungle (Mario + Rabbids Kingdom Battle)|Jungle]], and Rabbid Kong, who was spying on them, throws ink-filled coconuts at them throughout the level. They soon encounter [[Mega Rabbid Kong]] and fight him. After destroying the Megabug Pool, Rabbid Kong escapes as it explodes and the team falls into the [[Dungeon (world)|Dungeon]]. The trio escape from the Dungeon, only with Mega Rabbid Kong waiting for them for one last battle. The three use a golden [[Blast Barrel]] to destroy his hammer, and he spits out his Bad Banana. Rabbid Peach then convinces him to bring the main part of the Time Washing Machine back to Banana Lagoon to send her and Beep-0 back to Peach's Castle. At the end of the game, the team hugs a sad Rabbid Kong, which makes him happy again. | |||
==Heroes== | ==Heroes== | ||
In Donkey Kong Adventure, only Rabbid Peach, Donkey Kong, and Rabbid Cranky are playable. While Rabbid Peach is only slightly altered from her main game version, Donkey Kong uses almost all new abilities and Rabbid Cranky combines and renames existing abilities. | In Donkey Kong Adventure, only Rabbid Peach, Donkey Kong, and Rabbid Cranky are playable. While Rabbid Peach is only slightly altered from her main game version, Donkey Kong uses almost all new abilities and Rabbid Cranky combines and renames existing abilities. | ||
{|class="wikitable" style="text-align:center; margin:auto" | {|class="wikitable" style="text-align:center; margin:auto" | ||
!style="background: | !style="background:yellow" colspan="3"|{{color-link|Donkey Kong|red}} | ||
!style="background:HOTPINK" colspan="3"|{{color-link|Rabbid Peach|white}} | !style="background:HOTPINK" colspan="3"|{{color-link|Rabbid Peach|white}} | ||
!style="background: | !style="background:gray" colspan="3"|{{color-link|Rabbid Cranky|white}} | ||
|- | |- | ||
|style="background: | |style="background:LIGHTYELLOW" colspan="3"|[[File:MRKB Donkey Kong Stats.png|200px]] | ||
|style="background:PINK" colspan="3"|[[File:RabbidPeachSentry.png|200px]] | |style="background:PINK" colspan="3"|[[File:RabbidPeachSentry.png|200px]] | ||
|style="background: | |style="background:LIGHTGRAY" colspan="3"|[[File:MRKB Rabbid Cranky Stats.png|200px]] | ||
|- | |- | ||
|style="background: | |style="background:LIGHTYELLOW" colspan="3"|''He's the Ziggy crushin', high jumpin', cover point luggin', king of the ground-pondin' apes who never backs down when his friends (or his banana supply) are endangered.'' | ||
|style="background:PINK" colspan="3"|''A proficient healer and damage-denier, when this defense-oriented prima donna takes the battlefield she keeps one eye on the enemy, and one on Mario.'' | |style="background:PINK" colspan="3"|''A proficient healer and damage-denier, when this defense-oriented prima donna takes the battlefield she keeps one eye on the enemy, and one on Mario.'' | ||
|style="background: | |style="background:LIGHTGRAY" colspan="3"|''The irascible Rabbid Cranky may not be as fast as he used to be, but he doesn't need to be when he has a Boombow and short-ranged Barrel Bolts as explosive as his temper.'' | ||
|- | |- | ||
|style="background: | |style="background:LIGHTYELLOW" colspan="3"|'''Health Points'''<br>280 | ||
|style="background:PINK" colspan="3"|'''Health Points'''<br>220 | |style="background:PINK" colspan="3"|'''Health Points'''<br>220 | ||
|style="background: | |style="background:LIGHTGRAY" colspan="3"|'''Health Points'''<br>200 | ||
|- | |- | ||
|style="background: | |style="background:LIGHTYELLOW" colspan="3"|'''Area of Movement'''<br>6 Cells | ||
|style="background:PINK" colspan="3"|'''Area of Movement'''<br>6 Cells | |style="background:PINK" colspan="3"|'''Area of Movement'''<br>6 Cells | ||
|style="background: | |style="background:LIGHTGRAY" colspan="3"|'''Area of Movement'''<br>6 Cells | ||
|- | |- | ||
|style="background: | |style="background:LIGHTYELLOW" colspan="3"|'''Pipe Exit Range'''<br>3 Cells | ||
|style="background:PINK" colspan="3"|'''Pipe Exit Range'''<br>3 Cells | |style="background:PINK" colspan="3"|'''Pipe Exit Range'''<br>3 Cells | ||
|style="background: | |style="background:LIGHTGRAY" colspan="3"|'''Pipe Exit Range'''<br>3 Cells | ||
|- | |- | ||
|style="background: | |style="background:LIGHTYELLOW;vertical-align: top" colspan="3"| | ||
{| class="mw-collapsible mw-collapsed" cellspacing=0 cellpadding=4 style=width:100% | {| class="mw-collapsible mw-collapsed" cellspacing=0 cellpadding=4 style=width:100% | ||
|'''Grab & Launch'''<br>20 Damage | |'''Grab & Launch'''<br>20 Damage | ||
| Line 63: | Line 54: | ||
|<hr><small>Allows Rabbid Peach to '''DASH''' more than one enemy while on the move.<hr>'''''Damage'''''<br>''30''</small> | |<hr><small>Allows Rabbid Peach to '''DASH''' more than one enemy while on the move.<hr>'''''Damage'''''<br>''30''</small> | ||
|} | |} | ||
|style="background: | |style="background:LIGHTGRAY;vertical-align: top" colspan="3"| | ||
{| class="mw-collapsible mw-collapsed" cellspacing=0 cellpadding=4 style=width:100% | {| class="mw-collapsible mw-collapsed" cellspacing=0 cellpadding=4 style=width:100% | ||
|'''Dash'''<br>20 Damage | |'''Dash'''<br>20 Damage | ||
| Line 70: | Line 61: | ||
|} | |} | ||
|- | |- | ||
|style="background: | |style="background:LIGHTYELLOW;vertical-align: top" colspan="3"| | ||
{| class="mw-collapsible mw-collapsed" cellspacing=0 cellpadding=4 style=width:100% | {| class="mw-collapsible mw-collapsed" cellspacing=0 cellpadding=4 style=width:100% | ||
|'''Throw Range'''<br>6 Cells | |'''Throw Range'''<br>6 Cells | ||
| Line 77: | Line 68: | ||
|} | |} | ||
|style="background:PINK" colspan="3"|'''Team Jump'''<br>6 Cells | |style="background:PINK" colspan="3"|'''Team Jump'''<br>6 Cells | ||
|style="background: | |style="background:LIGHTGRAY;vertical-align: top" colspan="3"| | ||
{| class="mw-collapsible mw-collapsed" cellspacing=0 cellpadding=4 style=width:100% | {| class="mw-collapsible mw-collapsed" cellspacing=0 cellpadding=4 style=width:100% | ||
|'''Grump Jump'''<br>6 Cells | |'''Grump Jump'''<br>6 Cells | ||
| Line 84: | Line 75: | ||
|} | |} | ||
|- | |- | ||
|style="background: | |style="background:LIGHTYELLOW;vertical-align: top" colspan="3"| | ||
{| class="mw-collapsible mw-collapsed" cellspacing=0 cellpadding=4 style=width:100% | {| class="mw-collapsible mw-collapsed" cellspacing=0 cellpadding=4 style=width:100% | ||
|'''Primary Weapon'''<br>Bwananarang | |'''Primary Weapon'''<br>Bwananarang | ||
| Line 106: | Line 97: | ||
|<small><hr>Never stops chasing its target, it will detonate when it gets close. Can be destroyed.<hr>''<u>Panoramic Pillager</u>''<br>'''''Hit Damage'''''<br>''30-40''<br>'''''Honey Damage'''''<br>''52''<br>'''''Honey Chance'''''<br>''30%''<br>'''''Long Range'''''<br>''15 Cells''<br>'''''Cover Damage'''''<br>''LOW''<br>'''''Cooldown'''''<br>''1 Turn''<br>'''''Area of Damage'''''<br>''1 Cell''<br>'''''Sentry Health Points'''''<br>''60''<br>'''''Sentry Move Range'''''<br>''6 Cells''</small> | |<small><hr>Never stops chasing its target, it will detonate when it gets close. Can be destroyed.<hr>''<u>Panoramic Pillager</u>''<br>'''''Hit Damage'''''<br>''30-40''<br>'''''Honey Damage'''''<br>''52''<br>'''''Honey Chance'''''<br>''30%''<br>'''''Long Range'''''<br>''15 Cells''<br>'''''Cover Damage'''''<br>''LOW''<br>'''''Cooldown'''''<br>''1 Turn''<br>'''''Area of Damage'''''<br>''1 Cell''<br>'''''Sentry Health Points'''''<br>''60''<br>'''''Sentry Move Range'''''<br>''6 Cells''</small> | ||
|} | |} | ||
|style="background: | |style="background:LIGHTGRAY;vertical-align: top" colspan="3"| | ||
{| class="mw-collapsible mw-collapsed" cellspacing=0 cellpadding=4 style=width:100% | {| class="mw-collapsible mw-collapsed" cellspacing=0 cellpadding=4 style=width:100% | ||
|'''Primary Weapon'''<br>Boombow | |'''Primary Weapon'''<br>Boombow | ||
| Line 118: | Line 109: | ||
|} | |} | ||
|- | |- | ||
|style="background: | |style="background:LIGHTYELLOW;vertical-align: top" colspan="3"| | ||
{| class="mw-collapsible mw-collapsed" cellspacing=0 cellpadding=4 style=width:100% | {| class="mw-collapsible mw-collapsed" cellspacing=0 cellpadding=4 style=width:100% | ||
|'''Primary Technique'''<br>Hairy Eye | |'''Primary Technique'''<br>Hairy Eye | ||
| Line 141: | Line 132: | ||
|<small><hr>Restores health points to all Heroes in range.<hr>'''''Cooldown'''''<br>''3 Turns''<br>'''''Technique Range'''''<br>''6 Cells''<br>'''''HP Bonus'''''<br>''30%''</small> | |<small><hr>Restores health points to all Heroes in range.<hr>'''''Cooldown'''''<br>''3 Turns''<br>'''''Technique Range'''''<br>''6 Cells''<br>'''''HP Bonus'''''<br>''30%''</small> | ||
|} | |} | ||
|style="background: | |style="background:LIGHTGRAY;vertical-align: top" colspan="3"| | ||
{| class="mw-collapsible mw-collapsed" cellspacing=0 cellpadding=4 style=width:100% | {| class="mw-collapsible mw-collapsed" cellspacing=0 cellpadding=4 style=width:100% | ||
|'''Primary Technique'''<br>Stink Eye | |'''Primary Technique'''<br>Stink Eye | ||
| Line 154: | Line 145: | ||
|} | |} | ||
|} | |} | ||
<!--===Skill Trees=== | <!--===Skill Trees=== | ||
==Enemies== | ==Enemies== | ||
==Items and objects== | ==Items and objects== | ||
| Line 165: | Line 154: | ||
==Enemies== | ==Enemies== | ||
{{more images|section=y|Fill the enemies that currently have a No Image placeholder}} | |||
{{:Mario + Rabbids Kingdom Battle bestiary|transcludesection=Tropical Ziggy|align=horizontal}} | |||
{{:Mario + Rabbids Kingdom Battle bestiary|transcludesection=Tropical Hopper|align=horizontal}} | |||
{{:Mario + Rabbids Kingdom Battle bestiary|transcludesection=Tropical Smasher|align=horizontal}} | |||
{{:Mario + Rabbids Kingdom Battle bestiary|transcludesection=Tropical Collector|align=horizontal}} | |||
{{:Mario + Rabbids Kingdom Battle bestiary|transcludesection=Tropical Smuggler|align=horizontal}} | |||
{{:Mario + Rabbids Kingdom Battle bestiary|transcludesection=Finn|align=horizontal}} | |||
{{:Mario + Rabbids Kingdom Battle bestiary|transcludesection=Side Eye|align=horizontal}} | |||
{{:Mario + Rabbids Kingdom Battle bestiary|transcludesection=Tropical Summoner|align=horizontal}} | |||
<gallery> | |||
Tropical Buckler portrait.jpg|[[Buckler|Tropical Buckler]] | |||
Mega_Rabbid_Kong_MRKB_DK_DLC.png|[[Mega Rabbid Kong]] | |||
</gallery> | |||
==Worlds== | |||
{| class="wikitable" | |||
|- | |||
! [[Banana Lagoon]] | |||
! [[Reef]] | |||
! [[Jungle_(Mario + Rabbids Kingdom Battle)|Jungle]] | |||
! [[Dungeon (world)|Dungeon]] | |||
|- | |||
|[[Barrel of Rabbids]] | |||
|[[Spitting Image]] | |||
|[[Coconut Shunt]] | |||
|[[House of Bounce]] | |||
|- | |||
|[[Purloined Parts]] | |||
|[[Smuggler's Blues]] | |||
|[[Kidnapped Components]] | |||
|[[Com-Bust-ables]] | |||
|- | |||
|[[Revenge of Rabbid Kong]] | |||
|[[Filched Fragments]] | |||
|[[Supply Deny]] | |||
|[[Deity Hostility]] | |||
|- | |||
|[[Bananas Gone Bad]] | |||
|[[Reef Chief]] | |||
|[[Bad Banana Bonanza]] | |||
|[[When Kongs Collide]] | |||
|- | |||
|[[The Honey Bombers]] | |||
| | |||
|[[Torch Song for Rabbid Kong]] | |||
| | |||
|- | |||
|[[Standof-Fish]] | |||
| | |||
| | |||
| | |||
|} | |||
==References to other games== | ==References to other games== | ||
| Line 181: | Line 212: | ||
*''[[Donkey Kong Country Returns]]'': Just before the heroes fight Rabbid Kong for the first time, Donkey Kong attacks him like he attacks bosses at the end of boss battles from this game. | *''[[Donkey Kong Country Returns]]'': Just before the heroes fight Rabbid Kong for the first time, Donkey Kong attacks him like he attacks bosses at the end of boss battles from this game. | ||
==Gallery== | |||
== | <gallery heights=108px widths=192px> | ||
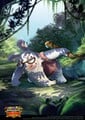
== | MRKB Donkey Kong Adventure Promotional Artwork.jpg|Promotional artwork | ||
</gallery> | |||
===Official environment, prop, and material renders=== | |||
<gallery heights=125px widths=192px> | |||
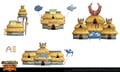
Silva Diego MRKB-DKA enviro01.jpg | |||
Silva Diego MRKB-DKA enviro02.jpg | |||
Silva Diego MRKB-DKA enviro03.jpg | |||
Silva Diego MRKB-DKA enviro04.jpg | |||
Silva Diego MRKB-DKA enviro05.jpg | |||
Silva Diego MRKB-DKA enviro06.jpg | |||
Silva Diego MRKB-DKA enviro07.jpg | |||
Silva Diego MRKB-DKA enviro08.jpg | |||
Silva Diego MRKB-DKA enviro09.jpg | |||
Silva Diego MRKB-DKA enviro10.jpg | |||
Silva Diego MRKB-DKA enviro11.jpg | |||
Silva Diego MRKB-DKA enviro12.jpg | |||
Silva Diego MRKB-DKA enviro13.jpg | |||
Silva Diego MRKB-DKA enviro14.jpg | |||
Silva Diego MRKB-DKA enviro15.jpg | |||
Silva Diego MRKB-DKA enviro16.jpg | |||
Silva Diego MRKB-DKA enviro17.jpg | |||
Silva Diego MRKB-DKA enviro18.jpg | |||
Ditrani Salvatore MRKB-DKA enviro1.jpg | |||
Ditrani Salvatore MRKB-DKA enviro2.jpg | |||
Ditrani Salvatore MRKB-DKA enviro3.jpg | |||
Ditrani Salvatore MRKB-DKA enviro4.jpg | |||
Ditrani Salvatore MRKB-DKA enviro5.jpg | |||
Ditrani Salvatore MRKB-DKA enviro6.jpg | |||
Ditrani Salvatore MRKB-DKA enviro7.jpg | |||
Ditrani Salvatore MRKB-DKA enviro8.jpg | |||
Ditrani Salvatore MRKB-DKA enviro9.jpg | |||
Ditrani Salvatore MRKB-DKA enviro10.jpg | |||
Ditrani Salvatore MRKB-DKA enviro11.jpg | |||
Ditrani Salvatore MRKB-DKA enviro12.jpg | |||
Ditrani Salvatore MRKB-DKA enviro13.jpg | |||
Ditrani Salvatore MRKB-DKA enviro14.jpg | |||
Ditrani Salvatore MRKB-DKA enviro15.jpg | |||
Ditrani Salvatore MRKB-DKA enviro16.jpg | |||
</gallery> | |||
===Concept art=== | |||
<gallery> | |||
Pochet Fabio MRKB DKA concept art Banana Lagoon b.jpg|"Treasure Octopus" | |||
Pochet Fabio MRKB DKA concept art Banana Lagoon a.jpg | |||
Pochet Fabio MRKB DKA concept art Banana Lagoon c.jpg|[[Banana Lagoon]] huts | |||
Pochet Fabio MRKB DKA concept art Banana Lagoon d.jpg|Hut designs | |||
Pochet Fabio MRKB DKA concept art Banana Lagoon e.jpg | |||
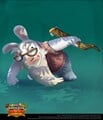
Pochet Fabio MRKB DKA concept art Rabbid Cranky a.jpg|Rabbid Cranky concept art | |||
Pochet Fabio MRKB DKA concept art Rabbid Cranky b.jpg | |||
Pochet Fabio MRKB DKA concept art Rabbid Cranky c.jpg | |||
Pochet Fabio MRKB DKA concept art Rabbid Cranky d.jpg | |||
Pochet Fabio MRKB DKA concept art Rabbid Cranky e.jpg|Rabbid Cranky expression sheet | |||
</gallery> | |||
{{M+RKB}} | {{M+RKB}} | ||
[[Category:Mario + Rabbids Kingdom Battle]] | [[Category:Mario + Rabbids Kingdom Battle]] | ||
[[Category:Downloadable content]] | [[Category:Downloadable content]] | ||
Latest revision as of 07:55, March 18, 2024
This article is under construction. Therefore, please excuse its informal appearance while it is being worked on. We hope to have it completed as soon as possible.
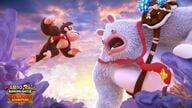
Donkey Kong Adventure is a story expansion for Mario + Rabbids Kingdom Battle, included in Mario + Rabbids Kingdom Battle Gold Edition and available as add-on content that can be purchased from Nintendo eShop for other versions of the game. As its name suggests, it prominently features Donkey Kong. The expansion becomes available when the Top Banana level of the base game has been completed. The expansion follows Donkey Kong, Rabbid Peach, Beep-0, and Rabbid Cranky as they work to defeat Rabbid Kong, who seeks revenge for his defeat in the main game, and has formed an army. It features exclusive enemies, weapons, collectibles, and worlds not available in the main game. Donkey Kong and Rabbid Cranky are also exclusively playable in Donkey Kong Adventure.
Story[edit]
The story begins just after the defeat of Rabbid Kong in Ancient Gardens. Bowser Jr. and Spawny are seen spying on Peach's Castle, though they also see Rabbid Kong near the Time Washing Machine. He later touches it after being encouraged by some Rabbids, but he gets electrocuted and causes it to malfunction. Rabbid Kong, as well as some various junk and Rabbids, are sucked into the machine, which stresses Spawny out, causing him to fire a ray from the SupaMerge headset into the machine. Bowser Jr. and Spawny escape just as Mario, Luigi, Rabbid Peach, and Rabbid Luigi arrive. Rabbid Peach later goes over to the machine to plug in her phone, but she gets sucked into the machine along with Beep-0, who was trying to get her away from the machine.
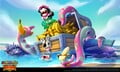
In an alternate dimension, the Time Washing Machine falls onto an unknown island. During the fall, Rabbid Peach and Beep-0 fly off and land at a small area of Banana Lagoon. There, the two wake up to find themselves on the unknown island. They attempt to talk to some locals, who turn out to be Tropical Ziggies who attack them. Rabbid Peach left her Blasters back at Peach's Castle to roast mushrooms, so she cannot fight back. Suddenly, Donkey Kong appears, causing the Ziggies to flee. Alongside him is Rabbid Cranky, an elderly and grouchy Rabbid dressed as Cranky Kong. The three defeat the Ziggies after Rabbid Cranky gives Rabbid Peach a new Blaster.
While exploring, they come across parts of the Time Washing Machine, only for them to be taken by Collectors. They also face Smugglers that carry some Bad Bananas. After collecting a few parts, Rabbid Cranky leads the team to Rabbid Kong, who notices Rabbid Peach and remembers their battle in the main game, enraging him and causing him to punch her into the ground. This also angers Donkey Kong and Rabbid Cranky, who then proceed to attack him. Rabbid Kong then commands his minions to attack them, and after Rabbid Peach comes back out of the ground, the trio proceed to fight Rabbid Kong's minions.
After that, Rabbid Cranky explains how the main part of the Time Washing Machine ended up at Rabbid Kong's fort and powered him up. The gang then head off to find the two keys to reach his hideout. They also learn that the Time Washing Machine was being used to create Bad Bananas, which can power up Rabbids and are the source of Rabbid Kong's new powers. Each one of the keys is located at a different path, with one of the paths leading to a broken bridge to the Reef. They then battle a big Rabbid with a key known as Side Eye, who is tricked into fighting them. After defeating Side Eye, it is revealed that he is one of the Rabbids that were with Rabbid Kong at the start of the story.
After obtaining the first key, they free some Rabbids from the Megabug's control, and they fix the bridge to the Reef. They soon came across Finn, another big Rabbid who owns the second key. After defeating him, it is revealed that Finn was the other Rabbid who was with Rabbid Kong at the start of the story.
After obtaining the second key, they unlock the gate and storm into the Jungle, and Rabbid Kong, who was spying on them, throws ink-filled coconuts at them throughout the level. They soon encounter Mega Rabbid Kong and fight him. After destroying the Megabug Pool, Rabbid Kong escapes as it explodes and the team falls into the Dungeon. The trio escape from the Dungeon, only with Mega Rabbid Kong waiting for them for one last battle. The three use a golden Blast Barrel to destroy his hammer, and he spits out his Bad Banana. Rabbid Peach then convinces him to bring the main part of the Time Washing Machine back to Banana Lagoon to send her and Beep-0 back to Peach's Castle. At the end of the game, the team hugs a sad Rabbid Kong, which makes him happy again.
Heroes[edit]
In Donkey Kong Adventure, only Rabbid Peach, Donkey Kong, and Rabbid Cranky are playable. While Rabbid Peach is only slightly altered from her main game version, Donkey Kong uses almost all new abilities and Rabbid Cranky combines and renames existing abilities.
| Donkey Kong | Rabbid Peach | Rabbid Cranky | ||||||||||||||||||
|---|---|---|---|---|---|---|---|---|---|---|---|---|---|---|---|---|---|---|---|---|

|

|

| ||||||||||||||||||
| He's the Ziggy crushin', high jumpin', cover point luggin', king of the ground-pondin' apes who never backs down when his friends (or his banana supply) are endangered. | A proficient healer and damage-denier, when this defense-oriented prima donna takes the battlefield she keeps one eye on the enemy, and one on Mario. | The irascible Rabbid Cranky may not be as fast as he used to be, but he doesn't need to be when he has a Boombow and short-ranged Barrel Bolts as explosive as his temper. | ||||||||||||||||||
| Health Points 280 |
Health Points 220 |
Health Points 200 | ||||||||||||||||||
| Area of Movement 6 Cells |
Area of Movement 6 Cells |
Area of Movement 6 Cells | ||||||||||||||||||
| Pipe Exit Range 3 Cells |
Pipe Exit Range 3 Cells |
Pipe Exit Range 3 Cells | ||||||||||||||||||
|
|
| ||||||||||||||||||
|
Team Jump 6 Cells |
| ||||||||||||||||||
|
|
| ||||||||||||||||||
|
|
| ||||||||||||||||||
Enemies[edit]
It has been requested that more images be uploaded for this section. Remove this notice only after the additional image(s) have been added. Reason: Fill the enemies that currently have a No Image placeholder
| Mario + Rabbids Kingdom Battle enemy | ||||||
|---|---|---|---|---|---|---|
| Tropical Ziggy | ||||||

|
Health Points | 80 | Team Jump | None | Double Dash | 20 DMG |
| Area of Movement | 6 Cells | Primary Weapon | Blaster | Secondary Weapon | ||
| 25 DMG | None | |||||
| Pipe Exit Range | 3 Cells | Primary Technique | Villain Sight | Secondary Technique | ||
| 25 DMG | None | |||||
| Chase Range | None | Tertiary Technique | Dashing Ne'er-do-wells! | |||
| None | ||||||
| Mario + Rabbids Kingdom Battle enemy | ||||||
|---|---|---|---|---|---|---|
| Tropical Hopper | ||||||

|
Health Points | 110 | Double Jump (Vamp) | 8 Cells | Dash | None |
| Area of Movement | 6 Cells | Primary Weapon | Blaster | Secondary Weapon | ||
| 30 DMG | None | |||||
| Pipe Exit Range | 3 Cells | Primary Technique | Shield | Secondary Technique | ||
| -100% DMG | None | |||||
| Chase Range | None | Tertiary Technique | Team Jumping Jerks! | |||
| None | ||||||
| Mario + Rabbids Kingdom Battle enemy | ||||||
|---|---|---|---|---|---|---|
| Tropical Smasher | ||||||

|
Health Points | 180 | Team Jump | None | Dash | None |
| Area of Movement | 4 Cells | Primary Weapon | Melee | Secondary Weapon | ||
| 60 DMG | None | |||||
| Pipe Exit Range | 2 Cells | Primary Technique | Weaken | Secondary Technique | ||
| -50% DMG | None | |||||
| Chase Range | 4 Cells | Tertiary Technique | Pinheads in Pursuit! | |||
| None | ||||||
| Mario + Rabbids Kingdom Battle enemy | ||||||
|---|---|---|---|---|---|---|
| Tropical Collector | ||||||

|
Health Points | 130 | Team Jump | None | Dash | None |
| Area of Movement | 25 Cells | Primary Weapon | Secondary Weapon | |||
| None | None | |||||
| Pipe Exit Range | 10 Cells | Primary Technique | Secondary Technique | |||
| None | None | |||||
| Chase Range | None | Tertiary Technique | Compulsive Curators! | |||
| None | ||||||
| Mario + Rabbids Kingdom Battle enemy | ||||||
|---|---|---|---|---|---|---|
| Tropical Smuggler | ||||||

|
Health Points | 180 | Team Jump | None | Dash | None |
| Area of Movement | 4 Cells | Primary Weapon | Melee | Secondary Weapon | ||
| 10 DMG | None | |||||
| Pipe Exit Range | 2 Cells | Primary Technique | Secondary Technique | |||
| None | None | |||||
| Chase Range | 2 Cells | Tertiary Technique | Banana Lovin' Bootleggers! | |||
| None | ||||||
| Mario + Rabbids Kingdom Battle enemy | ||||||
|---|---|---|---|---|---|---|
| Finn | ||||||

|
Health Points | 600 | Team Jump | None | Shark Rage | 20 DMG |
| Area of Movement | 38 Cells | Primary Weapon | Octo Hammer | Secondary Weapon | ||
| 70 DMG | None | |||||
| Pipe Exit Range | None | Primary Technique | Prying Eyes Denier | Secondary Technique | Villain Sight | |
| Immune to reaction shots while moving | 70 DMG | |||||
| Chase Range | 6 Cells | Tertiary Technique | One shark feeding frenzy! | |||
| None | ||||||
| Mario + Rabbids Kingdom Battle enemy | ||||||
|---|---|---|---|---|---|---|
| Side Eye | ||||||

|
Health Points | 400 | Team Jump | None | Dash | None |
| Area of Movement | 14 Cells | Primary Weapon | Bomb Bludgeon | Secondary Weapon | ||
| 50 DMG | None | |||||
| Pipe Exit Range | None | Primary Technique | Prying Eyes Denier | Secondary Technique | Villain Sight | |
| Immune to reaction shots while moving | 40 DMG | |||||
| Chase Range | None | Tertiary Technique | StandofFISH scaredy cat! | |||
| None | ||||||
| Mario + Rabbids Kingdom Battle enemy | ||||||
|---|---|---|---|---|---|---|
| Tropical Summoner | ||||||

|
Health Points | 130 | Team Jump | None | Dash | None |
| Area of Movement | 6 Cells | Primary Weapon | Grenaduck | Secondary Weapon | ||
| 25 DMG | None | |||||
| Pipe Exit Range | 3 Cells | Primary Technique | Summon | Secondary Technique | Heal | |
| Calls to arms for one or more enemies | 30% HP | |||||
| Chase Range | None | Tertiary Technique | Incorrigible invokers! | |||
| None | ||||||


Worlds[edit]
References to other games[edit]
- Donkey Kong: An area features a Rabbid on a girder throwing barrels at another Rabbid jumping over them, much like Donkey Kong and Mario do in this game, respectively. Beep-0 comments that the jumping Rabbid would "be lucky to get to 125 meters unless he finds a hammer".
- Donkey Kong 64: An arrangement of the hub world music from this game appears.
- Donkey Kong Country Returns: Just before the heroes fight Rabbid Kong for the first time, Donkey Kong attacks him like he attacks bosses at the end of boss battles from this game.
Gallery[edit]
Promotional artwork

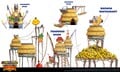
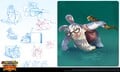
Official environment, prop, and material renders[edit]


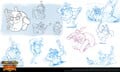
Concept art[edit]
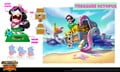
"Treasure Octopus"
Banana Lagoon huts
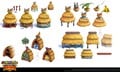
Hut designs
Rabbid Cranky concept art
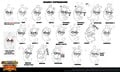
Rabbid Cranky expression sheet


