Toybox 3
| Level | |||||||
|---|---|---|---|---|---|---|---|
| Toybox 3 | |||||||

| |||||||
| Level code | 6-2 | ||||||
| Game | DK: Jungle Climber | ||||||
| |||||||
Toybox 3 is the second level of the Wormhole in DK: Jungle Climber.
Layout[edit]
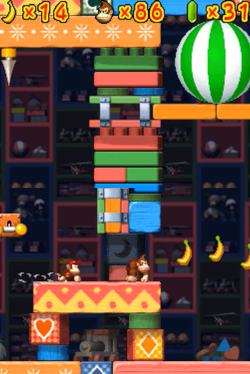
Donkey Kong starts out in an area with a DK Barrel on a nearby ledge; below the ledge is a passage with a large bouncy ball above its exit. To proceed, the Kongs must jump into the ball to bounce it upward into a spike on the ceiling, where it will pop and release many gems and a Switch Peg, then pull down the Switch Peg to open two gates on either side of it. The first Banana Coin is in a small corridor in the upper right; it can be obtained by using a Diddy Attack off the Switch Peg, then walking towards the position of the DK Barrel to guide Diddy Kong into the Banana Coin. Past the right gate are four pegs moving in circles that meet near the center, with two static pegs and another Switch Peg above them. Pulling the Switch Peg releases a ball from the gate on the left, which the Kongs must bounce into a spike on the ceiling which was behind the right gate to release more gems and another Switch Peg. The second Banana Coin is in a narrow alcove above the bottom-right gate; it can be collected by having the Kongs jump off the spinning pegs to an isolated green peg, then using that peg to jump into the alcove. After this, the Kongs can pull the Switch Peg down and walk through the gate into the second section.
The second section features a Question Barrel at the bottom of an array of Peg Boards, with a single peg and a Barrel to the right. Breaking the Question Barrel releases another large bouncy ball, which the Kongs can let roll to the right near the barrel, then jump off to a ledge above the barrel, where they can jump again and collect the third Banana Coin. They must then use the Peg Boards to bounce the ball up a ledge near the top right, then again up another ledge to the right before sending the ball into another ceiling spike to release gems and a Switch Peg. If after the first ledge, the Kongs bounce the ball onto the ledge to the left of the second column of Peg Boards, they can jump off the ball to a Switch Peg above the ledge and pull it down to reveal the fourth Banana Coin behind some gates above. They can then jump into the coin to collect it. After pulling the Switch Peg from the popped ball, the Kongs will open the gate near the top right, which leads to the third area.
At the beginning of the third section is a bell; when rung, it causes many pegs and Peg Boards to appear for some time. To the right of the bell and the first three Peg Boards is a Zinger flying around a single Peg Board with some Bananas; defeating the Zinger grants the Kongs the fifth Banana Coin. Further to the right are more Peg Boards and eight pegs rotating in a circle. This circle of pegs remains even after the bells stop ringing. Below the rotating pegs is a DK Barrel, and above them are two bells, one of which can only be rung with a Diddy Attack. Ringing both bells causes more pegs and Peg Boards to appear further to the right. If the Kongs take the top route, they can move past a Zinger flying around a peg to collect the level's DK Coin above some tires to the right of the Zinger. As the Kongs continue across the pegs and Peg Boards, they will arrive at a worm hole on a ledge to the right, which they can enter to complete the level.