User:Koopa con Carne/archive: Difference between revisions
m (→Sherbet Desert) |
|||
| (3 intermediate revisions by the same user not shown) | |||
| Line 7: | Line 7: | ||
MKT Auto Mode in-game screenshot landscape.jpg | MKT Auto Mode in-game screenshot landscape.jpg | ||
MKT Auto Mode in-game screenshot portrait.jpg | MKT Auto Mode in-game screenshot portrait.jpg | ||
MKT NewYorkMinuteB Well fought screenshots.jpg | |||
MKT NewYorkMinuteB Well fought screenshots2.jpg | |||
</gallery> | </gallery> | ||
| Line 20: | Line 22: | ||
==''Mario + Rabbids Kingdom Battle'' images== | ==''Mario + Rabbids Kingdom Battle'' images== | ||
===Miscellaneous screenshots=== | ===Miscellaneous screenshots=== | ||
<gallery> | <gallery> | ||
| Line 786: | Line 128: | ||
*''[[Super Mario 3D World + Bowser's Fury]]'' [[File:Amiibo-read-only-icon.svg|17px]] | *''[[Super Mario 3D World + Bowser's Fury]]'' [[File:Amiibo-read-only-icon.svg|17px]] | ||
|} | |} | ||
=MKT kart measurements= | |||
[''archiving this table per what {{user|Mister Wu}} said [[User talk:Mister Wu#Size chart for Mario Kart Tour karts|here]]; basically, despite the dilligence and professionality shown by the people behind the cited study, there is no hard data in the game's files or any other official source that supports it] | |||
---- | |||
The following is a sortable table of measurements for the game's karts. In-game units are used for the measurements.<ref>ER☆Curtis, ER☆Rachid, ER antilev, ER★★★Studfit. [https://docs.google.com/spreadsheets/u/0/d/18kggYJbsJbdTYFF85d75b6z515ydssc_Pn0QY8U7Rpo/htmlview MKT Kart Dimensions]. ''Google Docs''. Retrieved .</ref> | |||
{|class="wikitable sortable" style="text-align:center; width:100%" border="1" border:1px cellspacing=0 cellpadding=2 | |||
|- | |||
!width=13%|Kart | |||
!width=3%|Icon | |||
!width=28%|Width | |||
!width=28%|Length | |||
!width=28%|Area | |||
|- | |||
![[Pipe Frame]] | |||
|[[File:MKT Icon PipeFrameRed.png|30px]] | |||
|128 | |||
|145 | |||
|18,560 | |||
|- | |||
![[Birthday Girl]] | |||
|[[File:MKT Icon BirthdayGirl.png|30px]] | |||
|108 | |||
|140 | |||
|15,120 | |||
|- | |||
![[Mushmellow]] | |||
|[[File:MKT Icon Mushmellow.png|30px]] | |||
|112 | |||
|116 | |||
|12,992 | |||
|- | |||
![[Koopa Dasher]] | |||
|[[File:MKT Icon KoopaDasher.png|30px]] | |||
|125 | |||
|174 | |||
|21,750 | |||
|- | |||
![[Biddybuggy]] | |||
|[[File:MKT Icon Biddybuggy.png|30px]] | |||
|146 | |||
|145 | |||
|21,170 | |||
|- | |||
![[Blue Biddybuggy]] | |||
|[[File:MKT Icon BlueBiddybuggy.png|30px]] | |||
|146 | |||
|145 | |||
|21,170 | |||
|- | |||
![[Cheep Charger]] | |||
|[[File:MKT Icon CheepCharger.png|30px]] | |||
|138 | |||
|168 | |||
|23,184 | |||
|- | |||
![[Pink Mushmellow]] | |||
|[[File:MKT Icon PinkMushmellow.png|30px]] | |||
|112 | |||
|116 | |||
|12,992 | |||
|- | |||
![[Birthday Girl Rosalina]] | |||
|[[File:MKT Icon BirthdayGirlRosalina.png|30px]] | |||
|108 | |||
|140 | |||
|15,120 | |||
|- | |||
![[Green Kiddie Kart]] | |||
|[[File:MKT Icon GreenKiddieKart.png|30px]] | |||
|128 | |||
|170 | |||
|21,760 | |||
|- | |||
![[Red Kiddie Kart]] | |||
|[[File:MKT Icon RedKiddieKart.png|30px]] | |||
|128 | |||
|170 | |||
|21,760 | |||
|- | |||
![[Bullet Blaster]] | |||
|[[File:MKT Icon BulletBlaster.png|30px]] | |||
|105 | |||
|170 | |||
|17,850 | |||
|- | |||
![[Bull's-Eye Banzai (kart)|Bull's-Eye Banzai]] | |||
|[[File:MKT Icon BullsEyeBanzai.png|30px]] | |||
|105 | |||
|170 | |||
|17,850 | |||
|- | |||
![[Landship]] | |||
|[[File:MKT Icon Landship.png|30px]] | |||
|125 | |||
|176 | |||
|22,000 | |||
|- | |||
![[Pipe Buggy]] | |||
|[[File:MKT Icon PipeBuggy.png|30px]] | |||
|182 | |||
|226 | |||
|41,132 | |||
|- | |||
![[Warship]] | |||
|[[File:MKT Icon Warship.png|30px]] | |||
|125 | |||
|176 | |||
|22,000 | |||
|- | |||
![[Green Cheep Charger]] | |||
|[[File:MKT Icon GreenCheepCharger.png|30px]] | |||
|138 | |||
|168 | |||
|23,184 | |||
|- | |||
! | |||
|[[File:MKT Icon .png|30px]] | |||
| | |||
| | |||
| | |||
|- | |||
![[Birthday Girl Daisy]] | |||
|[[File:MKT Icon BirthdayGirlDaisy.png|30px]] | |||
|108 | |||
|140 | |||
|15,120 | |||
|- | |||
![[Cheermellow]] | |||
|[[File:MKT Icon Cheermellow.png|30px]] | |||
|112 | |||
|116 | |||
|12,992 | |||
|- | |||
![[Ribbon Rider]] | |||
|[[File:MKT Icon RibbonRider.png|30px]] | |||
|108 | |||
|140 | |||
|15,120 | |||
|- | |||
![[Festival Girl]] | |||
|[[File:MKT Icon FestivalGirl.png|30px]] | |||
|108 | |||
|140 | |||
|15,120 | |||
|- | |||
![[Gold Pipe Frame]] | |||
|[[File:MKT Icon GoldPipeFrame.png|30px]] | |||
|128 | |||
|145 | |||
|18560 | |||
|- | |||
![[Swift Talon]] | |||
|[[File:MKT Icon SwiftTalon.png|30px]] | |||
|232 | |||
|238 | |||
|55,216 | |||
|- | |||
![[Gold Eagle]] | |||
|[[File:MKT Icon GoldEagle.png|30px]] | |||
|232 | |||
|238 | |||
|55,216 | |||
|- | |||
![[Blazing Eagle]] | |||
|[[File:MKT Icon BlazingEagle.png|30px]] | |||
|232 | |||
|238 | |||
|55,216 | |||
|} | |||
==References== | |||
<references/> | |||
=List of diegetic music in ''Mario'' video games= | =List of diegetic music in ''Mario'' video games= | ||
''[If you look at the earliest revisions on the “[[Bah]]” article, you may notice that the intro paragraph sounds | ''[If you look at the earliest revisions on the “[[Bah]]” article, you may notice that the intro paragraph sounds as if it follows up some broader explanation for a subject. This is because said article started out as a page meant to cover all instances of in-universe music in Mario games that has some kind of gameplay role. I decided to narrow down its focus after realising that such a page would creep into subjects that are too insignificant to lend any wortwhile info (e.g. nobody cares about the music coming from whatever phonograph in Luigi’s Mansion 2 even if the object technically interactable). The following is the original draft for this page, which I’m keeping here to better secure its posterity; it should not be brought into mainspace unless some consensus makes it fair game to do so.]'' | ||
---- | ---- | ||
Latest revision as of 12:09, January 15, 2023
Mario Kart Tour


Snapshots of the Japanese Mario Portal
Snapshots of several English-translated game entries on nintendo.co.jp (via archive.today):
- Super Mario 64
- Super Mario Sunshine
- Super Mario Galaxy
- Super Mario Galaxy 2
- New Super Mario Bros. U
- Super Mario 3D World
- Super Mario Odyssey
Mario + Rabbids Kingdom Battle images
Miscellaneous screenshots
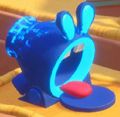
Open Blue Cannon
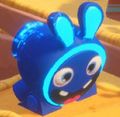
Closed Blue Cannon


Scans
McDonald's Mario Happy Meal box (Romanian)

Kinder Surprise Maxi package cardboard (Hungarian/Romanian)


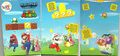
Play Nintendo Activity Book
there's also this other book
[need to find more material for this page]
This page lists fan-produced, Mario-related artwork acknowledged and shared by Nintendo in various venues.
Play Nintendo

The "Pics" category on the Play Nintendo website contains several galleries dedicated to fan work inspired by Nintendo media. One such gallery is a selection of Luigi-related works submitted by Miiverse users to Nintendo for The Year of Luigi,[1] shown below alongside the Miiverse usernames and regions of their respective artists.
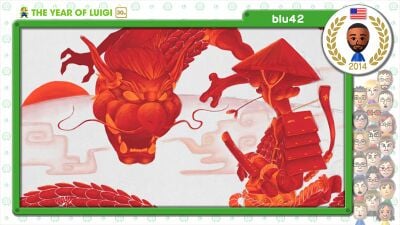
blu42

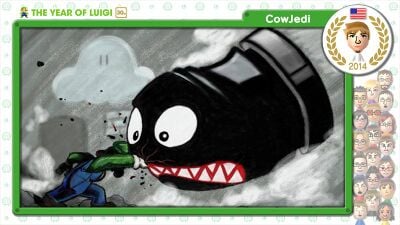
CowJedi
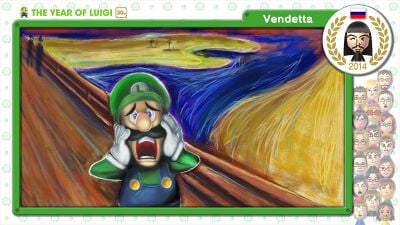
Vendetta File:Flag of Russia.png
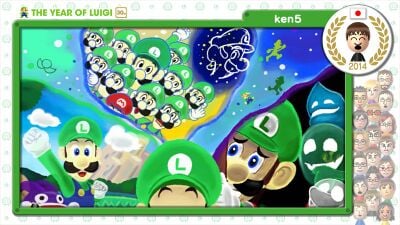
ken5

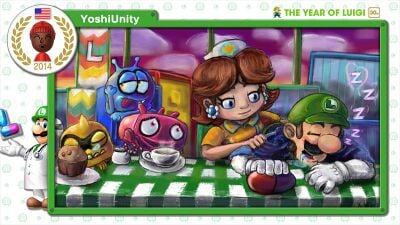
YoshiUnity
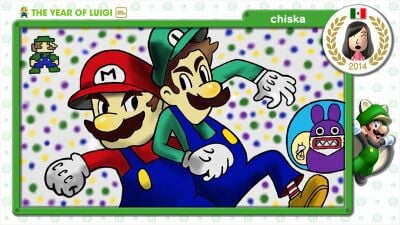
chiska

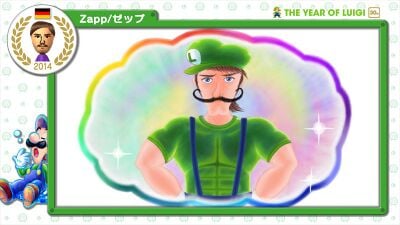
Zapp/ゼップ

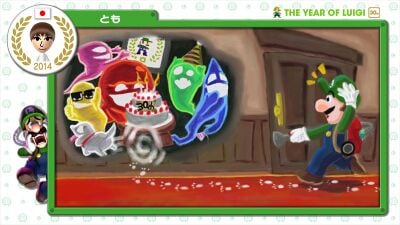
とも
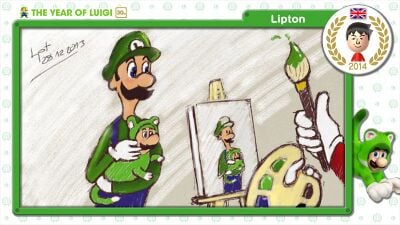
Lipton

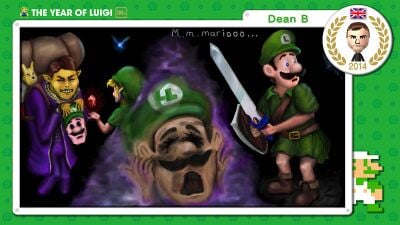
Dean B
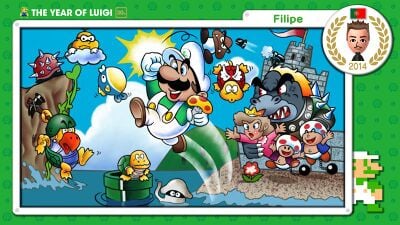
Filipe

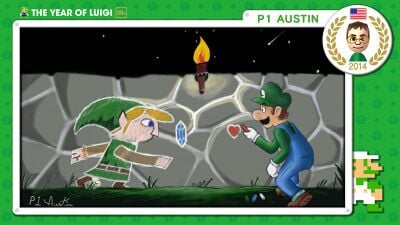
P1 AUSTIN
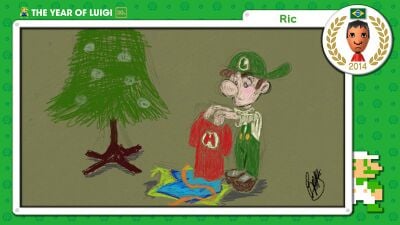
Ric

ドシダ
teish
やつはし
Mikito
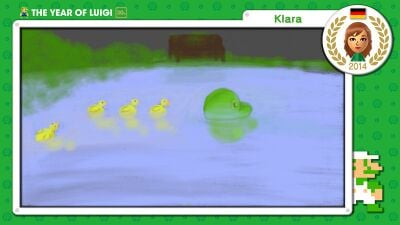
Klara
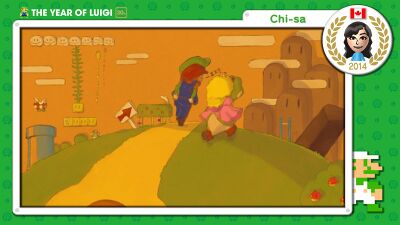
Chi-sa

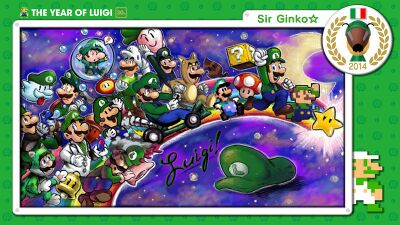
Sir Ginko☆

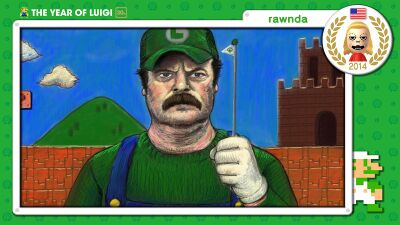
rawnda
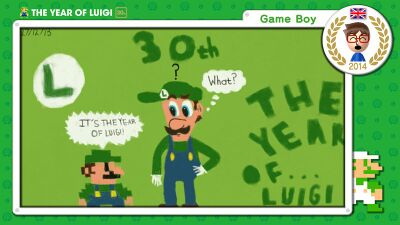
Game Boy
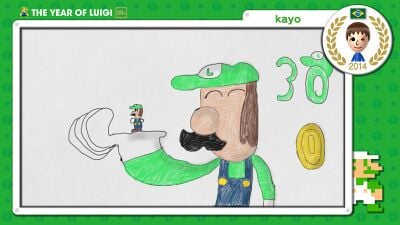
kayo
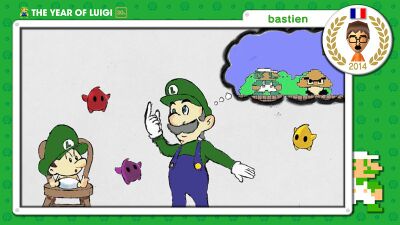
bastien

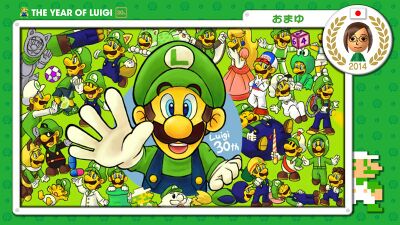
おまゆ
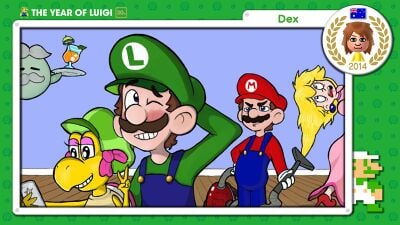
Dex

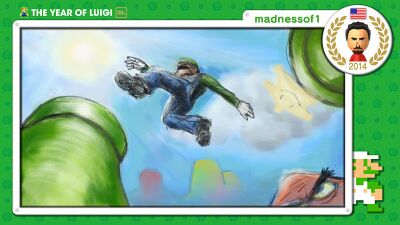
madnessof1
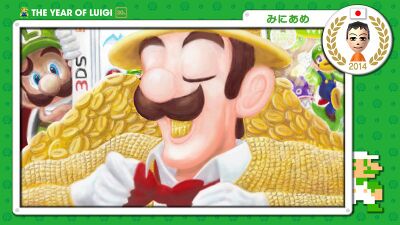
みにあめ
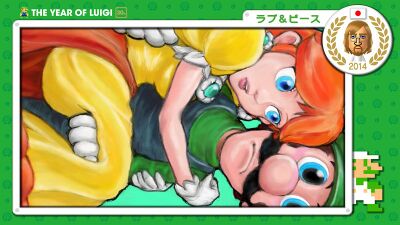
ラブ&ピース


References
- ^ Luigi SketchPad. Play Nintendo. Retrieved . (Archived August 10, 2021, 00:45:03 UTC via Wayback Machine.)
amiibo chart
[based on the chart made by Waluigi Time (talk)]

MKT kart measurements
[archiving this table per what Mister Wu (talk) said here; basically, despite the dilligence and professionality shown by the people behind the cited study, there is no hard data in the game's files or any other official source that supports it]
The following is a sortable table of measurements for the game's karts. In-game units are used for the measurements.[1]
| Kart | Icon | Width | Length | Area |
|---|---|---|---|---|
| Pipe Frame | 128 | 145 | 18,560 | |
| Birthday Girl | 108 | 140 | 15,120 | |
| Mushmellow | 112 | 116 | 12,992 | |
| Koopa Dasher | 125 | 174 | 21,750 | |
| Biddybuggy | 146 | 145 | 21,170 | |
| Blue Biddybuggy | 146 | 145 | 21,170 | |
| Cheep Charger | 138 | 168 | 23,184 | |
| Pink Mushmellow | 112 | 116 | 12,992 | |
| Birthday Girl Rosalina | 108 | 140 | 15,120 | |
| Green Kiddie Kart | 128 | 170 | 21,760 | |
| Red Kiddie Kart | 128 | 170 | 21,760 | |
| Bullet Blaster | 105 | 170 | 17,850 | |
| Bull's-Eye Banzai | 105 | 170 | 17,850 | |
| Landship | 125 | 176 | 22,000 | |
| Pipe Buggy | 182 | 226 | 41,132 | |
| Warship | 125 | 176 | 22,000 | |
| Green Cheep Charger | 138 | 168 | 23,184 | |
| File:MKT Icon .png | ||||
| Birthday Girl Daisy | 108 | 140 | 15,120 | |
| Cheermellow | 112 | 116 | 12,992 | |
| Ribbon Rider | 108 | 140 | 15,120 | |
| Festival Girl | 108 | 140 | 15,120 | |
| Gold Pipe Frame | 128 | 145 | 18560 | |
| Swift Talon | 232 | 238 | 55,216 | |
| Gold Eagle | 232 | 238 | 55,216 | |
| Blazing Eagle | 232 | 238 | 55,216 |
References
- ^ ER☆Curtis, ER☆Rachid, ER antilev, ER★★★Studfit. MKT Kart Dimensions. Google Docs. Retrieved .
List of diegetic music in Mario video games
[If you look at the earliest revisions on the “Bah” article, you may notice that the intro paragraph sounds as if it follows up some broader explanation for a subject. This is because said article started out as a page meant to cover all instances of in-universe music in Mario games that has some kind of gameplay role. I decided to narrow down its focus after realising that such a page would creep into subjects that are too insignificant to lend any wortwhile info (e.g. nobody cares about the music coming from whatever phonograph in Luigi’s Mansion 2 even if the object technically interactable). The following is the original draft for this page, which I’m keeping here to better secure its posterity; it should not be brought into mainspace unless some consensus makes it fair game to do so.]
In audiovisual media, diegetic music refers to music that is part of a fictional setting. In video games, such music may simply exist as an Easter egg or have a gameplay role—for instance, dictating non-playable characters to act in a certain manner.
The following are examples of diegetic music in the Mario franchise and related franchises that is specifically interactable or otherwise has an impact on gameplay.
New Super Mario Bros. games
Many musical tracks in the New Super Mario Bros. games incorporate a form of diegetic audio, mostly in the form of “bah” vocals. Interspersed at various points within a level’s music track, these vocals, when heard, cause objects and enemies on-screen to perform an action simultaneously. In underwater levels, a brief tinkling sound effect plays instead.
Donkey Kong Country series
In newer Donkey Kong Country games, hand slapping in front of certain objects causes them to play music that replaces the current soundtrack. The music swaps back to the non-diegetic soundtrack once the player hand slaps near the object again or exits the current area.
Donkey Kong Country Returns
In Donkey Kong Country Returns and Donkey Kong Country Returns 3D, hand slapping near the television in the KONG hut at the beginning of Jungle Hijinxs causes it to play the game's title theme.
Donkey Kong Country: Tropical Freeze
Donkey Kong Country: Tropical Freeze and its Nintendo Switch version feature a similar Easter egg at the beginning of Mangrove Cove; inside the plane wreck, there is a pile of TVs which produce the title theme of Donkey Kong Country Returns upon performing a nearby hand slap.
At the end of Canopy Chaos, there is a phonograph on an upper platform. When activated with a hand slap, the current soundtrack ends and the phonograph plays the title theme of Donkey Kong Country instead.
[[Category:Music|*]]
List of vehicles in Mario Party 9
[This is a page I made that I'm saving in my sandbox because I like how it looks. Since it has been decided through a proposal that it should be trimmed and merged with the Mario Party 9 page, do not attempt to re-create it.]
In Mario Party 9, characters collectively drive a vehicle to move through a board. There are three different exclusive vehicles for each stage: one is available by default, while the other two can be unlocked in the Museum for 200 Party Points each. All vehicles share a basic structure with a broad compartment for the characters to stay in, containing seats on the back side and a means of lighting on the frontal side. However, the type of a vehicle depends on the environment of the board in which it is used.
The following table lists all vehicles by board (and the corresponding vehicle type). A description is also presented along with each vehicle. Colored sections mark a starter vehicle.
| Toad Road Cars | ||
|---|---|---|
| Vehicle | Description | |
 Toad Mobile |
A round car with a vintage appearance, bearing metal bumpers and protruding lights, as well as red seats. Its coachwork is colored red, with white spots in several places, and has black tires. | |
 Rickety Ride |
A car whose components, including the bumpers, tires and coachwork, appear to be made out of wood. The car has a brown overall appearance and green seats. | |
 Wiggler Wagon |
A round car designed after a Wiggler, featuring flower tires as well as two beady eyes and a large nose on the front side. The car also has green seats and a metal bumper on its rear side. | |
| Bob-omb Factory Quadruped vehicles | ||
| Vehicle | Description | |
 Factory Walker |
A vehicle consisting of a round compartment with a black and yellow rim and two lights on the front side. Its feet are circular to reflect the overall shape of the vehicle. | |
 Gear Shifter |
A vehicle with a round compartment that displays gears and metallic patches on its body. The rim contains black and yellow portions on each side. The vehicle's feet are square to reflect its overall shape. | |
 King Bob-omb Bus |
A vehicle designed in the likeness of King Bob-omb. The face and crown are positioned in front of the vehicle. Despite the vehicle being circular overall, it has square feet. | |
| Boo's Horror Castle Floating carriers | ||
| Vehicle | Description | |
 Flying Carpet |
A generic magic carpet with purple and yellow coloration, as well as tassels hanging from each corner. | |
 Float Mattress |
A carrier that resembles a bed with white bedclothes and a golden frame. | |
 Boo Blanket |
A flying blanket inspired by King Boo, with his face imprinted on its surface and his crown serving as the characters' seats. Small crowns are hanging from each corner of the carpet. | |
| Blooper Beach Boats | ||
| Vehicle | Description | |
 Sub Baleen |
A boat that has the appearance of a blue whale, with headlights for eyes and paddles for fins. The name of the vehicle is a pun on the words "submarine" and "baleen". | |
 Coral Explorer |
A boat that resembles a submarine with an orange and white coloration. It has three portholes on each lateral side and a periscope on its frontal side. | |
 Blooper Boat |
A boat that resembles a Blooper lying backside down. Its lateral arms serve as paddles. | |
| Magma Mine Wagons | ||
| Vehicle | Description | |
 Shaky Mine Cart |
A generic mine cart with a wooden body and metal framework. It has two handles and a lantern on the front side, and red seats inside the compartment. | |
 Bone Barrow |
A wagon whose framework consists entirely of bones. There is also a skull figure on the front side, matching the cranial design of some dragons in the Mario franchise, such as Hooktail and Gobblegut. The inside of the wagon features blue seats. The name of the vehicle is a pun on "bone marrow". | |
 Chain Chomp Coupe |
A Chain Chomp-inspired wagon. It has metallic studs in each corner, bound by chains. The face of a Chain Chomp is mounted on the front side, while the inside of the wagon features red-colored seats. | |
| Bowser Station Space ships | ||
| Vehicle | Description | |
 Space Scuttle |
A yellow starship roughly shaped like a star. Two opposing points represent the engines of the ship, while those in-between represent exhaustion pipes. The inside of the Space Scuttle features cyan seats. | |
 Shiny Saucer |
A flying saucer-like vehicle with a lustrous silver appearance. It contains teal seats. | |
 Starship Bowser |
Another flying saucer-like vehicle inspired by Bowser's appearance. It has a green-colored plated exterior with spikes around it to resemble Bowser's shell. The rim of the cockpit resembles any of Bowser's collars, and the interior features red seats. | |
| DK's Jungle Ruins Four-wheel drive | ||
| Vehicle | Description | |
 Barrel Roller |
A vehicle whose body is designed after a barrel. It has wooden wheels and seats and a banana bunch emblem on its frontal side. There is also a large handle in the front. | |
 Jungle Junker |
A vehicle inspired by off-road safari jeeps, with tires for wheels. The coachwork is predominantly brown with a vertical red stripe on the frontal side, while the seats are light-gray. Like the Barrel Roller, the Jungle Junker has a banana bunch emblem on its cowling. There is a spare tire-like object on the back of the car. | |
 DK's Banana Slider |
A vehicle shaped like a banana bunch. The wheels and the inside of the vehicle, including the seats, appear to be wooden. | |
The Play Nintendo website has a section with Nintendo-themed printables, divided into three categories: "Cards", "Crafts" and "Print and Play". The printables come in the form of PDFs which can be downloaded from the website directly, and are usually accompanied by instructions on how to use them.
Bonus challenges
| Ring Race | ||||||
|---|---|---|---|---|---|---|
| Icon | Course variant | Chosen driver |
Chosen kart |
Chosen glider |
Grand Star scores | Tour appearances |

|
Regular | Baby Luigi |
Pipe Frame |
Super Glider |
|
Holiday Tour (2019) |
|
Mario Tour | |||||
| Glider Challenge | ||||||
|---|---|---|---|---|---|---|
| Icon | Course variant | Chosen driver |
Chosen kart |
Chosen glider |
Grand Star scores | Tour appearances |

|
Rainbow Road | Peach |
Pipe Frame |
Super Glider |
|
Holiday Tour (2019) |
|
Snow Tour Autumn Tour | |||||
| vs. Mega Metal Mario | ||||||
|---|---|---|---|---|---|---|
| Icon | Course variant | Mega opponent information | Tour appearances | |||
| Driver | Kart | Glider | Items used | |||

|
Regular | Metal Mario |
Gold Train |
Gold Glider |
Fire Flowers |
Holiday Tour (2019) Yoshi Tour (2021) |
| Do Jump Boosts | ||||||
|---|---|---|---|---|---|---|
| Icon | Course variant | Chosen driver |
Chosen kart |
Chosen glider |
Grand Star scores | Tour appearances |

|
Rainbow Road | Metal Mario |
Pipe Frame |
Super Glider |
|
New Year's Tour |

|
Shy Guy |
Pipe Frame |
Super Glider |
|
Summer Festival Tour | |
|
Space Tour | |||||
| Steer Clear of Obstacles | ||||||
|---|---|---|---|---|---|---|
| Icon | Course variant | Chosen driver |
Chosen kart |
Chosen glider |
Grand Star scores | Tour appearances |

|
Regular | Larry |
Pipe Frame |
Super Glider |
 Star Thwomp |
Mario Bros. Tour Yoshi Tour (2022) |
| Goomba Takedown | ||||||||
|---|---|---|---|---|---|---|---|---|
| Icon | Course variant | Chosen driver |
Chosen kart |
Chosen glider |
Item Box types found |
Number of item slots | Grand Star scores | Tour appearances |

|
Regular | Peachette |
Pipe Frame |
Super Glider |
Bob-omb Mega Mushroom Bullet Bill |
2 |
|
Baby Rosalina Tour |
| 1 |
|
Toad vs. Toadette Tour | ||||||
| Smash Small Dry Bones | ||||||
|---|---|---|---|---|---|---|
| Icon | Course variant | Chosen driver |
Chosen kart |
Chosen glider |
Grand Star scores | Tour appearances |

|
Regular | Rosalina |
Pipe Frame |
Super Glider |
|
Trick Tour (2020) Holiday Tour (2021) |
| Combo Attack | ||||||
|---|---|---|---|---|---|---|
| Icon | Course variant | Chosen driver |
Chosen kart |
Chosen glider |
Grand Star scores | Tour appearances |

|
T | Lakitu |
Pipe Frame |
Super Glider |
|
Flower Tour |
| Big Reverse Race | ||||||||||||
|---|---|---|---|---|---|---|---|---|---|---|---|---|
| Icon | Course variant | Opponents | Tour appearances | |||||||||
| 7th | 6th | 5th | 4th | 3rd | 2nd | 1st | Extra | |||||

|
Regular | Driver | Marine Tour Autumn Tour | |||||||||
| Kart | ||||||||||||
| Glider | ||||||||||||
| Time Trial | ||||||
|---|---|---|---|---|---|---|
| Icon | Course variant | Chosen driver |
Chosen kart |
Chosen glider |
Grand Star scores | Tour appearances |

|
Regular | Monty Mole |
Pipe Frame |
Super Glider |
|
Mario vs. Luigi Tour |

|
R | Toad (Pit Crew) |
Pipe Frame |
Super Glider |
|
Trick Tour (2021) |
| Snap a Photo | |||||||||
|---|---|---|---|---|---|---|---|---|---|
| Icon | Course | Chosen driver |
Chosen kart |
Chosen glider |
Other driver information | Objectives | Tour appearances | ||

|
Rainbow Road T | Mario (Satellaview) |
Lunar Cruiser |
Meteor Balloons |
Driver |
|
Space Tour | ||
| Kart | |||||||||
| Glider | TBD | TBD | |||||||