Special World 6 (Puzzle & Dragons: Super Mario Bros. Edition): Difference between revisions
No edit summary |
mNo edit summary |
||
| Line 12: | Line 12: | ||
==Courses== | ==Courses== | ||
{|class= width=100% cellspacing=0 border= | {|class= width=100% cellspacing=0 border=1 cellpadding=3 class="wikitable" style="text-align: center; margin:auto" | ||
|-style="background: #ABC" | |-style="background: #ABC" | ||
!Course | !style="background: #ABC"|Course | ||
!Terrain | !style="background: #ABC"|Terrain | ||
!Course type | !style="background: #ABC"|Course type | ||
!? Block items | !style="background: #ABC"|? Block items | ||
!Enemies found here | !style="background: #ABC"|Enemies found here | ||
!Boss(es) | !style="background: #ABC"|Boss(es) | ||
!Teammate(s) unlocked | !style="background: #ABC"|Teammate(s) unlocked | ||
|- | |- | ||
|[[World 6-1 (Puzzle & Dragons: Super Mario Bros. Edition)#★World 6-1|★World 6-1]] | |[[World 6-1 (Puzzle & Dragons: Super Mario Bros. Edition)#★World 6-1|★World 6-1]] | ||
| Line 149: | Line 149: | ||
==Enemies== | ==Enemies== | ||
*[[Paragoomba]]s | *[[Paragoomba]]s | ||
* | *[[Red Koopa Paratroopa]]s | ||
*[[Bullet Bill]]s | *[[Bullet Bill]]s | ||
*[[Lakitu]]s | *[[Lakitu]]s | ||
* | *[[Coin Coffer]]s (Yellow and Purple) | ||
*[[Spiny|Spinies]] | *[[Spiny|Spinies]] | ||
*[[Hammer Bro]]s | *[[Hammer Bro]]s | ||
| Line 159: | Line 159: | ||
*[[Bone Piranha Plant]]s | *[[Bone Piranha Plant]]s | ||
*[[Chain Chomp]]s | *[[Chain Chomp]]s | ||
* | *[[Big Bony Beetle]]s | ||
*[[Goomba]]s | *[[Goomba]]s | ||
*[[Bullet Bill]] & Goomba | *[[Bullet Bill]] & Goomba | ||
| Line 165: | Line 165: | ||
*2-Goomba Tower | *2-Goomba Tower | ||
*3-Goomba Tower | *3-Goomba Tower | ||
*[[Big Boo]]s | |||
*[[Boo]]s | |||
*[[King Boo]]s | |||
*[[Whomp]]s | |||
*[[Gold Goomba]]s | |||
*Whomp & Boos | |||
*[[Dry Bones]] | *[[Dry Bones]] | ||
*Bony | *[[Bony Beetle]]s | ||
*Heavy Para- | *[[Heavy Para-Beetle]]s | ||
*[[ | *[[Banzai Bill]]s | ||
*[[Bob-omb]]s | *[[Bob-omb]]s | ||
*Bob-omb & Lakitu | *Bob-omb & Lakitu | ||
*[[Thwomp]]s | *[[Thwomp]]s | ||
*Big [[ | *Big Whomps | ||
*[[King Bill]] | *[[Big Paragoomba]] | ||
*[[King Bill]] | |||
*[[Boom Boom]] ([[File:PDSMBE-Fortress1.png|25px]] boss, and replaces Bowser Jr. as the [[File:PDSMBE-Fortress2.png|25px]] boss, after Bowser Jr. joins the player) | *[[Boom Boom]] ([[File:PDSMBE-Fortress1.png|25px]] boss, and replaces Bowser Jr. as the [[File:PDSMBE-Fortress2.png|25px]] boss, after Bowser Jr. joins the player) | ||
*[[Bowser Jr.]] ([[File:PDSMBE-Fortress2.png|25px]] boss) | *[[Bowser Jr.]] ([[File:PDSMBE-Fortress2.png|25px]] boss) | ||
| Line 183: | Line 190: | ||
To reach the secret exit in this course, the player must first reach the branching path (where there is a signpost and a green [[Warp Pipe]]). Upon reaching the branching path, the player may notice a [[Gold Block]] in the center, between the Warp Pipe and the sign. In order to trigger the block, the player needs to clear more Dark Orbs than both Wood Orbs and Light Orbs. The course does not contain any Dark Orbs, however, so the player needs to bring an ally that can create them. Upon defeating the boss at the end of the secret path, the player unlocks {{world-link|sp6|ghosthousep|World 6-Ghost House (Puzzle & Dragons: Super Mario Bros. Edition)#★World 6-Ghost House}}. | To reach the secret exit in this course, the player must first reach the branching path (where there is a signpost and a green [[Warp Pipe]]). Upon reaching the branching path, the player may notice a [[Gold Block]] in the center, between the Warp Pipe and the sign. In order to trigger the block, the player needs to clear more Dark Orbs than both Wood Orbs and Light Orbs. The course does not contain any Dark Orbs, however, so the player needs to bring an ally that can create them. Upon defeating the boss at the end of the secret path, the player unlocks {{world-link|sp6|ghosthousep|World 6-Ghost House (Puzzle & Dragons: Super Mario Bros. Edition)#★World 6-Ghost House}}. | ||
== | ==Map gallery== | ||
<gallery> | <gallery> | ||
PDSMBE-SW6-1Map.jpg|★World 6-1 | PDSMBE-SW6-1Map.jpg|★World 6-1 | ||
Revision as of 11:29, June 28, 2016
- Not to be confused with Special 6.
Special World 6, known as ★World 6 in-game, is the sixth Special World in Puzzle & Dragons: Super Mario Bros. Edition, and is a more difficult version of World 6, with brown-colored skies instead of blue. This world consists of fourteen levels and a Toad House. Roy Koopa is the boss of this Special World and is fought in his castle and airship. Clearing ★World 6-![]() Tower 2 unlocks Yellow Winged Yoshi; ★World 6-
Tower 2 unlocks Yellow Winged Yoshi; ★World 6-![]() Airship unlocks Roy Koopa as an ally and the final upgrade for the Lucky ? Blocks spot at Toad Houses, where the player can have an even better chance at winning rare Skill items.
Airship unlocks Roy Koopa as an ally and the final upgrade for the Lucky ? Blocks spot at Toad Houses, where the player can have an even better chance at winning rare Skill items.
Courses
| Course | Terrain | Course type | ? Block items | Enemies found here | Boss(es) | Teammate(s) unlocked |
|---|---|---|---|---|---|---|
| ★World 6-1 | Sky (Platforms, Lifts) | 4-Color Course |
None | |||
| ★World 6-2 | Sky (Platforms, Lifts) | 4-Color Course |
None | |||
| ★World 6-3 | Sky (Mushrooms, Lifts) | Normal Course |
None | |||
| ★World 6- |
Fortress | Heartless Course |
None | |||
| ★World 6-4 | Sky (Lifts, Platforms) | 4-Color Course |
None | |||
| ★World 6-5 | Sky (Mushrooms, Lifts, Platforms) | 4-Color Course |
None | |||
| ★World 6-6 | Sky (Platforms, Mushrooms, Lifts) | 4-Color Course |
Normal exit: |
None | ||
| Secret exit: | ||||||
| ★World 6- |
Ghost House | Heartless Course |
None | |||
| ★World 6- |
Fortress | Heartless Course |
Before Bowser Jr. joins the player: |
|||
| After Bowser Jr. joins the player: | ||||||
| ★World 6-7 | Sky (Lifts, Platforms) | Normal Course |
None | |||
| ★World 6-8 | Sky (Lifts) | 3-Color Course |
None | |||
| ★World 6-9 | Sky (Platforms, Mushrooms) | Normal Course |
None | None | ||
| ★World 6- |
Castle | Heartless Course |
None | Before Roy joins the player: |
None | |
| After Roy joins the player: | ||||||
| ★World 6- |
Airship | Normal Course |
Before Roy joins the player: |
|||
| After Roy joins the player: |
Course maps
For a listing of course maps in ★World 6, see here.
Enemies
- Paragoombas
- Red Koopa Paratroopas
- Bullet Bills
- Lakitus
- Coin Coffers (Yellow and Purple)
- Spinies
- Hammer Bros
- Para-Beetles
- Spiny Egg & Lakitu
- Bone Piranha Plants
- Chain Chomps
- Big Bony Beetles
- Goombas
- Bullet Bill & Goomba
- Double Lakitu (also appears as the castle boss, after Roy joins the player)
- 2-Goomba Tower
- 3-Goomba Tower
- Big Boos
- Boos
- King Boos
- Whomps
- Gold Goombas
- Whomp & Boos
- Dry Bones
- Bony Beetles
- Heavy Para-Beetles
- Banzai Bills
- Bob-ombs
- Bob-omb & Lakitu
- Thwomps
- Big Whomps
- Big Paragoomba
- King Bill
- Boom Boom (
 boss, and replaces Bowser Jr. as the
  boss, after Bowser Jr. joins the player)
 - Bowser Jr. ( boss)
- Roy Koopa (Castle/Airship boss)
- Bullet Bill & Goombas (replaces Roy as the airship boss, after Roy joins the player)
Secret exit
★World 6-6
To reach the secret exit in this course, the player must first reach the branching path (where there is a signpost and a green Warp Pipe). Upon reaching the branching path, the player may notice a Gold Block in the center, between the Warp Pipe and the sign. In order to trigger the block, the player needs to clear more Dark Orbs than both Wood Orbs and Light Orbs. The course does not contain any Dark Orbs, however, so the player needs to bring an ally that can create them. Upon defeating the boss at the end of the secret path, the player unlocks ★World 6-![]() Ghost House.
Ghost House.
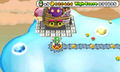
Map gallery
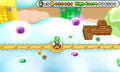
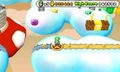
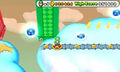
★World 6-1
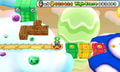
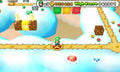
★World 6-2
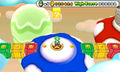
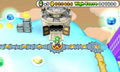
★World 6-3
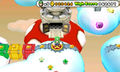
★World 6-
 Tower 1
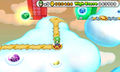
★World 6-4
★World 6-5

★World 6-6
★World 6-
 Ghost House
★World 6-
 Tower 2
★World 6-7
★World 6-8
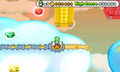
★World 6-9
★World 6-
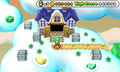
 Castle
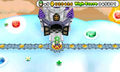
★World 6-
 Airship


