When Dolphins Ruled the Earth!
| Wario: Master of Disguise episode | |||
|---|---|---|---|
| When Dolphins Ruled the Earth! | |||

| |||
| Location | Blowhole Castle | ||
| Boss | Stuffy the 64th | ||
| Key items | |||
| Guise/Mastery Gems | |||
| |||
| << List of episodes >> | |||

- “All hail Stuffy the 64th! By the will of his dolphinic majesty, this door has been magically sealed! So by the decree of Stuffy the 64th, you are doomed to remain here...forever!”
- —Count Cannoli, Wario: Master of Disguise
When Dolphins Ruled the Earth! is the eighth episode of Wario: Master of Disguise. In this episode, Wario explores the haunted Blowhole Castle, which is filled with spirit switches that cause the normally harmless ghost enemies to become solid and attack Wario. The spirit switches also control the solidity of various platforms. Several rooms contain white doors that will vanish unless Wario reaches them quickly after entering the room. These doors often have treasures behind them. Once they vanish, they are gone for the rest of the episode, and the only way to respawn them is to restart the episode or go back to a previous save point.
Plot[edit]
Wario reaches the castle after destroying the Barfatronic Lavachomper and making it out of Sweatmore Peak. Count Cannoli is surprised to see that Wario beat the Lavachomper and flees inside the castle, telling Wario to follow him inside and bring Goodstyle along if he wants to know where the next Wishstone piece is. Before Wario goes inside, the girl from the previous episode shows up and warns him about the ghosts that lurk in the castle.
After reaching the top of the castle, Wario finds himself blocked by a flaming wall formed by spirits. The mysterious girl appears again and speaks to the spirits, and she informs Wario that they've gathered there because one of their friends is missing. By finding the missing spirit and reuniting it with the others, Wario gets the spirits to leave. However, Wario walks into the next room only to find a locked door. Cannoli arrives and tells him that he has aligned himself with the castle's ruler, Stuffy the 64th; his magic is holding the door shut. Wario fights Stuffy and defeats him, undoing his magic seal and allowing him to escape from the castle.
Layout[edit]

The episode starts at the entrance to the castle. Once inside, Wario will immediately find a Sir Flap-A-Lot. However, it is intangible and will not attack Wario. After climbing a ladder, he will reach to a pool of green water with crumbling block platforms over it and two geysers that harm Wario if he touches them. Five more Sir Flap-A-Lots are flying above the pool. Going in the water and to the right leads to a red treasure chest containing the Fool's Candy. The passage to the right of the crumbling blocks takes Wario to a tall room. In here, Wario will find a Gooey and a spirit switch. The switch can be hit by bouncing one of Cosmic Wario's lasers off of the angled corners behind the fake wall. This makes the intangible blue flames above turn into platforms but also makes the enemies in the castle turn hostile. Wario must hit the spirit switch and quickly ascend to reach the white door above, otherwise it will disappear. Behind it is a room with two moneybags and a red chest containing the Sassy Wig. Below the white door is a path leading left; Wario should turn the spirit switch off before going through. It leads to a room with two Gooeys and three spots where harmful green gas sprays out periodically. Past them is another white door; behind it is a red chest with the Lucky Love Toast inside. By going back, turning the spirit switch on, and going further up, Wario can reach a different section of this room with five Gooeys and four gas spouts, which has another red chest containing the Sweet & Spicy Pastries. To the left of this room, there is yet another red chest, which contains the Scary Mr. Bunny.

Continuing to the left takes Wario past more Gooeys and gas spouts before bringing him to a room with a hat switch and a laser switch. Shooting the laser switch brings down an elevator Wario can ride past five Sir-Flap-A-Lots to reach three moneybags and a path leading to the right. The next room has eight Gooeys and ladders leading both up and down. Wario must climb up quickly, turn off the spirit switch, and draw a block to reach a white door before it disappears. If successful, he will find a red chest with the Game & Watch 9000 inside. A hidden narrow passage on the left leads to a room with some red blocks and another red chest containing the Clever Sidekick. Climbing up the ladder in here takes Wario past a Buffy the Dolphin and into a dark room with four Bombats and a green chest. It contains the Sparky Mastery Gem which gives Sparky Wario the ability to shoot balls of electricity in random directions. Its sole purpose is to attack enemies and it is never required for anything in the game, making it an optional upgrade. Dropping down the hole takes Wario to another dark room, where he will find two Bombats and a ladder that leads to two more Bombats and a locked door, which requires the Lower Key to unlock. The key is in the room on the right and is obtained by defeating three Buffy the Dolphins.

After unlocking the door, Wario will be taken to a large area with a pool that has tall geysers gushing out of it. In the middle of this area is a disappearing white door with the Kneecap Guards treasure behind it. To get to the other side, Wario needs to shoot the switches at the top with lasers, then jump across the platforms they spawn. The next room has six Gooeys and a ladder leading down. Going down will eventually lead Wario to a room with a Puffy the Dolphin. He must destroy the red block so he can hit the spirit switch and open the way forward. Moving on, Wario must hit another spirit switch so he can crawl through a narrow passage to get to an area with gas spouts. There is a disappearing white door here, but the only thing behind it is a Buffy the Dolphin. By progressing to the left, Wario will reach a room with a moneybag and a purple chest, which contains the Upper Key. The spirit switches must be on to get it. The path to the left leads to two Gooeys and a pool of water which houses a purple chest with the castle's map inside. At the top of the ladder is a Puffy the Dolphin and a hat switch, and the passage on the upper-left leads back to the room with the Gooeys next to the elevator room. Wario can use the Upper Key to unlock a door in the room where he got the Lower Key.

Going through the door takes Wario to a room with several laser switches. To the right is an area with a Gooey where Wario can jump into a pool of water if the spirit switches are off and drop down to a red chest containing the Rare Gem Cereal. Hitting the switches makes temporary platforms appear, which can be used to reach a ledge with gas spouts and a passage on the left. In the next room, there is a disappearing white door. Wario must rush through while the spirit switches are on and use Arty Wario's blocks to reach it. Behind it, there is a Puffy the Dolphin on the right and twenty Rolltergeists on the left. On the bottom-left of the room with the white door is a hidden passage leading to a red chest with the Super Mega Trump Card inside. The path on the upper-right leads to a room with a Stuffy the 5th statue guarding a purple chest, which contains the Wandering Soul. The path on the upper-left leads to an area with crumbling block platforms over a large pit of spikes. Two Sir Flap-A-Lots fly over the pit, and there is a lift that will carry Wario across the spikes if a block is drawn on the nearby button. The next room has seven Gooeys and multiple spirit switch platforms leading upward. Further up is a hat switch and a pair of moneybags followed by a red chest containing the Heartfelt Hotcakes. The path to the right leads to a higher portion of the previous area with laser switches that spawn platforms with a Sir Flap-A-Lot in the middle. On the far right, Wario will reach a room with a wall of spirits in the way. Returning the Wandering Soul to them allows Wario to get by. Next, he encounters Count Cannoli, who introduces him to Stuffy the 64th. Wario must defeat Stuffy in three separate rooms to finish the episode.
Enemies[edit]
| Sprite | Name | Count |
|---|---|---|
| Sir Flap-A-Lot | 12 | |
| Gooey | 39 | |
| Buffy the Dolphin | 5 | |
| Bombat | 8 | |
| Puffy the Dolphin | 3 | |

|
Stuffy the 5th | 1 |
| Rolltergeist | 20 | |
| Treasure Pest | 1 | |
| Fluffy the Dolphin | Spawned by Stuffy the 64th |
Treasure chest locations[edit]
A Treasure Pest will appear in place of one of the red chests, making it unobtainable on the first run.
| Chest color | Treasure | Description | Worth | Location |
|---|---|---|---|---|
Fool's Candy |
If you give this candy to a stranger, they will believe whatever you say. Keep away from used car salesmen and those weird dudes who strap signs to themselves and dance around. | $7,901 | Obtained by dropping below the first crumbling bridge into the water below, then going into the room to the right. | |
Sassy Wig |
This fine wig is perfect for snowed-in monks and balding corporate executives alike. It can also be wrapped around a frostbitten Chihuahua. | $128 | Behind the disappearing white door in the first room with a spirit switch. | |
Lucky Love Toast |
If you cram this toast in your mouth and bolt out the door, you will run into the boy or girl of your dreams! Why does it work? We have no idea. | $333 | Behind the disappearing white door in the bottom half of the room above the one with the crumbling bridge. If the spirit switches are turned off, Arty Wario's blocks can be used to access the chest. | |
Sweet & Spicy Pastries |
Most of these delicious pastries are made from the finest cream in the land, but one is made from the fiery habanero pepper. Give that one to your enemies. | $110 | In the upper half of the room above the one with the crumbling bridge. | |
Scary Mr. Bunny |
This cute bunny has a fluffy body, but its red eyes glisten with an evil ferocity that is borne out of pure rage. Keep away from children. | $79 | In the room to the left of the one where the Sweet & Spicy Pastries are. The spirit switches must be off to obtain it. | |
Game & Watch 9000 |
An amazing handheld game unit with FIFTY screens! When unfolded, it takes up as much space as a timeshare condo. | $38,021 | Behind the white door at the top of the tall room with Gooeys and spirit switches near the elevator room. | |
Clever Sidekick |
A hilarious sidekick. Everybody needs one of these babies. He promises to guffaw loudly at every joke you make, no matter how lame it might be. | $37 | Accessed by entering a hidden passage at the top left of the aforementioned room with Gooeys and spirit switches. The spirit switches must be off to obtain it. | |
| N/A | N/A | Obtained by continuing upward from where the Clever Sidekick is, then going into the dark room to the right. | ||
Tiger Underwear of Doom |
A set of tiger underwear that imbues the wearer with near-godlike powers of classiness. Wear them without pants for the greatest effect. | $2,980 | Replaces the Sparky Mastery Gem during subsequent runs of the episode. | |
| Castle Map | N/A | N/A | Obtained by going through the bottom left passage in the room with the lone Puffy the Dolphin and hat switch and traveling through the water. The spirit switches must be off to obtain it. | |
| "This key is oddly marked on its bottom. Where do I use it?" | N/A | Obtained in the room with the locked door with a green key icon next to it by defeating the three Buffy the Dolphins. | ||
Kneecap Guards |
This armor stops people from trying to kneecap you. It's the must-have gift of the year for hired goons and figure skaters alike. | $5,974 | Behind the white door in the middle of the large room near the center of the castle with the water and crumbling blocks. | |
| "This key is oddly marked on its top. Where do I use it?" | N/A | On a ledge in the room with the lone Puffy the Dolphin and hat switch. Only accessible from the right due to requiring the spirit switches to be turned on. | ||
Rare Gem Cereal |
A breakfast cereal made from actual emeralds! Try not to swallow it whole, or you may have an unpleasant surprise in the evening. | $4,096 | Obtained by going two rooms to the right of where the Upper Key is used, then jumping into the water and dropping all the way down. | |
Super Mega Trump Card |
This card always beats all of the other cards on the table, no matter what game you're playing. Even solitaire. | $456 | In the bottom-left corner of the room above the one where the Upper Key is used, located behind a hidden passage. | |
| "These sad souls can't recall where to go back to. I better put them back where they belong." | N/A | In the room with the Stuffy the 5th statue directly below where the boss is fought. | ||
Heartfelt Hotcakes |
These delicious pancakes are made from 100% real love. Don't be fooled by evil fake pancakes, which are made from mayonnaise. | $109 | In the upper-left corner of the castle, accessed using Arty Wario's blocks. |
Gallery[edit]
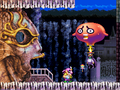
Wario and Cannoli outside the castle
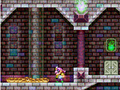
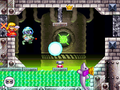
The white door room with Rolltergeists inside. This is the only room where these enemies appear.
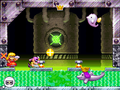
The first phase of the boss battle against Stuffy the 64th
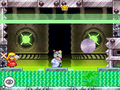
The second phase of the boss battle
The third phase of the boss battle


