A Third Thief Brings Grief!
| Wario: Master of Disguise episode | |||
|---|---|---|---|
| A Third Thief Brings Grief! | |||

| |||
| Location | Sneezemore Cave | ||
| Boss | Head Honcho Carpaccio | ||
| Key items | |||
| Guise/Mastery Gems | |||
| |||
| << List of episodes >> | |||

- “Hey, looky what the cat dragged in! Carpaccio didn't expect company here!”
- —Carpaccio, Wario: Master of Disguise
A Third Thief Brings Grief! is the fourth episode of Wario: Master of Disguise. In this episode, Wario explores Sneezemore Cave searching for the person who robbed the Smithsnorian Museum before he could, who turns out to be Carpaccio. The episode's main goal is to find four crystals in order to open the way to where Carpaccio is keeping the second piece of the Wishstone.
Plot[edit]
When Wario arrives at the cave, he drops down a large pit. He begins his search for the "guy in a suit" the Sphinx mentioned in the previous episode, assuming that the person in question is Count Cannoli. However, once Wario is gone, a nearby snowman reveals itself to be Cannoli in disguise, who is also searching for the "guy in a suit" and by extension, the Wishstone piece.
Inside the cave, Wario meets Carpaccio. He mistakes Wario for Cannoli, who is quick to correct him. Carpaccio apologizes for all the traps he set in the museum, which were intended for Cannoli. Wario then realizes that Carpaccio is the person Wario is looking for, not Cannoli. However, Carpaccio blocks the path to him with four stone doors, telling Wario to look him up when he is "tired of being a loser." Goodstyle notes the bird statues next to the doors, but this only angers and frustrates Wario. Cannoli appears and offers to tell him how to open the doors in exchange for Goodstyle, but Wario refuses.
Wario searches the cave for a method of opening the doors and finds four bird-shaped crystals. He uses the crystals to open the doors, and Cannoli shows up again, amazed that Wario was able to figure out how to open them. Wario then recloses the doors, leaving Cannoli behind. Wario confronts Carpaccio, who has the next Wishstone tablet, in the next room. Carpaccio notices Goodstyle and once again mistakes Wario for Cannoli. He introduces himself as the head of Sigil Securities, but Wario does not care and simply wants the Wishstone piece. Carpaccio transforms into Head Honcho Carpaccio and swallows Wario whole, however, Wario is able to defeat him from the inside. Carpaccio realizes that Wario is not Cannoli and leaves, allowing Wario to get his second Wishstone piece.
The text on the Wishstone piece was: ...the wishes were...bargained for...the Pharaoh's dreams...made real...his dynasty preserved forever...the Pharaoh forever...in his palace...palace turned into a pyramid...pyramid buried under the sand...and one piece of the stone..buried alongside him...
Goodstyle uses this to deduce that the next Wishstone piece is likely buried alongside the Pharaoh in his pyramid.
Layout[edit]

The episode begins at the entrance to the cave. Upon entering, Wario will drop down a large pit. A red treasure chest containing the Majestic Heart-Shaped Straw is at the end of a hidden passage to the right. To the left, Wario will encounter the first enemy of the episode, a Mr. Cheeky. Right next to it is a moneybag. Further to the left is a large room with a hat switch and a purple chest where the cave's map can be found. If Wario continues further to the left, he will meet Carpaccio, who will block the path with four stone doors. Four bird-shaped crystals must be found to open them. There is a door on the upper right which leads to an area with a green background where Wario can climb a ladder to find a moneybag and a green chest. The chest contains the Dragon Guise Gem. Wario can now turn into Dragon Wario, who can breathe fire. He can use this new ability to destroy fiery red blocks and reach a nearby moneybag. Dragon Wario also falls through Semisolid Platforms, which can be used to find a hat switch on the bottom right corner. Two moneybags can be found at the bottom of the room. Near the green chest is a door which leads to a room with a lot of dripping icy water and a breakable floor over a pool of water. In the water is a chest holding the Jurassic Snot, but it cannot be reached without Captain Wario's upgrade. There are a Snow Globe and a Mr. Cheeky in here, and at the top of the room is a large heart and the purple chest containing the Red Crystal.
Back in the green room, Wario can climb upward while destroying red blocks to find another door. Upon entering the door, Wario will immediately find a red chest with the Paranoid Bear Carving in it, as well as a Blow Globe and a Sipping Stalk. To the right is a moneybag and a pair of blue blocks blocking the way to the Bath-Time Shampoo Hat, making it impossible to obtain without Dragon Wario's upgrade. Wario can make the Sipping Stalk grow by defeating the Blow Globe while it is above the sprout. By climbing it, Wario will find another moneybag and a ladder leading up to a room with two large ice chunks over a pit. Wario must use Dragon Wario to destroy the red block beneath the ice chunks so they will fall down, then use Cosmic Wario to shoot down the small ice formation on the ceiling to make the hill below it icy. He can then slide over to the other side of the pit to find the Yellow Crystal guarded by a Sir Lance-A-Lot. Dropping down the pit leads back to another part of the previous room, where the large ice chunks will have formed a floor. Past some red blocks is a red chest containing the Spoiled Child's Pacifier. After that, Captain Wario can be used to get past the water current and return to the green room.

There is a small ice formation near the door which can be shot down to create an icy floor. By sliding off of it as Cosmic Wario, he can reach a section with multiple icy slopes leading to another door. It leads to a room with two dripping icy water spots and a hat switch. A small, somewhat hidden passage to the right leads to a moneybag. By falling down the left side of the pit on the left, Wario will land on a ledge in the room below, allowing him to access another room, which contains a pool of water with the Haunted Television treasure inside. Wario can glide over the pit by shooting down the ice formation near it. The room to the left contains a moneybag, a Sipping Stalk, and two Snow Globes. By climbing the Sipping Stalk and several ladders, Wario will encounter a Slithervine. From here, there is a hidden passage on the right, and a ladder leading up. Going up leads to a dark room. There is an upper path and lower path, the lower one having a red block in the way, but both lead to the same place. On the right is a pair of Mr. Cheekys, a big heart, and a red chest holding the Mustache Wax. A ladder leads up to a room with another Mr. Cheeky and two dripping water spots. A pit on the right takes Wario to another portion of the dark room, where Wario can drop through two Semisolid Platforms into a large area, where he will find a moneybag. The upper portion of this area has dripping water and two Mr. Cheekys (this is where the hidden passage near the Slithervine leads). The lower portion has a pool of water with several chandelier-like ice formations above it. By going through a passage in the pool on the left, Wario can find a red chest containing the Fancy Ramen Noodle Soup. The "ice chandeliers" function exactly like the chandeliers found in previous episodes and can be lowered by shooting them with Cosmic Wario. By hopping across them, Wario can reach the purple chest holding the Blue Crystal. The door next to the chest leads to a room with an icy slope and a ledge with a red chest. The chest contains the Seductive Lipstick. Going to the right leads to the upper-left corner of the large green room.

In the green room, there are two paths leading to the left. The lower path contains a moneybag hidden behind a fake wall as well as a hat switch, while the upper path is a straightaway with four Sir Lance-A-Lots. Both paths lead to a room with a door that leads to an area with a Mr. Cheeky standing over a crumbling bridge. Inside the pool of water below the bridge is the Odd Lucky Thingie treasure, but it is not accessible on the first run due to requiring Captain Wario's upgrade to break the blocks in the way. A Sipping Stalk sits on the left side of the pool with two Snow Globes nearby. Before climbing it, Wario can go to the left to find a Mr. Cheeky and three red blocks holding up large chunks of ice. Destroying the red blocks causes the ice chunks to fall and shatter, opening a path that would otherwise be blocked off if Wario went there without doing this. There is a hidden passage midway up the Sipping Stalk that contains a green chest with a Vita Mighty inside. After climbing to the top of the stalk, Wario can enter a room where he will immediately encounter a Sir Lance-A-Lot. Past where the ice chunks were, there are four red blocks below; destroying them reveals a red chest containing the Friendly Clown Autograph. Above them is another Sipping Stalk with two Snow Globes near it. To the right is two Sir Lance-A-Lots and a red block concealing a hidden passage with two moneybags at the end. Two more moneybags are at the top of the room. There are two passages on the right, with the upper one leading to a room with a red block, which can be destroyed to drain the water into the lower portion of the room, which is accessed from the lower passage. Here, there are two Sir Lance-A-Lots, a large heart, and a crumbling bridge. By rowing across the drained water, Wario can reach the chest containing the Green Crystal.

A ladder in the room leads down into a room with a Mr. Cheeky, as well as three red blocks on a ledge concealing a large heart. On the left is a pile of ice blocking a large ice ball, which can be melted with Dragon Wario's fire. This clears the way for Wario to push the ball from the left later. Dropping through a Semisolid Platform places Wario in between a Sir Lance-A-Lot and a Blow Globe. Near the Blow Globe is a red chest containing the Really Boring Firework. After destroying two red blocks, Wario can climb up the Sipping Stalk from earlier, climb up a small ladder, and go to the right to get to the left side of the ice ball. Pushing the ball down the slope causes it to crash through the ground, creating a hole that allows Wario to reach a green chest containing the Arty Mastery Gem. This lets Arty Wario draw up to three blocks at a time, as well as draw hearts.
Once all four colored crystals are obtained, Wario can open the four doors leading to Carpaccio, who has the second Wishstone piece. He transforms into Head Honcho Carpaccio and swallows Wario whole. After defeating him from the inside, Wario is able to claim the Wishstone piece.
Enemies[edit]
| Sprite | Name | Count |
|---|---|---|
| Mr. Cheeky | 10 | |
| Snow Globe | 7 | |

|
Blow Globe | 2 |
| Sir Lance-A-Lot | 11 | |

|
Slithervine | 1 |
| Treasure Pest | 1 |
Treasure chest locations[edit]
A Treasure Pest will appear in place of one of the red chests, making it unobtainable on the first run.
| Chest color | Treasure | Description | Worth | Location |
|---|---|---|---|---|
Majestic Heart-Shaped Straw |
A humorous straw with two sipping holes. He who can drink from it alone shall go down in history as a true king among men! | $110 | Beyond a hidden passage right next to where Cannoli was disguised as a snowman, accessed using Arty Wario. | |
| Sneezemore Cave Map | N/A | N/A | In the large room to the right of where Carpaccio is first met. | |
| N/A | N/A | In the huge room with four doors. | ||
Golden Throne |
A magnificent toilet adorned with gold leaf and rare gems that emits a pleasing floral scent when used. Truly, this is a throne of kings! | $876 | Replaces the Dragon Guise Gem during subsequent runs of the episode. | |
| "It's a bird-shaped red crystal." | N/A | At the top-left corner of the room beyond the door next to where the Dragon Guise Gem is obtained. | ||
Jurassic Snot |
This big hunk of dino nose goo was excavated from a giant nostril at the price of millions of dollars and three failed marriages. Don't ask about the details. | $14,783 | At the bottom left corner of the Red Crystal's room. Unobtainable on the first run due to requiring Captain Wario's upgrade to break the blocks. | |
Paranoid Bear Carving |
It may look like a nice little bear carving, but it's actually a malevolent alien robot sent to spy on your every move. Don't turn around. | $93 | In the bottom-left corner of the room beyond the uppermost door in the room where the Dragon Guise Gem is obtained. | |
Bath-Time Shampoo Hat |
This fully automated shampoo helmet turns shower time into fun time! Not that shower time isn't already fun or anything. We're just saying. | $7,359 | In the area beyond the two blue blocks in the room where the Paranoid Bear Carving is obtained. Unobtainable on the first run due to requiring Dragon Wario's upgrade to break the blocks. | |
| "It's a bird-shaped yellow crystal." | N/A | In the room above the one where the Paranoid Bear Carving is. Obtained by shooting down the ice cluster and riding the slippery floor to the right side. | ||
Spoiled Child's Pacifier |
This pacifier was once used by a rich child on a luxury cruise that was commissioned to celebrate his first birthday. It was then dropped in the unchlorinated deck pool. | $6,501 | Obtained by dropping down the large hole from the Yellow Crystal's room. | |
Haunted Television |
A haunted ectoplasma TV that features outstanding picture quality, unbelievable surround sound, and murderous poltergeists bent on revenge. | $492 | In the room directly above where Carpaccio is first met, accessed from a high ledge in the room to the right. | |
Mustache Wax |
Cannoli's very own mustache wax. Applied liberally, it can turn your soup strainer into a deadly pointed weapon. En garde! | $373 | In the dark area above the tall room with the lone Slithervine. | |
Fancy Ramen Noodle Soup |
This ramen contains a single gold ingot that was once owned by a queen of heartbreaking beauty. Oh, and it's got pork in it, too. Rumor says that it grants you eternal life. ...And trichinosis. | $6,409 | In an isolated cove in the tall room with the lone Slithervine, accessed from the room to the right. | |
| "It's a bird-shaped blue crystal." | N/A | Next to the door in the room to the right of where the Fancy Ramen Noodle Soup is, accessed by hopping across the "ice chandeliers". | ||
Seductive Lipstick |
This fancy lipstick will enchant even the most jaded of romantics. Not for use in crowded subway cars or densely packed apartment complexes. | $89 | In the room beyond the door in the Blue Crystal's room, the chest is on a ledge. | |
Odd Lucky Thingie |
A Feng Shui item that brings good luck. Stick it in the corner of your bedroom or home office and watch the good times roll! | $234 | At the bottom left corner of the room with a Mr. Cheeky that runs over an ice bridge. Unobtainable on the first run due to requiring Captain Wario's upgrade to break the blocks. | |

|
N/A | N/A | Accessed via a hidden passage near a Sipping Stalk in the room with the Odd Lucky Thingie. | |
Gilded Ice Cream Sandwich |
This ice cream sandwich is filled with molten gold that melts all the ice cream, thus rendering it useless. But it sure looks fancy! | $4,734 | Replaces the Vita Mighty during subsequent runs of the episode. | |
Friendly Clown Autograph |
Clownie the clown is the least frightening of all clowns, which is why his autograph is highly prized among coulrophobics. ...Go look it up. | $379 | At the bottom-left corner of the large room of the far left end of the cave, hidden behind red blocks. | |
| "It's a bird-shaped green crystal." | N/A | In the room to the right of the Friendly Clown Autograph's room, accessed by using Dragon Wario to break a red block and drain the water so Captain Wario can reach it. | ||
Really Boring Firework |
This looks like a dull firework, but many feel it to be a true piece of avant-garde art that expresses the depth of the human search for existence in ways heretofore unseen. ...But it's still dull. | $270 | In the area below the room with the ice ball. | |
| N/A | N/A | Obtained by removing the ice chunk blocking the ice ball, looping around and pushing the ball from the left to create a hole in the ground, then dropping down. | ||
Crop Circle Pendant |
A cool crop-circle-shaped pendant. Clip it on your cell phone to stand out in a crowd. Hooray for aliens! Hooray for needless agricultural destruction! | $120 | Replaces the Arty Mastery Gem during subsequent runs of the episode. |
Gallery[edit]
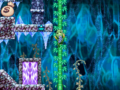
Dragon Wario climbing a Sipping Stalk
Dragon Wario destroying a red block

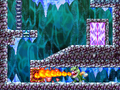
All four crystals in place


Names in other languages[edit]
| Language | Name | Meaning | Note(s) | Ref. |
|---|---|---|---|---|
| Japanese | 探せ!第三の男 Sagase! Dai-san no otoko |
Find it! Third man | [?] | |
| French | Trois hommes et un butin! | Three men and one booty! | [?] | |
| German | Aller schlechten Dinge sind drei! | All bad things come in threes! | [?] | |
| Italian | Il terzo ladro | The third thief | [?] | |
| Spanish | ¡Tres ladrones y un destino! | Three thieves and one destiny! | [?] |