The Case of the Rainy-Day Plot: Difference between revisions
mNo edit summary Tag: Mobile edit |
(Add French name meaning) |
||
| Line 67: | Line 67: | ||
|FreAM= | |FreAM= | ||
|FreE=Crime par temps pluvieux | |FreE=Crime par temps pluvieux | ||
|FreEM= | |FreEM=Crime in rainy weather | ||
|Ger= | |Ger= | ||
|GerM= | |GerM= | ||
Revision as of 13:06, April 26, 2024
| Level | |||
|---|---|---|---|
| The Case of the Rainy-Day Plot | |||

| |||
| World | 4F | ||
| Game | Princess Peach: Showtime! | ||
| Music track | Leave the Sleuthing to Me (Detective Peach) | ||
| |||
| << Directory of levels >> | |||
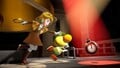
The Case of the Rainy-Day Plot is a stage in Princess Peach: Showtime!, located at the far right of 4F. This stage is available after 3F has been completed. This is the second stage to feature Detective Peach, and clearing this stage allows access to The Dark Museum & the Purple Mystery.
Layout

Upon entering stage, Princess Peach is already in her Detective Peach transformation. The Junior Detective gets the attention of Detective Peach, who has arrived five minutes earlier. He informs Peach about a possible subject who walks by the street every day. The two detectives then sit on the nearby bench where they watch for the suspect. Some Theets walk by, as well as a Criminal, who is indeed the suspect. Detective Peach and the Junior Detective then follow him to see what he is doing. Detective Peach must hide whenever the criminal turns around, because if he sees her, Peach takes one heart of damage. After following the criminal enough, he sprints off, dropping a piece of paper on the ground.
Upon observing the paper, it reads that the "you-know-what will be ready soon", and that "(the criminal) should meet at the hideout". Using clues from a puddle and footsteps, the detectives find a passage between buildings leading to another street. The criminal is seen there, where Peach and the Junior Detective stealthily follow him again. After following him some more, he sprints off again. The end of the street has three apartments with designs above their entrances: the left has a flower relief, the middle has a leaf, and the right has a sprout. A piece of paper found before the apartments provides information that "(they're) ready to finish the you-know-what, and it's time for (them) to meet at the hideout". The middle apartment is the entrance to the criminals' hideout is the middle apartment, as nearby Theets claim they live in the other apartments. The two detectives then enter the hideout.

Inside the hideout, Detective Peach and the Junior Detective overhear the plans of the three criminals; they are going to use a bomb to blow up something. The Junior Detective reacts in shock upon hearing this, giving away the detectives. Panicked that they are found out, the criminals escape through a window and start their plan. Detective Peach and the Junior Detective then search the hideout to find out where the criminals plan to use the bomb. Using clues around the hideout, it is revealed that they plan to use the bomb to blow up the clock tower. With this new information, the detectives head for the clock tower and the Junior Detective calls the police.
At the entrance to the clock tower, the detectives and the police enter the building. When they enter, they see the three criminals using a lift to climb higher. The group must use the lift to follow them, but they need the correct key to operate it. The "6" key must be used, but the key is nowhere to be seen. The correct key is rotated 180° to look like a "9". Using the lift, the detectives and the Police Chief reach higher up in the clock tower.
The three then reach to the face of the clock tower, where they find a criminal blocking the way. The police then arrive and tie him up. This criminal does not have the bomb, and he says that they will not find it on the top floor of the clock tower. The two detectives then proceed higher in the clock tower. They enter a room where a lift is not activated. Three pieces of a gear are needed to make this lift operate. These gear pieces are found between pipes, on a gear, and inside a box. After activating the lift, Detective Peach and the Junior Detective travel higher to another room with a lift, also deactivated. A key is needed to activate this lift. There are two vents that lead to the face of the clock tower, where the key is. Only one vent can be open though, as the machinery to open them is missing a gear. There is one gear that can be swapped between the two sets of gears, which will allow the other vent door to open. The right vent must be open, because that is the side where the key is. After obtaining the key, the detectives can use the lift to reach the top of the clock tower.
Using footprints on the ground, Detective Peach discovers that the bomb is inside the bell of the clock tower. After revealing the bomb, the two detectives quickly try to throw the bomb out the window before it explodes. The Junior Detective initially has the bomb, but he trips and drops it, so Detective Peach throws it out the window instead, where it explodes and does no harm. The stage is then complete.
Sparkle Gems
- This Sparkle Gem is obtained after using a Strike of Intuition on the entrance to the criminals' hideout.
- Found in a sub-area to the right of the apartments. Peach must strike a pose on a manhole cover to access the area. Once inside the area, Detective Peach must use a Strike of Intuition on a glowing crate. After she does so, she will obtain the Sparkle Gem.
- Obtained after using a Strike of Intuition on the replica of the clock tower inside the criminals' hideout.
- Found on top of crates to the left of the clock tower entrance.
- Obtained after using a Strike of Intuition on a criminal hiding behind a pipe inside the clock tower. A lift must be used to travel a floor below to the area where the criminal is.
- Obtained after using a Strike of Intuition on a criminal hiding behind a gear higher up in the clock tower.
- Obtained after using a Strike of Intuition to find the bomb inside the bell of the clock tower.
Stella ribbon
Detective Ribbon: To the far right of the first section of the stage, there are three paintings. One of these paintings is created by Mira Culous. The Ribboner is close to these paintings, and he is confused as to which painting is the real one. The leftmost painting (the one of the detective) is the correct painting, as the middle one is created by a student of the arts and the rightmost painting is created by an artist of no importance. After Detective Peach identifies the real painting, the Ribboner becomes happy, thanks Detective Peach and awards her the ribbon.
Hidden Theets
- Found in the first section of the stage, along the wall behind the paper dropped by the suspect.
- Found in the criminals' hideout below the window the criminals use to escape.
- Found on the face of the clock tower, close to the key.
Gallery
The stage's album picture

Names in other languages
| Language | Name | Meaning |
|---|---|---|
| Chinese (simplified) | 名侦探事件簿 雾雨中的阴谋 Míngzhēntàn Shìjiànbù Wùyǔ Zhōng De Yīnmóu |
Detective's Casebook: Conspiracy in the Fog and Rain |
| Chinese (traditional) | 名偵探事件簿 霧雨中的陰謀 Míngzhēntàn Shìjiànbù Wùyǔ Zhōng De Yīnmóu |
Detective's Casebook: Conspiracy in the Fog and Rain |
| French (NOE) | Crime par temps pluvieux |
Crime in rainy weather |
| Italian | Indagini in una giornata piovosa |
Investigations in a rainy day |
| Spanish | El plan secreto |
The secret plan |